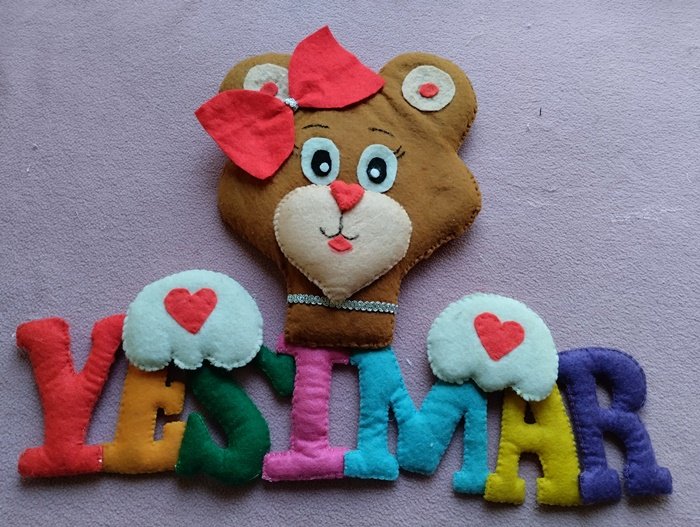
Saludos, mis estimados amigos 👋☺. Espero que se encuentren bien, mis mejores deseos para ustedes. Hoy vengo a compartirles un hermoso identificador para la puerta de la habitación, quise recrear el que me hizo mi abuela el día que nací. Por lo tanto, hay un gran valor sentimental en esta manualidad, un detalle de esta naturaleza cautiva el alma y hace que nos sintamos más agradecidos por todo el cariño que nos brindan las personas que amamos. Ella usó como diseño una osa, al cual añadió mi nombre: "Yesimar". Les describiré el proceso, pongamos mano a la obra.
Materiales:
- Fieltros (marrón, azul, rojo, piel, amarillo, verde, fucsia, naranja, negro y blanco)
- Guata o esponja
- Tijera
- Hojas recicladas
- Lápiz
- Lapicero
- Pega
- Hilo
- Aguja
- Marcador
- Cinta
Greetings, my dear friends 👋☺. I hope you are well, my best wishes to you. Today I come to share with you a beautiful identifier for the bedroom door, I wanted to recreate the one my grandmother made me the day I was born. Therefore, there is a great sentimental value in this craft, a detail of this nature captivates the soul and makes us feel more grateful for all the love that the people we love give us. She used a bear as a design, to which she added my name: "Yesimar". I will describe the process to you, let's get down to work.
Materials:
- Felts (brown, blue, red, fur, yellow, green, fuchsia, orange, black and white).
- Wadding or sponge
- Scissors
- Recycled sheets
- Pencil
- Pencil
- Glue
- Thread
- Needle
- Marker
- Tape
Procedimiento:
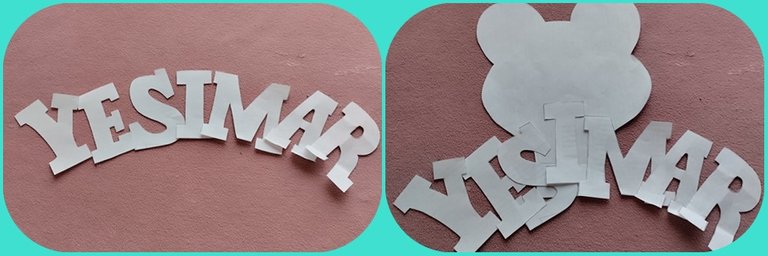
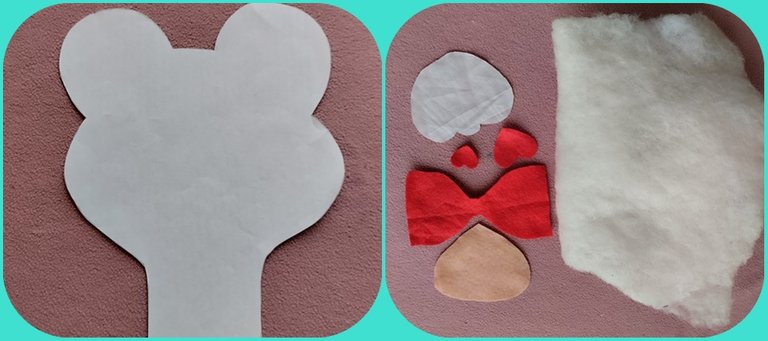
En una hoja de reciclaje marqué la cabeza de una osa y, en otra, las letras de mi nombre. Posteriormente, saqué las demás piezas (lazo, ojos, trompa, nariz y manos).
Con ayuda de un lapicero, calqué en fieltro marrón a la osa, luego, recorté dos partes iguales y cosí por el borde al derecho en forma de zigzag. Cuando estuvo listo lo rellené con guata, también se puede utilizar esponja. La idea era que quedara con un poco de relieve, pero con la estructura plana.
Usé el molde de la trompa para marcarla en fieltro color piel. Igualmente, el de las manos, aquí se sacaron dos, cuando estuvo lista, la decoré con lindos corazones. La nariz la hice con esta misma forma. Todos los fragmentos se cosieron por fuera con un acabado minucioso para que no quedaran agujeros y pudieran romperse.
Procedure:
On one recycling sheet I marked the head of a bear and, on another, the letters of my name. Then, I cut out the other pieces (bow, eyes, trunk, nose and hands).
With the help of a pencil, I traced the bear on brown felt, then I cut out two equal parts and sewed along the right edge in a zigzag pattern. When it was ready, I filled it with wadding, but you can also use sponge. The idea was to have a little relief, but with a flat structure.
I used the mold of the trunk to mark it in skin-colored felt. Likewise, the one for the hands, here I took two, and when it was ready, I decorated it with cute hearts. The nose was made with the same shape. All the fragments were sewn on the outside with a meticulous finish so that no holes were left and could break.
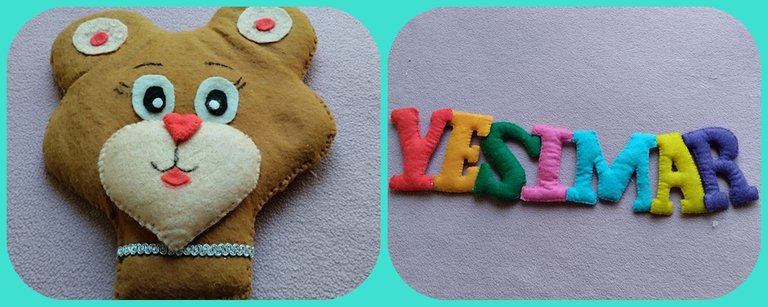
El mismo procedimiento lo hice con las letras, usé diferentes colores para que fuera más llamativo. La Y roja, la E naranja, la S verde, la I fucsia, la M azul, la A amarilla y la R morada. Consideré que esta combinación era ideal para este propósito. Con una aguja uní el nombre.
Cosí la trompa a la cara, luego le pegué la nariz y con el marcador le dibujé las rayas, le añadí una lengua, un detalle tierno que me pareció encantador.
Posteriormente, saqué unos círculos color piel y rojos para el interior de las orejas. También recorté los ojos en forma de óvalo con el peculiar haz de luz en blanco. Además, le dibujé las cejas y las pestañas.
I did the same procedure with the letters, using different colors to make it more eye-catching. The Y red, the E orange, the S green, the I fuchsia, the M blue, the A yellow and the R purple. I felt that this combination was ideal for this purpose. With a needle I attached the name.
I sewed the trunk to the face, then I glued the nose and with the marker I drew the stripes, I added a tongue, a tender detail that I found charming.
Later, I drew some fur-colored and red circles for the inside of the ears. I also cut out the eyes in the shape of an oval with the peculiar beam of light in white. In addition, I drew the eyebrows and eyelashes.
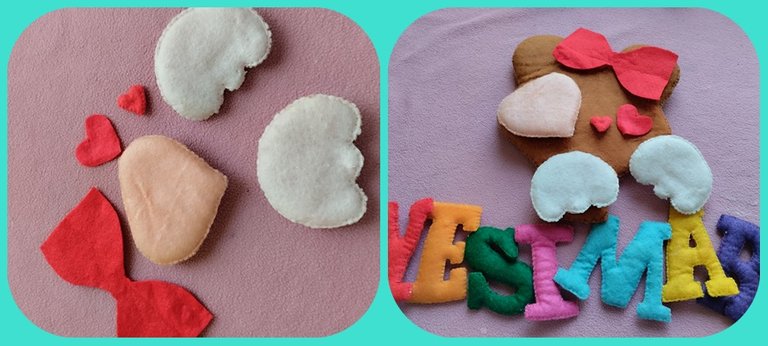
La cabeza de la osa la uni arriba de las grafías. Luego, las manos se las cosí encima de estas para darle relieve.
El toque coqueto lo puse con un lazo de color rojo y en el medio un trozo de cinta plateada, el cual le cosí en la oreja derecha. También le agregué un collar con la misma cinta.
Para guindarla le coloqué un pedazo de cinta doblada, se la pegué en el medio de la cabeza. Para darle equilibrio podemos sostener con unos chinches en los huecos que tienen las letras. De esta forma, concluimos nuestro proyecto, me encanta poner mis manos a trabajar, me relajo y lo disfruto, fue un placer compartir este tutorial, hasta una próxima ocasión.
I attached the bear's head on top of the lettering. Then, I sewed the hands on top of the lettering to give it relief.
I added a flirty touch with a red bow and a piece of silver ribbon in the middle, which I sewed on the right ear. I also added a necklace with the same ribbon.
To hang it I put a piece of folded ribbon, I glued it in the middle of the head. To give it balance, we can hold it with a few bugs in the holes that have the letters. This way, we concluded our project, I love to put my hands to work, I relax and enjoy it, it was a pleasure to share this tutorial, until next time.
Las fotografías son de mi archivo personal.
Texto traducido con DeepL.
The photographs are from my personal archive.
Text translated with DeepL.