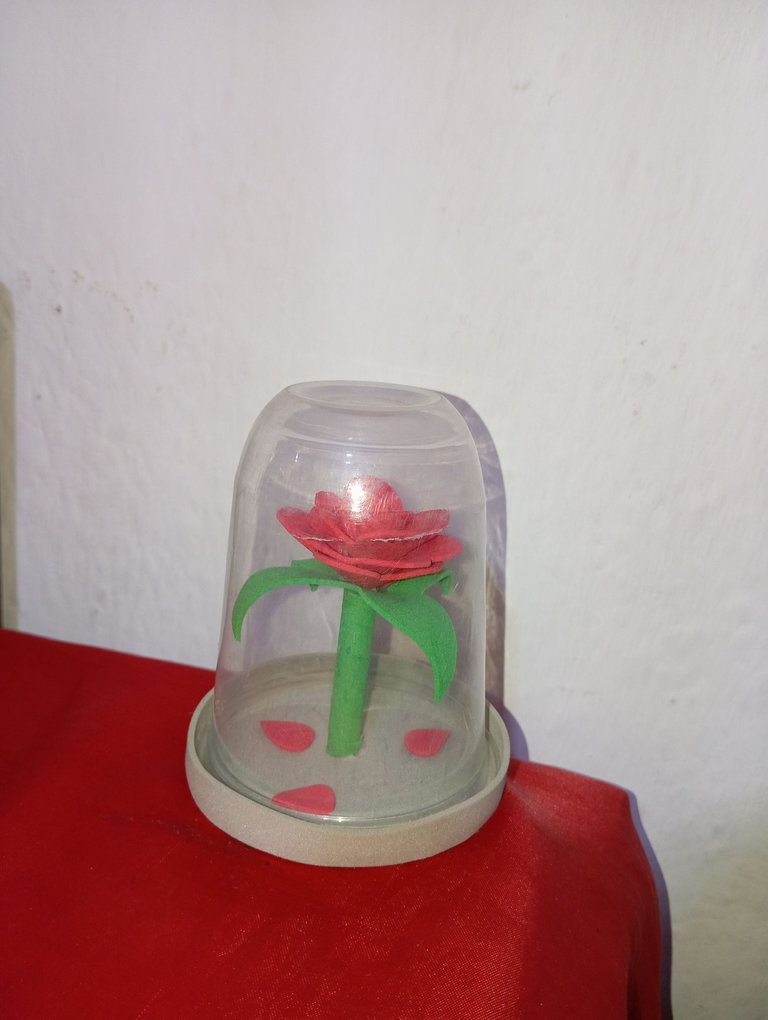
Buenos días amigos, feliz inicio de semana para todos, bendiciones , espero que hayan amanecido bien , les quiero compartir una linda mini rosa encantada , los que hemos visto la película y comiquita de la bella y la bestia pueden entender mi creación de hoy , yo soy una mujer amante a las rosas , por tal motivo realicé una de este modelo para decorar un rincón de mi hogar
Good morning friends, happy start of the week to all, blessings, I hope you have dawned well, I want to share a nice mini enchanted rose, those who have seen the movie and cartoon of beauty and the beast can understand my creation today, I am a woman who loves roses, for this reason I made one of this model to decorate a corner of my home.
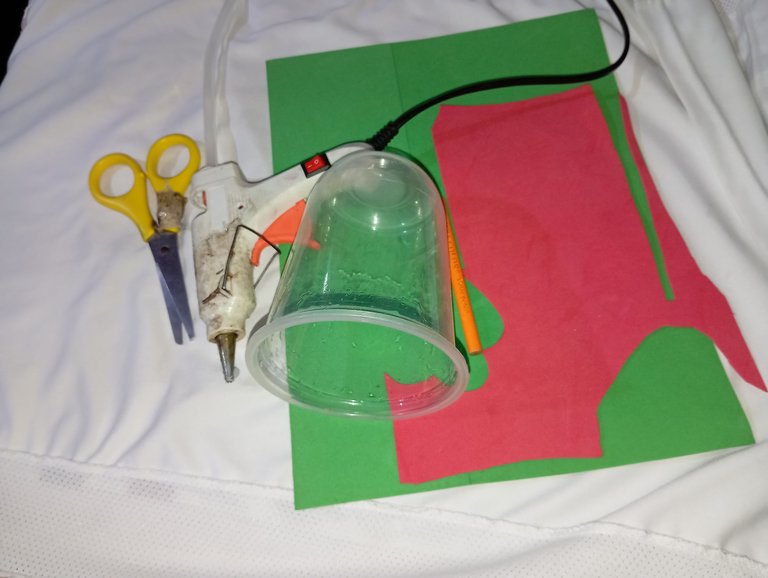
Materiales qué utilicé:
-Vaso plástico
-Foamis
-Tijera
-Silicon
-Lapiz
Materials I used:
-Plastic cup
-Foamis
-Scissors
-Silicon
-Pencil
A continuación los pasos a seguir:
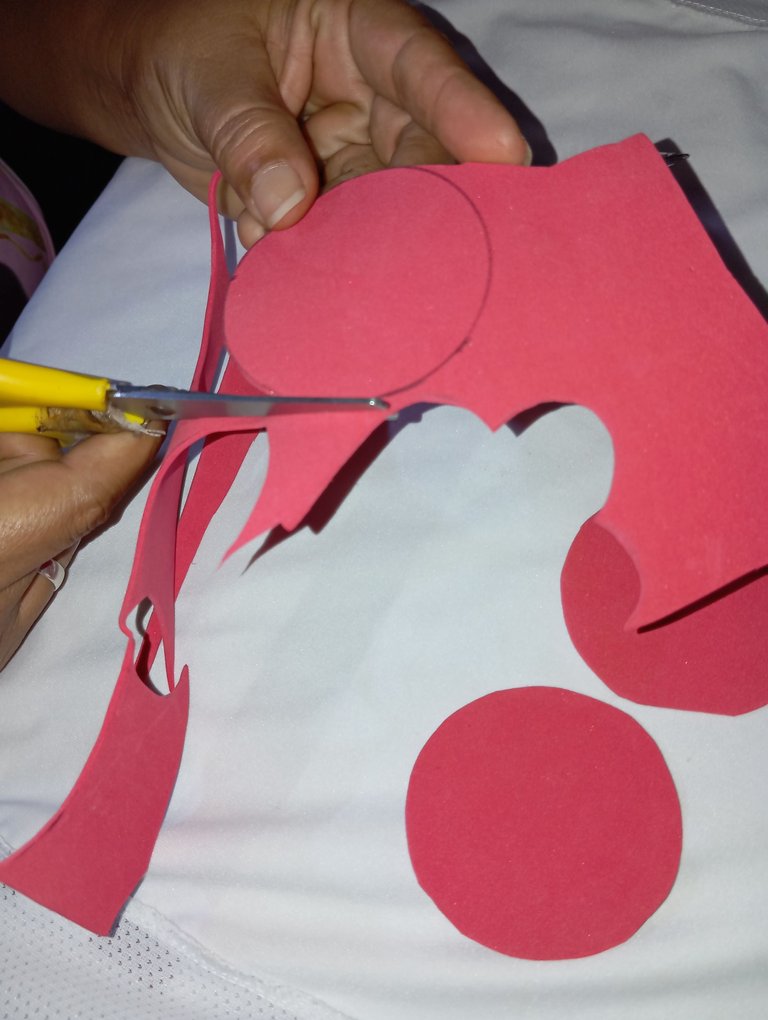
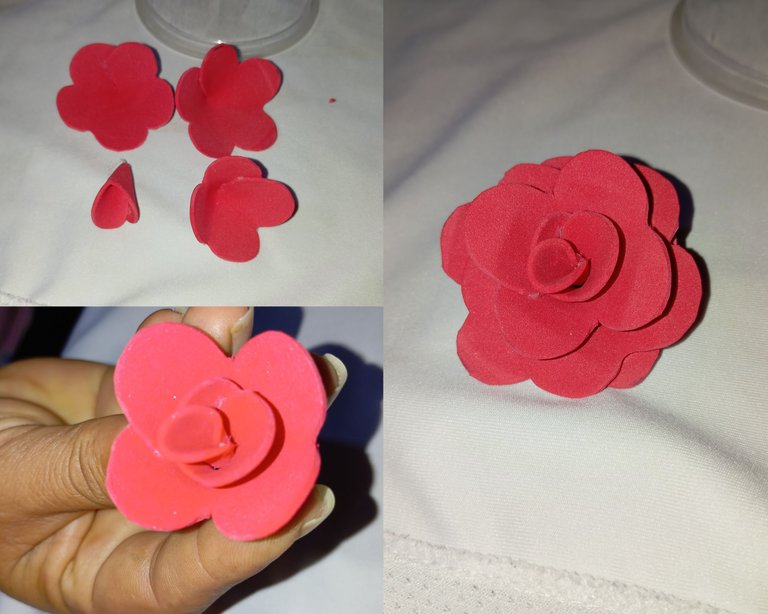
Iniciaremos realizando la rosa , por este motivo comencé realizando tres círculos , son pequeños porque el envase es chiquito , si gustan que tenga varias capas de pétalos , realicen más circulos
Here are the steps to follow:
We will start by making the rose, for this reason I started by making three circles, they are small because the container is small, if you like to have several layers of petals, make more circles.

Luego que tengamos marcados todos nuestros círculos, vamos a continuar recortando cada uno con la ayuda del teléfono
After we have marked all our circles, we will continue cutting out each one with the help of the telephone.
Tomaremos todos los círculos y realizaremos cuatro dobles como ese que pueden apreciar, luego tomaremos la tijera y moldearemos en forma de pétalos para que al abrir queden varios pétalos como lo pueden apreciar
We will take all the circles and we will make four double circles like the one you can see, then we will take the scissors and we will mold them in the shape of petals so that when we open them we will have several petals as you can see.
En este siguiente paso ,vamos a realizar la rosa , a las flores pequeña le recorté dos pétalos y a la otra uno , continúe pegando borde con borde, luego que tenga las flores pegue uno arriba de la otra
In this next step, we are going to make the rose, to the small flowers I cut two petals and to the other one, continue gluing edge to edge, after you have the flowers glue one on top of the other
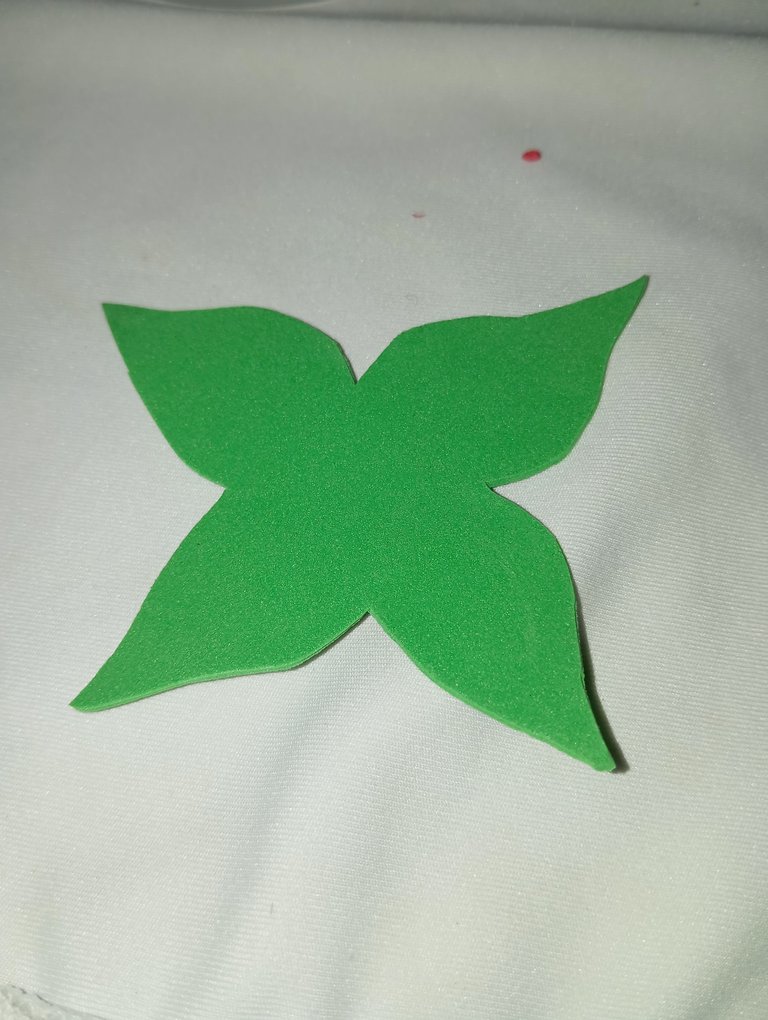
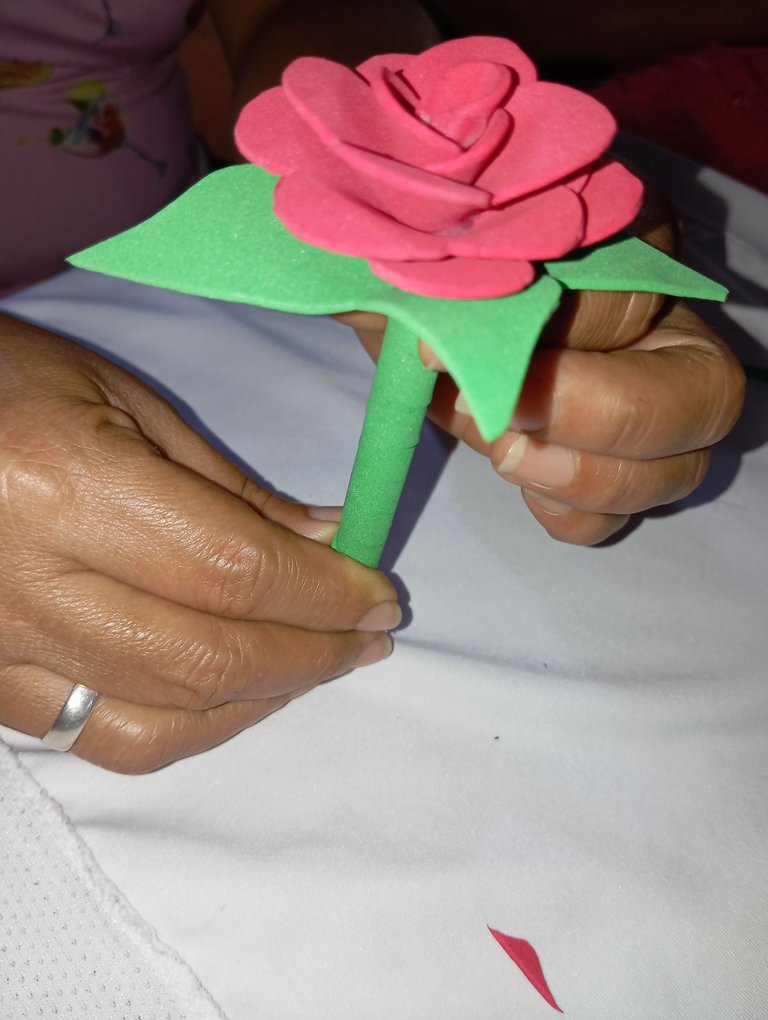
Luego continúe recortando cuatro hojas pero unidas para colocarlo a la flor encantada
Then continue cutting out four leaves but joined together to place them on the enchanted flower.
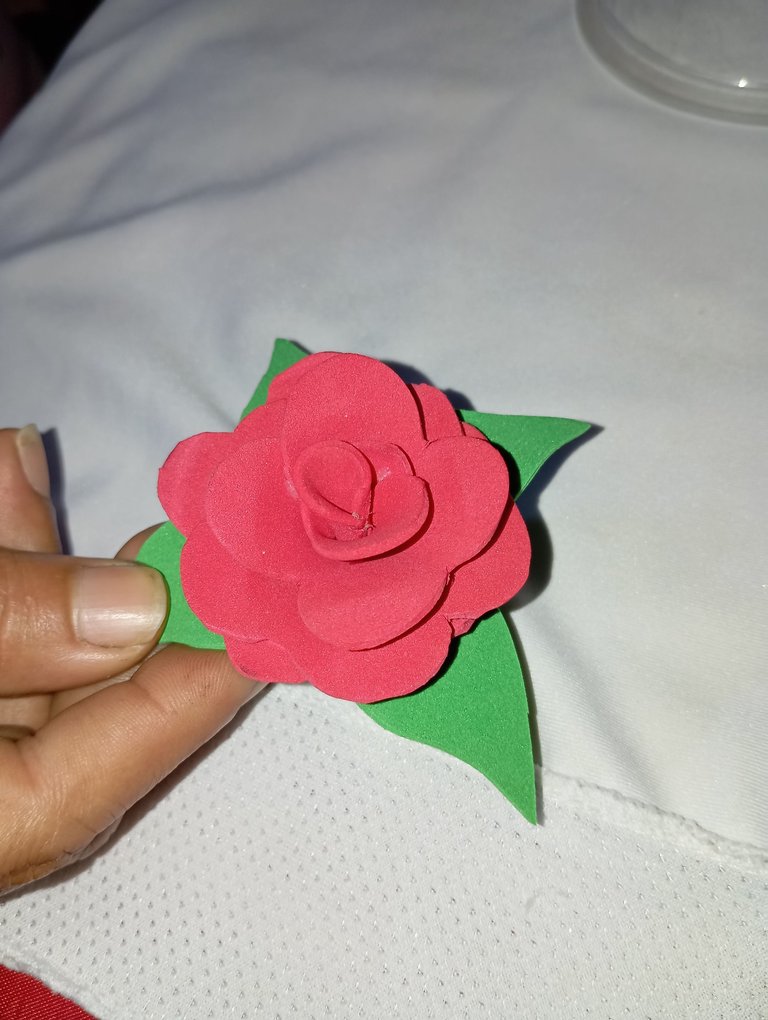
Una vez que tengamos estás hojas vamos a continuar pegando debajo de la rosa como lo pueden ver ya que todas las rosas tienen hojas
Once we have these leaves we will continue gluing under the rose as you can see since all roses have leaves.
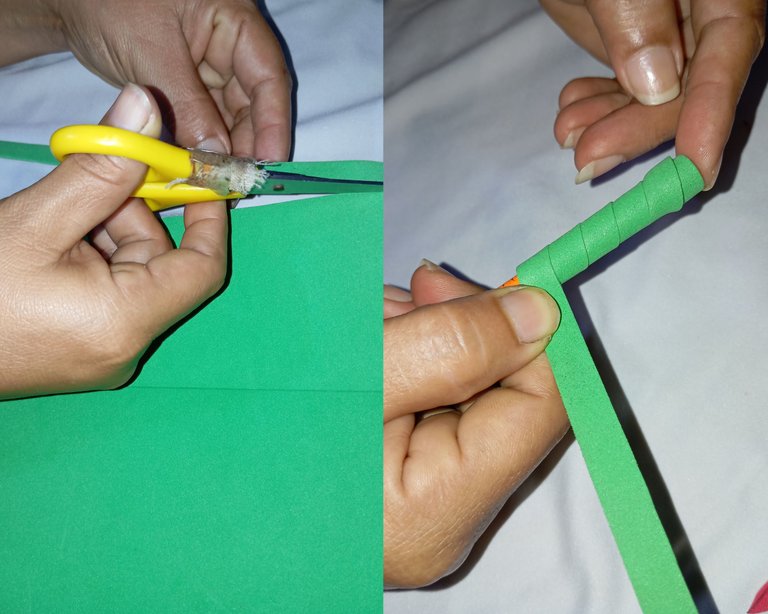
Realizaremos el tallo de la rosa , para esto tomé un lápiz pequeño , recorté una tira de foamis verde , agregué silicón a la punta y comencé enrollando hasta cubrirlo
We will make the stem of the rose, for this I took a small pencil, cut out a strip of green foamis, added silicone to the tip and started rolling it up to cover it.
Por último pegué el tallo al centro de la rosa , finalizando esta bella rosa encantada
Finally I glued the stem to the center of the rose, finishing this beautiful enchanted rose.
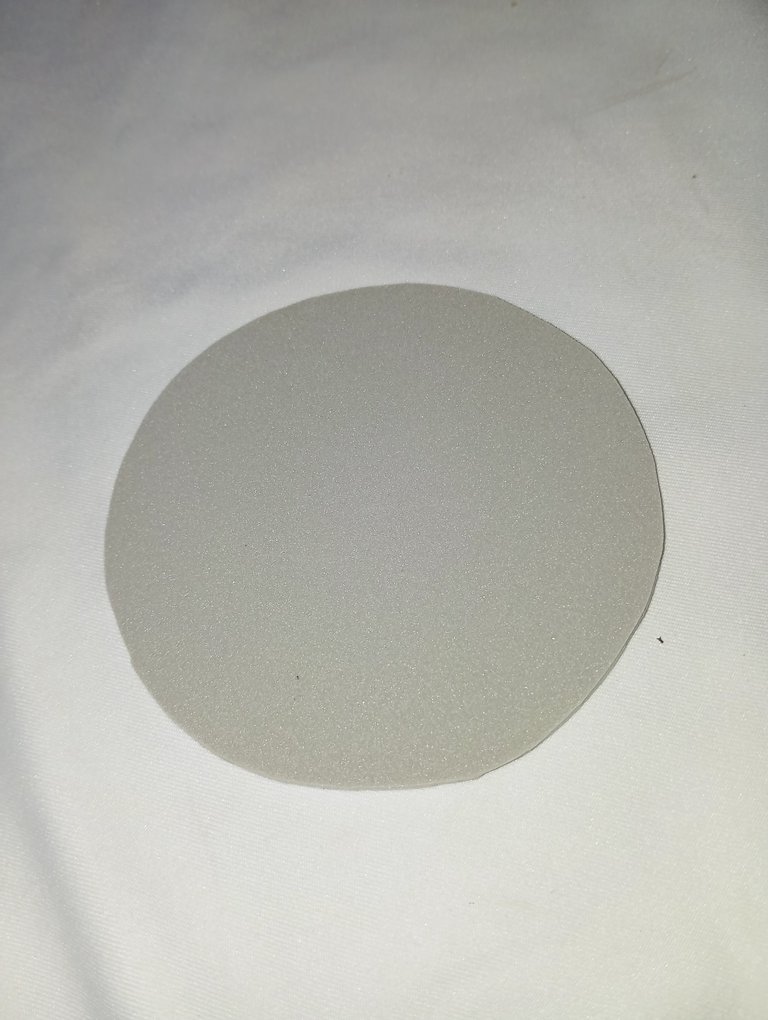
Luego continúe recortando un círculo para realizar la base donde va la rosa , el círculo debe ser del mismo tamaño que tiene la boca del vaso , el mismo grosor
Then I continued cutting out a circle to make the base where the rose goes, the circle should be the same size as the mouth of the glass, the same thickness
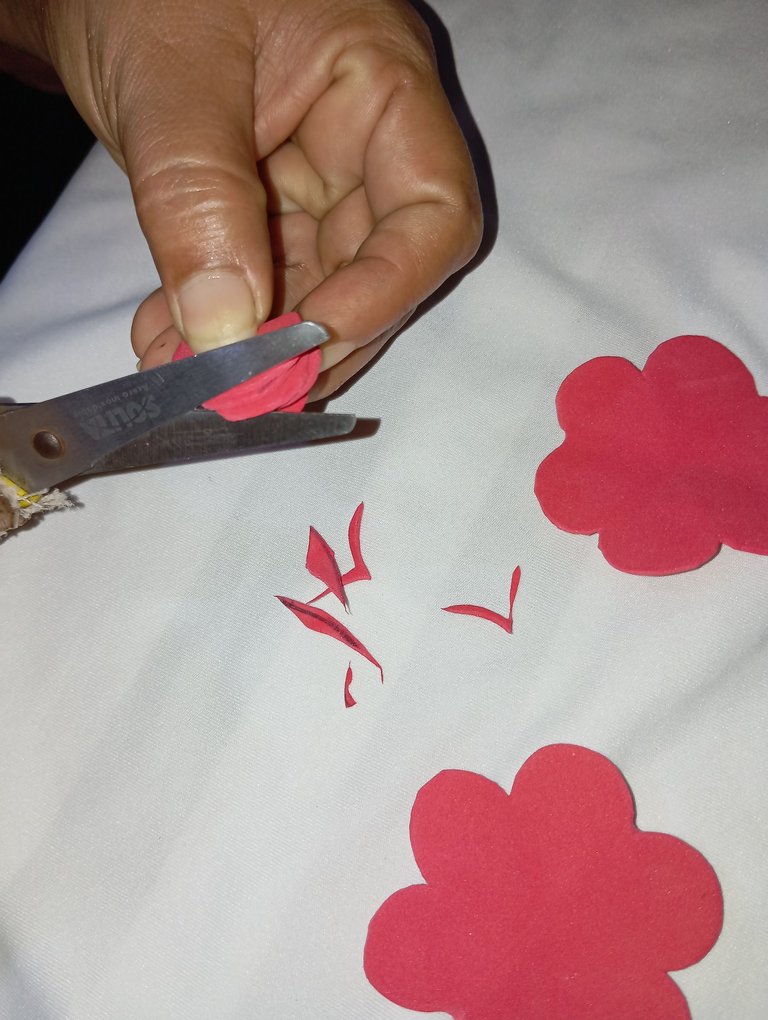
Luego en todo el centro de la base vamos a pegar la flor , a los alrededor pegué unos pétalos para que simulen como en la película que cada vez que pasaba el tiempo un pétalo caía
Then in the center of the base we are going to glue the flower, around it I glued some petals to simulate as in the movie that every time the time passed a petal fell.

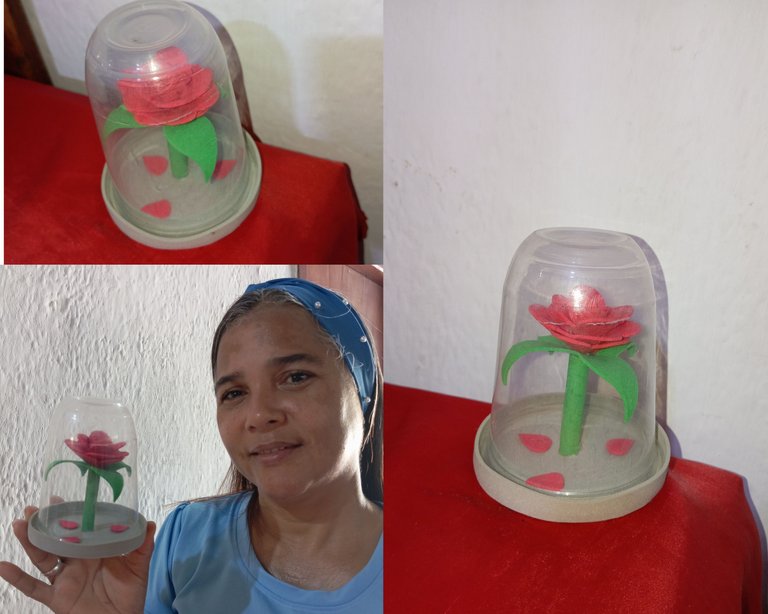
Para finalizar, agregué silicón al borde del vaso y lo pegue a la base , de esta manera quedó mi bella rosa encantada , ideal para decorar nuestras repisas , habitaciones, mesas , y sobre todo para las personas que amamos las rosas , que pasen un bello día , gracias por la atención, feliz día
To finish, I added silicone to the edge of the glass and glued it to the base, in this way was my beautiful enchanted rose, ideal for decorating our shelves, rooms, tables, and especially for people who love roses, have a beautiful day, thank you for your attention, happy day.