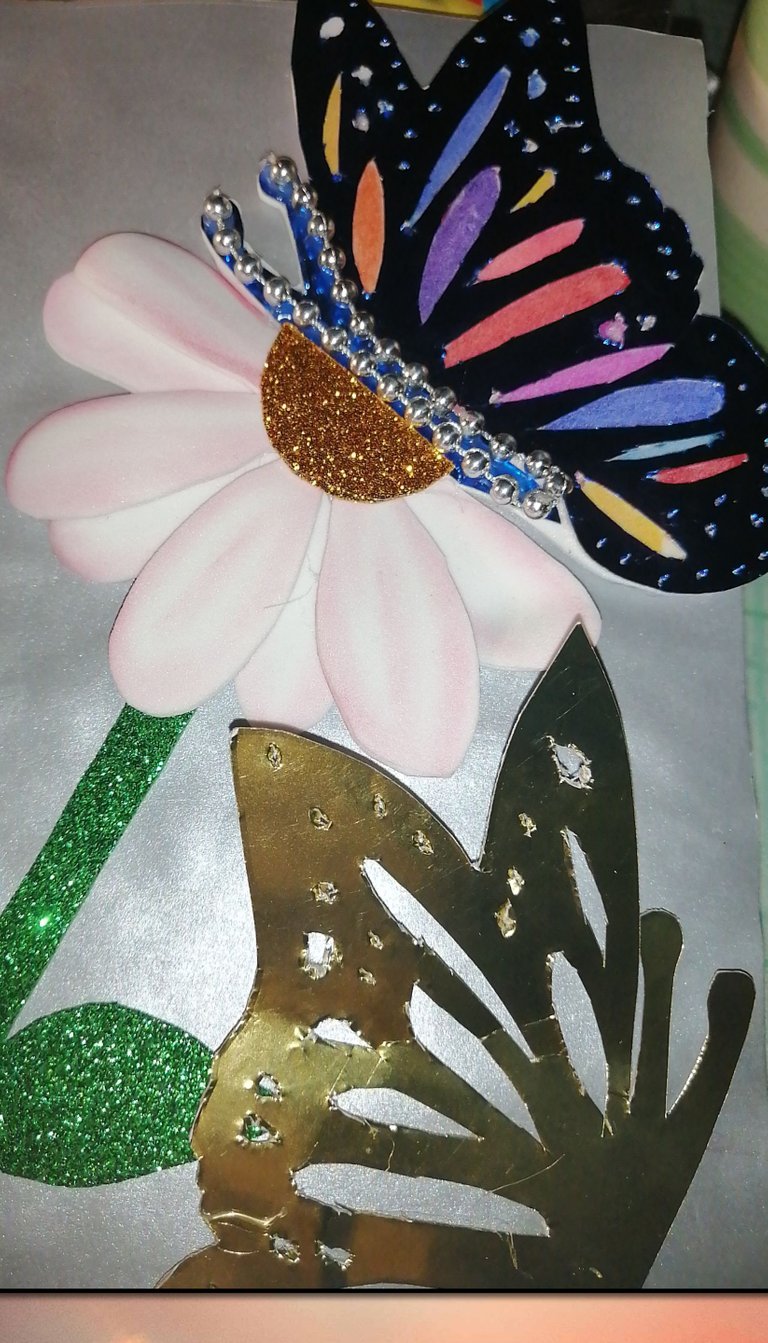
Buenos dias hermosa comunidad dios me los bendiga y me los cuide siempre, hoy me encuentro por aquí con mi participacion en el concurso MI HIVE FAVORITO de nuestra comunidad hive diy liderada esta vez por nuestro amigo @gaboamc2393,dando gracias de antemano por poder participar en este nuevo concurso.
Nuestro hive favorito en realidad son muchos pues todos cada dia dan lo mejor de ellos, creando y elaborando muchos proyectos geniales aun cuando mucho de nosotros no podamos verlos y valorarlos aun asi seguimos escribiendo y haciendo buenos contenidos decalidad antes de mencionar alguien especifico les doy las gracias a todos y les invito a segui haciendo lo que nos gusta.
En esta oportunidad quiero agradecer a mi amiga e hija radaicarlys17 por su ayuda para entrar en esta hermosa comunidad, por su paciencia para enseñar, por su creatividad por todas las ayudas que me ha brindado. Y ademas por su perceverancia y constante dedicacion es por eso que de merece mas que mi admiracion gracias te doy hija de mi vida por ser un ser muy especial, ademas de que sus proyectos partieron prácticamente de la nada y han crecido mucho en tan corto tiempo gracias también por su empeño de aprender dios te bendiga.
Aprovecho esta oportunida tambien para invitar a @KateLópez77
Good morning beautiful community god bless me and take care of me always, today I am here with my participation in the contest MY FAVORITE HIVE of our hive diy community led this time by our friend @gaboamc2393, giving thanks in advance for participating in this new contest.
Our favorite hive actually are many because everyone every day give the best of them, creating and developing many great projects even when many of us can not see them and value them even so we continue writing and making good quality content before mentioning someone specific I thank you all and I invite you to continue doing what we like.
In this opportunity I want to thank my friend and daughter radaicarlys17 for her help to enter this beautiful community, for her patience to teach, for her creativity for all the help she has given me. And also for her perseverance and constant dedication is why she deserves more than my admiration thank you daughter of my life for being a very special being, besides her projects started practically from nothing and have grown a lot in such a short time, thank you also for your commitment to learn, God bless you.
I would also like to take this opportunity to invite @KateLópez77
Materiales a utilizar
Cartulina metalizada color dorada y azul.
Cartulina blanca
Cartulina plateada
Perla corrida plateada
Cartulina escarchada marrón
Foami escarchado verde
Foami blanco
Sombra
Pincel
Marcadores
Patrones
Materials to use
Gold and blue metallic cardboard.
White cardboard
Silver cardboard
Silver pearl bead
Brown frosted cardboard
Green frosted foami
White foami
Shadow
Brush
Markers
Procedimientos
Procedures
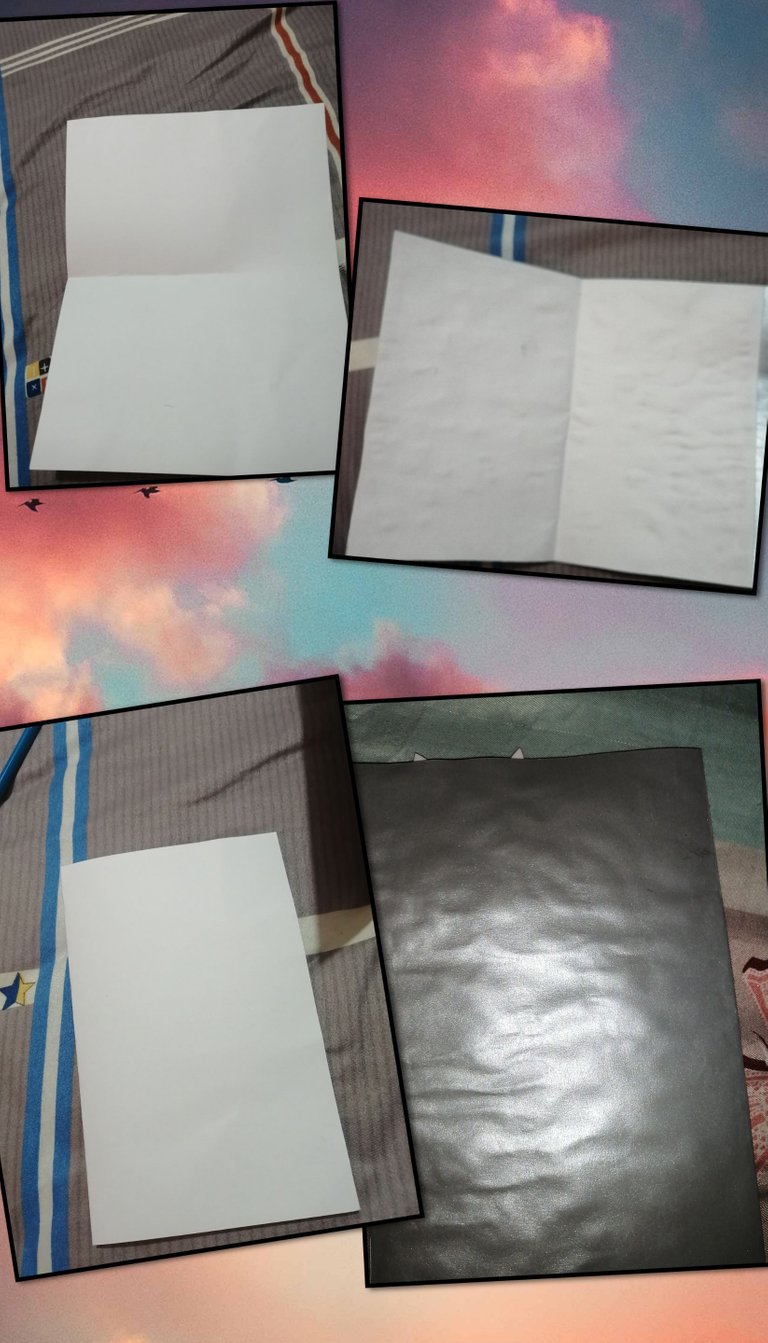
Para comenzar doblamos la cartulina de color plateada y blanca en 2 partes iguales y luego pegamos con pega blanca o silicon liquido.
To begin, we fold the silver and white cardboard into 2 equal parts and then glue with white glue or liquid silicone.
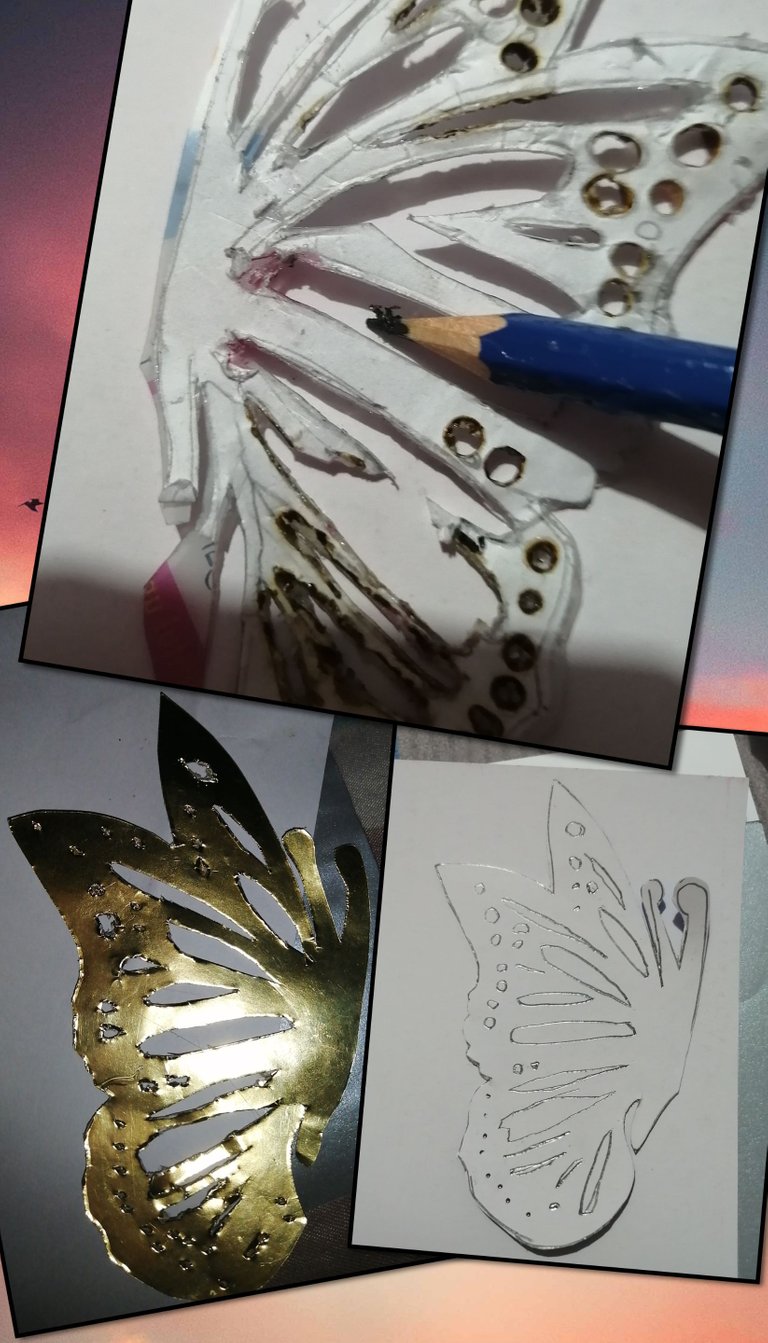
Para continuar lo siguente qie haaremos sera tomar los patrones de la mariposa y marcaremos en la cartulina metalizada color azul y dorada y recortamoscon ayuda de una tijera pegueña de punta fina poco a poco sacandole con mucho ciudado los detalles de las mismas.
To begin, we fold the silver and white cardboard into 2 equal parts and then glue with white glue or liquid silicone.
Lo siguente sera marcar y recortar 2 piezas del patron de las flores y un rectangulo de 1,5cm de ancho y 10cm de largo,luego recortaremos una pequeña hoja, y medio circulo de 2cm.
The next step is to mark and cut out 2 pieces of the flower pattern and a rectangle of 1.5cm wide and 10cm long, then cut out a small leaf, and a half circle of 2cm.
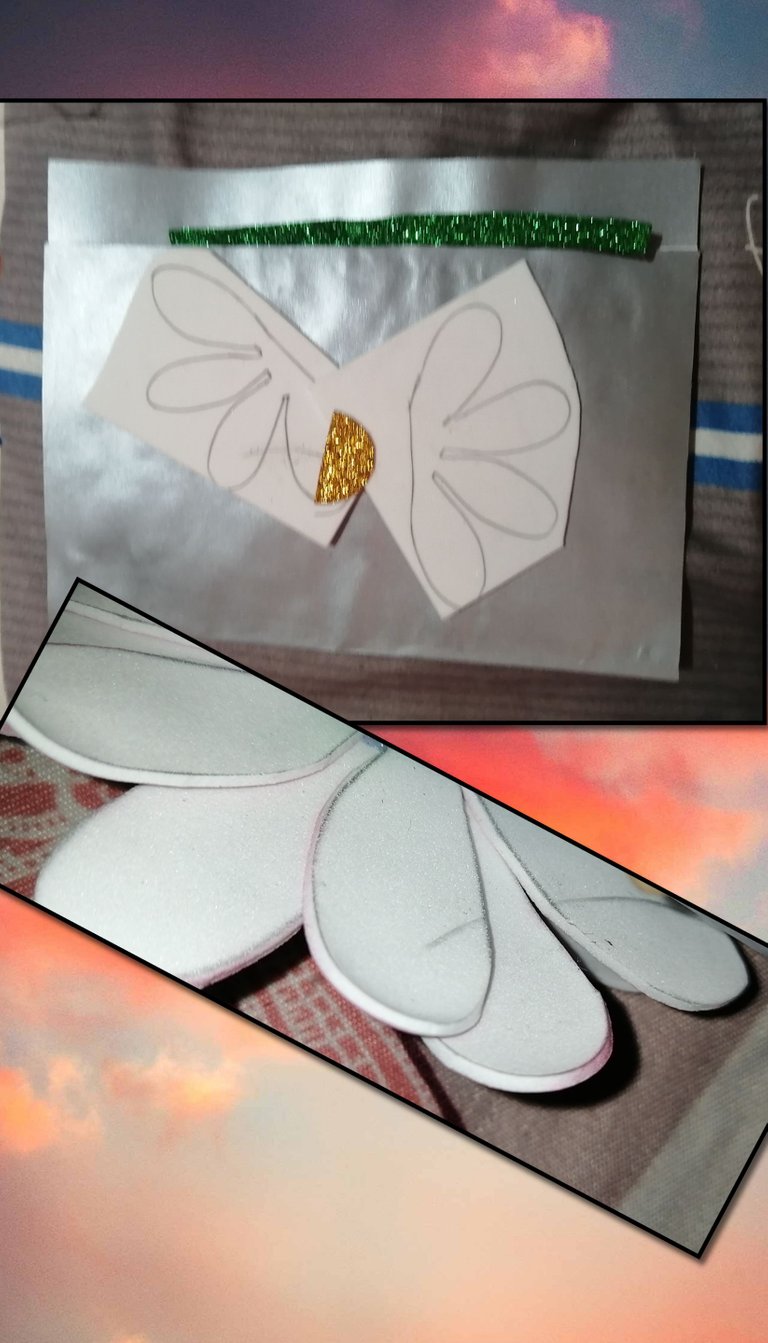
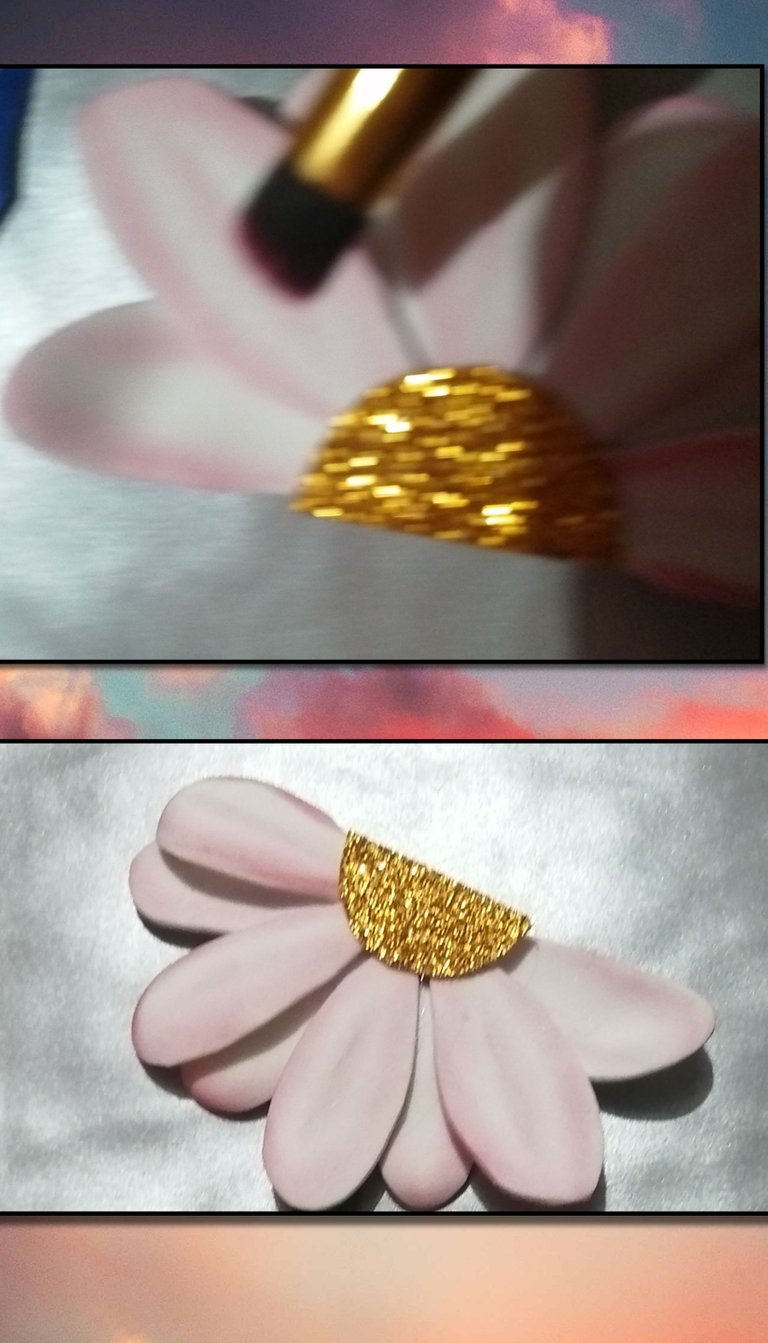
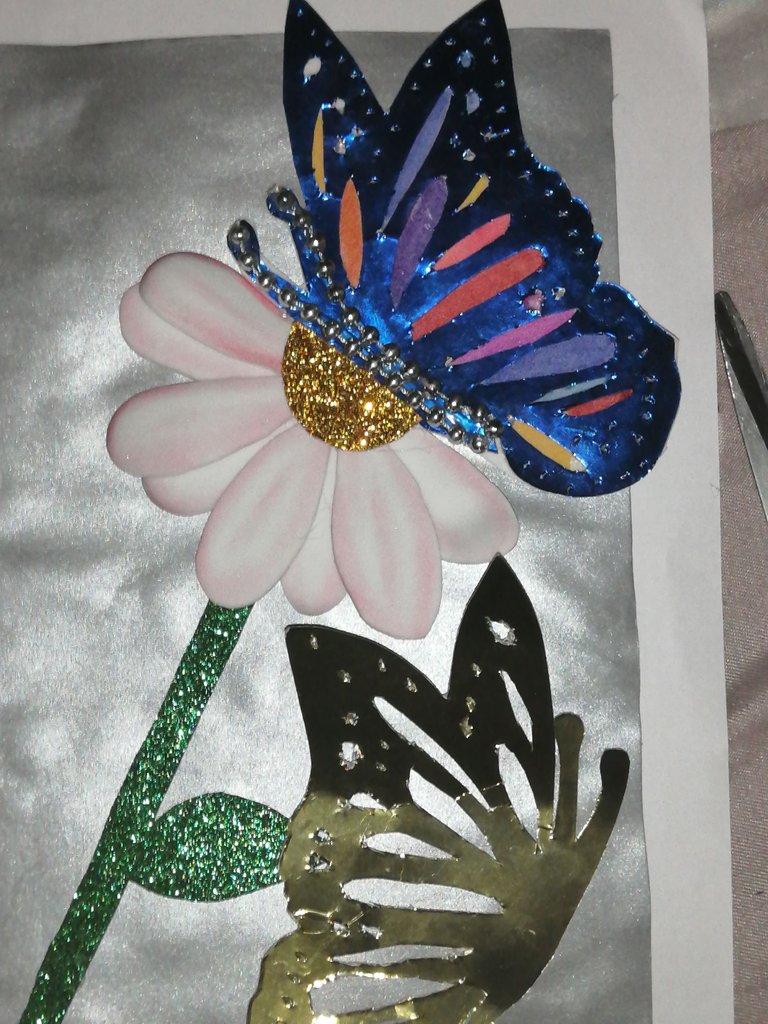
El proximo paso es empezar a armar la portada de nuestra linda tarjeta, primero armamos la flor pegando las dos piezas de la misma ya recortadas, una ensima de la otra pero tapando los espacios de los petalos y luego la pegamos sobre la targeta y la sombreamos y pegamos la mitad de circulo.
The next step is to mark and cut out 2 pieces of the flower pattern and a rectangle of 1.5cm wide and 10cm long, then cut out a small leaf, and a half circle of 2cm.
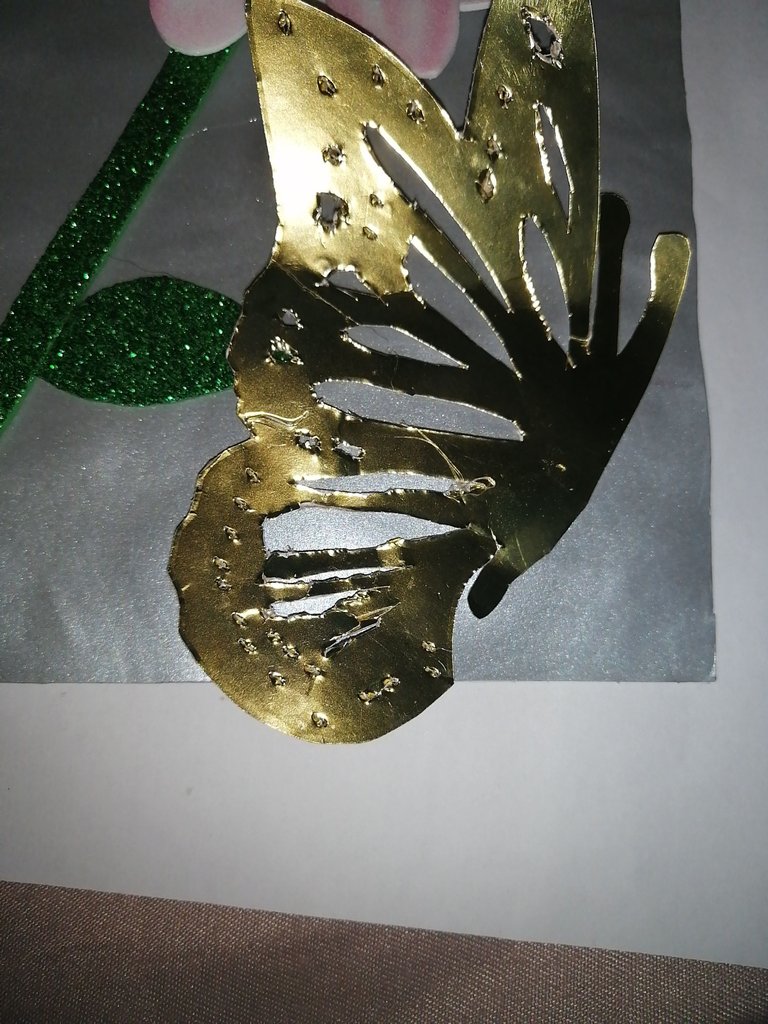
Luego pegamos el regtangulo antes recortado debajo de la flor y a un costado del mismo la hoja antes recortada para formar asi el tallo de la flor, luego pegamos las mariposas antes recortadas una encima de la flor y la otra en la base de la targeta.
Then we glue the rectangle previously cut out under the flower and on one side of it the leaf previously cut out to form the stem of the flower, then we glue the butterflies previously cut out, one on top of the flower and the other on the base of the card.
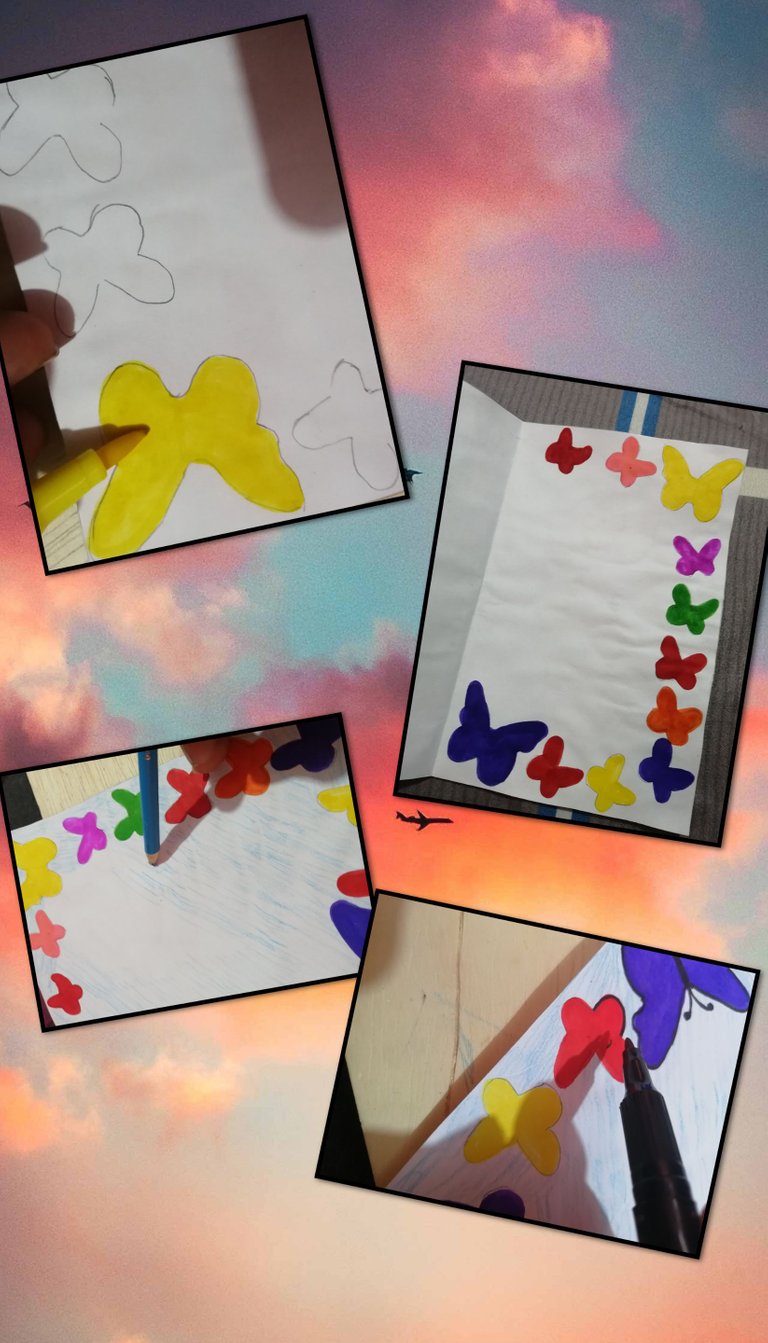
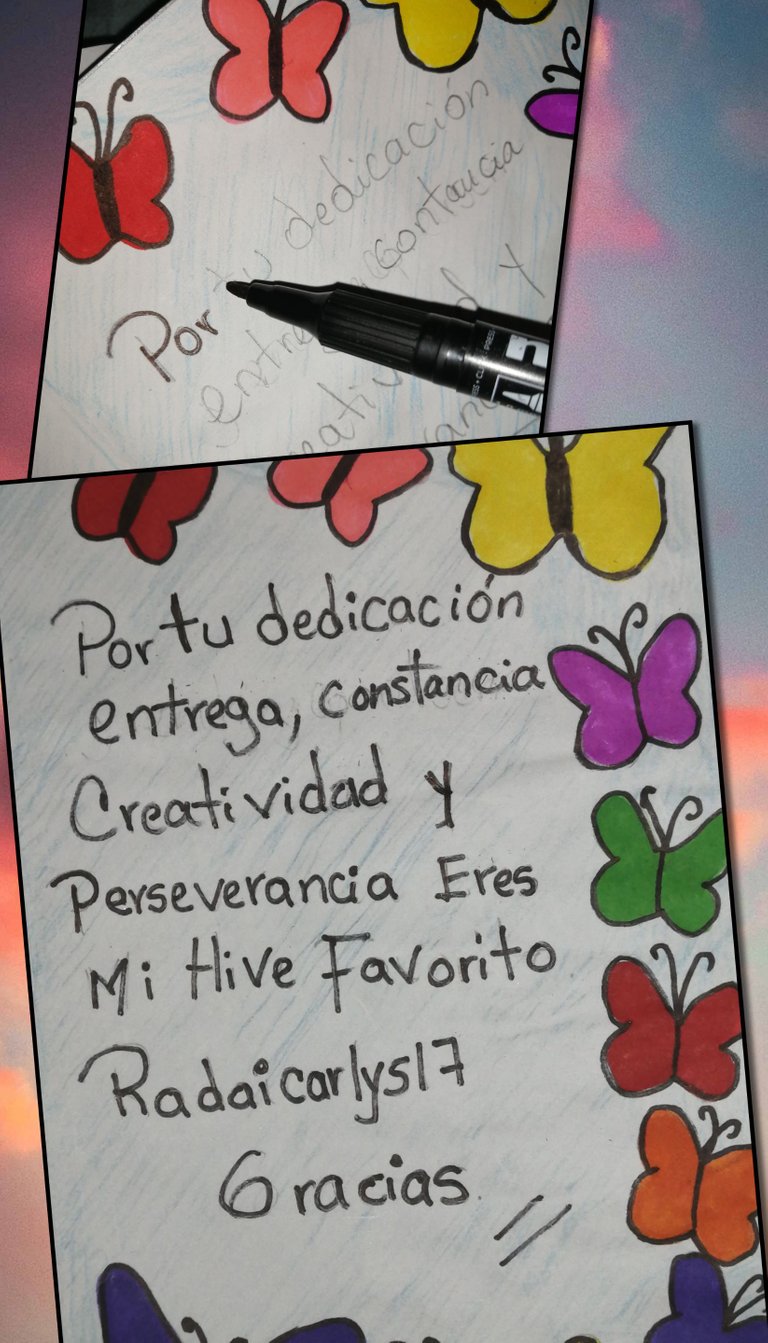
Lo siguente sera armar el interior de la targeta, marcamos y coloreamos mariposas en la orilla interna de la targeta y luego con ayuda de un marcador negro remarcamos las mariposas luego sombreamos toda la pieza con un color azul para resaltar la misma.
The next step is to assemble the inside of the card, we mark and color butterflies on the inside edge of the card and then with the help of a black marker we highlight the butterflies and then we shade the whole piece with a blue color to highlight it.
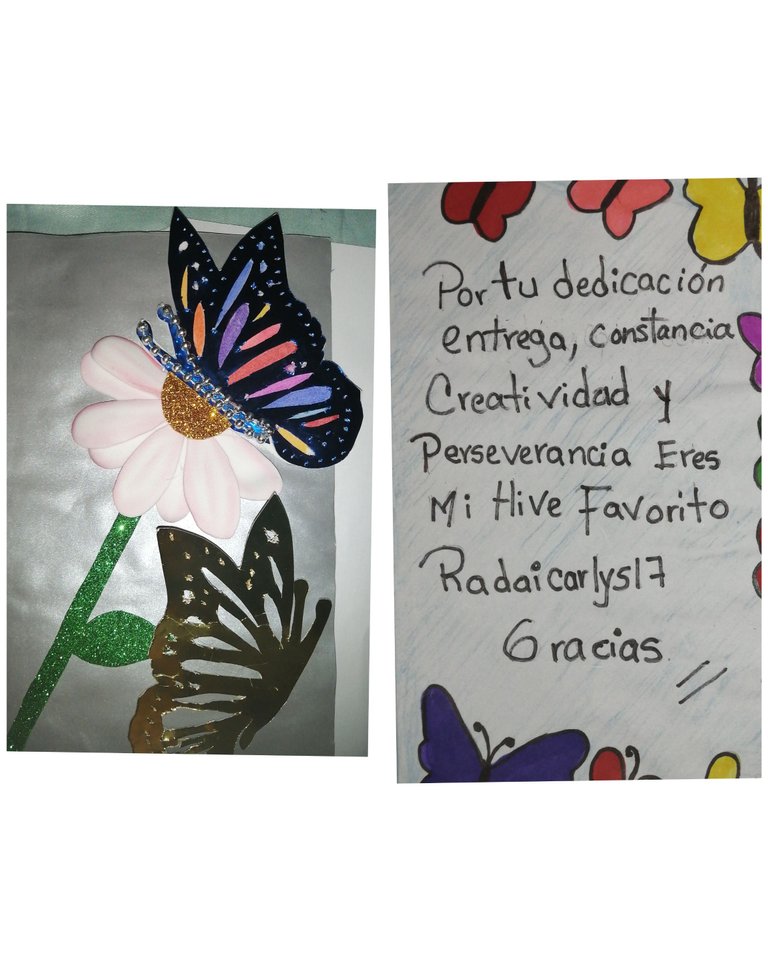
Ahora escribimos la dedicatoria a nuestro hive favorito expresando toda la admiracion que sentimos.
Now we write the dedication to our favorite hive expressing all the admiration that we feel.
Resultado final
Result finish
Gracias a todos aquellos que se toman el tiempo para ver mi block espero en dios les guste hasta la próxima oportunidad.
Thanks to all those who take the time to view my block I hope in God you like it until next time.


