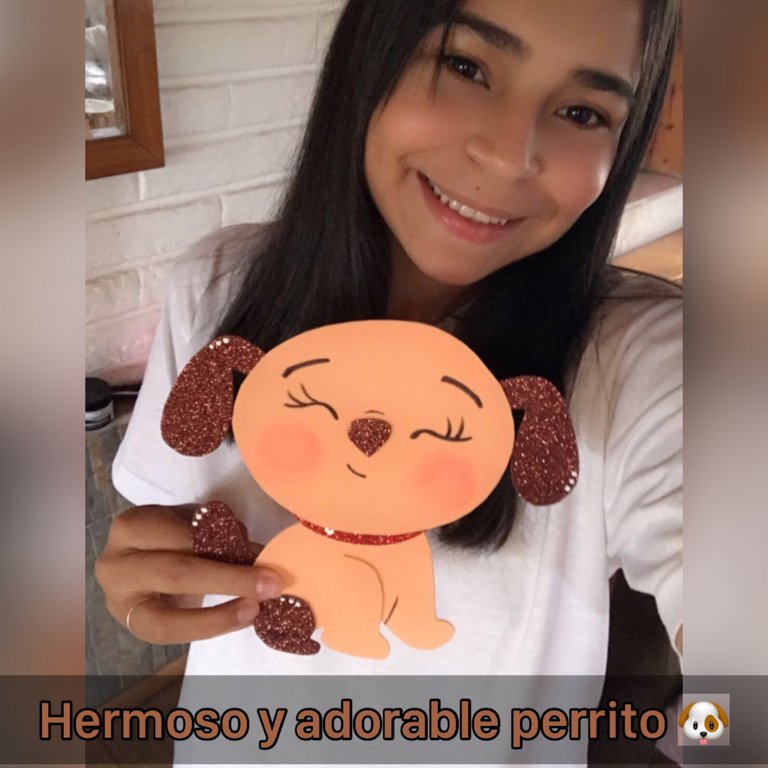
Un cordial saludo a todos los integrantes de esta hermosa comunidad de HIVE DIY, espero y se encuentren bien con la bendición de Dios amigos, me he alejado mucho de esta comunidad pero ya hoy les traté nueva manualidad ojalá y les guste queridos amigos, bueno hoy les mostraré hacer un perrito lindo a adorable esta muy fácil de hacer y nos puede servir para descordar los cuadernos de los más pequeños de la casa o para adornar cualquier lugar de nuestro hogar pero como les dije está muy fácil de hacer y les invito a ver el paso a paso
A warm greeting to all members of this beautiful community of HIVE DIY, I hope you are well with God's blessing friends, I have been away from this community a lot but today I tried a new craft I hope you like it dear friends, well today I will show you how to make a cute and adorable dog is very easy to do and we can use it to decorate the notebooks of the smallest of the house or to decorate any place in our home but as I said is very easy to do and I invite you to see the step by step
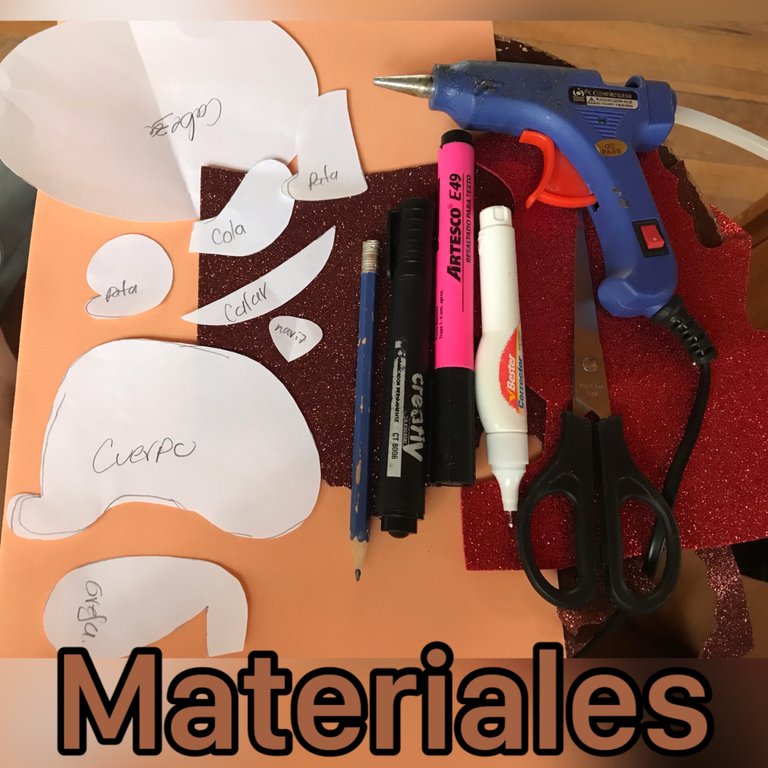
MATERIALES A UTILIZAR
• foami color carne
• foami escarchado marrón y rojo
• corrector
• resaltador fucsia
• marcador negro
• patrones del perrito
• pistola de silicon
• tijeras
• lápiz
**MATERIALS TO BE USED
- flesh-colored foami
- brown and red frosted foami
- concealer
- fuchsia highlighter
- black marker
- doggie patterns
- silicone gun
- scissors
- pencil
AHORA SI AMIGOS MANOS A LA OBRA
NOW IF FRIENDS, LET'S GET TO WORK
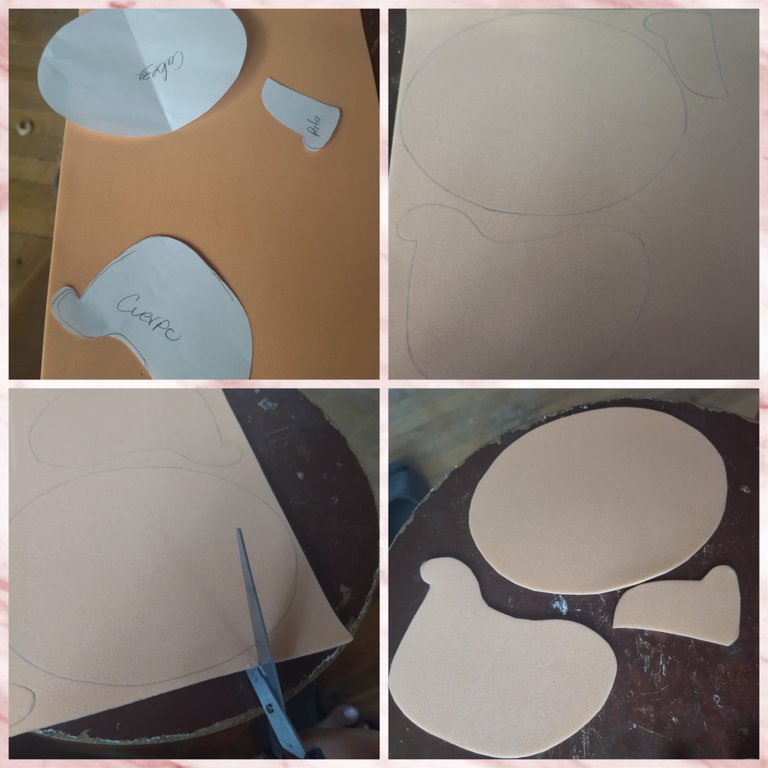
Primero marcamos y recortamos en el foami color carne la cabeza, cuerpo y pata del perrito
First we mark and cut out the head, body and paw of the puppy on the flesh-colored foami
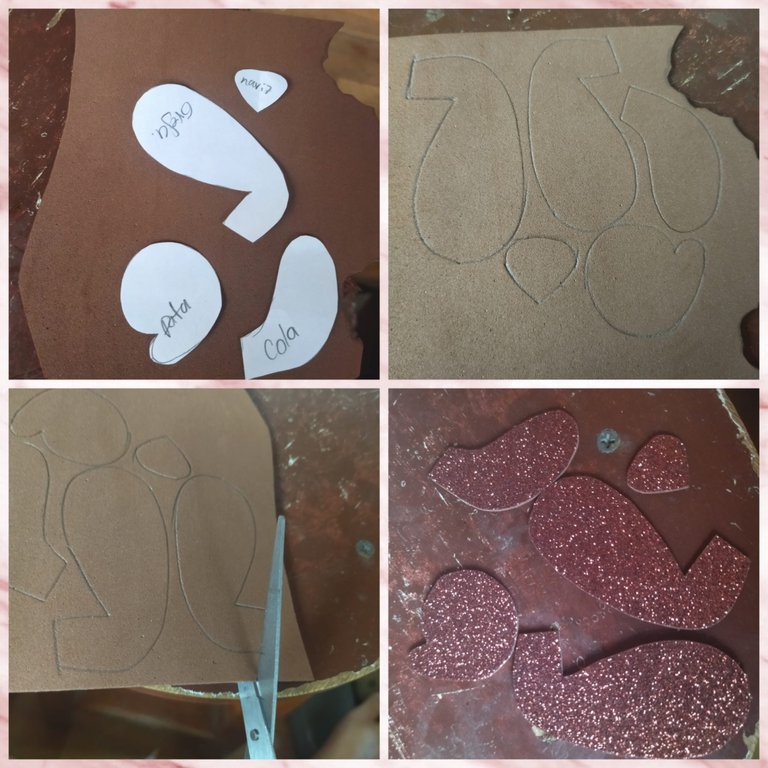
Marcamos y recortamos en el foami escarchado marrón la nariz, orejas, cola y la pata trasera del perrito
We mark and cut out the nose, ears, tail and hind leg of the puppy on the brown frosted foami
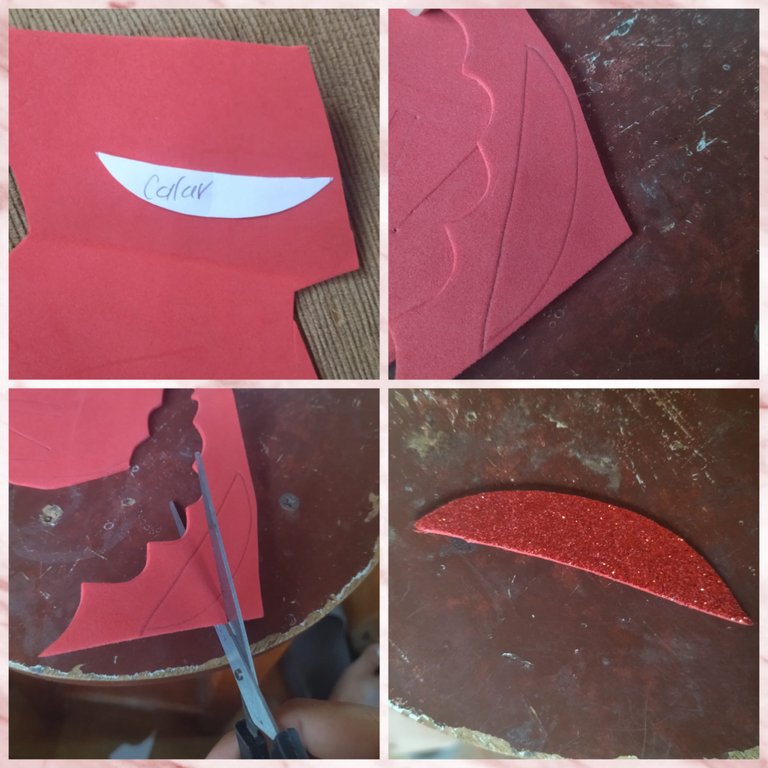
Marcamos y recortamos en el foami escarchado rojo el collar del perrito
We mark and cut out on the red frosted foami the collar of the puppy
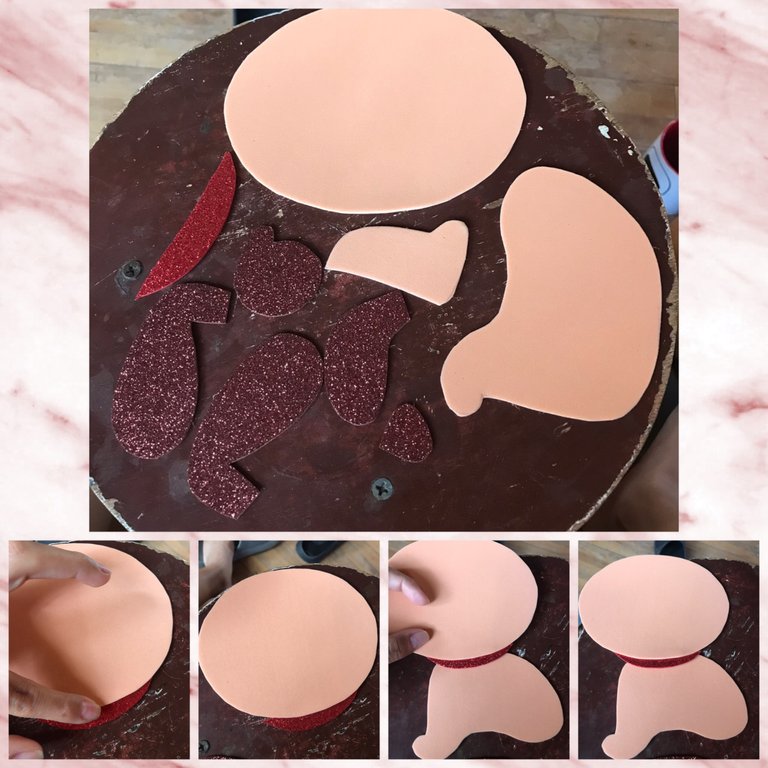
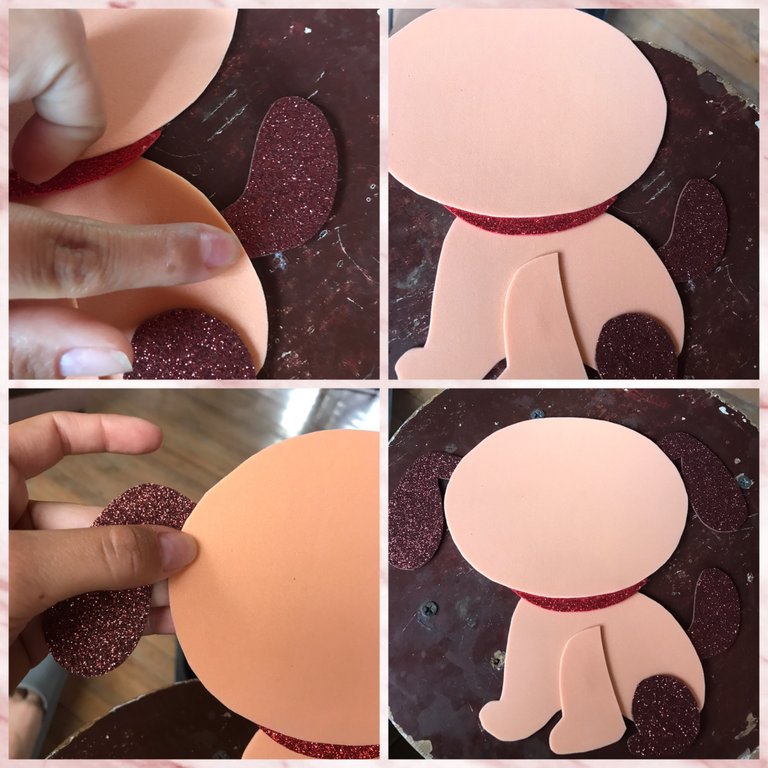
Ya que estén cortados todos los patrones empezamos a pegar el collar del perrito a la cabeza del perrito cuando esté bien pegado lo pegaremos al cuerpo del perrito
Once all the patterns have been cut, we start to glue the collar to the head of the puppy when it is well glued we glue it to the body of the puppy
Ahora pegaremos la pata delantera y luego que esté bien pegada pegaremos la pata trasera
Now we will glue the front leg and after it is well glued we will glue the back leg
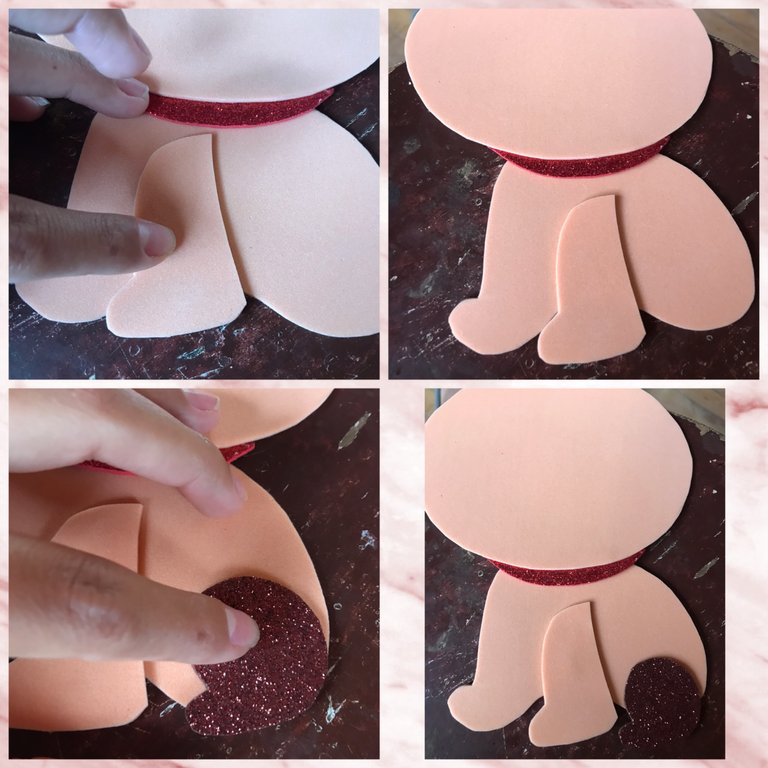
Pegaremos la cola en la parte trasera del perrito y después pegaremos las orejas a la cabeza del perrito 🐶
We will glue the tail to the back of the puppy and then glue the ears to the head of the puppy 🐶
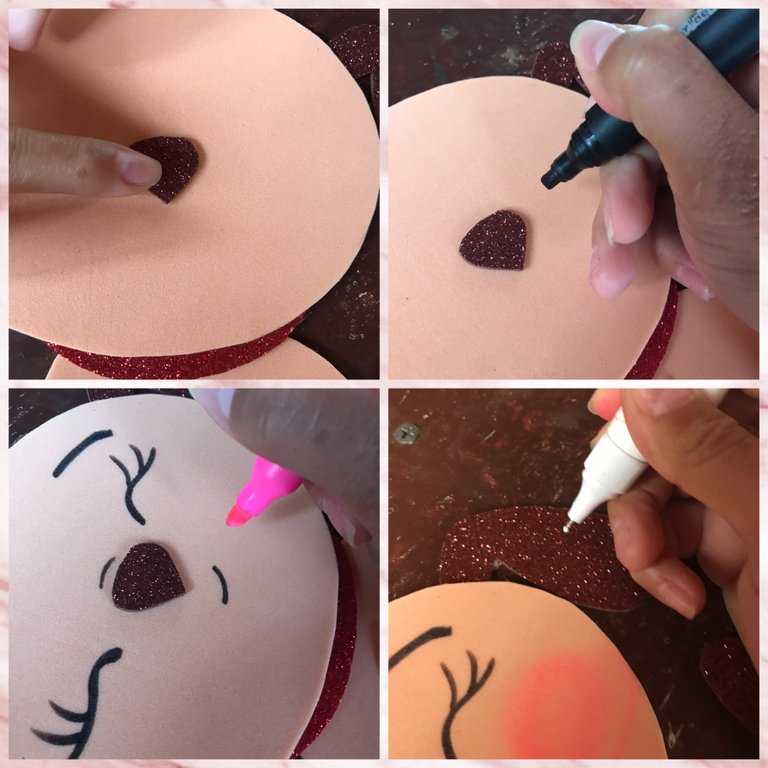
Para finalizar pegaremos la nariz en la cabeza del perrito esperaremos a que esté bien pegado para empezar hacerle los ojos, con el marcador negro aremos los ojos, cejas, pestañas y boca del perrito, con el resaltador fucsia aremos las mejillas y con el corrector le aremos unos puntos blancos a las orejas, cola y pata del perrito 🐶
To finish we will glue the nose on the head of the puppy, we will wait until it is well glued to start making the eyes, with the black marker we will make the eyes, eyebrows, eyelashes and mouth of the puppy, with the fuchsia highlighter we will make the cheeks and with the concealer we will make some white dots on the ears, tail and paw of the puppy 🐶
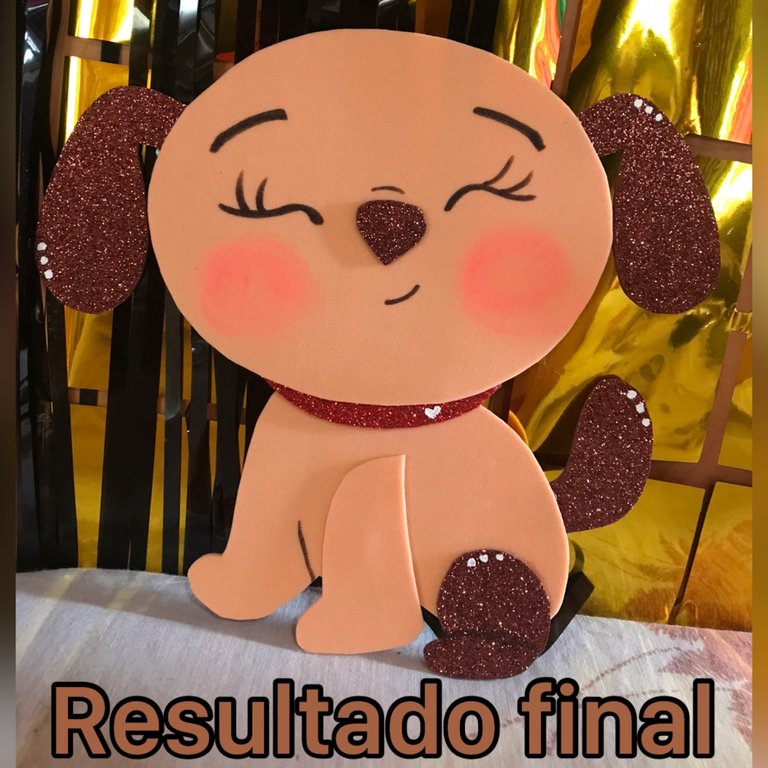
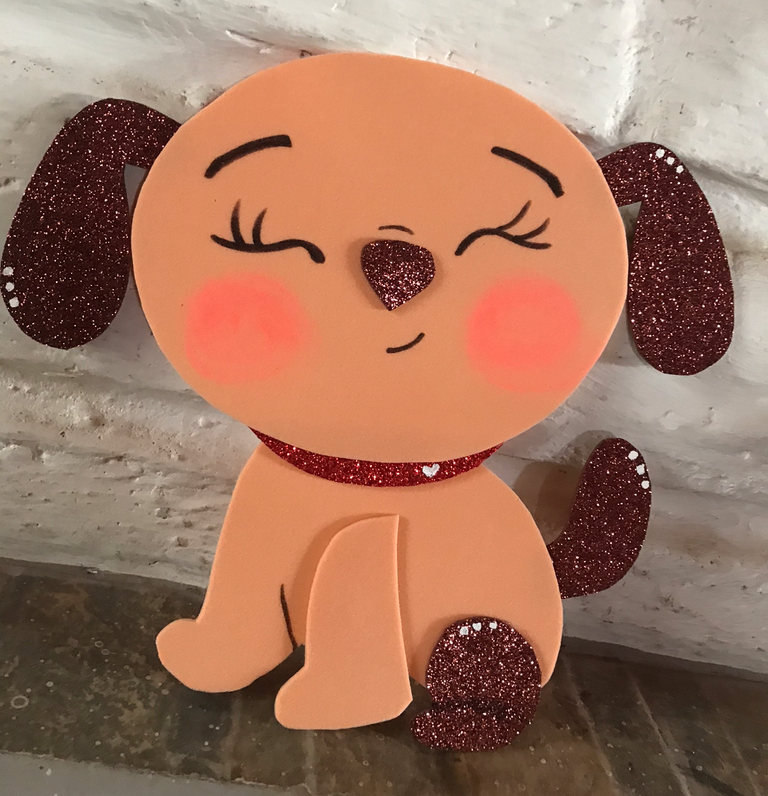
RESULTADO FINAL
FINAL RESULT
ESPERO Y LES HALLA GUSTADO MI TRABAJO AMIGOS, ESPERO Y ME PUEDAN AYUDAR A DARLE CORAZÓN Y A COMENTAR QUE LES PARECIÓ, QUE DIOS LOS BENDIGA SIEMPRE HASTA LA PRÓXIMA OPORTUNIDAD
I HOPE YOU LIKED MY WORK FRIENDS, I HOPE YOU CAN HELP ME TO GIVE IT HEART AND COMMENT WHAT YOU THOUGHT, MAY GOD BLESS YOU ALWAYS UNTIL THE NEXT OPPORTUNITY


