Bienvenidos | Welcome
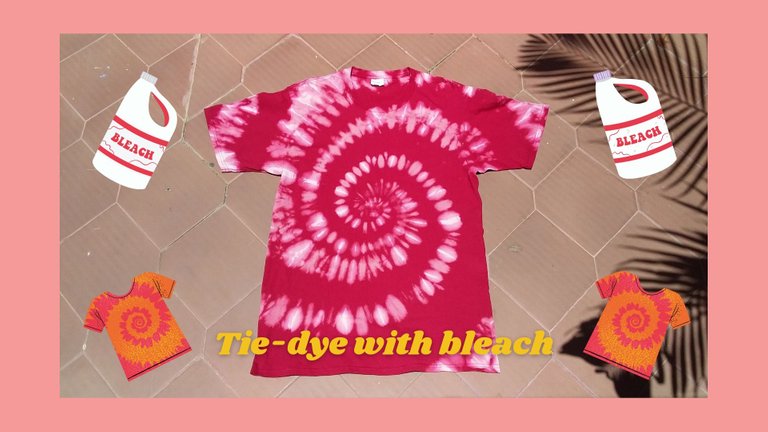
Hola de nuevo, gente preciosa de Hive diy, espero que se encuentren súper de maravilla y que estén pasando una excelente Semana Santa 🙏 hace mucho que no subía contenido a esta comunidad y ya empezaba a extrañarlos. El día de hoy estoy de regreso con un tutorial donde les mostraré cómo hacer una Camiseta Tie Dye uwu usualmente esta técnica se hace con camisetas blancas y un montón de tintes para ropa de distintos colores, pero, en mi ciudad no hay variedad en tintes 😔 así que se me ocurrió que podía intentarlo con cloro🤔 que básicamente, sería decolorar en lugar de teñir. Esta propuesta es muchísimo más sencilla y económica, asi que espero que les guste mucho.
Hello again, beautiful people of Hive diy, I hope you are feeling great and that you are having a great Easter 🙏 it's been a long time since I last uploaded content to this community and I was starting to miss you. Today I will be back with a tutorial where I will show you how to make a Tie dye T-shirt uwu usually this technique is done with white t-shirts and a lot of dyes for clothes of different colors, but, in my city there is no variety in dyes 😔 so I thought I could try it with bleach🤔 which basically, would be bleaching instead of dyeing. This proposal is much simpler and cheaper, so I hope you like it a lot.
Materiales | Materials:
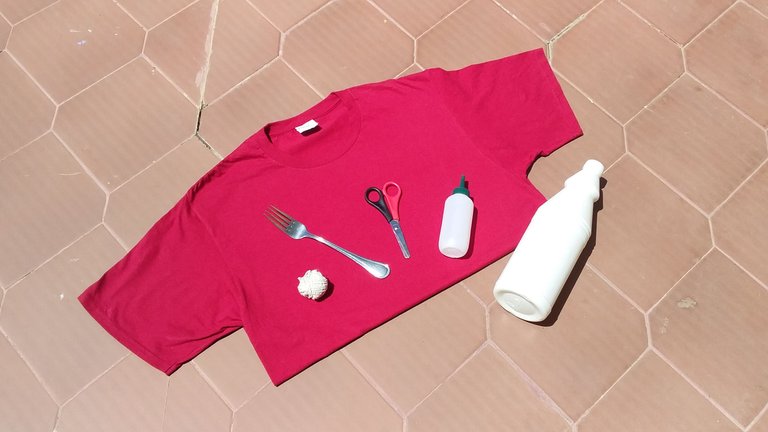
- Una camiseta de algodón
- Cloro
- Tenedor
- Botella
- Lana
- Tijeras
- Cotton T-shirt
- Bleach
- Fork
- Bottle
- Wool
- Scissors
👕Proceso | Process👕
Paso 1 | Step 1
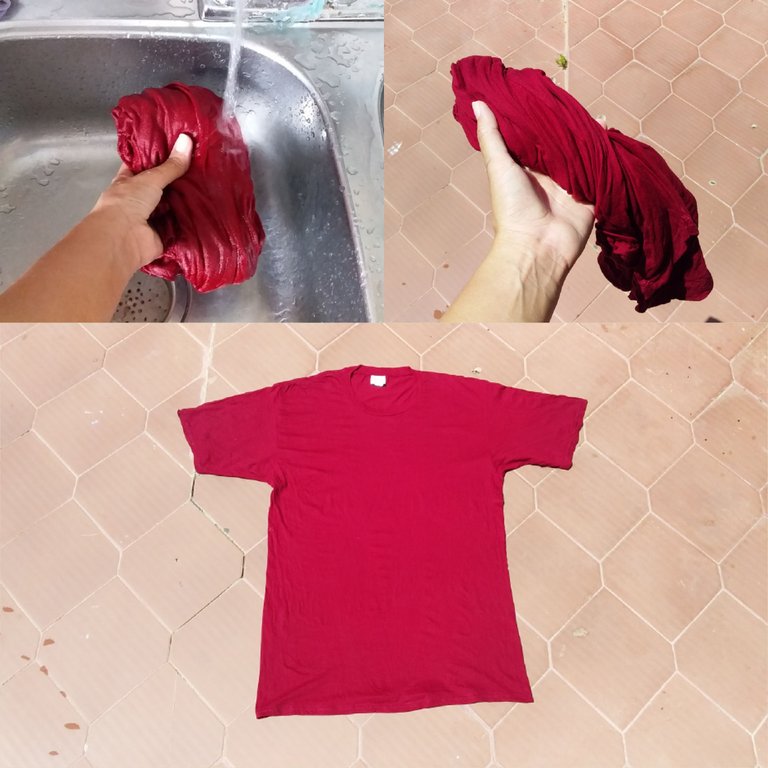
Lo primero que haremos será mojar nuestra camiseta, escurrirla para sacar el exceso de agua y luego la estiraremos muy bien en nuestra área de trabajo
The first thing we will do is wet our T-shirt, wring it to remove excess water and then stretch it well on our work area.
Paso 2 | Step 2
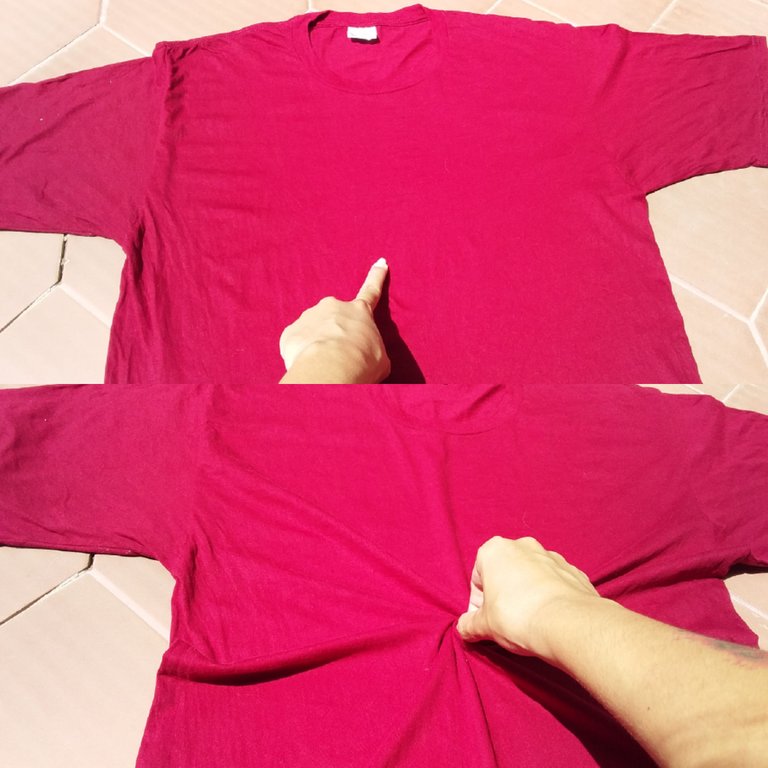
Lo siguiente será ubicar el centro de la camiseta, pellizcar para tomar ambas capas de tela (la de arriba y la de abajo) y luego torceremos un poco
The next step is to locate the center of the T-shirt, pinch to take both layers of fabric (top and bottom) and then twist a little bit.
Paso 3 | Step 3
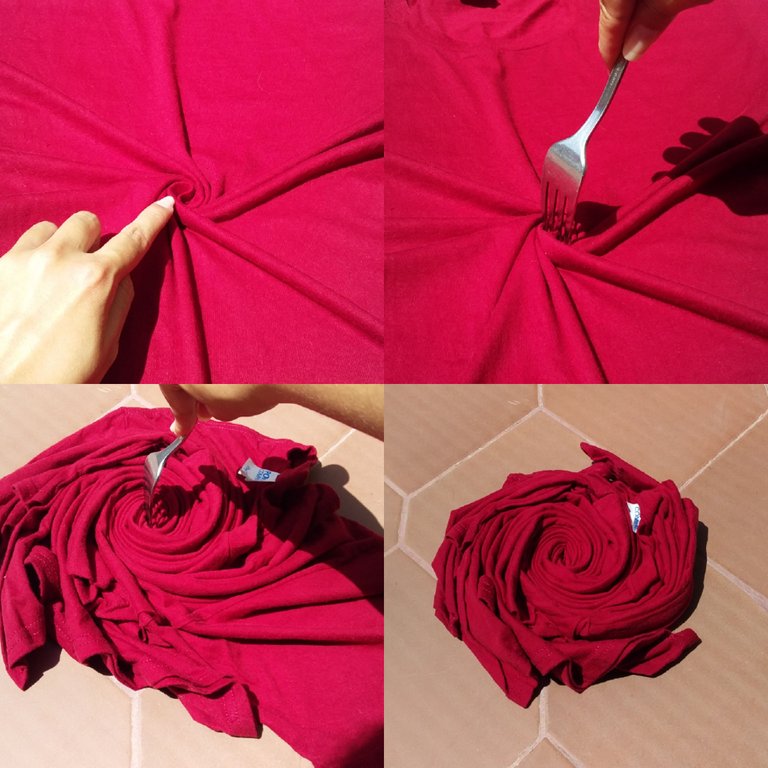
Nos deben quedar dos hoyos como en la primera foto, ahí pondremos el tenedor y lo empezaremos a girar hasta que quede todo bien enrrollado.
We should have two holes as in the first photo, there we will put the fork and begin to turn until everything is well rolled up.
Paso 4 | Step 4
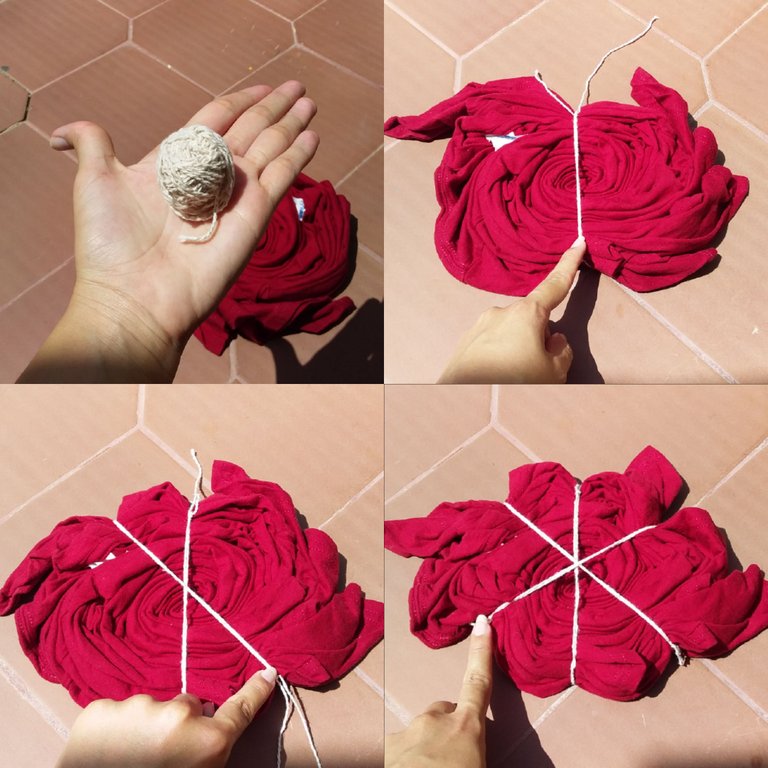
Cortaremos unos trozos de lana y los ataremos a la camiseta, primero uno en vertical y luego dos en diagonal (en sentidos opuestos), de esta manera quedará dividida en seis partes. Si no tienes lana puedes utilizar tres ligas y este paso se te hará mucho más sencillo.
We will cut some pieces of wool and we will tie them to the T-shirt, first one vertically and then two diagonally (in opposite directions), in this way it will be divided into six parts. If you don't have wool you can use three rubber bands and this step will be much easier.
Paso 5 | Step 5
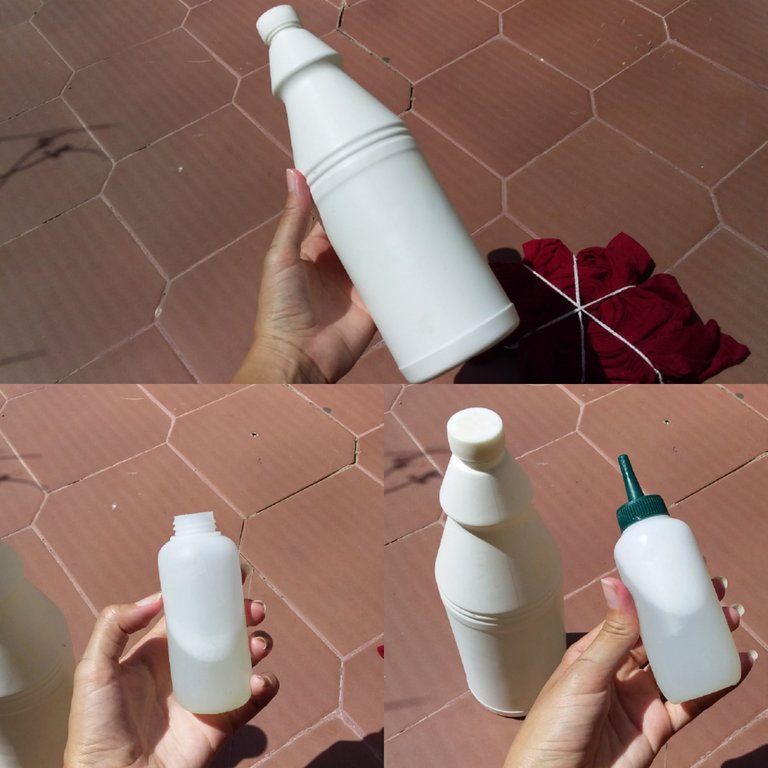
Ahora, llenaremos la mitad de nuestra botella con cloro y la otra mitad con agua. Te recomiendo mucho estas botellas que son para aplicar tinte en el cabello, son muy precisas para este tipo de trabajo por su tapa en forma de pico, pero si no tienes, puedes usar otro que se le parezca o simplemente tomar una botella de agua corriente y perforar la tapa.
Now, we will fill half of our bottle with bleach and the other half with water. I highly recommend these bottles that are for applying hair dye, they are very accurate for this type of work because of their spout-shaped cap, but if you don't have one, you can use another one that looks like it or just take a regular water bottle and pierce the cap.
Paso 6 | Step 6
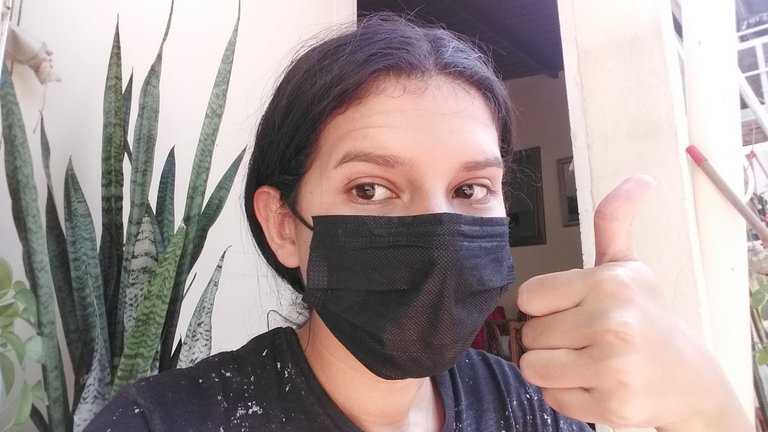
Antes de empezar con este merequetengue, es necesario que sepas que si eres sensible a los olores (como yo) debes utilizar una mascarilla, ya que el cloro es muy fuerte 😷😷😷 y de ser posible utiliza guantes también. Hay que cuidarse, nenis 😔💛
Before we start with this merequetengue, you need to know that if you are sensitive to odors (like me) you should use a mask, as the bleach is very strong 😷😷😷😷 and if possible use gloves too. You have to take care, babys 😔💛
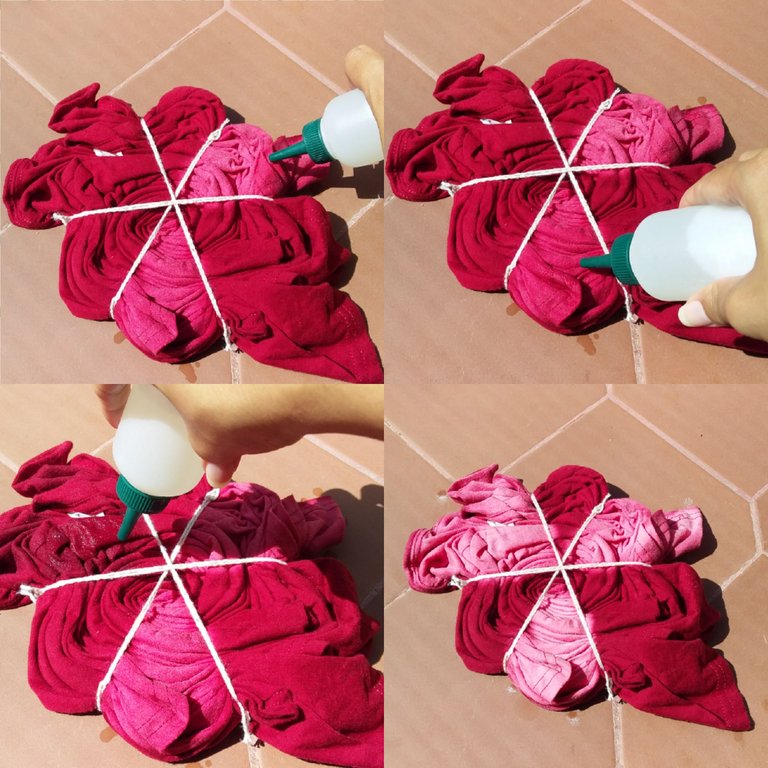
Aplicaremos el cloro en solo tres secciones, dejando un espacio entre ellas (como se ve en las fotos)
We will apply the bleach in only three sections, leaving a space between them (as shown in the pictures).
Paso 7 | Step 7
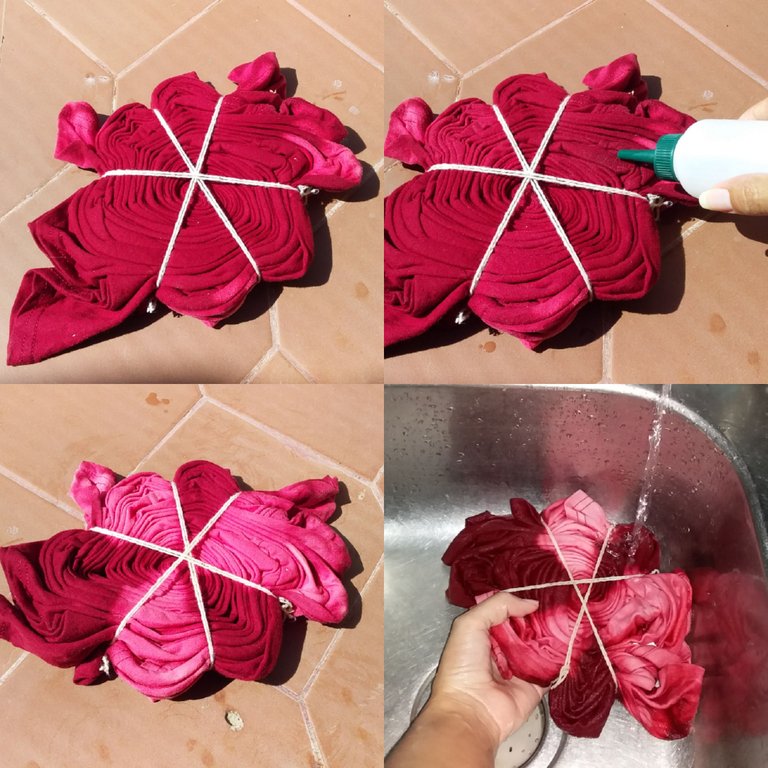
Le daremos vuelta a la camiseta y terminaremos de aplicar cloro en las mismas secciones que mojamos anteriormente. Dejaremos actuar unos 20-30 minutos o hasta que veamos que se ha aclarado bastante, pero con cuidado de no excedernos en el tiempo ya que la prenda podría dañarse!. Por último la lavaremos y cortaremos los hilos o ligas.
We will turn the t-shirt over and finish applying bleach in the same sections that we wet previously. We will leave it on for about 20 - 30 minutes or until we see that it has cleared up enough, but be careful not to exceed the time since the garment could be damaged! Finally we will wash it and cut the threads or garters.
💦Resultado | Result💦
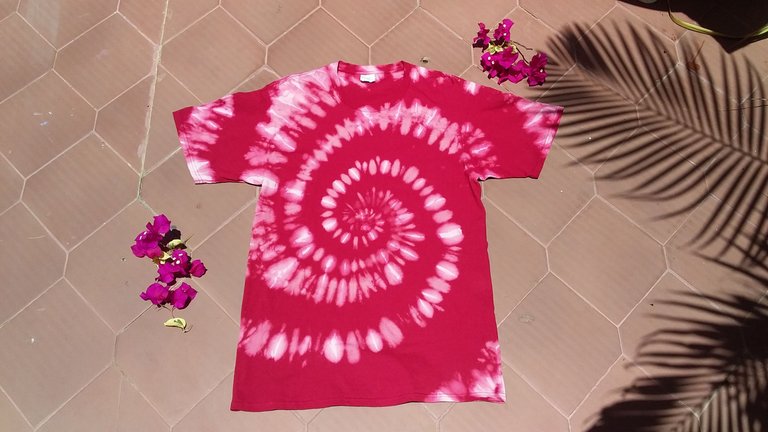
Y este es el resultado 💛 espero que les haya gustado muchísimo y que lo hagan en casita.😙
Gracias por leerme.💛
And this is the result 💛 I hope you liked it very much and that you will make it at home.😙
Thanks for reading me.💛
