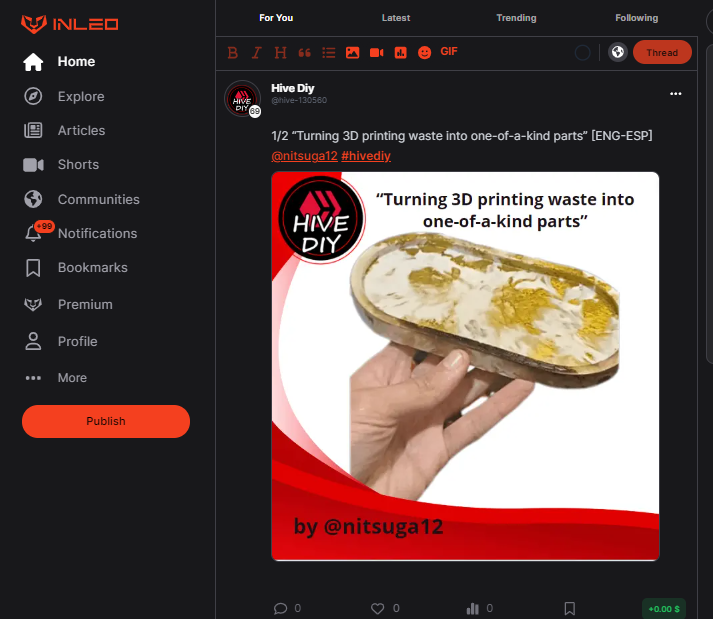
Greetings dear friends of Hive, welcome to my post once again, this time I bring a couple of works I did just to experiment and take advantage of my time in the winter vacations plus it served to recycle a lot of plastic waste from my 3D printing venture, so without further ado I start to tell you.
Saludos queridísimos amigos de Hive, bienvenidos a mi post una vez más, en esta oportunidad traigo un par de trabajos que hice simplemente para experimentar y aprovechar mi tiempo en las vacaciones de invierno sumado a que sirvió para reciclar bastantes desechos plásticos provenientes de mi emprendimiento de impresión 3D, así que sin más rodeos comienzo a contarles.
How did I come up with it? It's not even close to being my original idea, in this post I'm going to document the things I noticed in the process of making these pieces, recommendations and that kind of things that one realizes with experimentation. Some time ago a friend of mine started to make a couple of molds, he uploaded the images to Instagram and I got very interested because they generated some really beautiful patterns by combining different colors, I got rid of the basic doubts and began to devise what I was going to do.
¿Cómo se me ocurrió? Ni de cerca es una idea original mía, yo en este posteo voy a dedicarme a documentar las cosas que fui notando en el proceso para hacer estas piezas, recomendaciones y ese tipo de cosas que uno se va dando cuenta con la experimentación. Hace ya algún tiempo un amigo arranco a hacer un par de moldes, subió las imágenes a Instagram y me interese muchísimo debido a que se generaban unos patrones realmente hermosos al combinar diferentes colores, me saque las dudas básicas y comencé a idear lo que iba a hacer.
|
|
|---|
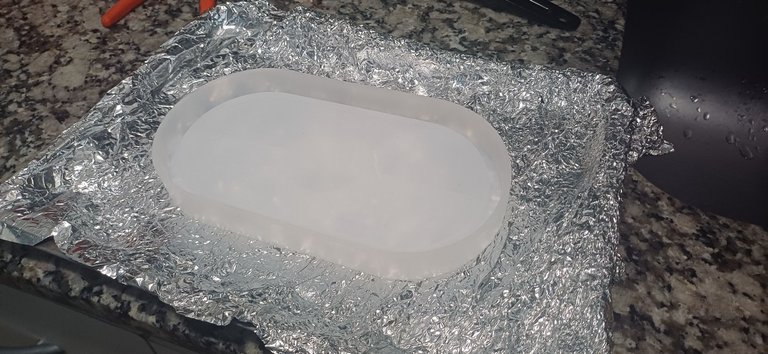
I looked for a silicone mold, the ones used to make resin or concrete pieces and I must admit that at first I thought about buying some extravagant mold, but I decided to go for the safe thing, a simple piece without many nooks and crannies, mainly to be sure that it would work. If I remember correctly the mold cost me about $5,000 Argentine pesos, less than 4 dollars.
Averigüé por un molde de silicona, los que se usan para hacer piezas de resina o concreto y debo admitir que en un comienzo pensé comprar algún molde extravagante, pero decidí ir por lo seguro, una pieza sencilla sin muchos recovecos principalmente para estar seguro de que iba a funcionar. Si mal no recuerdo el molde me costo unos $5mil pesos argentinos, menos de 4 dólares.
|
|
|---|

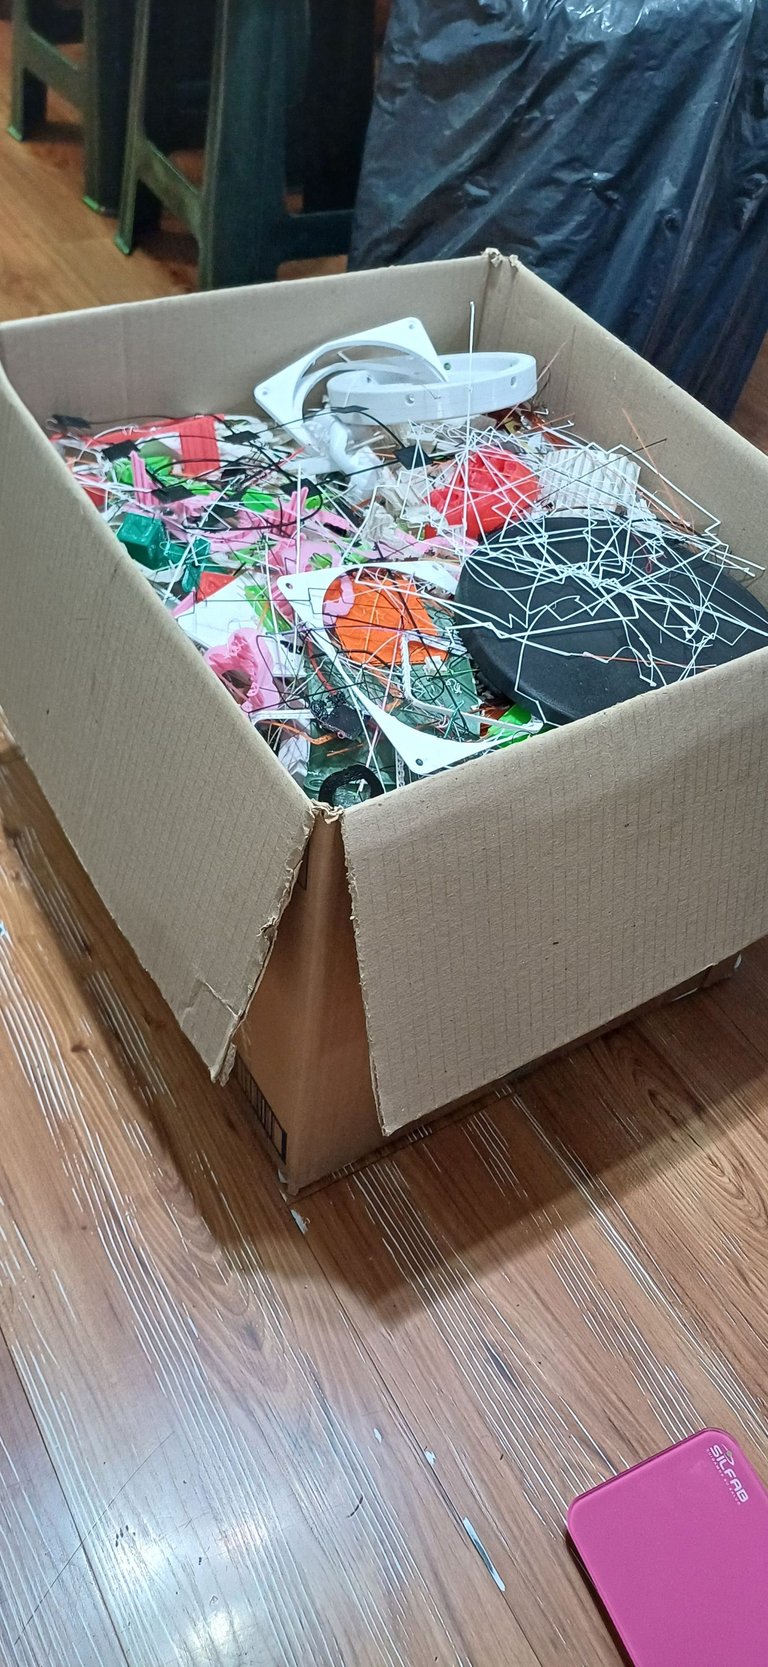
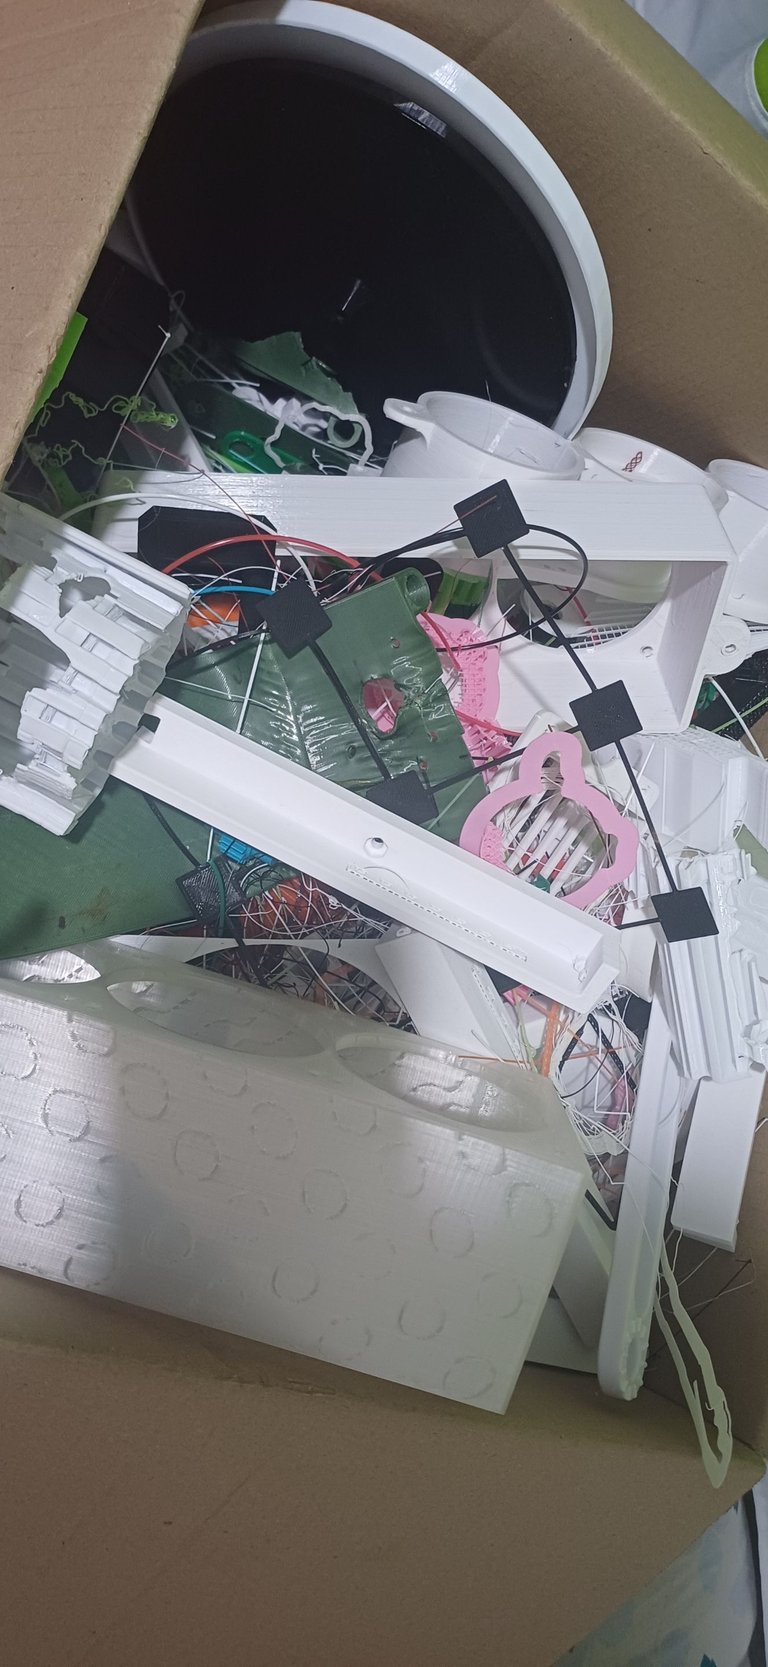
Once I had the mold I started to think about what colors I wanted my pieces to have, so I had to prepare the raw material to make them. Generally per year I am generating about 10 kilos of plastic waste and when I filled a box I took them to another place to recycle them and make products, the bad thing is that due to time and distance I could not do this anymore, but it ended up being an opportunity to do these tests.
Una vez tuve el molde comencé a pensar que colores quería que tuvieran mis piezas, así que debía preparar la materia prima para fabricarlos. Generalmente por año estoy generando unos 10 kilos de desperdicios plásticos y cuando llenaba una caja los llevaba a otro lugar para que los reciclaran y armaran productos, lo malo es que por cuestiones de tiempo y lejanía ya no pude hacer esto, pero termino siendo una oportunidad para hacer estas pruebas.
|
|
|---|
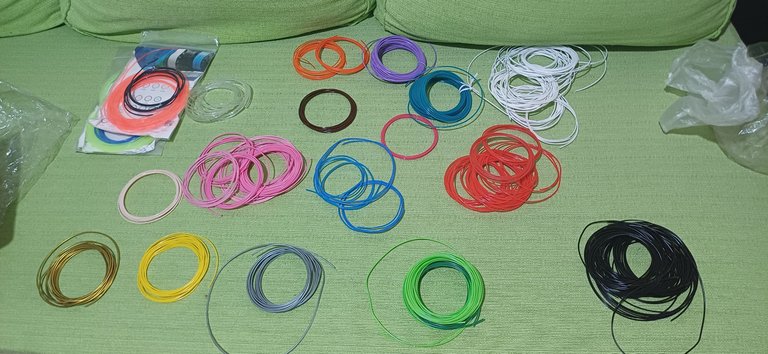
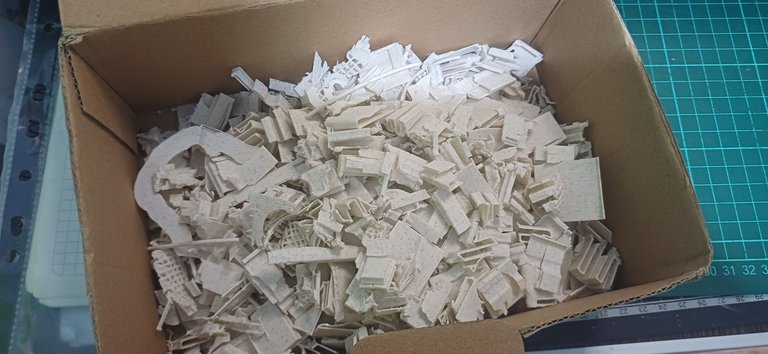
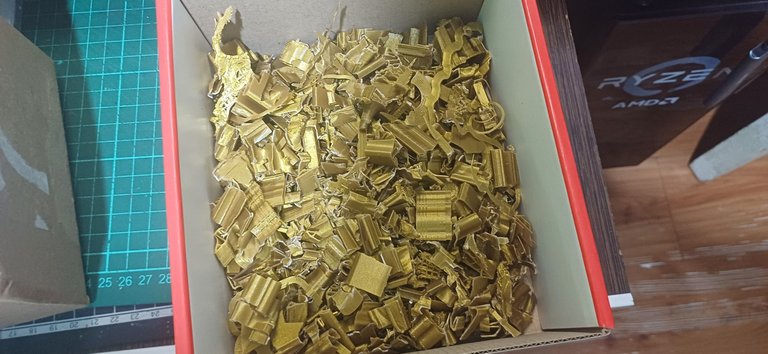
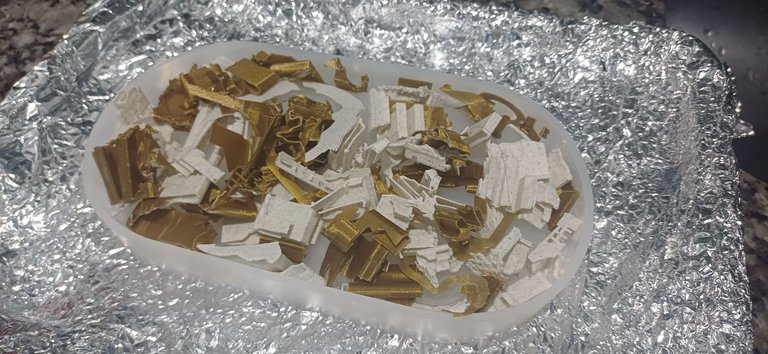
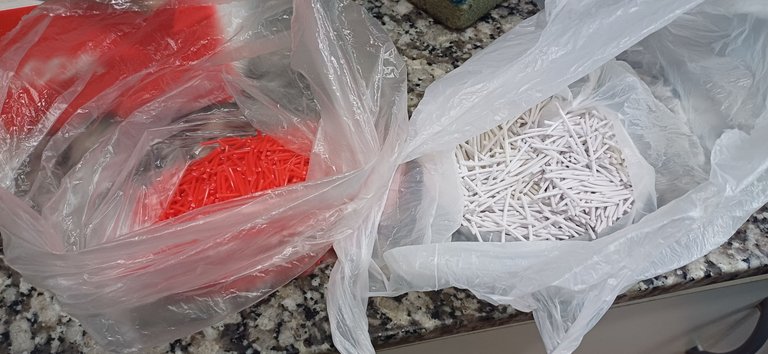
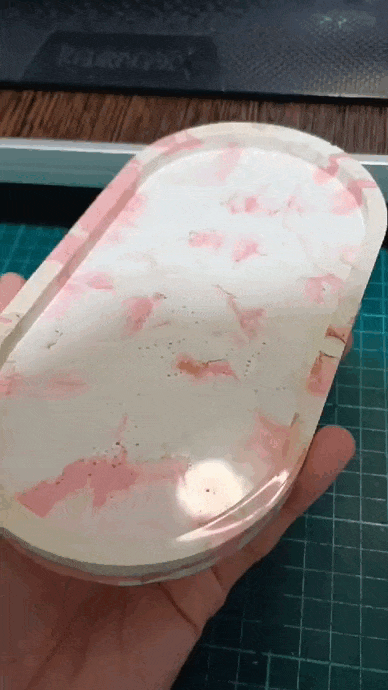
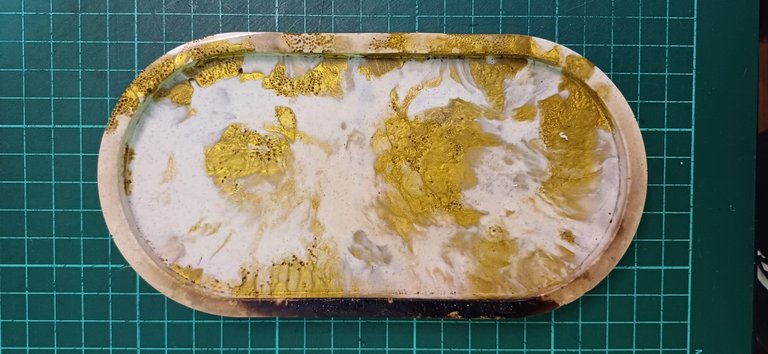
I opened the huge box and started to rummage through everything, I decided to separate the colors that I thought could best be combined, such as gold with a material similar to marble, black and white (a quiet combination but I knew it would be balanced), red, green, orange, among some others. I mainly chose small scraps because otherwise I would have to process the mimes too much to be able to place them in the silicone mold.
Abrí la enorme caja y comencé a revolver todo, decidí ir separando los colores que mejor me parecían que podrían ir combinados como por ejemplo el dorado con un material similar al mármol, blanco y negro (Una combinación tranquila pero que sabía que estaría equilibrada), rojo, verde, naranja, entre algunos otros más. Principalmente elegí desperdicios pequeños ya que si no tenia que procesar demasiado los mimos para poder irlos colocando en el molde de silicona.
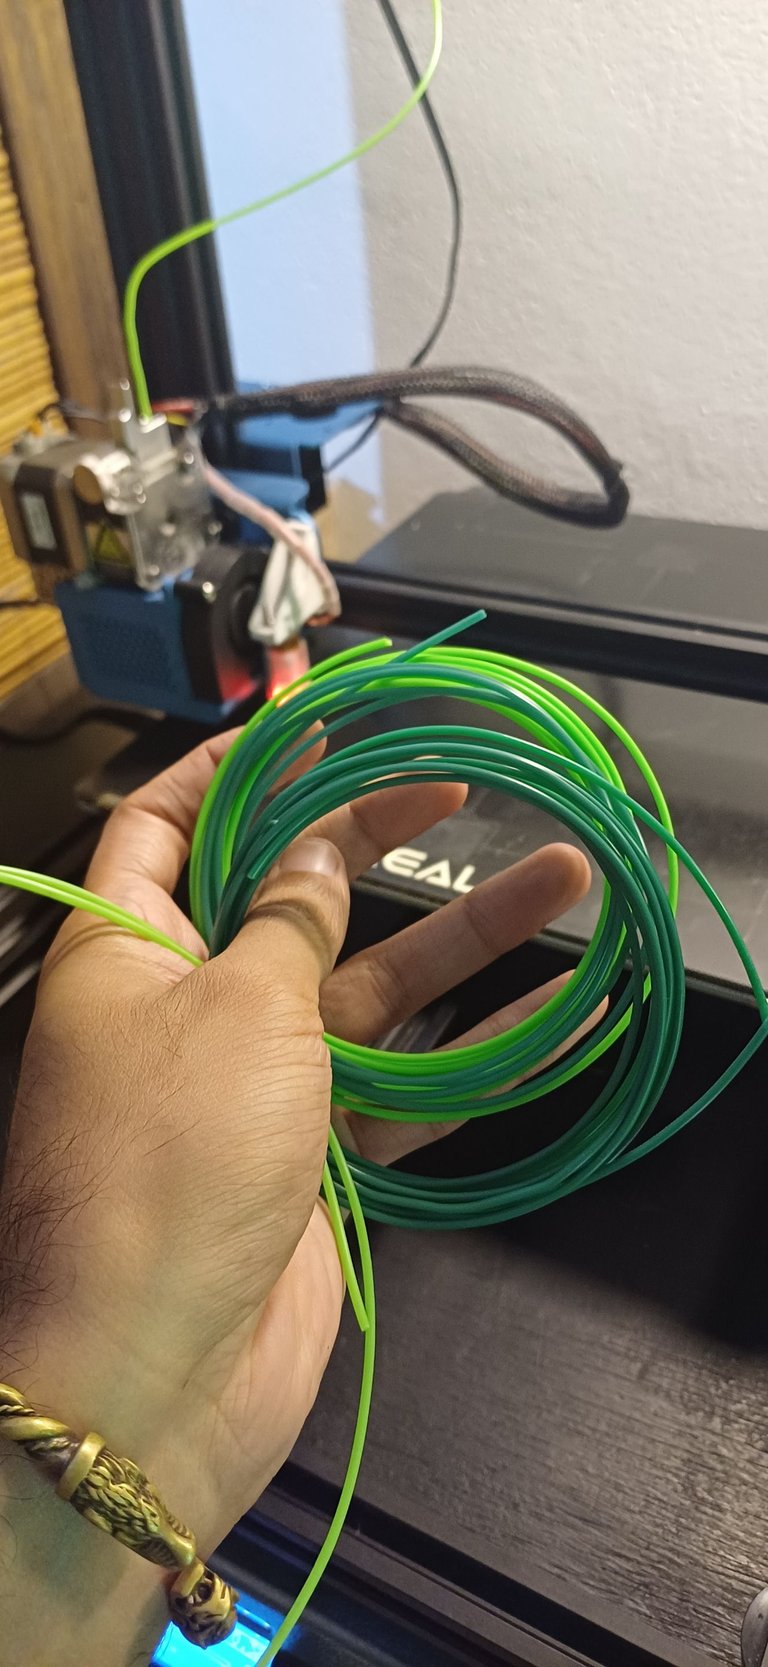
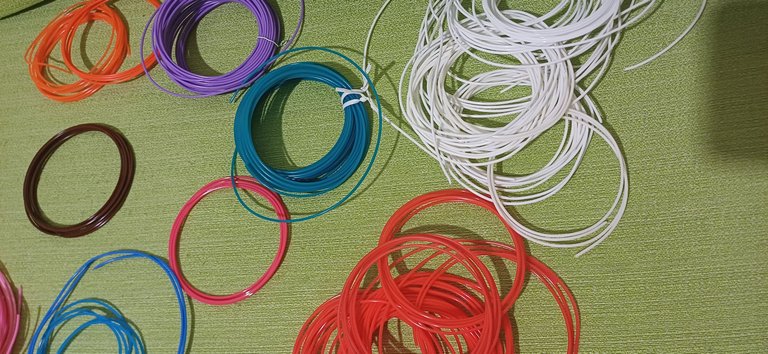
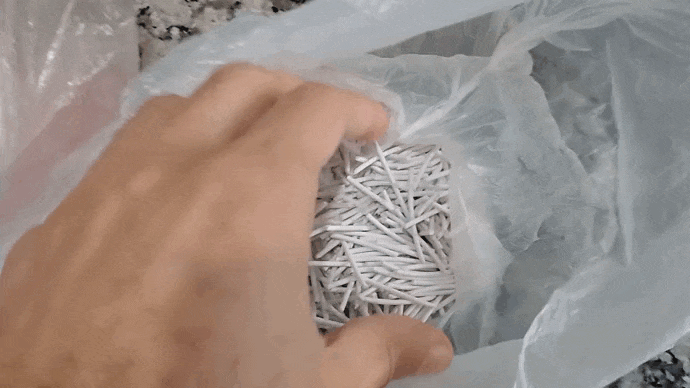
At the same time, I also used the filament scraps from my PLA rolls, cutting them into shorter sections to generate plastic pellets and create a more homogeneous color mix.
A su vez también utilicé los restos de filamento de mis rollos de PLA, los fui cortando en secciones más cortas como para generar pellets plásticos y generar una mezcla de colores más homogénea.
 |  |
|---|
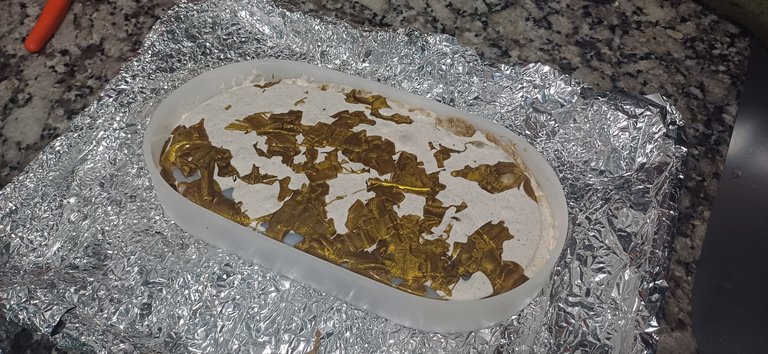
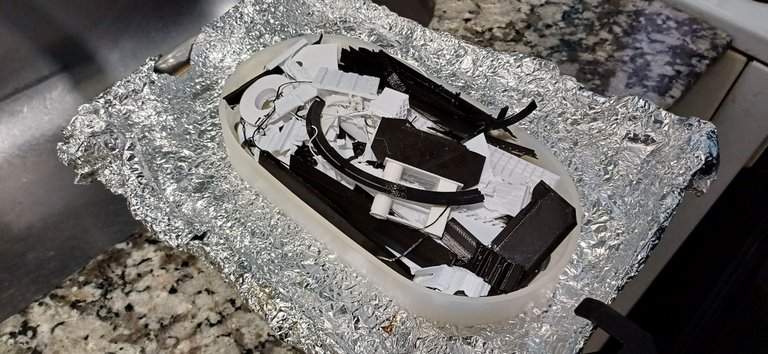
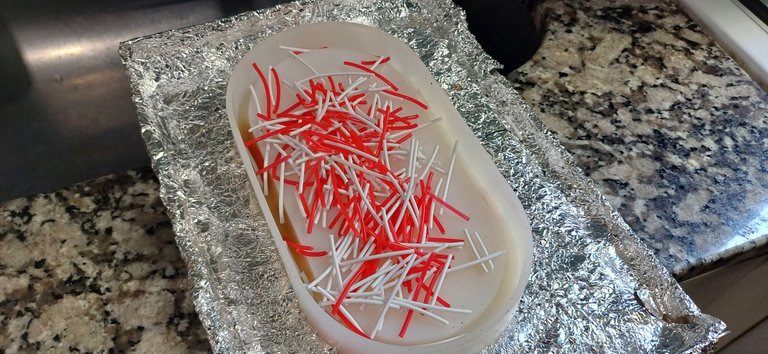
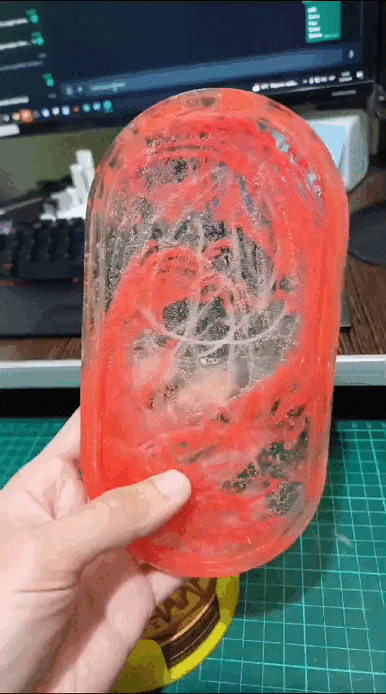
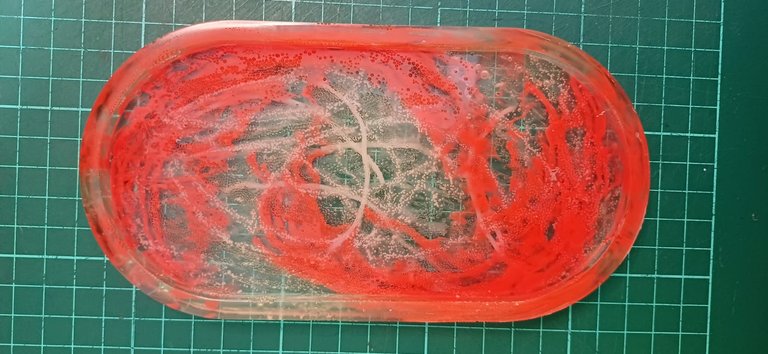
The first test was done in an electric oven, I used a small metal dish that I covered with aluminum foil so as not to ruin the surface in case any plastic piece fell and melted, I placed the oven at about 150C° along with the silicone mold and some golden pieces and marble material, more or less every 15 minutes I checked if the material had melted to continue adding, what I had not realized and did not consider is that my electric oven having only one resistance at the bottom heated unevenly the piece so after removing the mold I noticed that a section had been charred by the excess temperature.
La primera prueba la realice en un horno eléctrico, utilice una pequeña fuente de metal que recubrí con papel aluminio para no arruinar la superficie llegado el caso de que callera alguna pieza plástica y se derritiera, coloque el horno a unos 150C° junto con el molde de silicona y algunas piezas doradas y del material mármol, más o menos cada unos 15 minutos revisaba si el material se había derretido para seguir agregando, lo que no me había dado cuenta y no considere es que mi horno eléctrico al contar solo con una resistencia en la parte inferior calentaba de forma despareja la pieza así que tras retirar el molde note que una sección se había carbonizado por el exceso de temperatura.
The next test I did in the oven of my home, I must warn that it is not healthy to melt plastic because, although we do not see it, the material emanates gases added to the fact that doing it in an oven that one uses for cooking is not the best, but it is a conscious risk that I took since I really wanted to do this.
La siguiente prueba ya la realicé en el horno de mi hogar, debo advertir que no es sano derretir plástico porque, aunque no lo veamos, el material emana gases sumado a que hacerlo en un horno que uno usa para cocinar tampoco es lo mejor, pero es un riesgo consiente que tome ya que tenía muchísimas ganas de hacer esto.
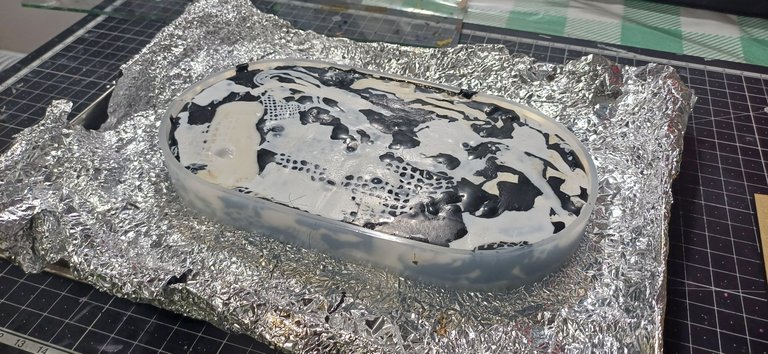
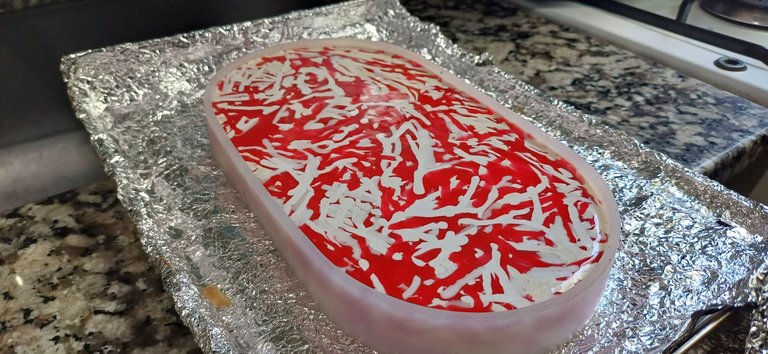
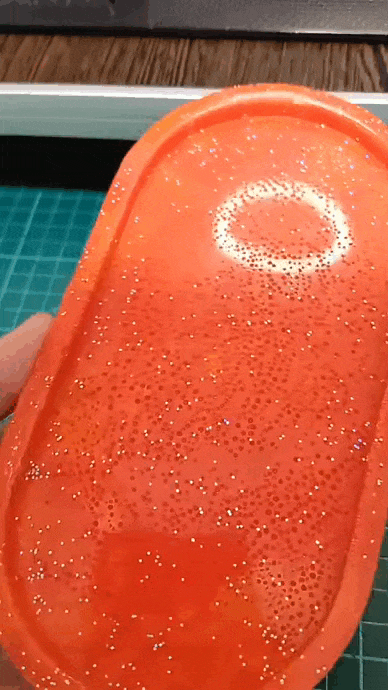
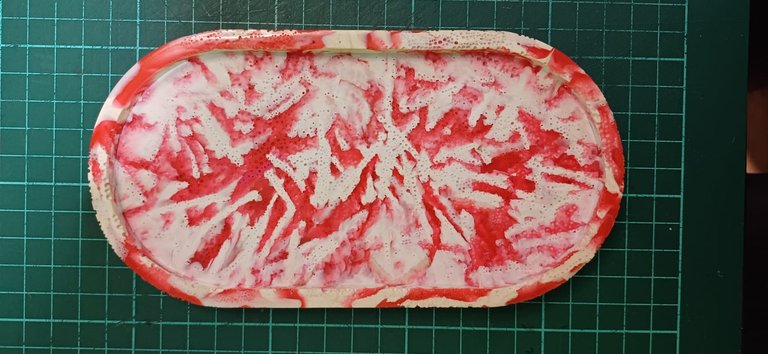
This time I preheated the oven along with the silicone mold and then added the plastic to melt in the same way every 10 or 15 minutes I checked to continue adding material until I got the desired result to all this the oven was at maximum and in this second test I noticed that many bubbles were generated in the piece, plus the support base had not been very neat, it really was not a big problem but I wanted to get the best possible.
En esta ocasión precalenté el horno junto con el molde de silicona y posteriormente agregué el plástico para que se derritiera de igual forma cada unos 10 o 15 minutos revisaba para seguir agregando material hasta conseguir el resultado deseado a todo esto el horno se encontraba al máximo y en esta segunda prueba note que se generaron muchas burbujas en la pieza, sumado a que la base de apoyo no había quedado muy prolija, realmente no era un gran problema pero yo quería que salgan lo mejor posible.

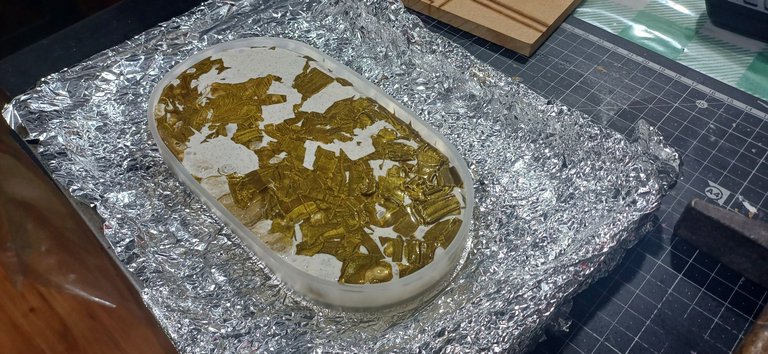
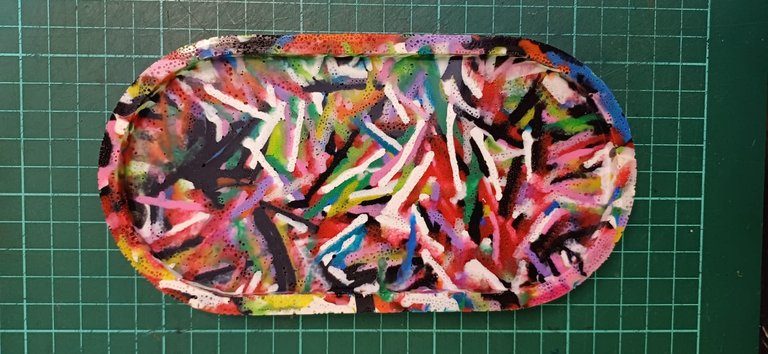
After asking and drawing conclusions I realized that I should work with a lower temperature to prevent bubbles from being generated and between the layers of material that I was adding to wait for them to melt well so that no air is trapped inside, I returned to perform a new test and got better results than in the previous one, this time with a medium temperature. I also tried with a piece of wood to flatten the base by means of a few light blows, but there are no great results.
Tras preguntar y sacar conclusiones me di cuenta que debía trabajar con una temperatura menor para evitar que se generen burbujas y entre las capas de material que iba agregando esperar a que se derritieran bien para que no quede aire atrapado dentro, volví a realizar una nueva prueba y obtuve mejores resultados que en la anterior, esta vez con una temperatura media. También intente con una pieza de madera aplanar la base por medio de unos leves golpes, pero no hay grandes resultados.
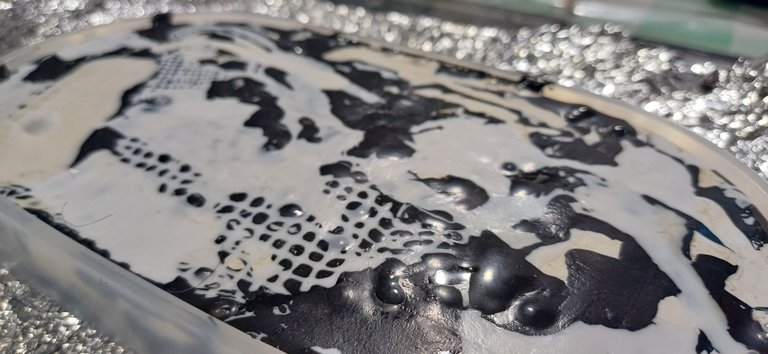
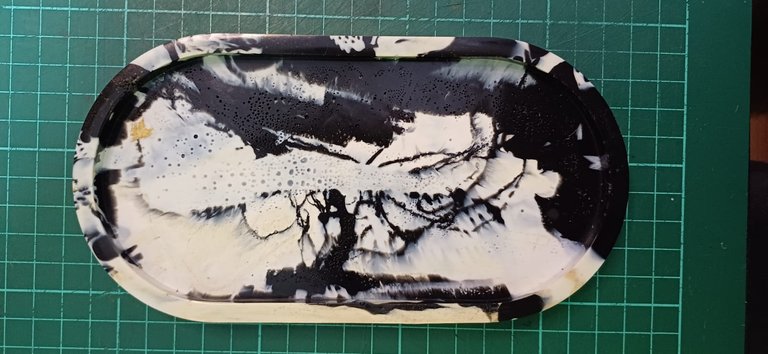
Note that if you use filaments cut as if they were pellets, the whole process is much easier. Because you can better control the amount of material that you place, being smaller pieces everything melts faster plus there is not so much air between the layers reducing the amount of bubbles that are generated in addition to the support base is much flatter.
Note que si uno usa filamentos cortados como si fueran pellets todo el proceso es mucho más sencillo ¿Por qué? Porque se puede controlar mejor la cantidad de material que uno coloca, al ser piezas más chicas se derrite todo más rápido sumado a que no queda tanto aire entre las capas disminuyendo la cantidad de burbujas que se generan sumado a que la base de apoyo queda muchísimo más plana.

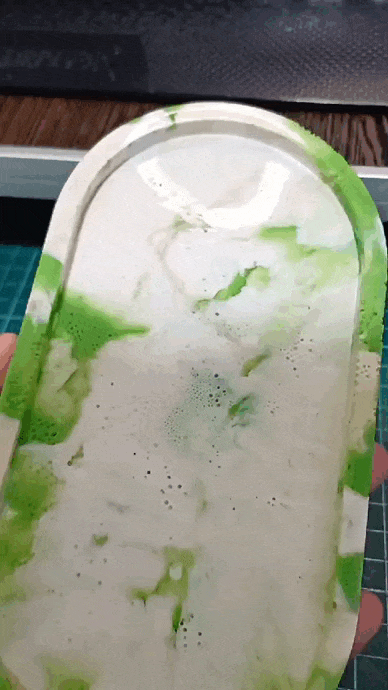
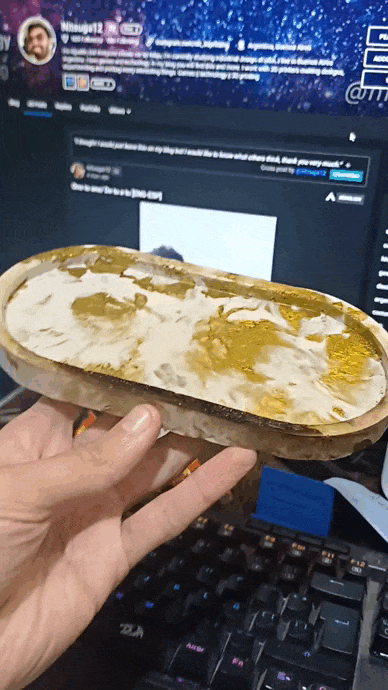
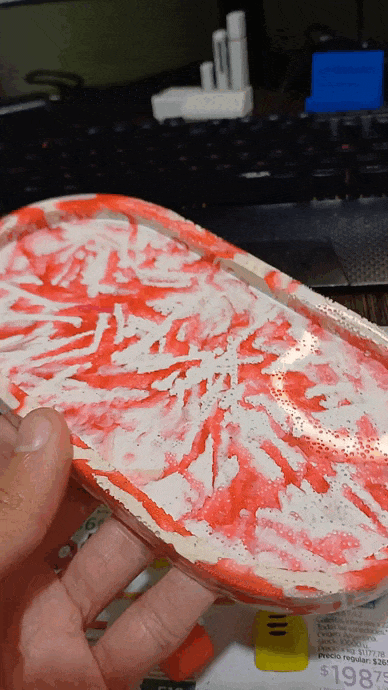
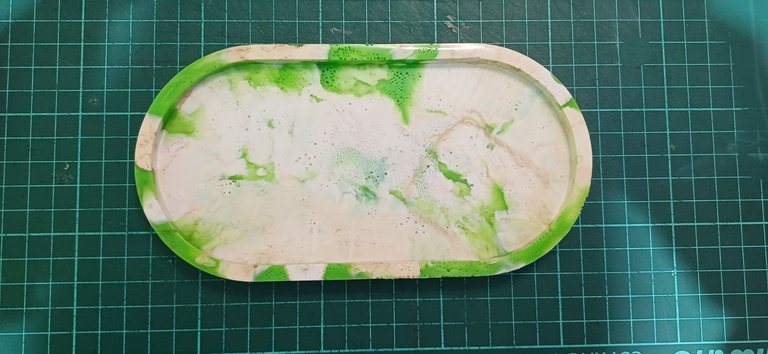
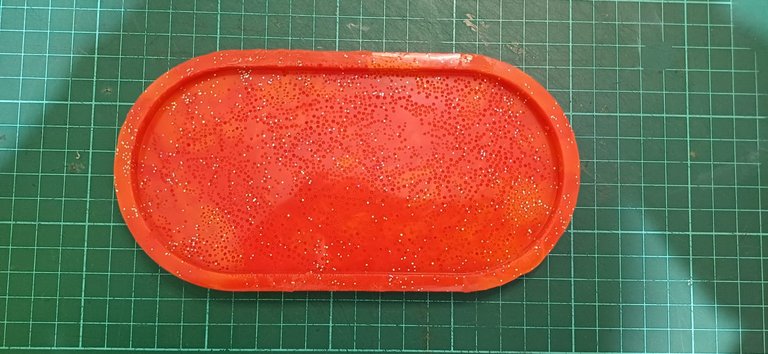
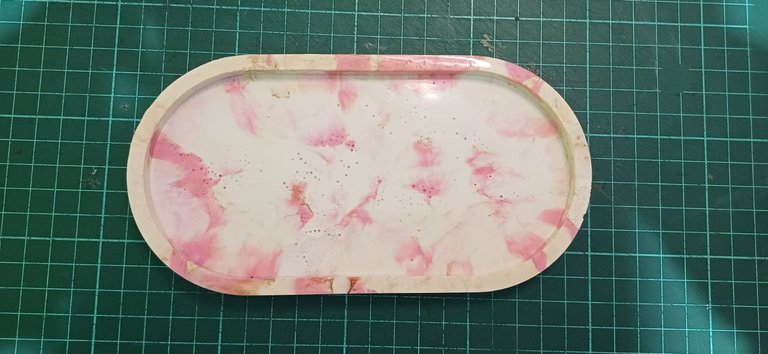
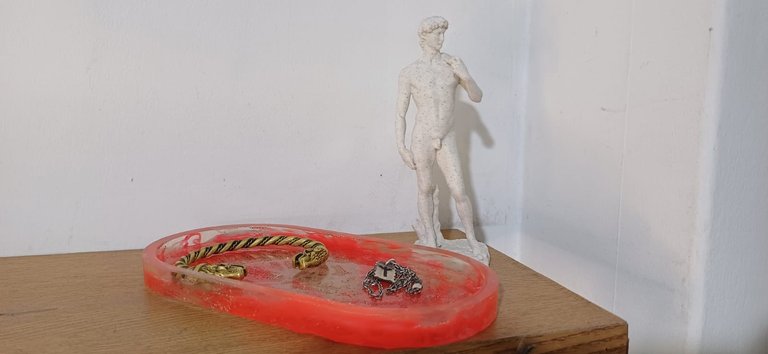
So far I have made 10 different pieces, I only plan to keep one and the rest I will use to make gifts for my loved ones, I noticed that after the use the silicone mold began to show the first signs of wear and tear because when unmolding the pieces the joints of the silicone mold are breaking little by little. For now I will not make more but surely in a few months I will buy another mold to make different pieces.
Hasta ahora he hecho 10 piezas diferentes, solo pienso quedarme con una y el resto voy a aprovechar para hacer regalos a mis seres queridos, note que tras el uso el molde de silicona comenzó a mostrar los primeros síntomas de desgaste ya que al desmoldar las piezas las uniones del molde de silicona van rompiéndose de apoco. Por ahora no hare más pero seguramente en unos meses voy a comprar otro molde para hacer piezas diferentes.
|  |
 |
|---|
|  |
|---|
I love the results I obtained, I was able to improve the technique and the patterns that are generated by combining colors are really exquisite. As a last mention I use a tool called a deburring machine to remove the sharp edges, improving even more the final finish of these pieces.
Me encantan los resultados que obtuve, pude mejorar bastante la técnica y los patrones que se generan al combinar colores son realmente exquisitos. Como ultima mención yo utilizo una herramienta que se llama rebabadora para retirar los bordes filosos, mejorando aún más la terminación final de estas piezas.
How did you like it, would you like me to bring you other different pieces later on? I'd love to read them in the comments, I'm Nitsu and I wish you a great week.
¿Qué les ha parecido? ¿Les gustaría que más adelante traiga otras piezas diferentes? Me encantaría poder leerlos en los comentarios, soy Nitsu y les deseo una excelente semana.

My 3D printing works @nit_3dprinting
Mis trabajos de impresión 3D @nit_3dprinting
Translated by DeepL
Traducido con DeepL
All images are my own
Todas las imágenes son de mi autoría
My last post La jubilación de Rusty: el refugio perfecto para escapar del estrés [ENG-ESP]