English version
Page markers are indispensable objects for any reader, otherwise how could they know on which page they left their reading?
Sometimes, when we don't have a bookmark at hand, we have to improvise, I myself have used some random objects to remember the last page I read in a book: from socks, thin combs, brushes and bracelets; but obviously it is more comfortable to use a paper or cardboard bookmark to avoid damaging the pages.
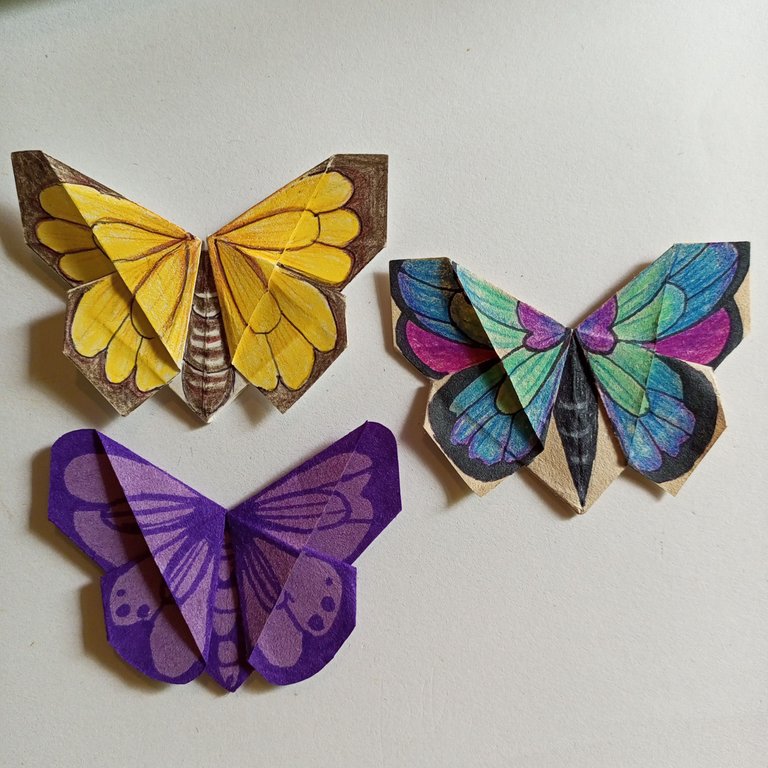
I must give the credit for this bookmark idea to a friend who showed me this origami butterfly figure, I adored the idea as soon as I saw the butterfly design and thought you would love to know how to make one too... so, join me for the step by step.
Process:
 |  | |
 |  | ! |
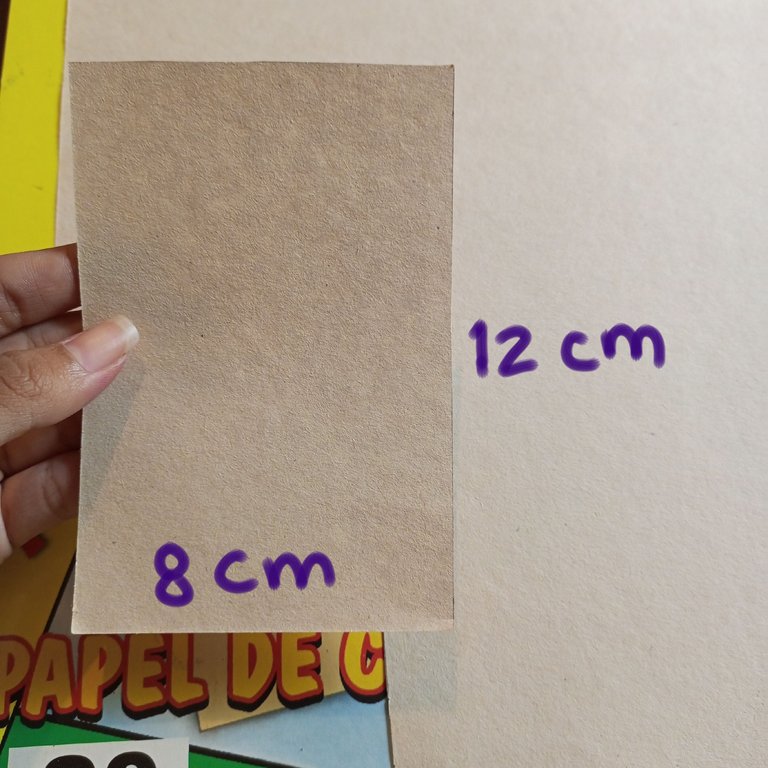
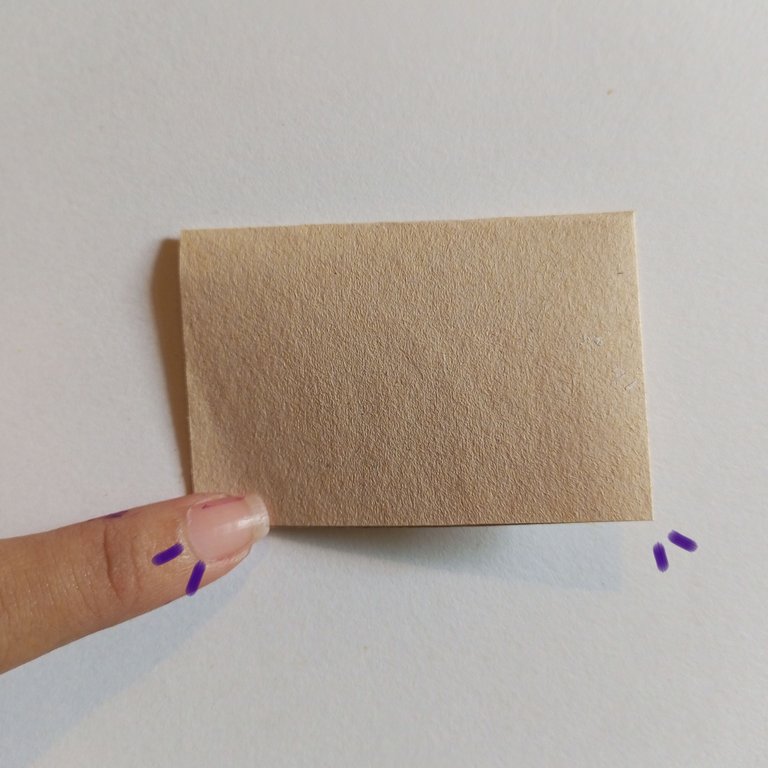
The first thing to do is to cut out a sheet of paper with dimensions of 8x12cm. In my case I used a sheet of cardboard, it has a texture similar to paper and I liked the beige color it had. I do not recommend using a cardboard too thick.
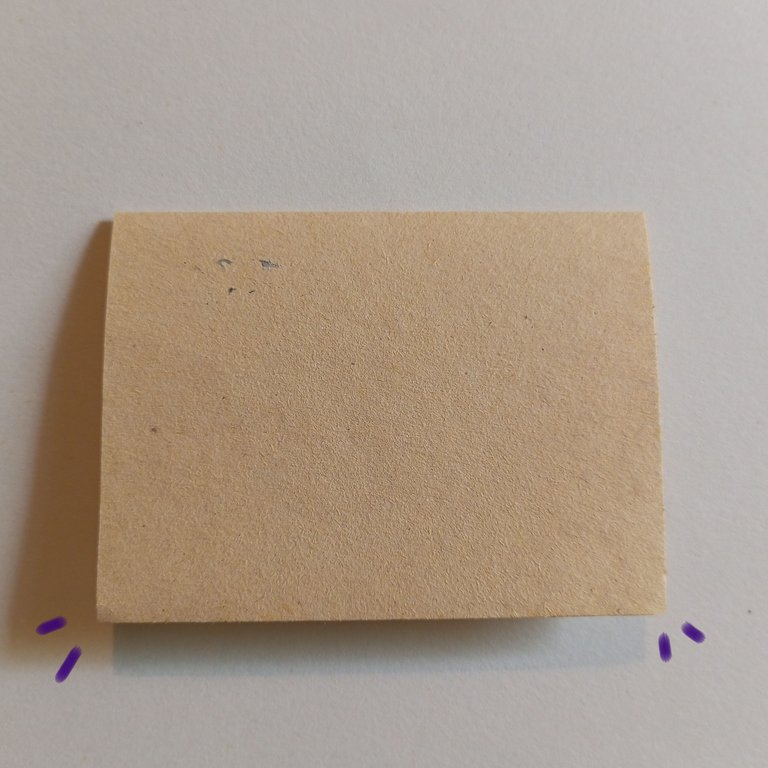
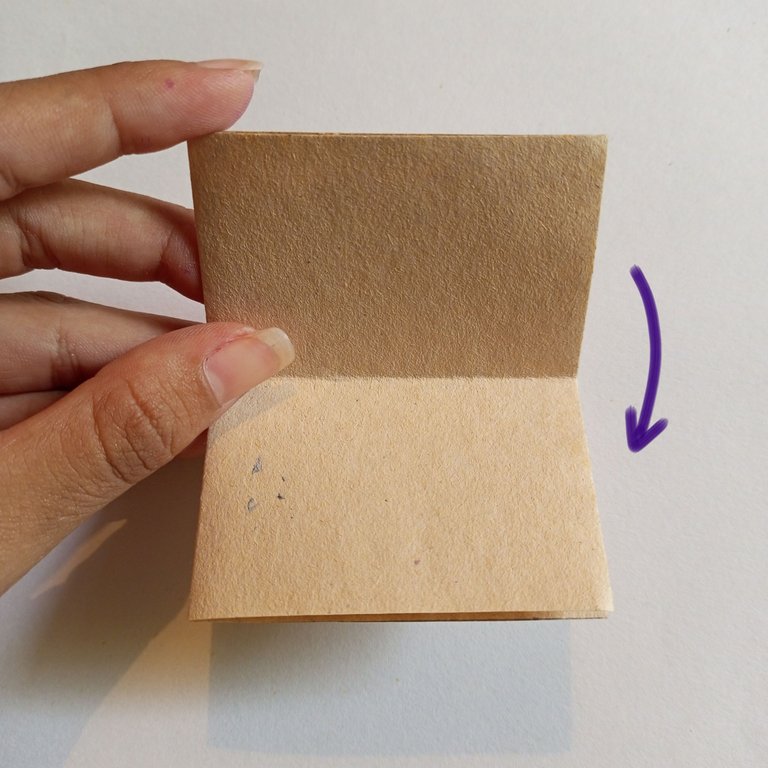
Once we cut out our piece of paper we will have to fold it twice in half.
 |  | |
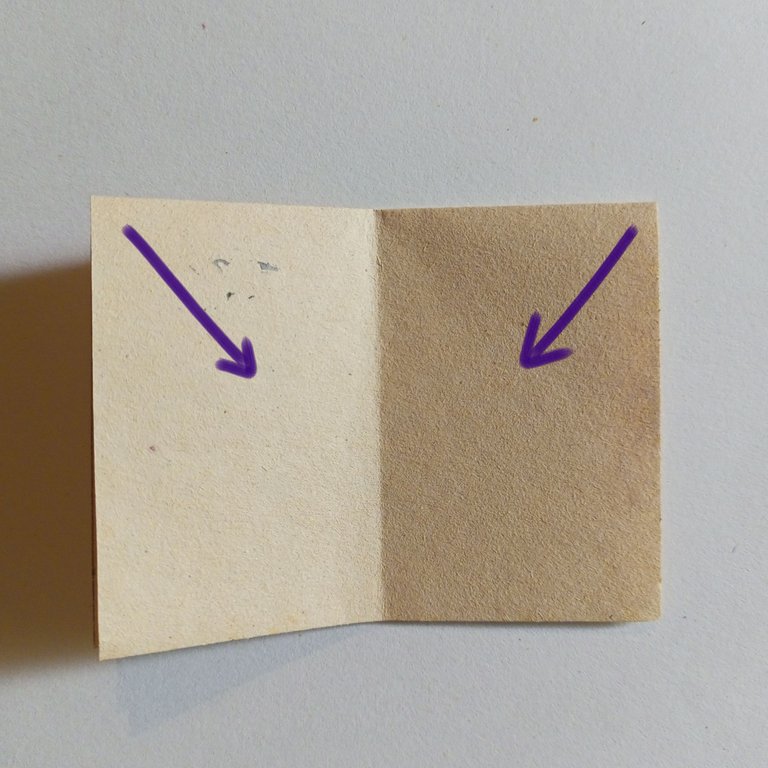 | 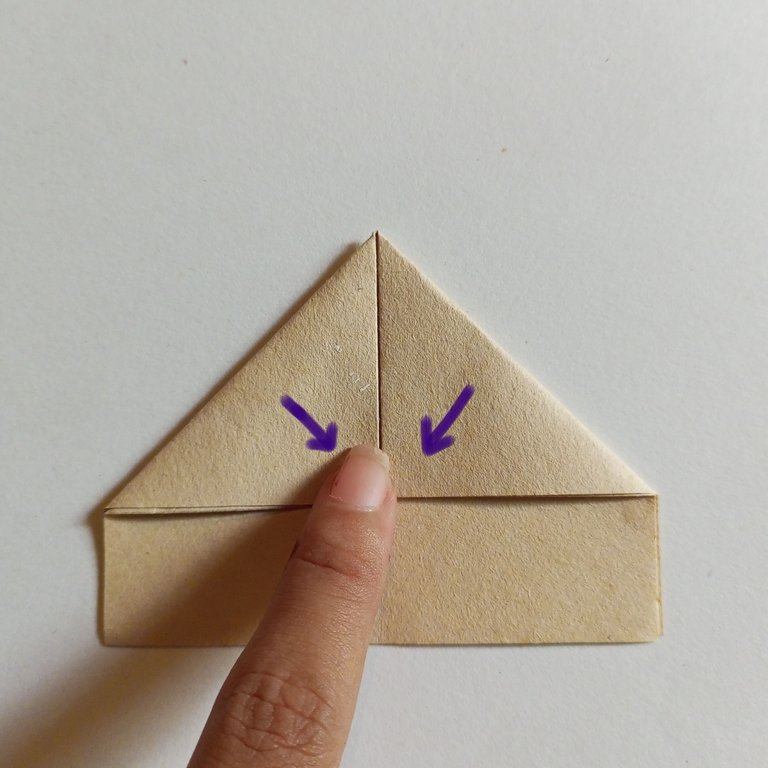 | ! |
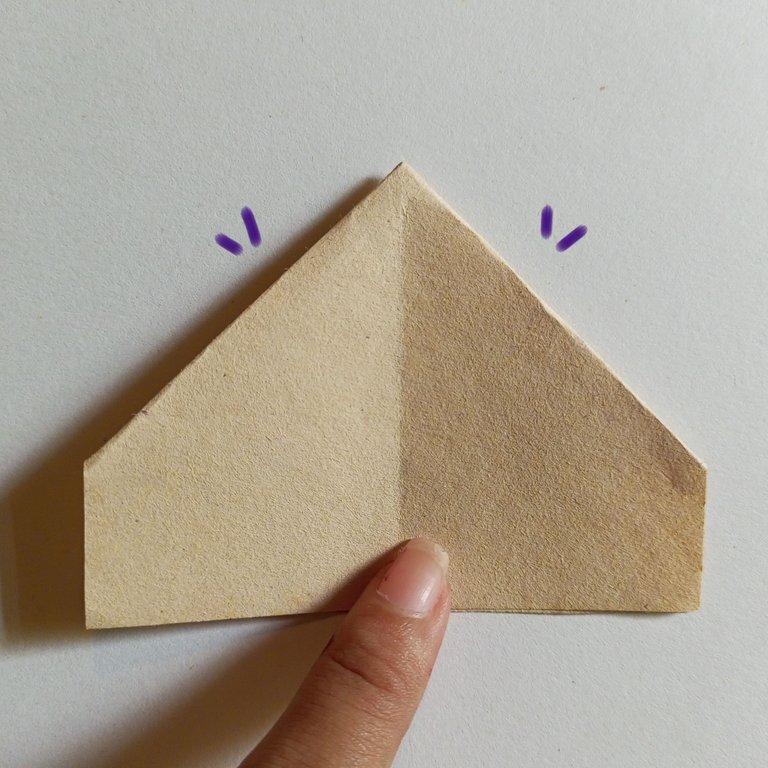
Once that is done, we will turn the paper so that it is horizontal and we will join the upper corners inwards. For each fold you have to make sure that the corners are very well joined.
 |  | |
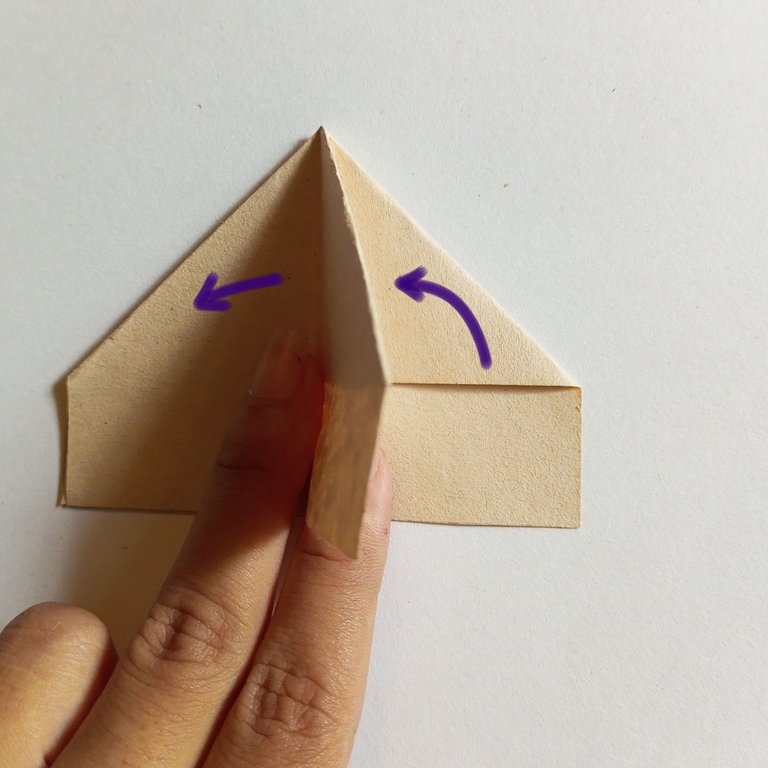 |  | ! |
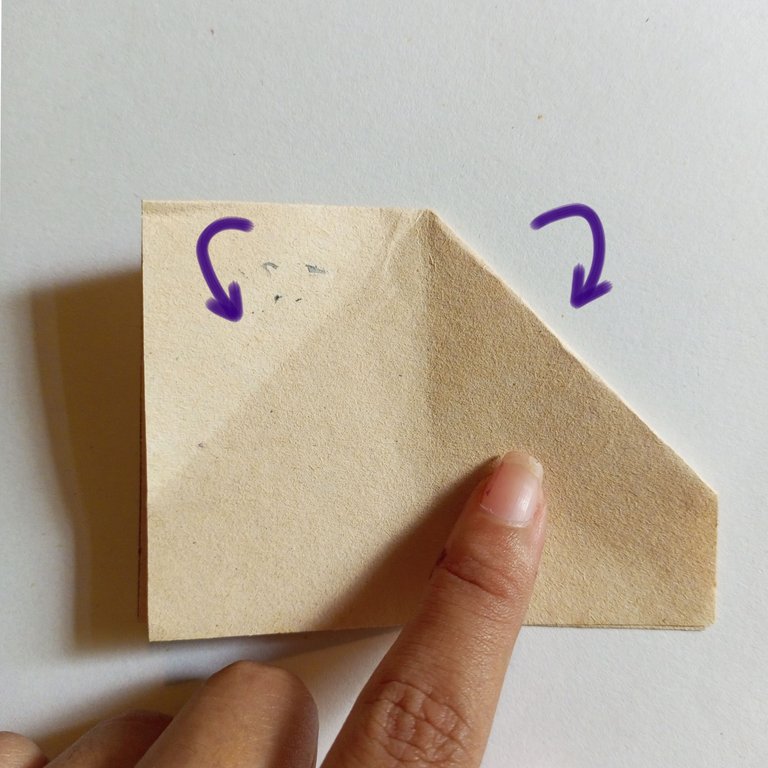
Well, once we have folded the tabs at the top, we will unfold them and put them inside the paper on both sides, until these tabs are not visible, as in the right image above.
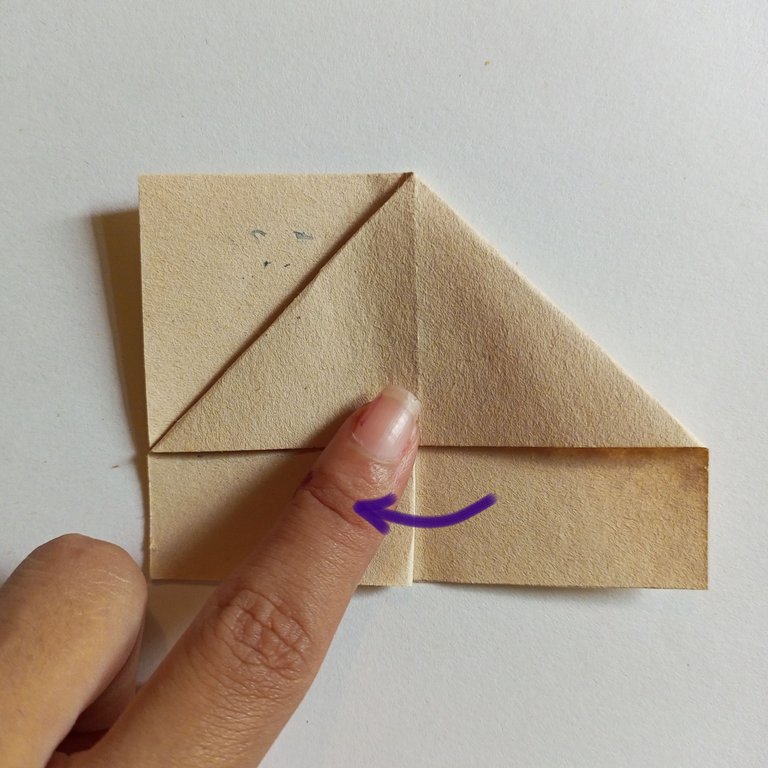
Then, open a corner of the paper on the right side, and turn it to the left, and do the same with the back, but from left to right, that will make a small slot between each corner that will serve for the wings of the butterfly.
 |  |
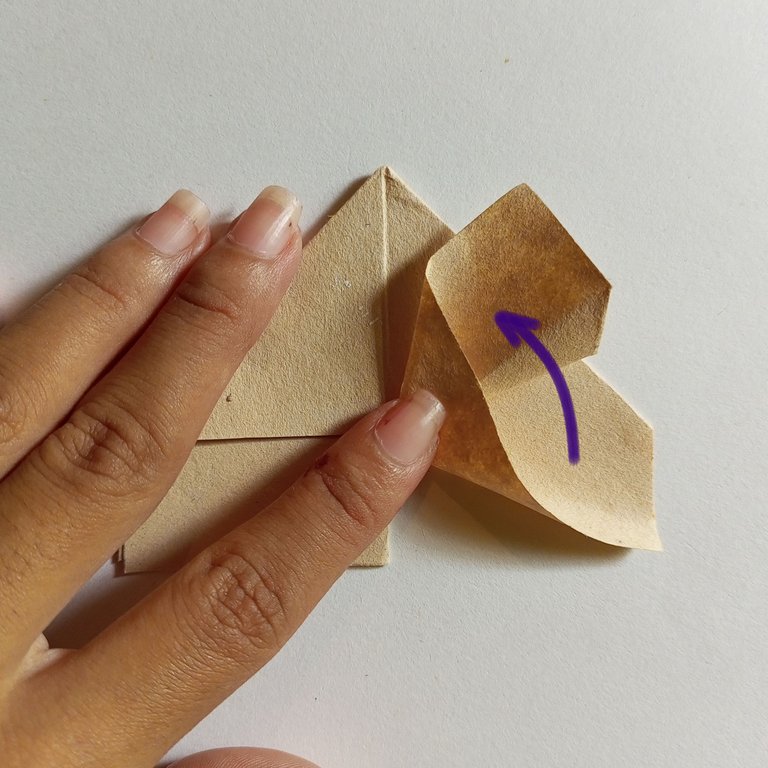 | 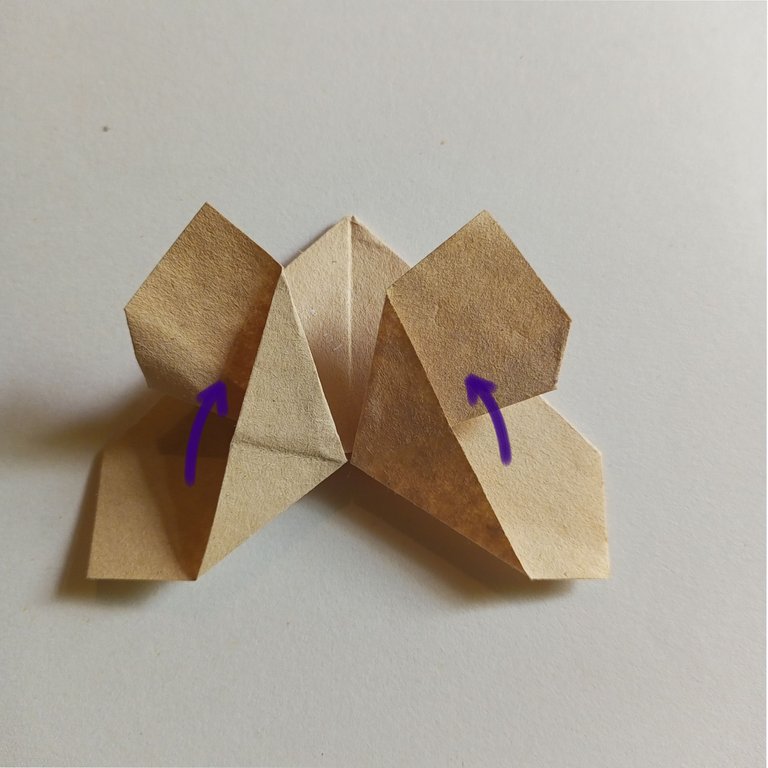 |
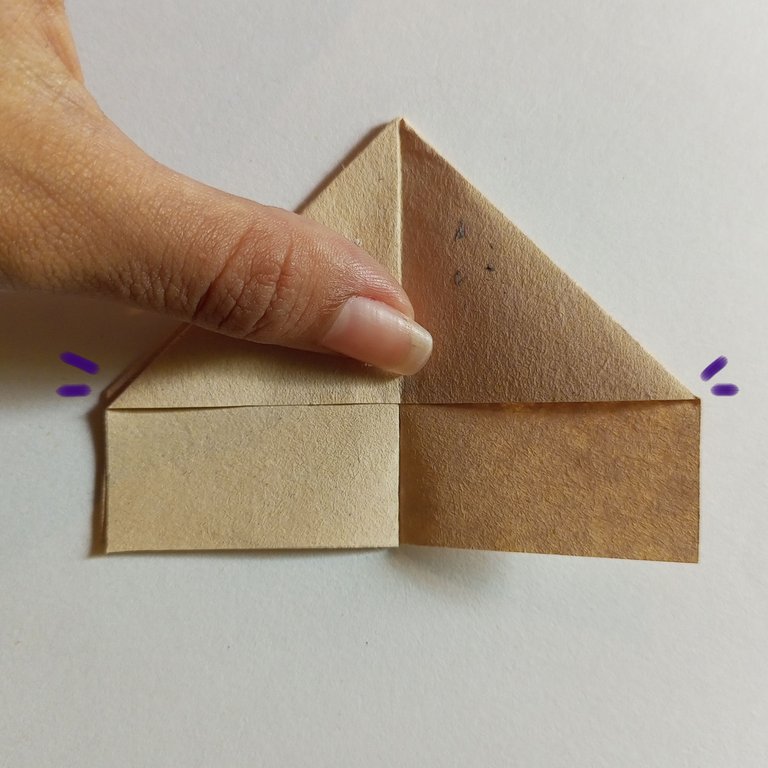
Once you have turned each tab of paper, you will take a bottom center corner and fold it upwards, the same will be done with the other remaining tab.
These last steps may seem complex but they are not too complex, if you follow each image I am sure you will get the final shape of the butterfly.
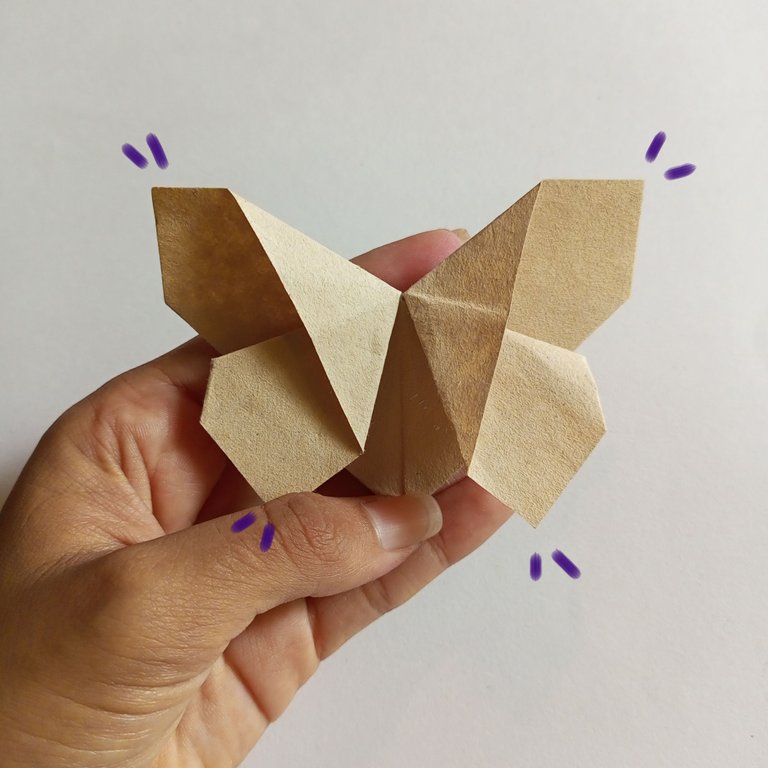 | 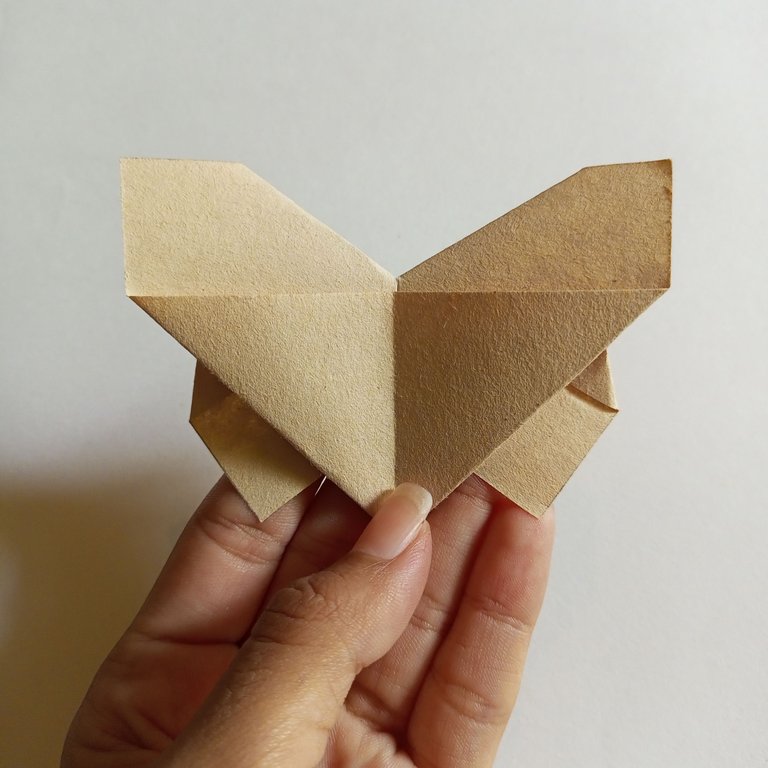 |
If you flip the origami over you will be able to see better that the figure is perfect, and at the back there is a pocket where the pages of the book will fit.
 |  |
To make it easier to color and to keep the shape for a long time, I used some liquid silicone on some folds (maybe it was a bit of cheating but I felt it was necessary, haha).
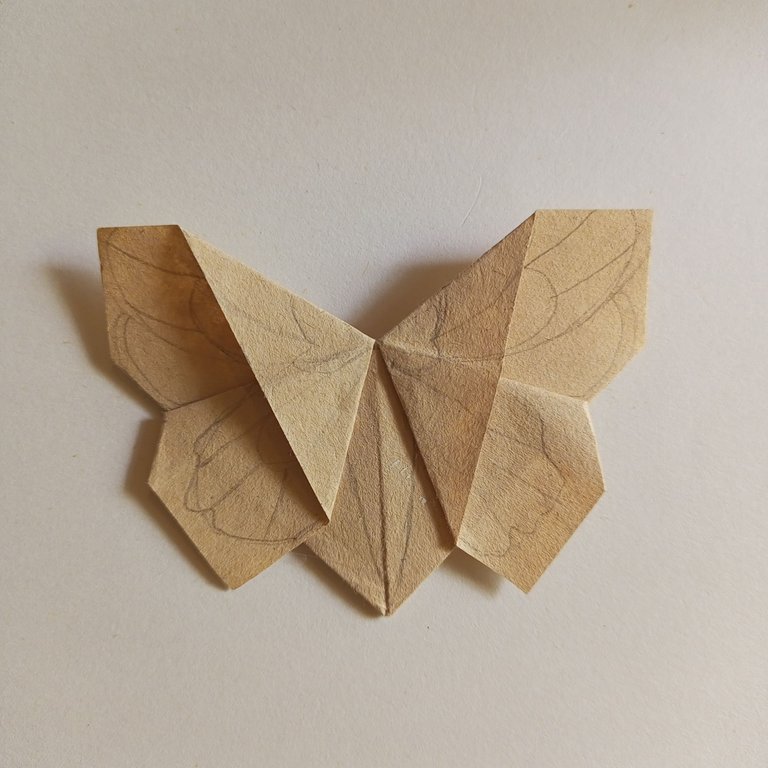
In this step we may or may not draw the butterfly figure to our taste and style, and we can also color it or simply outline it with markers or a pen.
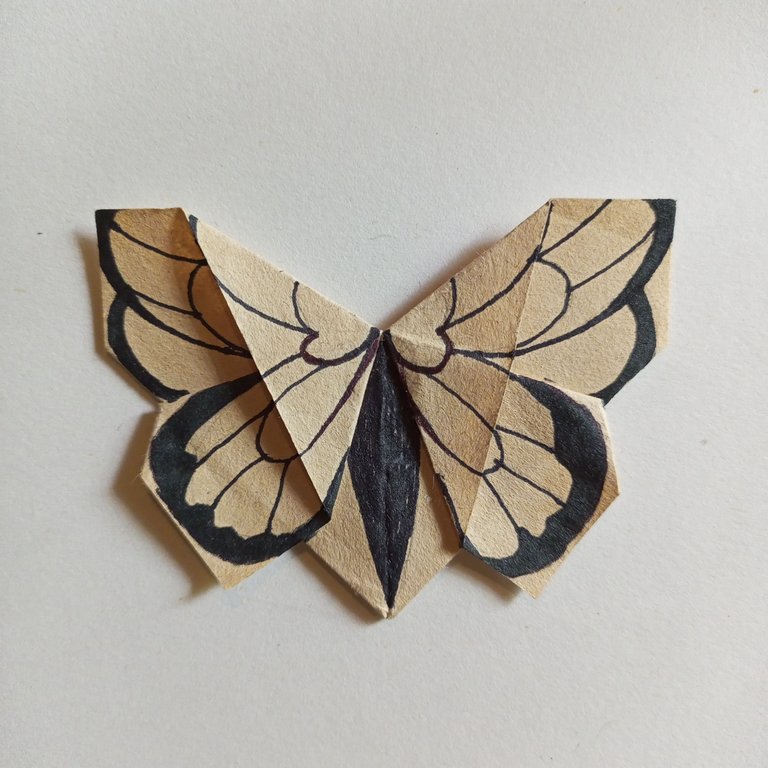 |  |
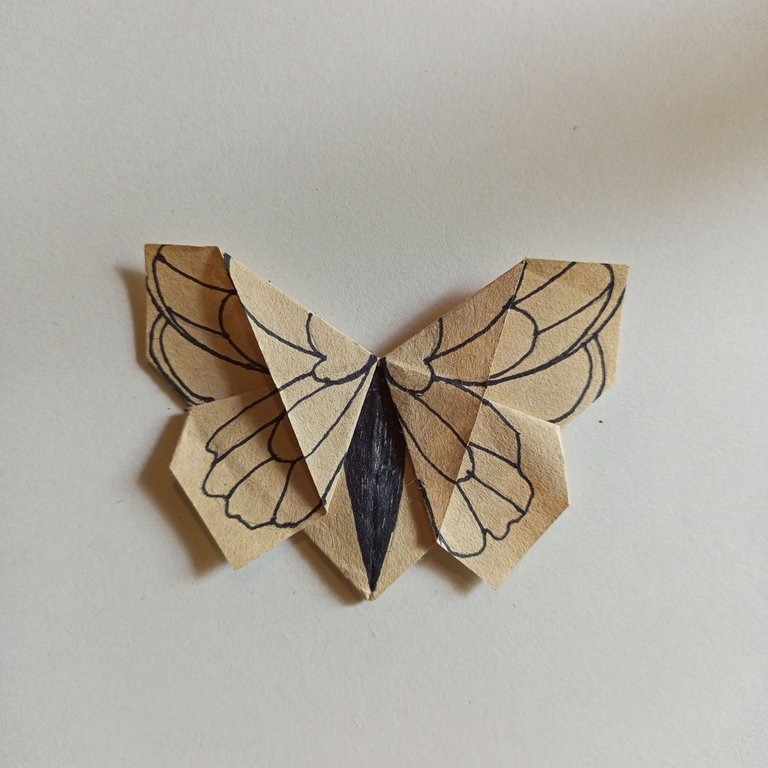
In my case, I first outlined with marker and then used various colors to bring the design to life. I am a total butterfly lover so I focused on making it look very pretty.
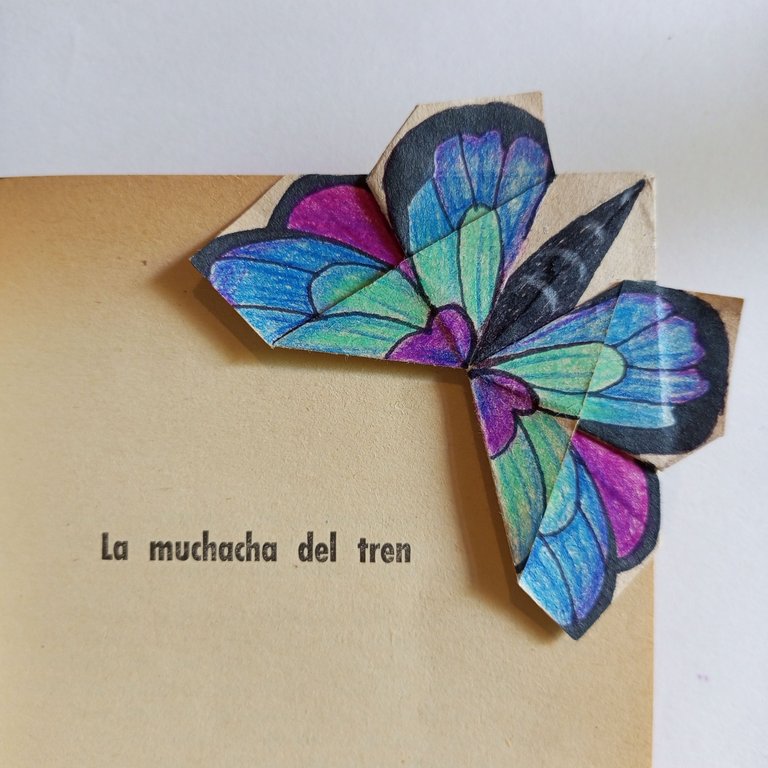
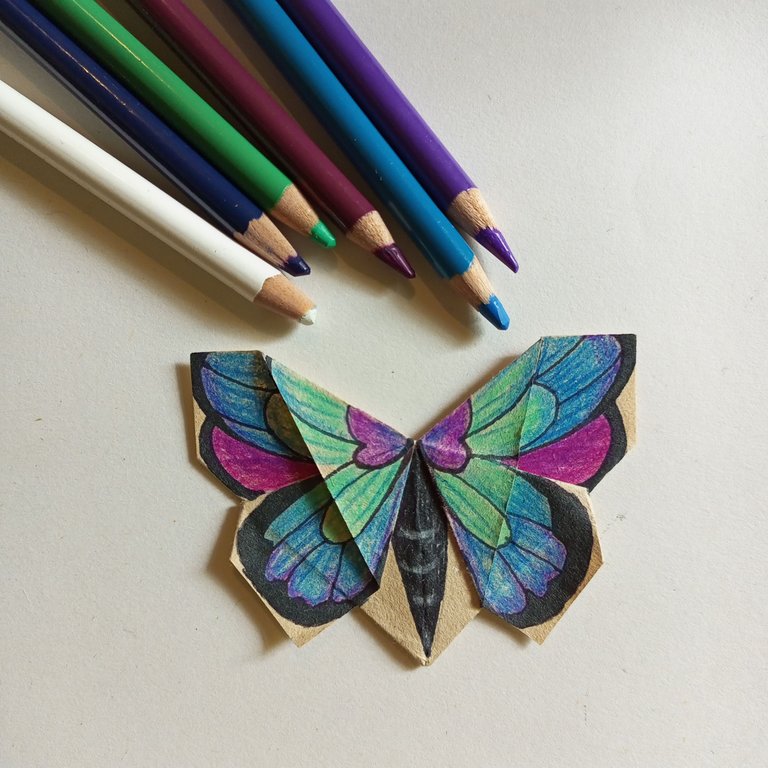
And this was the result, what do you think? If you liked the model I hope you are encouraged to do it at home, in my case I am not very skilled with origami but with a little patience it is possible to do it.
I hope you enjoyed today's post, see you next time!
All the images were taken and edited by me.

Versión en Español
Los marca páginas son objetos imprescindibles para cualquier lector, sino ¿Cómo podrían saber en qué página dejaron su lectura?
En ocasiones, cuando no tenemos un marca páginas a la mano, debemos improvisar, yo misma he usado algunos objetos aleatorios para recordar la última página que leí en un libro: desde medias, peines delgados, pinceles y pulseras; pero obviamente resulta más cómodo usar un marca páginas de papel o cartulina para no maltratar las hojas.
Debo darle el crédito de esta idea de marca libros a una amiga que me enseñó esta figura de mariposa en origami, adoré la idea apenas vi el diseño de mariposa y pensé que a ustedes también les encantaría saber cómo hacer uno... así que, acompáñenme a ver el paso a paso.
Proceso:
| |
| |
Lo primero que hay que hacer es recortar una hoja de papel con unas dimensiones de 8x12cm. En mi caso usé una lámina de cartulina, tiene una textura similar al papel y me gustaba el color beige que tenía. No les recomiendo usar una cartulina demasiado gruesa.
Una vez recortamos nuestro pedazo de papel deberemos doblarla dos veces a la mitad.
| |
| |
Una vez hecho eso, giraremos el papel de manera que quede en horizontal y uniremos las esquinas superiores hacia dentro. Por cada doblez hay que cuidar que las esquinas estén muy bien unidas.
| |
| |
Bien, una vez hayamos doblado las pestañas de la parte superior, las desdoblaremos y las meteremos hacia dentro del papel por ambos lados, hasta que no se vean estas pestañas, como en la imagen derecha de arriba.
Luego, abriremos una esquina del papel de la parte derecha, y lo giraremos a la izquierda, y haremos lo mismo con la parte de atrás, pero de izquierda a derecha, eso hará una pequeña ranura entre cada esquina que nos servirá para las alas de la mariposa.
| |
| |
Una vez hayan girado cada pestaña de papel, tomarán una esquina inferior central y le harán un doblez hacia arriba, lo mismo harán con la otra pestaña restante.
Estos últimos pasos pueden parecer complejos pero no lo son demasiado, si siguen cada imagen estoy segura que les saldrá la figura final de la mariposa.
| |
Si voltean el origami podrán ver mejor que la figura queda perfecta, y por detrás queda un bolsillo que es donde entrarán las páginas del libro.
| |
Para que fuera más fácil de colorear y mantuviera la forma por mucho tiempo, usé un poco de silicón líquido en algunos dobleces (quizá fue hacer un poco de trampa pero lo sentí necesario, jaja).
En este paso podemos o no dibujar la figura de la mariposa a nuestro gusto y estilo, y también podremos colorearla o simplemente delinear con marcadores o un bolígrafo.
| |
En mi caso, primero delineé con marcador y luego usé varios colores para darle vida al diseño. Soy una amante total de las mariposas así que me enfoqué en que quedara muy bonita.
Y este fue el resultado. ¿Ustedes qué les parece? Si les gustó mucho el modelo espero que se animen a hacerlo en sus hogares, en mi caso no soy muy habilidosa con el origami pero con un poco de paciencia es posible lograrlo.
Espero que hayan disfrutado el post de hoy, ¡nos vemos en una próxima ocasión!
Todas las imágenes fueron tomadas y editadas por mí.