Gusto en saludarlos amigos de Hive DIY. Espero que estén súper bien y ansiosos como yo con la llegada de la Navidad 🎄 y las decoraciones para la época 🤶.
I'm glad to greet you Hive DIY friends. I hope you are super well and anxious as I am with the arrival of Christmas 🎄 and decorations for the season 🤶.
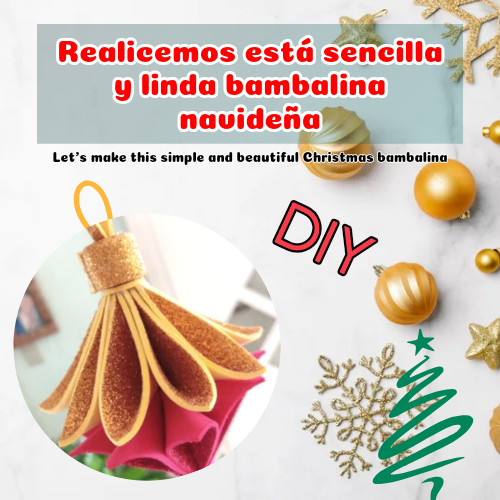 Portada realizada en Canva – Cover made in canva
En ésta oportunidad compartiré un sencillo tutorial para realizar una linda bambalina navideña que puede colocarse en los tradicionales arbolitos de Navidad o cualquier otro lugar que deseen🎄.
This time I'll share a simple tutorial to make a nice Christmas scenery that can be placed in the traditional Christmas trees or any other place you want🎄.
Para realizar éste tipo de decoraciones podemos recurrir a materiales reciclados ♻️, en éste caso retazos de foami. Quédense por aquí y les cuento cómo se hace...▶️
To make this type of decorations we can resort to recycled materials ♻️, in this case scraps of foami. Stick around and I'll tell you how it's done...▶️
Materiales - Materials 🎄♻️🎀🤶
✔️ Retazos de foami escarchado - Frosted foami scraps.
✔️Silicón caliente - Hot Silicone.
✔️Regla y tijera - Ruler and scissors.
✔️Lápiz - Pencil.
Procedimiento - Process
Paso I – Step I
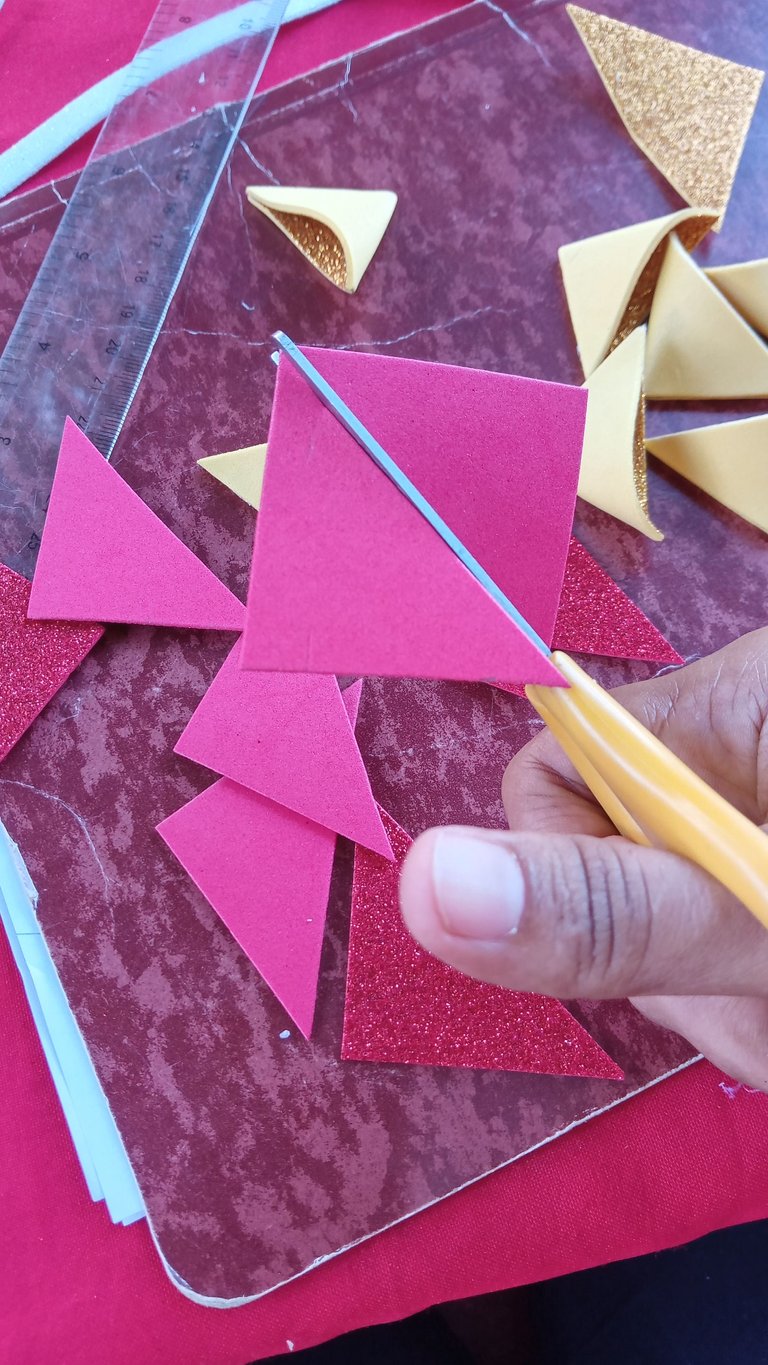
Partiendo de los retazos de foami en los colores que dispongamos, vamos a marcar 5 cuadrados de 5 cm por sus 4 lados y luego los recortamos con ayuda de una tijera. Si tenemos dos colores como en éste caso vamos a cortar 5 de cada color.
Starting with the foami scraps in the colors we have, we will mark 5 squares of 5 cm on its 4 sides and then cut them out with the help of a scissors. If we have two colors as in this case we will cut 5 of each color.

Paso II - Step II
Lo siguiente será marcar a la mitad cada uno de los cuadrados sea con la ayuda de una regla o simplemente doblar a la mitad para lograr una marca sencilla y luego cortar con tijera ✂️. En éste punto se forman 2 triángulos de cada cuadrado, y considerando los 5 cuadrados iniciales se forman 10 triángulos en total por cada color ❤️💛.
The next step is to mark in half each of the squares either with the help of a ruler or simply fold in half to achieve a simple mark and then cut with scissors ✂️. At this point form 2 triangles from each square, and considering the 5 initial squares form 10 triangles in total for each color ❤️💛.
Paso III - Step III
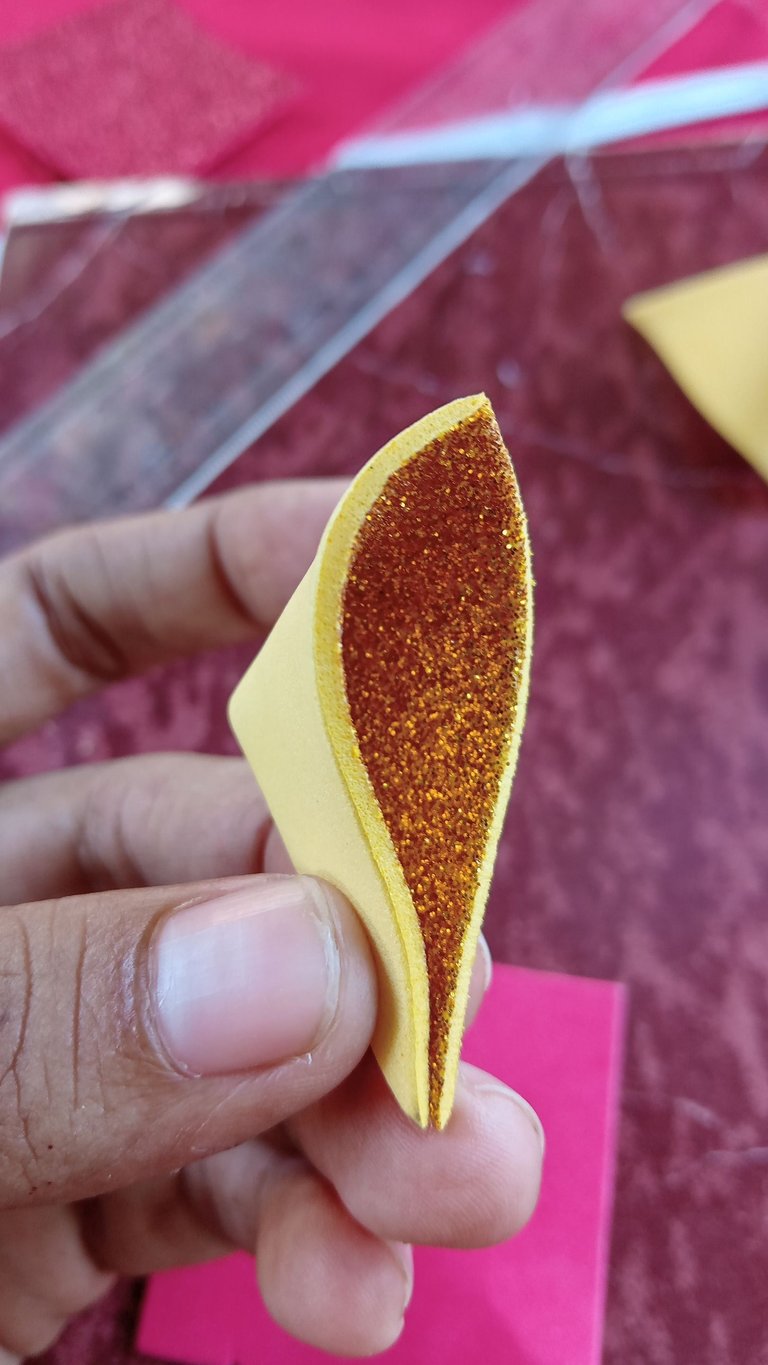
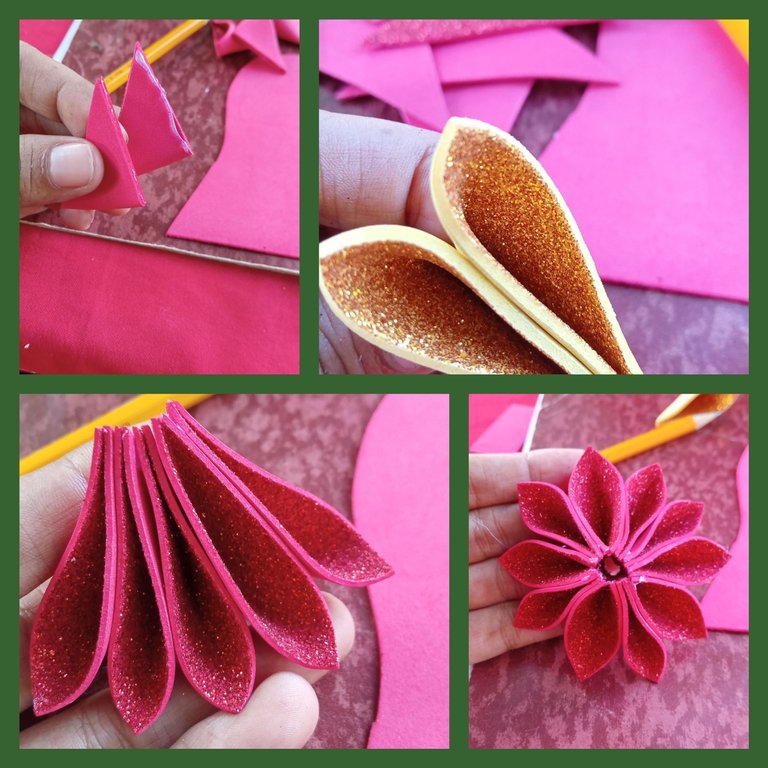
Cada triángulo formará un pétalo para la bambalina, en éste punto se toman dos extremos opuestos quedando la parte escarchada en el interior del pétalo. Esto se realizará con los 10 triángulos de cada color.
Each triangle will form a petal for the backdrop, at this point take two opposite ends, leaving the frosted part on the inside of the petal. This will be done with the 10 triangles of each color.
Paso IV – Step IV
Cada pétalo se va asegurando con silicón caliente en la base y luego se va pegando el resto de los pétalos formados, uno al lado del otro como se muestra en la figura.
Each petal is secured with hot silicone at the base and then the rest of the petals are glued side by side as shown in the figure.
Paso V – Step V
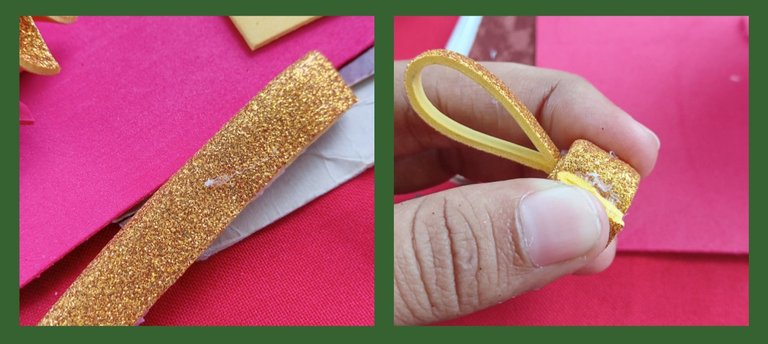
Ésta bambalina se realizó en dos colores, sin embargo es de acuerdo a las preferencias e incluso creatividad. Lo siguiente será armar un rollito que servirá como guinda para colgar la bambalina. Para ello utilizamos un rectángulo de 2 cm de ancho y 10 cm de largo, sin embargo se utilizará el largo que se desee.
This scrim was made in two colors, however it is according to preference and even creativity. The next thing will be to assemble a roll that will serve as a cherry to hang the scenery. For this we use a rectangle of 2 cm wide and 10 cm long, but you can use any length you want.
También cortamos una tira de 1/2 cm de ancho la doblamos con el largo deseado y esa será la guinda. El rectángulo lo unimos por los dos extremos del ancho y lo pegamos, antes de formar el rollito aseguramos la guinda con silicón caliente y vamos enrollando mientras pegamos. Listo tenemos el colgante listo.
We also cut a 1/2 cm wide strip and fold it with the desired length and that will be the cherry. The rectangle we join it by the two ends of the width and glue it, before forming the roll we secure the cherry with hot silicone and we roll while gluing. Ready we have the pendant ready.
Paso VI – Step VI
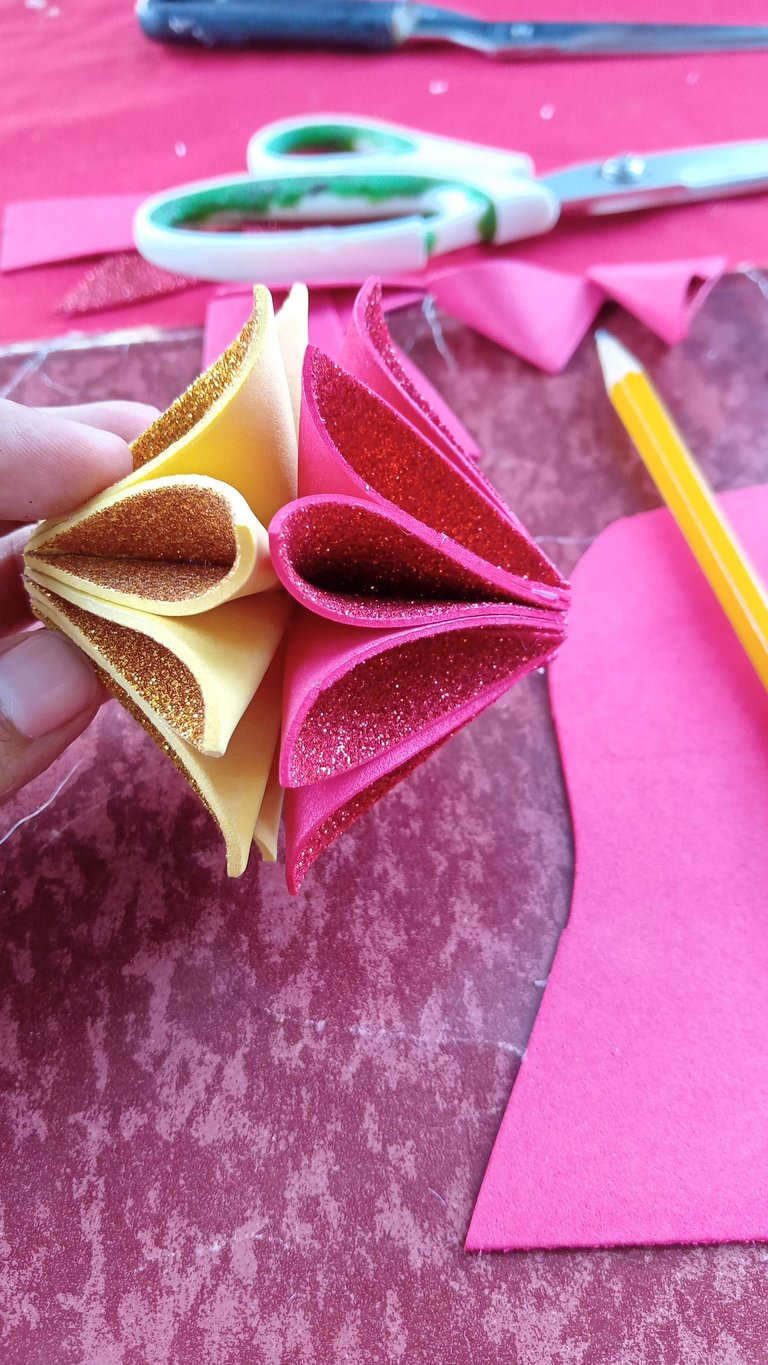
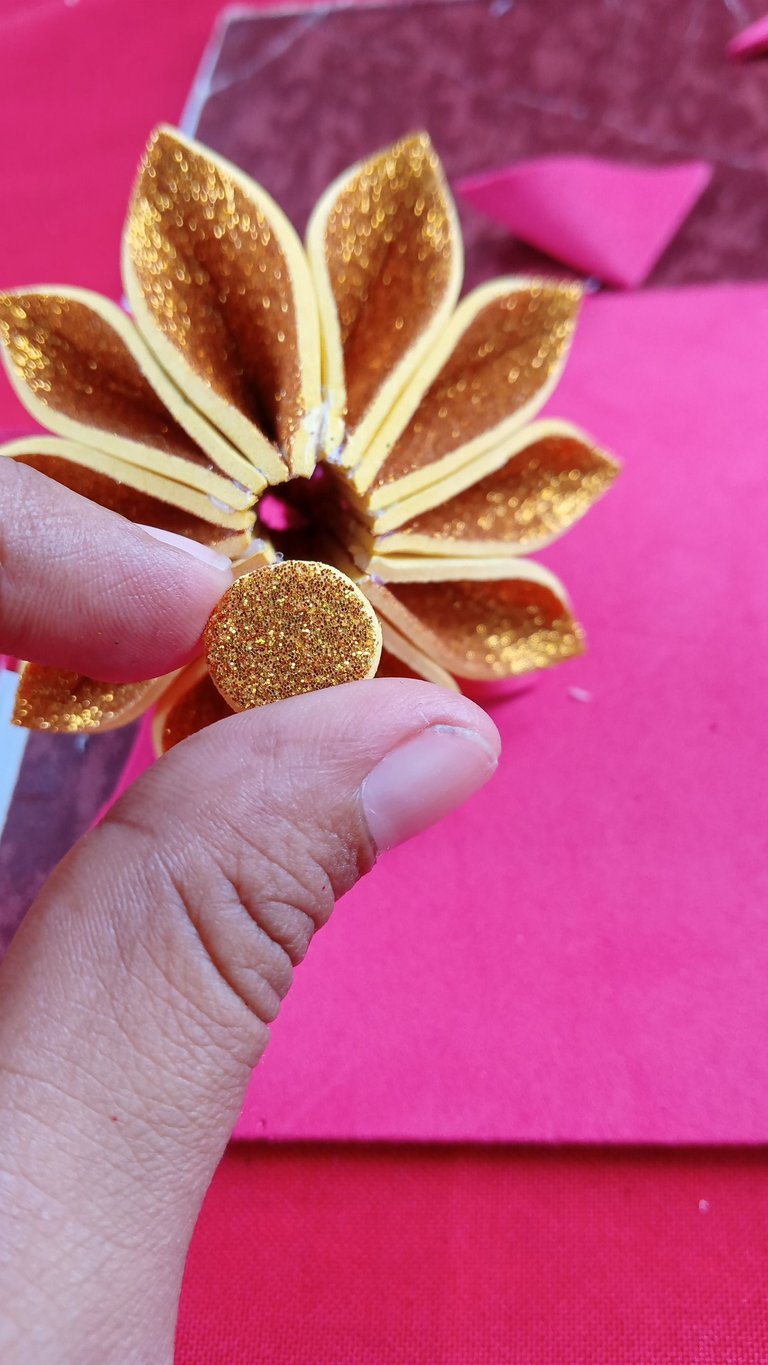
Para finalizar está linda bambalina aseguramos con silicón caliente el colgante, en uno de los lados donde se forma un hoyito. Del otro lado cubrimos el hoyito que también se formó con un círculo del mismo color del foami.
To finish this beautiful scenery, we secure the pendant with hot silicone on one of the sides where a small hole is formed. On the other side we cover the hole that was also formed with a circle of the same color of the foami.
Resultado - Result
Listo. Ya hemos terminado la bambalina, podemos hacerla con reciclaje y los retazos que tengamos por allí de foami. Se necesitan pocos materiales, es un procedimiento hasta terapéutico porque nos ayuda a relajarnos, combatir el estrés y divertirse mientras se realiza 🤪.
Ready. We have already finished the scenery, we can make it with recycling and the scraps that we have there of foami. Few materials are needed, it is even a therapeutic procedure because it helps us to relax, combat stress and have fun while doing it🤪.
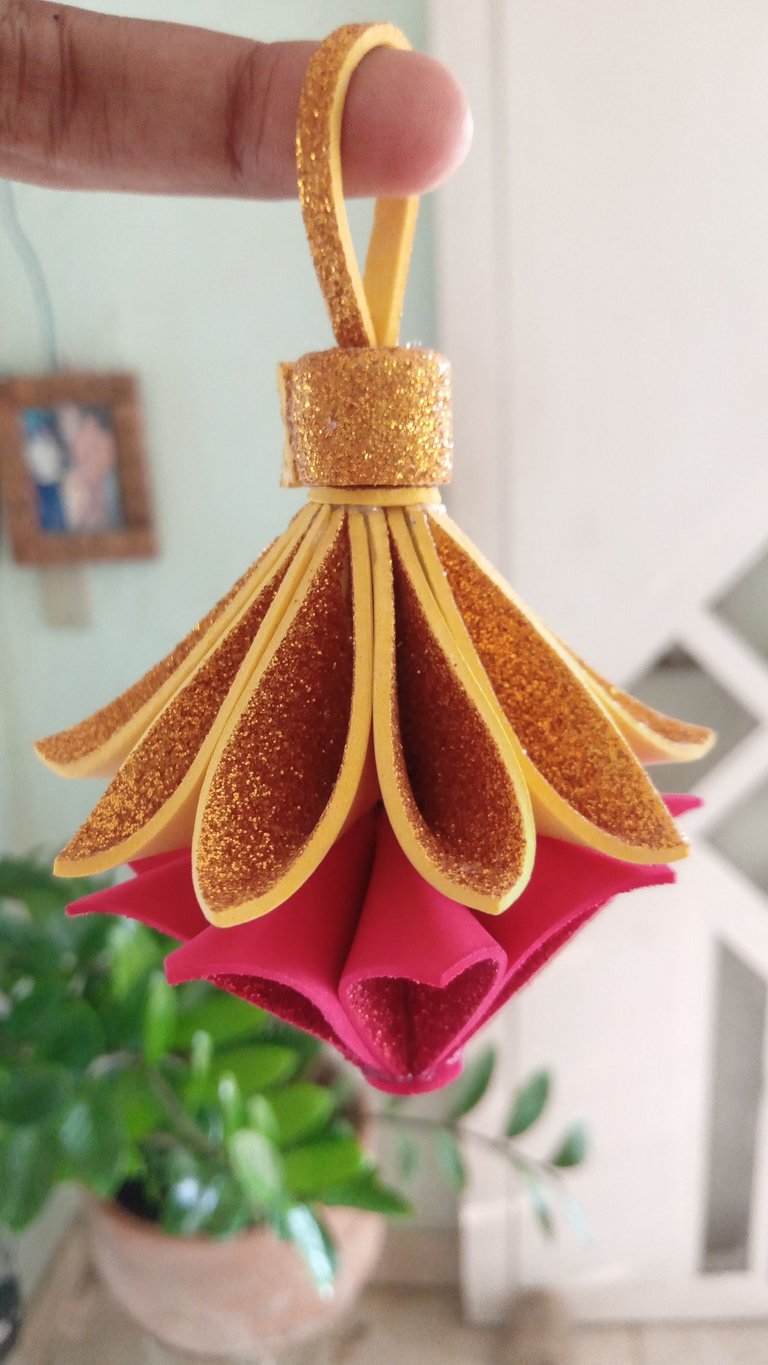
La Navidad 🎄 está cerquita y podemos activarnos con la creatividad para realizar las decoraciones 🎀 para nuestros hogares 🏡 y así darle la bienvenida 🎉 a la época más bonita del año.
Christmas 🎄 is near and we can get active with creativity to make decorations 🎀 for our homes 🏡 and thus welcome 🎉 the most beautiful time of the year.
Es todo por este tutorial. Nos vemos en un próximo encuentro queridos amigos ❤️💛🎄🎀🤶✂️♻️...
That's it for this tutorial. See you at a next meeting dear friends ❤️💛🎄🎀🤶✂️♻️...

Creditos - Credits
Stickers realizado en Bitmoji | Stickers made in Bitmoji.
Fotografías propias capturadas con telefono Alcatel 5007 | Own photographs captured with Alcatel 5007 phone.


