Hola hive diy , espero que estén muy bien, hoy traigo este fácil tutorial para realizar un lazo de papel, ideal para decorar, desde luego siguiendo la tendencia coquette que me parece realmente encantadora.
Lo que me motivo a realizar este lazo de papel es que próximamente estaré emprendiendo para el día del amor y la amistad y necesitaba una decoración hermosa, llamativa y económica para las cajas en dónde van los postres que voy a vender.
Este lazo de papel reúne todos esos atributos y además me lleva pocos minutos realizarlo, así que estoy segura de que también puede ser de utilidad para muchos de nosotros que amamos las manualidades faciles y exitosas.
Cabe destacar que esta hermosura de lazo, puede hacerse en un mayor tamaño duplicando o triplicado el tamaño inicial de la hoja, yo lo adecue al tamaño de las cajitas de anime que estaré decorando, también puede hacerse del color de su preferencia pero a en mi caso me va muy bien el color rosita aunque creo que también voy a estar haciendo unos rojos.
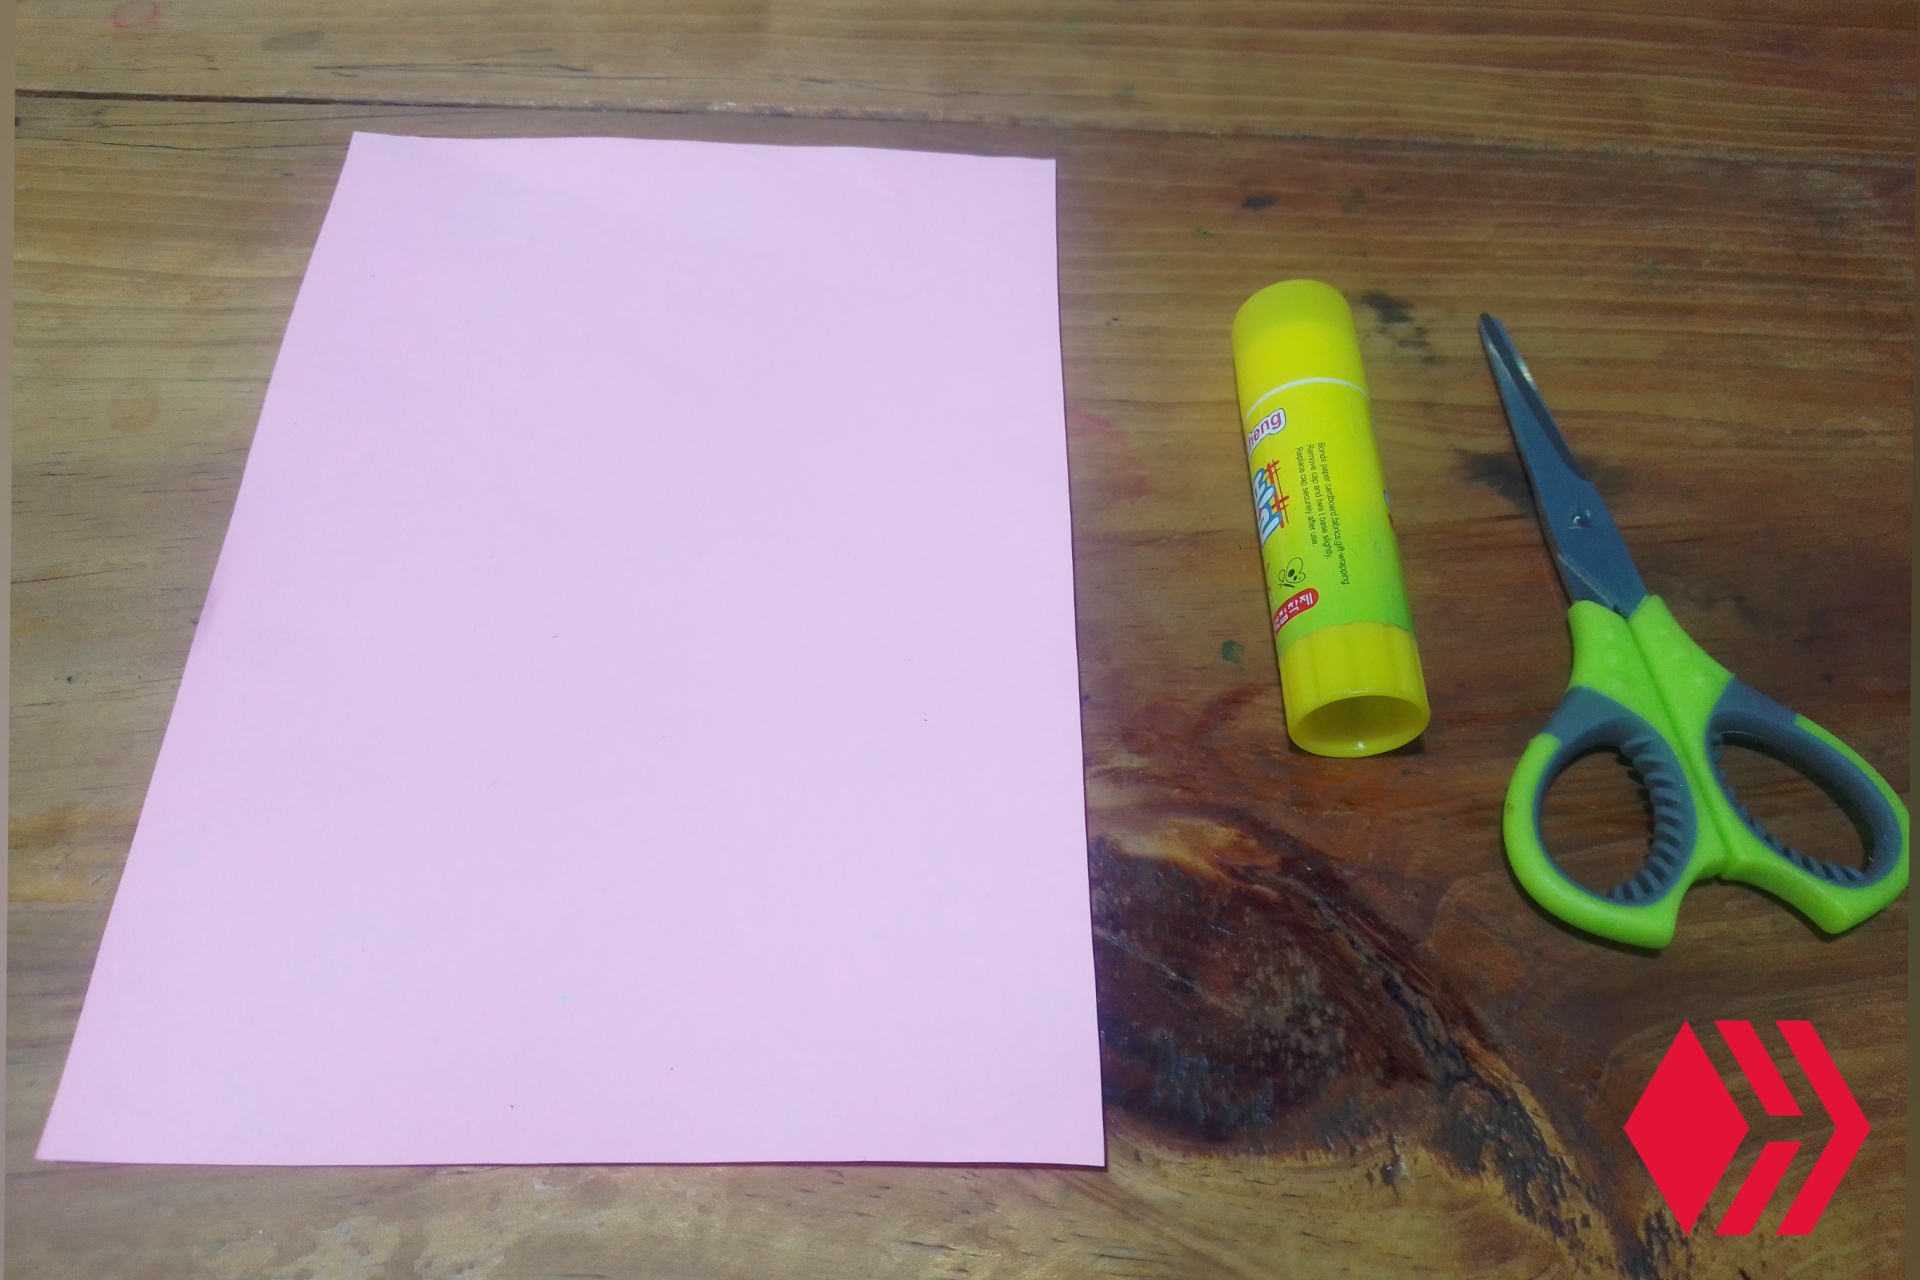
Si te ha gustado la idea, pon atención ya que con tan solo 3 materiales se puede hacer este lazo, quédate conmigo a realizar el paso a paso.
- La mitad de una hoja tipo carta rosada
- Tijera
- Pega en barra

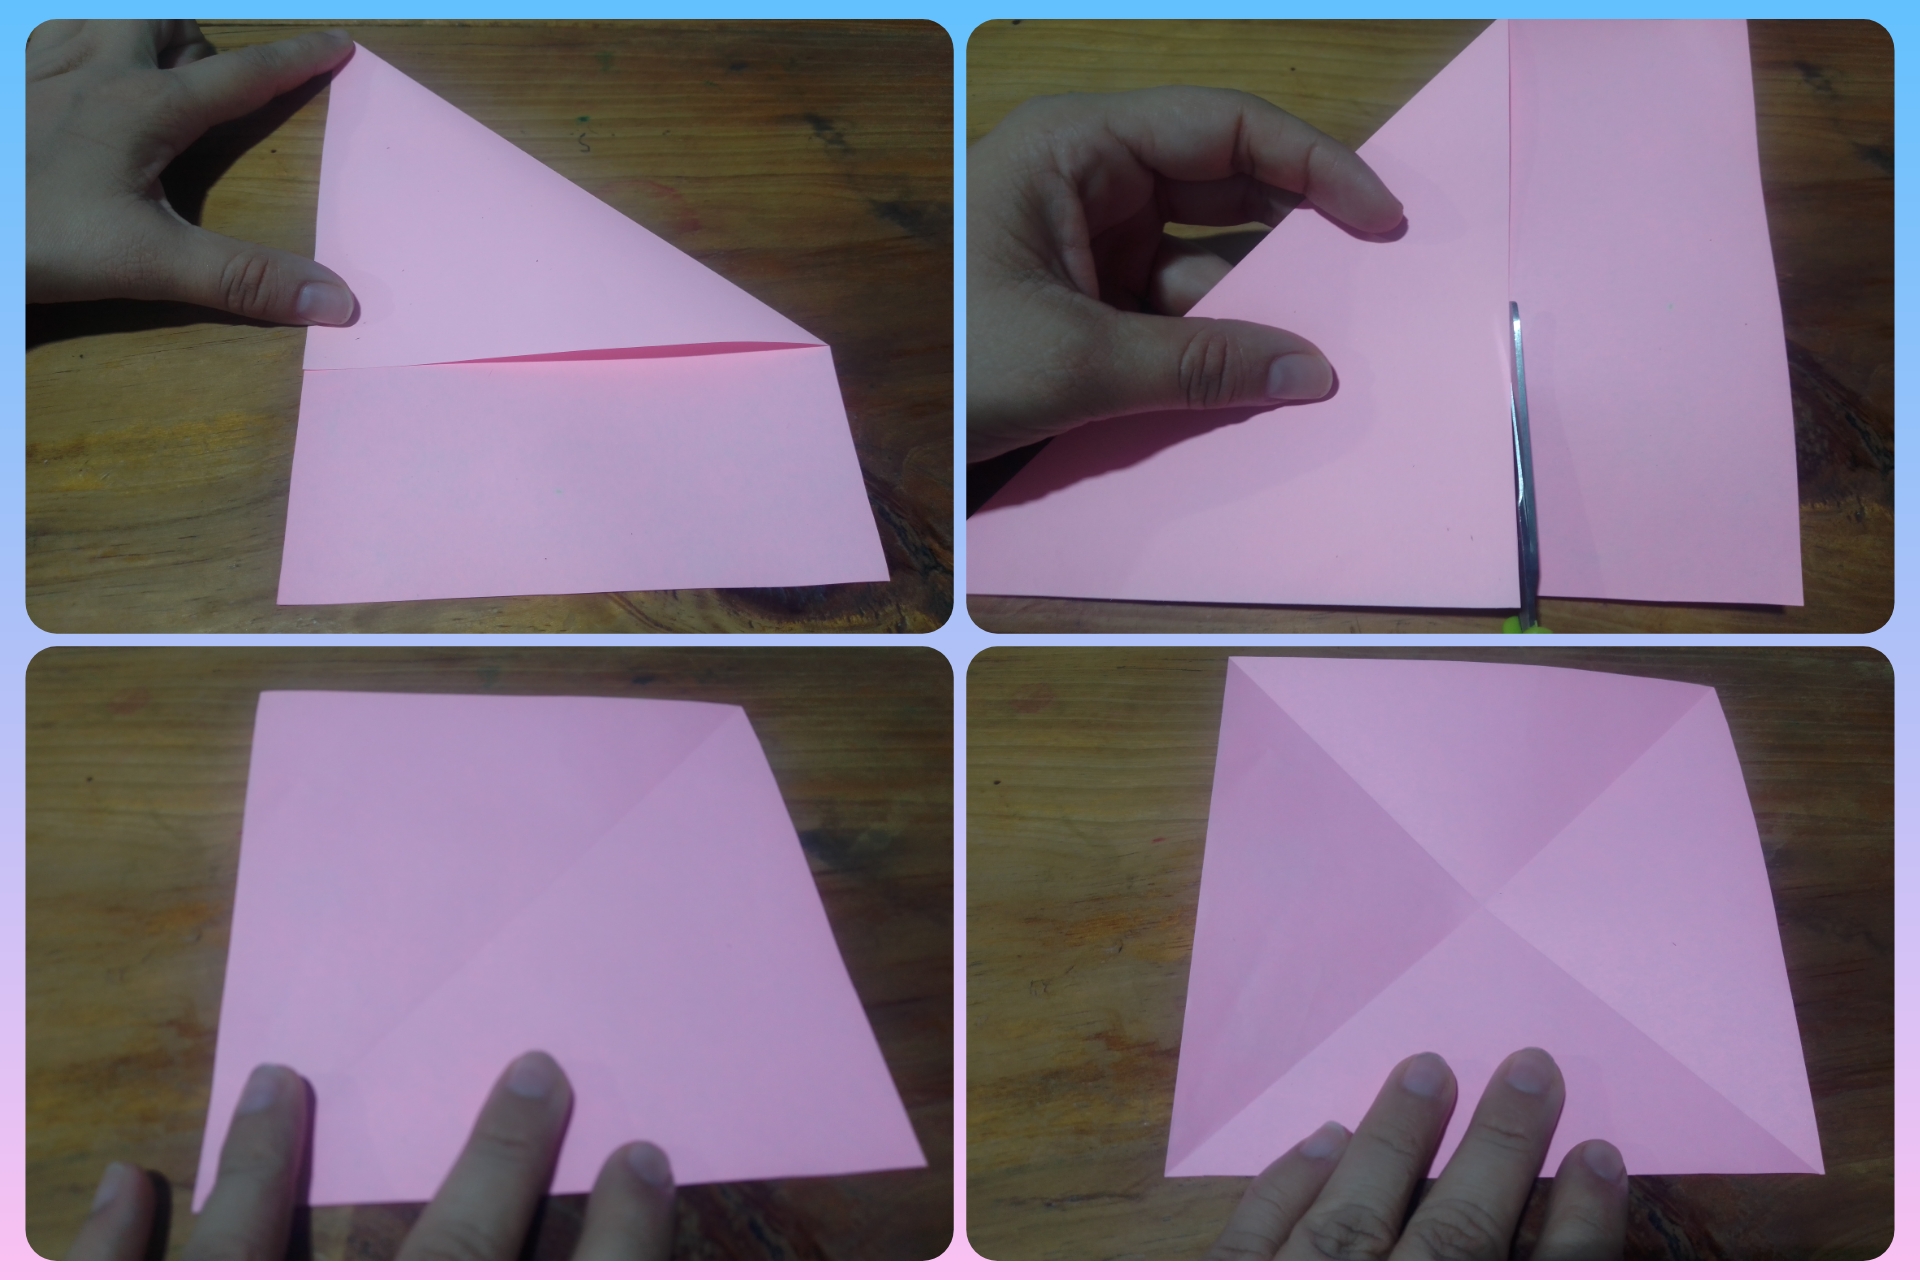
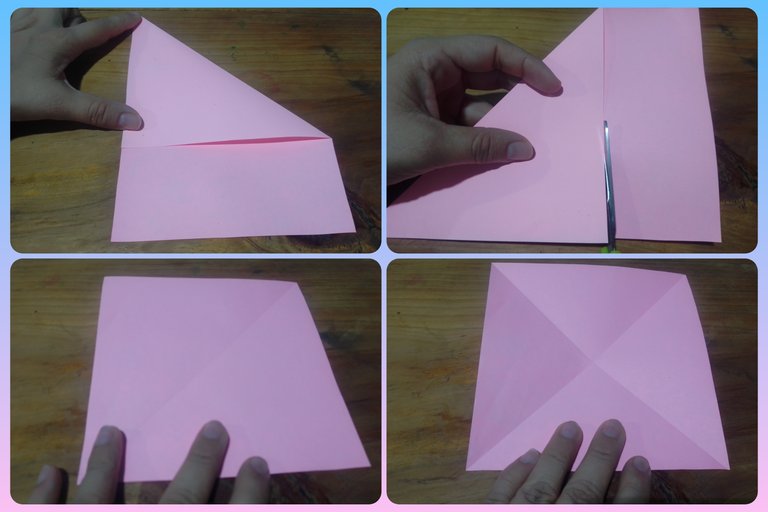
Iniciamos llevando una de las esquinas superiores de la hoja hacia uno de los laterales, en este punto realizar un doblez haciendo presión con los dedos.
Seguidamente recortamos el sobrante para darle una forma cuadrada a la hoja, ese pedazo de papel que sobró lo podemos utilizar luego para hacer otra manualidad.
Nos va a quedar un cuadrado con una marca así que hay que doblar en el sentido contrario y de nuevo hacemos presión con los dedos, de este modo nos quedará una marca de una equis en el papel y posteriormente esas marcas serán nuestra guía para hacer los cortes.
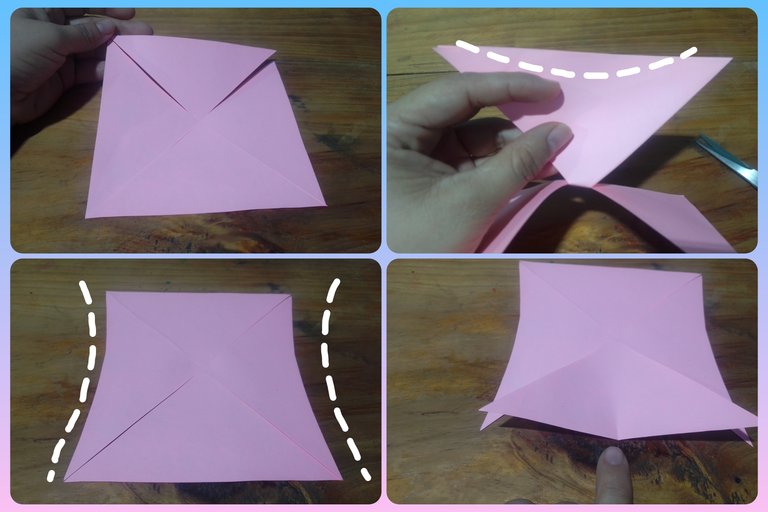
Con una tijera, vamos a recortar por las líneas que hemos marcado pero sin llegar al centro de la hoja, podemos dejar aproximadamente un centímetro de margen para hacer los cortes.
El paso siguiente es es unir las dos partes de los laterales del cuadrado de papel y en el vamos a realizar un corte empezando por la punta y haciendo un arco en el centro, de modo que los laterales se verán un poco arqueados.
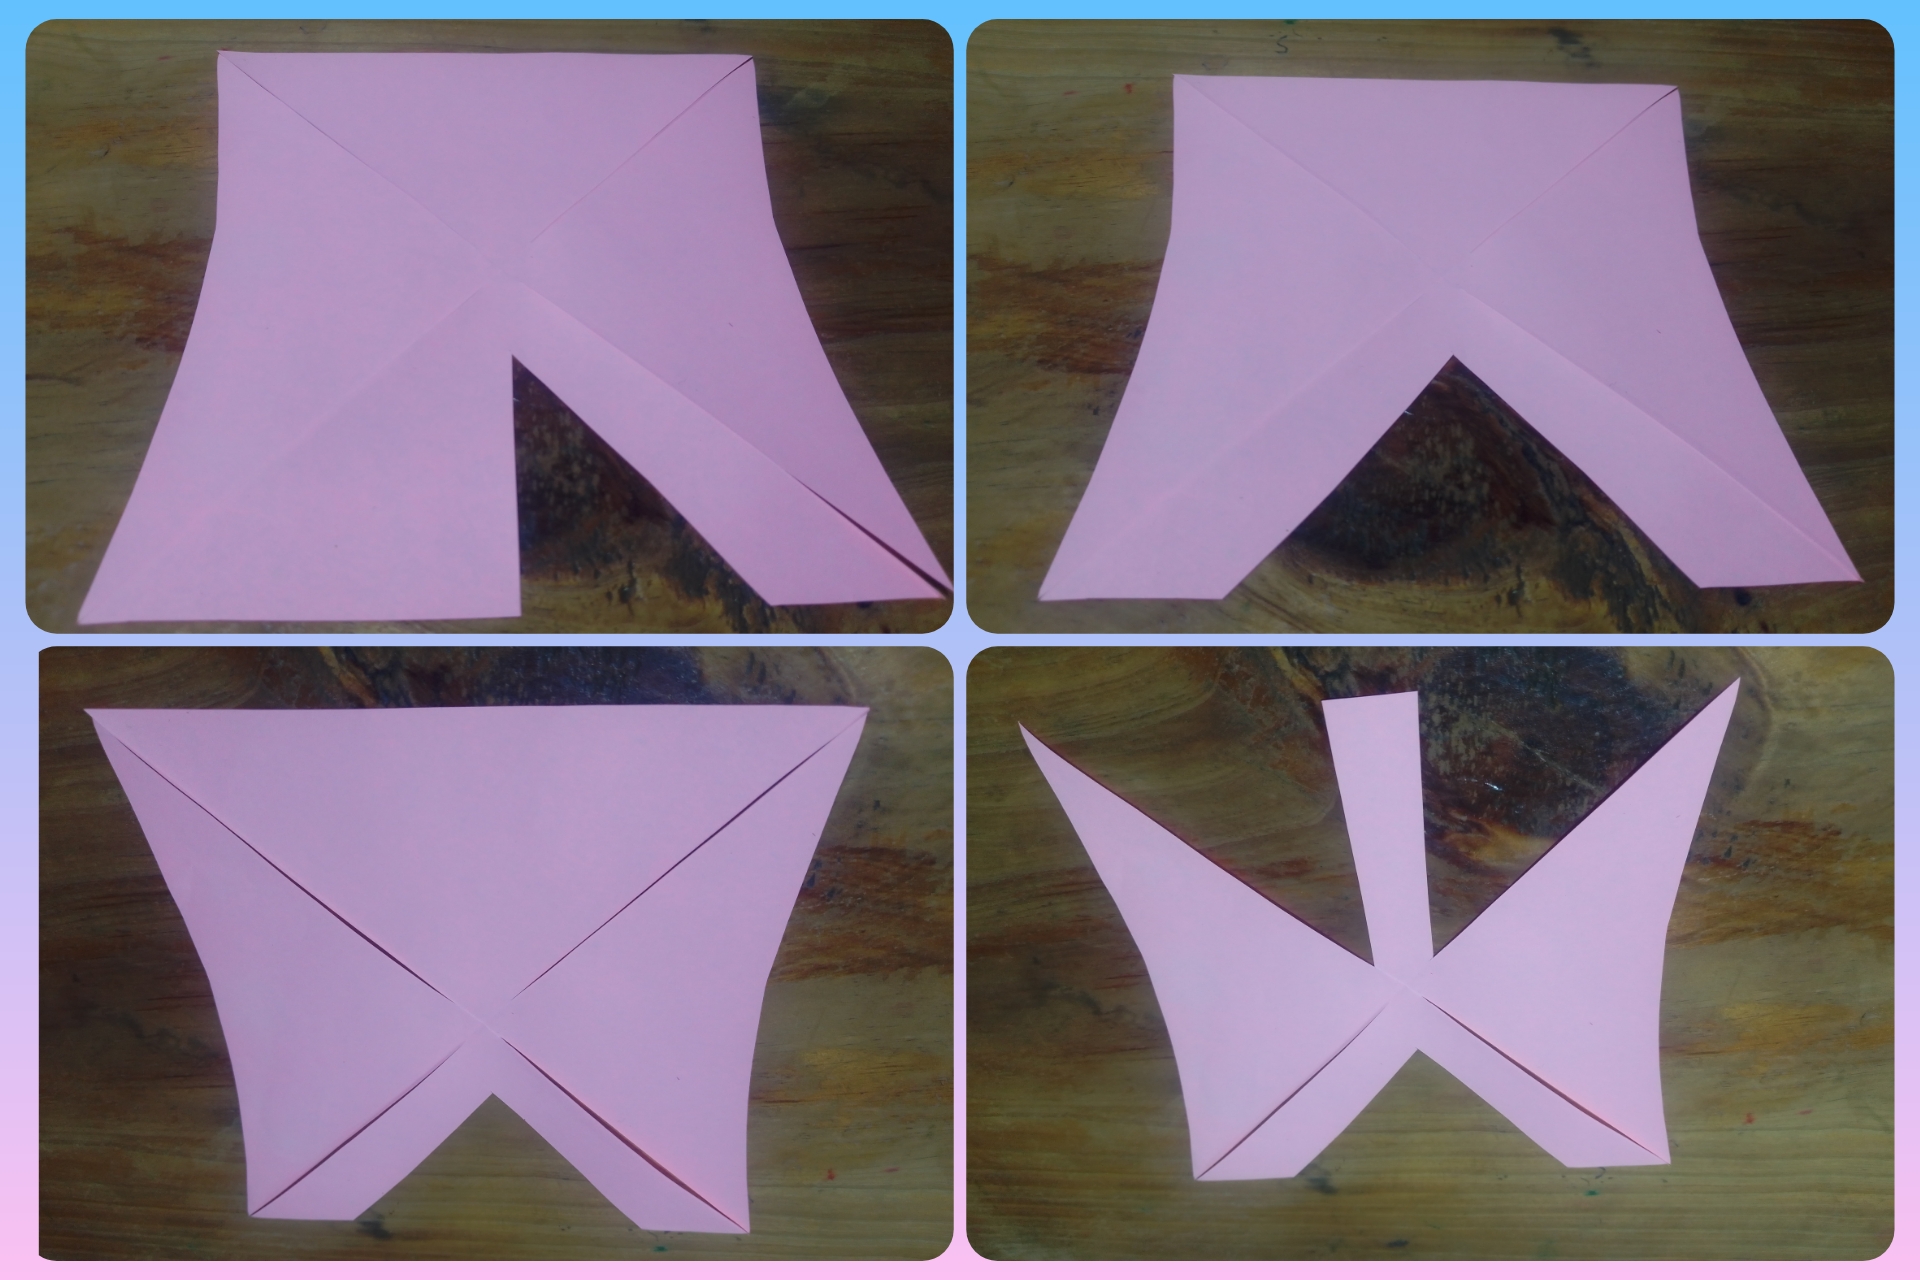
Ahora vamos a tomar en cuenta la parte inferior del cuadro de papel, vamos a unir las puntas para crear una marca en el centro y poder hacer un corte con la tijera, nuevamente sin llegar a cortarlo por completo sino dejando aproximadamente un centímetro sin cortar en el centro.
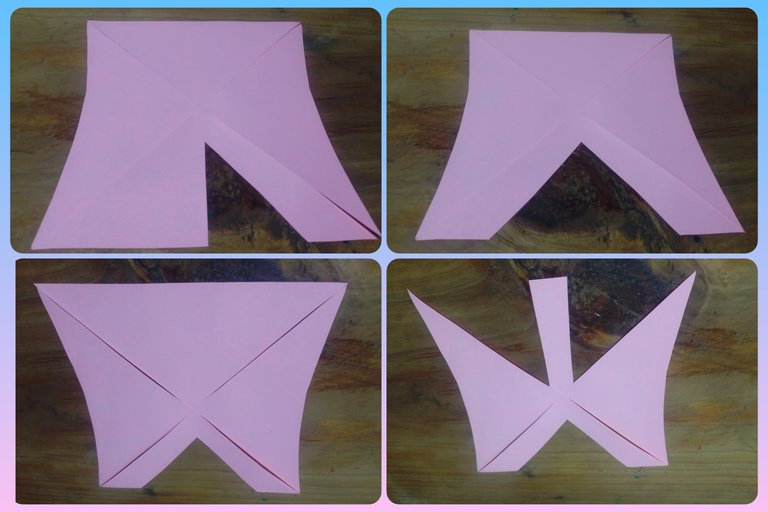
Luego vamos a recortar un triángulo y repetiremos el proceso con el fin de crear las tiras del lazo.
Seguidamente realizaremos los cortes en el extremo superior del cuadro de papel, en este caso, vamos tomar en cuenta el espacio del centro que no hemos recortado para sacar una tira de ese grosor.
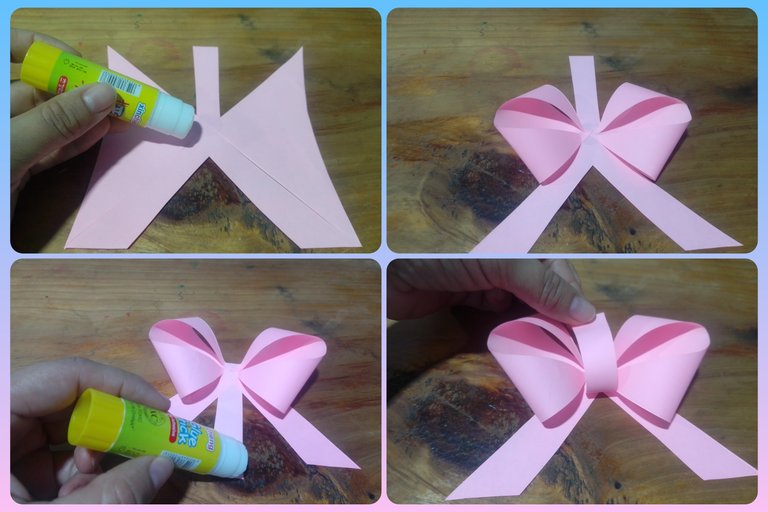
Ahora nuestro lazo empezará a tomar forma, aplicamos un punto de pega en barra en todo el centro y llevamos las puntas de los laterales hacia el centro.
Giramos nuestra pieza, de modo que las tiras queden en la parte superior y la tira del centro en la parte inferior.
Seguidamente doblamos las tiras para que queden del mismo lado de la tira inferior, agregamos un poco de pega en la punta de la tira central y allí tenemos listo este hermoso lazo
Para que me puedas entender mejor el último paso, te dejo este gif con el dobles de las tiras.

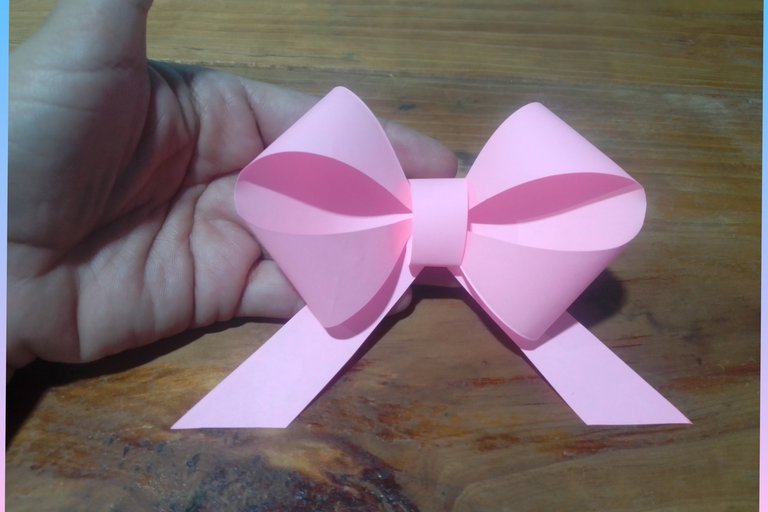
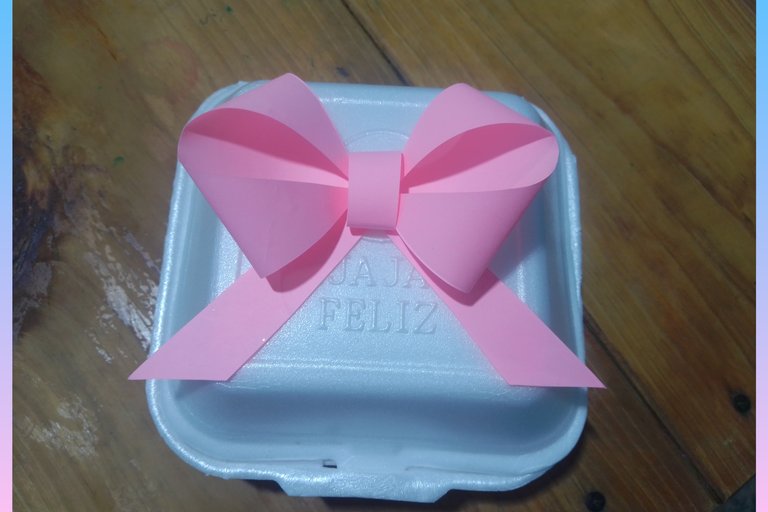
Y así queda está belleza de lazo de papel al estilo coquette, ideal para decorar!
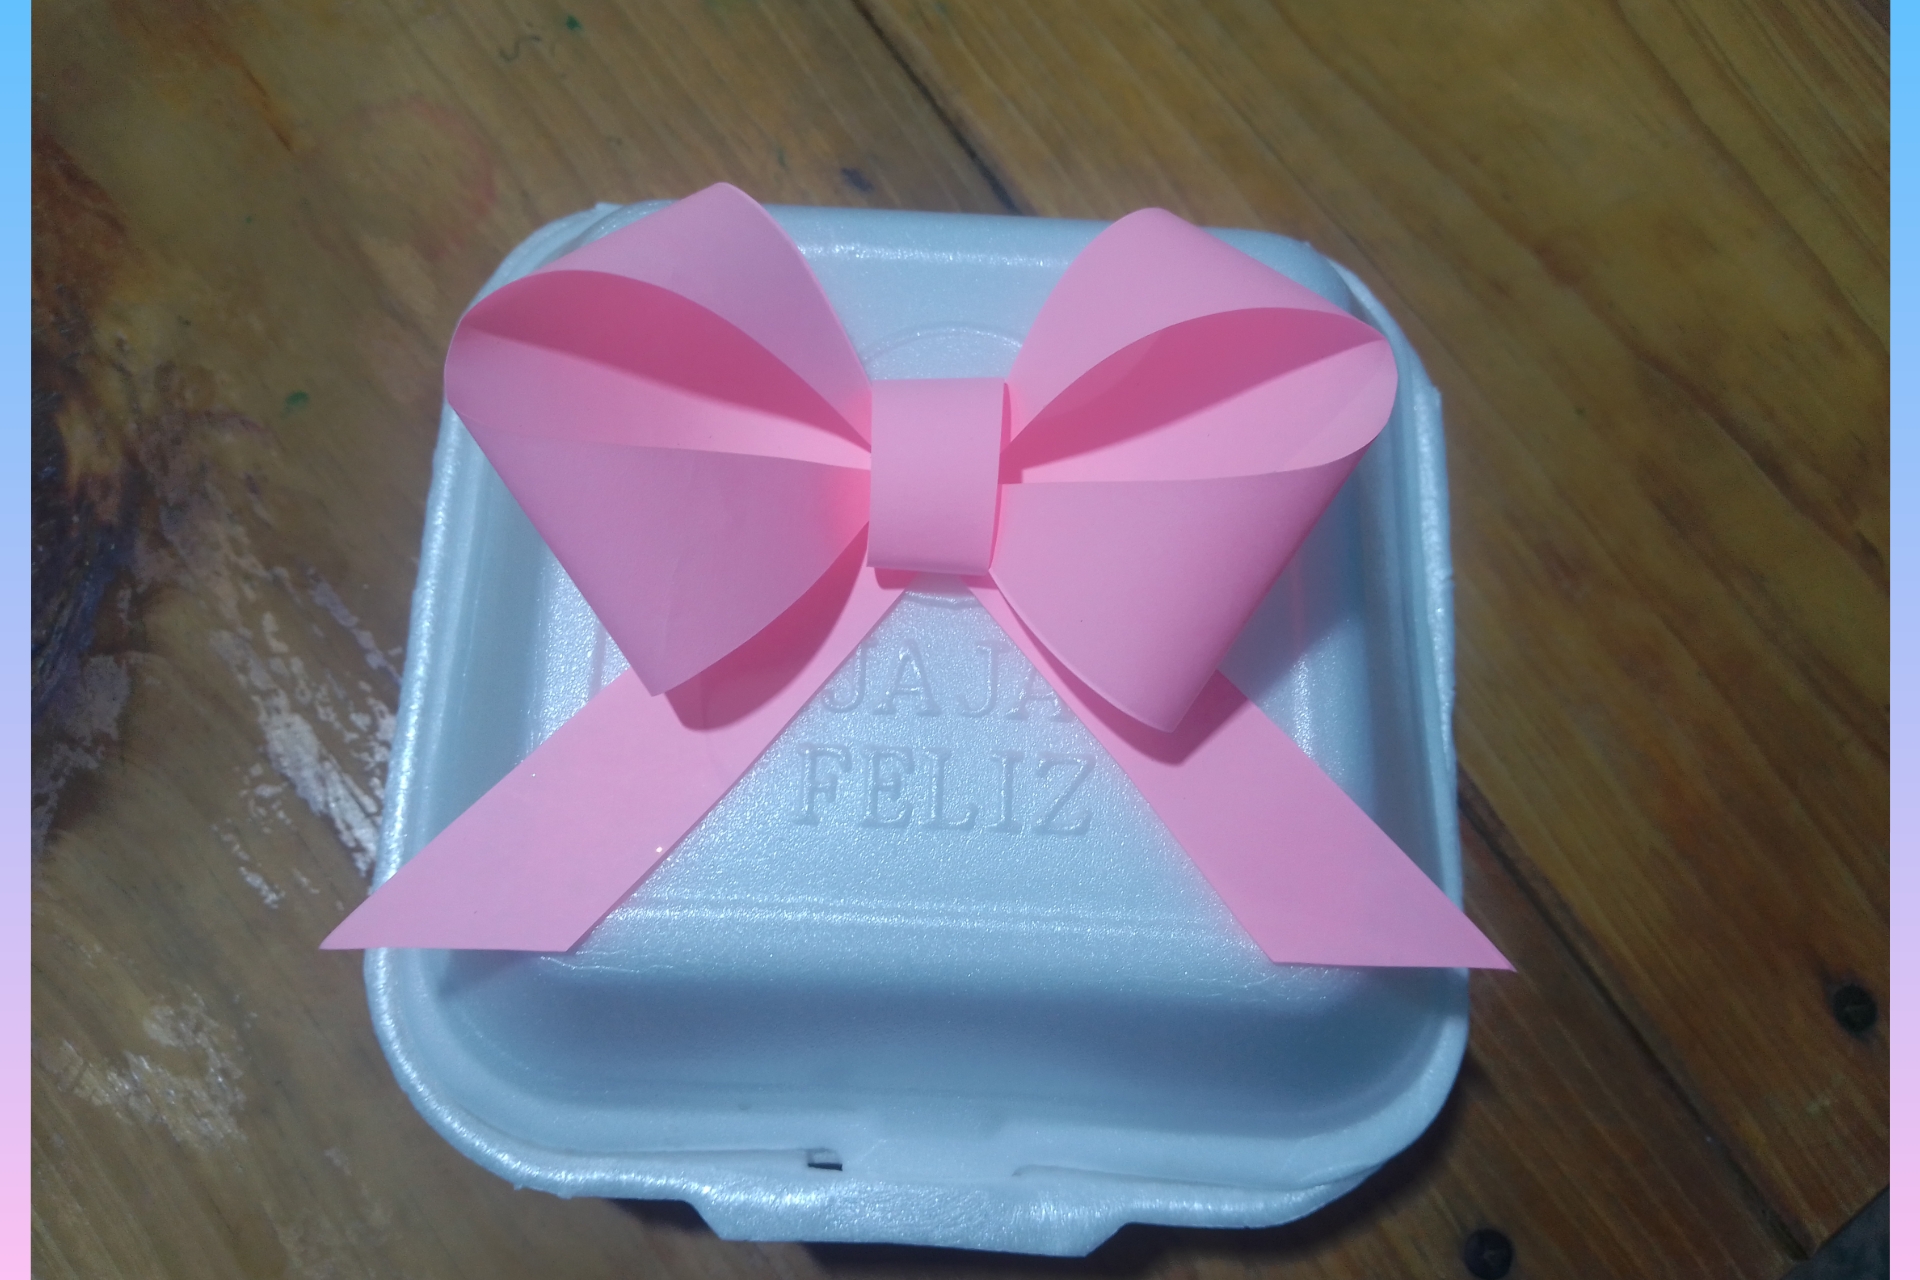
Como les comenté al inicio, este lazo me servirá para decorar las cajitas de los postres que estaré vendiendo este San Valentín , demasiado tierno ¿ cierto ?
Me encantaría saber de qué otra forma utilizarías este lazo 🎀 , Si has llegado hasta aquí gracias por tu atención.
Post Traducido con www.DeepL.com/Translator (versión gratuita)
Separador Banner editado en Canva


Hello diy hive, I hope you are very well, today I bring this easy tutorial to make a paper bow, ideal for decorating, of course following the coquette trend that I find really charming.
What motivated me to make this paper bow is that I will soon be undertaking for the day of love and friendship and I needed a beautiful, eye-catching and economical decoration for the boxes where the desserts that I will sell go.
This paper bow has all those attributes and it takes me just a few minutes to make it, so I'm sure it can also be useful for many of us who love easy and successful crafts.
It should be noted that this beautiful ribbon can be made in a larger size by doubling or tripling the initial size of the sheet, I adapted it to the size of the anime boxes that I will be decorating, you can also make it in the color of your choice but in my case the pink color suits me very well although I think I will also be making some red ones.
If you liked the idea, pay attention because with only 3 materials you can make this bow, stay with me to perform the step by step.
- Half of a pink paper sheet
- Scissors
- Glue stick
We start by taking one of the top corners of the sheet towards one of the sides, at this point make a fold by pressing with your fingers.
Then cut the excess to give a square shape to the sheet, that piece of paper that was left over can be used later to make another craft.
We will have a square with a mark so we have to fold in the opposite direction and again we make pressure with our fingers, in this way we will have a mark of an X on the paper and then these marks will be our guide to make the cuts.
With a scissors, we are going to cut along the lines that we have marked but without reaching the center of the sheet, we can leave approximately one centimeter of margin to make the cuts.
The next step is to join the two parts of the sides of the square of paper and in it we will make a cut starting from the tip and making an arc in the center, so that the sides will look a little arched.
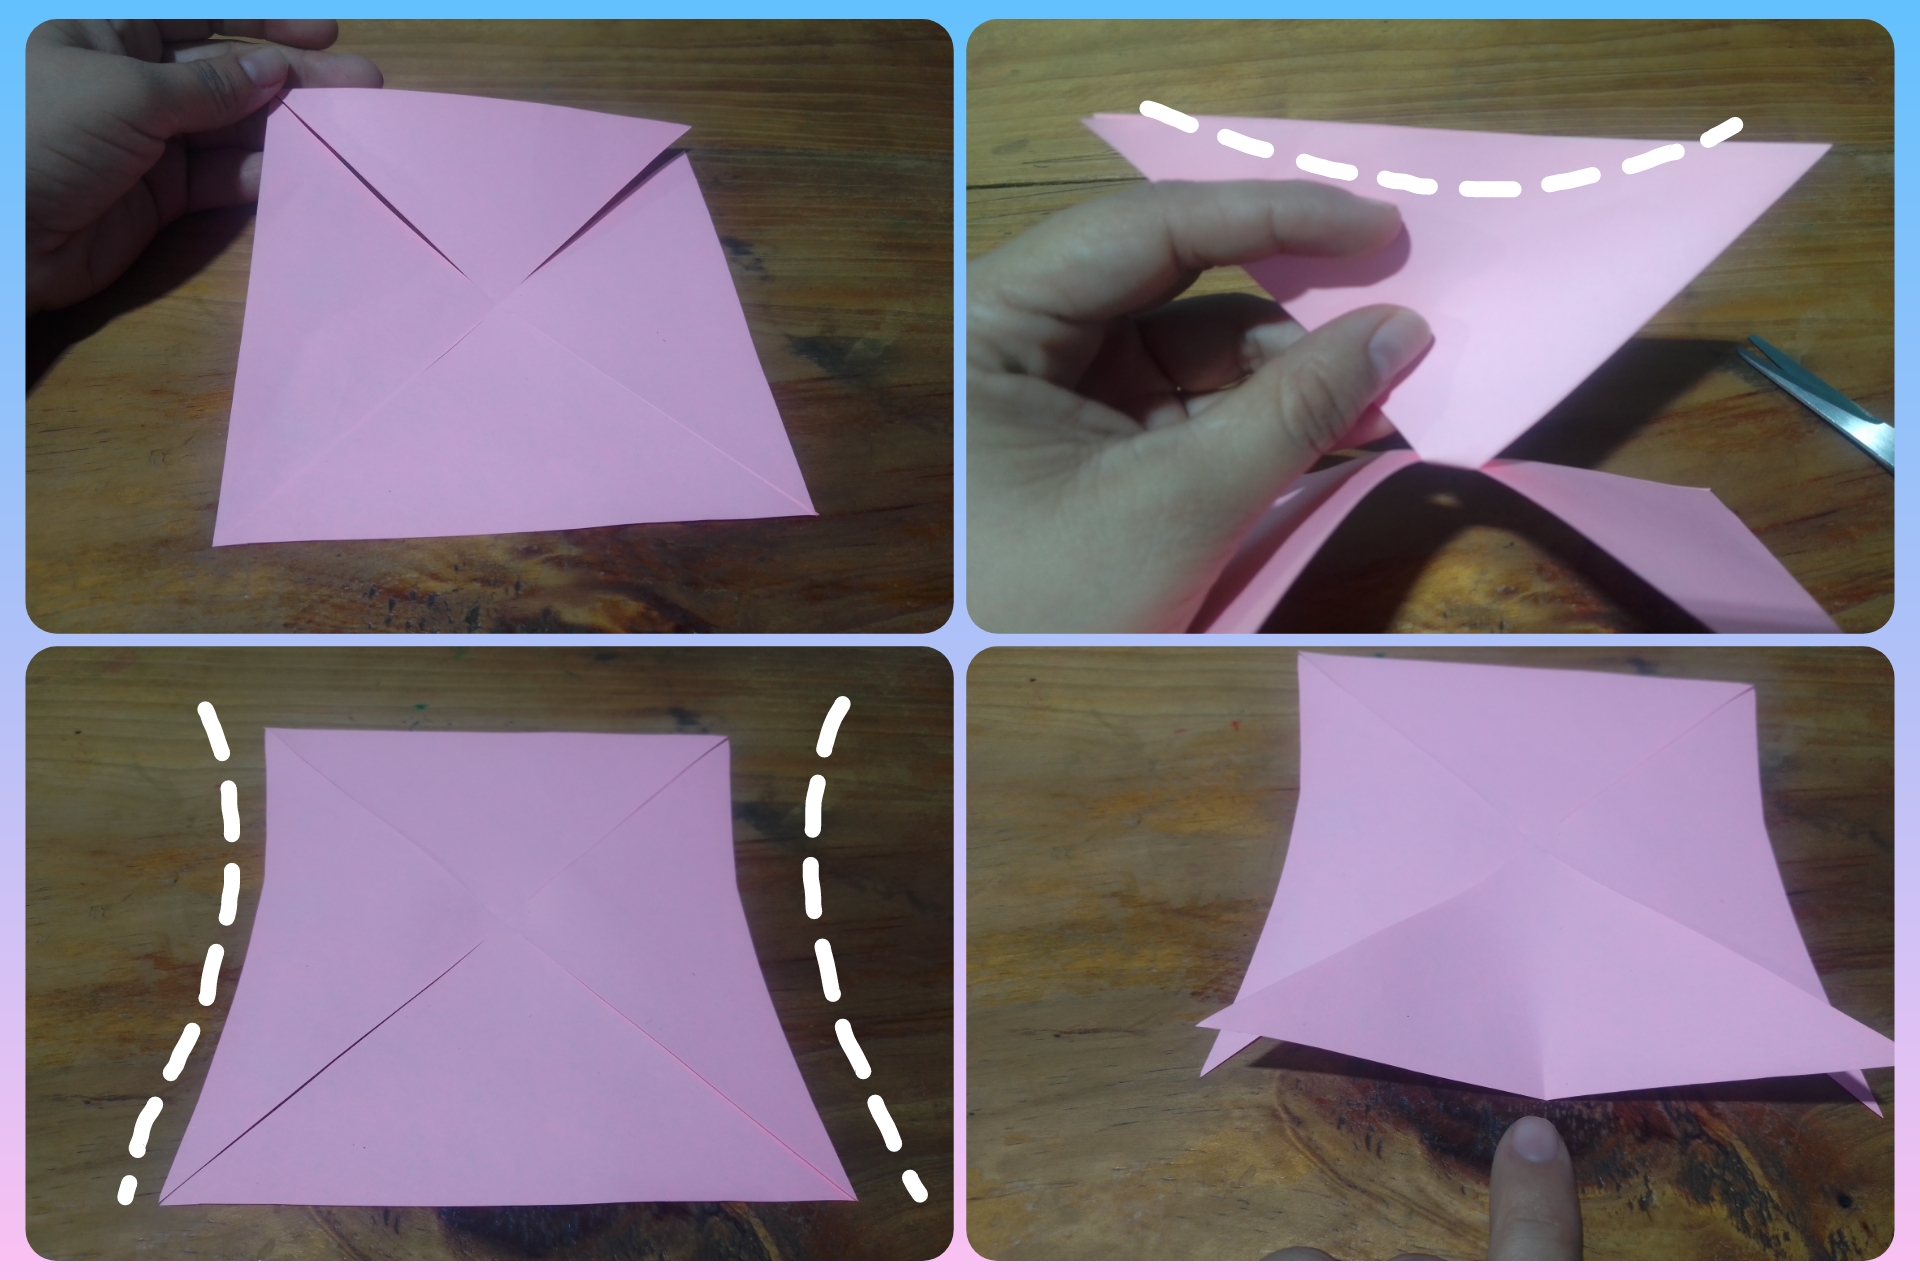
Now we are going to take into account the bottom of the paper square, we are going to join the ends to create a mark in the center and make a cut with the scissors, again without cutting it completely but leaving about a centimeter uncut in the center.
Then we will cut out a triangle and repeat the process in order to create the strips of the bow.
Next we will make the cuts at the upper end of the paper square, in this case, we will take into account the space in the center that we have not cut to get a strip of that thickness.
Now our loop will begin to take shape, we apply a dot of glue stick all around the center and bring the ends of the sides to the center.
We turn our piece so that the strips are at the top and the center strip is at the bottom.
Then we fold the strips so that they are on the same side of the bottom strip, add a little glue on the tip of the center strip and there we have this beautiful bow ready.

So that you can better understand the last step, I leave you this gif with the doubles of the strips.
And this is the beauty of this paper bow in the coquette style, ideal for decorating!

As I told you at the beginning, this bow will be used to decorate the boxes of the desserts that I will be selling this Valentine's Day, too cute, right?
I would love to know how else you would use this bow 🎀 , If you have made it this far thanks for your attention.
Post Traducido con www.DeepL.com/Translator (versión gratuita)
Separador Banner editado en Canva


