
✨🤍✨🤍✨🤍✨🤍✨🤍✨🤍✨🤍✨
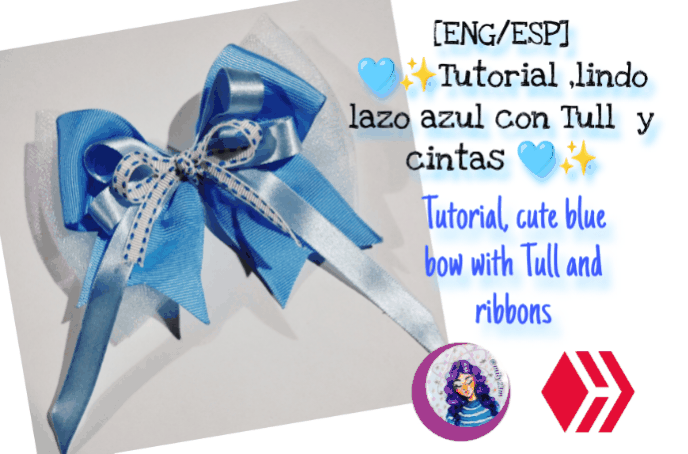
Hola comunidad de hivediy y artesanos! Cómo pasan el día de hoy ? , hoy quiero compartirles un poco de como fue que realice este lindo lazo con cintas y Tull, lo hice en lindos tonos azules claros y el resultado me pareció adorable me recuerda mucho al vestido de la caricatura de Alicia en el país de las maravillas en la versión de Disney ,un resultado muy bonito pero que se puede usar para todas las edades.Fotos del proceso mas adelante.
✨Materiales✨
🤍tull
🤍 Reglas
🤍tijeras
🤍hilo y aguja
🤍Cinta gross 4 cm de ancho
🤍Cinta de razo de 1 cm de ancho
🤍Cinta gross estampada de 1 cm de ancho
🤍 Silicón y caimán o cola para pegar el lazo.
Manos a la obra
✨🤍✨🤍✨🤍✨🤍✨🤍✨🤍✨🤍✨
Hello hivediy community and artisans! How are you spending your day today? Today I want to share with you a little bit about how I made this cute bow with ribbons and tulle. I did it in nice light blue tones and the result seemed adorable to me. It reminds me a lot of the dress from the Alice in Wonderland cartoon in the Disney version. A very pretty result that can be used by all ages. Photos of the process later.
✨Materials✨
🤍Tulle
🤍Rulers
🤍Scissors
🤍Thread and needle
🤍4cm wide ribbon
🤍1cm wide satin ribbon
🤍1cm wide printed ribbon
🤍Silicone and alligator or glue to stick the bow on.
Let's get to work
 )
)
( )
)
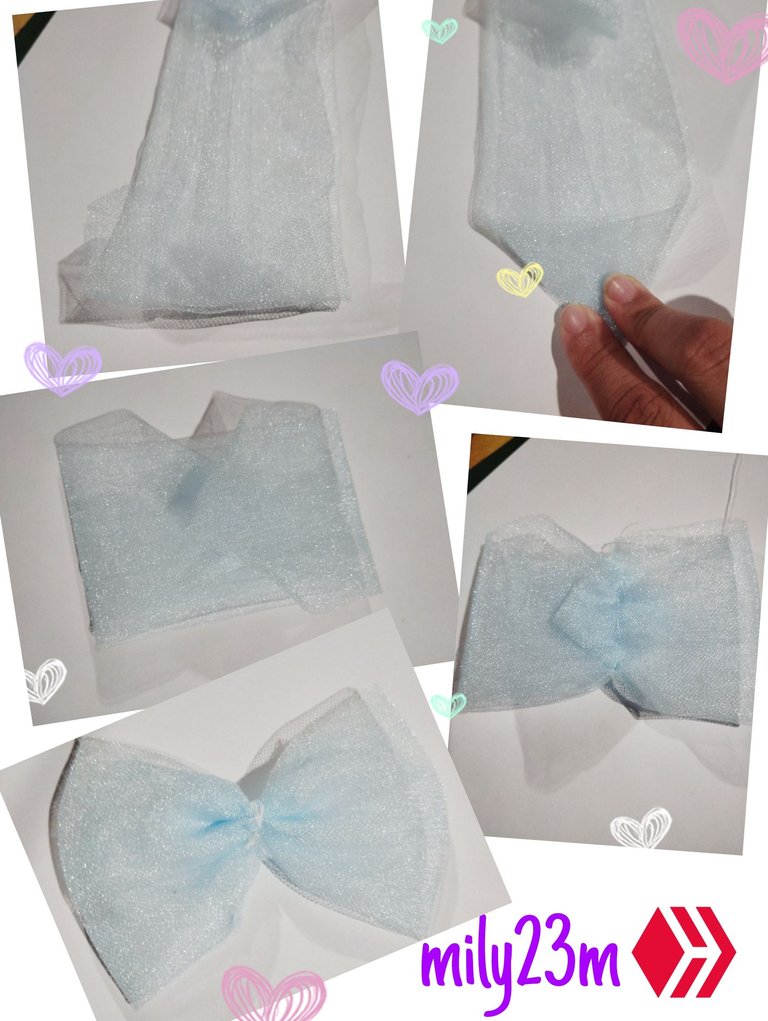
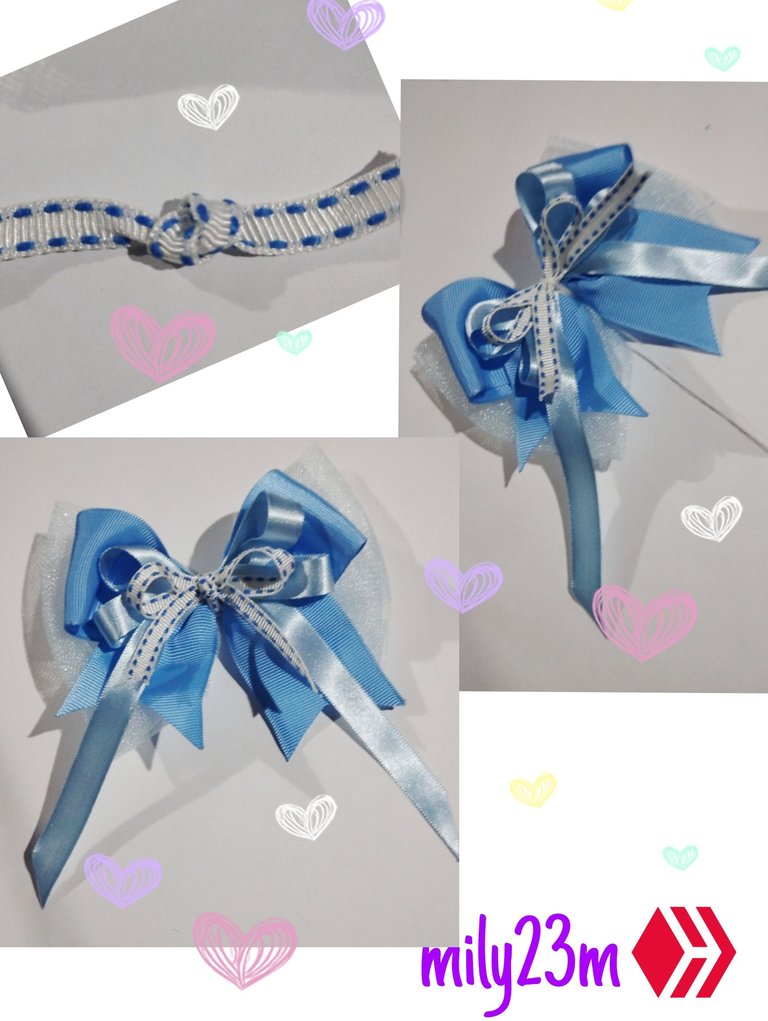
#1 Para el primer paso extendí mi Tull , este es de color azul muy claro y corté un rectángulo de 30 x 30 cm, dado que no estoy usando máquina, para los bordes lo que hice fue doblar hacia a dentro el borde superior unas tres dedos de ancho, para el borde inferior hice lo mismo ,doblar hacia adentro del Tull el borde dejando unos 3 dedos de ancho,Luego una vez tenga mis dos dobleces ,doble de nuevo hacia adentro la parte superior hacia adentro , al igual que en la parte inferior, es decir ,primero doble hacia adentro para ocultar los bordes y luego volví a doblar para hacer una tira larga más gruesa y con los bordes ocultos , de esta forma no necesito coser o pegar para mantener la forma de la tira.Al tener la tira larga del Tull en los extremos laterales doble hacia adentro dejando un 1 cm de Tull, y luego a este dobles lo volví a doblar en forma de triángulo, esto es para ocultar también estos bordes de los extremos, como el tul es delicado una vez tuve ambos extremos doblados en forma de triángulo los planche bien (con mi mano 🫱)aplicando presion para que los dobleces quedarán bien firmes , y luego encontré ambos extremos en el medio como se ve en la foto ,el resultado es un rectángulo mediano, con hilo y aguja , cosí todo el medio del lazo asegurando bien que el hilo cosa ambos extremos del lazo de tul súperpuestos y luego lo fruncí para hacer la forma del lazo, aseguré con varias vueltas del hilo el medio para que quedara más seguro.
English Version
#1For the first step I spread out my Tulle, this is very light blue and cut a 30 x 30 cm rectangle, since I'm not using a machine, for the edges what I did was fold the top edge inwards about three fingers wide, for the bottom edge I did the same, fold the edge of the Tulle inwards leaving about 3 fingers wide, Then once I have my two folds, I fold the top part inwards again, just like at the bottom, that is, first fold inwards to hide the edges and then fold again to make a thicker long strip with the edges hidden, this way I don't need to sew or glue to keep the shape of the strip. Having the long strip of Tulle at the side ends fold inwards leaving 1 cm of Tulle, and then fold it again in the shape of a triangle, this is to also hide these edges of the ends, as the tulle is delicate once I had both ends folded in the shape of a triangle I ironed them well applying pressure with my hand so that the folds would be firm, and then I found both ends in the middle as seen in the photo, the result is a medium rectangle, with thread and needle, I sewed the entire middle of the bow making sure that the thread sews both ends of the tulle bow superimposed and then I gathered it to make the shape of the bow, I secured the middle with several turns of thread to make it more secure.
 )
)
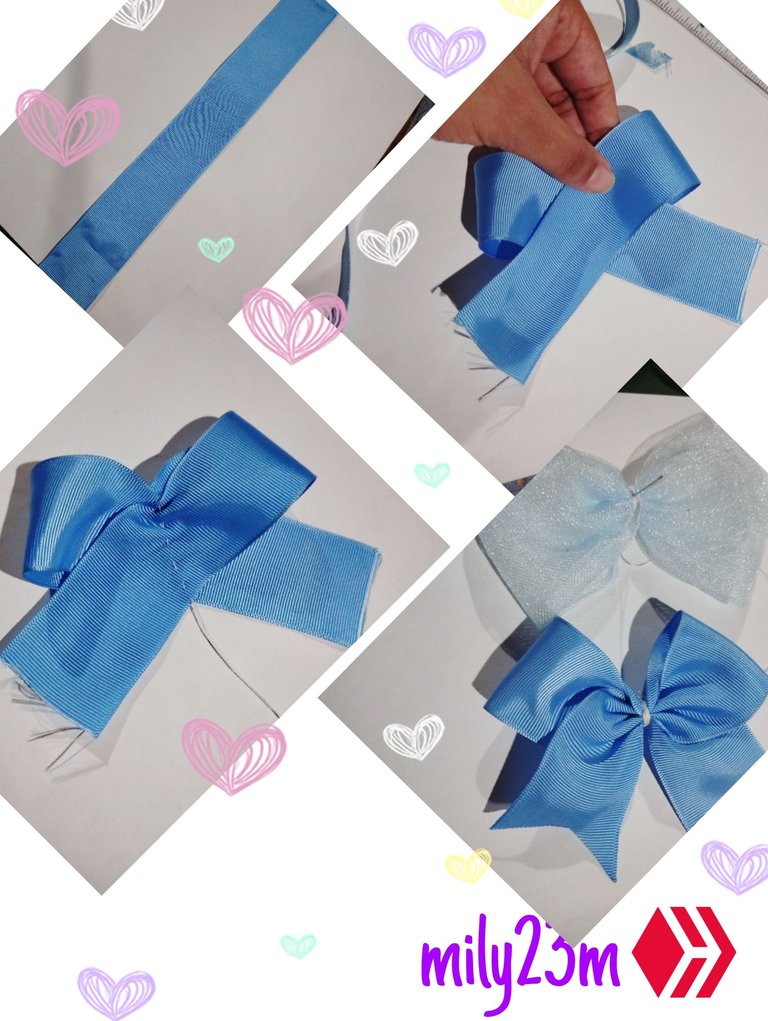
#2 For the bow that goes on top of the Tull bow I used a thick sky blue gross ribbon. I used what I had and it gave me a length of 37.5cm x 4cm wide. For this I made a traditional bow, making the two little ears ♾️ of the bow and then giving it a few stitches with thread, to gather it and secure the bow well with several turns of thread🧵. For the ends I cut them making two little peaks and then with the guide and thread I sewed it to the Tull bow.
 )
)
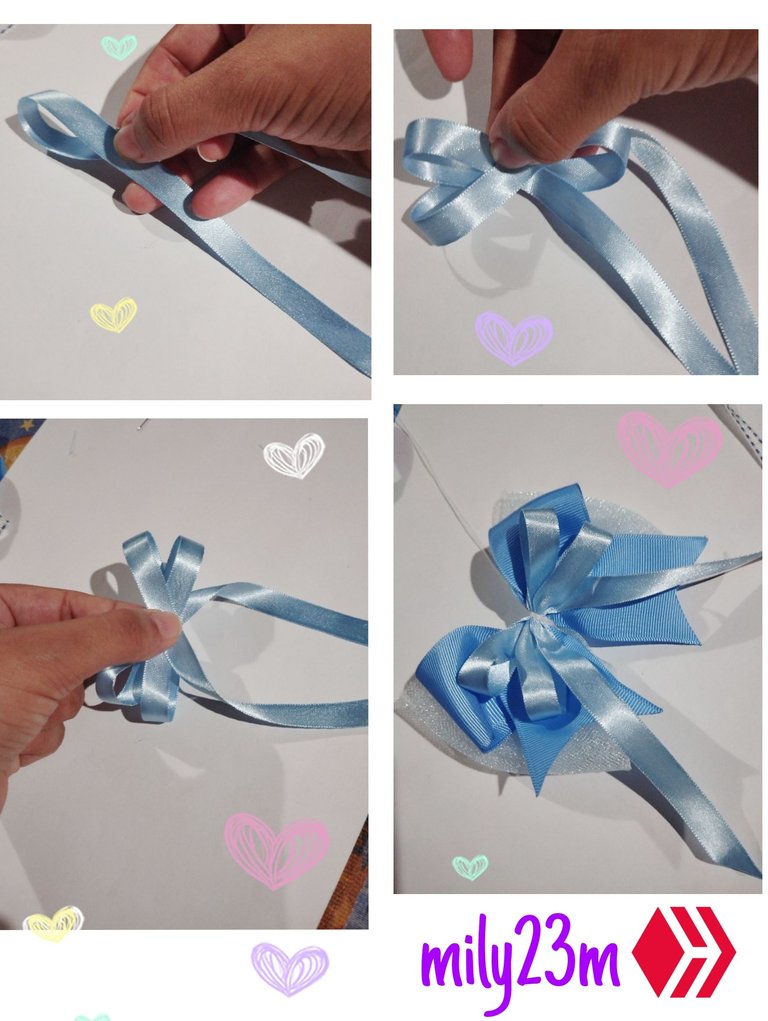
#3 I made a third bow with sky blue satin ribbon, I used 60 cm long x 1 cm wide, with this I wanted to make a double bow, that is, four little ears ♾️, first I left a few centimeters of ribbon for one of the ends, I made the shape of the two little ears and crossed them as if I were going to make an x and continued with the lower ears, I also left the other end several centimeters long, I gave them a few stitches in the middle of the bow also to secure it, and then I sewed it with a few stitches to the tulle bow.
 )
)
#4 Using a white gross ribbon with blue details, about 25 cm x 0.5 cm thick, I made a traditional two-ear bow, I also sewed it first before sewing it to the larger bow, I always make them before sewing them to the larger one and not directly because that way they are more assembled and last longer. With a small piece of the same ribbon about 7 CM long I tied it and then put it in the middle of the bow to cover all those joints, I secured it well by tightening it and sewing it back.
 )
)
🤍✨Espero que les haya gustado el resultado! Muchas gracias por leerme☺️ 🤍✨**
Fotos tomadas por mí,en mi equipo xiaomi redmi note 12, editadas en pics art y gifs en creador de gifs, texto traducido en Google traductor (una disculpa si existen errores en la traducción).
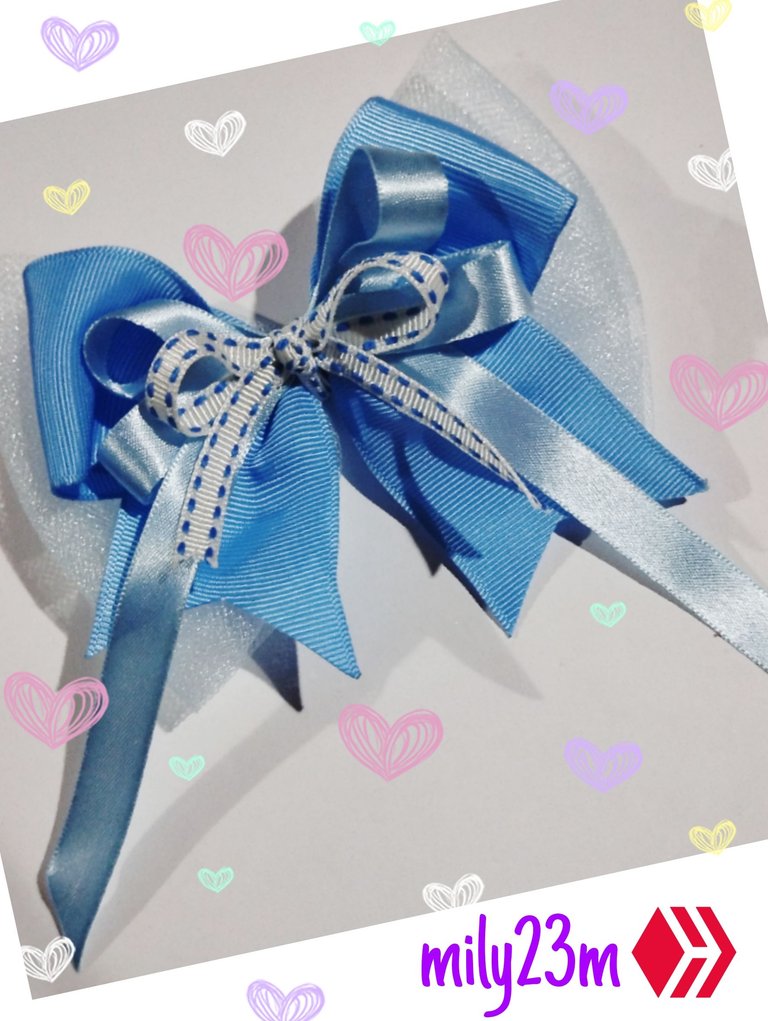
English VersionAnd that's it! This would be the final result, it is a very pretty bow but it also looks very elegant and delicate due to the contrast of ribbons, tulle and sky blue tones, very Coquette, you can glue it with hot silicone to an alligator or hook, or sew it to a tail or headband 🎀
🤍✨I hope you liked the result! Thank you very much for reading me ☺️ 🤍✨
Photos taken by me, on my xiaomi redmi note 12 device, edited in pics art and gifs in gif creator, text translated in Google translator (sorry if there are errors in the translation).