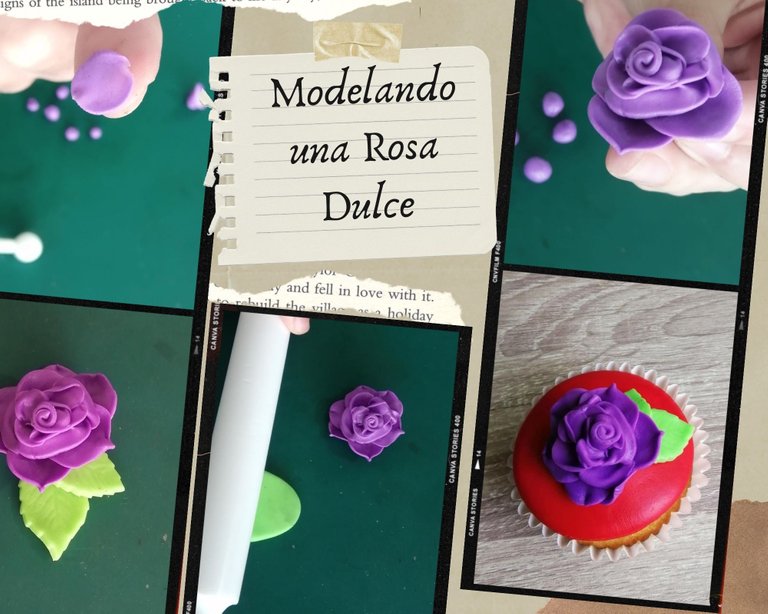
Modeling a sweet rose
I invite @tere.alv to participate in this great contest.
Invito a @tere.alv a participar en este grandioso concurso.

Hello my baking friends! I want to join this flower creation contest Spring, this time I will show you step by step how to make a purple rose in fondant, to decorate a delicious cupcake.
Join me!
¡Hola mis amigos reposteros! quiero sumarme a este concurso: Primavera de creación de flores, en esta oportunidad les enseñaré el paso a paso de cómo hacer un rosa color violeta en fondant, para adornar un delicioso cupcake.
¡Acompáñenme!
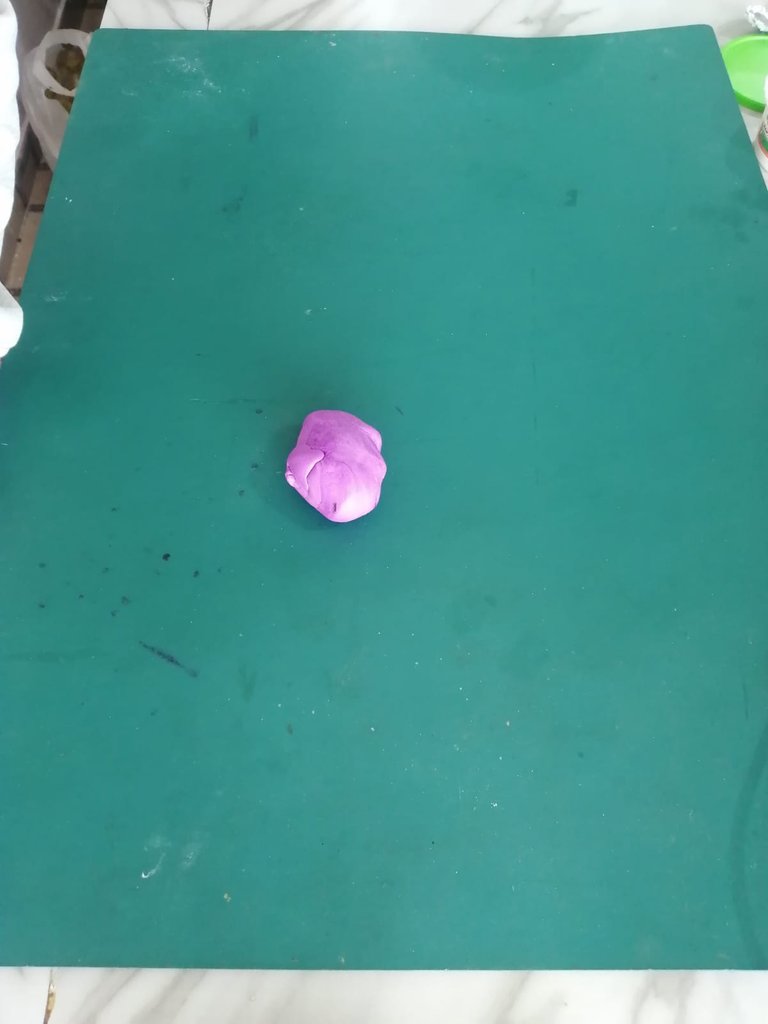
-First we take a small ball of purple fondant, or the color you prefer.
-Primero tomamos una pequeña bola de fondant de color violeta, o el color que prefieras.
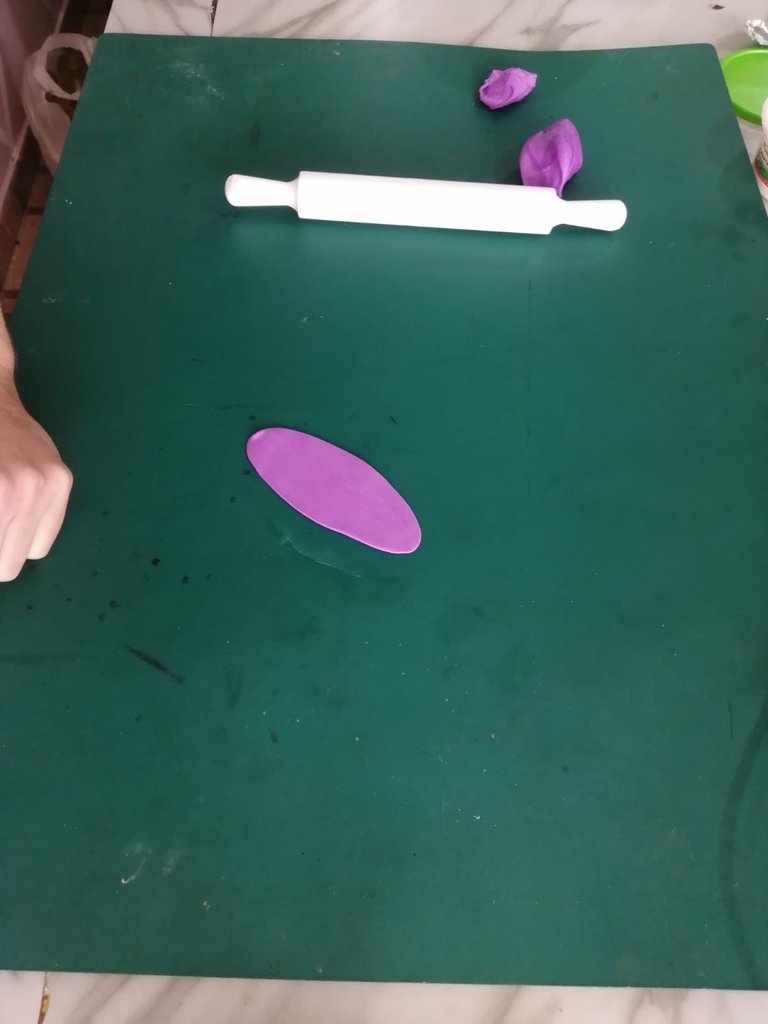
-We are going to separate a portion and stretch it with a rolling pin to form a long strip.
-Vamos a separar una porción y estiramos con un rodillo para formar una tira larga.
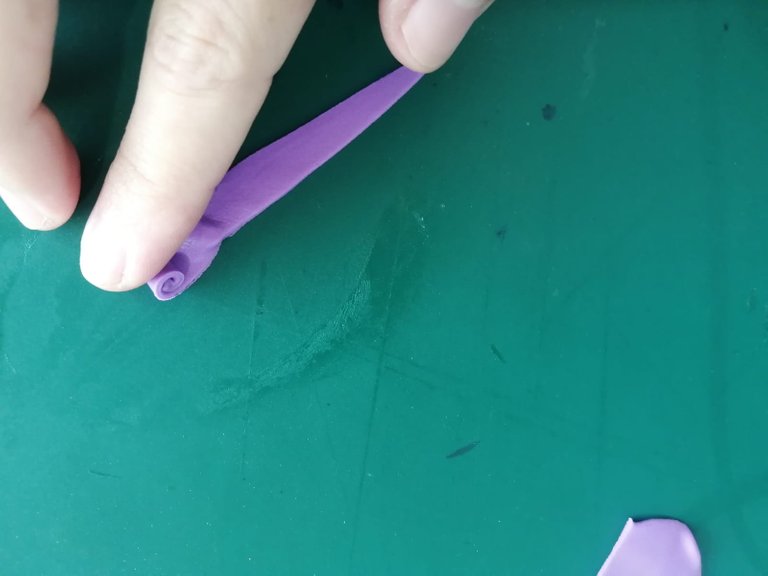
-We form a small spiral that will be our center of the rose. It should look like this:
-Formamos un pequeño espiral que será nuestro centro de la rosa. Debe quedar de la siguiente manera:

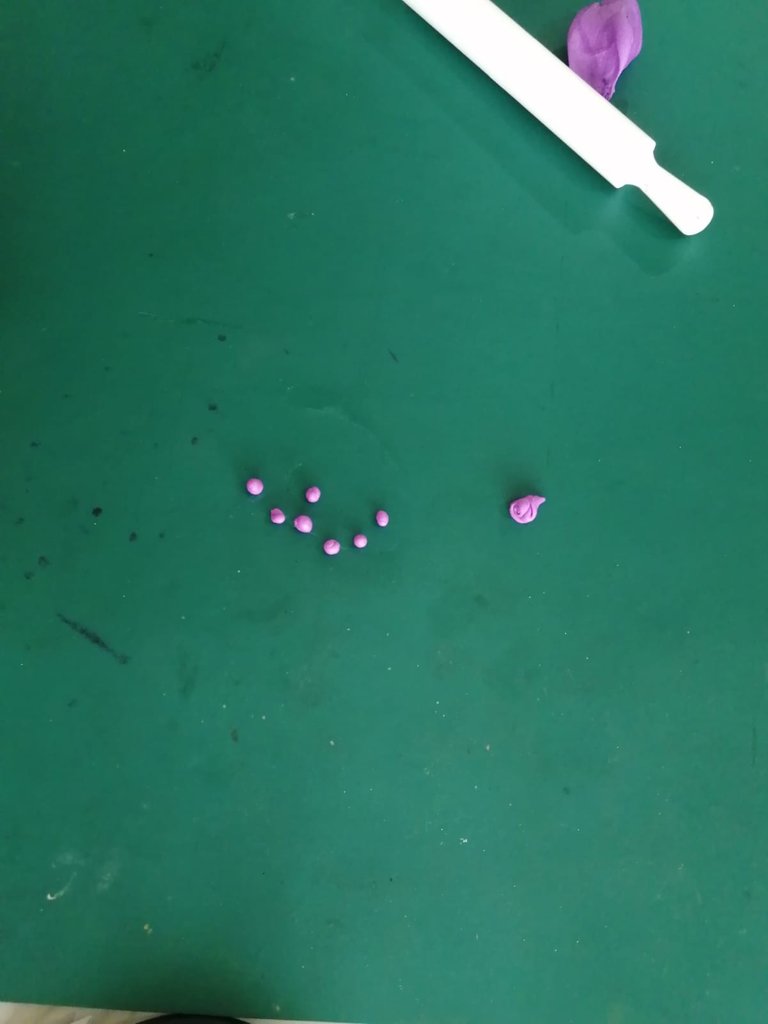
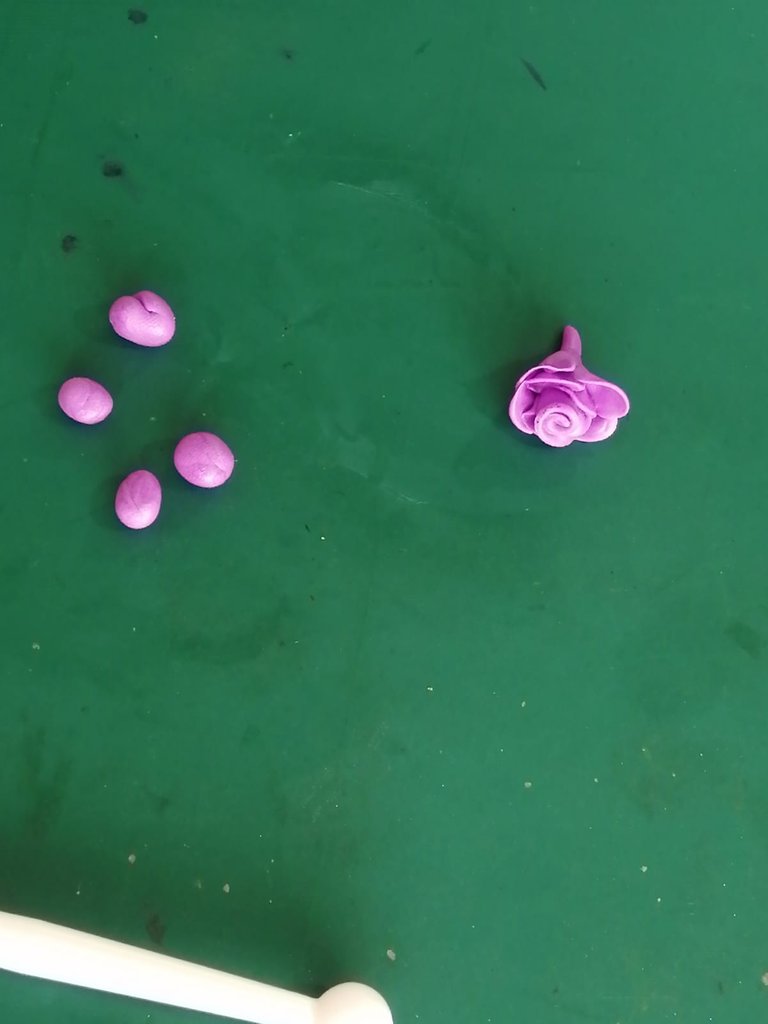
-Once we have the center we are going to start modeling and gluing the petals. We make 7 tiny balls to make the first layer of petals.
-Una vez que tenemos el centro vamos a empezar a modelar y pegar los pétalos. Hacemos 7 diminutas bolitas para hacer la primera capa de pétalos.
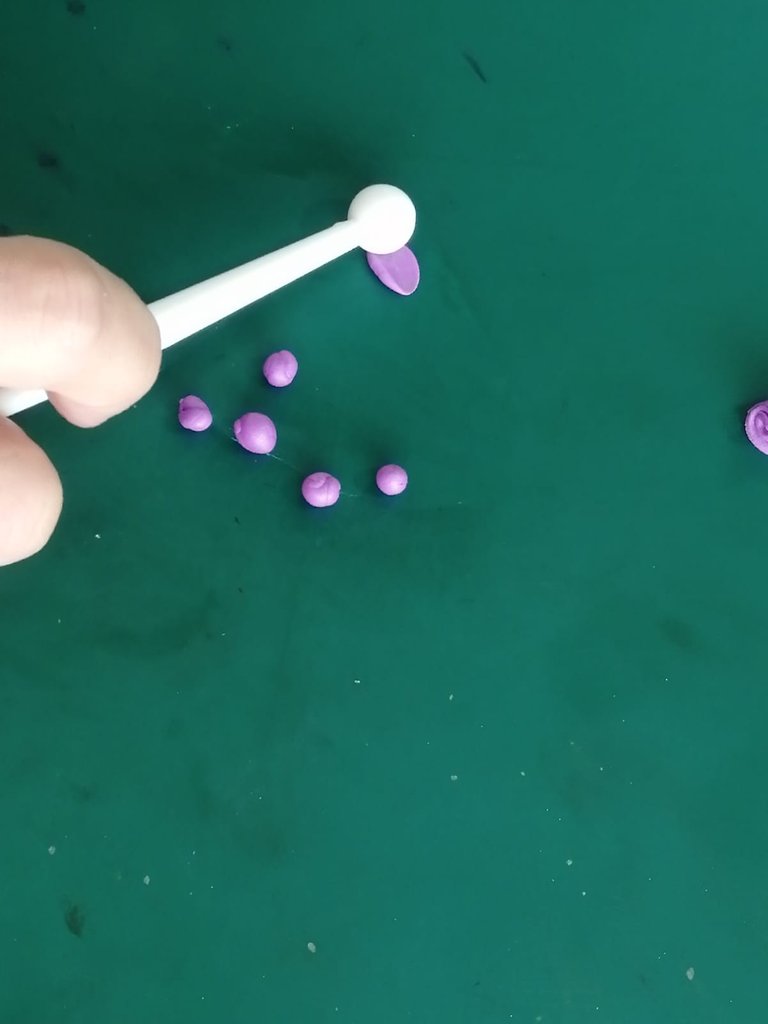
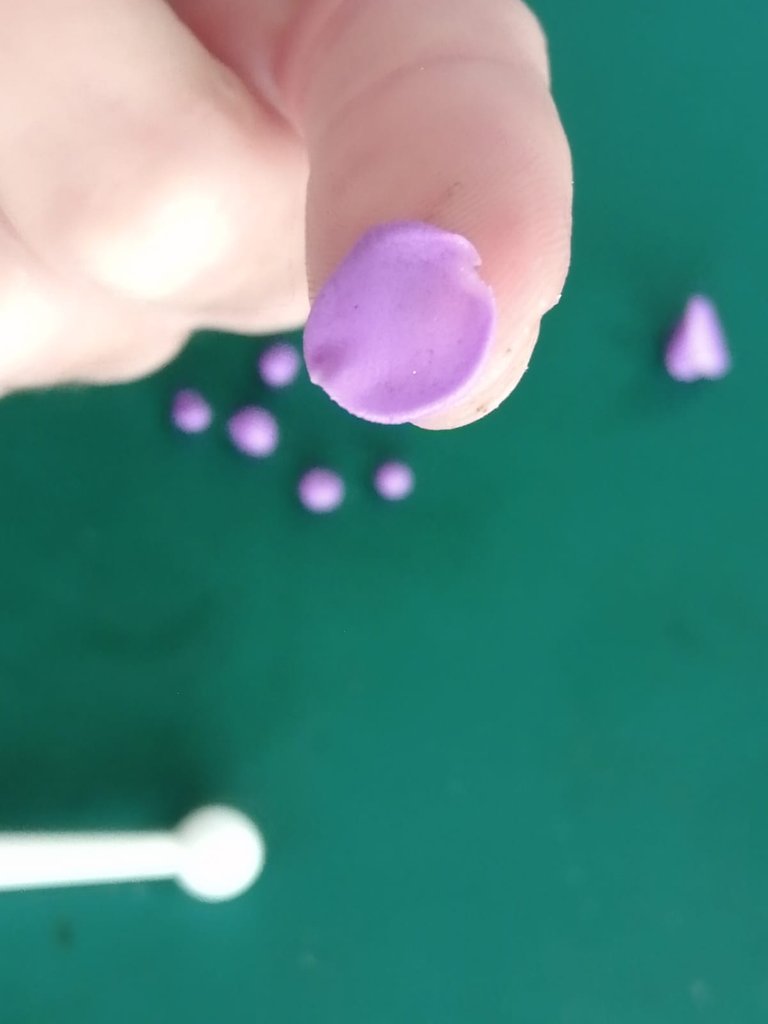
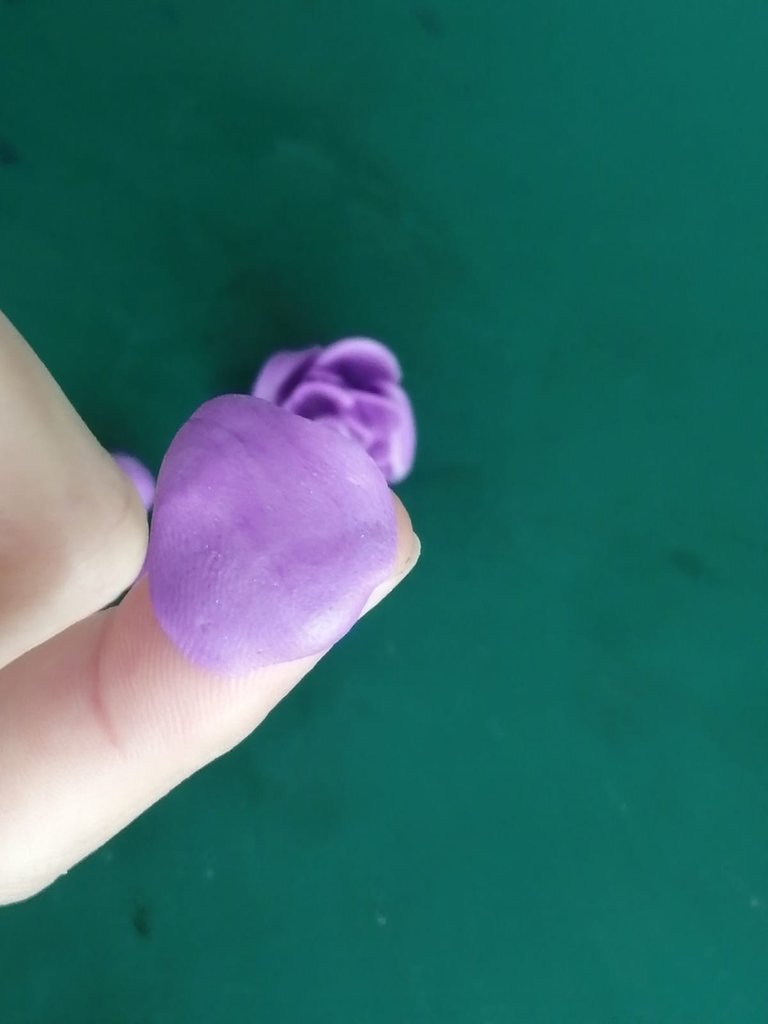
-With the help of a big ball stake, we are going to shape the petals, just flatten the ball with the stake and the petal will be formed.
-Con ayuda de una esteca de bola grande, vamos a dar forma a los pétalos, simplemente se debe aplastar la bolita con la esteca y se formará el pétalo.
-When we have the petals formed we glue, with edible glue or a drop of water, each petal around the center. they should look like this:
-Cuando tengamos los pétalos formados vamos pegando, con pegamento comestible o una gota de agua, cada pétalo alrededor del centro. deben quedar de la siguiente manera:

-Once we glue the first layer of petals, we are going to make some balls a little bigger than the previous petals to form a bigger layer. If you do not have the stecas to model you can use your fingertips in the following way:
-Una vez que pegamos la primera capa de pétalos, vamos a hacer unas bolitas un poco más grandes que las de los pétalos anteriores para formar una capa más grande. Si no tienes las estecas para modelar puedes utilizar la yema de los dedos de la siguiente manera:
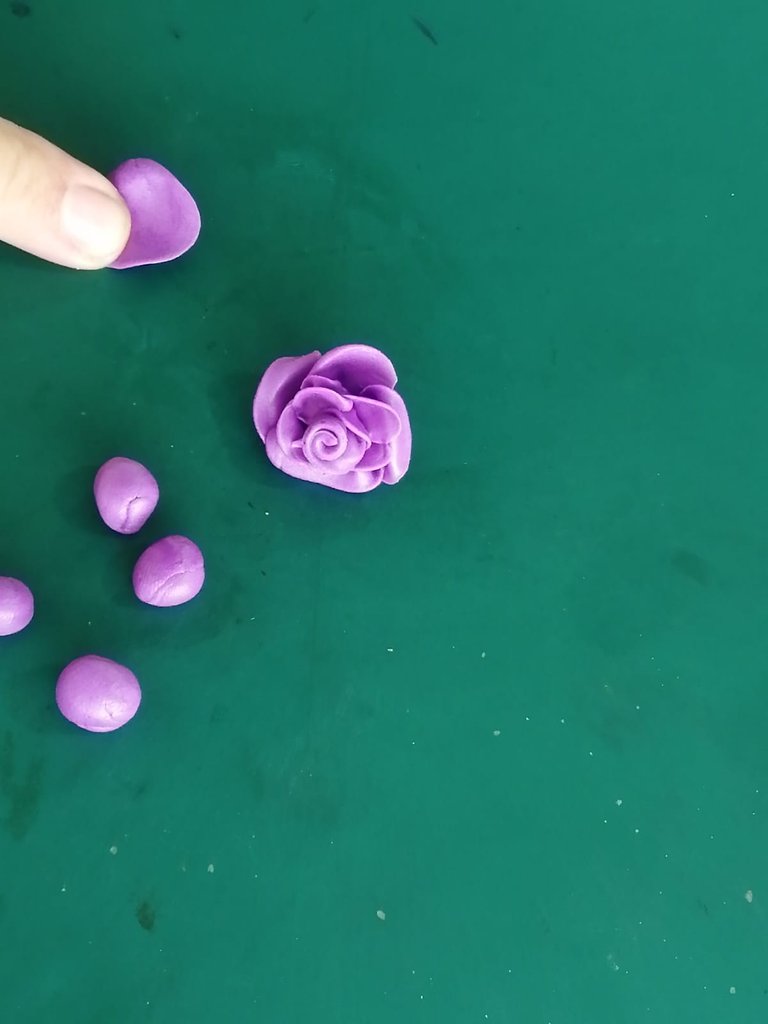
-Continue gluing petals, trying to give an outward arched shape.
-Continuamos pegando pétalos, tratando de dar forma arqueada hacia afuera.
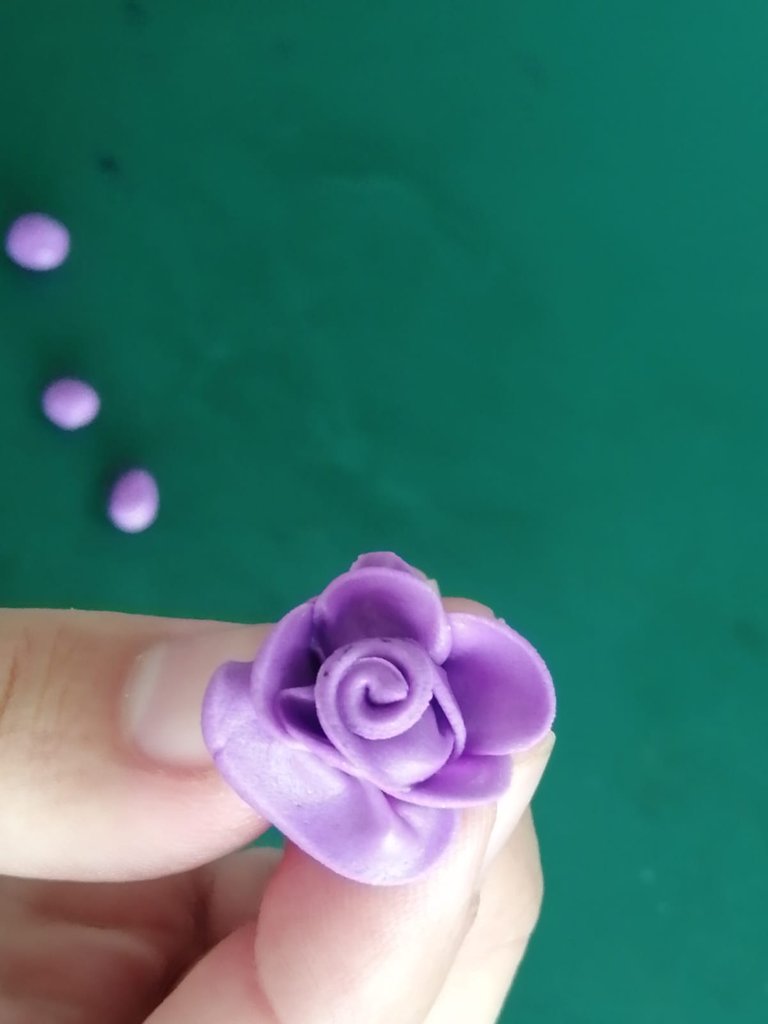
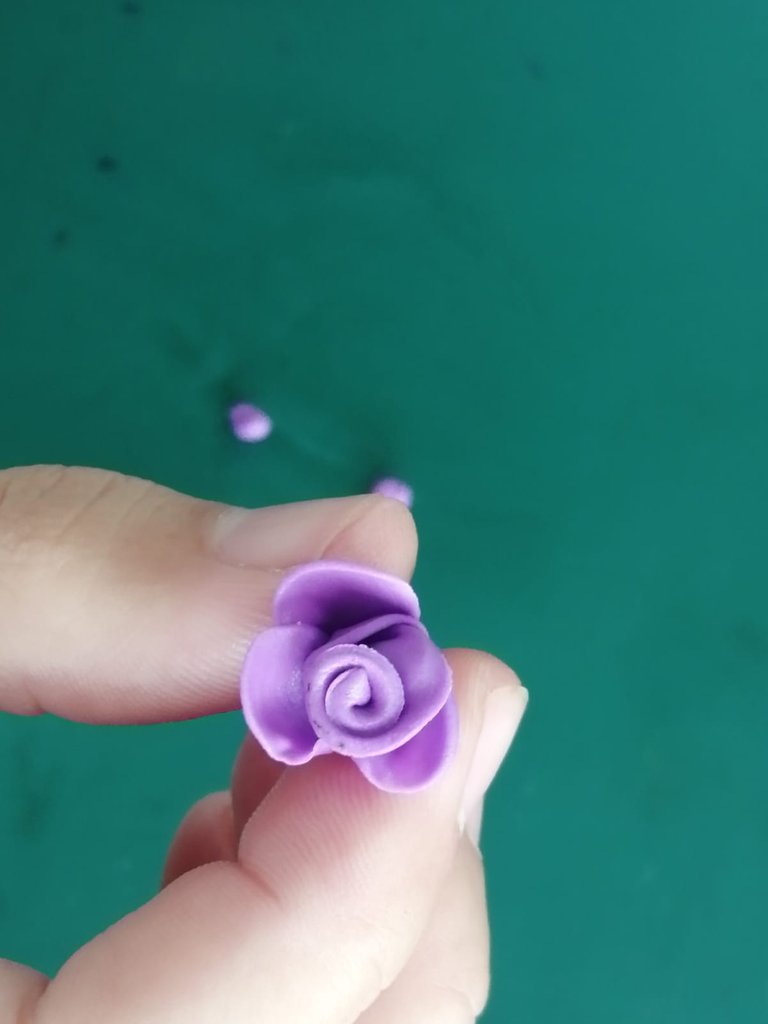
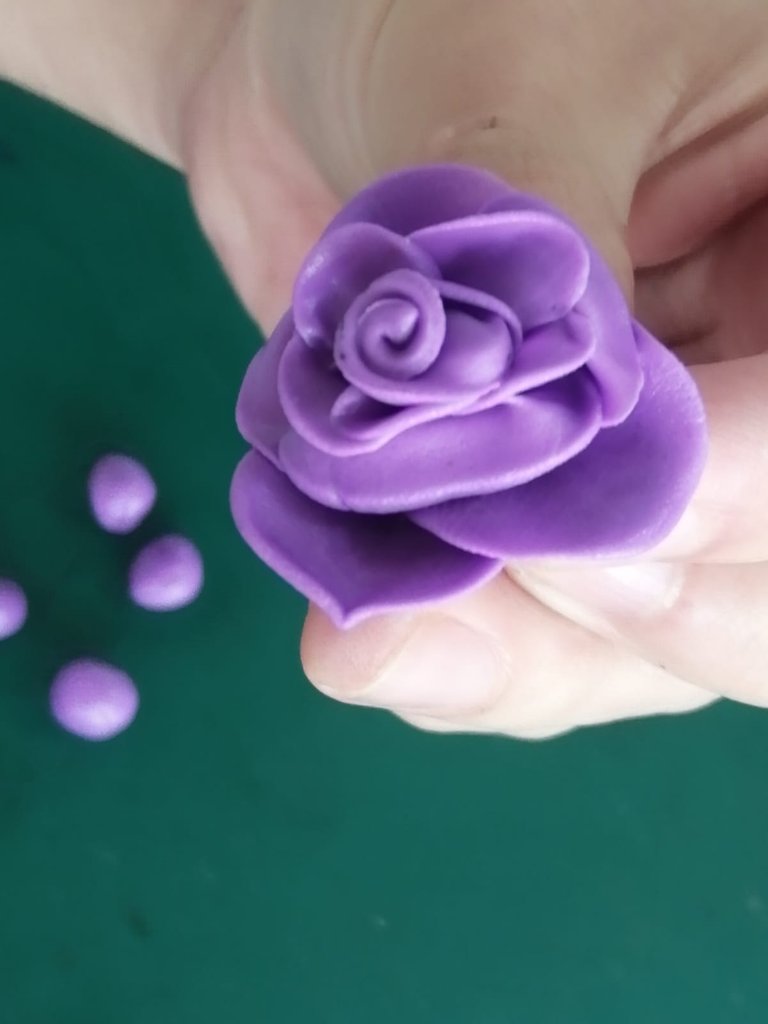
-Each layer we make we must increase the size of the petals. Until we reach a layer of 4 large petals which is the one that will give me the base of the rose. These last petals we try to keep them in the shape of a beak, so that it assembles better.
-Cada capa que hacemos debemos aumentar de tamaño los pétalos. Hasta llegar a una capa de 4 pétalos grandes que es la que dará la base la rosa. Estos últimos pétalos tratamos de que queden en forma de pico, para que arme mejor.
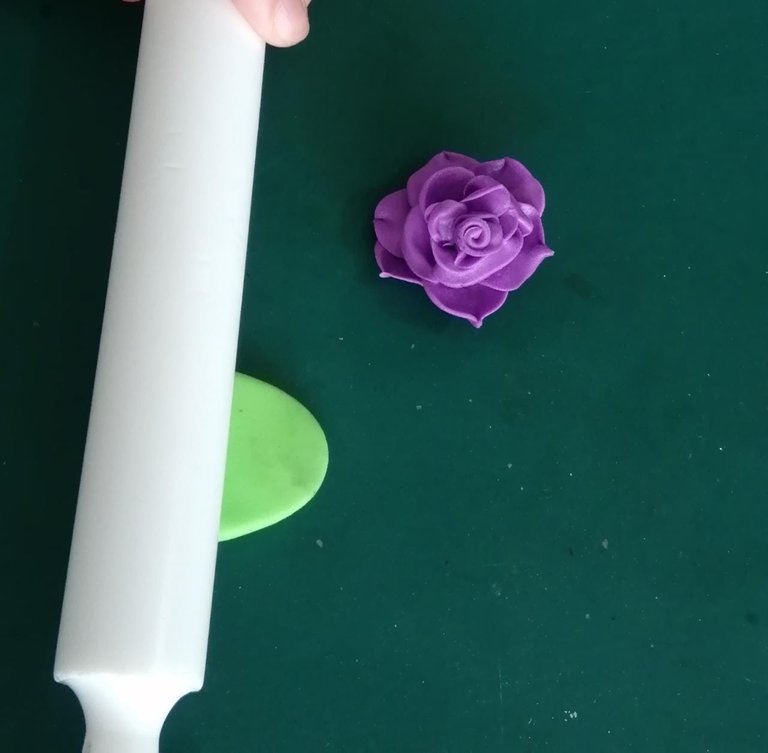
-When we finish assembling the petals, we are going to make a couple of leaves. For this we take a ball of green fondant and stretch it with a rolling pin.
-Cuando terminamos de montar los pétalos, vamos a hacer un par de hojas. Para esto tomamos una bolita de fondant color verde y estiramos con un rodillo.
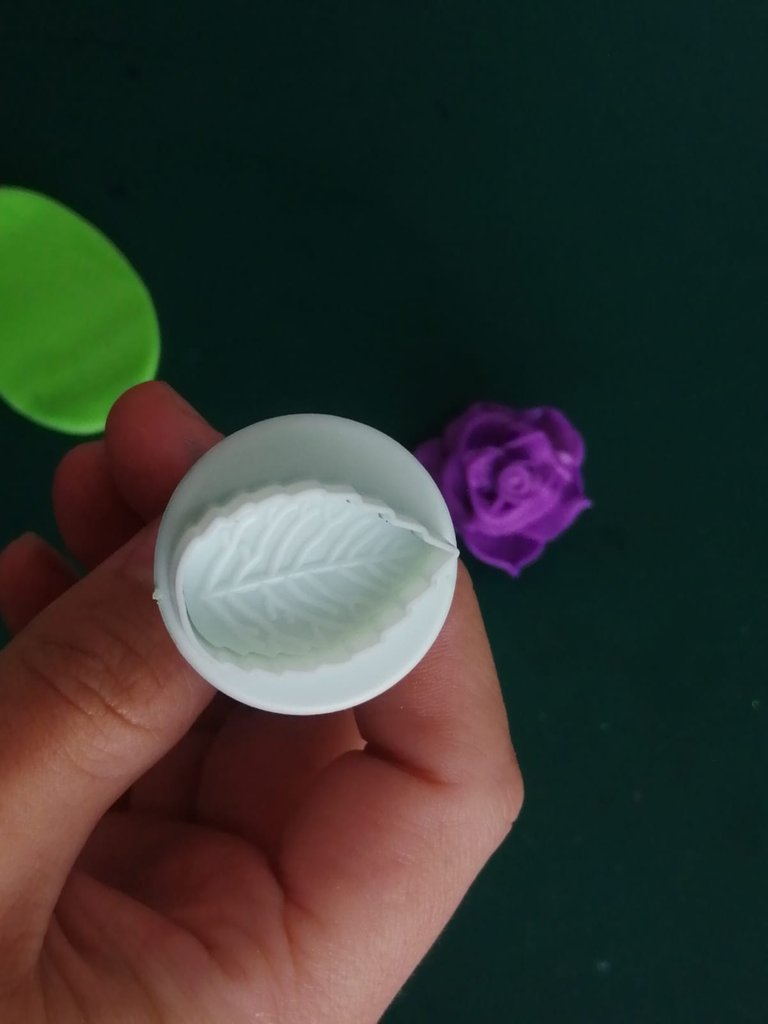
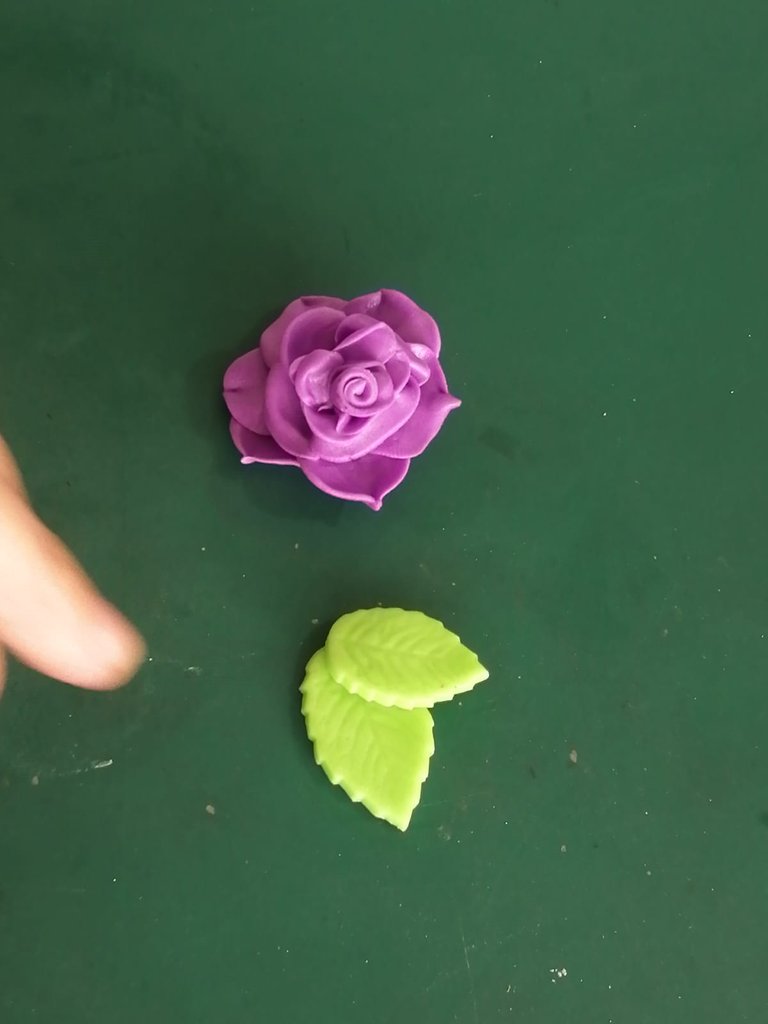
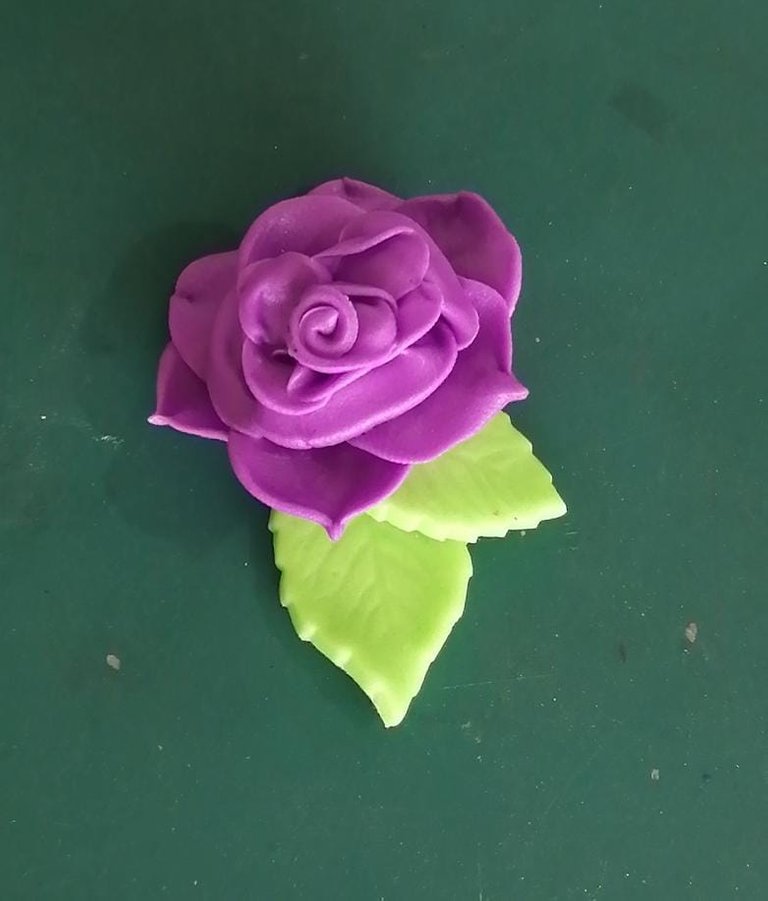
-With the help of a mold or cutter in the shape of a leaf, we will cut 2 leaves and glue them under the rose, so that it looks like this:
-Con ayuda de un molde o cortador en forma de hoja vamos a cortar 2 hojas. y a pegar por debajo de la rosa, para que quede de la siguiente manera:
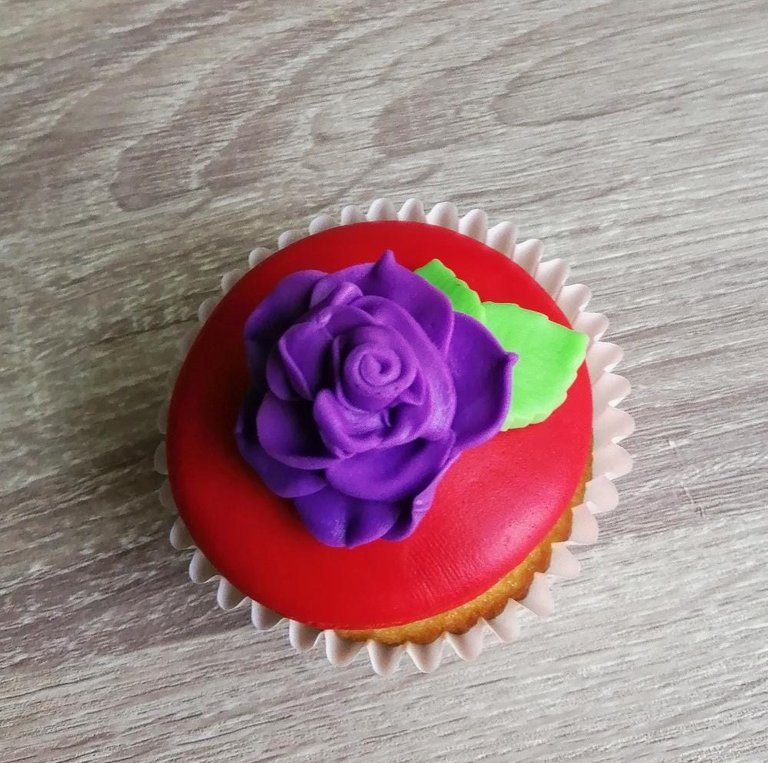
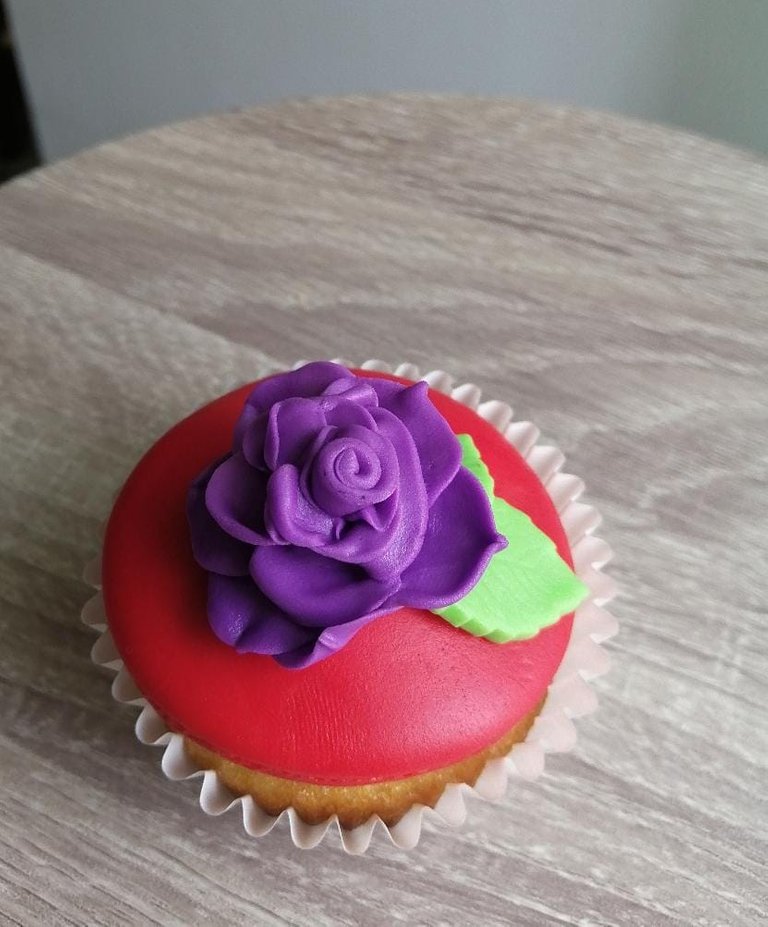
Then we mount on a fondant base and put on our cupcake, and ready! a sweet rose, simple and delicious to also decorate our snack with spring motif.
Luego montamos sobre una base de fondant y ponemos sobre nuestro cupcake, y listo! una dulce rosa, sencilla y deliciosa para adornar también nuestra merienda con motivo de primavera.
I hope you like this simple work that I share with much affection.
Thank you for visiting my blog, leave your comment and I will gladly answer your questions. See you next time! Remember that Mike cupcakes is a very sweet and fun way to sweeten your days.
Espero que les guste este sencillo trabajo que con mucho cariño les comparto.
Gracias por visitar mi blog, deja tu comentario y con gusto responderé tus dudas. Hasta una próxima oportunidad! Recuerda que Mike cupcakes es una manera muy dulce y divertida de endulzar tus días.
Post of my authorship. Photos taken of my work with my phone Huawei Psmart 2019.
Recursors used: Lighroom // InShot // Canva
Translated with Deepl.com
All Rights Reserved || © @mike.cupcakes 2021.
_
Post de mi autoría. Fotos tomadas a mis trabajos con mi teléfono Huawei Psmart 2019.
Recursors usados: Lighroom // InShot// Canva
Traducido con Deepl.com
Todos los Derechos Reservados || © @mike.cupcakes 2021.
Social Networking // Redes Sociales