Saludos cordiales tengan todos los amigos que hacen vida dentro de la plataforma, ya estamos cerca de la fecha de celebración de
#hallowen y aunque en mi país, Venezuela está festividad no es celebrada cómo tal,si se que hay algunos que si la toman como bandera para realizar fiestas.
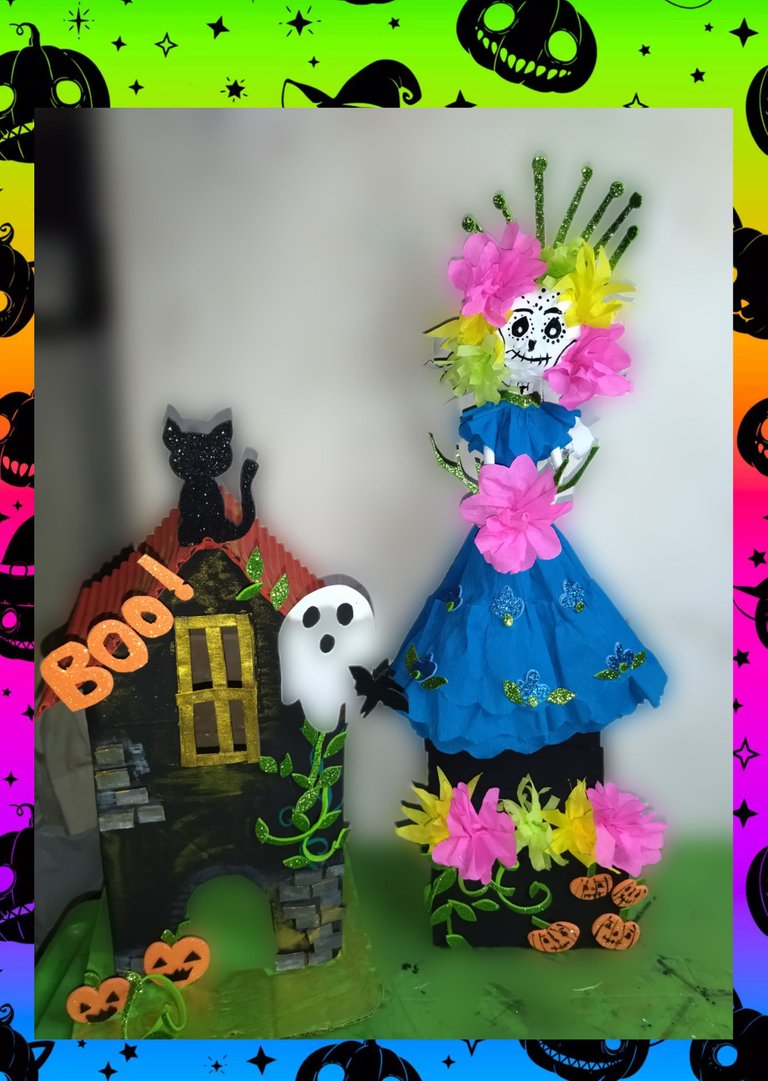
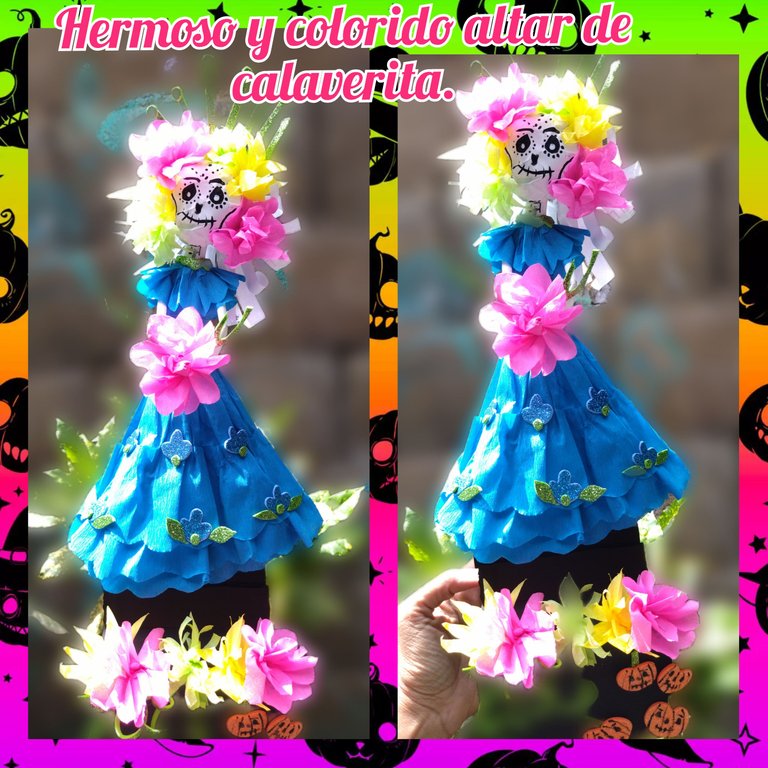
Por eso el día de hoy les traigo un tutorial de un hermoso y colorido mini altar de calaverita, para los que no lo saben esto forma parte de la tradicion en México donde se acostumbra a elaborar un altar donde se colocan fotos de los seres queridos ya fallecidos y es en este altar donde se colocan las ofrendas para ellos, comida, dulces, bebidas, flores,etc, a mí me encanta esta tradición así que decidí realizar un modelo de altar muy pequeño que sirva a modo de decoración en nuestra fiesta de Halloween.
Hice el tutorial un poco extenso para explicar de manera completa y fácil la elaboración de este trabajo, y lo mejor de todo es que lo hice con materiales de reciclaje, espero que lo disfruten, sin más que decirles damos inicio.
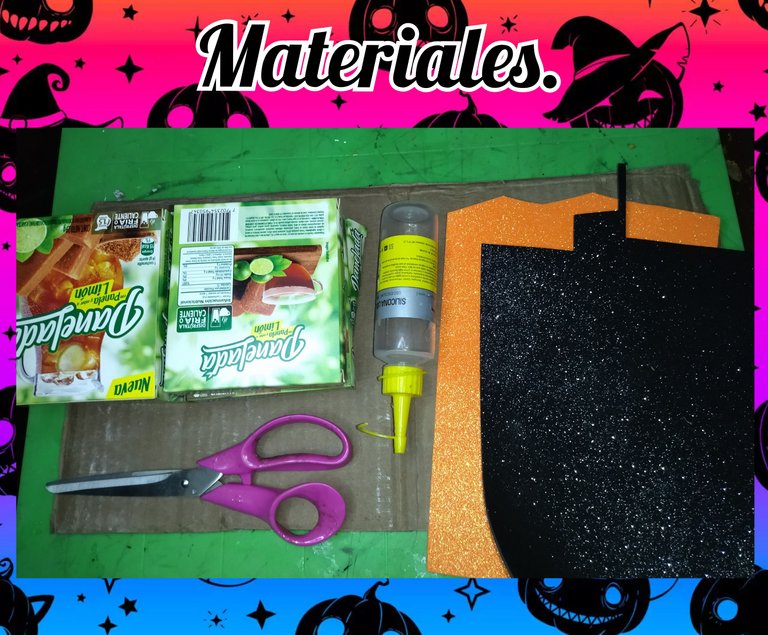
🌿🎃🌿 MATERIALES 🌿🎃🌿
 🌿🎃🌿 PROCESO CREATIVO 🌿🎃🌿
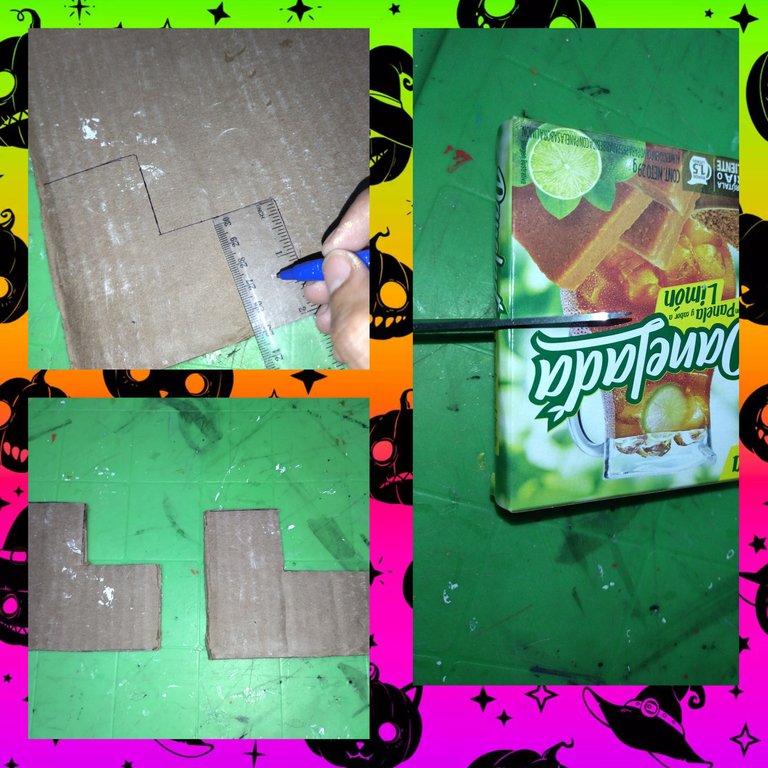
Primero marque una especie de (L) en el cartón de caja y recorte, se aprecia mejor la forma en la fotografía, se sacan dos piezas de igual tamaño y forma, el tamaño depende de cuan grande lo quieran realizar, con una cajita de esa de bebidas de sobre la pique a la mitad.
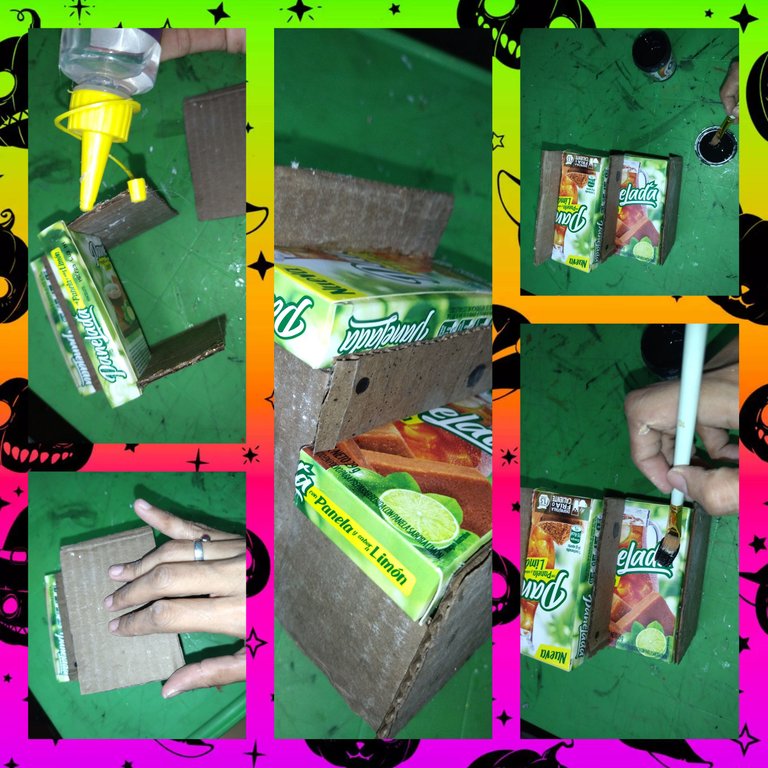
Aplique el silicón liquido en las piezas de cartón de caja que sacamos en el paso (1) y luego pegue en cada tramo una mitad de la cajita que picamos.
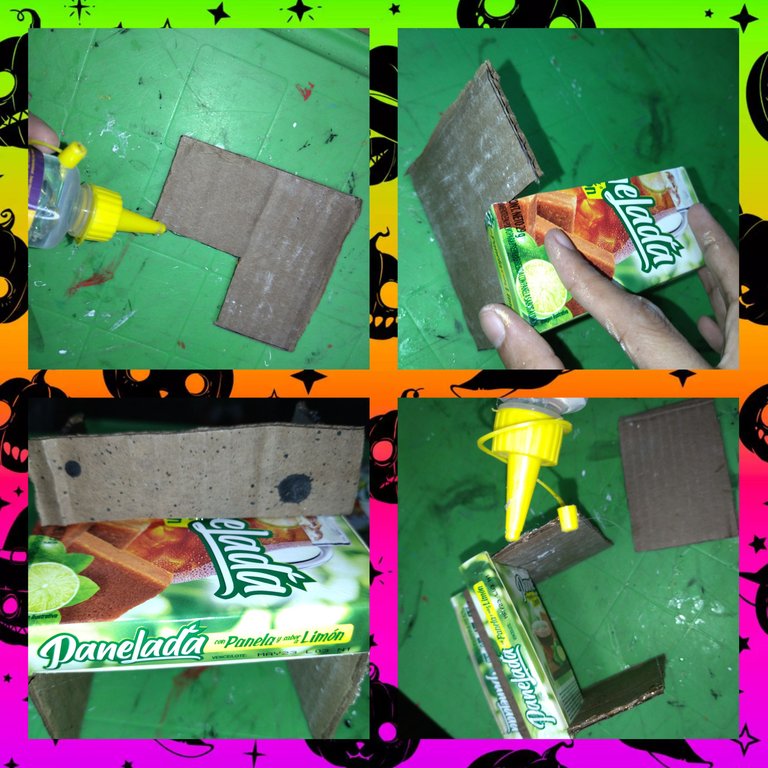
En el cartón de caja dibuje y recorte un trocito que servirá para tapar así como unir los dos tramos. (Véase la fotografía).
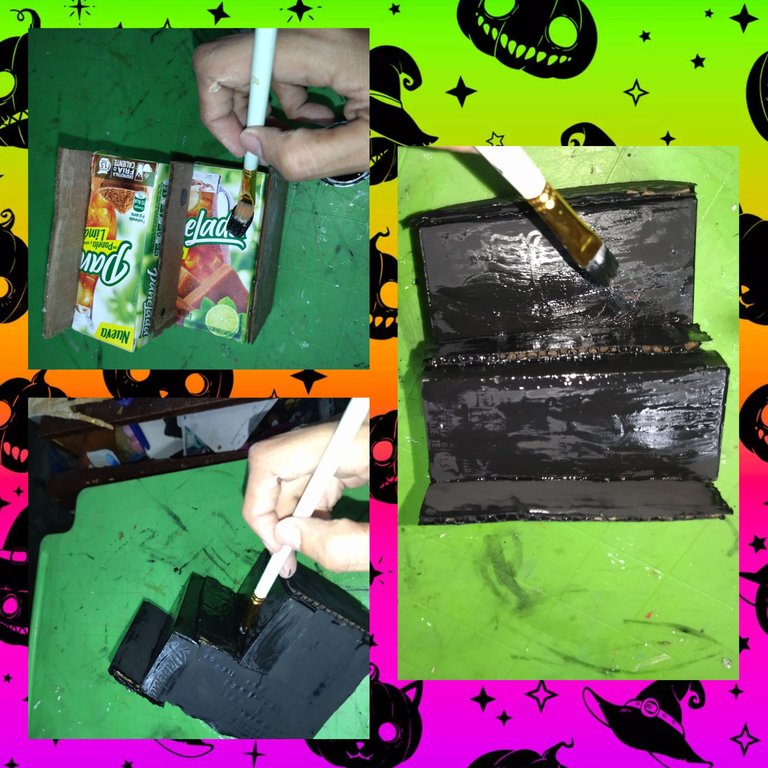
Una vez que haya secado, tome la pintura negra y un pincel plano y procedi a pintar la pieza que formamos.
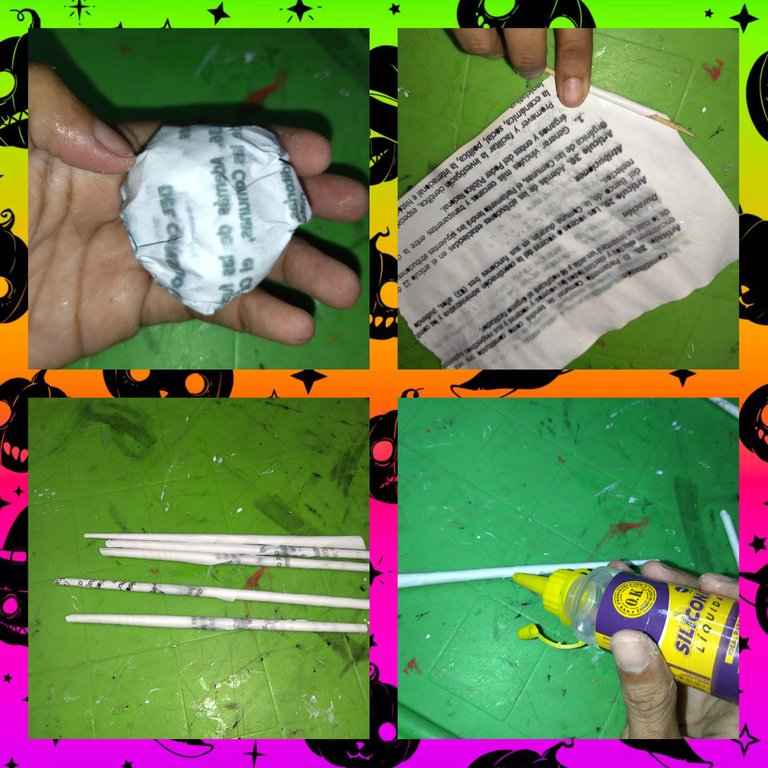
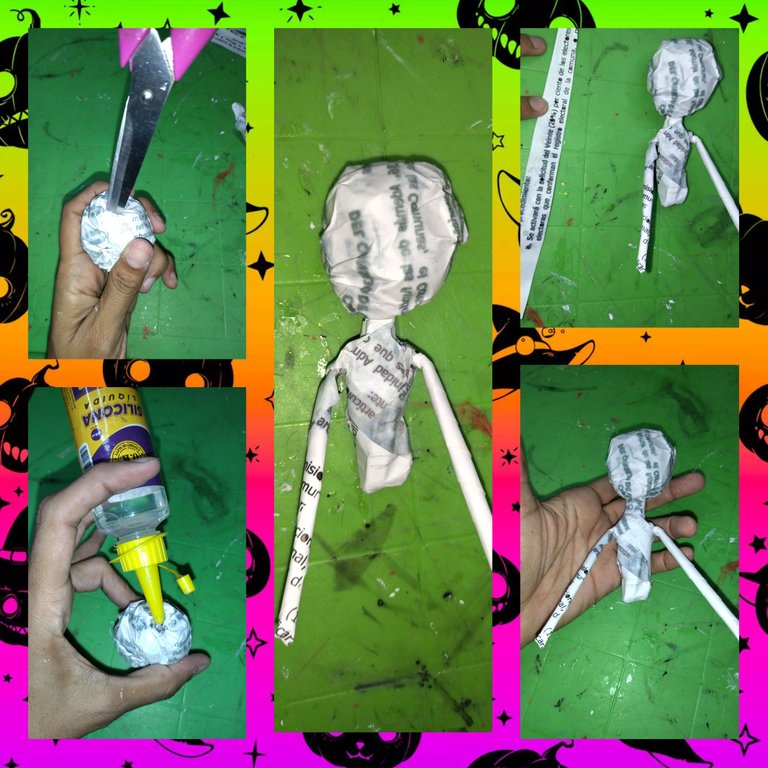
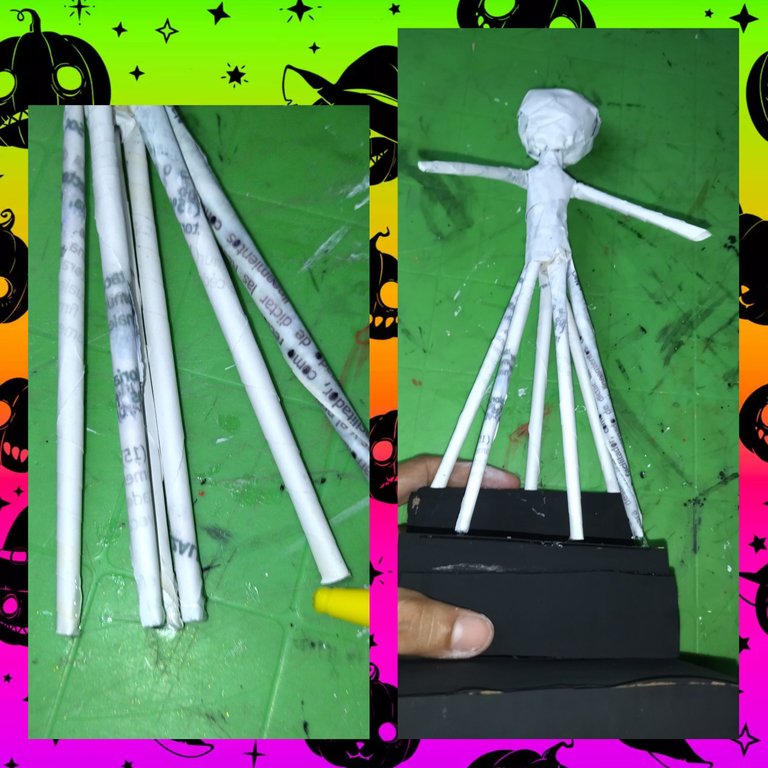
En este paso tome unas dos hojas de un cuaderno viejo ya usado y las enrolle hasta formar una pelota que se va a convertir en el rostro de mi personaje y lo fijé con un poco de silicón liquido.
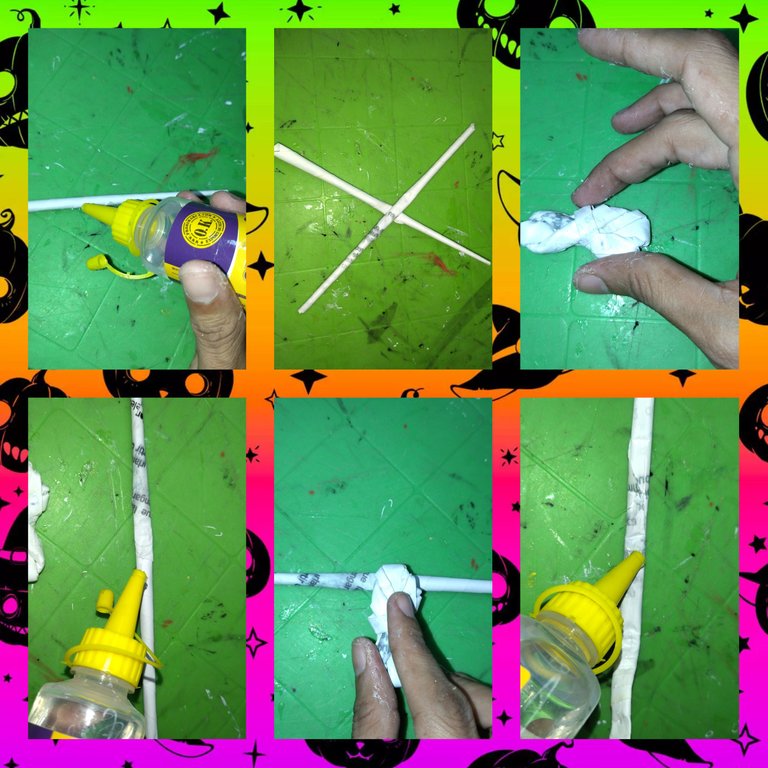
Después tome 10 páginas y las fui enrollando formando tubitos de papel con los que vamos a trabajar más adelante.
Tome dos tubitos de papel y los fui entrelazando hasta formar el torso de la muñeca y su cuello, después tome otro tubito más y le aplique Silicón líquido y pegue del torso.
A nuestra bola de papel que formamos, con ayuda de una tijera le hice un agujero el cuál rellene de silicón liquido y uno con la cabeza y dejo secar un rato.
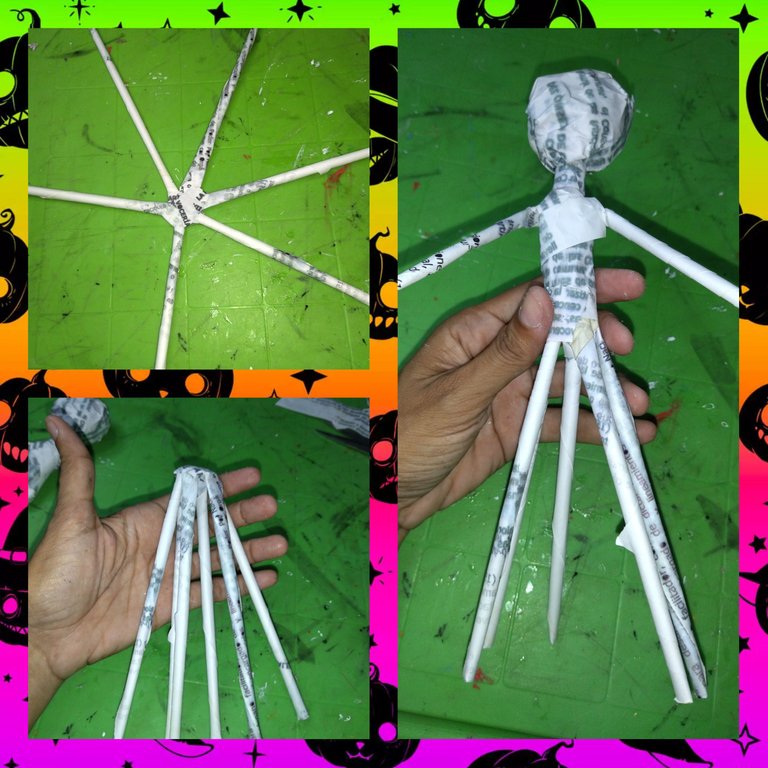
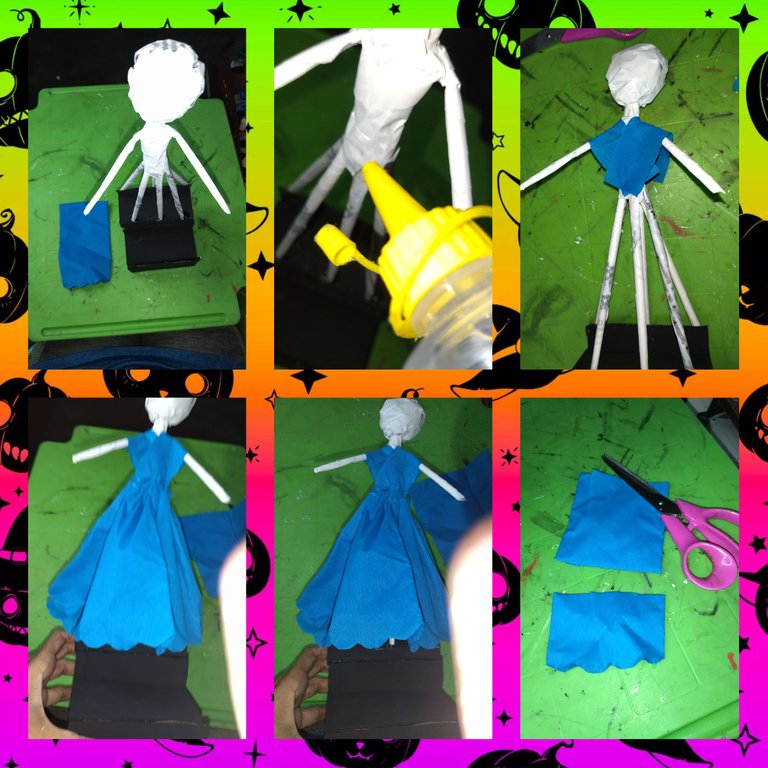
Ahora tome tres (3) tubitos de papel y los pegue con el silicón liquido, cuando seco los baje formando una especie de falda, luego uno está pieza de la falda con el torso, y para cubrir los detalles tome unas dos tiras de papel y les apliqué Silicón y forre la unión de las dos piezas.
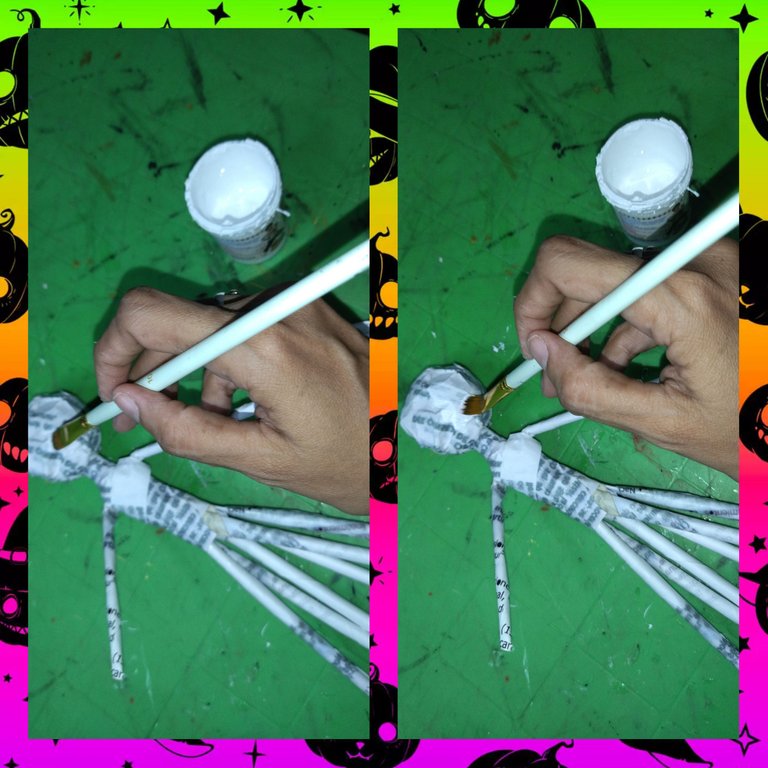
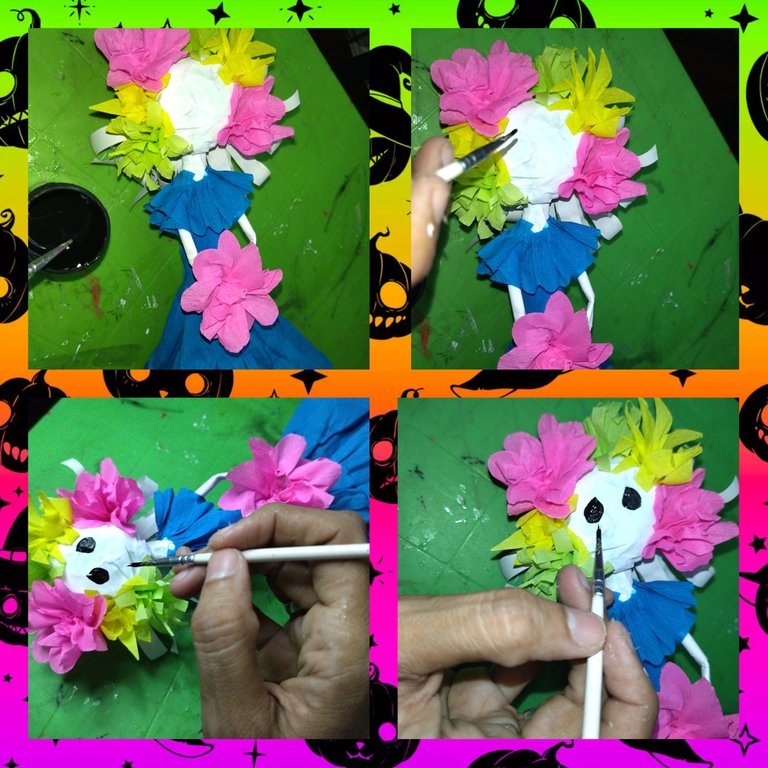
Ahora tome la pintura al frío Blanca y pinte la muñeca, del torso hacía a arriba.
Una vez seco le aplique Silicón líquido a las seis (6) patitas de la falda y pegamos a la pieza del altar.
Tome el papel crepé y forre el torso, es decir hice la parte de arriba del vestido, luego tome el papel crepé y lo pegue a la parte de abajo para formar la falda de el vestido.
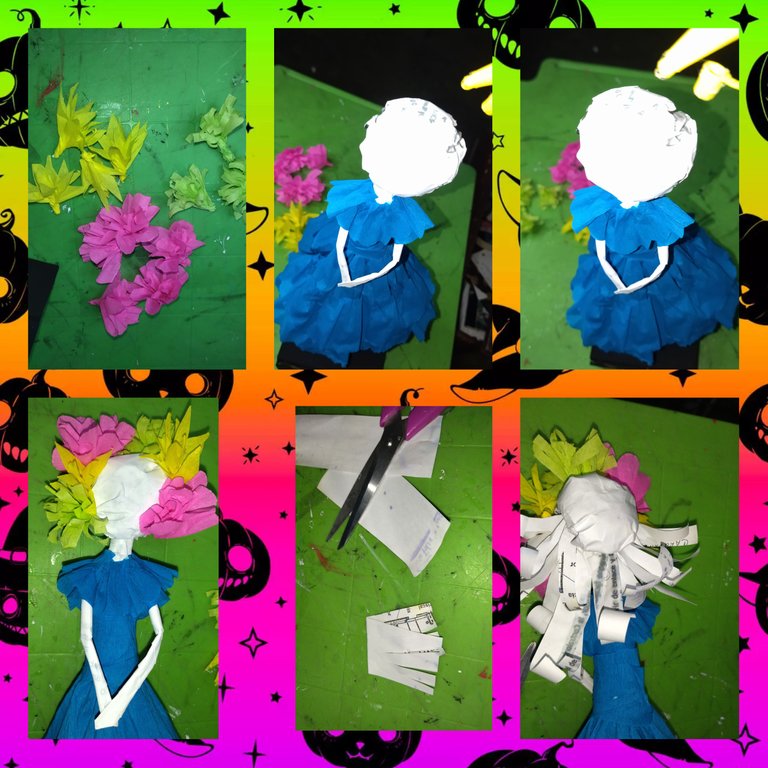
Realice otra bola de papel y la pegue en la parte trasera de la cabeza también le coloque una especie de cabellos con papel, así como también pegamos en la parte delantera de la cara algunas flores que previamente realice.
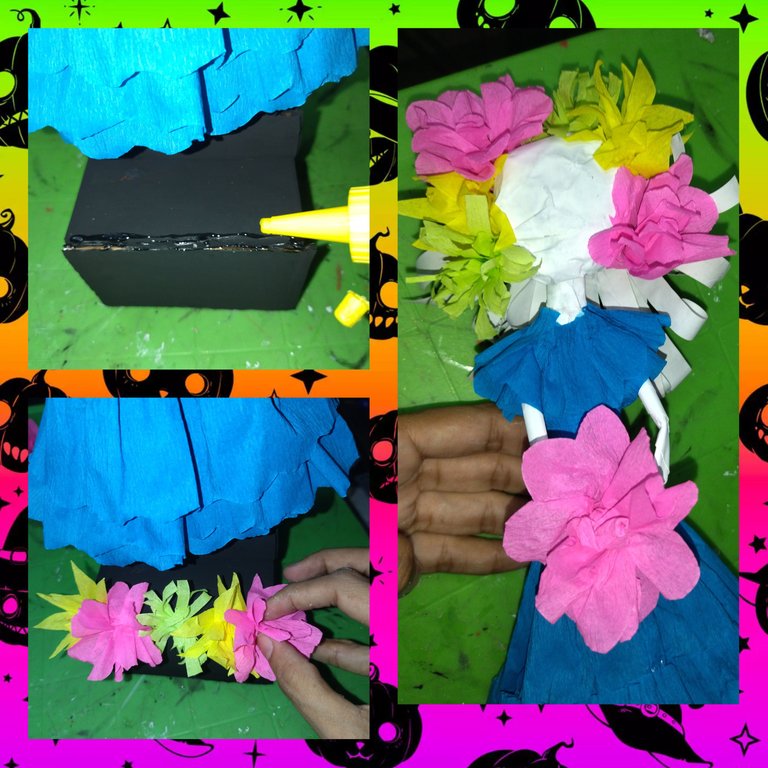
Aplique un poco de silicón liquido en el borde de un escalón del tramo y pegamos algunas flores, también le coloque una flor en las manos de la muñeca.
Ahora tome el pincel fino y la pintura negra y dibuje el rostro de la calavera.
Realice varios detalles en foami escarchado, como calabazas, flores y una corona.
Los pegue todos y listo hemos terminado.

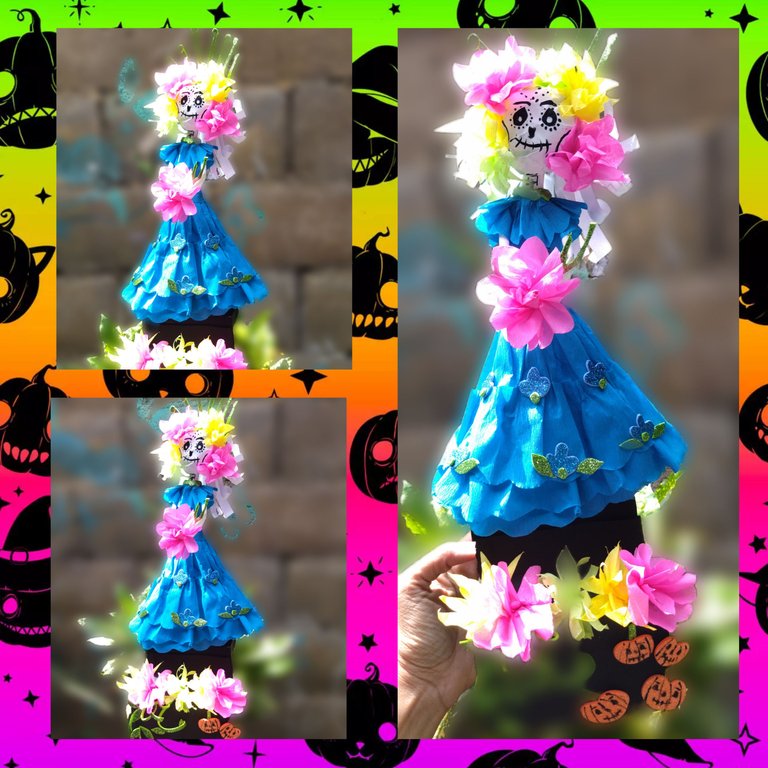
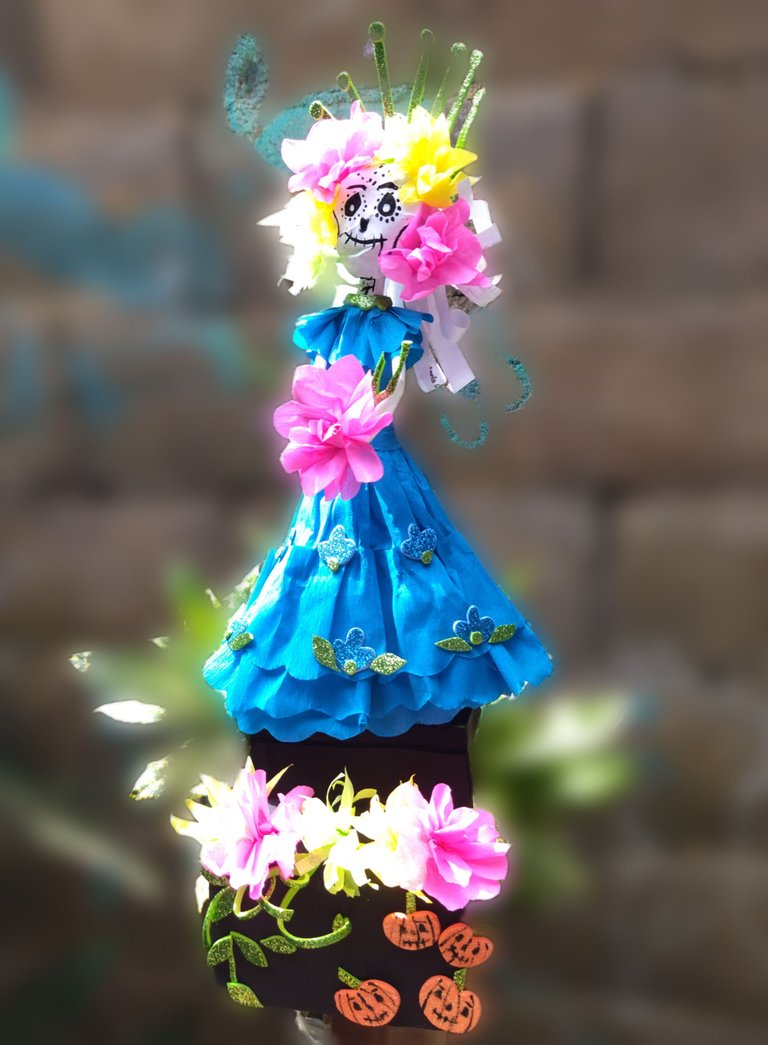
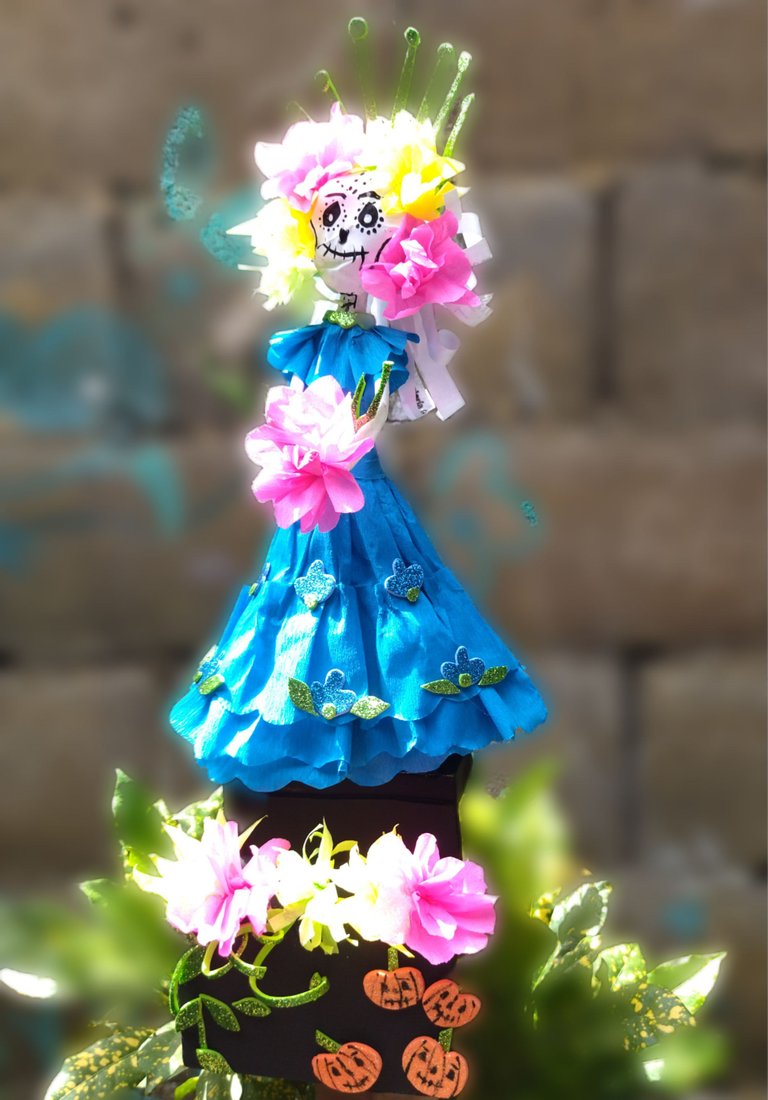
Listo hemos terminado nuestro altar decorativo, aquí les muestro el resultado final.
🌿🎃🌿 RESULTADO🌿🎃🌿
 🌿🎃🌿🎃🌿🎃🌿🎃
 🌿🎃🌿🎃🌿🎃🌿🎃
 🌿🎃🌿🎃🌿🎃🌿🎃
 🌿🎃🌿🎃🌿🎃🌿🎃
Espero que les haya gustado la elaboración de esta decoración que fue hecha con materiales de reciclaje, pero no es motivo para que se haga algo bonito al tiempo que contribuimos con el medio ambiente, aunque el proceso fue un poco largo, disfrute cada paso.
Por ahora es todo, me despido de ustedes mis hermosas abejitas hasta un siguiente post, no sin antes agradecerles de antemano por el apoyo que me brindan, a todos ustedes mil gracias.

🌿🎃🌿 ENGLISH 🌿🎃🌿
Cordial greetings to all the friends who make life within the platform, we are already close to the date of celebration of
#hallowen and although in my country, Venezuela this holiday is not celebrated as such, if I know that there are some who do take it as a flag to hold parties.
That is why today I bring you a tutorial of a beautiful and colorful mini skull altar, for those who do not know this is part of the tradition in Mexico where it is customary to make an altar where photos of deceased loved ones are placed and it is on this altar where offerings are placed for them, food, sweets, drinks, flowers, etc. I love this tradition so I decided to make a model of very small altar that serves as a decoration in our Halloween party.
I made the tutorial a bit long to explain in a complete and easy way the elaboration of this work, and the best of all is that I made it with recycled materials, I hope you enjoy it , without further ado, let's start.
🌿🎃🌿 MATERIALS 🌿🎃🌿
🌿🎃🌿 CREATIVE PROCESS 🌿🎃🌿
First mark a kind of (L) on the cardboard box and cut it out, the shape is better appreciated in the photograph, two pieces of the same size and shape are removed, the size It depends on how big you want to make it, with a box of that kind of drinks from about the chop to the middle.
Apply the liquid silicone on the pieces of cardboard from the box that we took out in step (1) and then glue one half of the box that we cut up on each section.
In the cardboard box, draw and cut out a piece that will serve to cover as well as join the two sections. (See photo).
Once it has dried, take the black paint and a flat brush and proceed to paint the piece we formed.
In this step I took about two sheets of an old notebook already used and rolled them up to form a ball that is going to become the face of my character and I fixed it with a little of liquid silicone.
Then I took 10 pages and rolled them up into little paper tubes that we are going to work with later.
Take two paper tubes and intertwine them until they form the torso of the doll and its neck, then take another tube and apply liquid silicone to it and paste the torso.</ div>
To our ball of paper that we formed, with the help of scissors I made a hole which I filled with liquid silicone and one with the head and let it dry for a while.
Now take three (3) paper tubes and paste them with the liquid silicone, when dry lower them forming a kind of skirt, then one is the piece of the skirt with the torso , and to cover the details I took two strips of paper and applied Silicone and lined the union of the two pieces.
Now take the White cold paint and paint the doll, from the torso up.
Once dry, apply liquid silicone to the six (6) legs of the skirt and glue it to the altar piece.
Make another ball of paper and paste it on the back of the head. I also placed a kind of hair with paper, as well as we glued on the front part of the face some flowers that you previously made.
Apply a little liquid silicone on the edge of a step of the section and glue some flowers, also put a flower on the doll's hands.
Now take the fine brush and black paint and draw the face of the skull.
Make various details in frosted foami, such as pumpkins, flowers and a crown.
Paste them all and we're done.
🌿🎃🌿 RESULT🌿🎃🌿
🌿🎃🌿🎃🌿🎃🌿🎃
🌿🎃🌿🎃🌿🎃🌿🎃
🌿🎃🌿🎃🌿🎃🌿🎃
I hope you liked the elaboration of this decoration that was made with recycled materials, but it is not a reason to do something nice while contributing to the environment, although the process was a bit long, enjoy every step.
That's all for now, I say goodbye to you my beautiful bees until a next post, but not before thanking you in advance for the support you give me, thank you all.< /div>