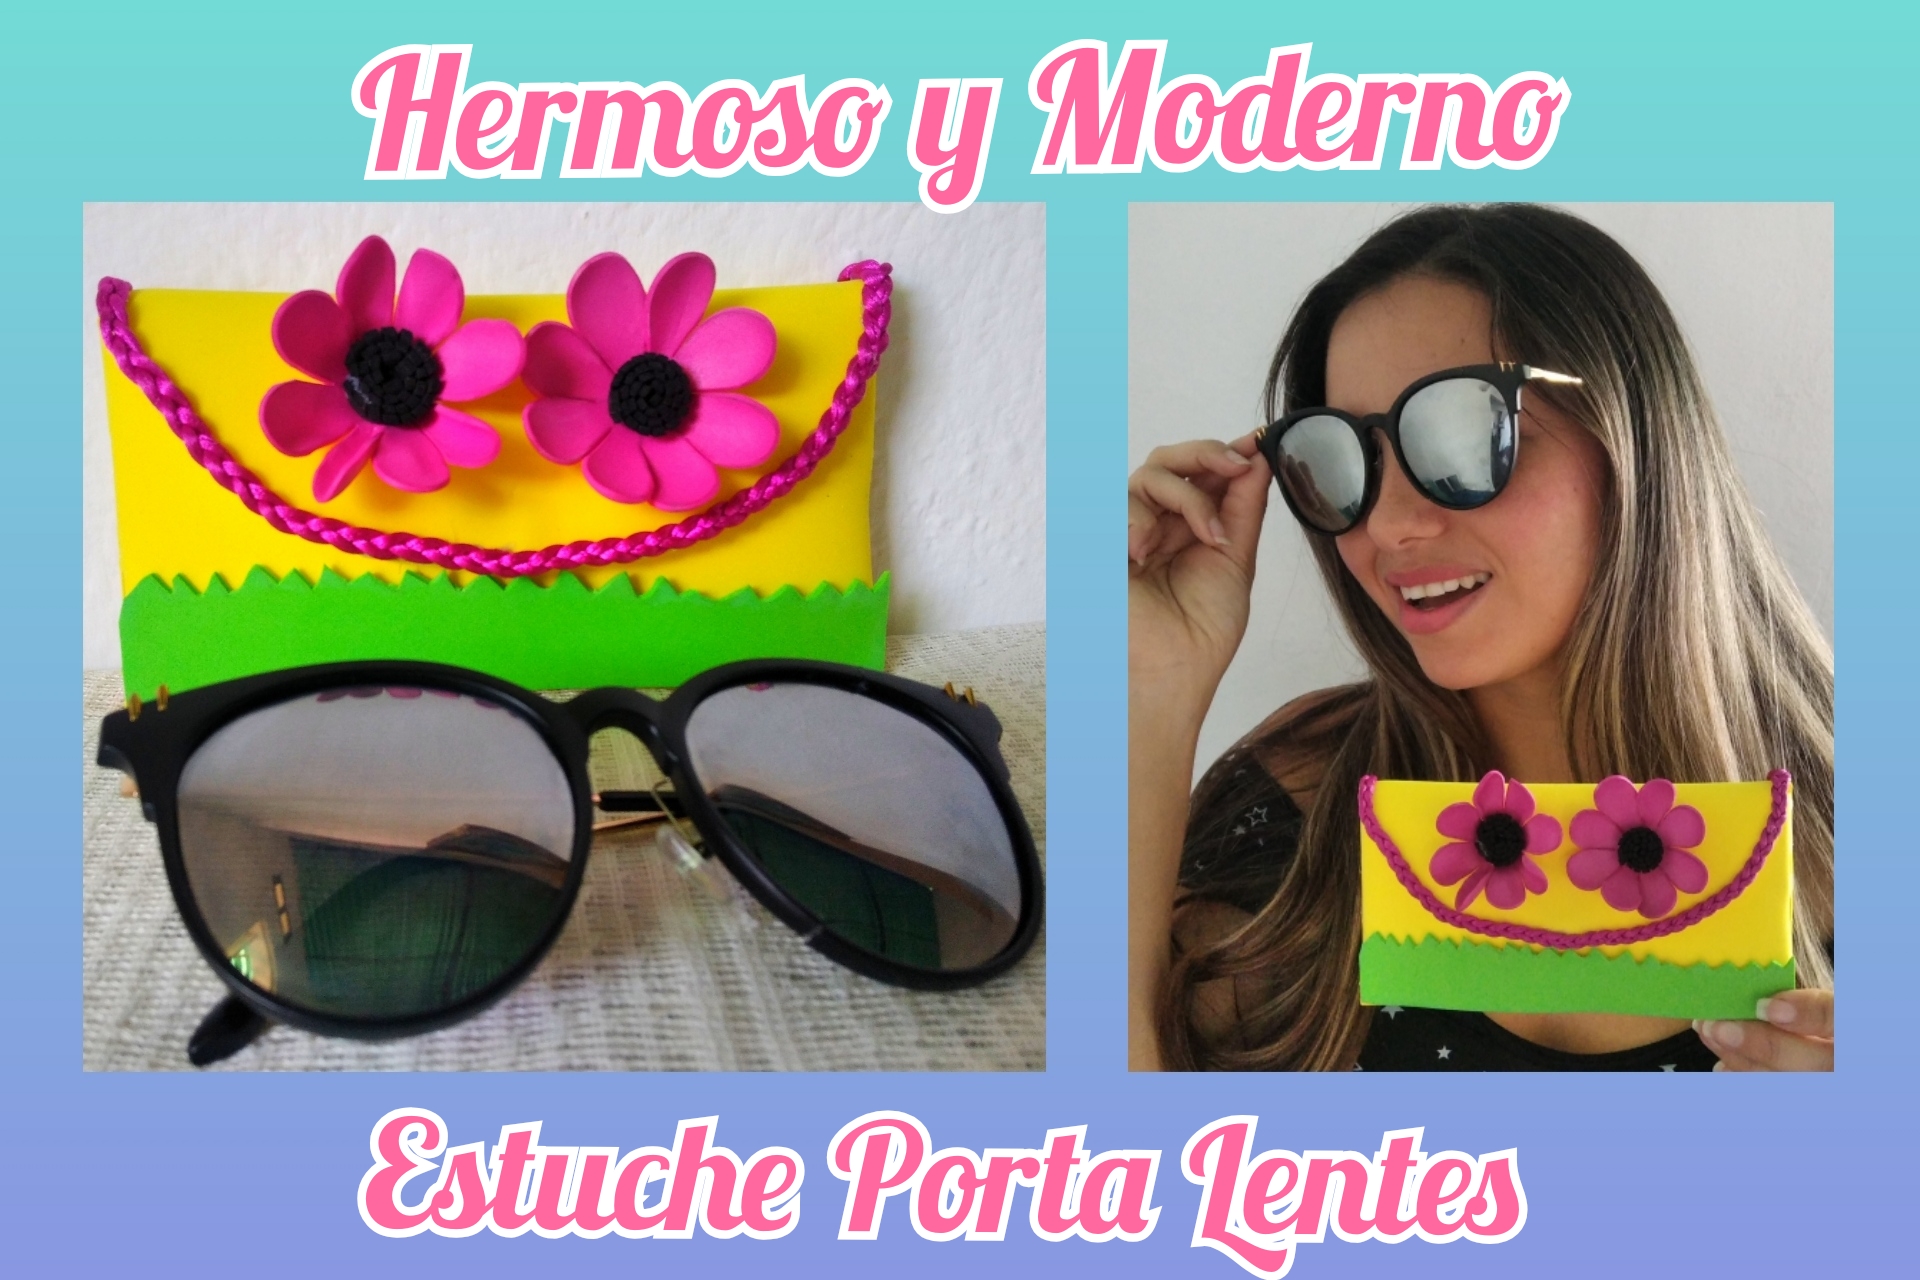
Hecho a Mano✋ Crea un hermoso Estuche para Lentes 🕶️ | Handmade✋ Create a beautiful Lens Case 🕶️

in #hive-1305603 years ago

Polish_20220317_141548470.jpg

Saludos para todos mis Amigos innovadores de esta creativa da comunidad #Hivediy 👩‍🎨🎊🎉

Greetings to all my innovative Friends of this creative #Hivediy community 👩‍🎨🎊🎉


15-51-12-Separadores-22-768x123.png

"Hoy es un buen día para empezar" con esta frase motivadora doy inicio a este post, porque cada mañana que abrimos nuestros ojos y vemos la luz del día, es un buen día para comenzar, es otra oportunidad para aprender, para enseñar, para ser felices y dejar lo malo atrás, sin rencores y sin cargas pasadas, viviendo la vida al máximo y disfrutando cada momento sea bueno o malo pero cada momento es fantástico mientras tengamos vida y salud.

"Today is a good day to start" with this motivating phrase I start this post, because every morning that we open our eyes and see the light of day, it is a good day to start, It is another opportunity to learn, to teach, to be happy and leave the bad behind, without grudges and without past burdens, living life to the fullest and enjoying every moment, good or bad, but every moment is fantastic as long as we have life and health.

Ahora sí amigos Hivers les cuento que el fin de semana viaje con mi esposo y unos amigos a la Colonia Tovar un mágico lugar de nuestra amada Venezuela, estando allí el sol era terrible (parecía sol de playa), entonces mi esposo me regaló unas lindas gafas de sol, estas venían en una bolsita algo suave y delicada por lo que quise hacer un estuche más resistente para mis nuevos lentes y de esta manera protegerlos y se que así no se me rayarán cuando los guarde en mi cartera.

Now yes Hivers friends I tell you that on the weekend I traveled with my husband and some friends to Colonia Tovar a magical place in our beloved Venezuela, being there the sun was terrible (it seemed beach), then my husband gave me some nice sunglasses, they came in a somewhat soft and delicate bag so I wanted to make a more resistant case for my new glasses and in this way protect them and I know that they will not be scratched when keep them in my wallet.

15-51-12-Separadores-22-768x123.png

🕶️ Estuche para mis nuevos lentes. 🕶️
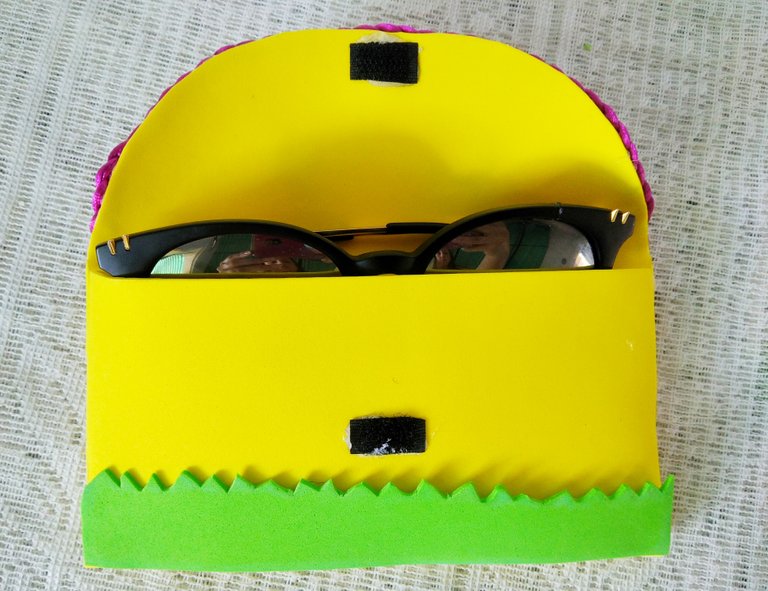
🕶️ Case for my new glasses. 🕶️


IMG_20220317_113815.jpg

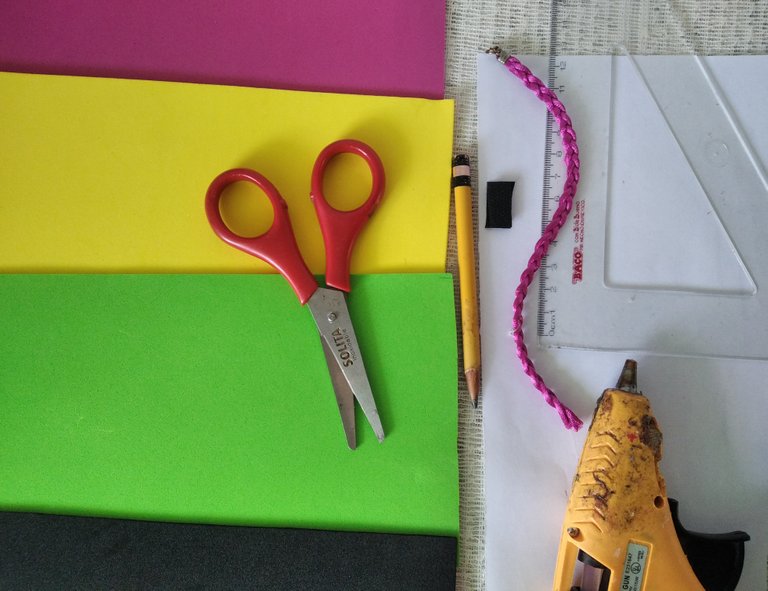
Para la elaboración de este estuche para lentes usé los materiales que les muestro a continuación.

To make this lens case I used the materials shown below.

15-51-12-Separadores-22-768x123.png

Materiales.

Materials.


IMG_20220317_112817.jpg

🕶️ Foami amarillo.
🕶️ Foami fucsia.
🕶️ Foami verde.
🕶️ Foami negro.
🕶️ Cierre mágico.
🕶️ Cinta trenzada.
🕶️ Silicón en barra.
🕶️ Lápiz de grafito.
🕶️ Hija blanca.
🕶️ Tijera.
🕶️ Pistola de silicón.
🕶️ Regla.

🕶️ Yellow foami.
🕶️ Fuchsia Foami.
🕶️ Green Foami.
🕶️ Foami black.
🕶️ Magic closure.
🕶️ Braided ribbon.
🕶️ Silicone in bar.
🕶️ Graphite pencil.
🕶️ White daughter.
🕶️ Scissor.
🕶️ Silicone gun.
🕶️ Rule.

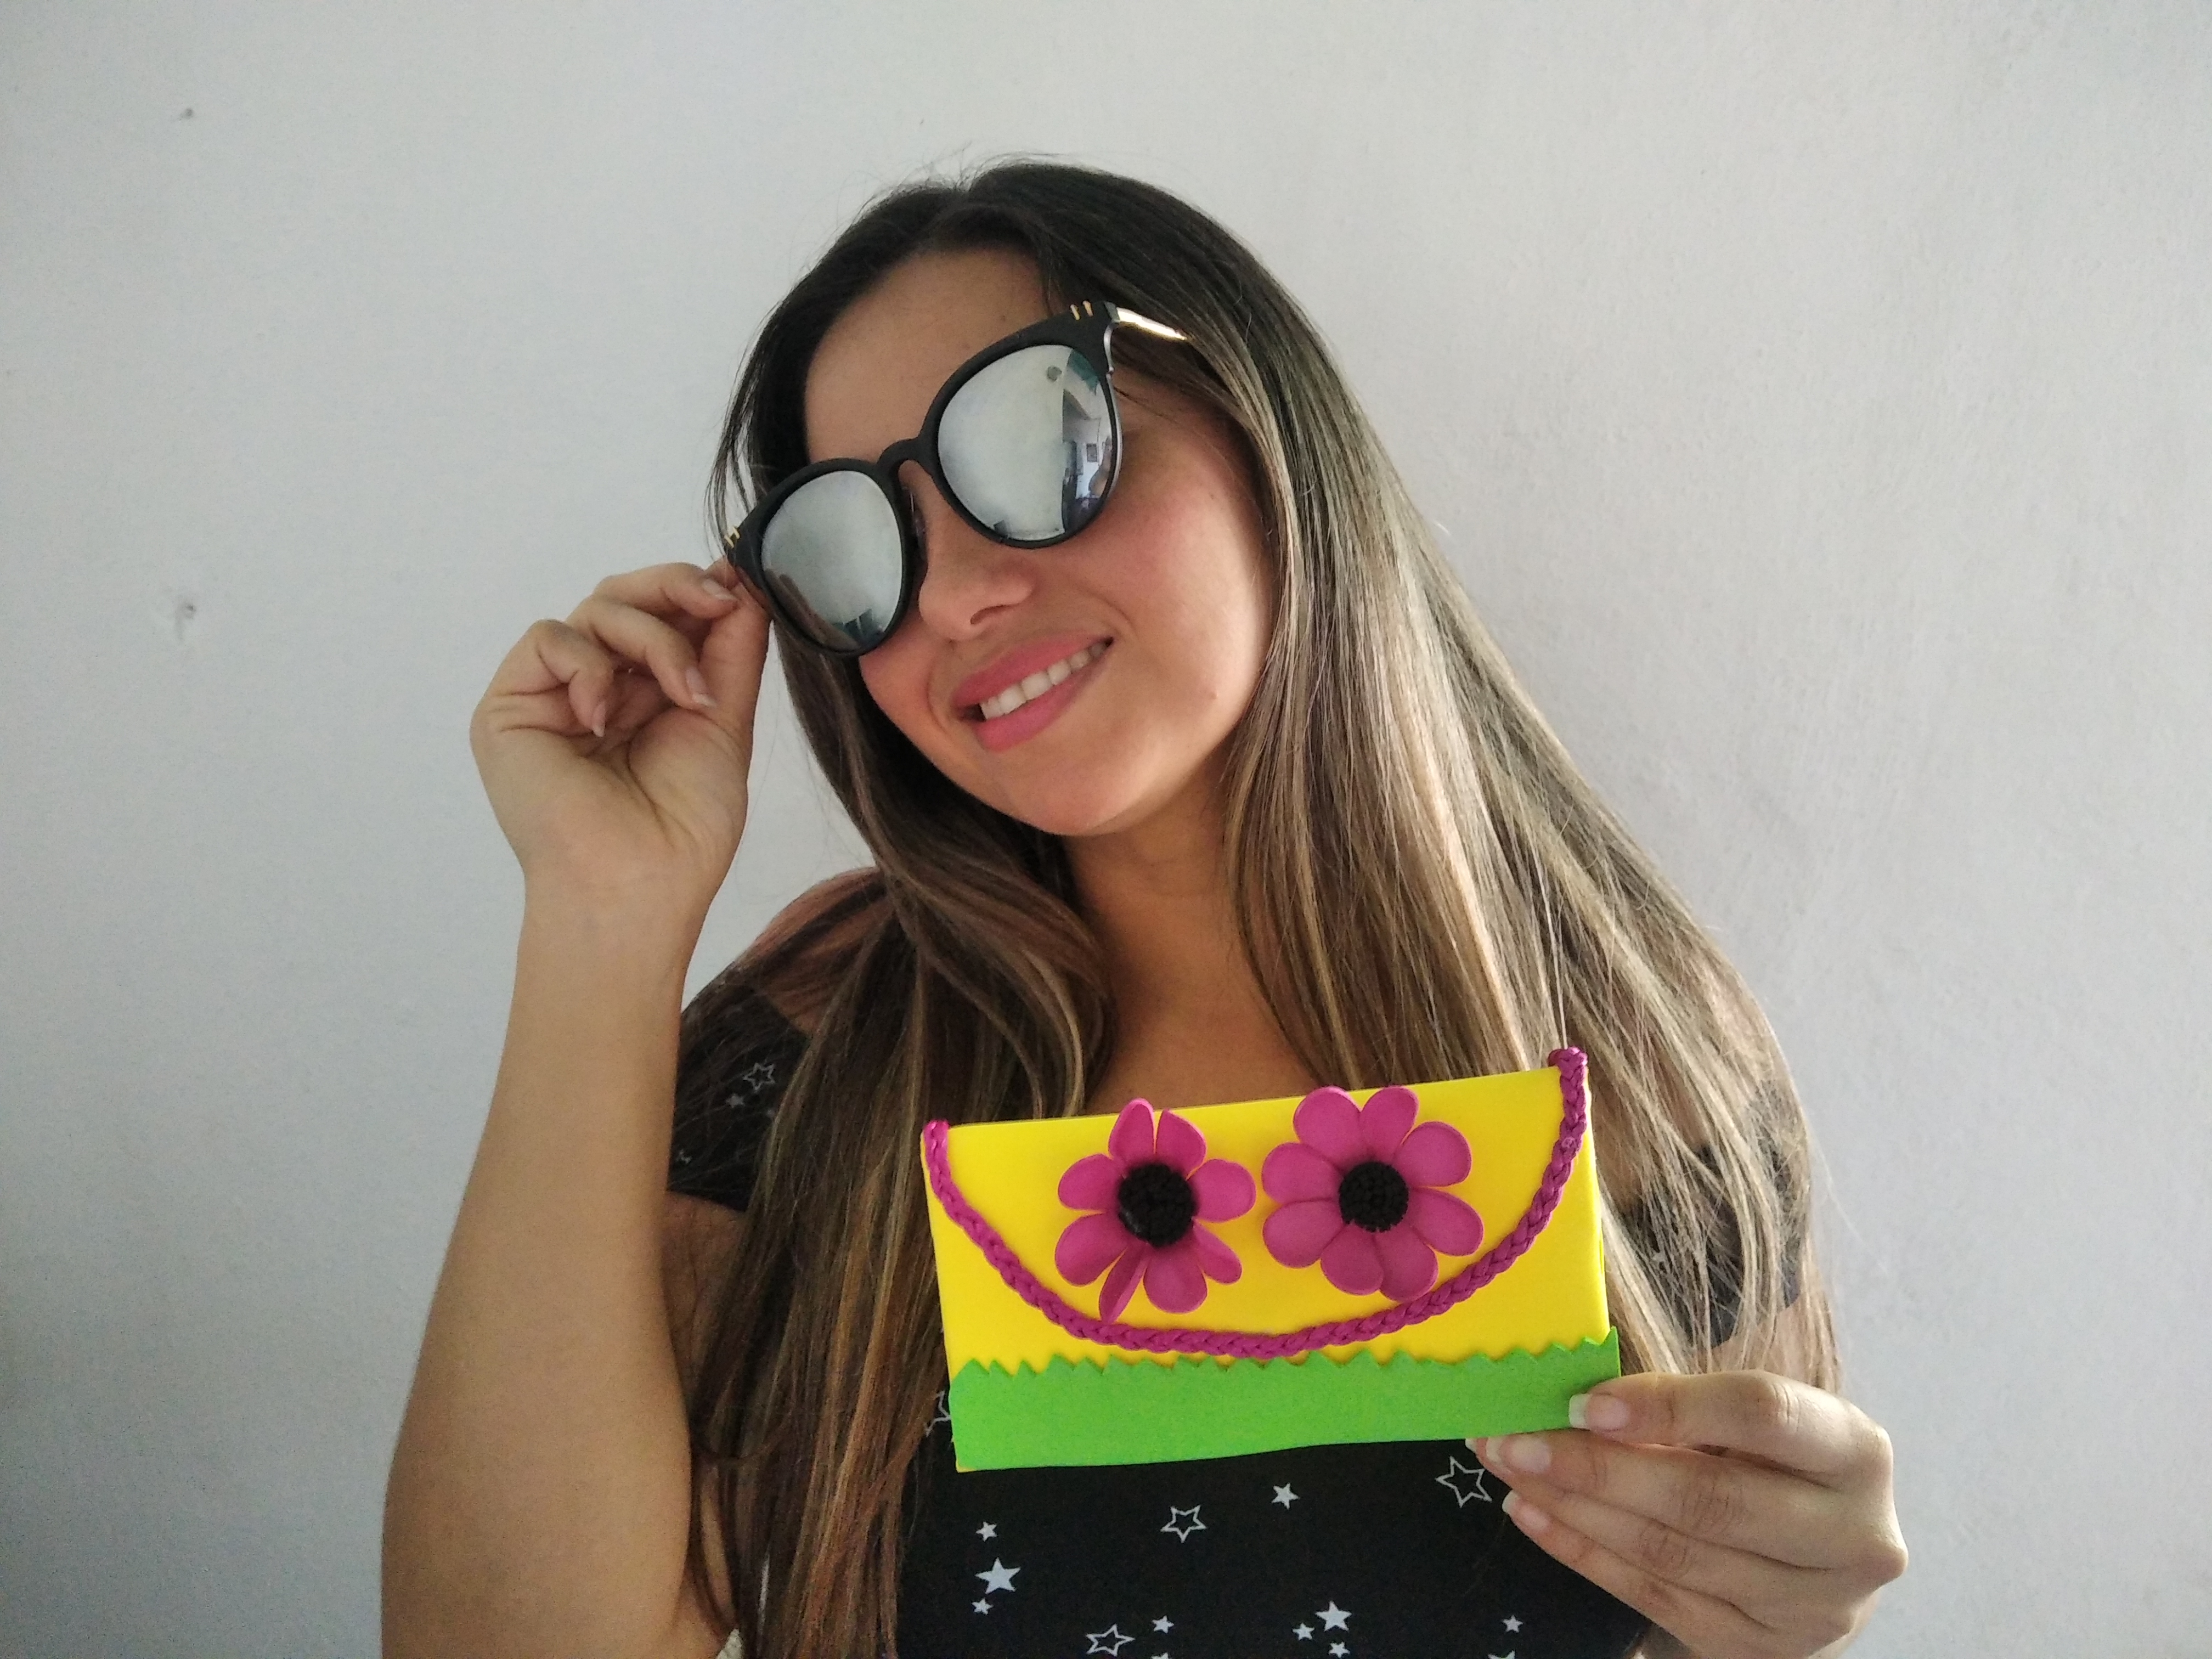
Luego de registrar todos los materiales vamos a ver cómo fue la elaboración de este lindo porta lentes que he elaborado de manera rápida y divertida, además he gastado poco dinero y como siempre digo lo más importante es el resultado final, cuando obtenemos algo que necesitamos y es hecho con nuestras propias manos, es lo máximo ver las bellezas que nosotros mismos podemos hacer.

After registering all the materials we are going to see how was the elaboration of this cute glasses holder that I have elaborated in a fast and fun way, I have also spent little money and as I always say the most important thing is the final result, when we get something we need and it is made with our own hands, it is the best to see the beauties that we ourselves can do.
IMG_20220317_110432.jpg


15-51-12-Separadores-22-768x123.png

Elaboración del porta lentes.

Producing the lens holder.


Paso 1.

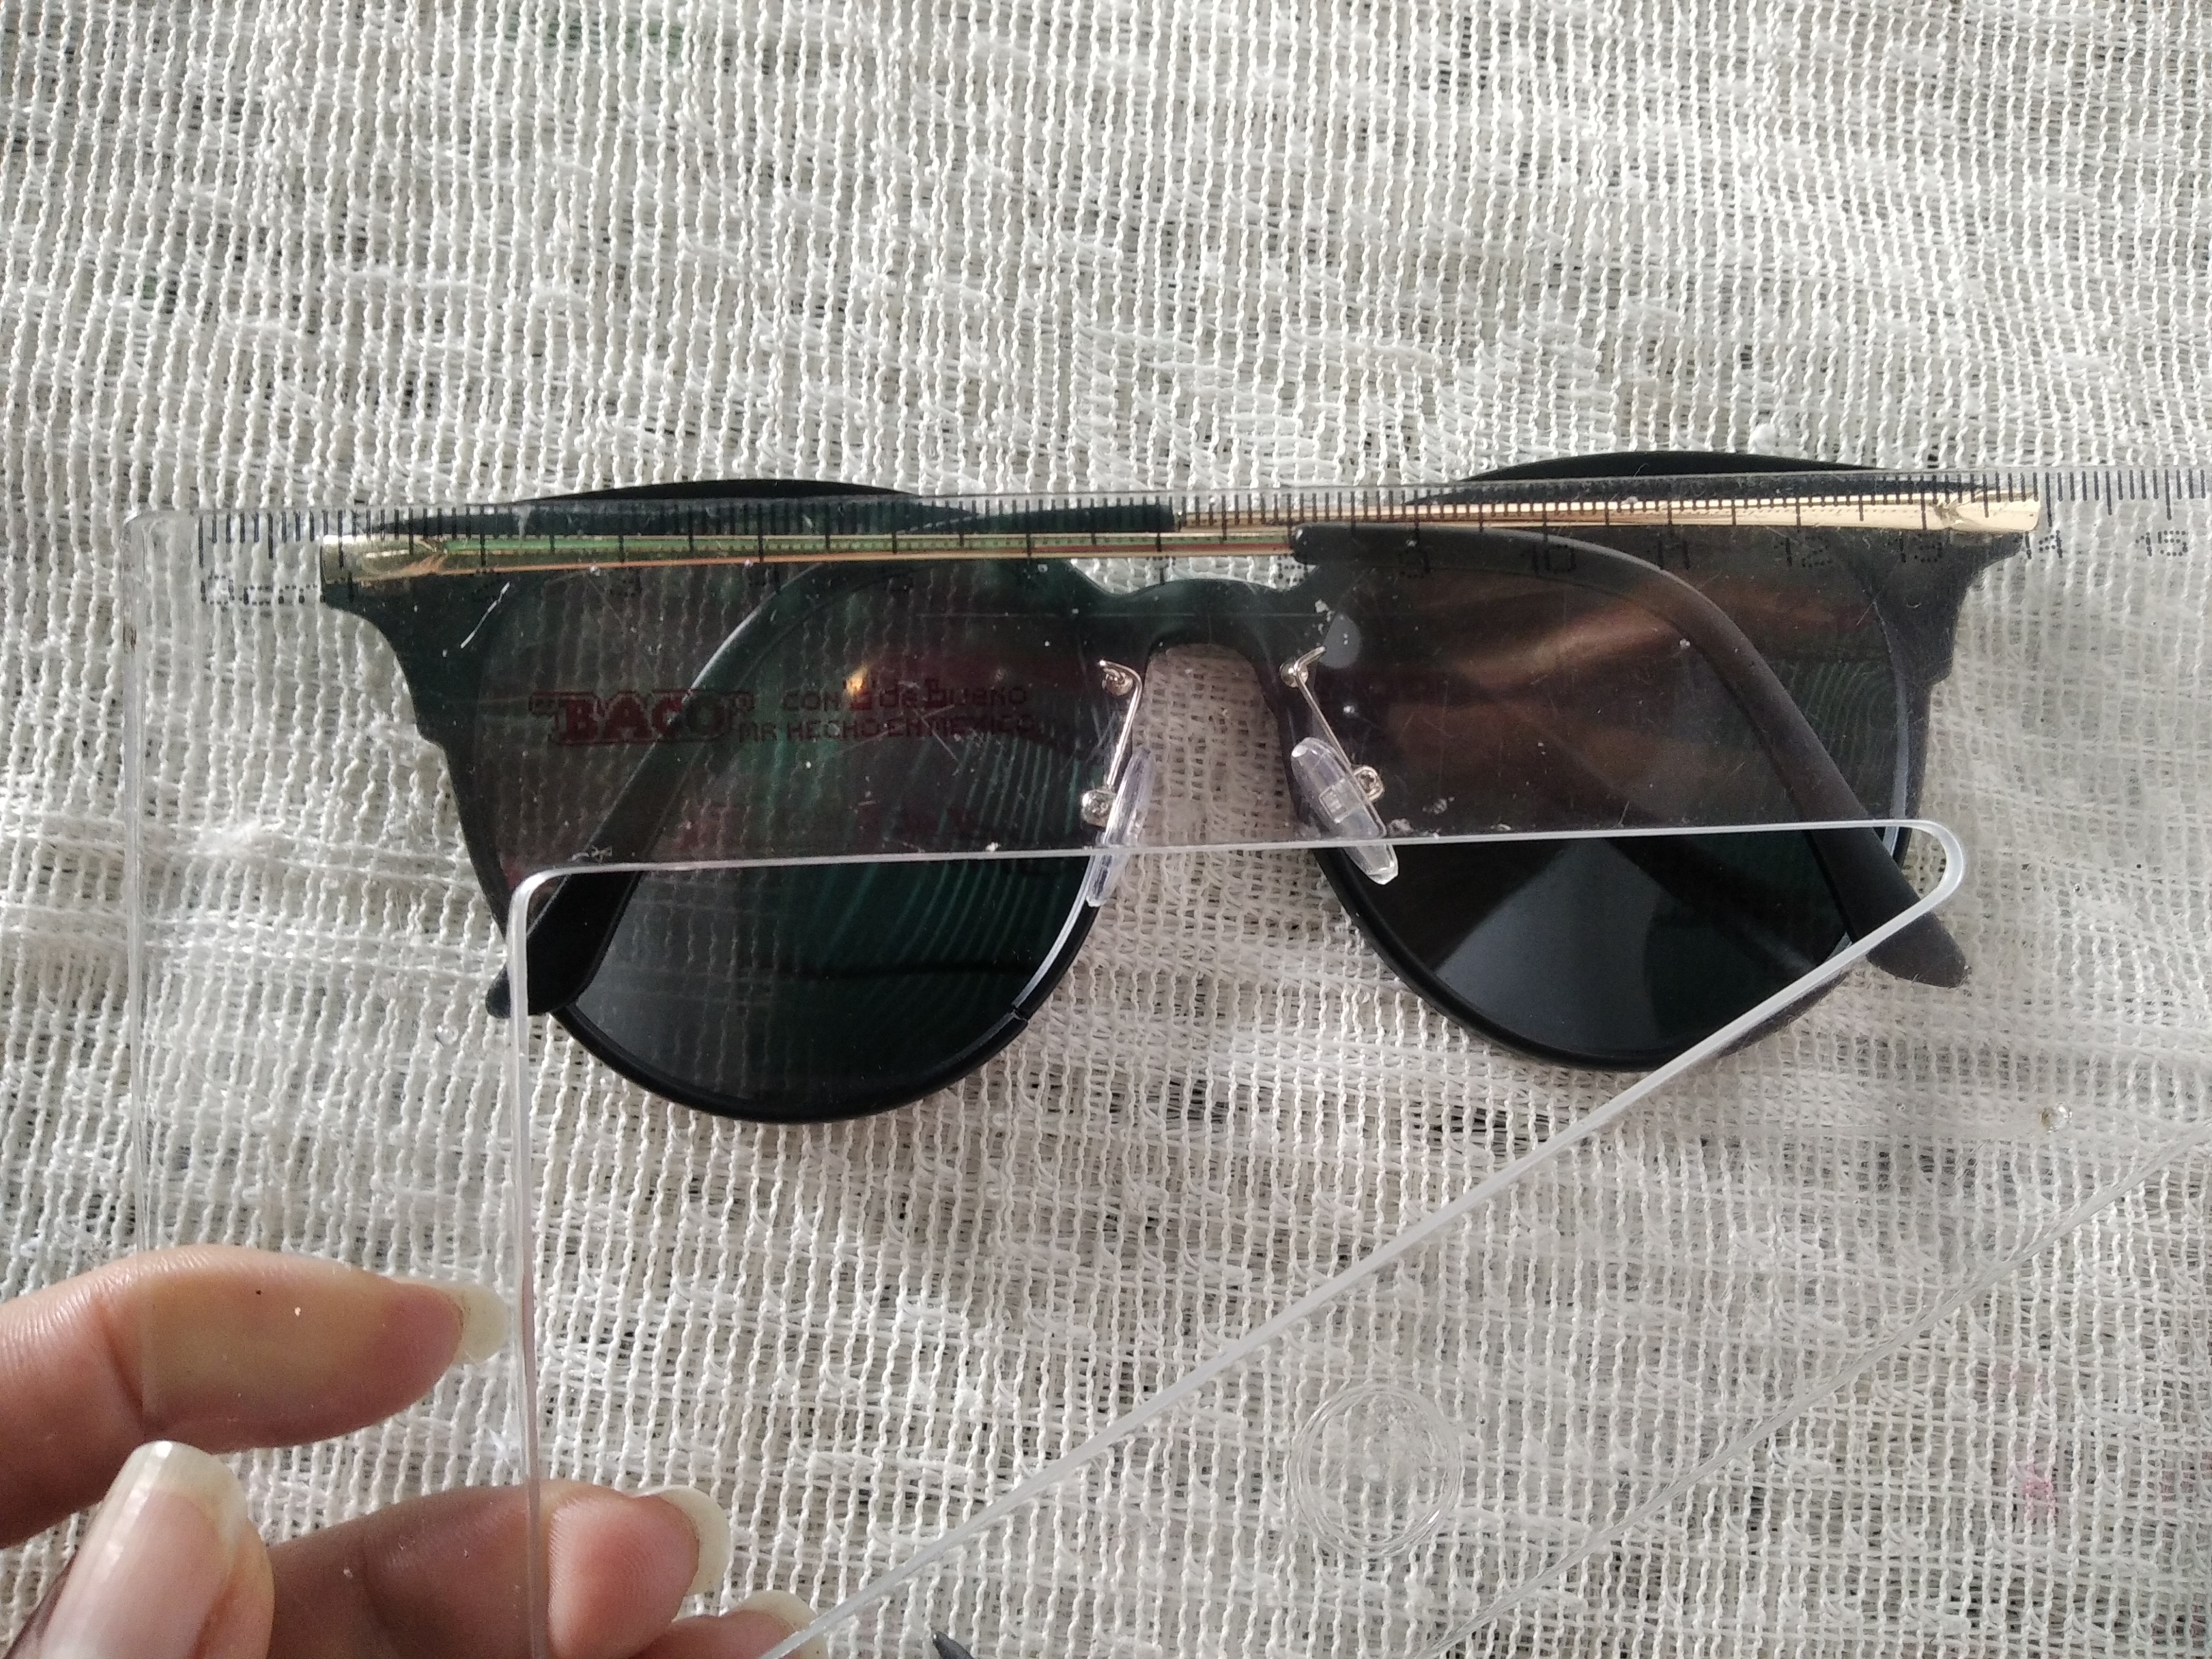
Comenzamos la elaboración de este lindo estuche para lentes midiendo nuestros lentes para saber el ancho que tienen y el ancho el cual realizaremos el estuche. Colocamos la regla sobre los lentes y vemos que miden aproximadamente 15 cm.

Step 1.

We start the elaboration of this cute case for glasses by measuring our glasses to know the width they have and the width which we will make the case. We place the ruler on the glasses and see that they measure approximately 15 cm.
IMG_20220317_085823.jpg

Paso 2.

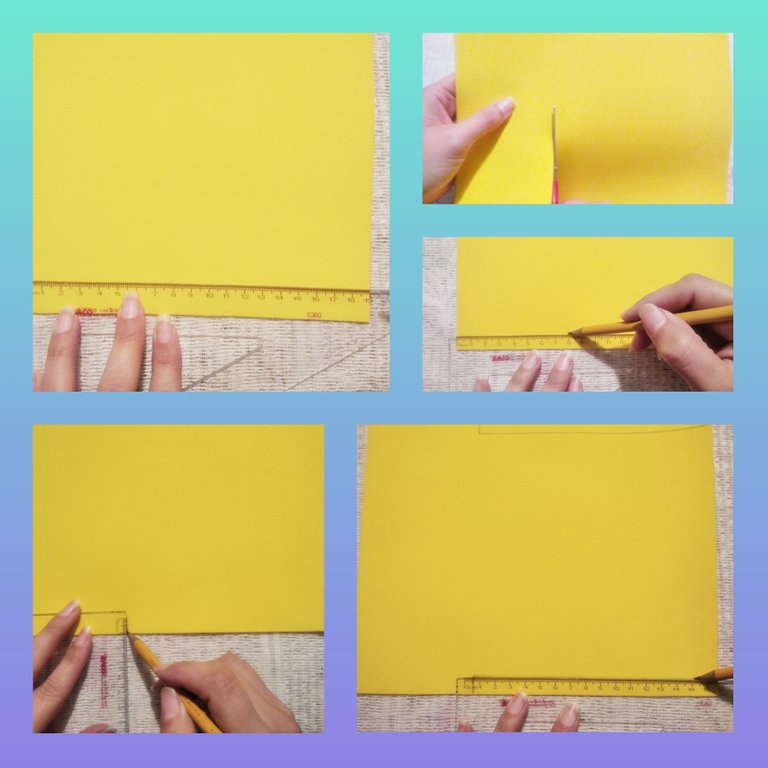
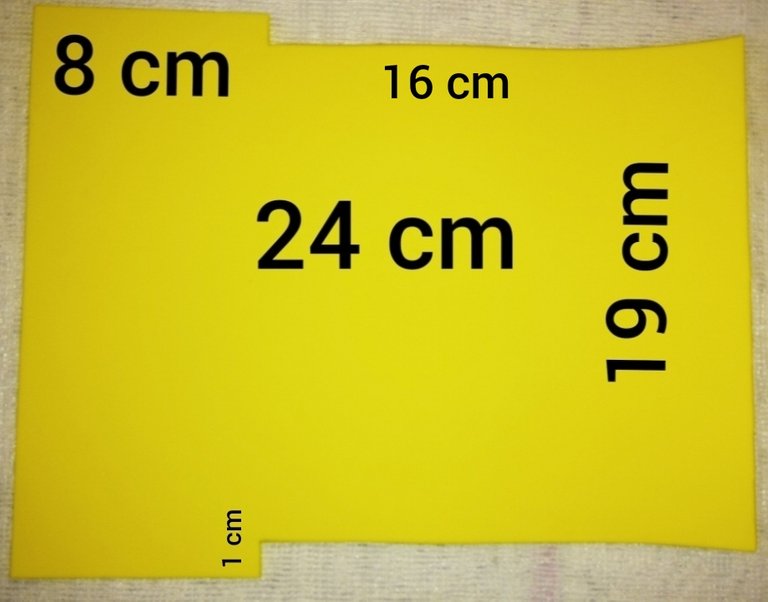
Ahora tomando el foami amarillo que es el color que escogí para este estuche, la medida del foami es de 24 cm de largo y es excelente, justo la medida que necesitamos. Como nuestros lentes midiendo de ancho 15 cm, nosotros haremos el estuche de 19 cm de ancho así dejamos 2 cm de cada lado y nuestros lentes podrán entrar con facilidad en el estuche. Con la regla medimos los 19 cm de ancho y cortamos el resto del foami. Luego que tengamos la medida de 24 cm de largo por 19 cm de ancho vamos a medir 16 cm por 1 cm de ancho, los 8 cm restantes es para hacer la parte de adentro del estuche, es como un sobre lo que haremos. Entonces de cada lado con la regla medimos los 16 cm por 1 cm.

Step 2.

Now taking the yellow foami, which is the color I chose for this case, the measurement of the foami is 24 cm long and it is excellent, just the measure we need. As our glasses measure 15 cm wide, we will make the case 19 cm wide so we leave 2 cm on each side and our glasses can easily fit into the case. With the ruler we measure the 19 cm width and cut the rest of the foami. After we have the measurement of 24 cm long by 19 cm wide we are going to measure 16 cm by 1 cm wide, the remaining 8 cm is to make the inside of the case, it is like an envelope what we will do. So on each side with the ruler we measure 16 cm by 1 cm.
Polish_20220317_073327289.jpg

Paso 3.

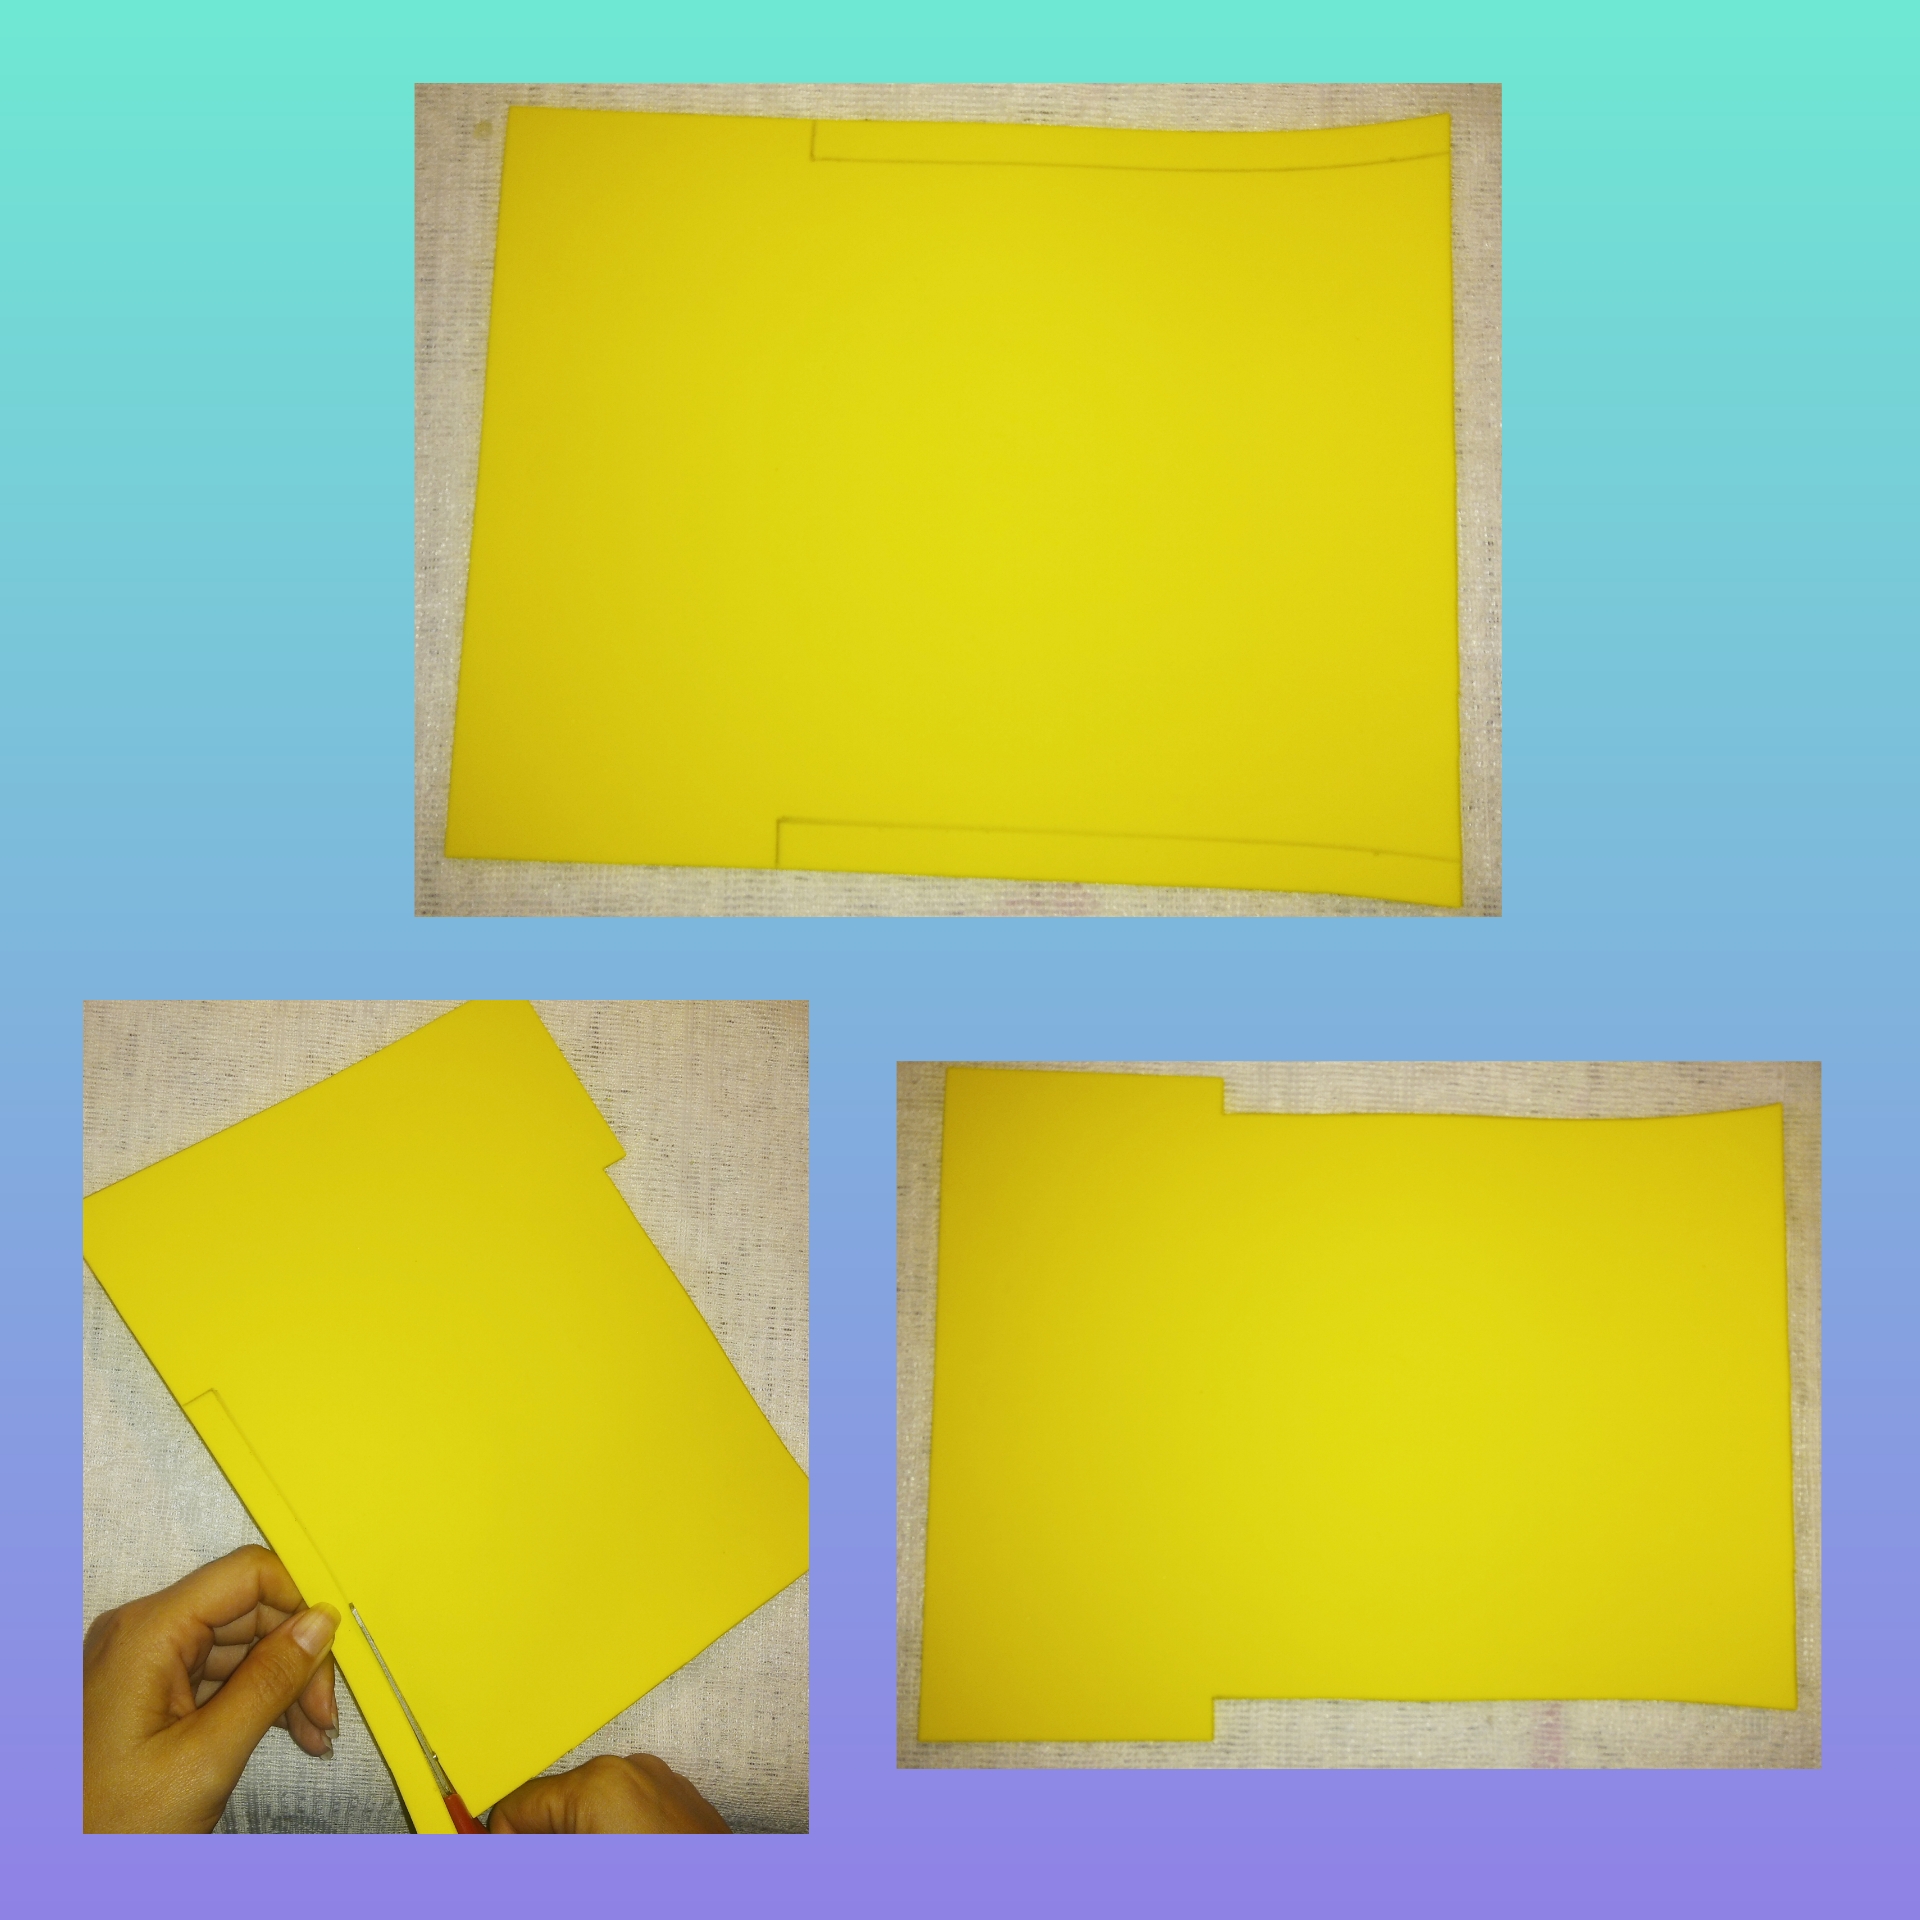
Listas las medidas vamos a cortar por toda la raya que hicimos como se muestra en la imágen.

Step 3.

Ready the measurements we are going to cut along the entire stripe that we made as shown in the image.
Polish_20220317_073642372.jpg

El foami nos quedará de esta manera, con estas medidas, ya listo para hacer nuestro sobre o estuche.

The foami will be this way, with these measurements, ready to make our envelope or case.
Polish_20220317_091644046.jpg

Paso 4.

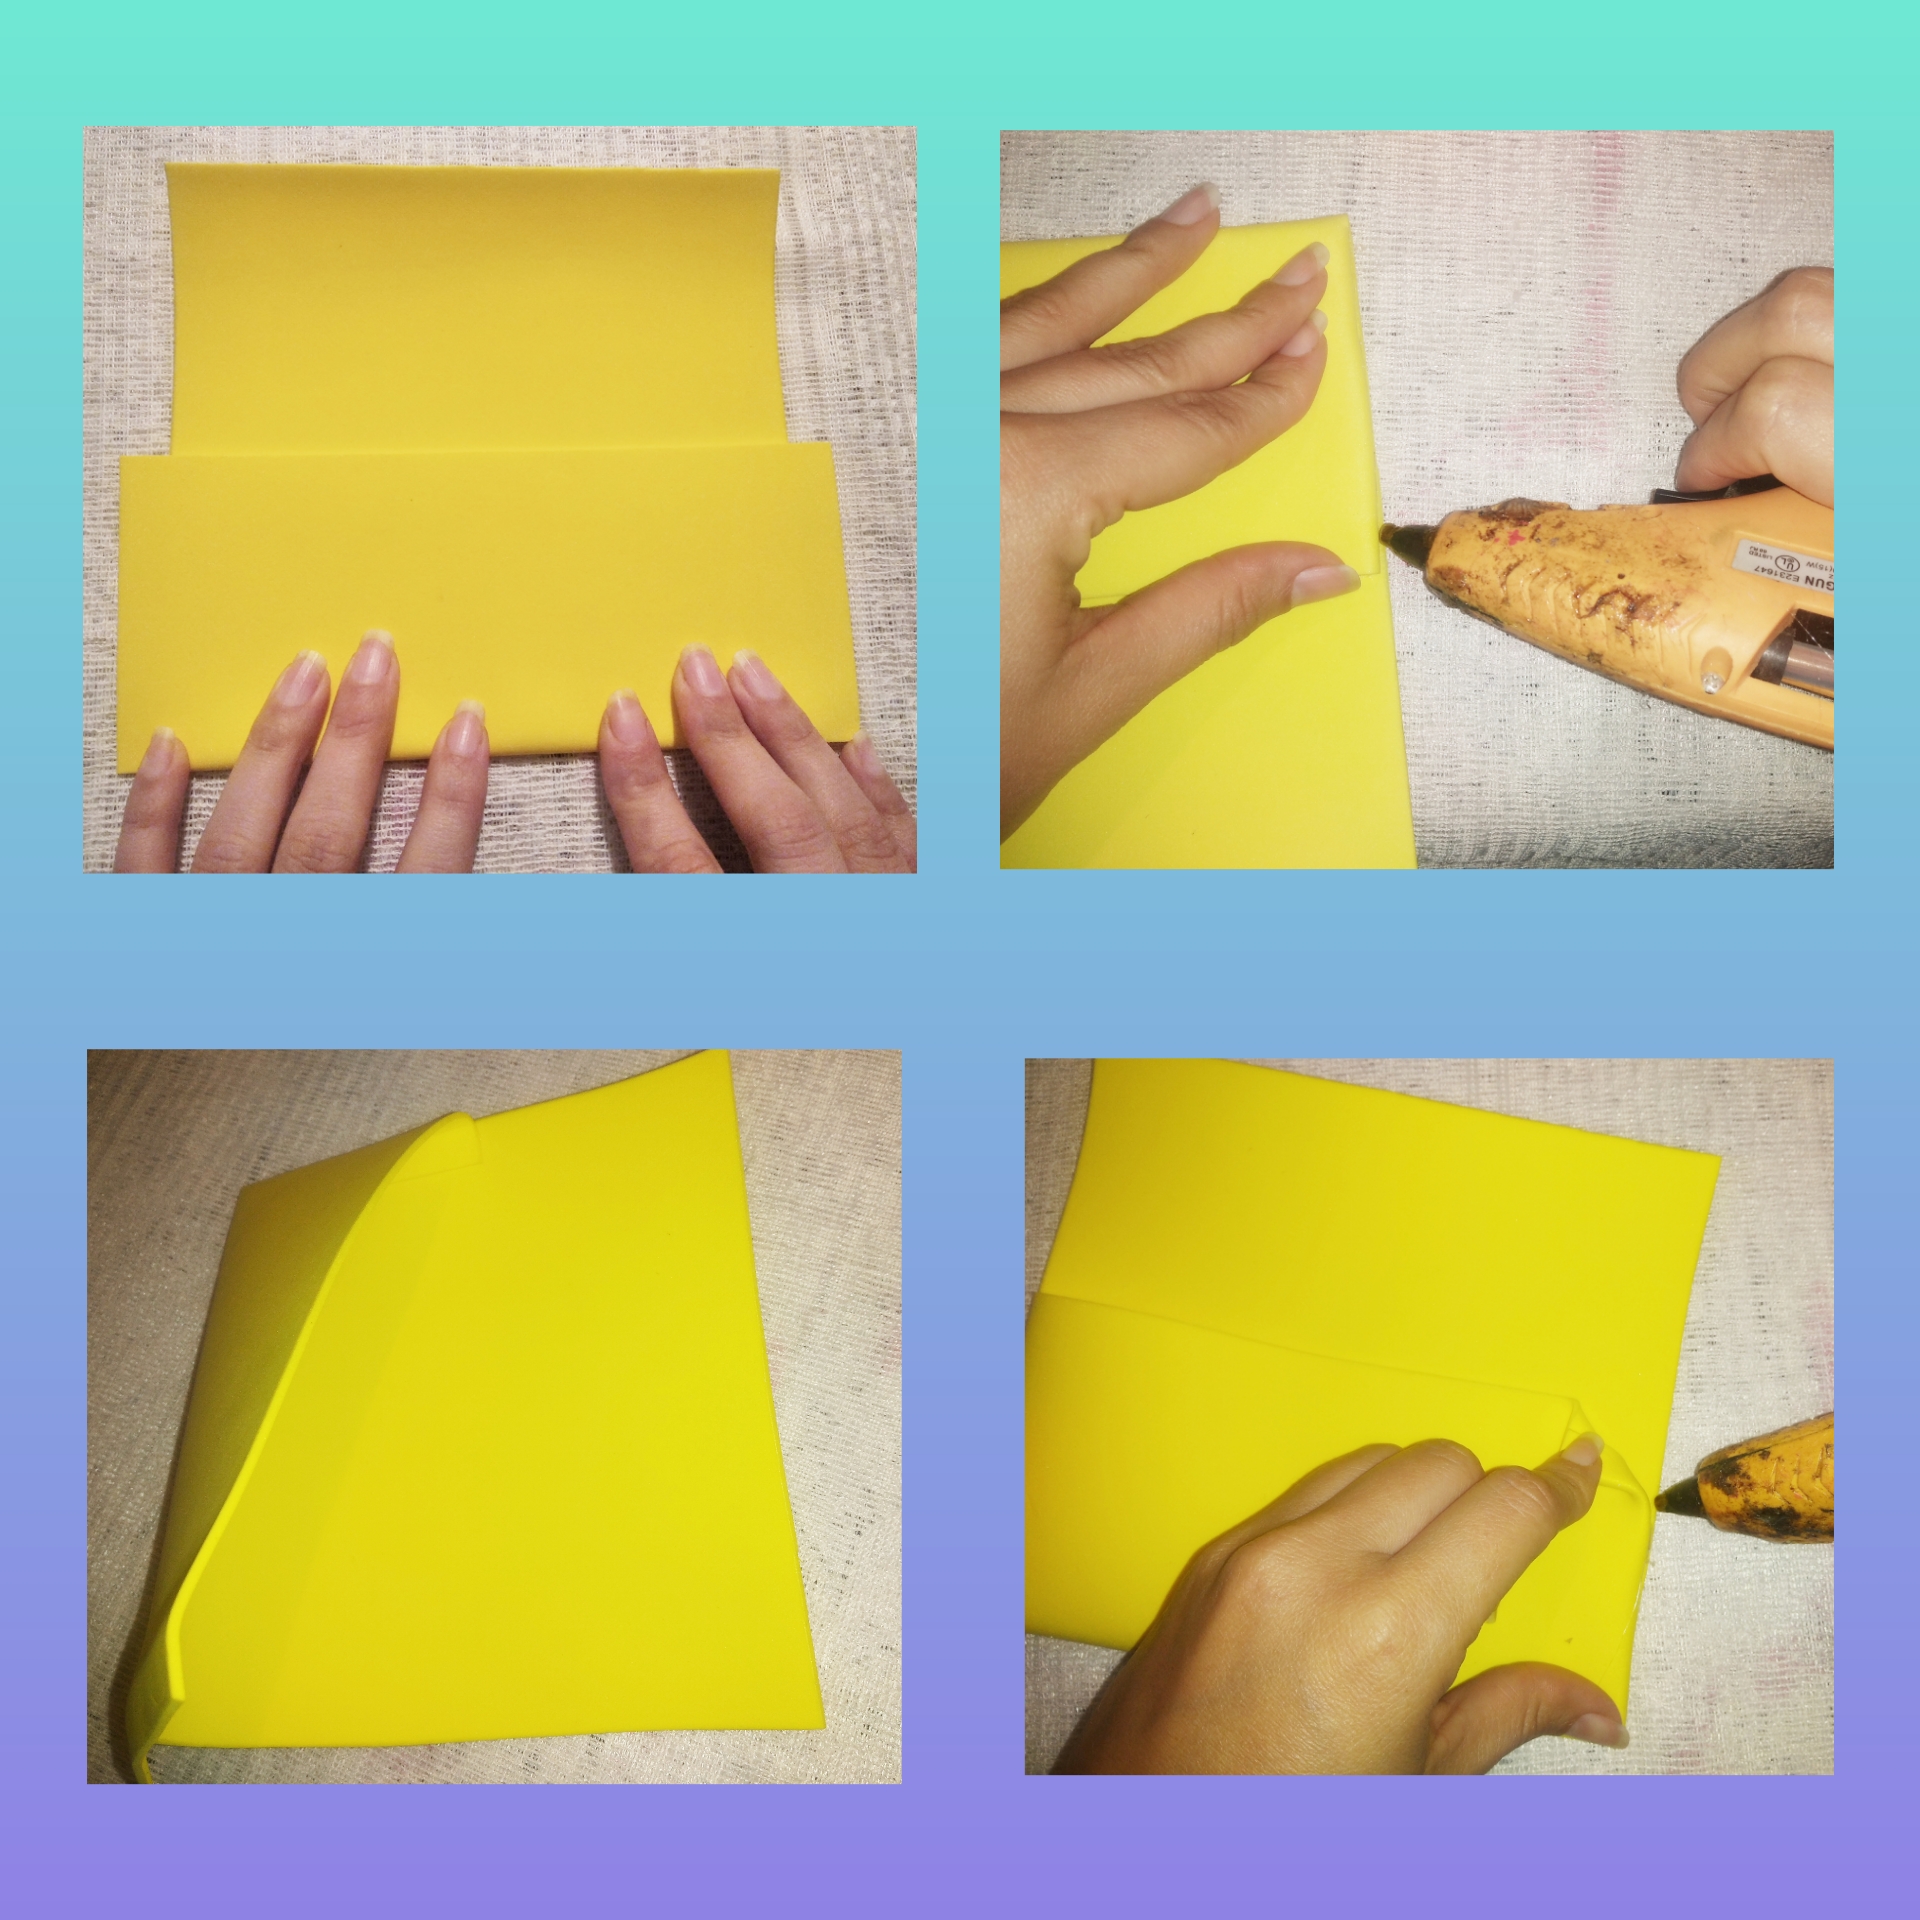
Vamos a tomar el foami por la parte más ancha y vamos a doblar justo hasta donde termina el centímetro de más que dejamos, luego esos bordes que sobresalen los doblamos hacia adentro y con silicón unimos, de igual manera hacemos del otro lado doblamos y unimos con silicón.

Step 4.

We are going to take the foami by the widest part and we are going to fold right up to where the extra centimeter that we left ends, then we fold those protruding edges inwards and with silicone we join, We do the same way on the other side, fold and join with silicone.
Polish_20220317_073957555.jpg

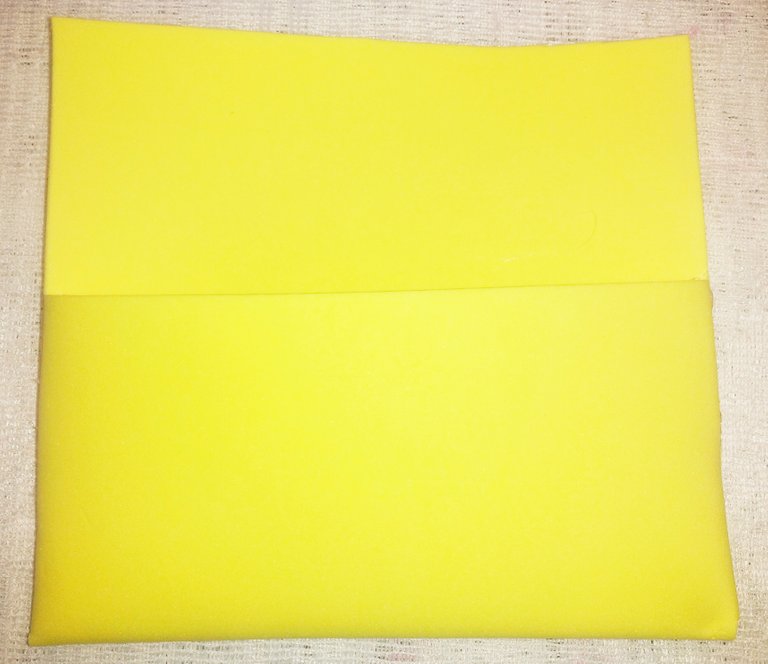
Y ya tendríamos el sobre casi listo, nos quedará de esta manera.

And we would have the envelope almost ready, it will look like this.
IMG_20220317_073744.jpg

Paso 5.

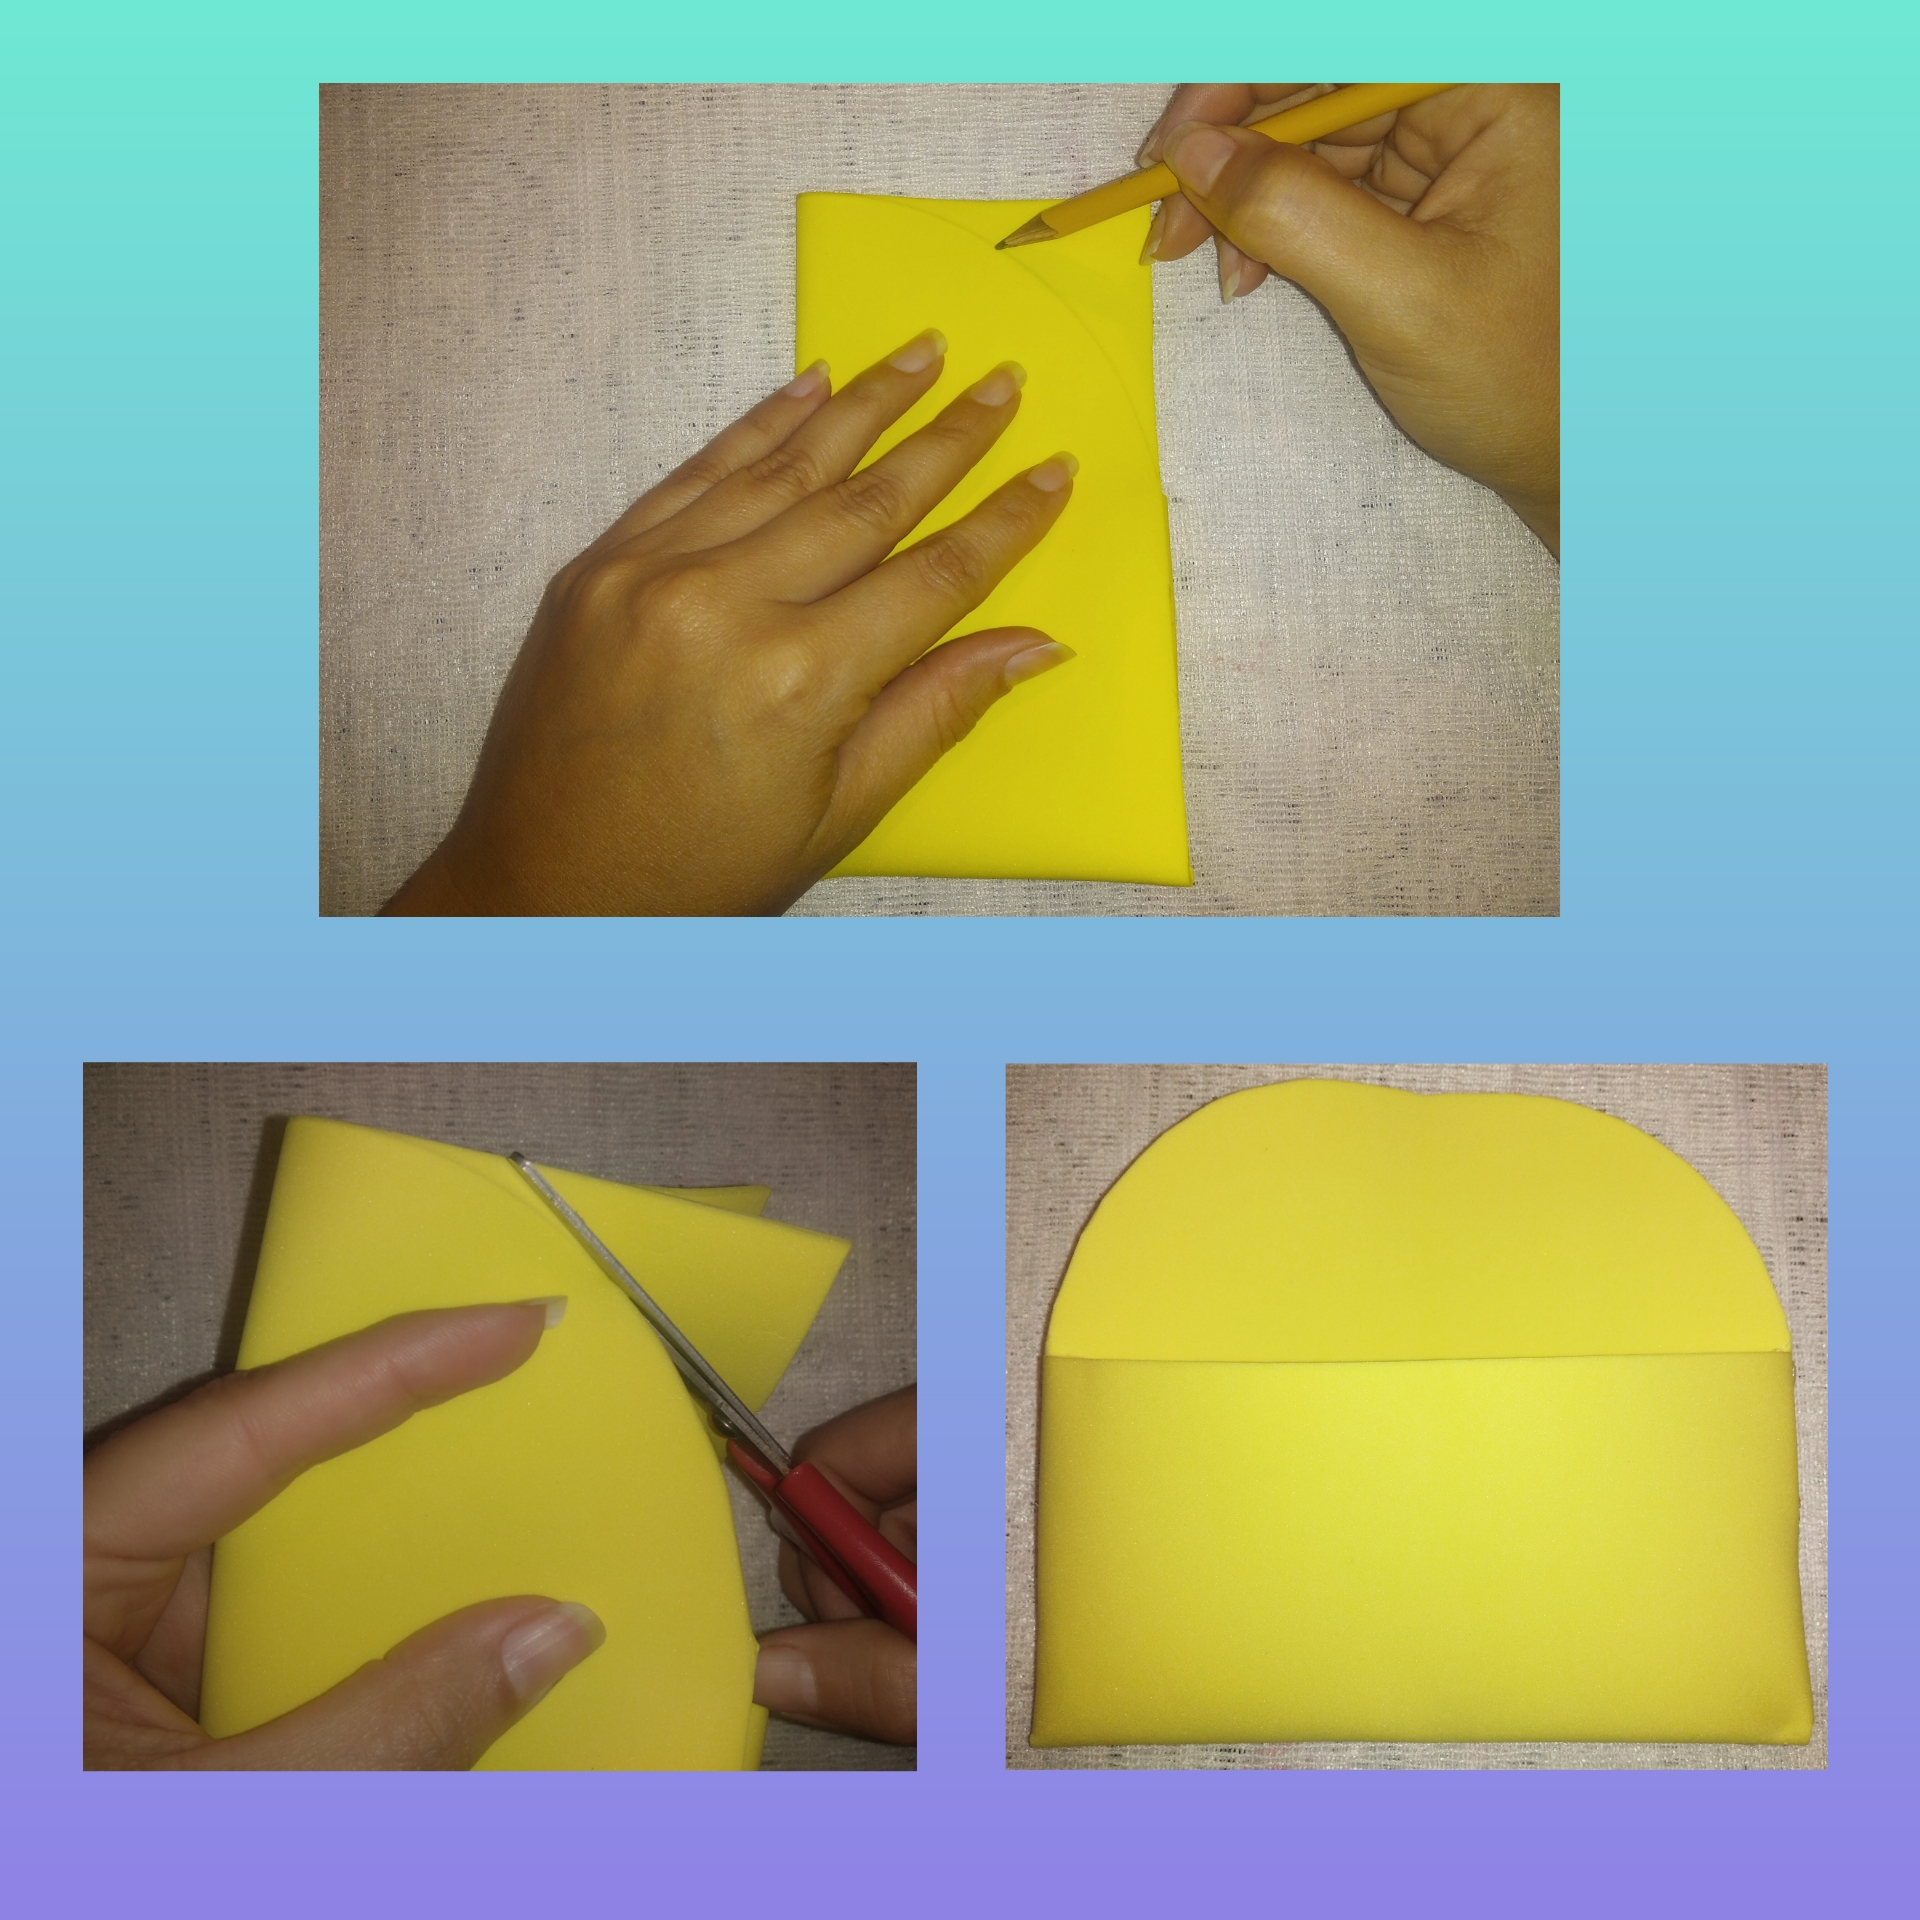
Ahora nos falta darle forma ovalada en la parte de arriba, para lo cual doblamos el sobre por la mitad y allí con el lápiz dibujamos la forma ovalada que queremos y luego con la tijera recortamos el exceso de foami que ya no queremos. Ahora sí el estuche está listo vamos a adornarlo para que se vea más lindo.

Step 5.

Now we need to give it an oval shape at the top, for which we fold the envelope in half and there with the pencil we draw the oval shape we want and then with the scissors we cut the excess of foami that we no longer want. Now the case is ready, let's decorate it to make it look prettier.
Polish_20220317_074229763.jpg

15-51-12-Separadores-22-768x123.png

Adornos

Ornaments


Para adornar este estuche haremos unas lindas flores, yo amo las flores de todos los tamaños y colores, me fascina que me regalen flores y me gusta adornar todo con flores, pienso que son una de las más bellas creación de Dios por eso he recreado este lindo porta lentes en un lindo jardín floreado que me acompañará de aquí en adelante. Para elaborar estás bellas flores

To decorate this case we will make some pretty flowers, I love flowers of all sizes and colors, I love being given flowers and I like to decorate everything with flowers, I think they are one of the most beautiful creation of God, that's why I have recreated this beautiful eyeglass holder in a beautiful flowery garden that will accompany me from now on. To make these beautiful flowers

Paso 6.

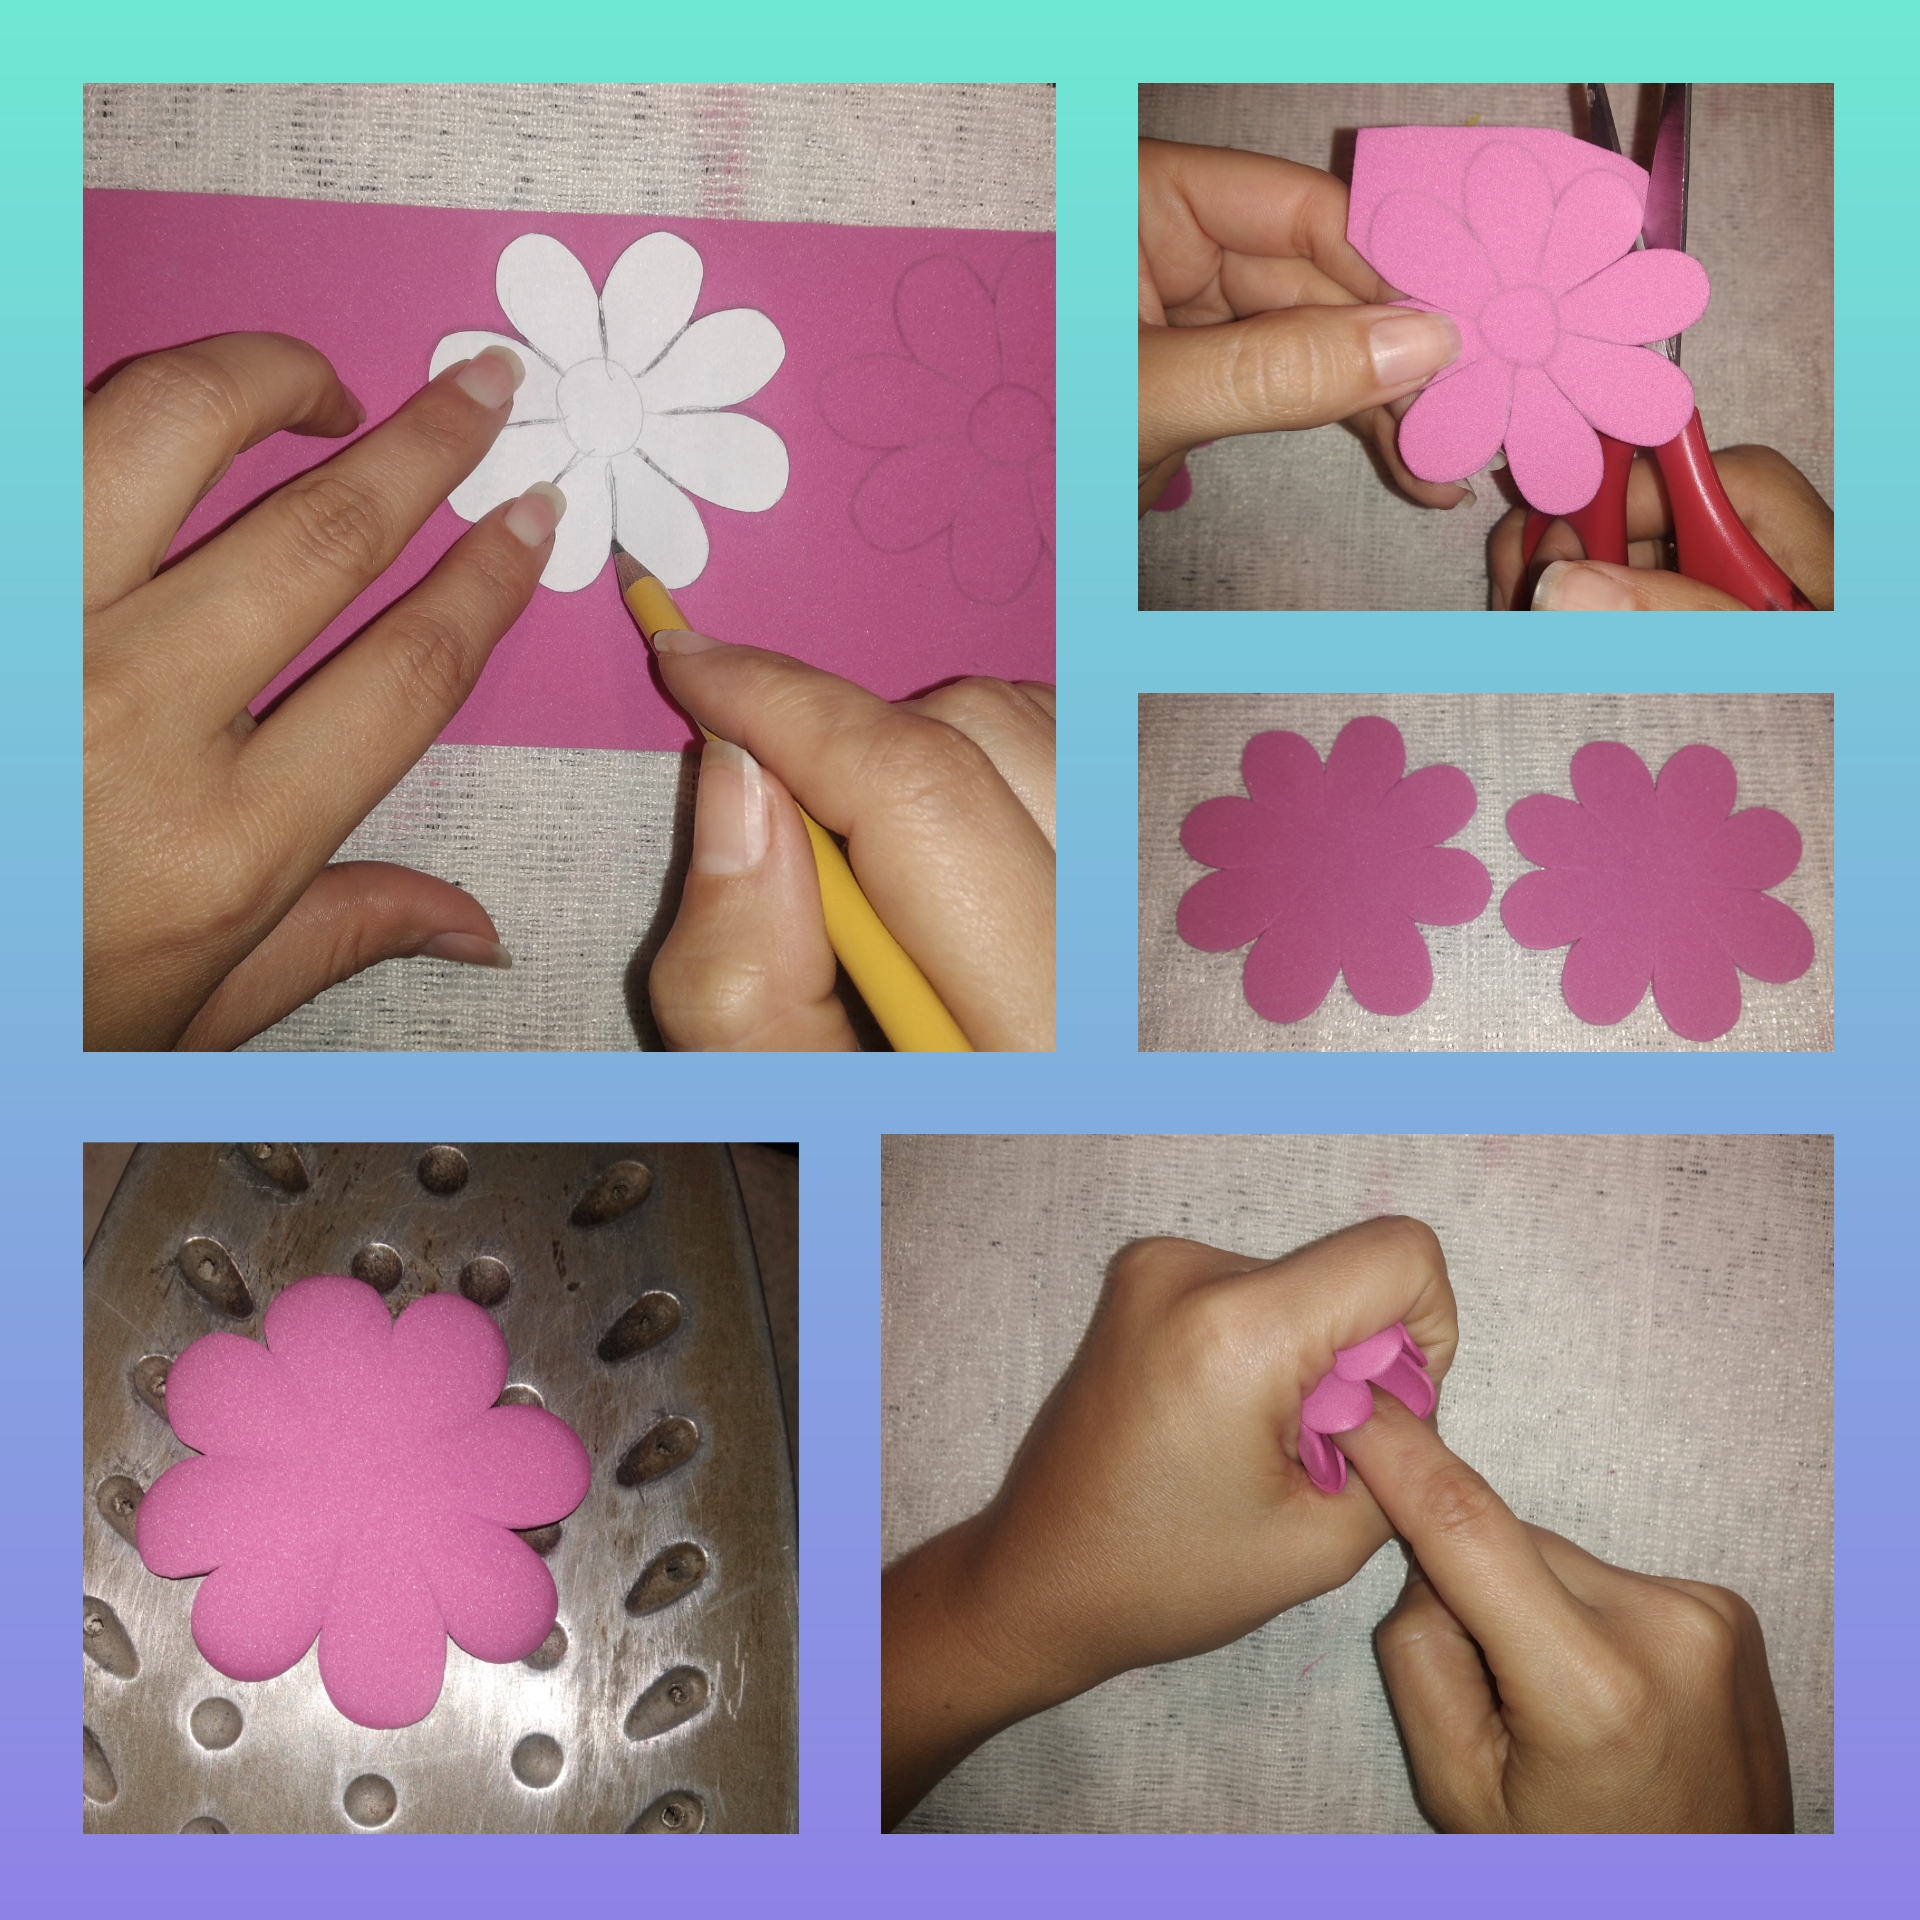
En una hoja reciclada vamos a dibujar la flor que deseemos, luego recortamos y ya tenemos nuestro molde, vamos a colocar la hoja sobre el foami fucsia y con el lápiz vamos a dibujar dos hermosas flores, recortamos y luego sobre la plancha de planchar nuestra ropa cuando esté bien caliente colocamos la flor sobre ella, el foami con el calor se va a comenzar a mover y cuando se abombe lo retiramos y la colocamos sobre nuestra mano con el dedo índice lo introducimos en el medio y allí la presionamos, este proceso es para darle volumen a nuestras flores así se verán más reales y llamativas.

Step 6.

In a recycled sheet we are going to draw the flower that we want, then we cut it and we already have our mold, we are going to place the sheet on the fuchsia foami and with the pencil we are going to draw two beautiful flowers, we cut and then on the iron to iron our clothes when it is very hot we place the flower on it, the foami with the heat will begin to move and when it bulges we remove it and place it on our hand with the index finger we introduce it in the middle and there we press it, this process is to give volume to our flowers so they will look more real and striking.
Polish_20220317_075005170.jpg

Paso 7.

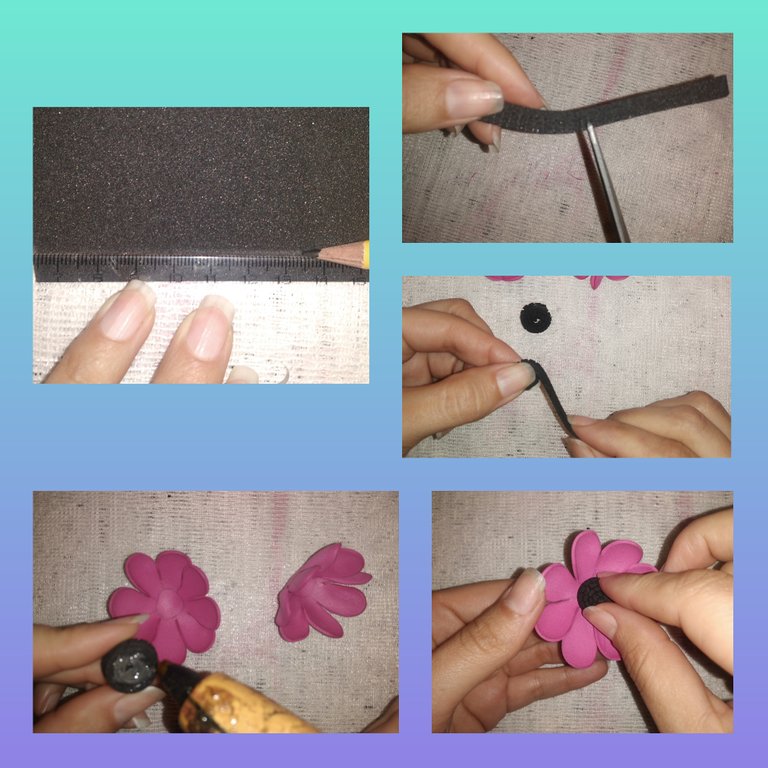
Ahora formaremos en botón de las flores, tomamos el foami negro y cortamos unas tiritas muy delgadas, luego hasta la mitad de la tira vamos a hacer cortes seguidos, enrrollamos la tira como un espiral y con silicón unimos la punta para que no se suelten, hacemos este proceso dos veces para obtener dos botones uno para cada flor, luego le colocamos silicón por debajo y lo pegamos en el centro de cada flor, se verá de esta manera.

Step 7.

Now we will form the flower button, we take the black foami and cut some very thin strips, then up to the middle of the strip we are going to make consecutive cuts, we roll the strip like a spiral and with silicone we join the tip so that they do not come loose, we do this process twice to obtain two buttons, one for each flower, then we place silicone underneath and stick it in the center of each flower, it will look like this.
Polish_20220317_075428815.jpg

Paso 8.

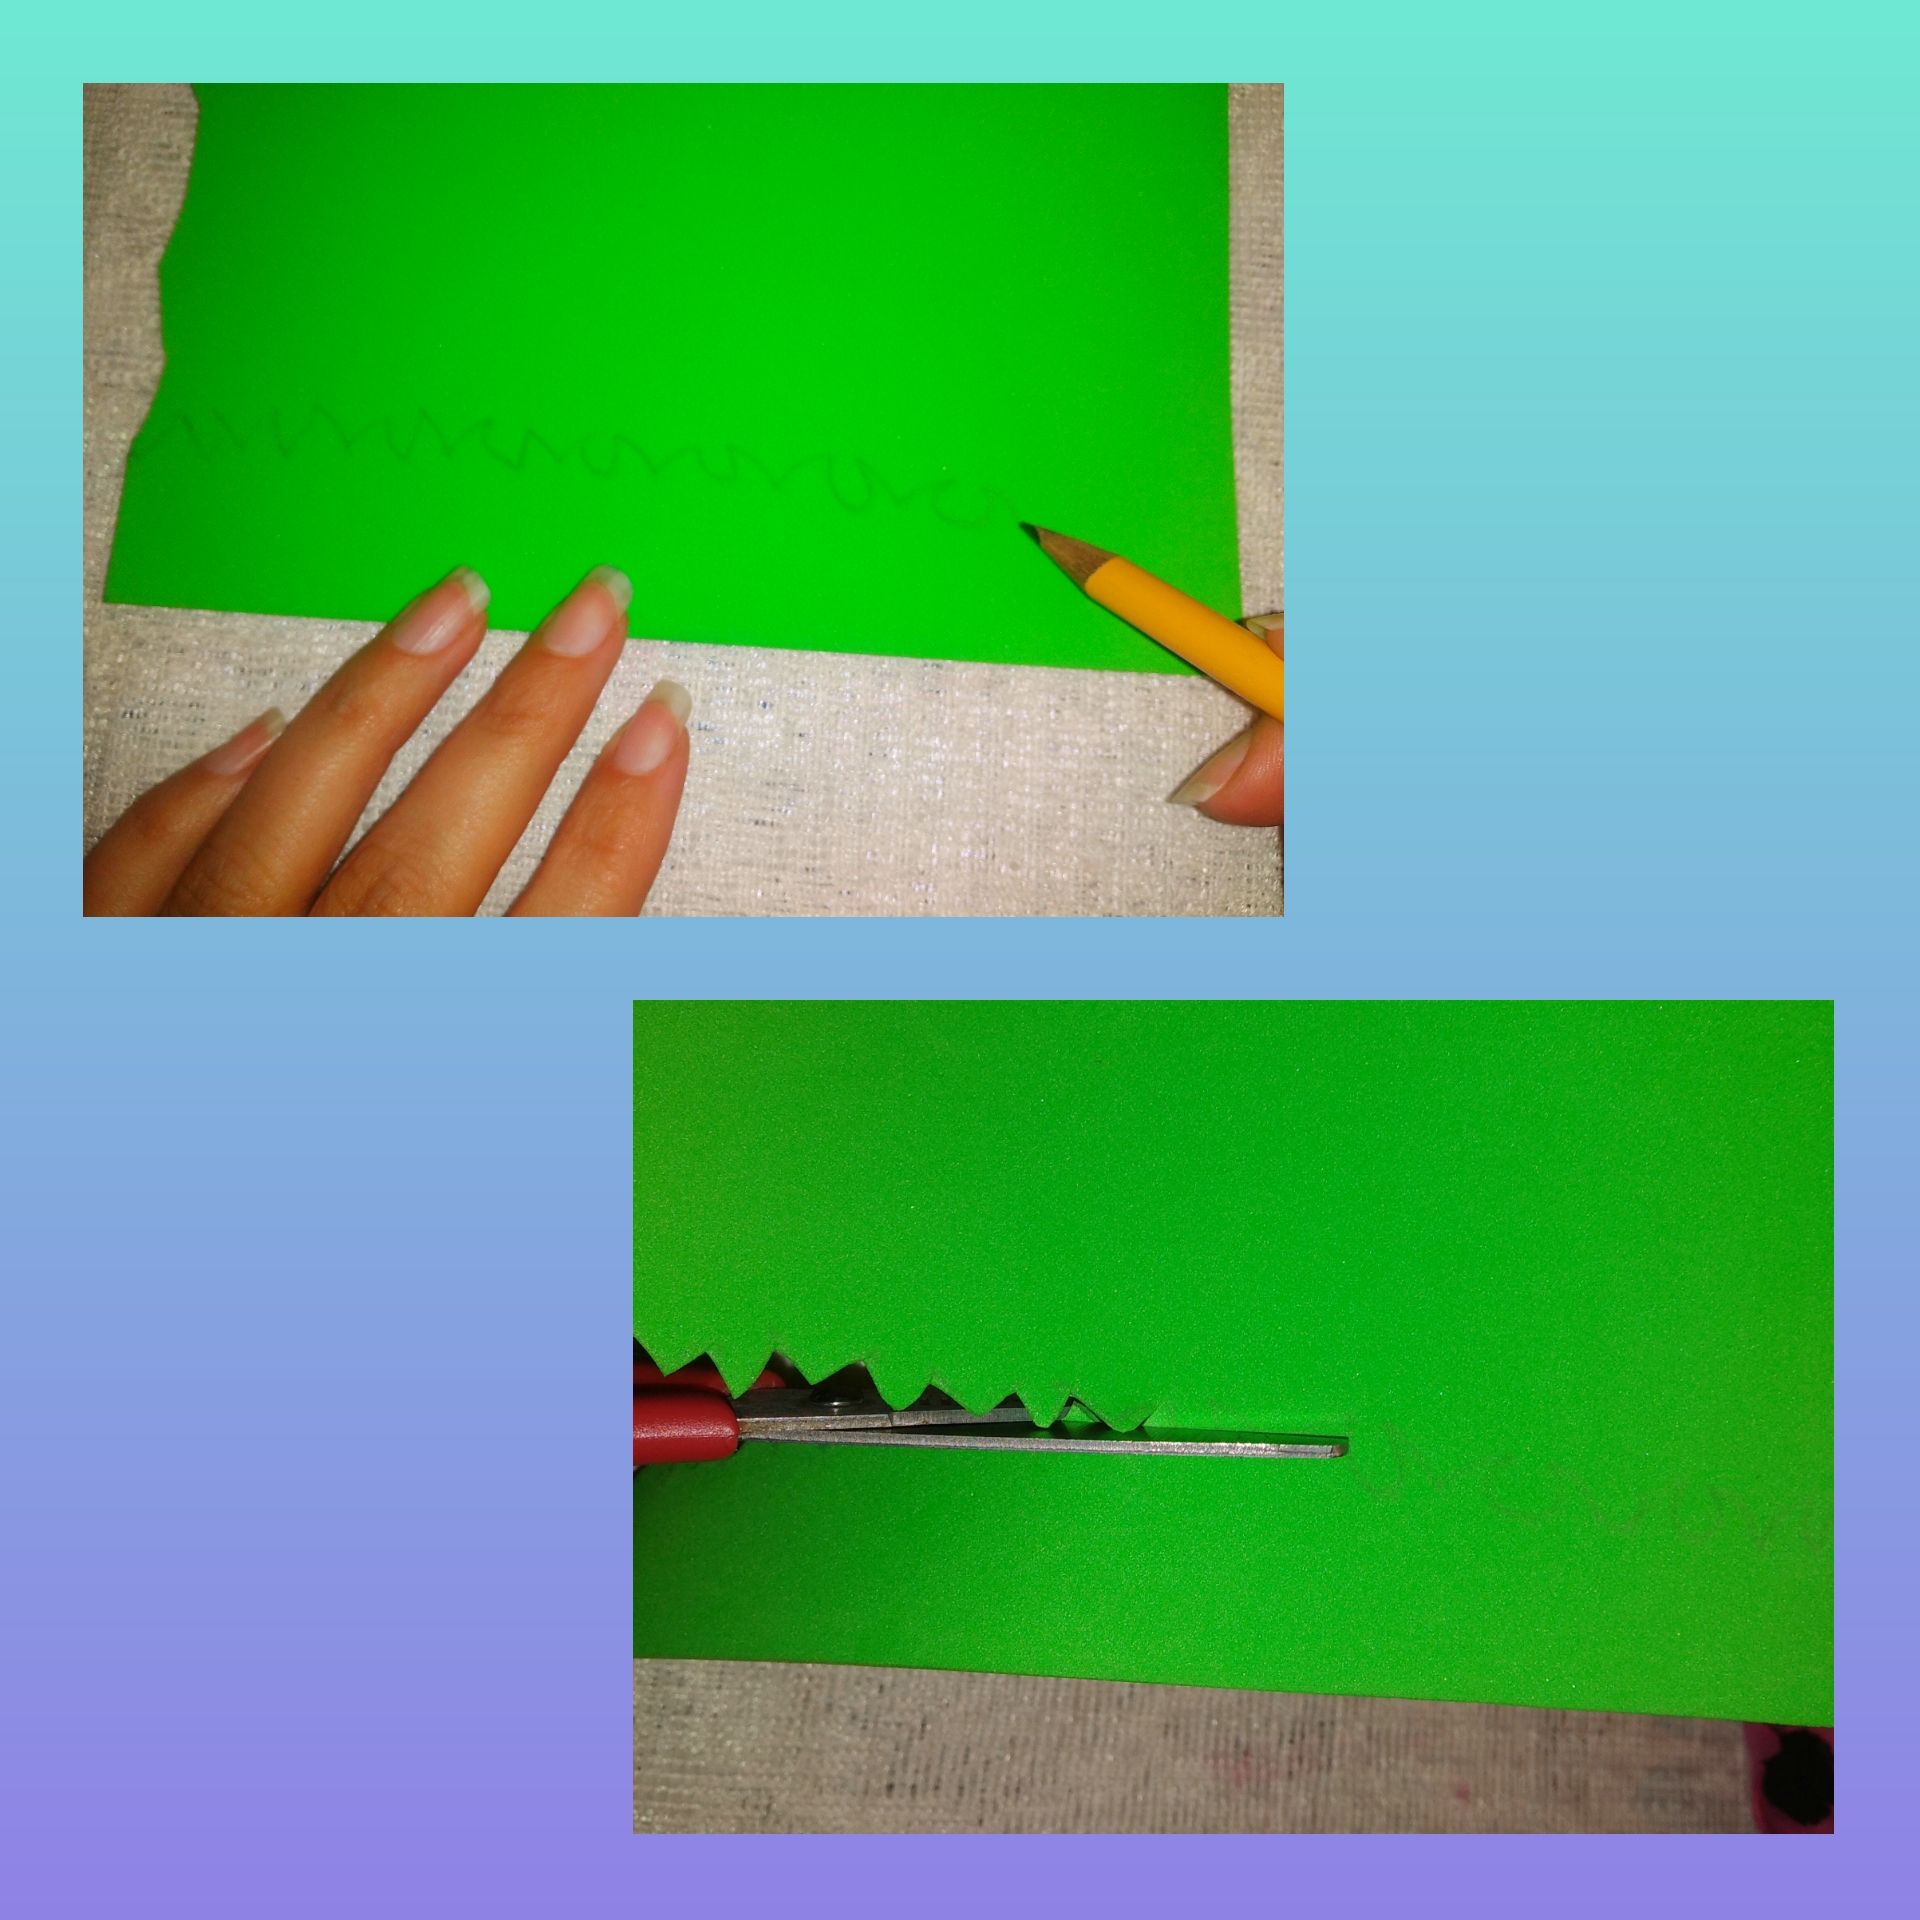
En este paso haremos un agradable pasto el cual es característico de todo lindo jardín. Para el pasto tomamos el foami verde lo medimos con el estuche y dibujamos con un lápiz las gramas que sobresalen para darle esa semejanza de pasto, con la tijera recortamos.

Step 8.

In this step we will make a nice grass which is characteristic of every nice garden. For the grass we take the green foami we measure it with the case and we draw with a pencil the grasses that stand out to give it that resemblance of grass, with the scissors we cut.
Polish_20220317_080300634.jpg

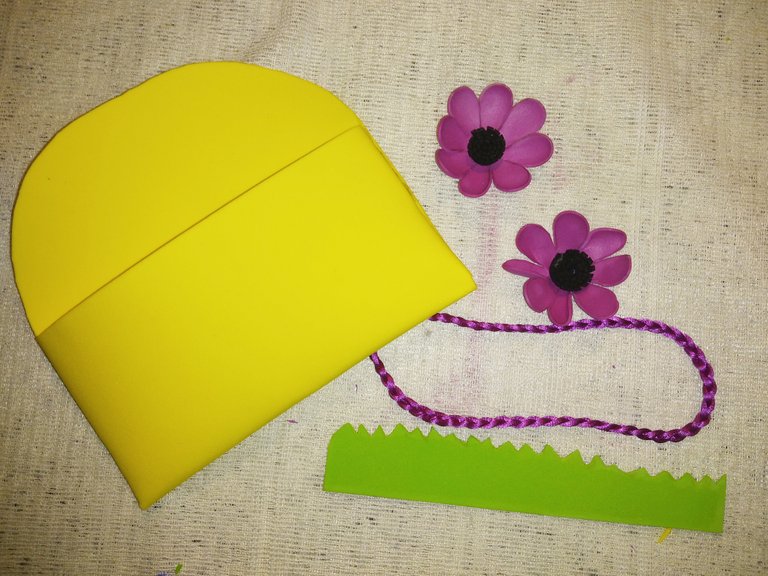
Teniendo todas las piezas listas como son el estuche, las flores, el pasto y la cinta, vamos a proceder a armar.

Having all the pieces ready, such as the case, the flowers, the grass and the ribbon, we are going to proceed to assemble.
IMG_20220317_075626.jpg

Paso 9.

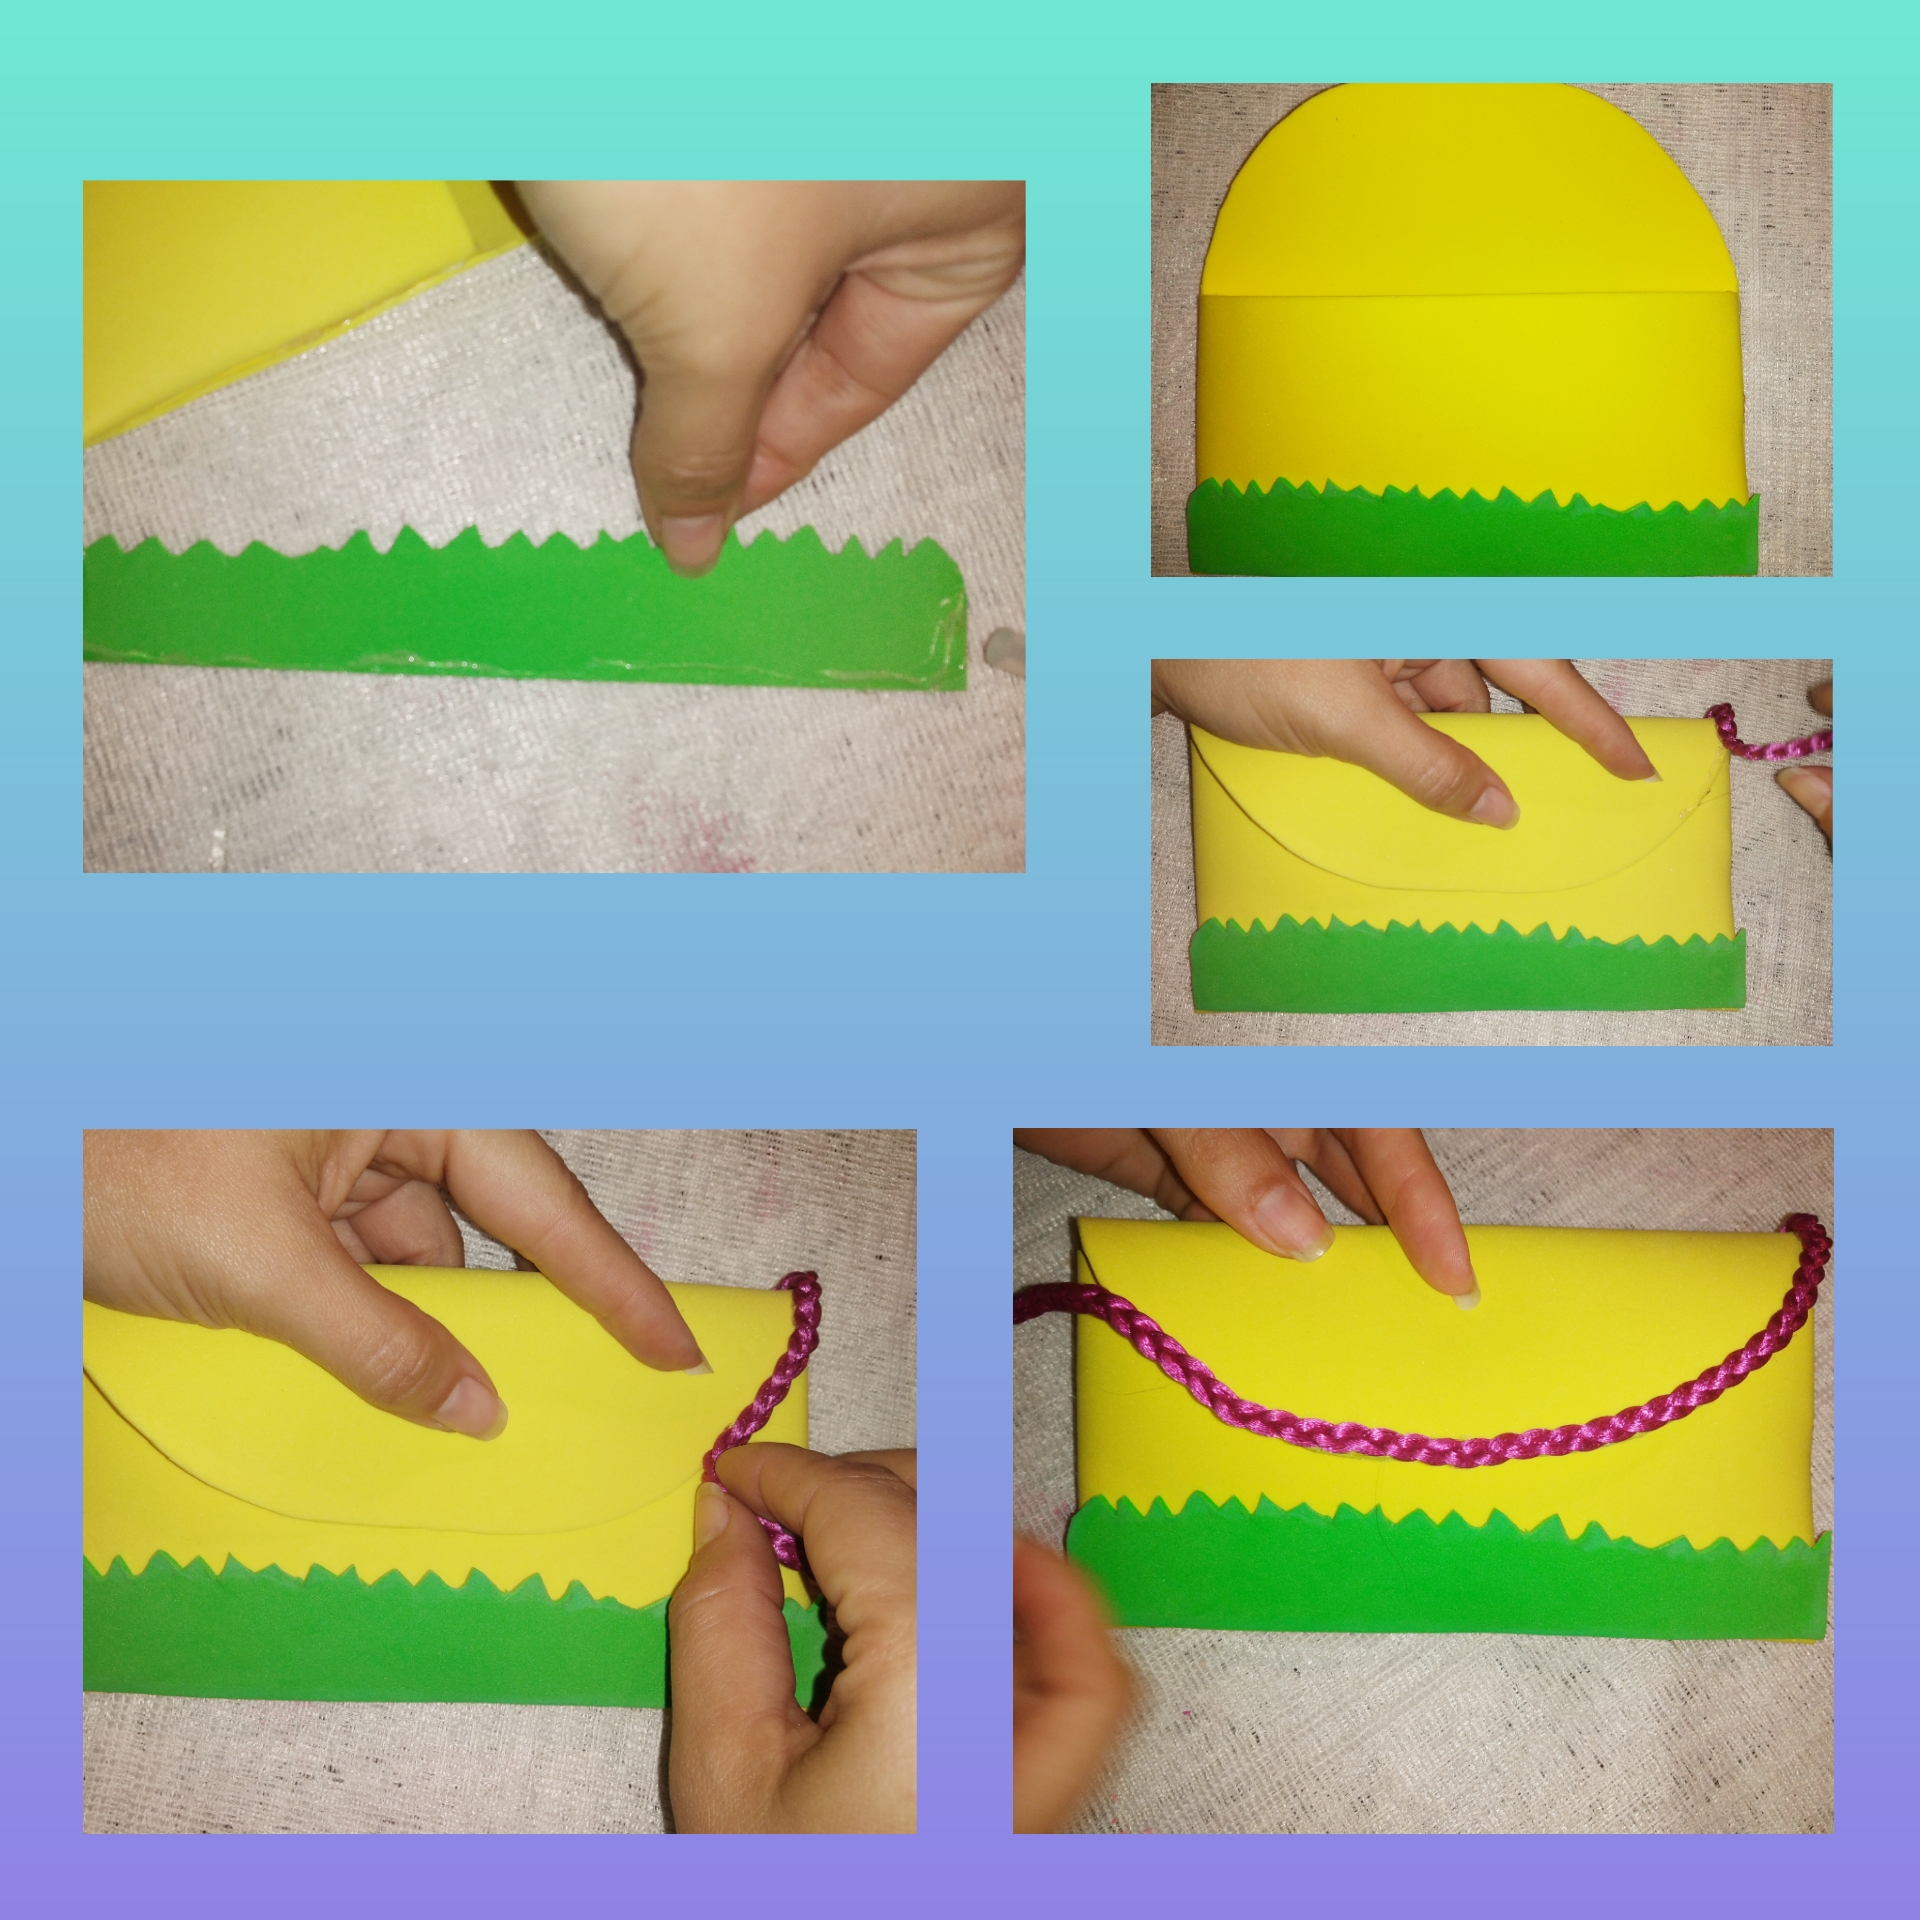
Primero vamos a pegar en la parte inferior del estuche el pasto, luego en la tapa del sobre vamos a ir colocando por todo el borde la cinta trenzada color fucsia.

Step 9.

First we are going to glue the grass to the bottom of the case, then we are going to place the fuchsia braided ribbon on the top of the envelope.
Polish_20220317_080407106.jpg

Paso 10.

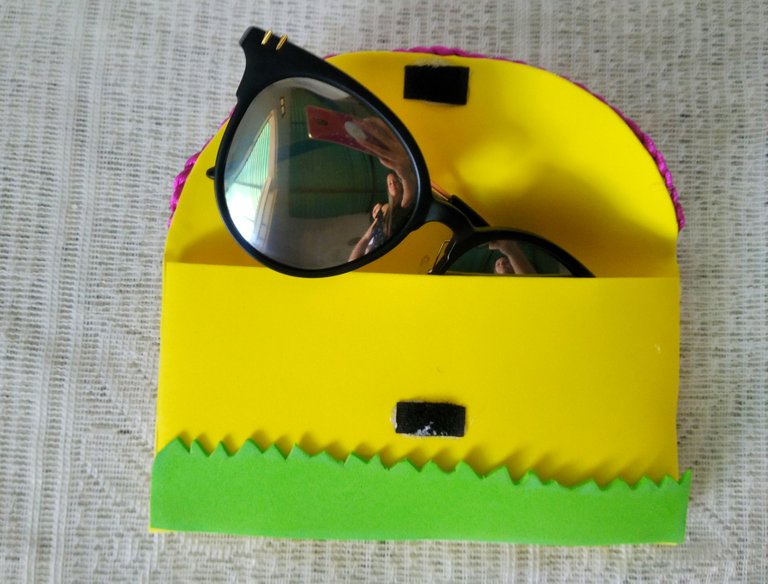
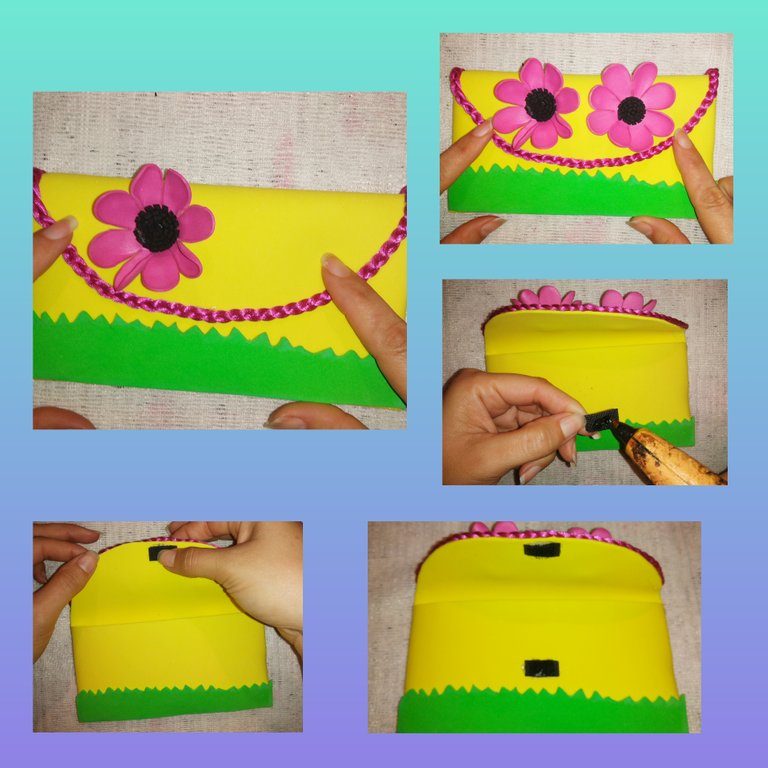
En la tapa del estuche hacia la izquierda pegamos la primera flor, luego hacia la izquierda pegamos la segunda flor. Y en la parte de adentro pegamos el pedacito de cierre mágico que no permitirá que nuestros lentes se salgan del estuche.

Step 10.

On the lid of the case to the left we paste the first flower, then to the left we paste the second flower. And on the inside we glue the little piece of magic closure that will not allow our glasses to come out of the case.
Polish_20220317_080546908.jpg

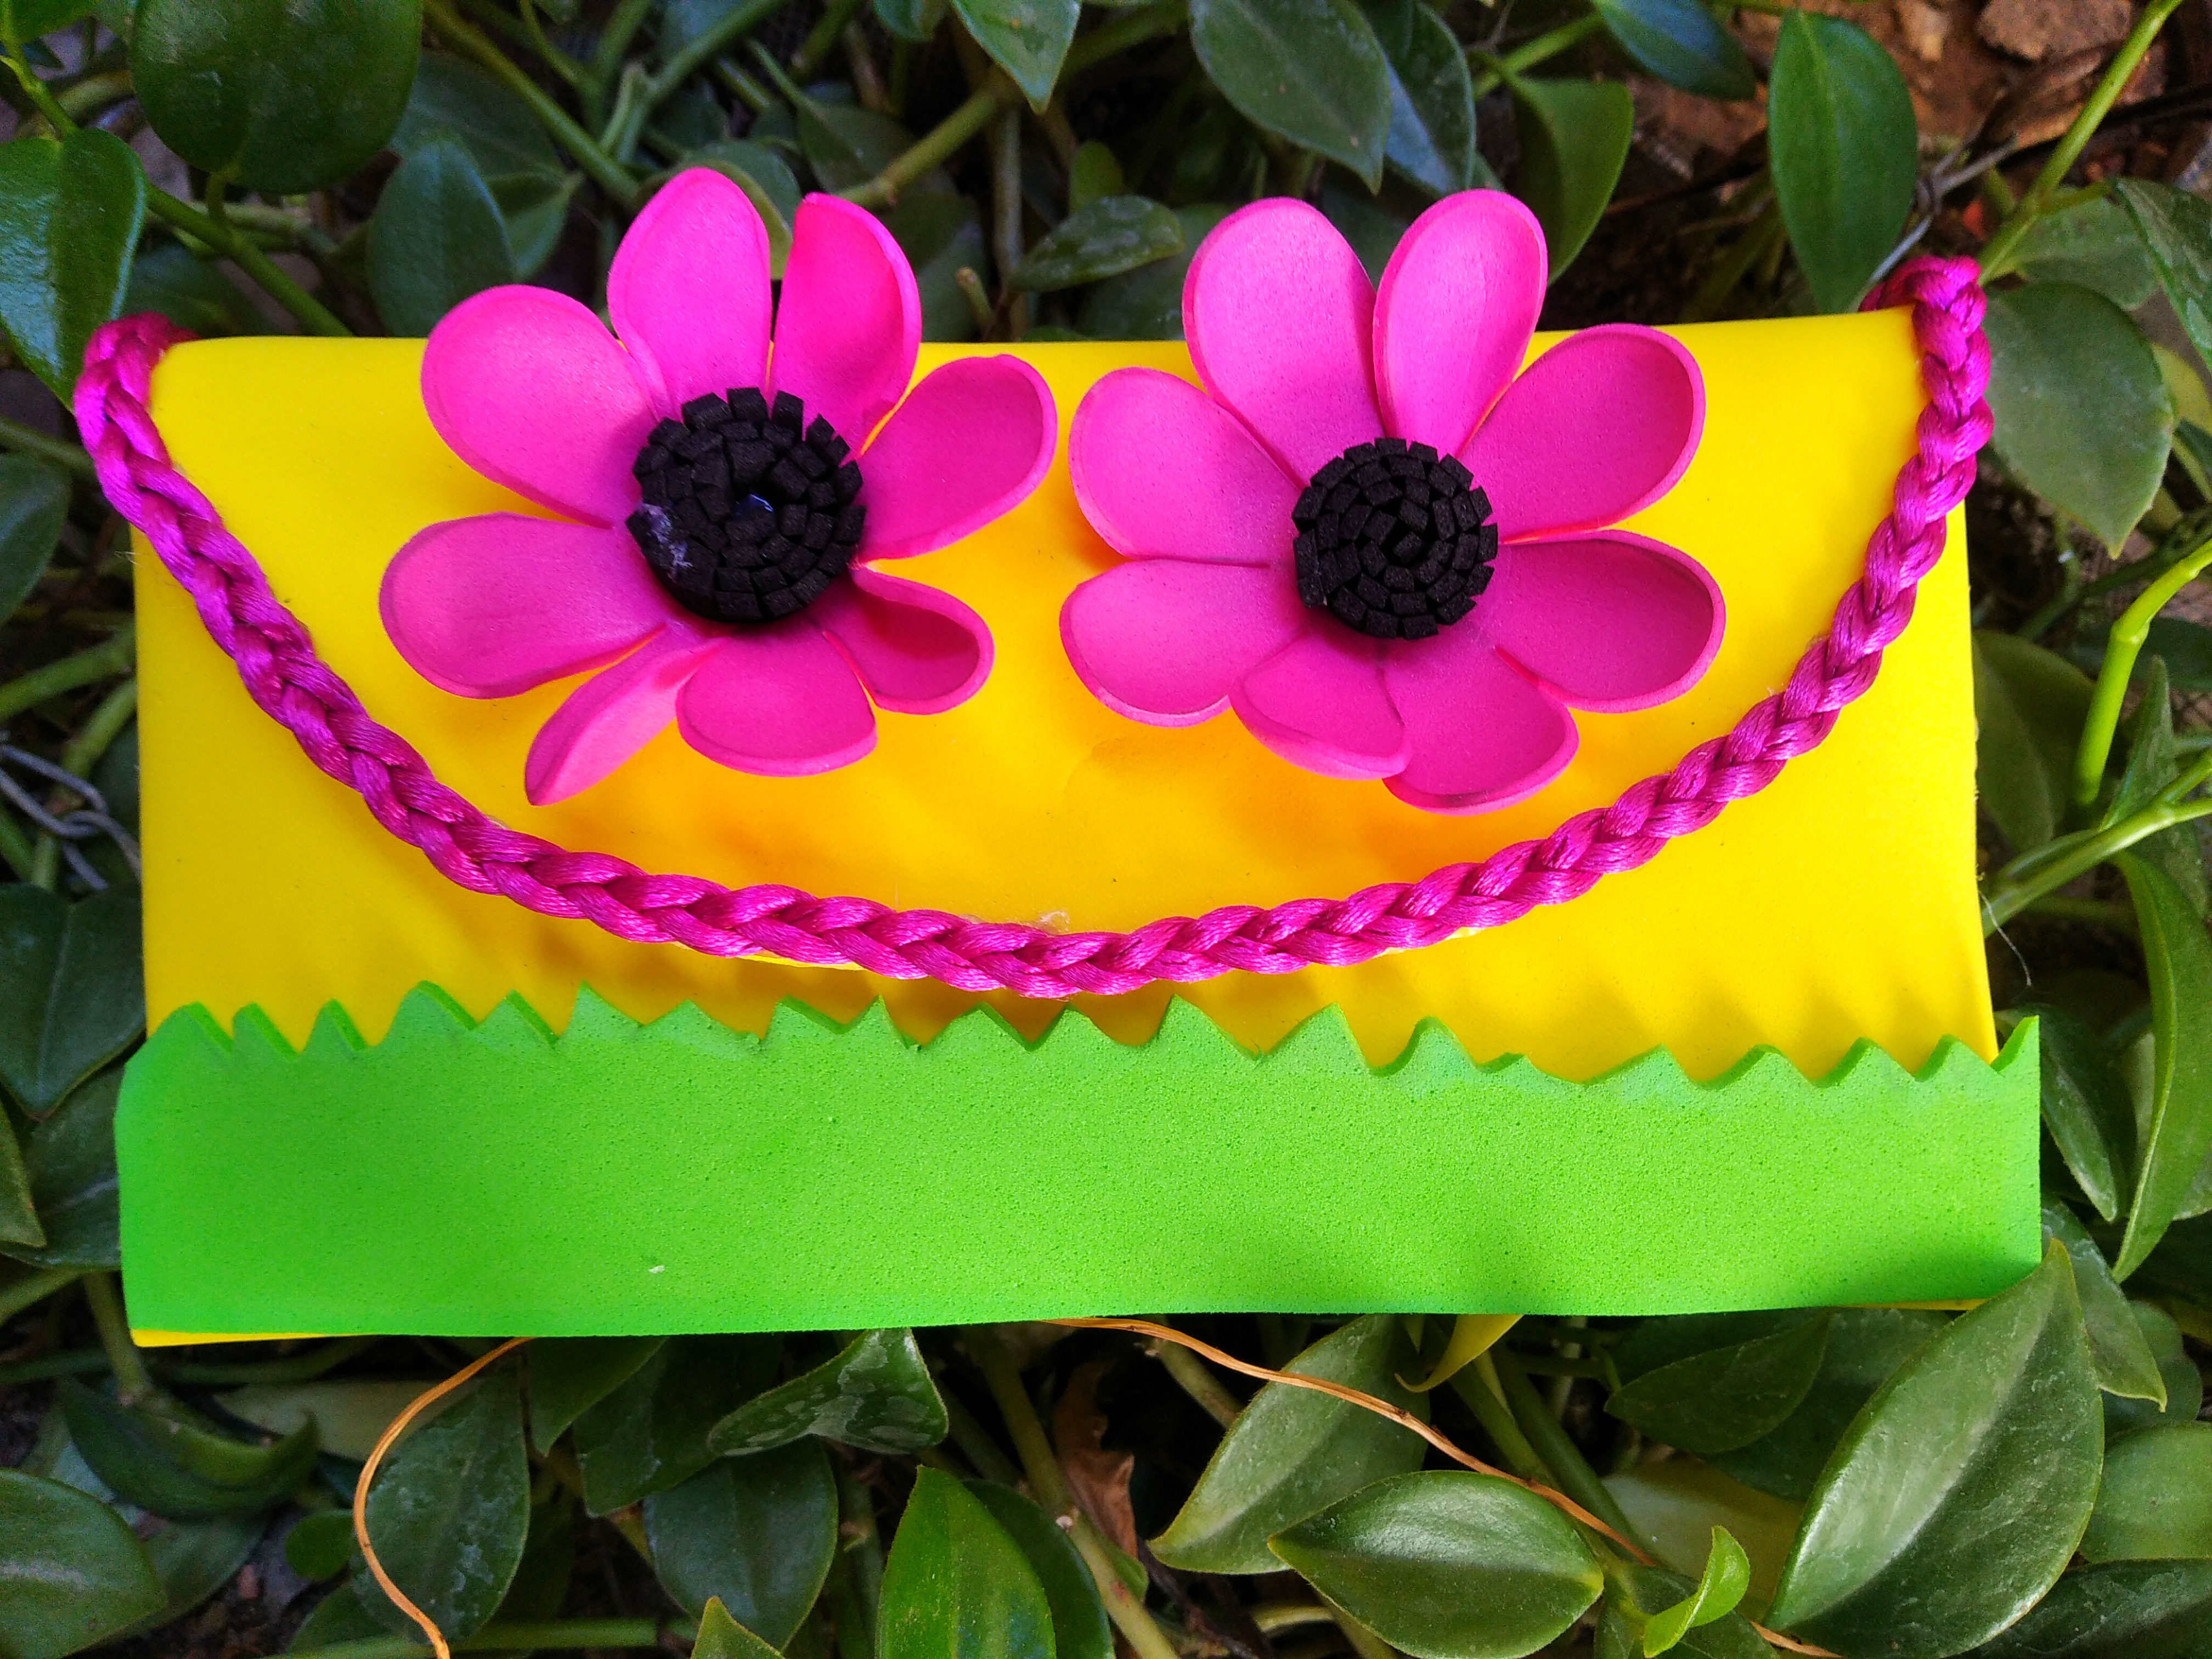
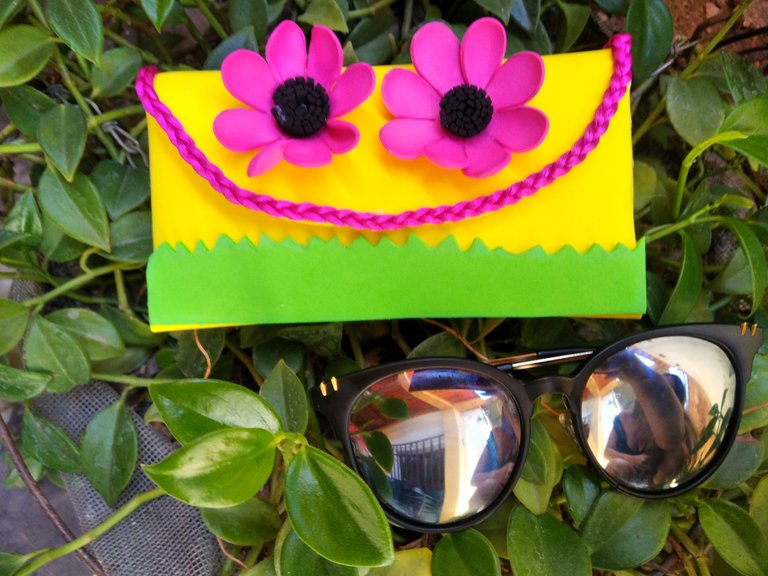
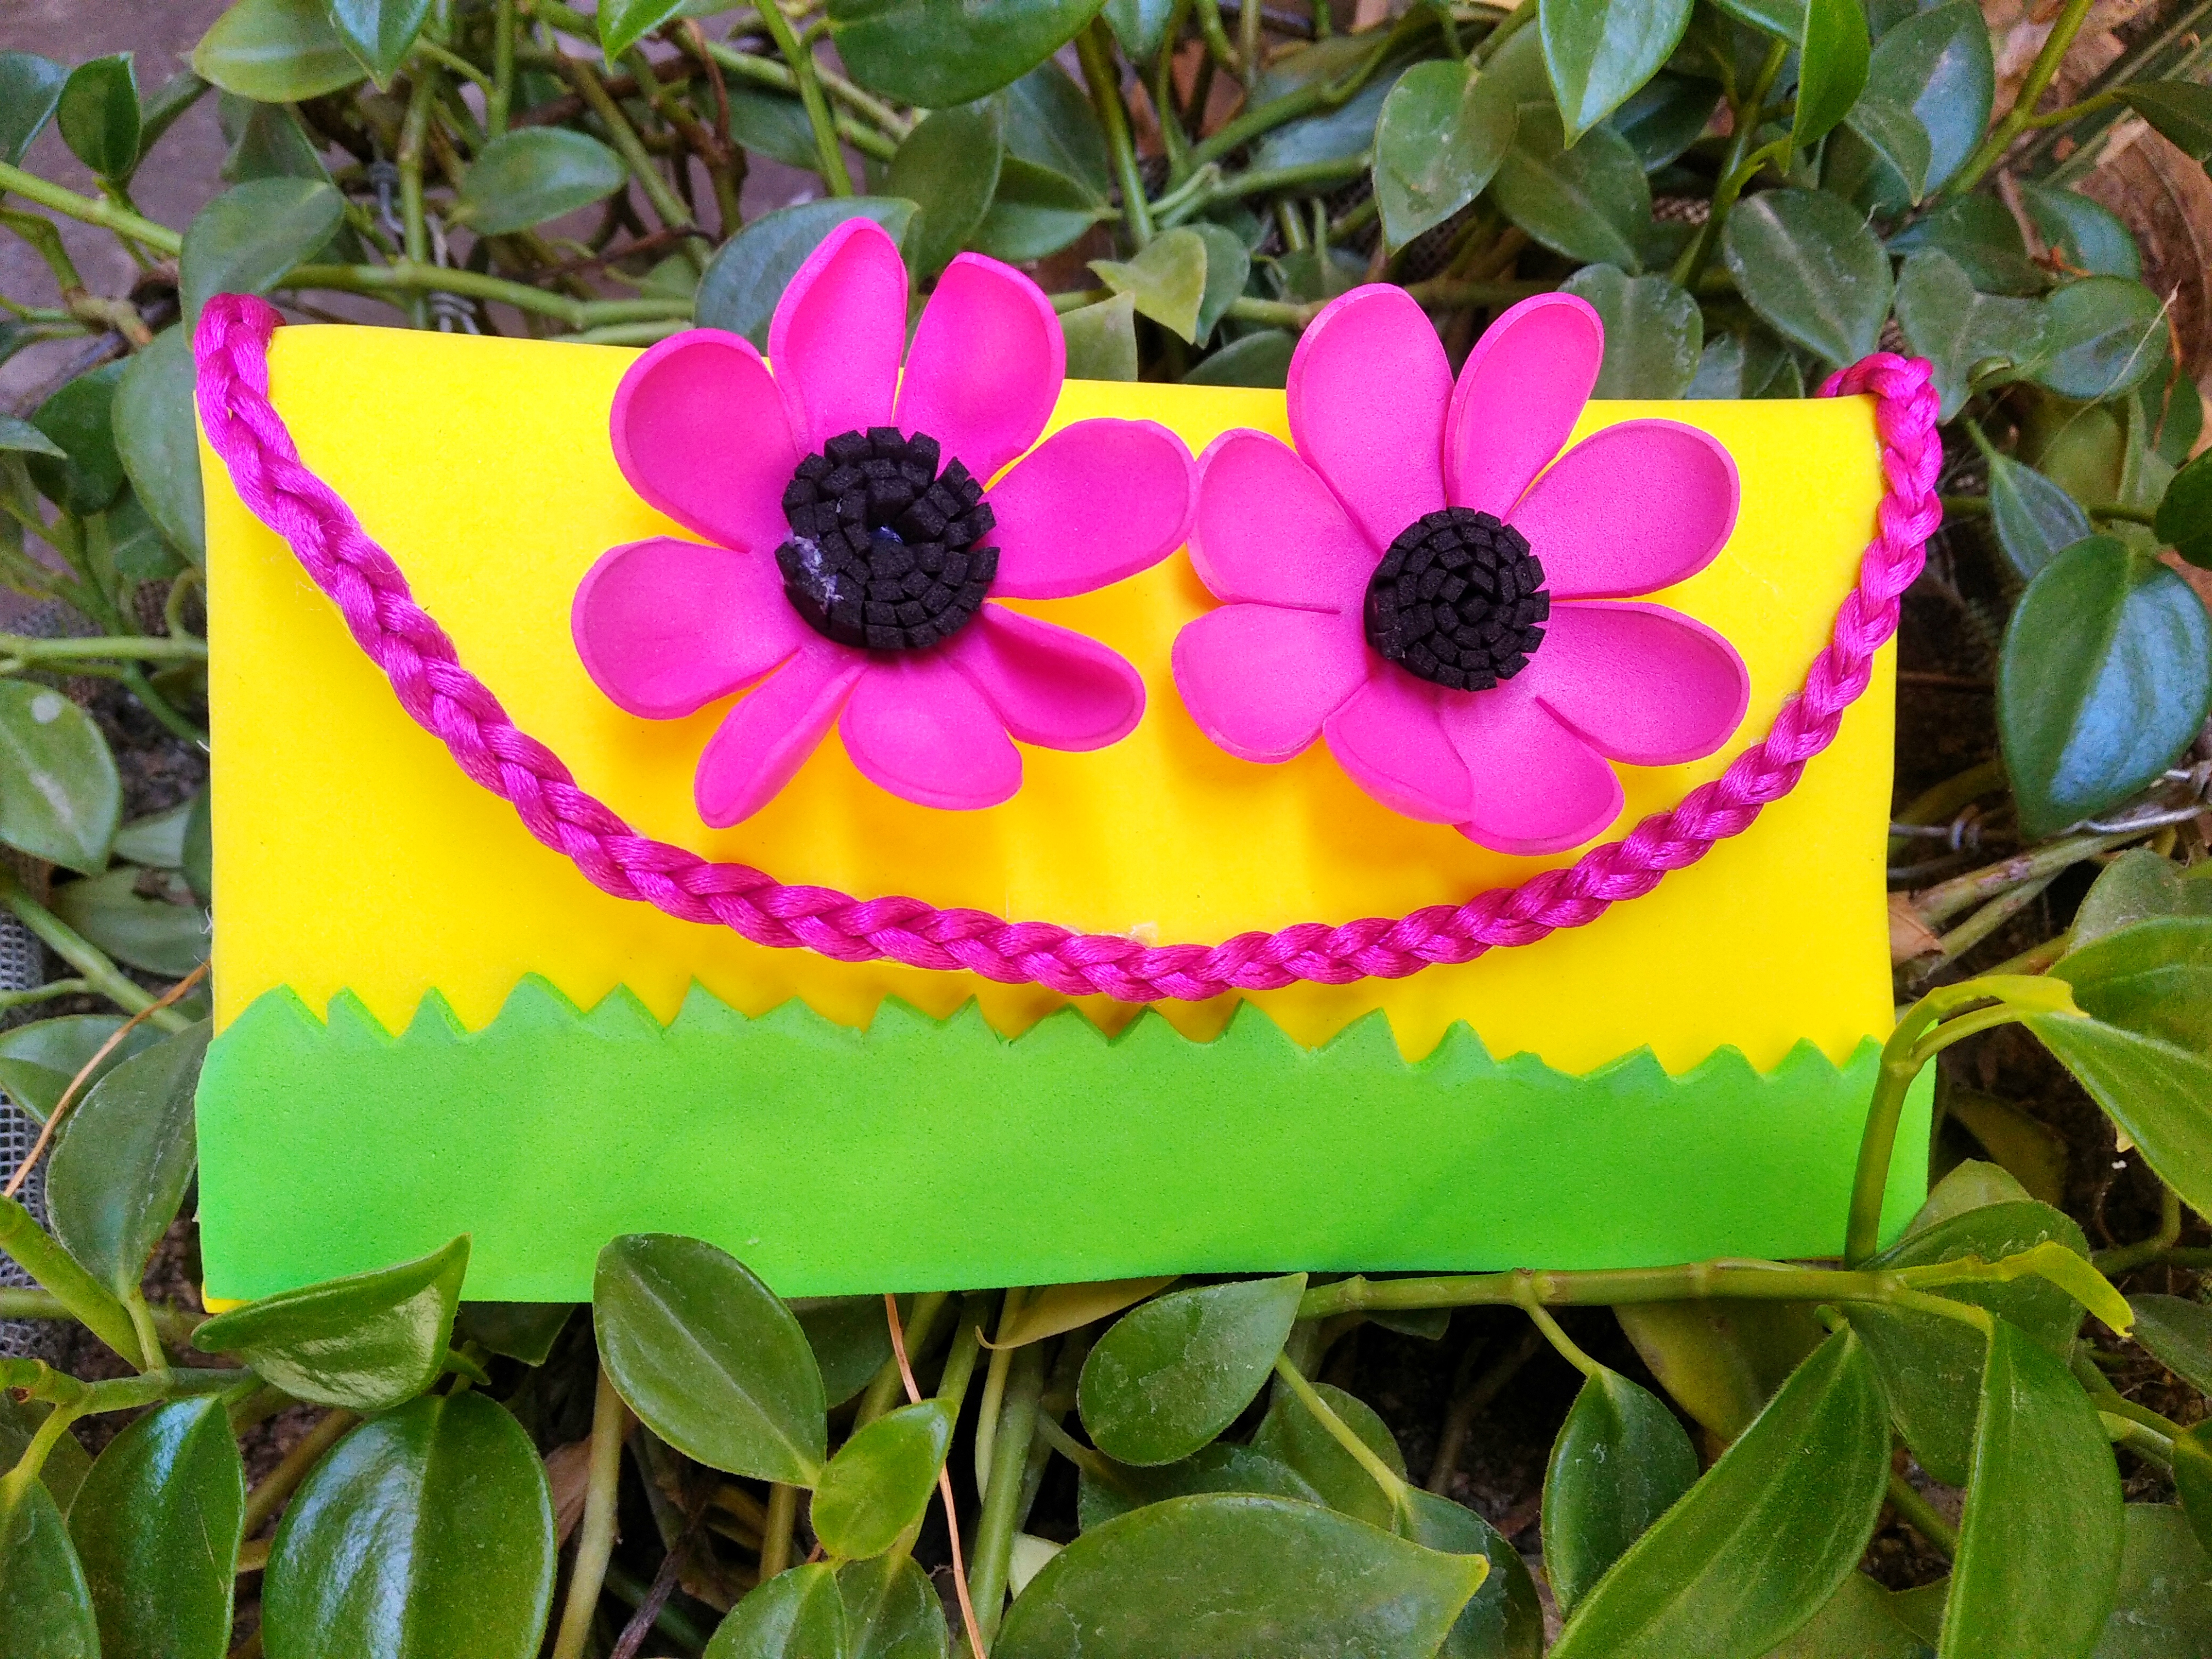
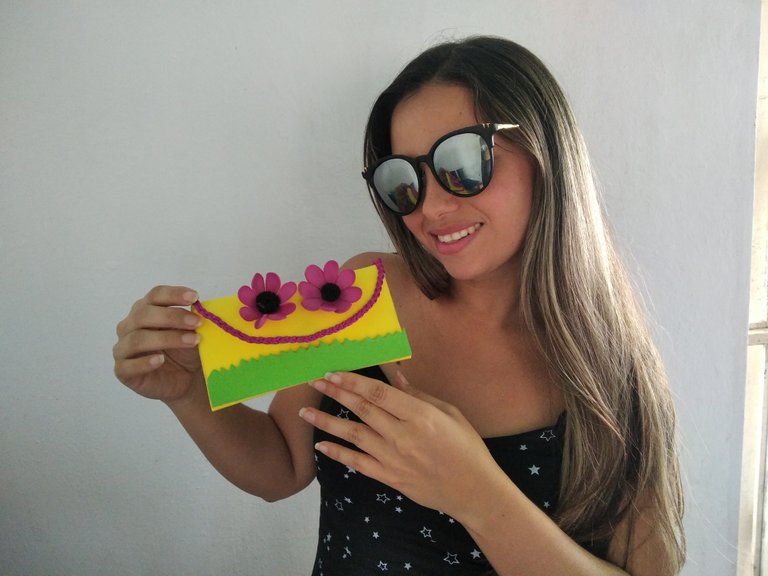
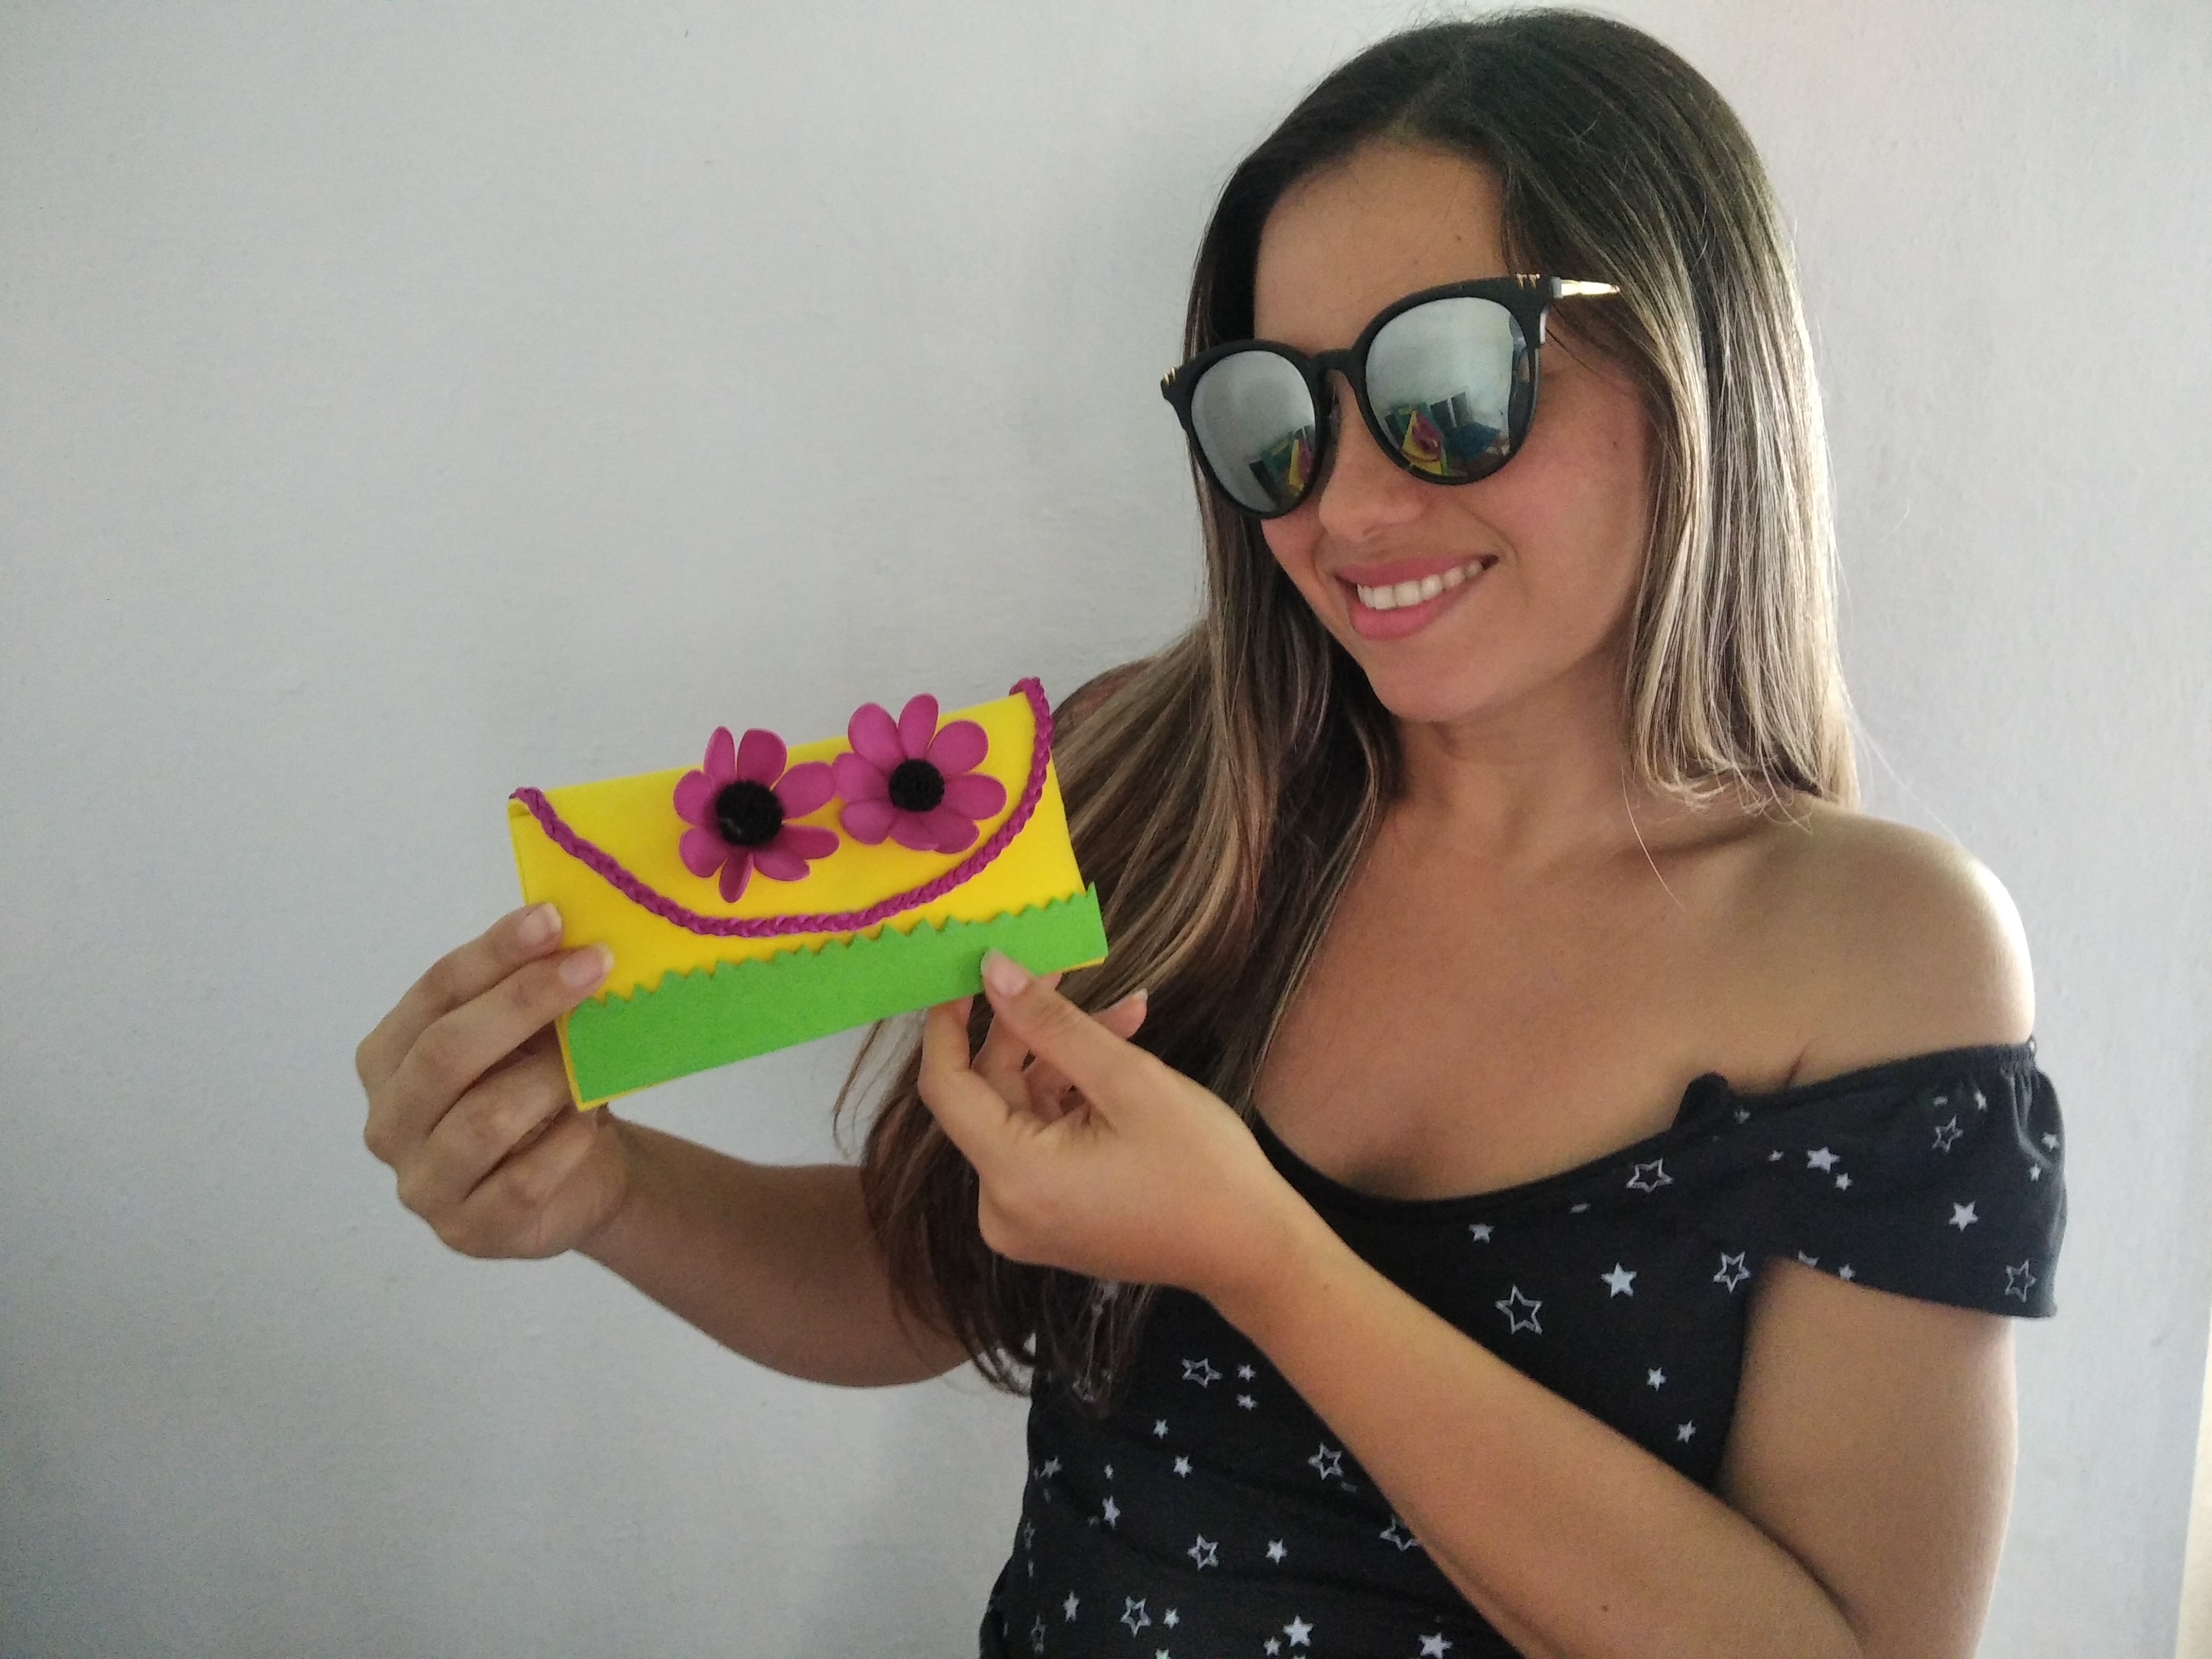
Ahora sí amigos terminamos esta linda y útil manualidad, veamos todos el resultado final.

Now, friends, we finished this nice and useful craft, let's all see the final result.

15-51-12-Separadores-22-768x123.png

Resultado Final.

End Result.


IMG_20220317_113746.jpg

IMG_20220317_113621.jpg

IMG_20220317_113553.jpg

IMG_20220317_113533.jpg

IMG_20220317_110300_1.jpg

IMG_20220317_110119_1.jpg

Bueno amigos ahora me despido, fué un verdadero placer el poder compartir este lindo estuche con ustedes, espero puedan hacerlo en casa y de esta manera resguardar sus lentes o los de algún ser querido ya sea hijos, esposo, esposa, entre otros. Mil gracias a los que amablemente me visitan, me leen y me comentan, es muy importante para mí saber que les ha gustado esta manualidad.


Well friends now I say goodbye, it was a real pleasure to be able to share this beautiful case with you, I hope you can do it at home and in this way protect your glasses or those of a loved one already be children, husband, wife, among others. A thousand thanks to those who kindly visit me, read me and comment on me, it is very important for me to know that you liked this craft.

15-51-12-Separadores-22-768x123.png

Todas las fotografías son mi propiedad, tomada con mi teléfono Redmi 8A y editadas con la aplicación Polish.Traductor Googl.co.ve. Los separadores de texto usados. All photos are my property, taken with my Redmi 8A phone. Translator Googl.co.ve. The text separators used.

Source

Gracias por tu agradable visita.
Thank you for your nice visit.
🥰

Sort:  

Que hermoso te quedó el estuche amiga, está increíble. 😍😍

IMG_20220317_162039.jpg

Que bellezura valeee... Éxitos totales :)

Congratulations @mayi04! You have completed the following achievement on the Hive blockchain and have been rewarded with new badge(s):

You received more than 2250 upvotes.
Your next target is to reach 2500 upvotes.

You can view your badges on your board and compare yourself to others in the Ranking
If you no longer want to receive notifications, reply to this comment with the word STOP

Check out the last post from @hivebuzz:

Hive Power Up Month - Feedback from February day 15
Support the HiveBuzz project. Vote for our proposal!
Thank you for sharing this amazing post on HIVE!
  • Your content got selected by our fellow curator @rezoanulvibes & you just received a little thank you via an upvote from our non-profit curation initiative!

  • You will be featured in one of our recurring curation compilations and on our pinterest boards! Both are aiming to offer you a stage to widen your audience within and outside of the DIY scene of hive.

Join the official DIYHub community on HIVE and show us more of your amazing work and feel free to connect with us and other DIYers via our discord server: https://discord.gg/mY5uCfQ !

If you want to support our goal to motivate other DIY/art/music/homesteading/... creators just delegate to us and earn 100% of your curation rewards!

Stay creative & hive on!