Hola, hola hermosa comunidad de #hivediy 👩🎨

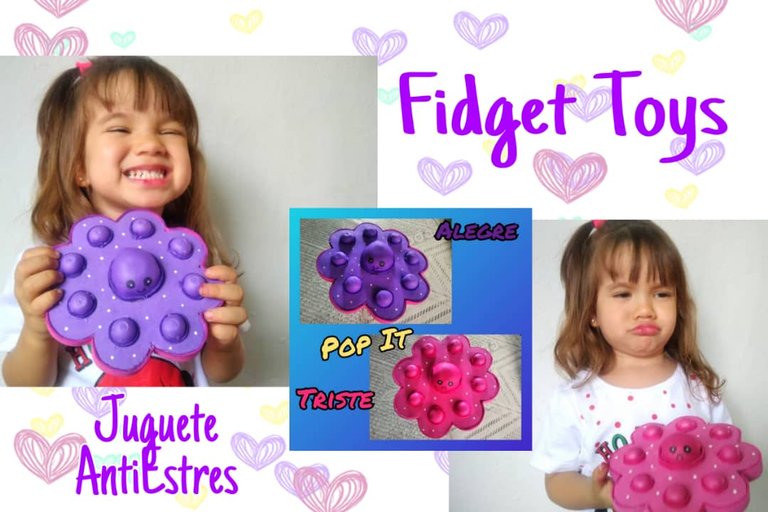
Blessed day have all my dear friends, once I want to share with you a beautiful work that I have done and I thought it was great, in recent days we met with some friends who have a baby of My little Nicole's age, exactly 2 years old, she was carrying a toy that is super fashionable today, and is known as a "POP IT" or "Fidget Toys".
This is a relax and anti-stress toy, very colorful and striking, made in many ways among the most common, horse, heart, flower, unicorn, among others. This toy was created mainly for children who have some condition such as autism, attention deficit, hyperactivity, however it expanded and its popularity grew rapidly encompassing the general population.
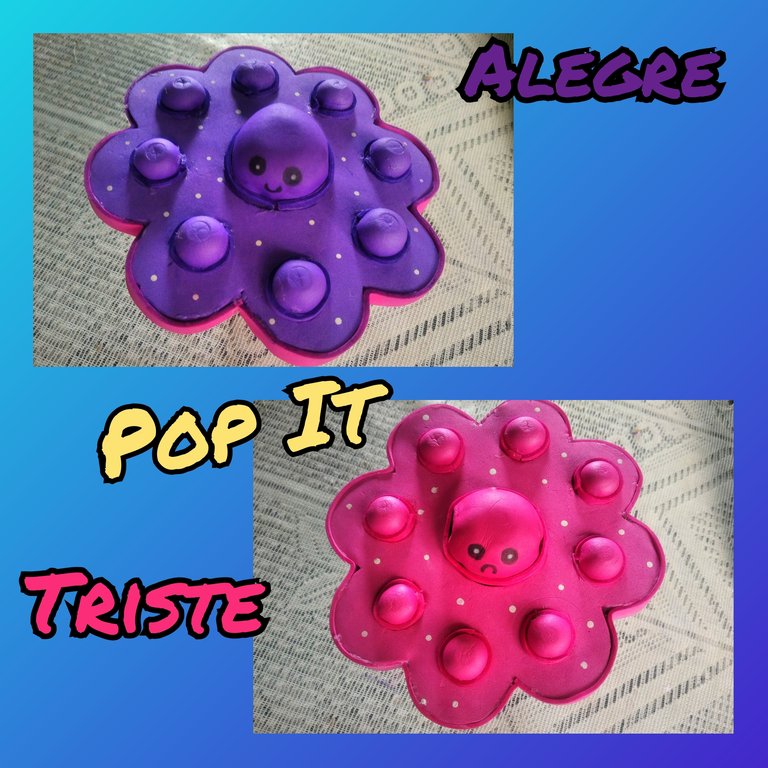
Nowadays all children want a Pop It, they like the feeling of popping bubbles and the sound it makes when doing so. My daughter Nicole played all afternoon with Mari's It pop and she didn't want to come home without it, that's why friends I wanted to create this It pop with my own hands, so that my little girl can entertain herself and enjoy a lot. This pop It also expresses emotions, on the one hand it is happy and on the other it is sad. Now let's see the materials we used to make this pop It.

Materiales

🐙 Cartón.
🐙 Foami morado.
🐙 Foami fucsia.
🐙 Hija blanca.
🐙 Lápiz de grafito.
🐙 Marcadores morado, fucsia y negro.
🐙 Pistola de silicón.
🐙 Silicón en barra.
🐙 Tijera.
🐙 Metra o canica.
🐙 Pelota de plástico.
🐙 Vaso pequeño.
🐙 Plancha de cabellos.
🐙 Cardboard.
🐙 Purple foami.
🐙 Fuchsia foami.
🐙 White daughter.
🐙 Graphite pencil.
🐙 Purple, fuchsia and black markers.
🐙 Silicone gun.
🐙 Silicone in bar.
🐙 Scissor.
🐙 Meter or marble.
🐙 Plastic ball.
🐙 Small glass.
🐙 Hair straightener.
Now let's go step by step and make this Fidget Toys, which is inspired by a cute octopus since my daughter likes many animals and that's why I wanted to make it an octopus.
Elaboración

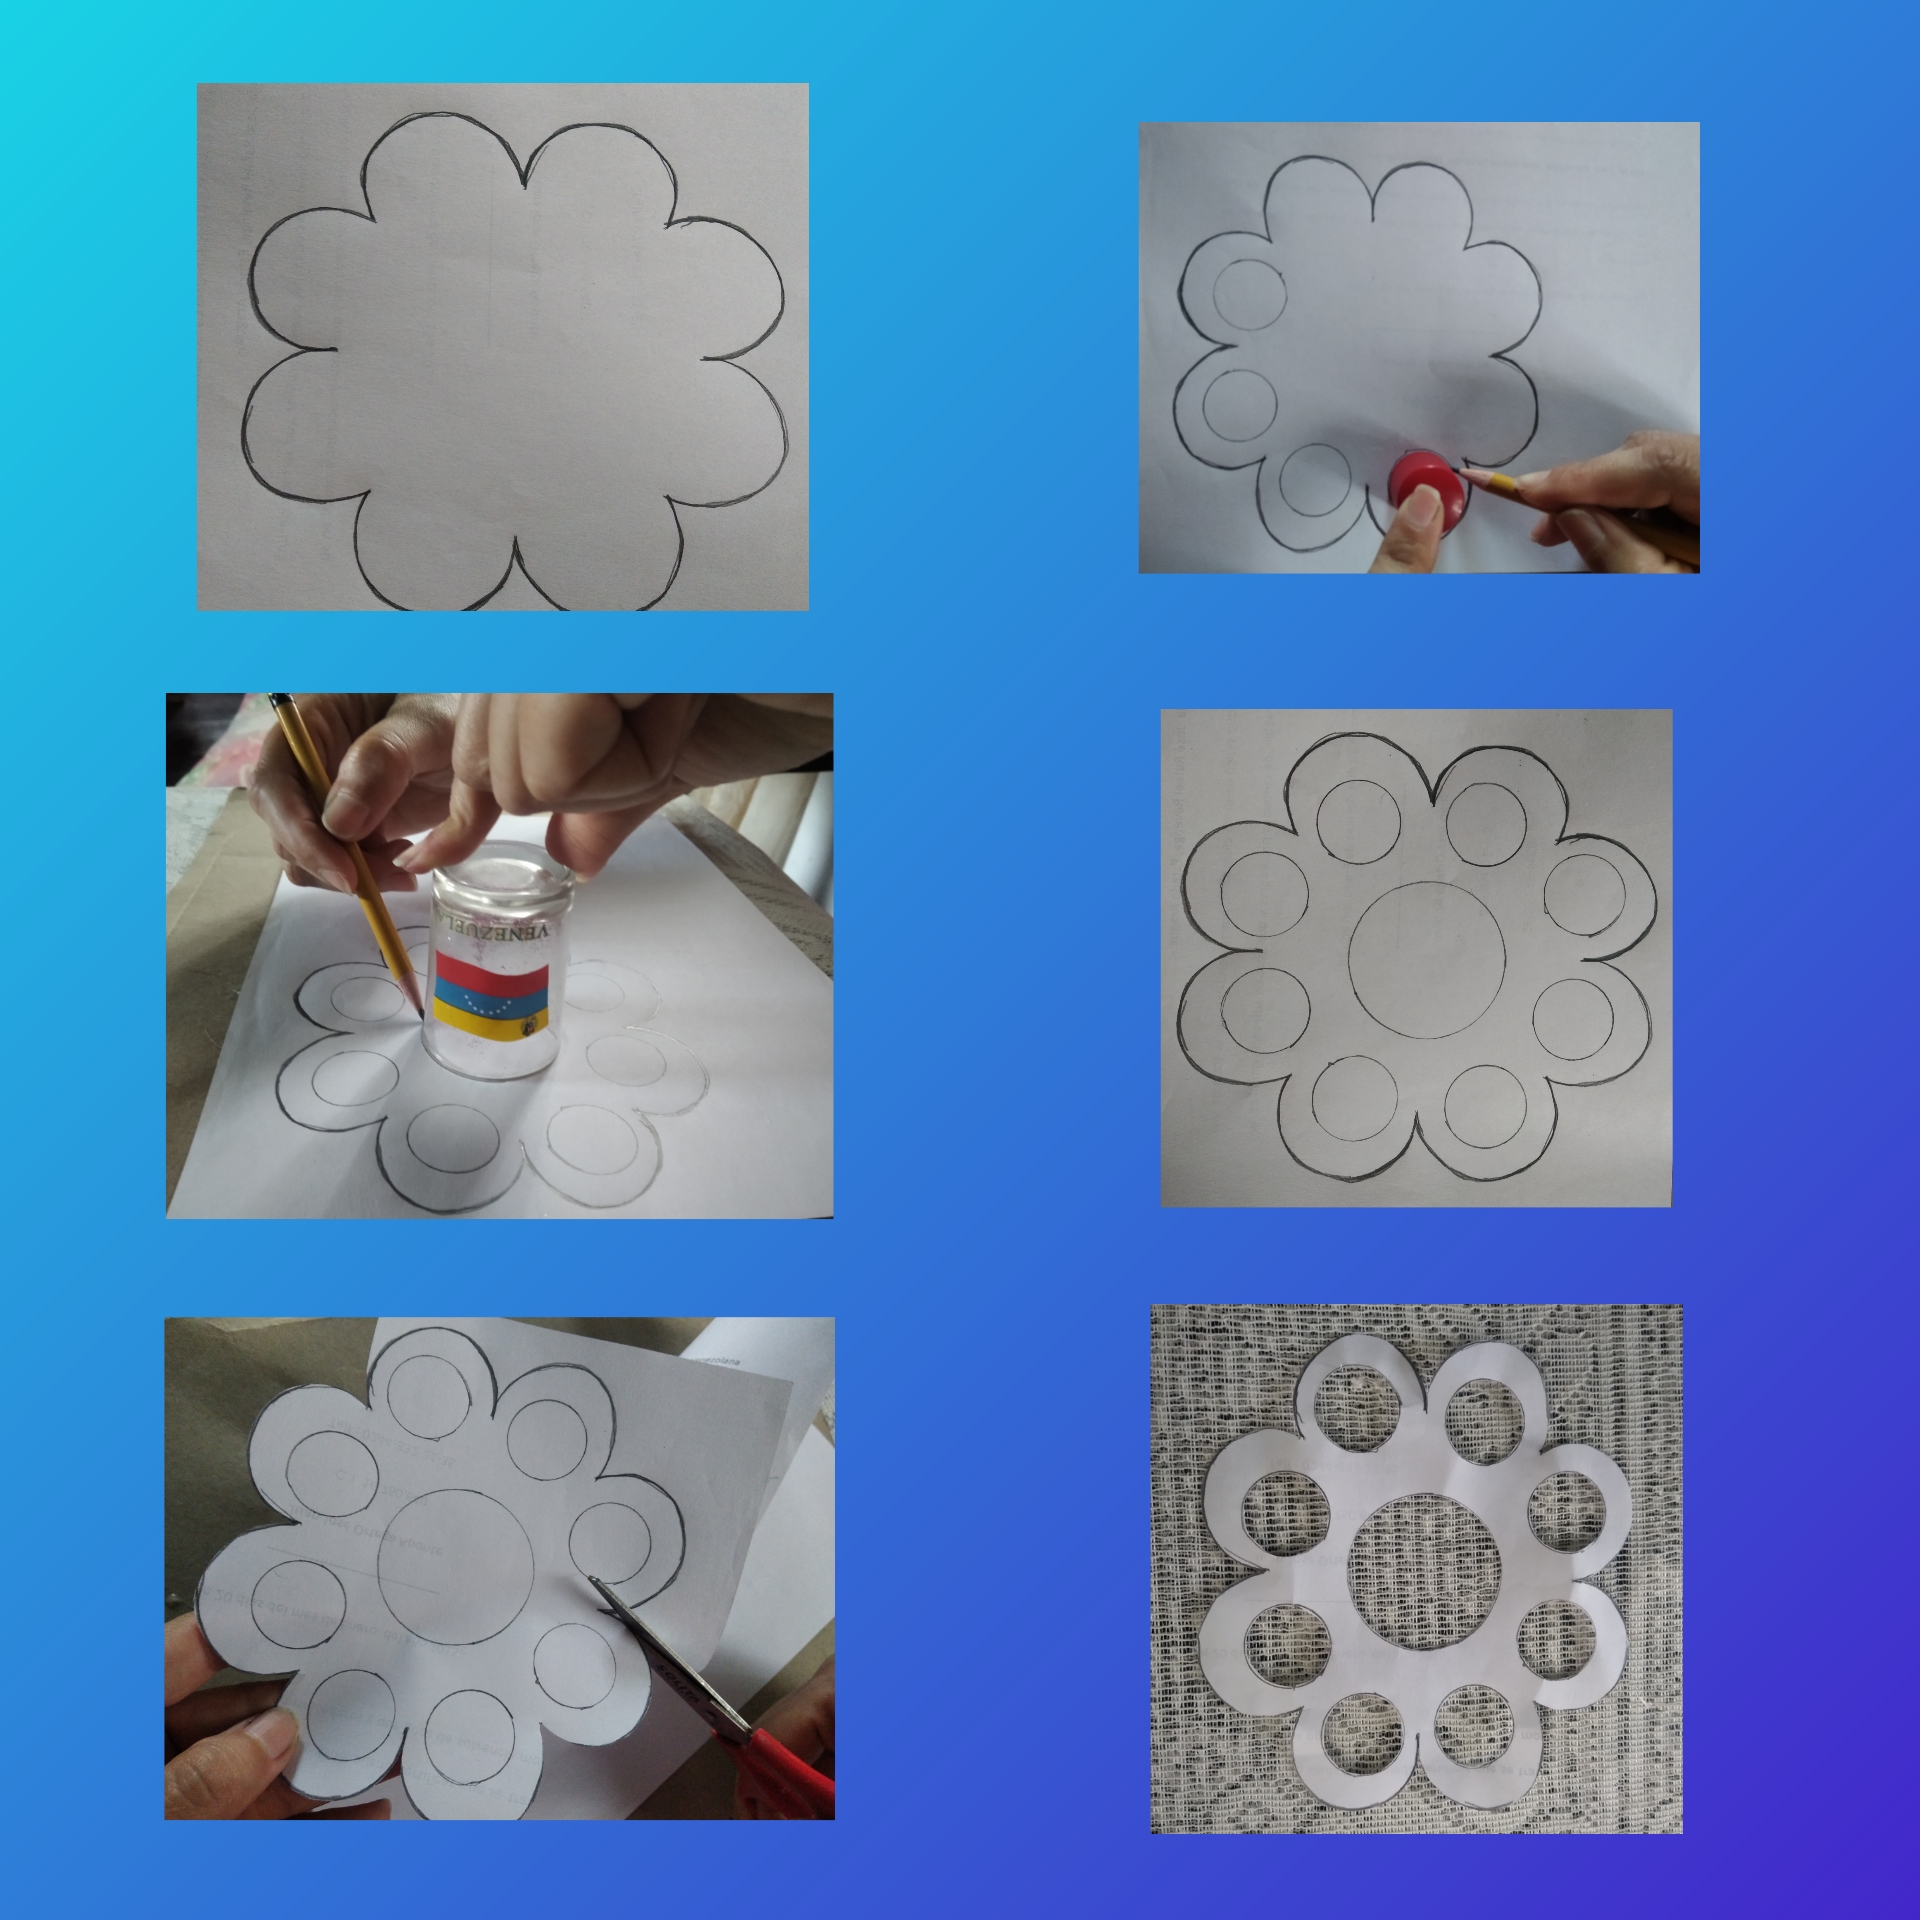
Step 1.We begin this elaboration by drawing an octopus on a white sheet as shown in the image and the size we want our pop It to be, after drawing it we are going to take a mold in this case I am going to use an acetone cap and around it I draw a circle in the middle of each tentacle, then with a larger mold in this step a glass I will draw the central circle which is larger than the 8 circles we made around it . We cut along the edge and in the center of each circle formed and we will have the mold ready.
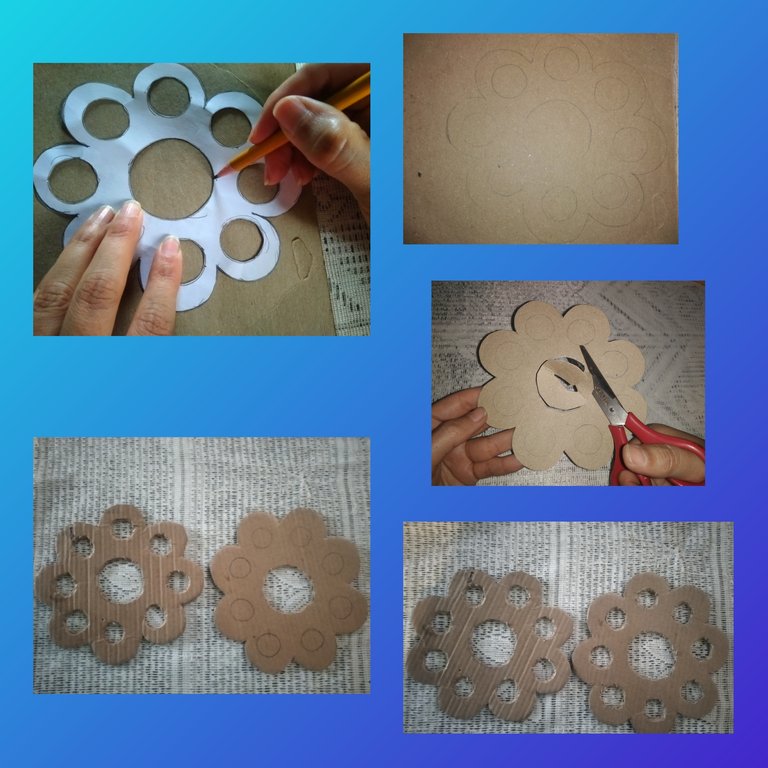
Step 2.We place the template we obtained on the cardboard and we are going to draw it, we do it twice and then we cut it out.
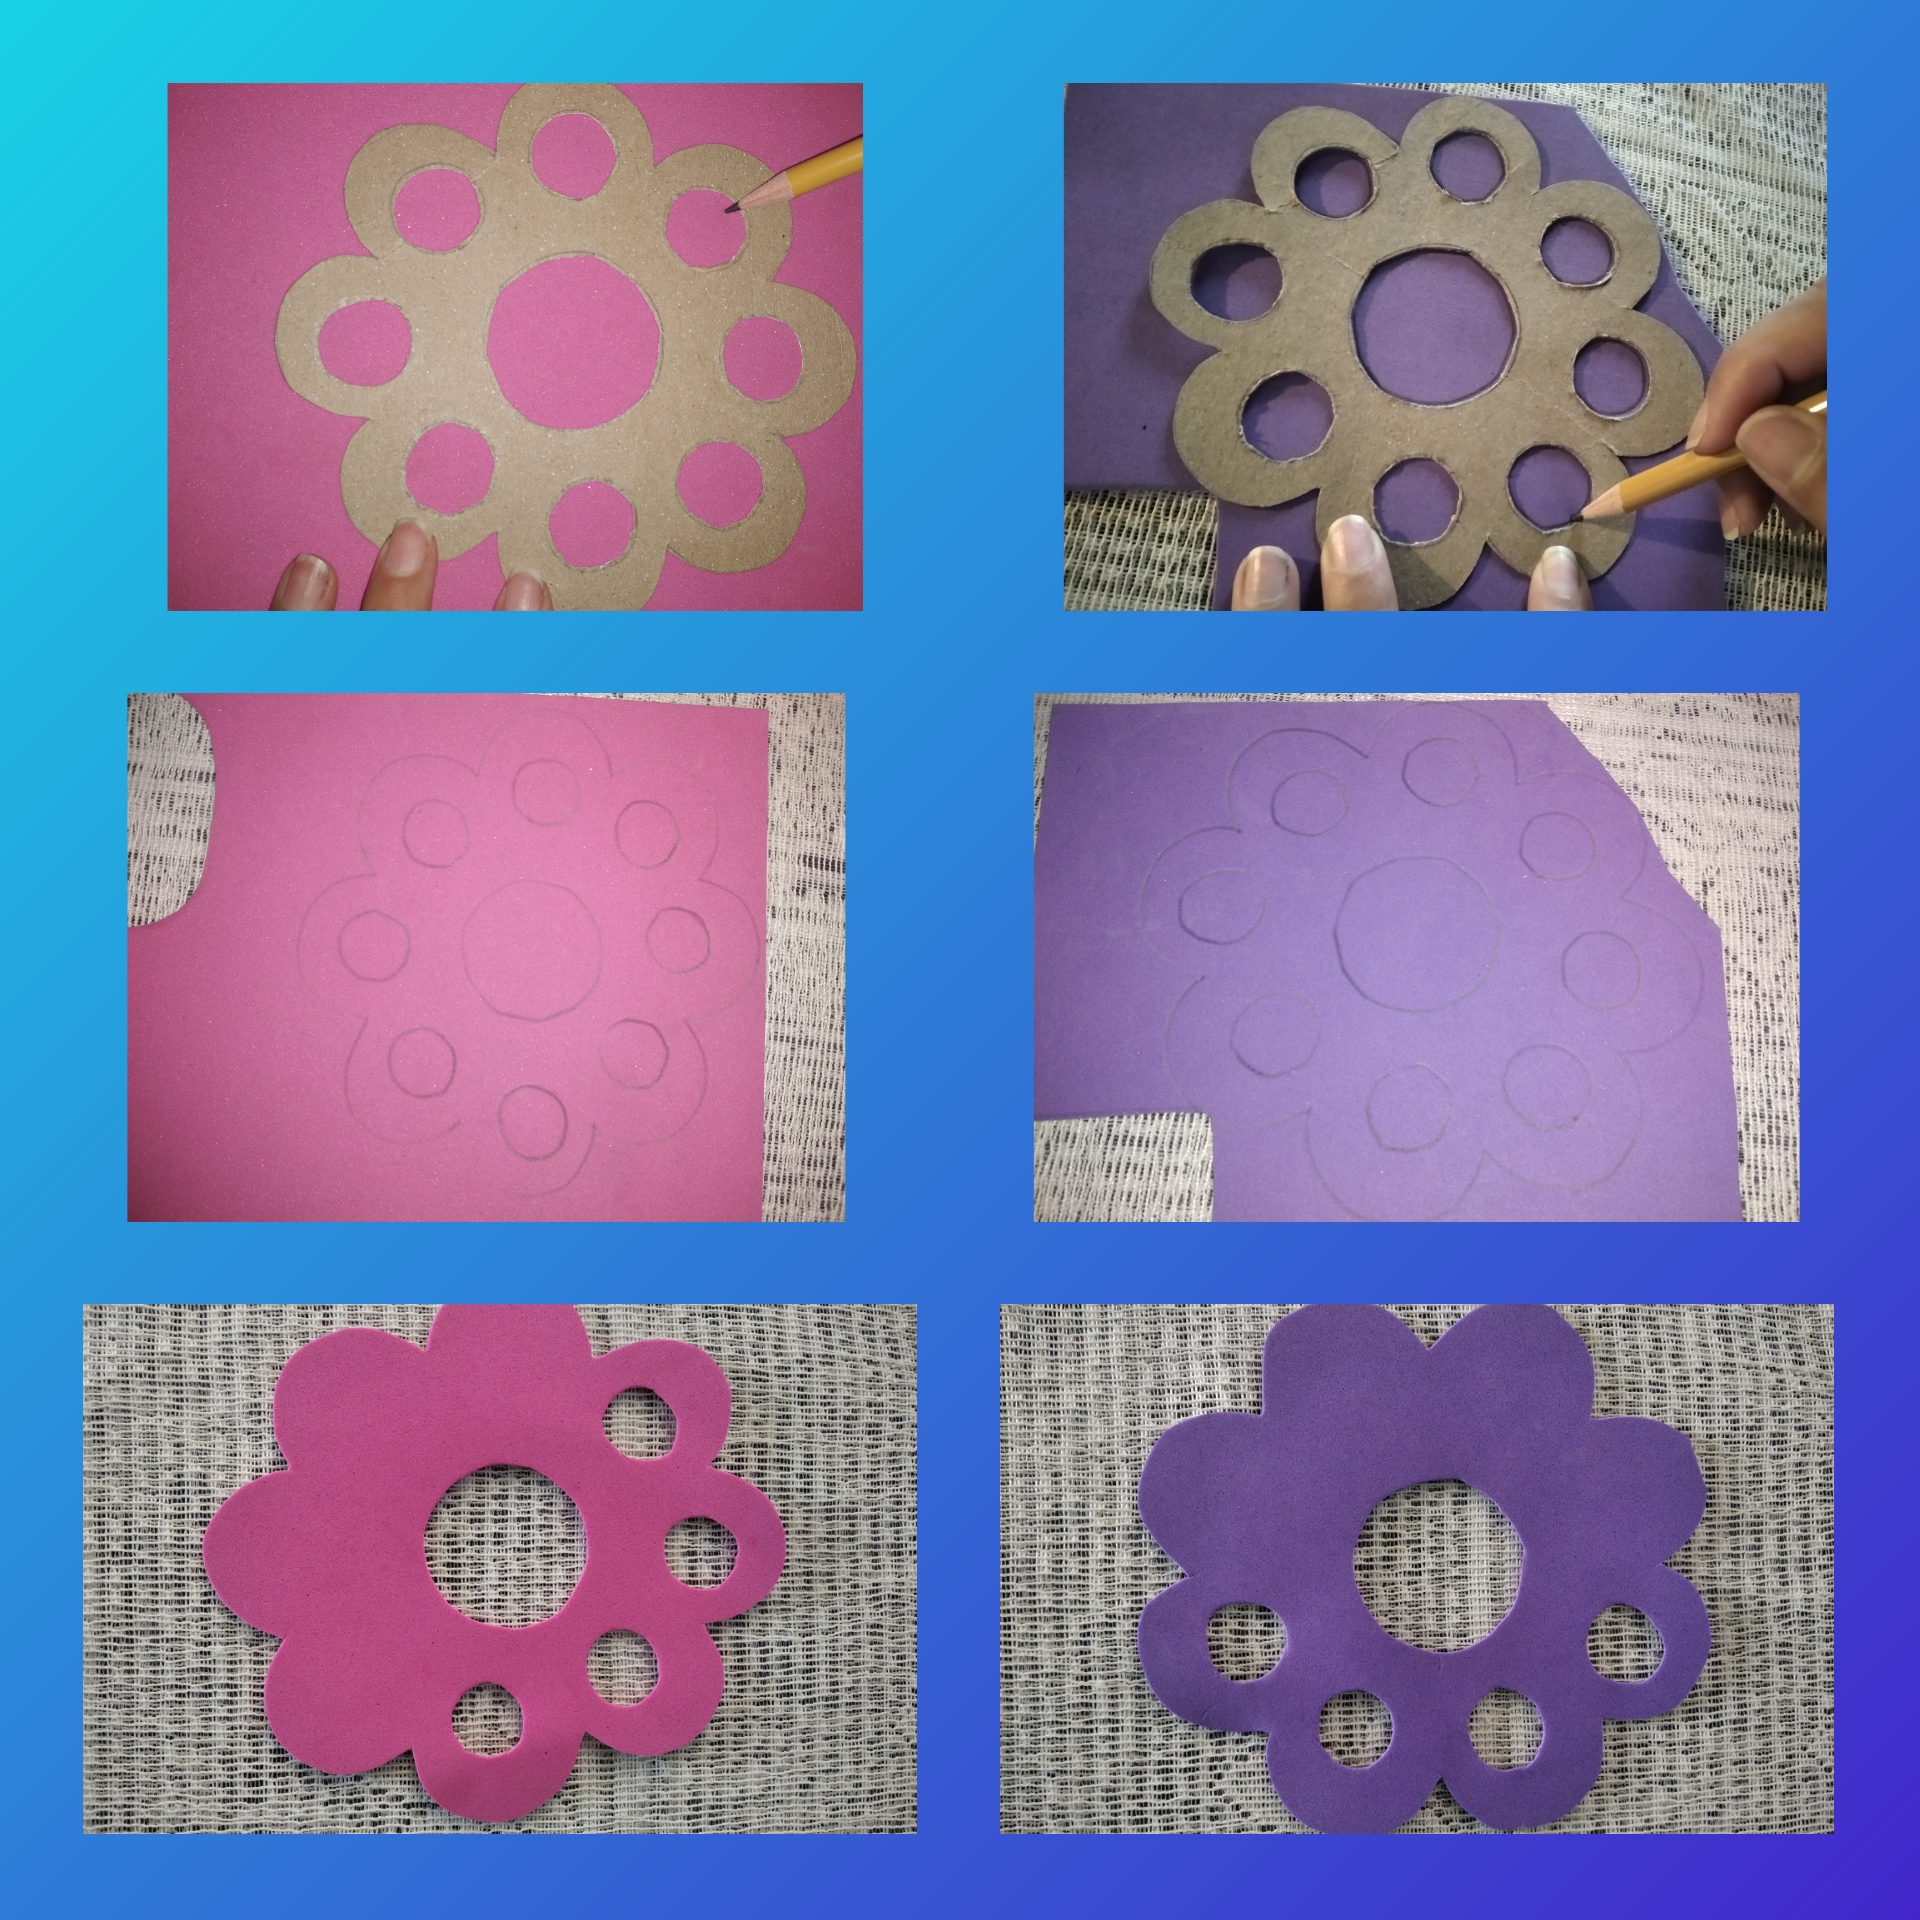
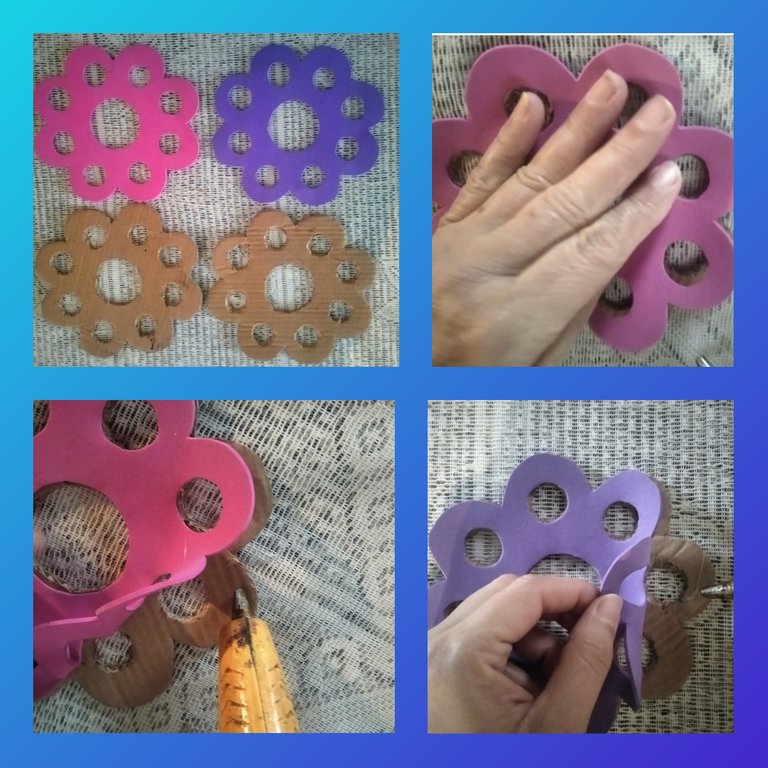
Step 3.When we have our two cardboards ready, we are going to highlight the fuchsia foami and then cut them out on the purple foami.
Step 4.When we have the four pieces ready, we are going to glue together the purple piece with a piece of cardboard and the fuchsia piece with the other piece of cardboard.
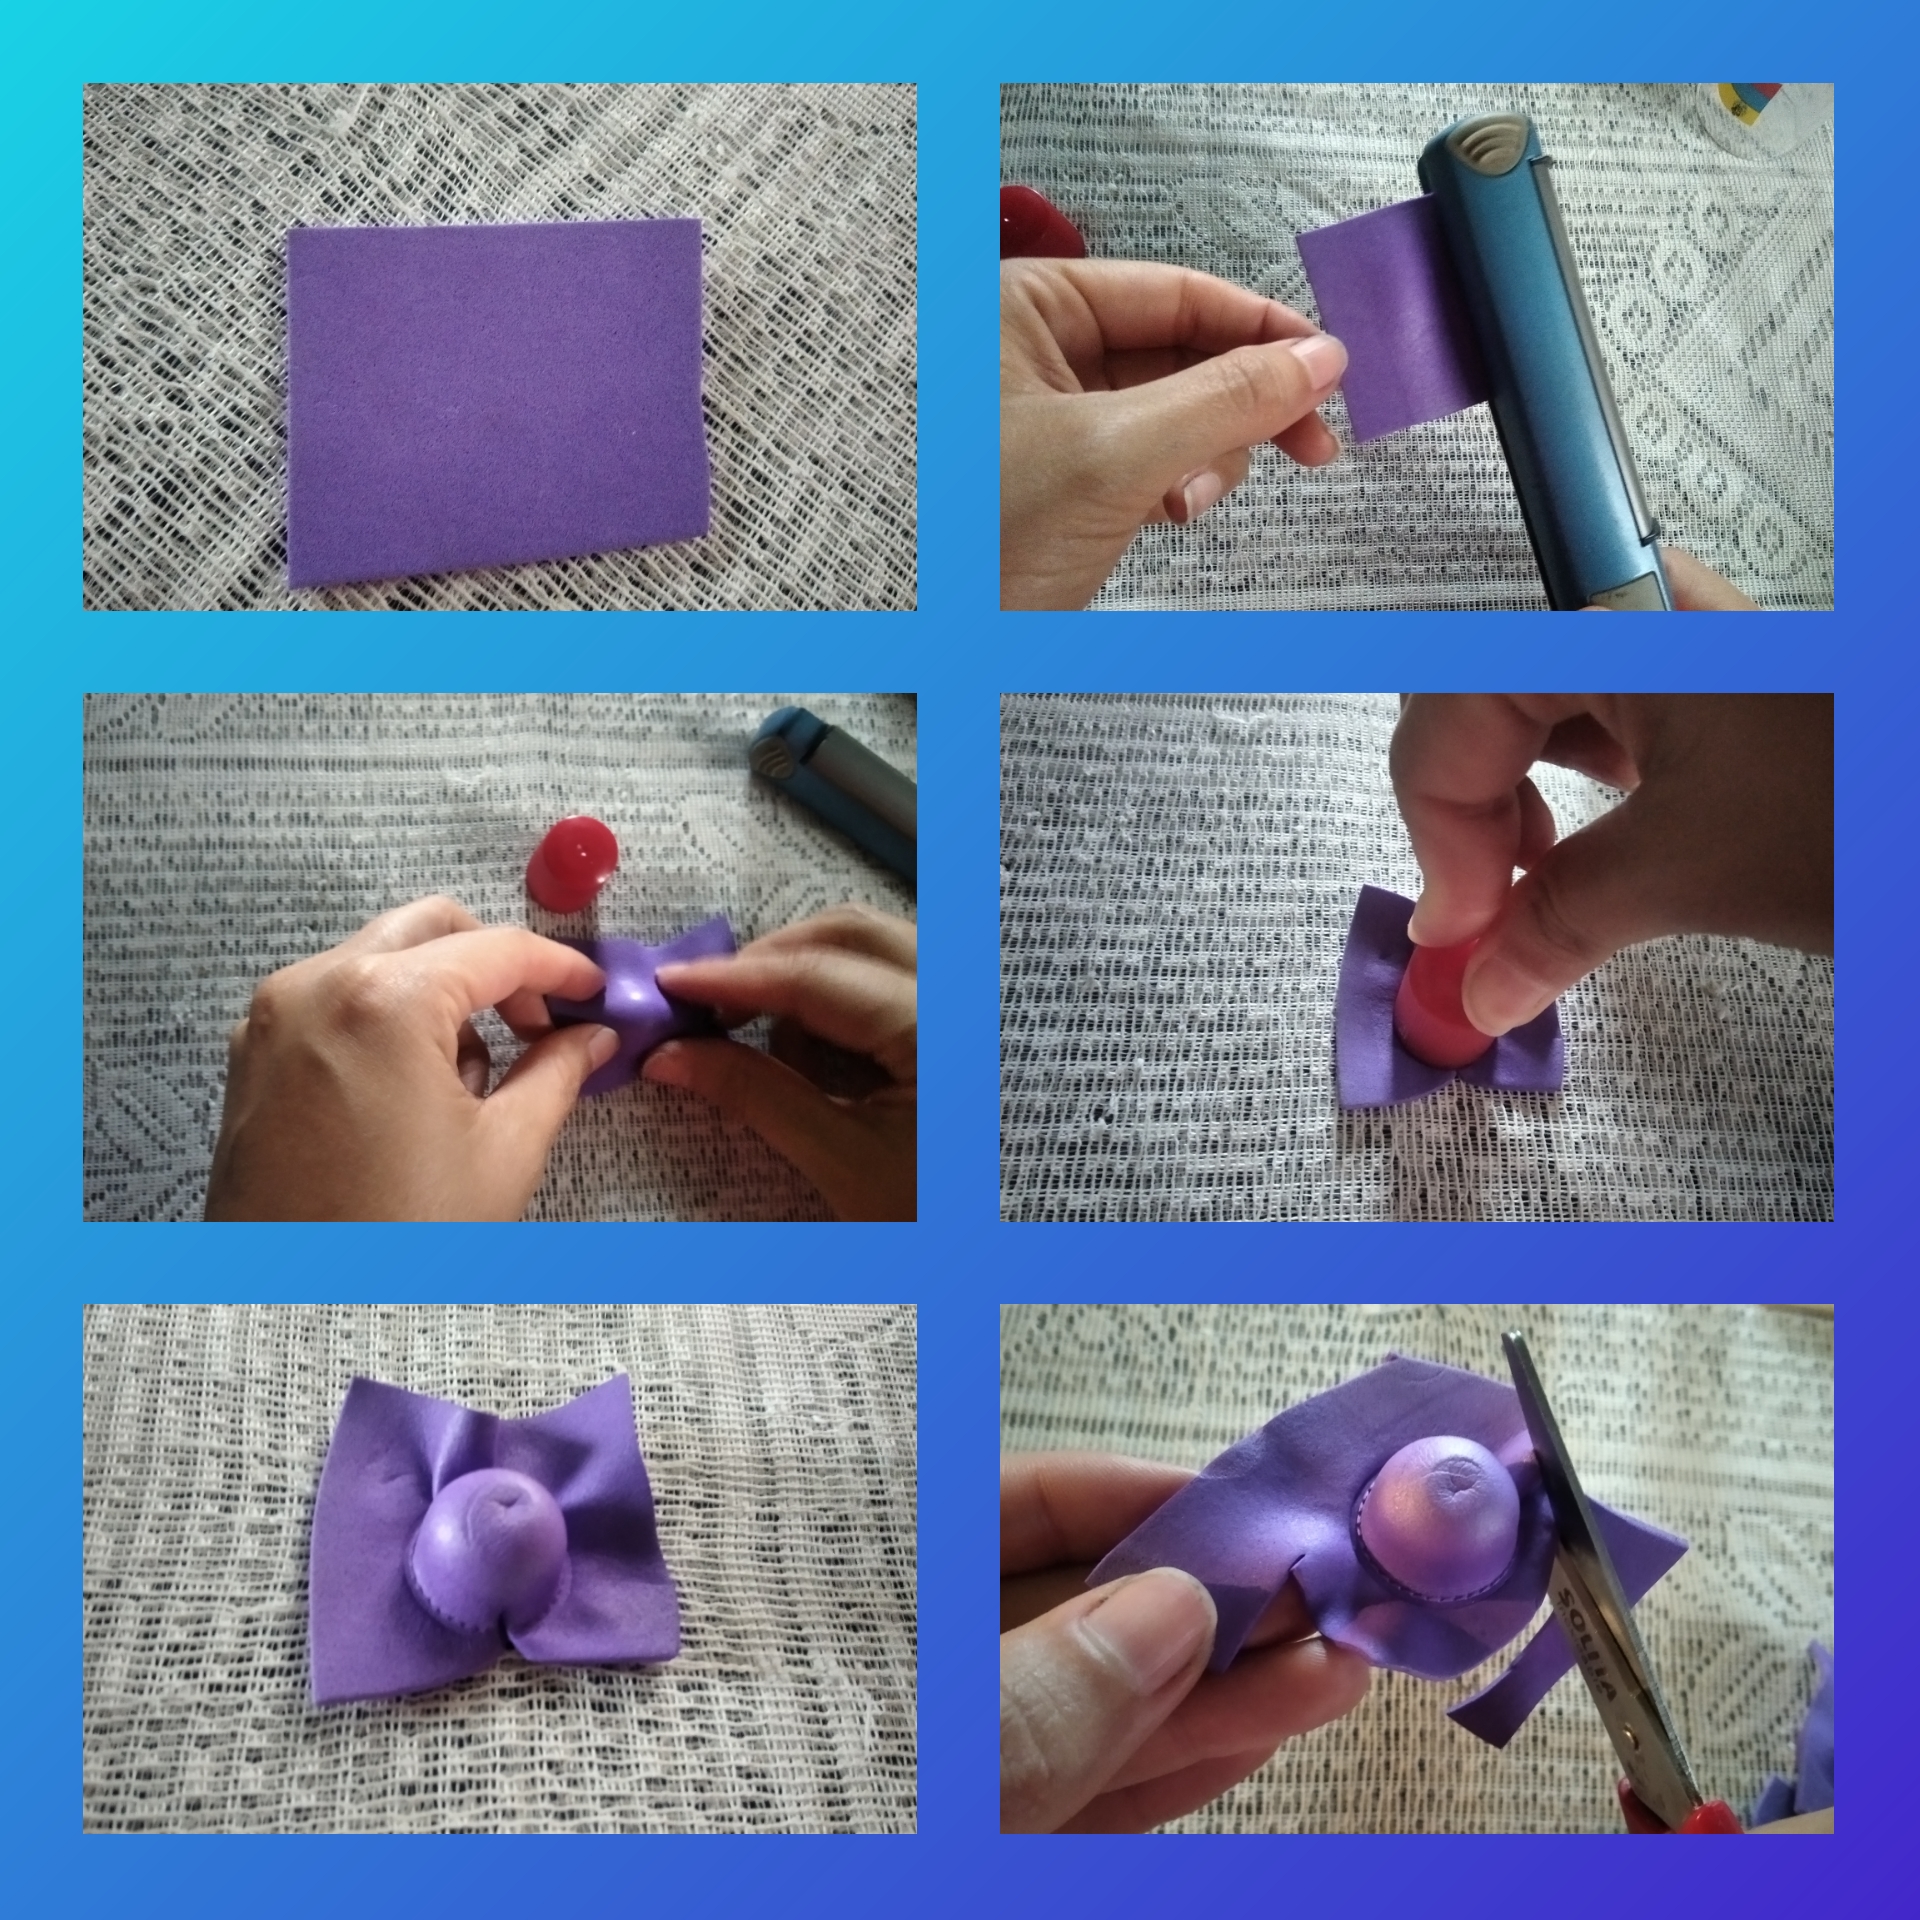
Step 5.Now we are going to make the bubbles that will give emotion to this cute pop It. We start by taking a piece of purple foami and we are going to heat it with the hair iron, after it is hot We place it on a Metra or marble and with the acetone lid we wrap this to give the foami that endorsed shape, finally we cut the excess foami.
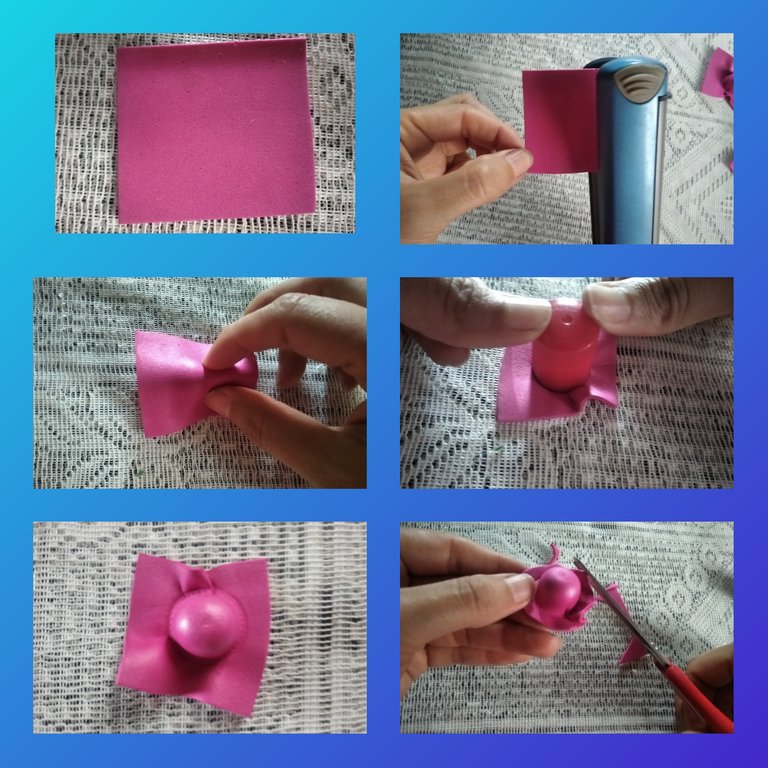
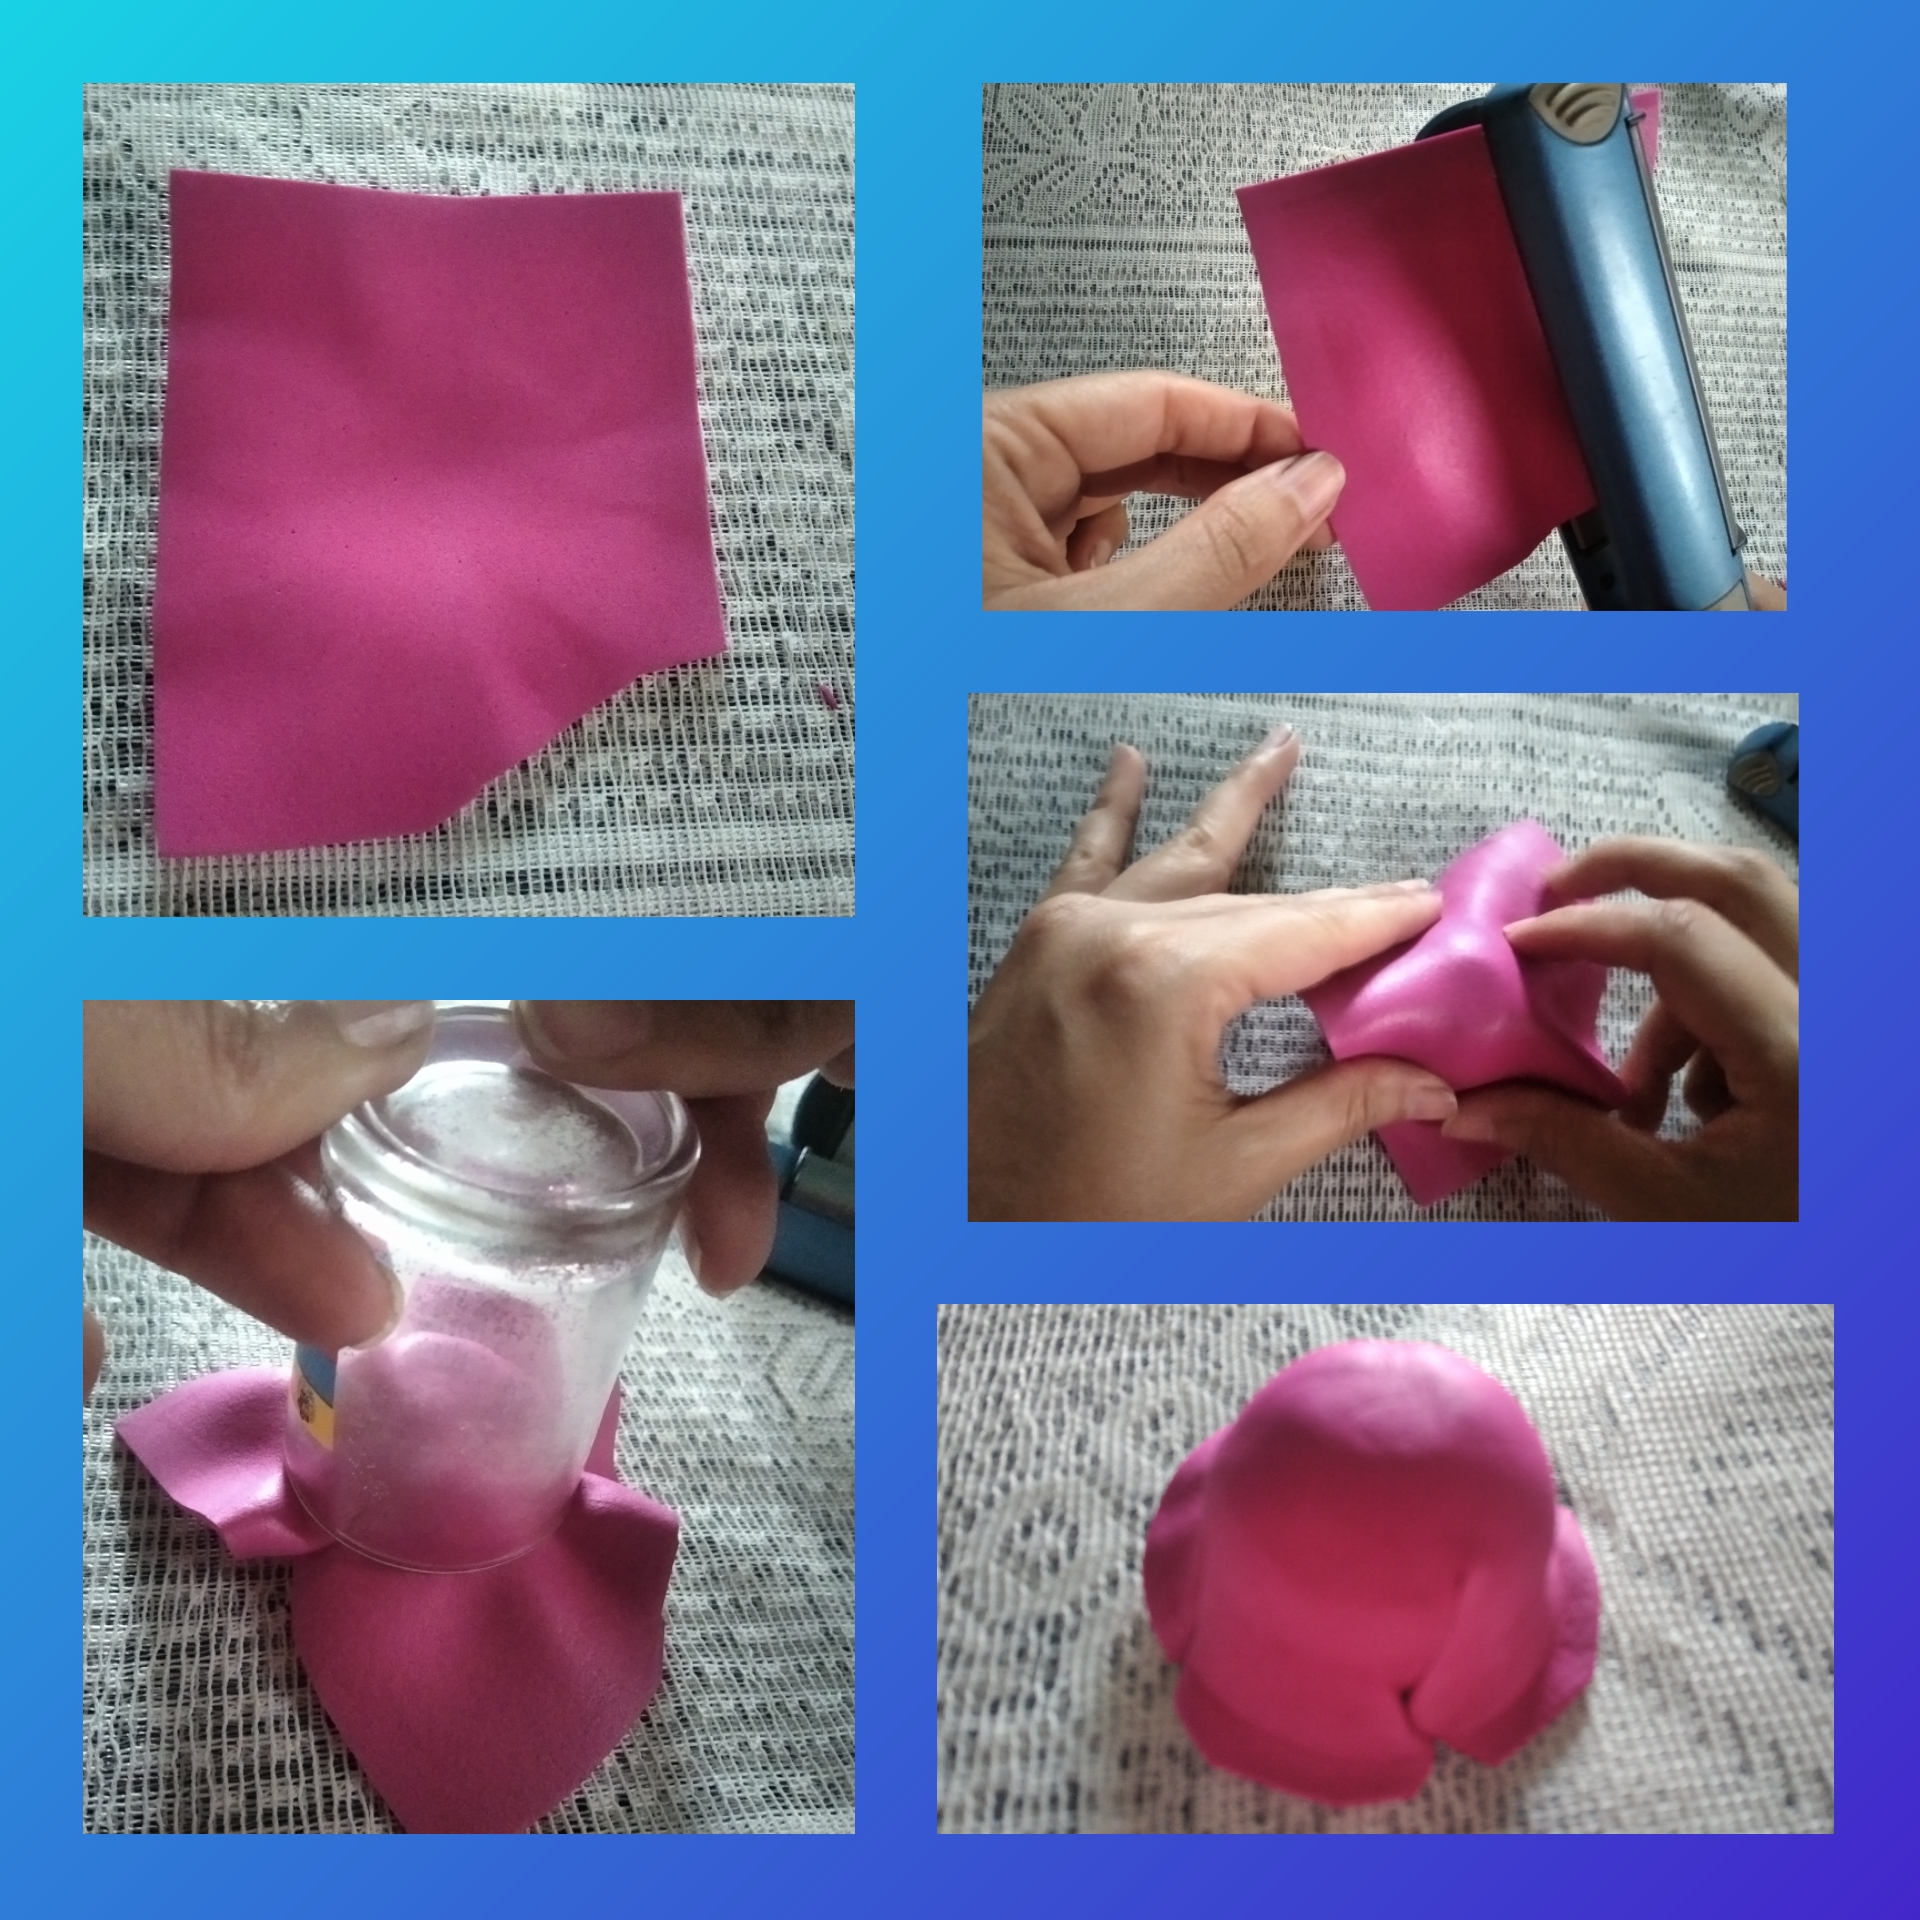
Step 6.In the same way we do with the fuchsia foami, we take a piece and heat it with the iron, then we place it on the marble and finally we put the acetone lid, we cut the excess foami and we will stay this way.
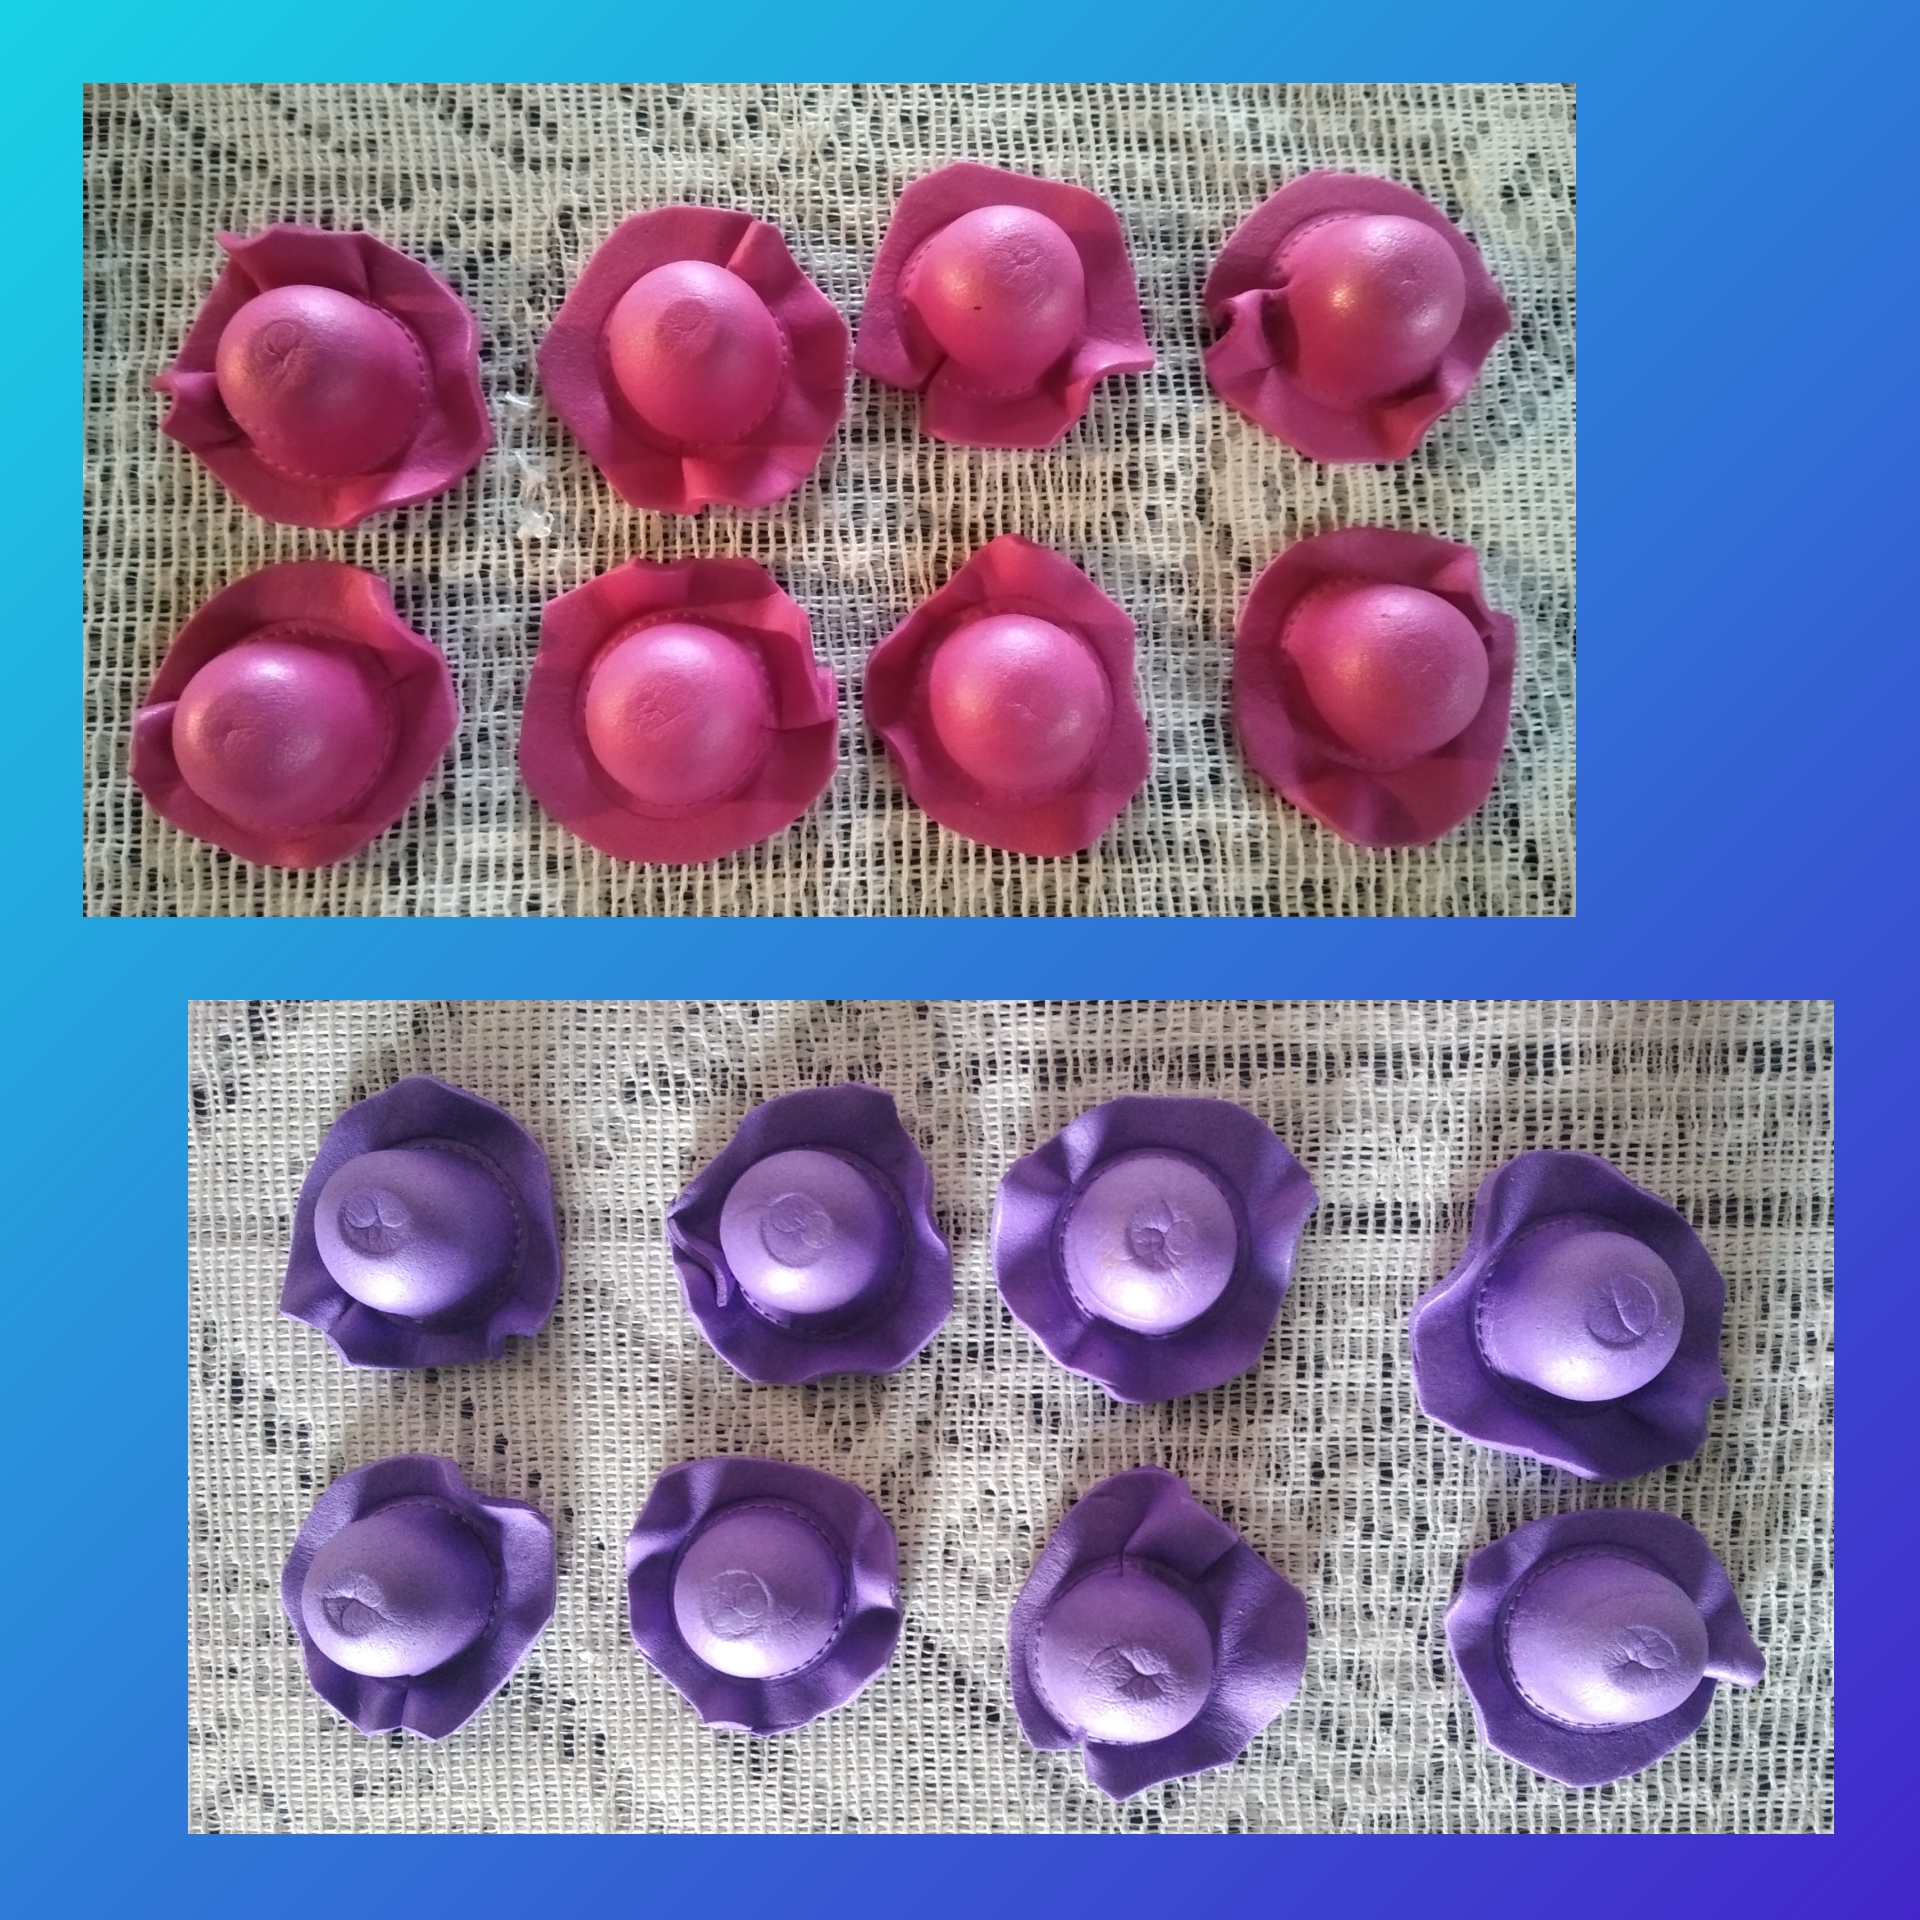
In total we will make eight fuchsia bubbles and 8 purple bubbles.
Step 7.For the bubble that goes in the center and is the head of the octopus, we will use a small plastic ball as a mold. In the same way we take a piece of foami that covers the ball, then we heat the foami with the iron and place it on the ball and on it the glass to give it the oval shape.
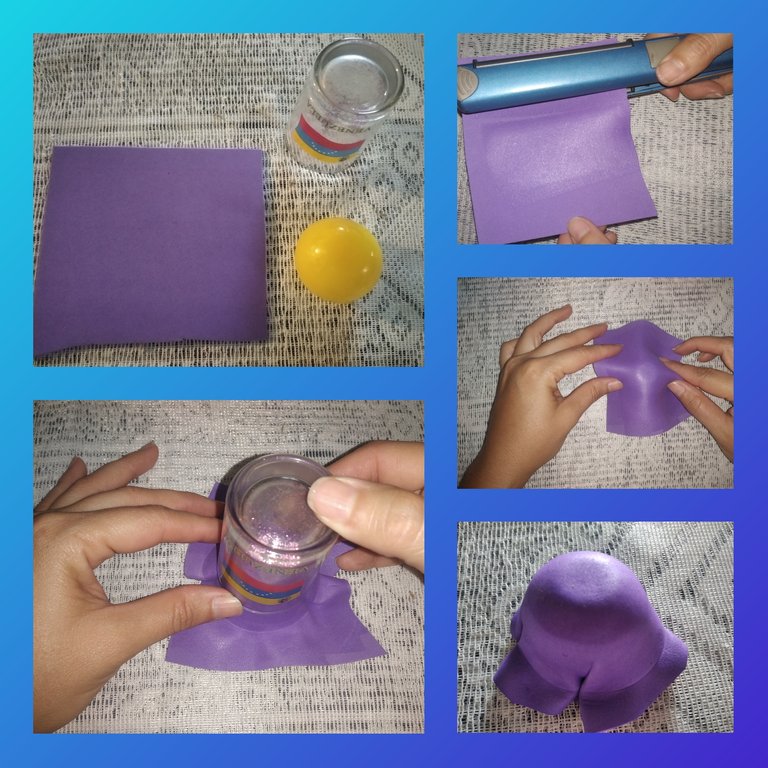
Step 8.We will do the same for the fuscia head, we take the fuscia foami and heat it, then we place it on the plastic ball and finally we put it in the glass.
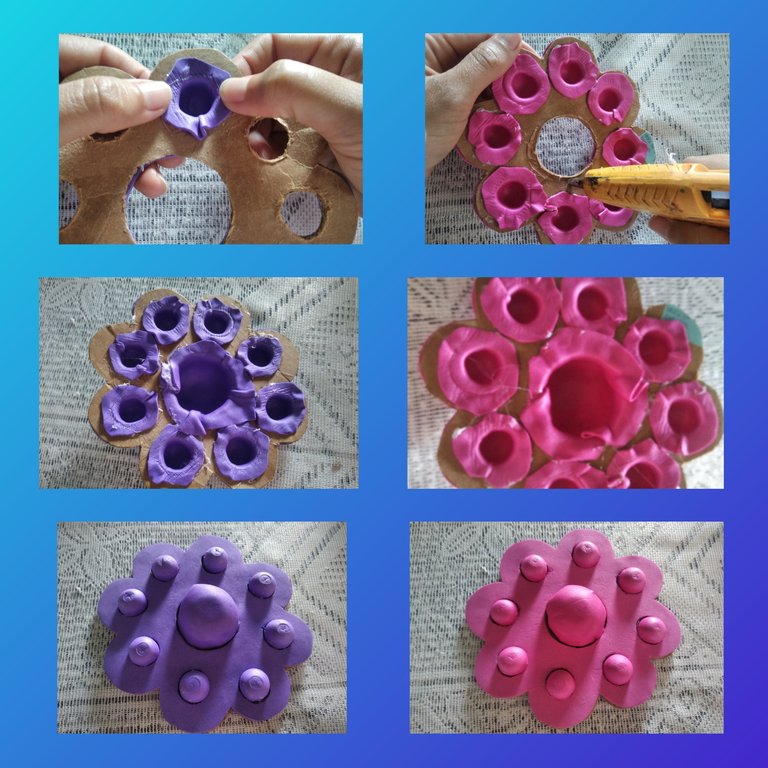
<div class="text-justify"We already have the two bases ready and all the bubbles, we are going to assemble in the part of the cardboard we are going to paste with silicone, we introduce each bubble in each hole as shown in the image.
Step 9.
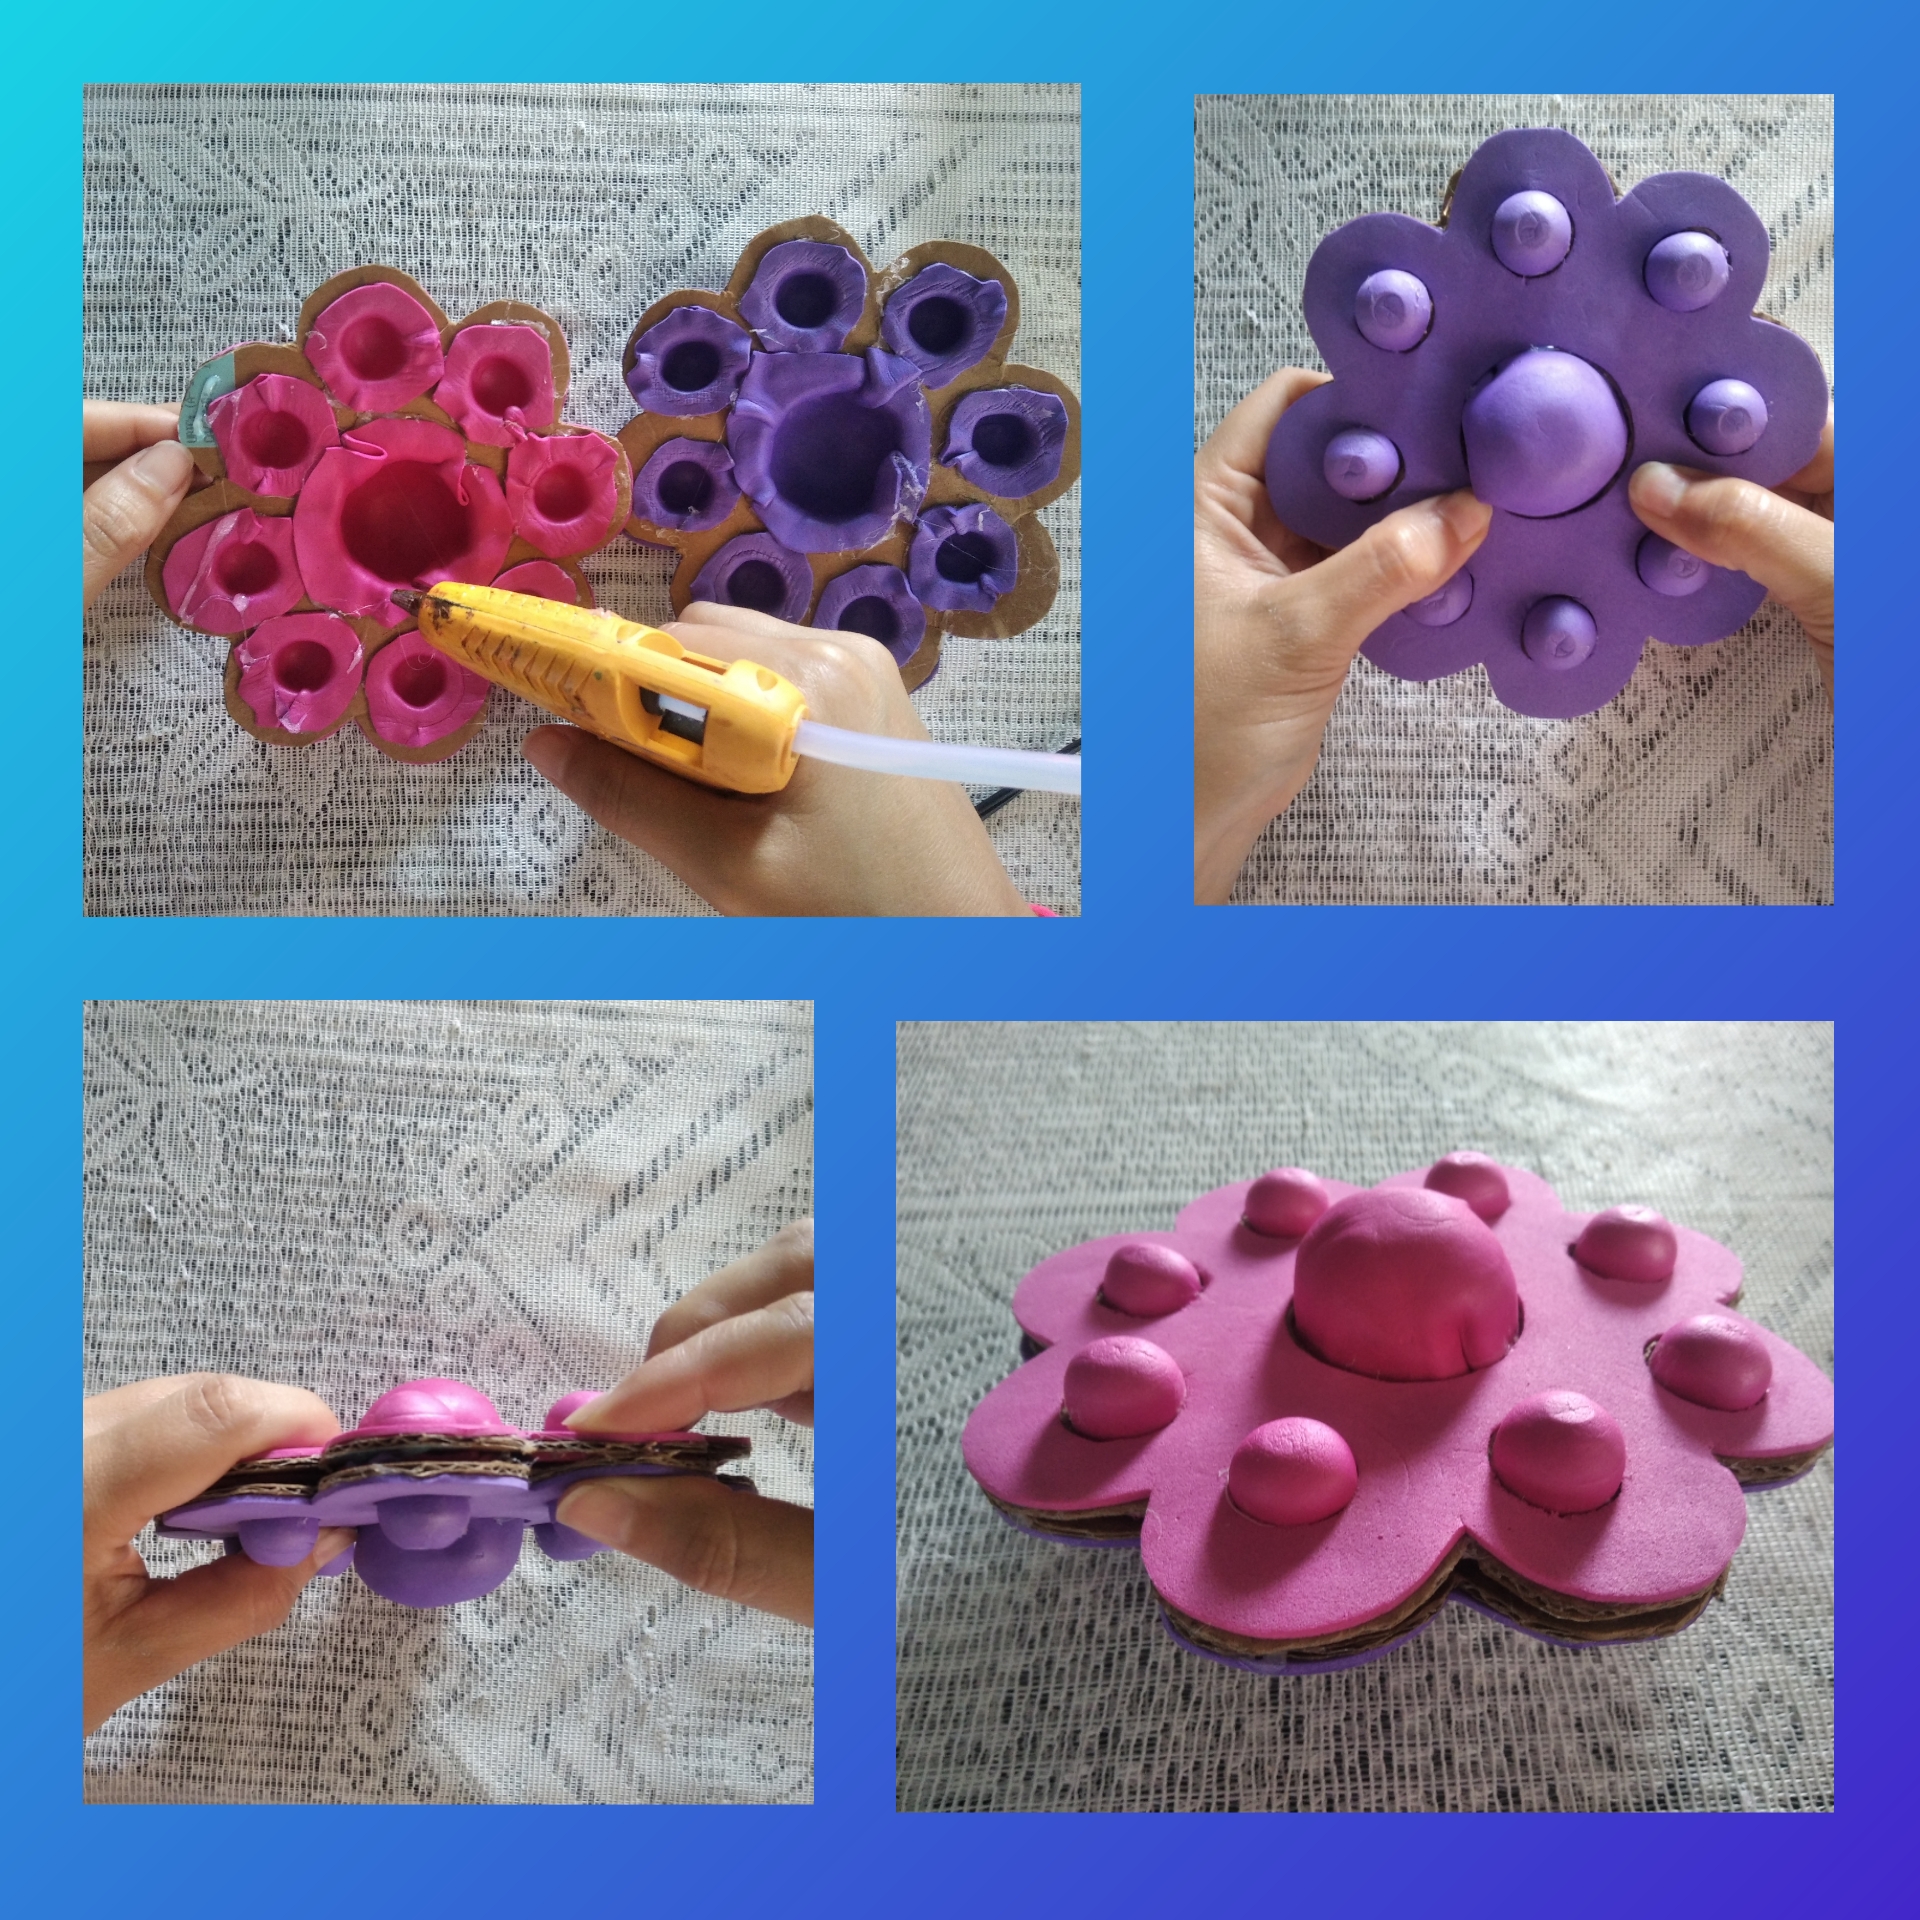
Step 10.With silicone we join the two pieces and we will be left with a pop It on both sides, one side fuscia and the other purple.
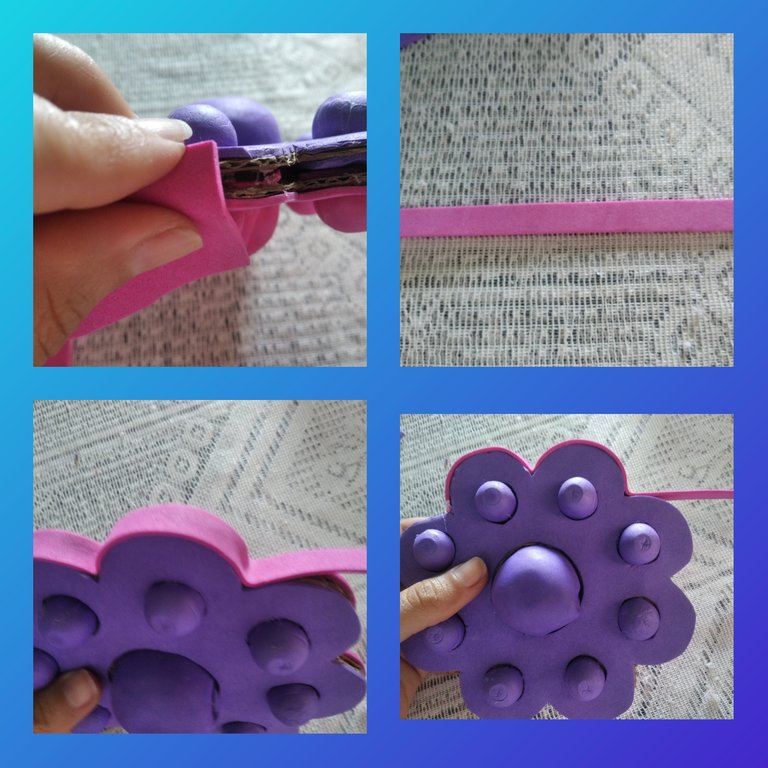
Step 11.We are going to cover the edges, with the fuscia foami we measure the width of the pop It and cut a strip and join it with silicone around the edge.
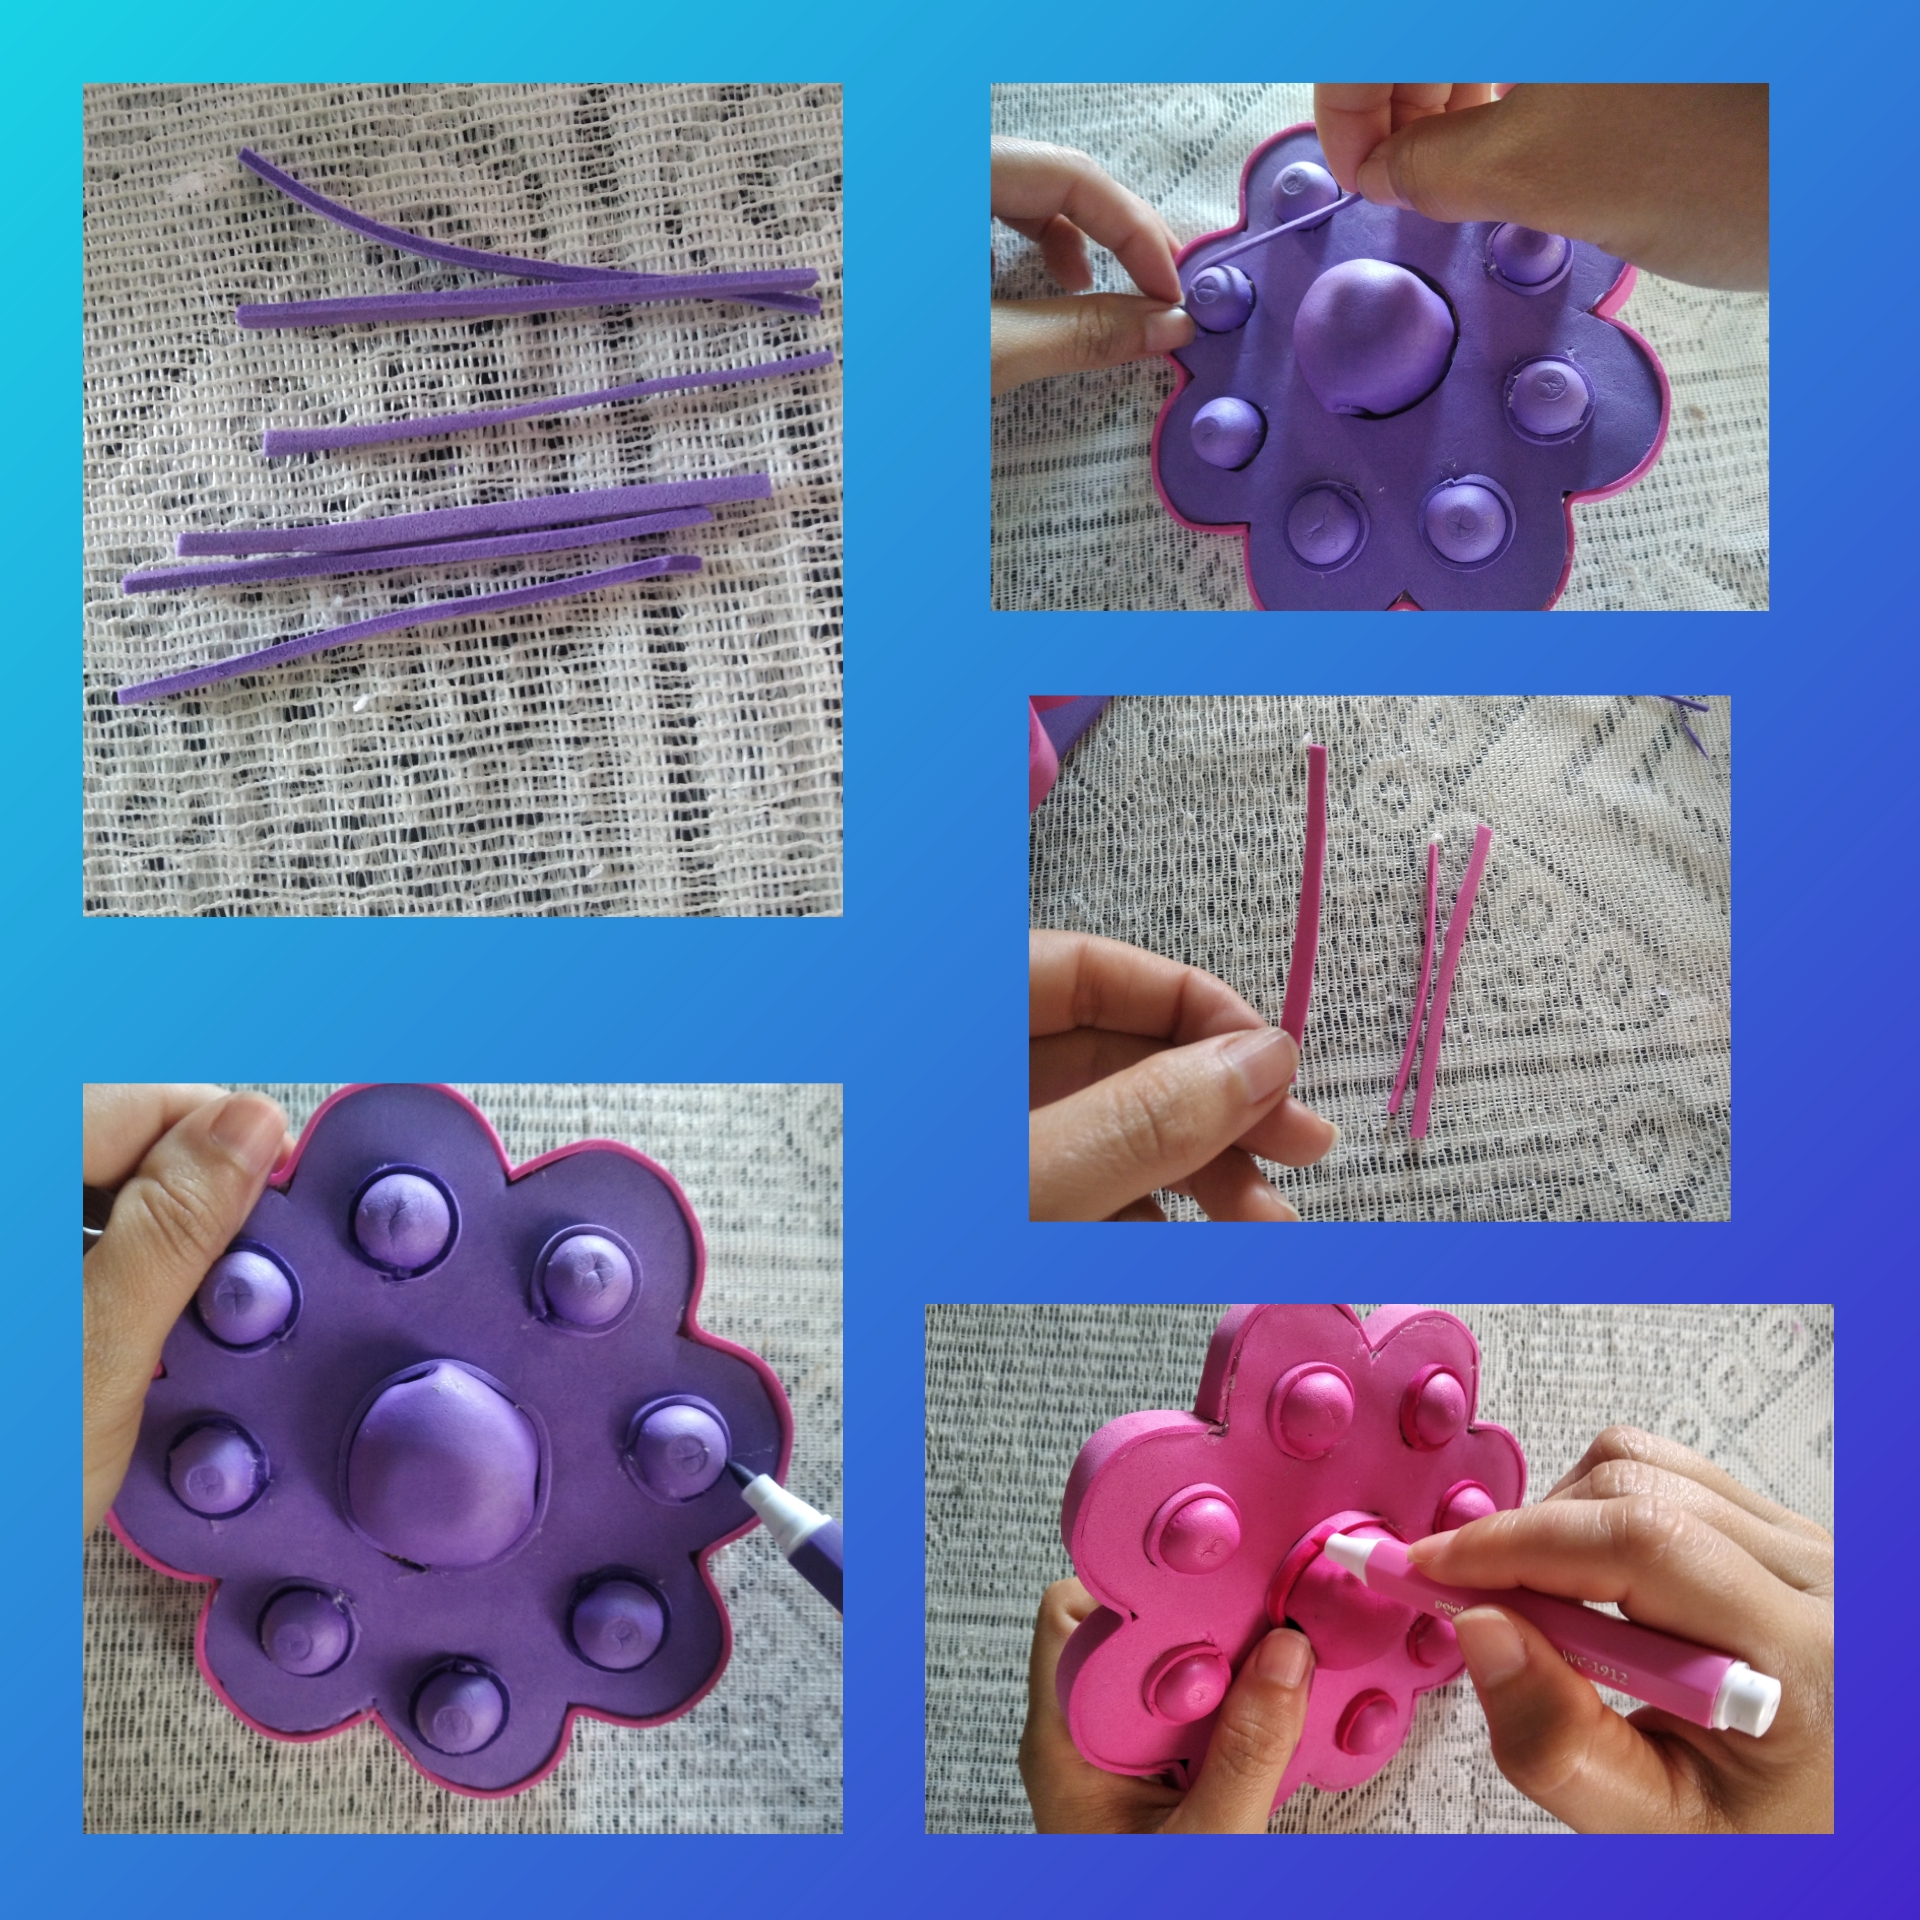
Step 12.To make this Pop It more similar to those sold in stores, we cut some thin purple and fuchsia foami ribbons and glued them around the bubbles, then with a marker we traced the edge of each bubble.
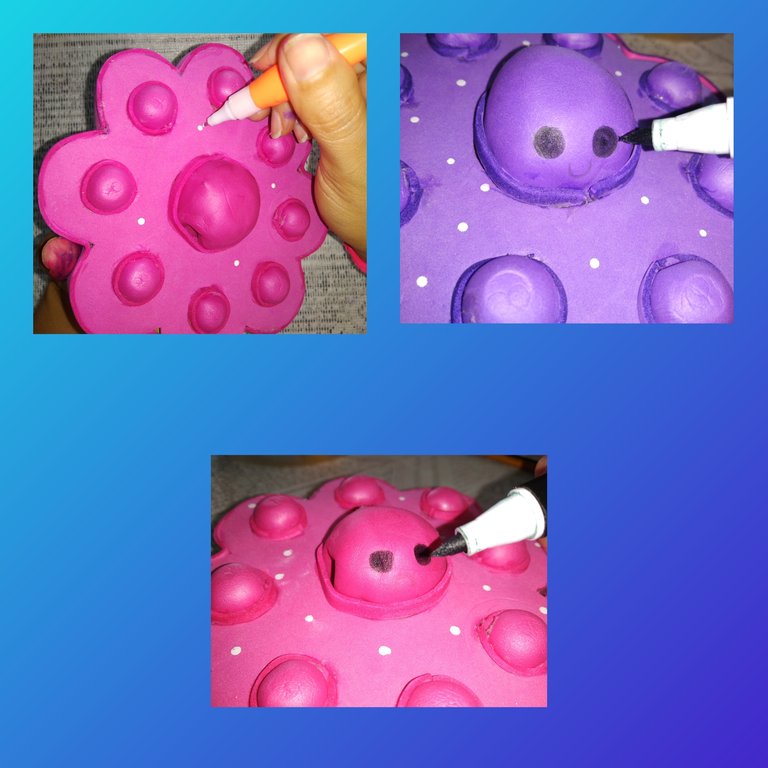
Step 13.As a last step we take the corrector and make some white dots at the base of the pop It, with the black marker we make the eyes and the mouth and finished our pop It, let's see friends this ideal anti-stress toy for our little ones.

Presentación Final.
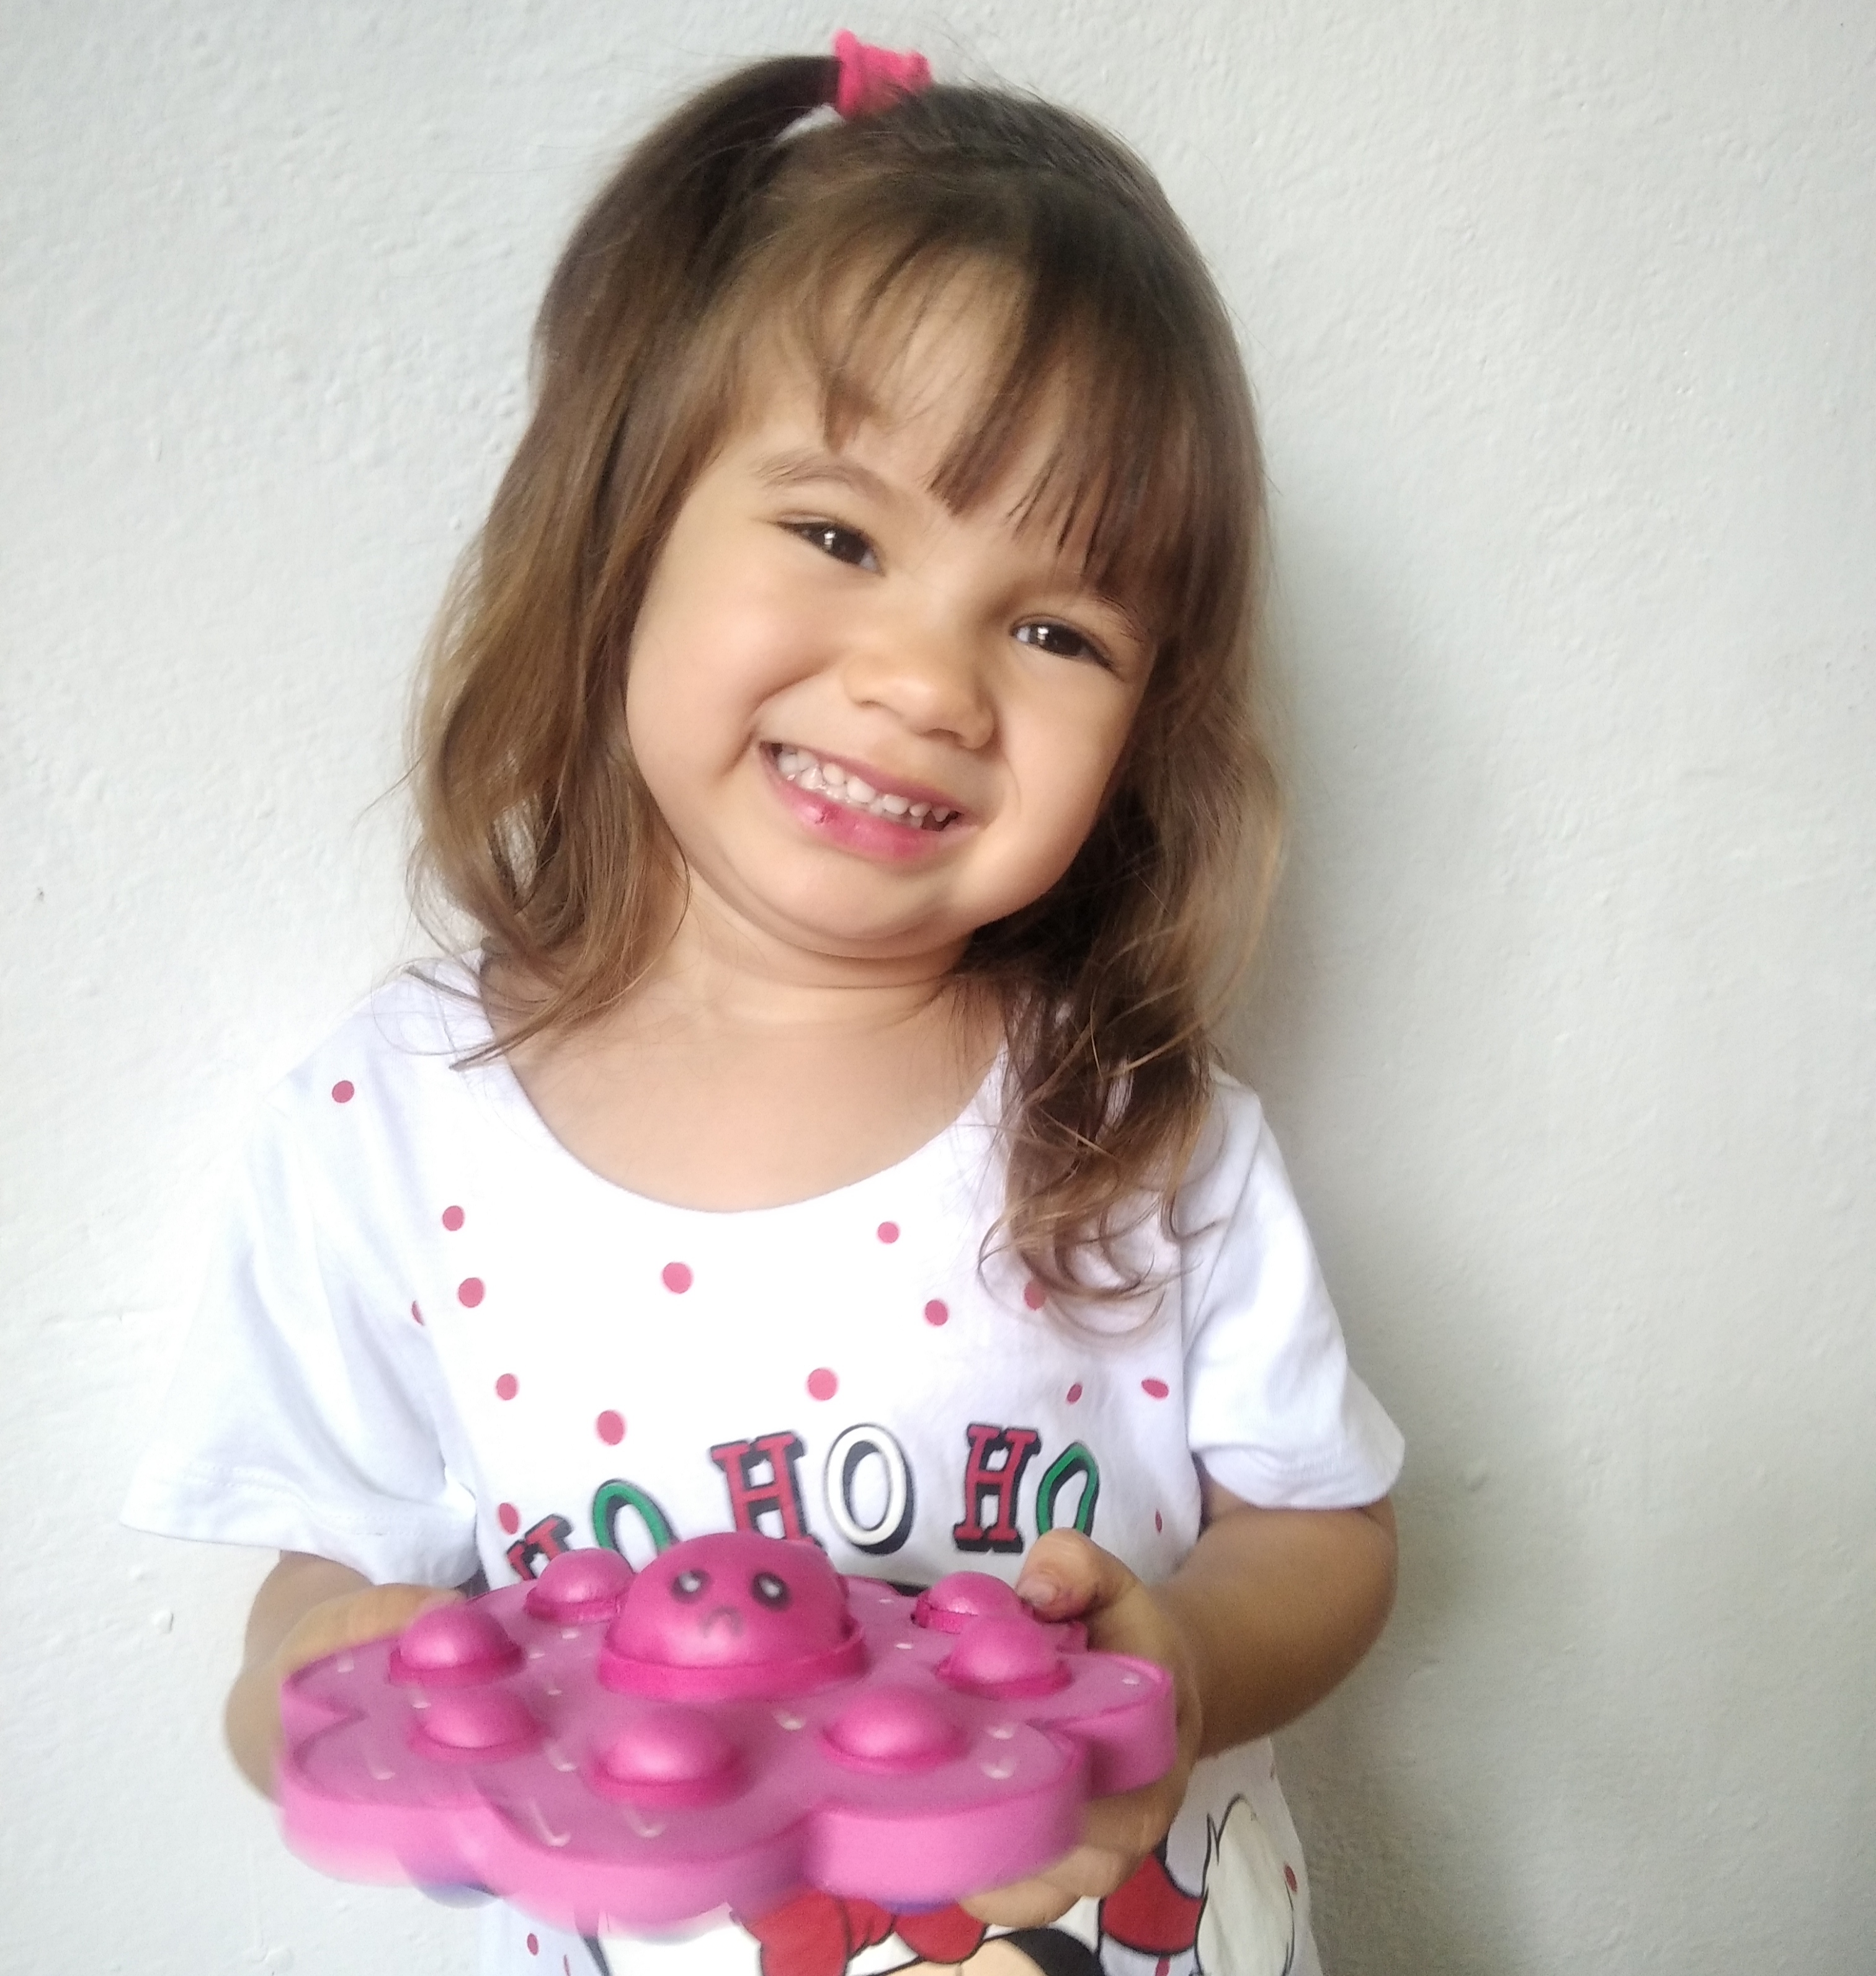
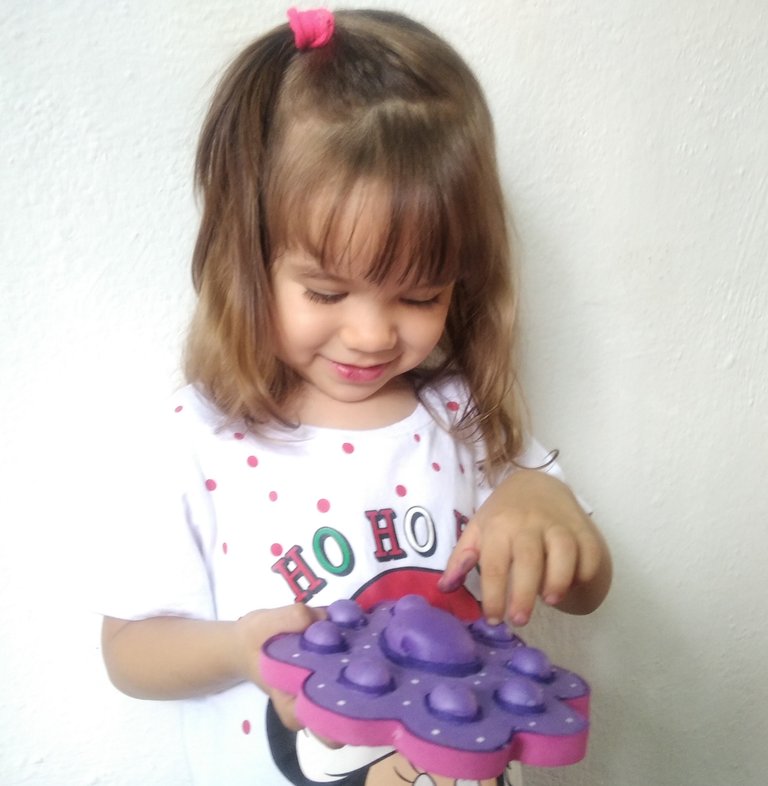
Well friends, I say goodbye for now, I hope you liked this great craft as much as my baby did, thanks to those who followed me here, thousands of blessings to all.

Gracias por su Visita. ❤️
Thank you for your visit. ❤️


