Felíz miércoles comunidad Hive Diy, saludos a todos los miembros maravillosos que la conforman, espero este día haya sido de mucho provecho para ustedes, ya a mitad de semana, los dias pasan volando y ya casi llegamos a la navidad, hoy me encuentro en éste espacio creativo con el fin de compartir un pequeño detalle que realicé con pocos materiales.
Happy Wednesday Hive Diy community, greetings to all the wonderful members that make it up, I hope this day has been very useful for you, it's already halfway through the week, the days fly by and we're almost there for Christmas, today I find myself in this creative space in order to share a small detail that I made with few materials.
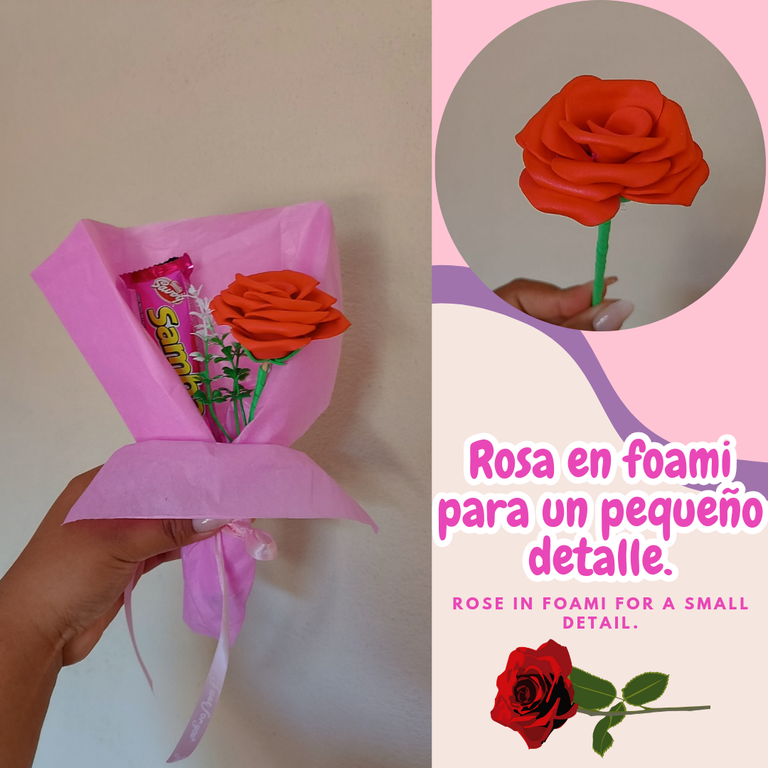
Se trata de una rosa elaborada en foami, la realicé para obsequiar y tuve que improvisar con papel de seda que encontré entre mis materiales para envolver, agregué un dulce también, pues con pocos materiales podremos crear algo lindo. Mi parte favorita es la rosa roja que también es súper fácil de realizar, espero es guste, a continuación los materiales y el paso a paso.
It is a rose made of foam, I made it as a gift and I had to improvise with tissue paper that I found among my wrapping materials, I also added a candy, because with just a few materials we can create something pretty. My favorite part is the red rose, which is also super easy to make, I hope you like it, below are the materials and the step by step.
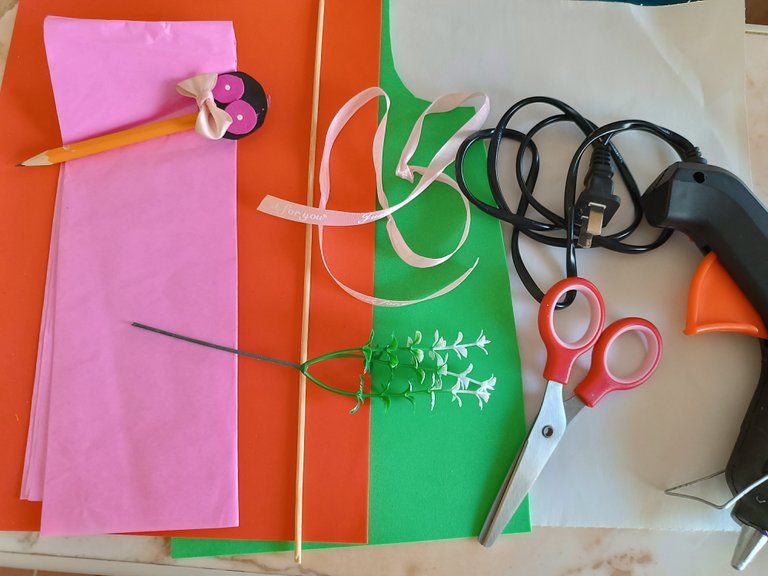
Materiales:
✅Foami rojo.
✅Foami verde.
✅Palillo de altura.
✅Tijera.
✅Lápiz.
✅Silicón.
✅Cinta reutilizada.
✅Papel seda color rosa.
Materials:
Red foam.
Green foam.
Tall stick.
Scissors.
Pencil.
Silicone.
Reused tape.
Pink tissue paper.
Paso a paso / Step by step
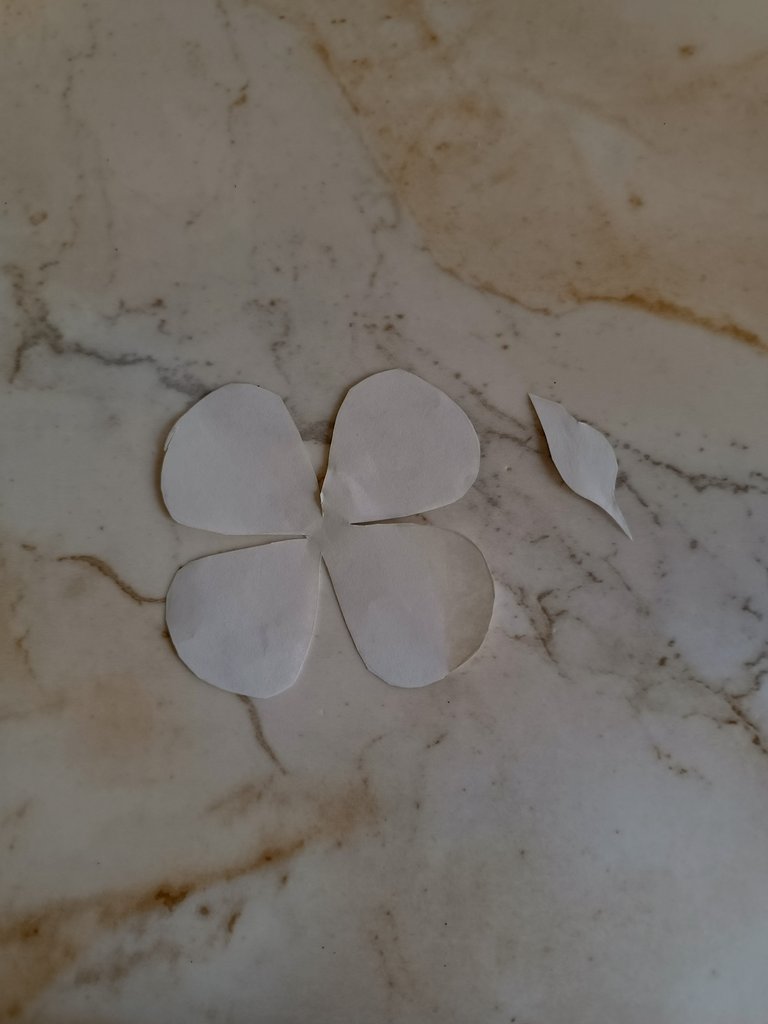
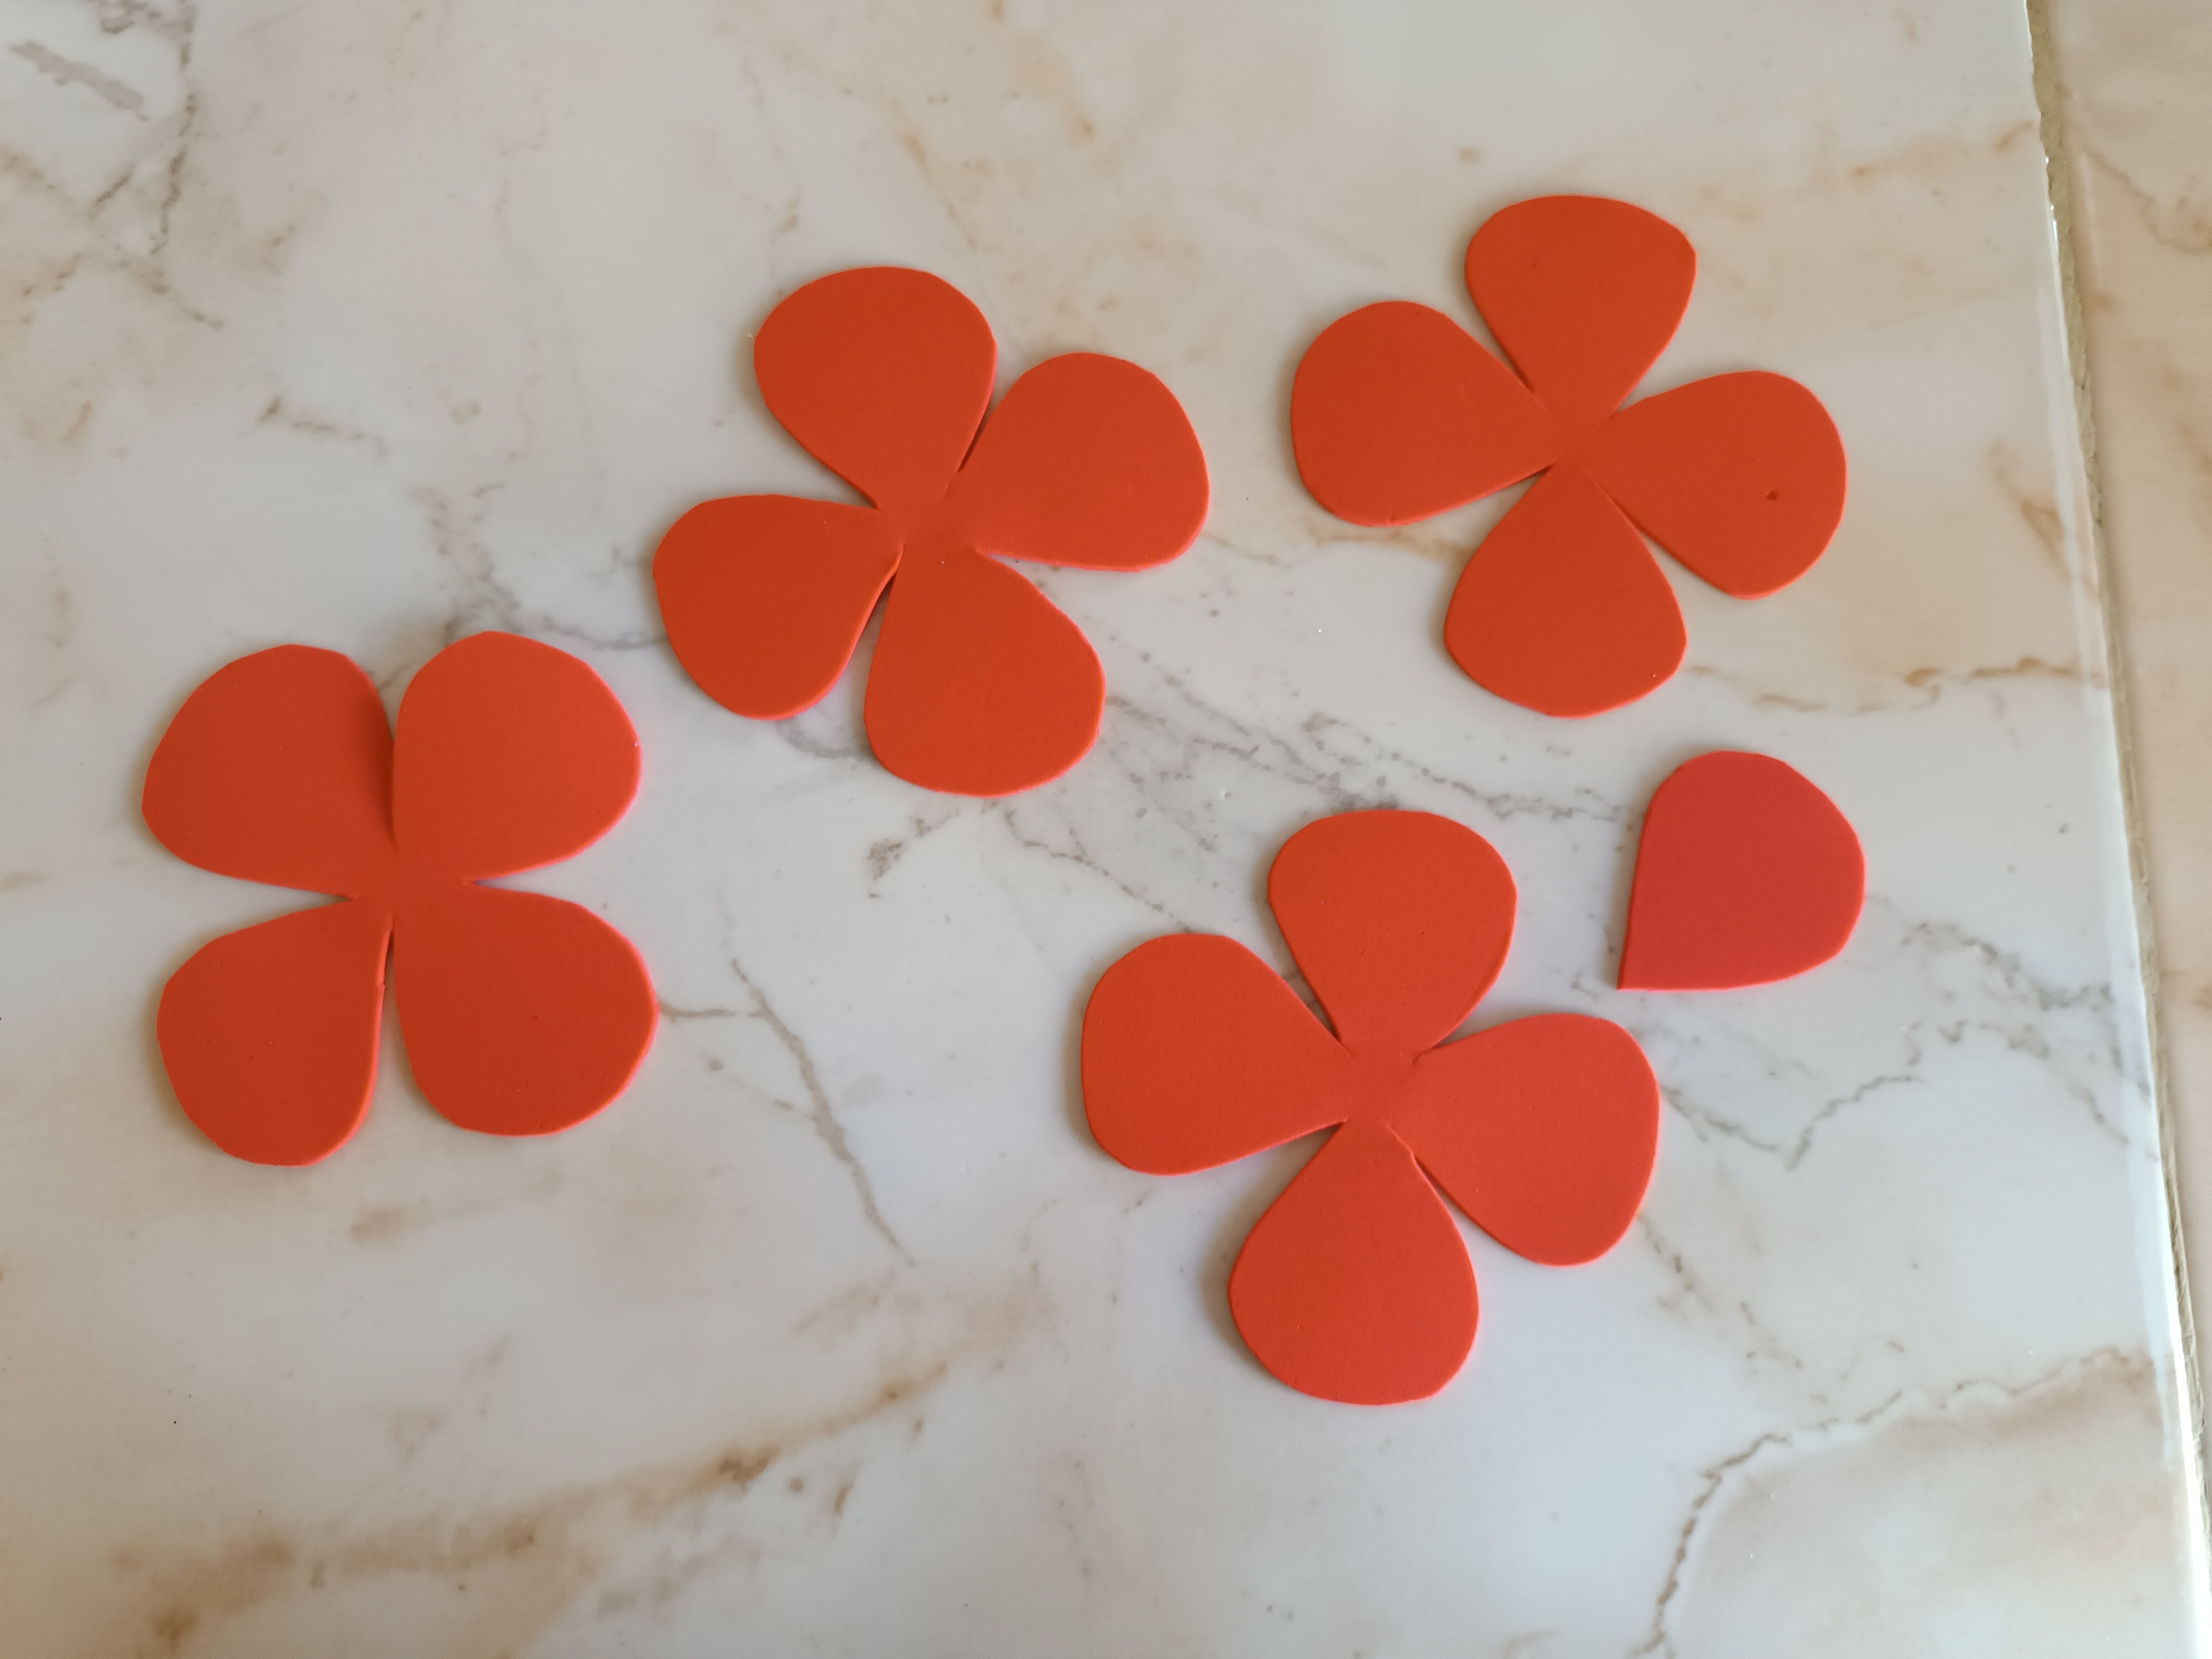
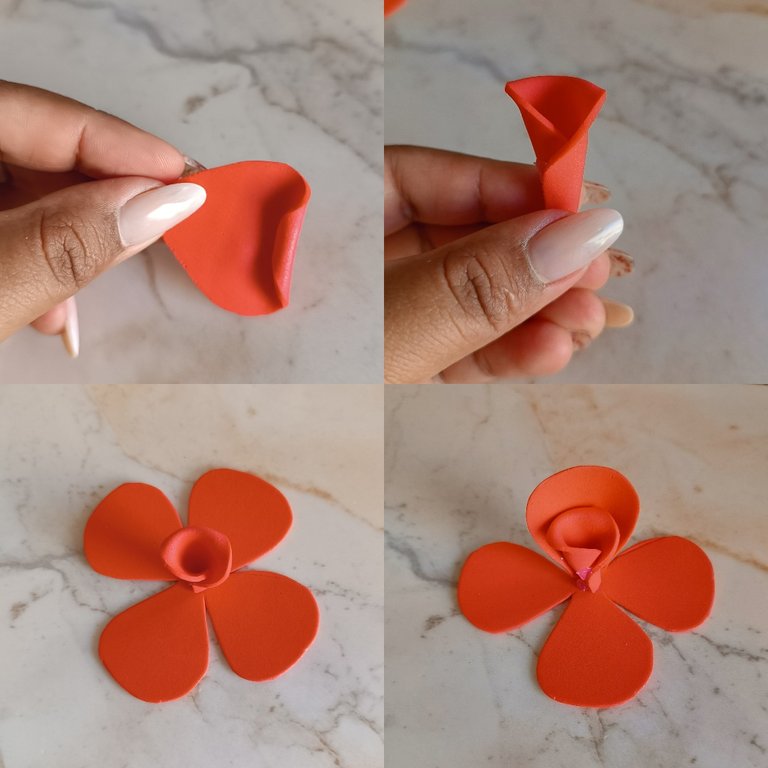
El primer paso para realizar la rosa es dibujar en una hoja una flor de cuatro pétalos, ahora en foami rojo voy a dibujar cuatro de estás, y con el mismo molde dibujé solo un pétalo a parte, ahora cortamos el foami.
The first step to make the rose is to draw on a leaf a flower with four petals, now in red foam I am going to draw four of these, and with the same mold I drew only one petal separately, now we cut the foam.


Ahora el pétalo individual que corté voy a aplicar calor solo en la punta y con los dedos damos forma hacia dentro, ahora voy a girarlo y voy a unir los laterales con silicón, voy a tomar una de los moldes ya cortados y pegamos con silicón en medio de éste, ahora con silicón voy a unir solo los laterales en la parte inferior, voy hacer esto con los cuatro pétalos.
Now the individual petal that I cut I am going to apply heat only to the tip and with my fingers we shape it inwards, now I am going to rotate it and I am going to join the sides with silicone, I am going to take one of the already cut molds and glue it with silicone middle of this, now with silicone I am going to join only the sides at the bottom, I am going to do this with the four petals.
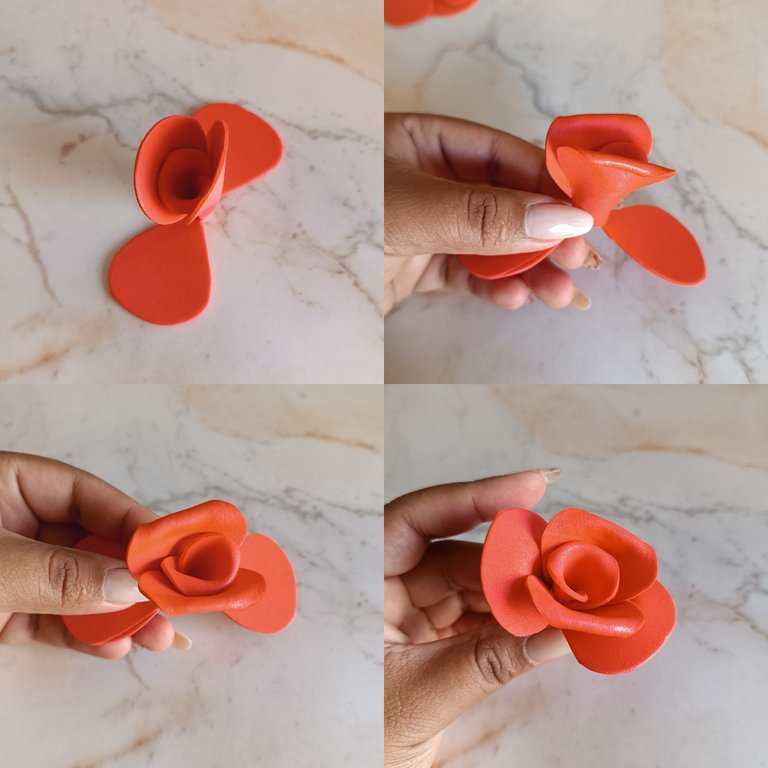
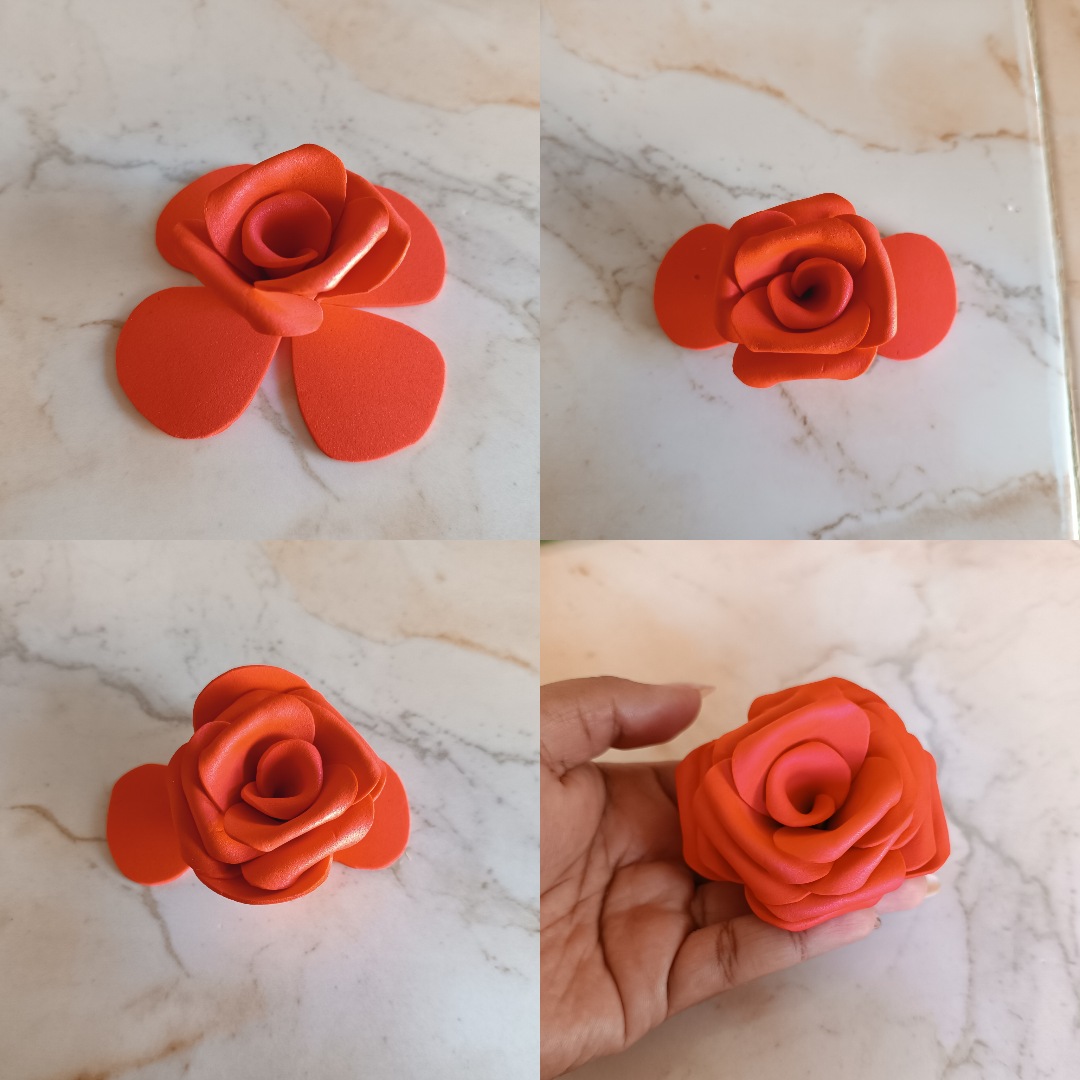
Luego con una plancha aplicamos calor en las puntas de los pétalos y damos forma hacia afuera con los dedos, ahora la segunda capa de foami la voy a pegar de igual forma pero en sentido contrario a la primera, realizamos el mismo paso con el resto de los pétalos, una vez terminando de unir todas las capas que cortamos y dando forma a las puntas con calor veremos como se forma la rosa.
Then with an iron we apply heat to the tips of the petals and shape them outward with our fingers. Now I am going to glue the second layer of foam in the same way but in the opposite direction to the first, we carry out the same step with the rest of the foam. the petals, once we finish joining all the layers that we cut and shaping the tips with heat we will see how the rose is formed.
El siguiente paso es dibujar cuatro hojas pequeñas en foami verde, el cual voy a ubicar por debajo de la rosa, también corté una franja de foami verde para envolver en el palillo donde la voy a colocar.
The next step is to draw four small leaves in green foam, which I am going to place below the rose. I also cut a strip of green foam to wrap around the toothpick where I am going to place it.
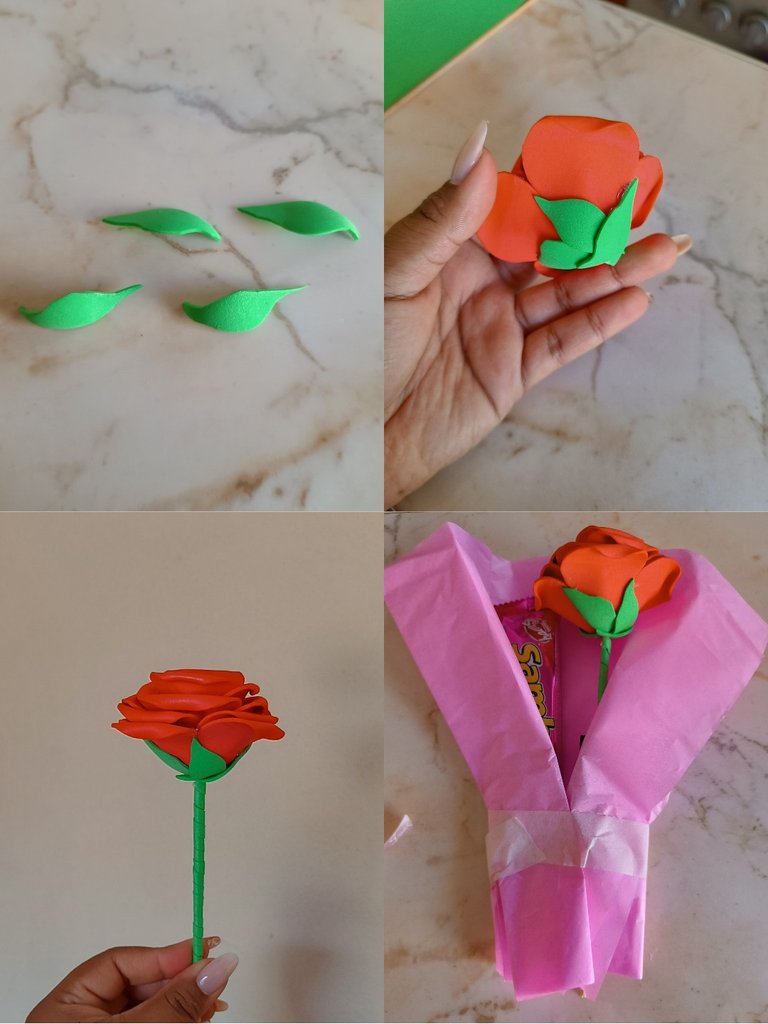
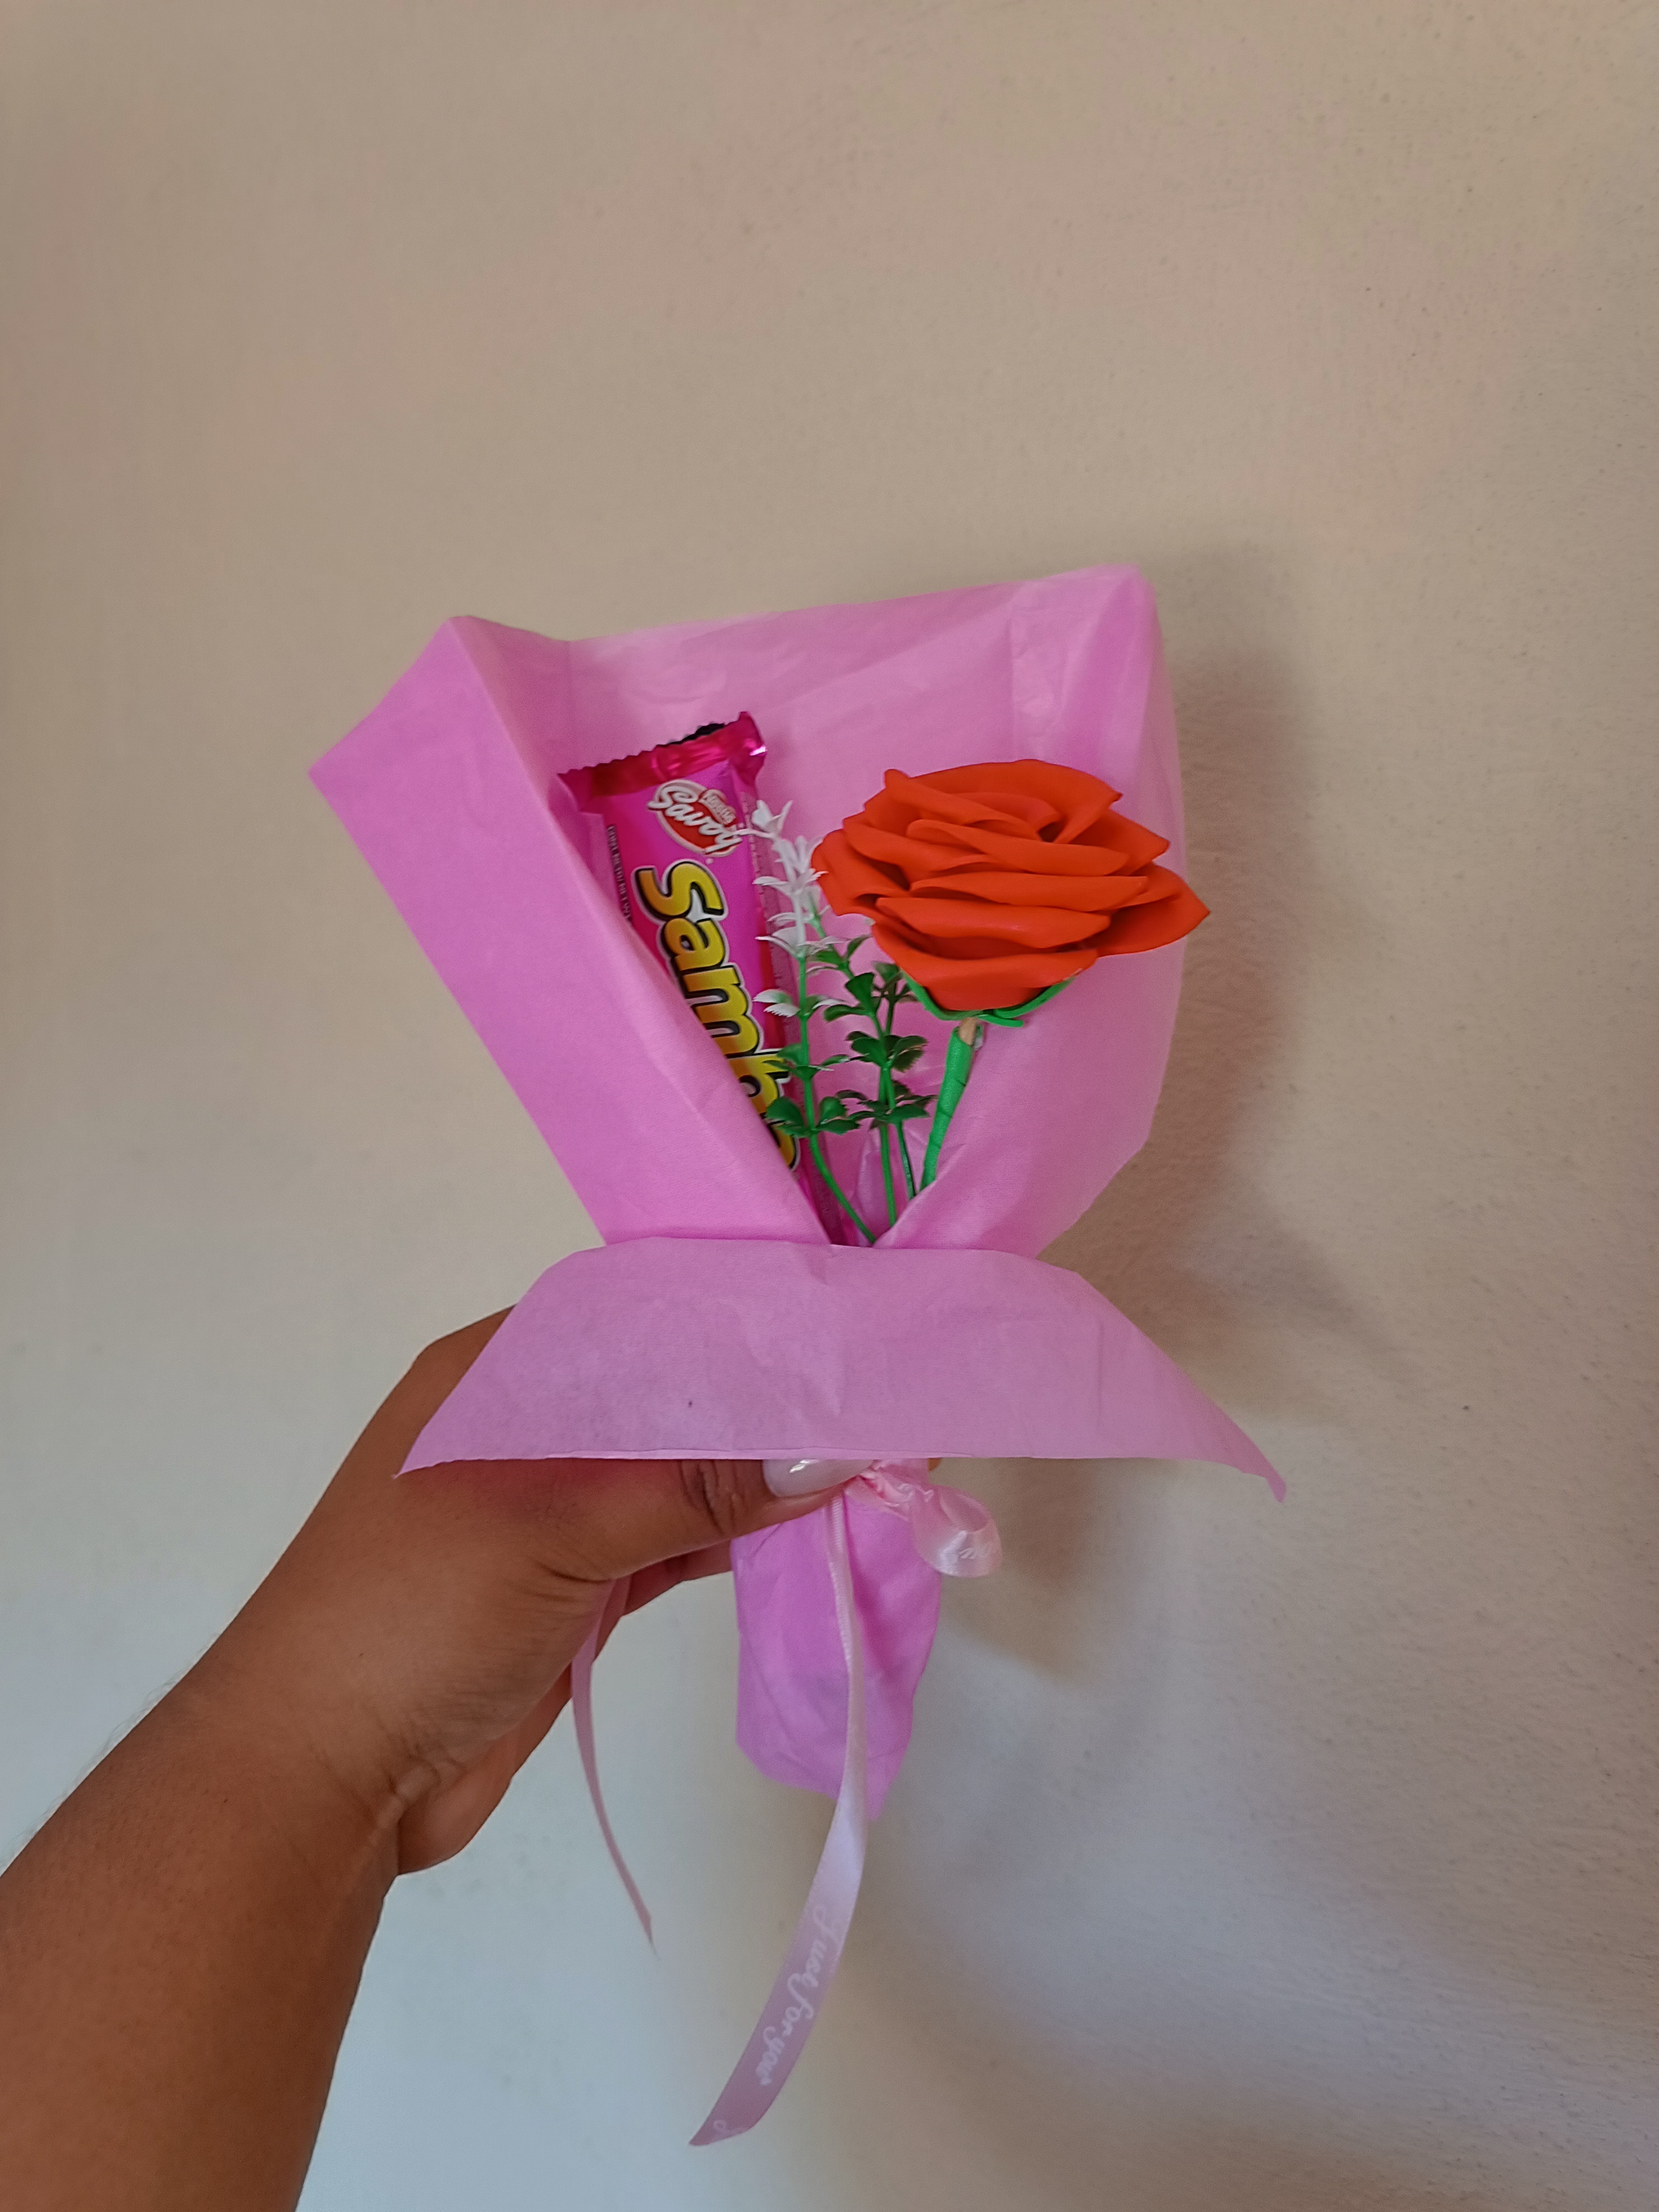
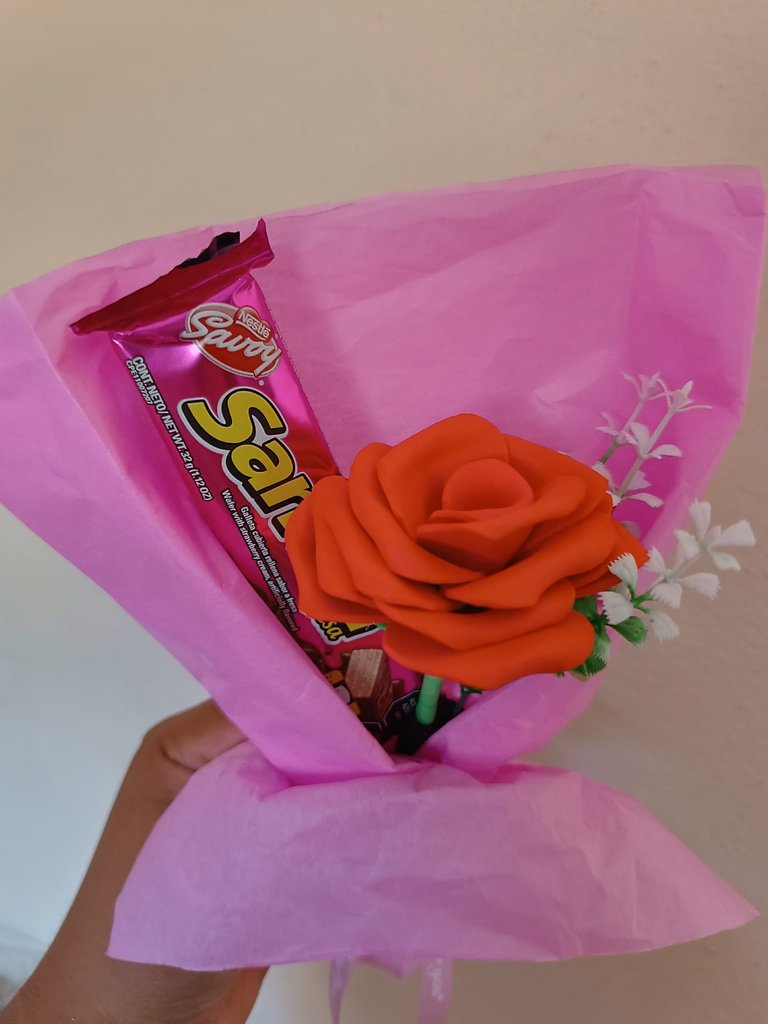
Luego de culminar la rosa, voy a colocar la rosa dentro de una franja de foami esto para dar soporte, tambien se puede colocar anime, luego voy a extender un retazo de papel seda lo doblé un poco a los lados y coloqué la rosa junto al dulce ( coloqué un poco de silicón) con ayuda de adhesivo uni la parte inferior, y con otro retazo de papel más pequeño cubrí está parte, y realicé un lazito con la cinta de reciclaje, también agregué unas florecitas artificiales que tenía guardada.
After completing the rose, I am going to place the rose inside a strip of foam, this to provide support, you can also place anime, then I am going to spread a piece of tissue paper, I folded it a little on the sides and placed the rose next to the sweet (I placed a little silicone) with the help of adhesive I joined the bottom part, and with another smaller piece of paper I covered this part, and I made a little bow with the recycling tape, I also added some artificial flowers that I had saved.
De ésta forma terminé este pequeño detalle, que aunque no es realizado por alguien experto siento que se hizo con todo el cariño, muchas gracias por visitar mi publicación nos vemos en una próxima oportunidad con más ideas creativas.
In this way I finished this small detail, which although it is not done by someone expert I feel that it was done with all the love, thank you very much for visiting my publication, see you next time with more creative ideas.

Contenido original. - original content.
Los separadores y banner fueron realizados en Canva. - The dividers and banner were made in Canva.
Las fotografias son tomadas con mi teléfono Redmi Note 11s y editadas en PicsArt - The photographs are taken with my Redmi Note 11s phone and edited in PicsArt.
Traducción de: Google traductor - Translation of: Google translator.