Hola, cómo están por aqui, amigos de la comunidad de Hive diy, espero sea muy bien, hoy día martes, les traigo una hermosa manualidad la cual realicé con silicón caliente, se trata de un imán para la nevera con forma de huevo frito, es muy fácil de hacer y con pocos materiales, aquí les dejo el paso a paso.
Hello, how are you here, friends of the Hive diy community, I hope it is very well, today, Tuesday, I bring you a beautiful craft which I made with hot silicone, it is a fridge magnet in the shape of a fried egg, It is very easy to do and with few materials, here I leave the step by step.
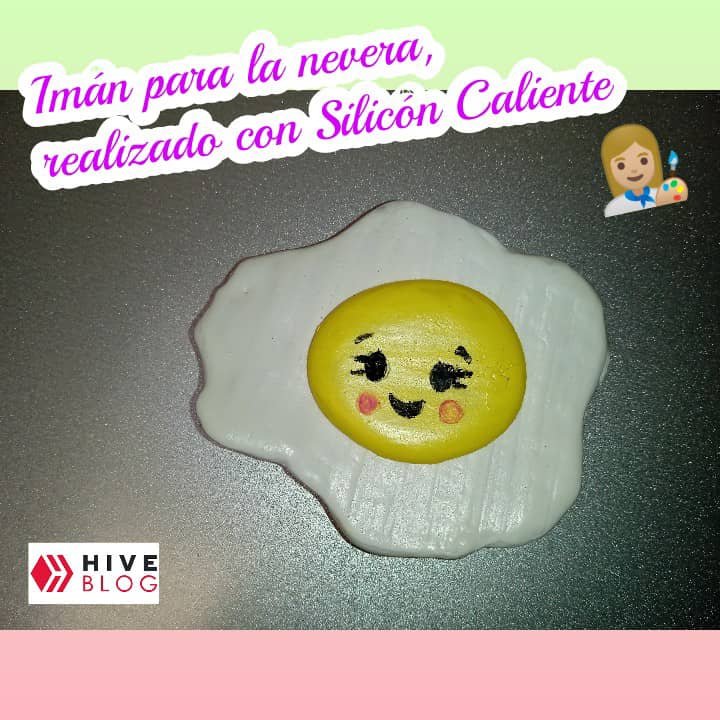
Diy: Imán para la nevera, realizado con Silicón Caliente 🍳, Paso a paso.
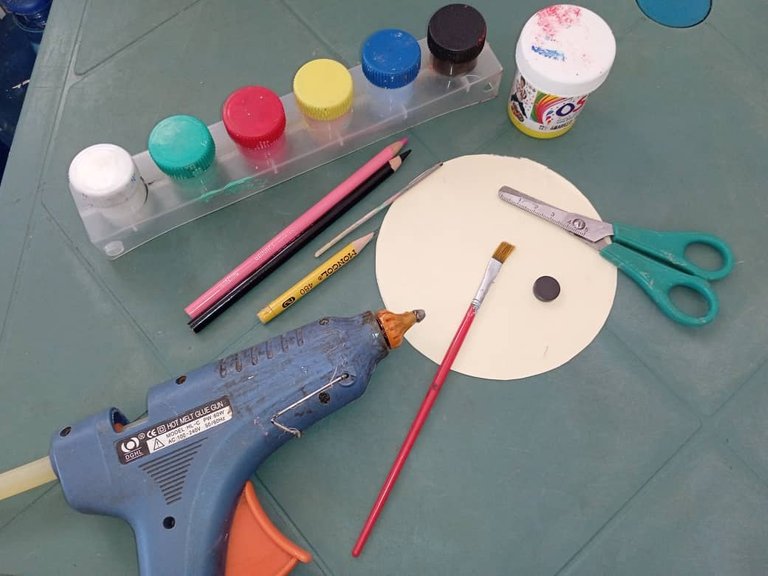
Materiales:
Silicón caliente
Lápiz
Pincel cartulina reciclada
Pintura al frío amarilla y blanca
Marcador o colores negro y rosada
Pega blanca
Imán
Diy: Magnet for the fridge, made with Hot Silicone 🍳, Step by step.
Materials:
hot silicone
Pencil
Recycled cardboard
brush
Yellow and white cold paint
Marker or black and pink colors
white paste
Magnet
Procedimiento:/Procedure:
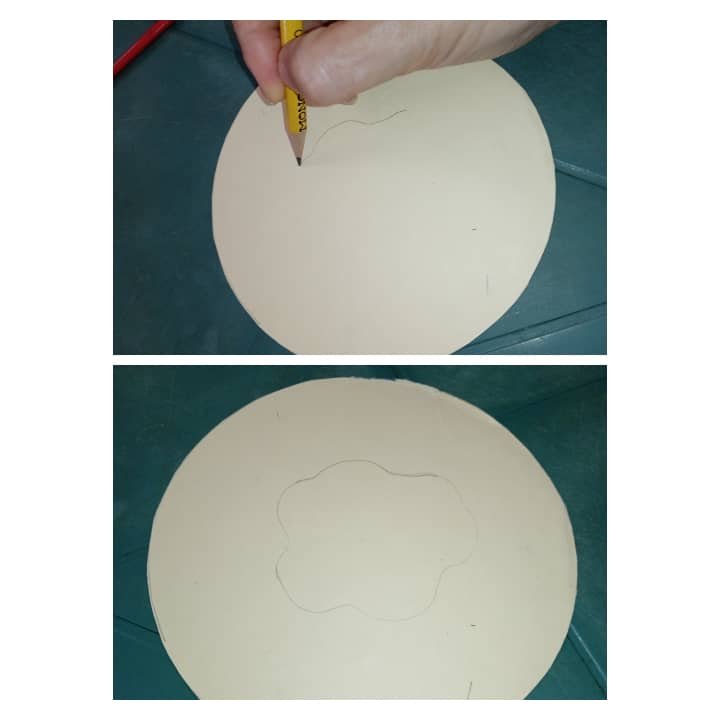
1.Para comenzar este proyecto, vamos a dibujar con el lápiz la forma de la clara de huevo en la cartulina.
1.To start this project, we are going to draw the shape of the egg white on the cardboard with the pencil.
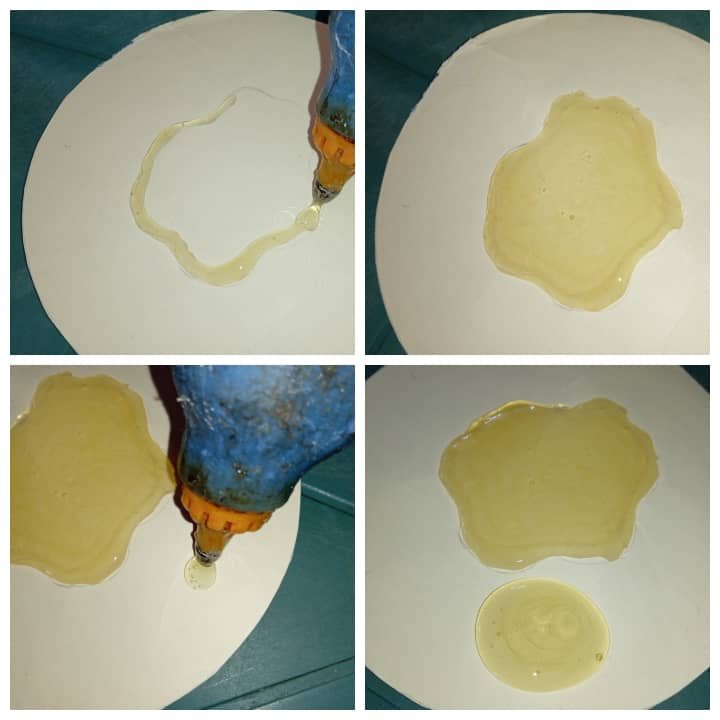
2.Luego vamos a calentar muy bien el silicón y lo agregaremos por todo el dibujo que hicimos en la cartulina, lo rellenamos muy bien, aparte también haremos un círculo de unos 3cm de diámetro, la cual simulará la yema de huevo, dejar secar muy bien.
2.Then we are going to heat the silicone very well and we will add it to all the drawing we made on the cardboard, we fill it very well, apart we will also make a circle of about 3cm in diameter, which will simulate the egg yolk, let it dry very good.
3.Despues vamos a recortar las piezas y a pintar con la pintura blanca la pieza más grande que simulará la clara y de amarillo la yema, vamos a agregar las capas necesarias, hasta que quede n color homogéneo, dejar secar muy bien.
3.Then we are going to cut out the pieces and paint the largest piece with white paint that will simulate the white and the yolk yellow, we are going to add the necessary layers, until a homogeneous color remains, let it dry very well.
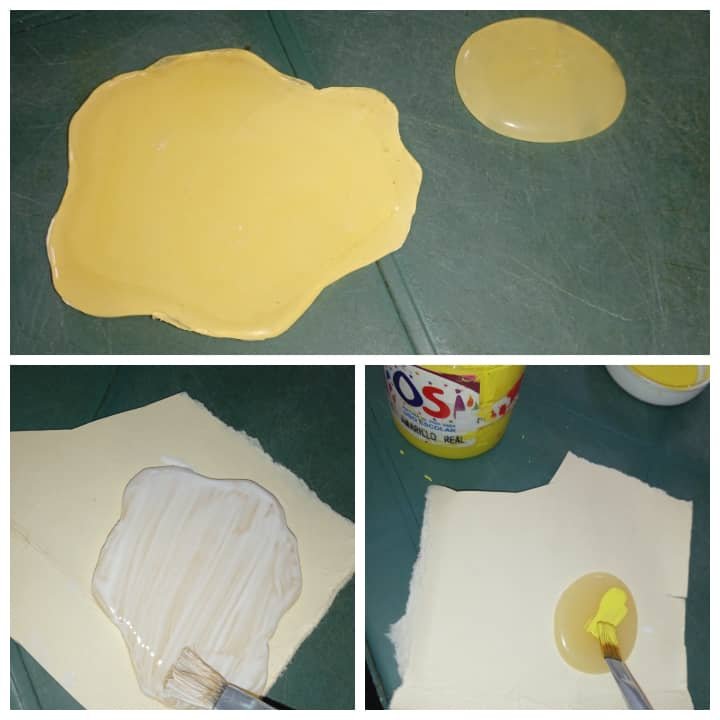
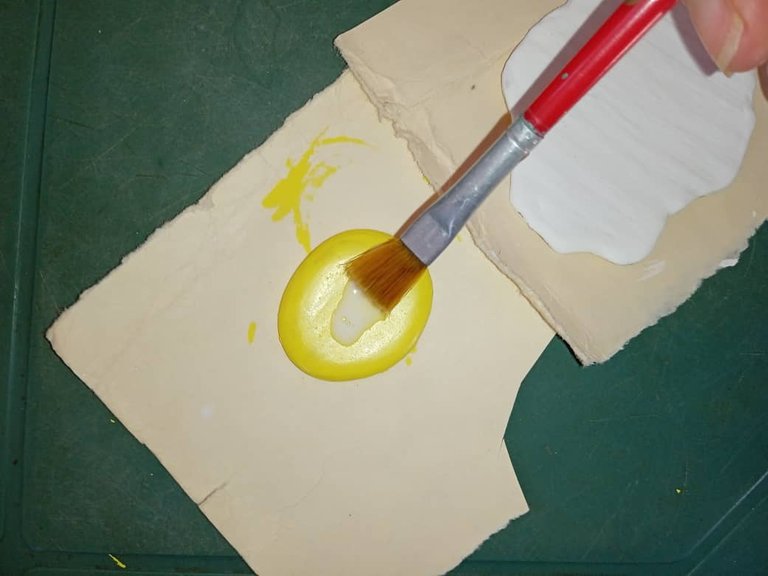
4.Luego vamos a agregar por encima pega blanca, el cual distribuimos por toda la pieza con el pincel, como si fuese pintura, dejar secar muy bien, este paso es para darle resistencia y brillo.
4.Then we are going to add white glue on top, which we distribute throughout the piece with the brush, as if it were paint, let it dry very well, this step is to give it resistance and shine.
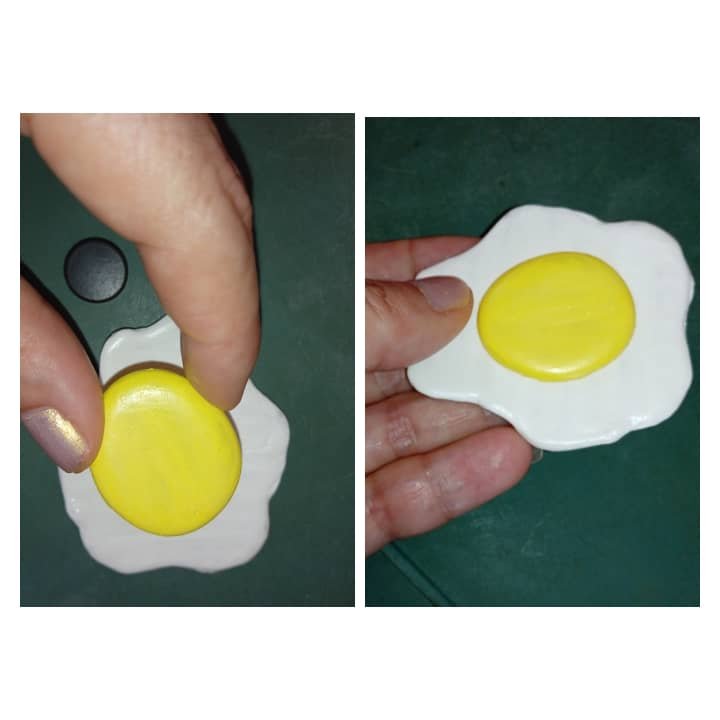
5.Seguido de ello vamos a pegar con silicón la yema a la clara y también el imán en la parte posterior.
5.Followed by this we are going to glue the yolk to the white with silicone and also the magnet on the back.
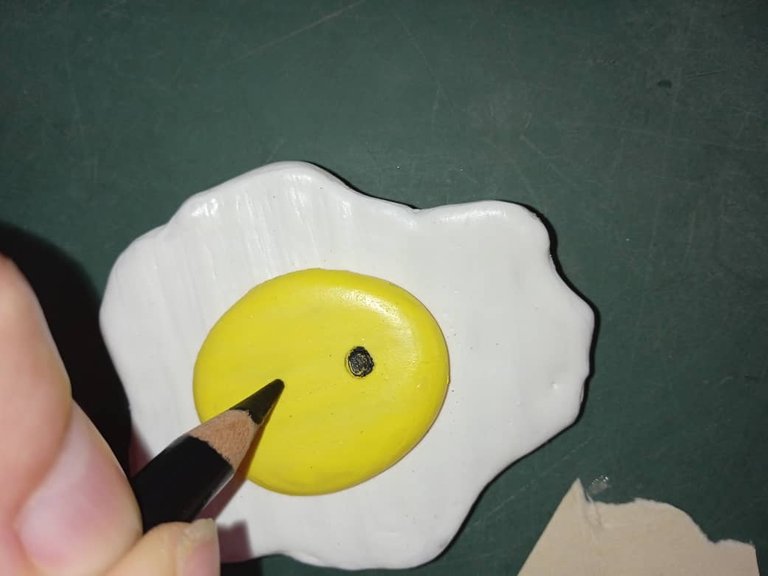
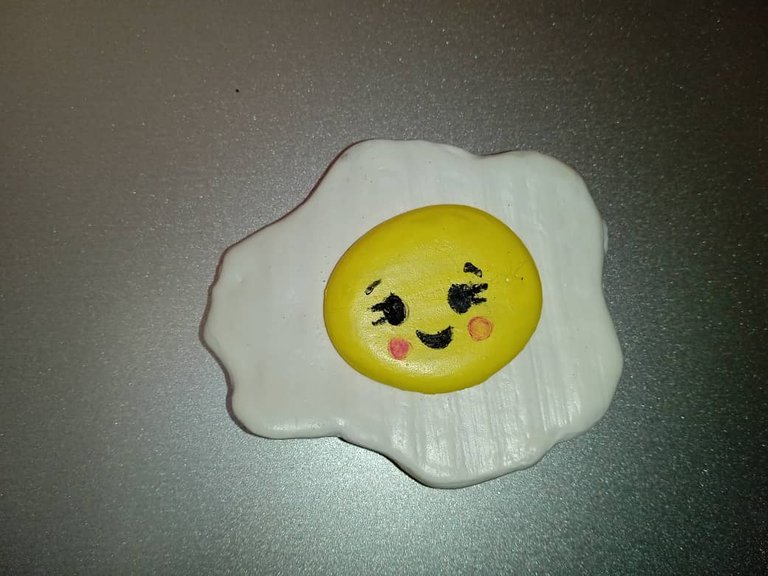
6.Por último en la parte amarilla, dibujamos unos ojitos y boca y listo para decorar.
6.Finally in the yellow part, we draw some eyes and a mouth and ready to decorate.
Listo!
Ready!
Hasta aquí mi Proyecto de este día, espero les haya gustado, muchas gracias por el apoyo brindado. Saludos 🍳
So Project for this day, I hope you liked it, thank you very much for the support. Greetings 🍳
Todas las imágenes son de mi autoria por @mariarodriguez, tomadas especialmente para esta publicación.
All images are my own by @mariarodriguez, taken especially for this publication.