Feliz martes apreciados amigos de la comunidad de Hive diy, es para mí un placer saludarles, hoy con mi nuevo proyecto navideño, para esta ocasión les compartiré como elaboré una hermosa bola navideña decorativa, la hice con cartón y pintura al frío, es muy fácil de hacer, aquí les dejo el paso a paso.
Happy Tuesday, dear friends of the Hive DIY community, it is a pleasure for me to greet you, today with my new Christmas project, for this occasion I will share with you how I made a beautiful decorative Christmas ball, I made it with cardboard and cold paint, it is very easy to do, here I leave you step by step.
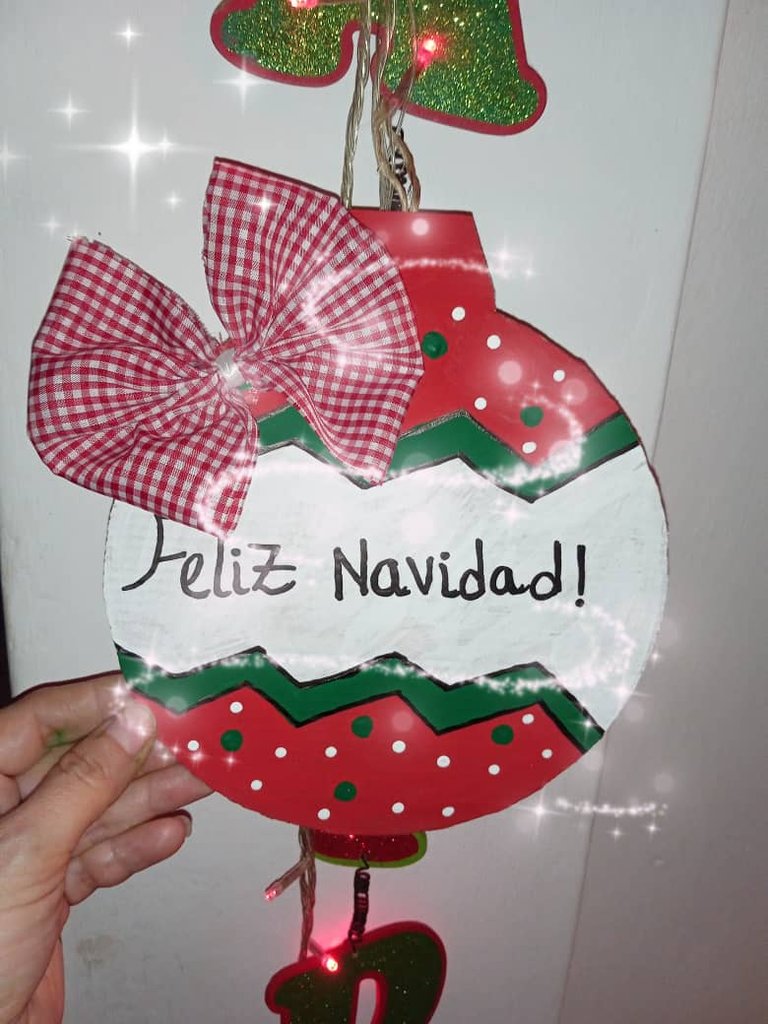
Diy: Bola Navideña Decorativa elaborada con cartón 🎄🎀
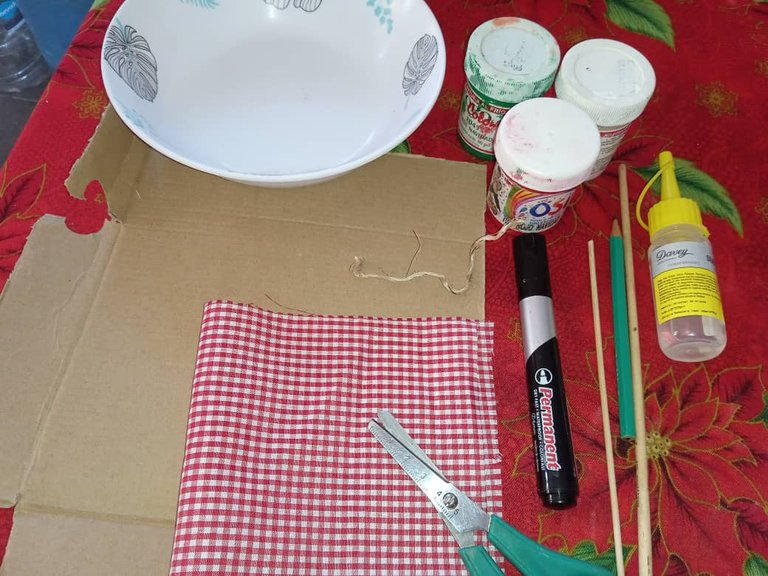
Materiales
Materiales:
- cartón reciclado
*Pintura al frío rojo, blanco y verde - Marcador negro
*Lápiz
*Pincel
*Palito de altura
*Silicón
*Tela estampada 26x13 cm
*Patrón circular de 18 cm de diámetro
*6 cm de yute
Diy: Decorative Christmas Ball made with cardboard 🎄🎀
Materials Materials:
- recycled carton
*Cold paint red, white and green - Black marker
*Pencil
*Brush
*Stick height
*Silicone
*Printed fabric 26x13 cm
*Circular pattern 18cm diameter
*6 cm jute
Paso a Paso
Paso 1
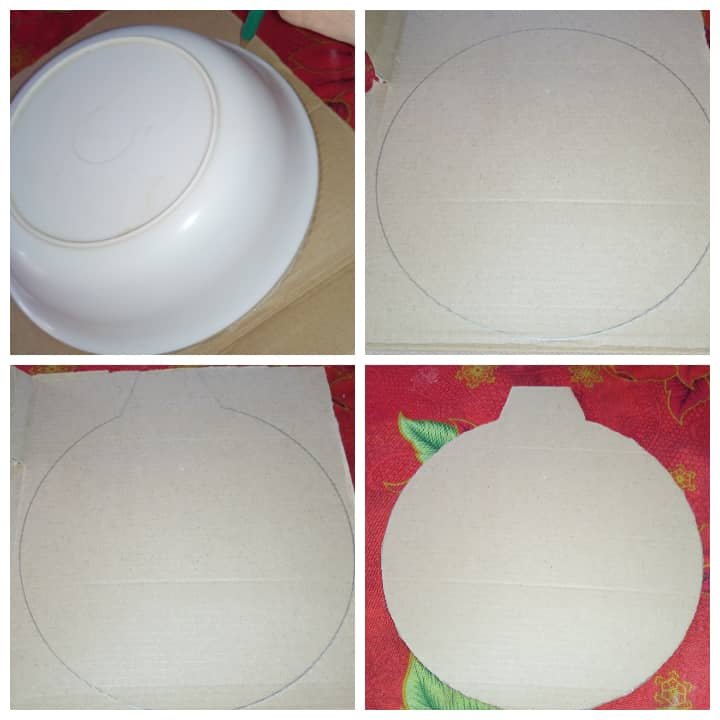
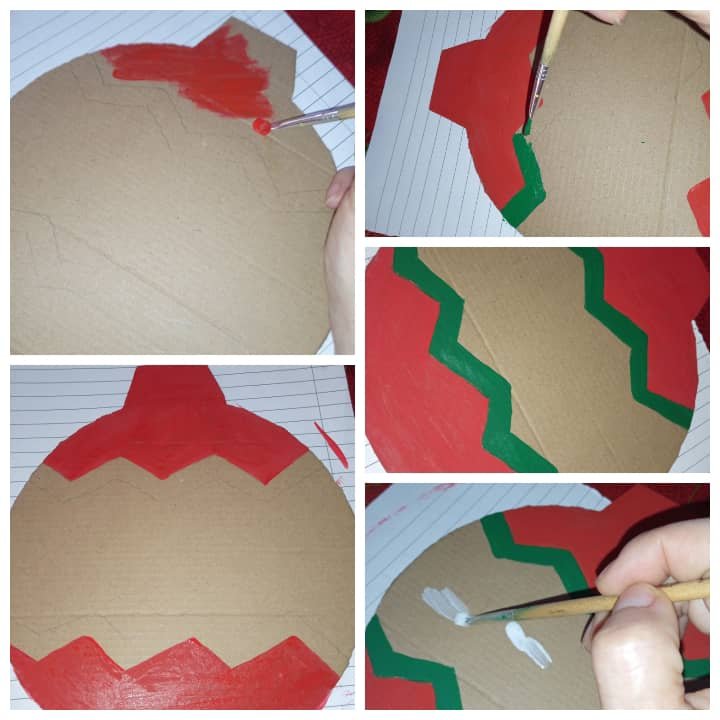
Primero vamos a marcar el patrón del círculo en el cartón, en la parte superior mar amos como especie de un rectángulo de la siguiente forma y recortamos.
Step by Step
Step 1
First we are going to mark the circle pattern on the cardboard, on the upper part we make a kind of rectangle of the following shape and cut it out.
Paso 2
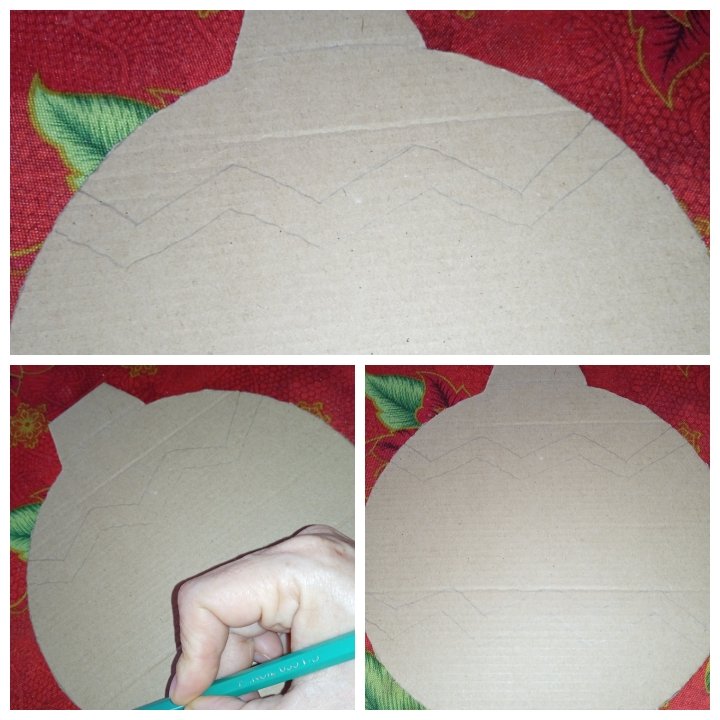
Luego con el lápiz marcamos y as líneas en forma de zigzag, tanto e n la parte superior como en la parte inferior de la bola.
Step 2
Then with the pencil we mark zigzag lines, both at the top and at the bottom of the ball.
Paso 3
Seguidamente vamos a pintar con la pintura al frío roja, la parte superior e inferior, dejar secar, luego de verde la parte del zigzag y por último el centro blanco, dejar secar muy bien.
Step 3
Next we are going to paint the top and bottom with red cold paint, let it dry, then the zigzag part green and finally the white center, let it dry very well.
Paso 4
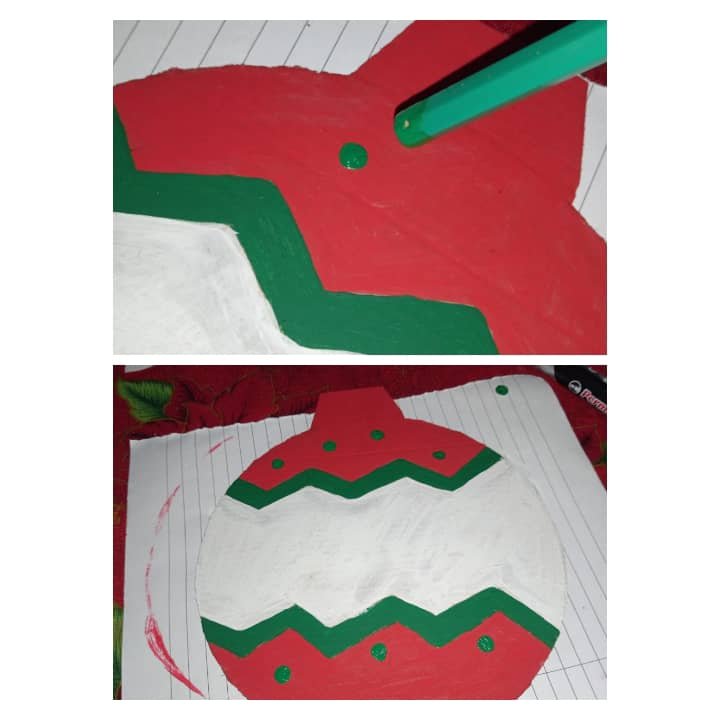
Después con la parte de abajo del lápiz lo introducimos en la pintura verde y hacemos circulos en la parte roja, seguidamente el palito de altura lo introducimos en la pintura blanca y hacemos circulos más pequeños a los lados de los verdes grandes, dejar secar muy bien.
Step 4
Then with the bottom part of the pencil we introduce it into the green paint and make circles in the red part, then we introduce the height stick into the white paint and make smaller circles on the sides of the large green ones, let it dry very well .
Paso 5
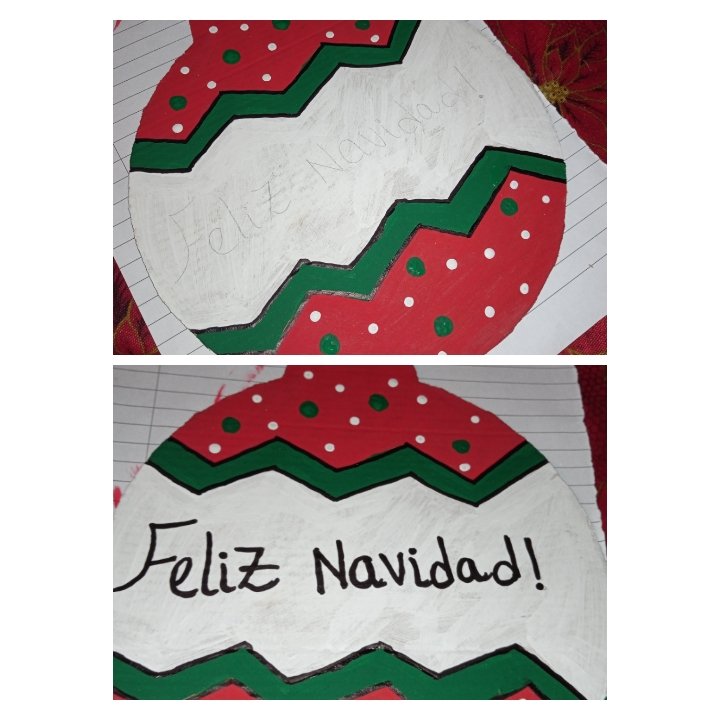
Luego con el marcador negro, pintamos las líneas del zigzag y en el centro escribimos Feliz Navidad!.
Step 5
Then with the black marker, we painted the zigzag lines and in the center we wrote Merry Christmas!.
Paso 6
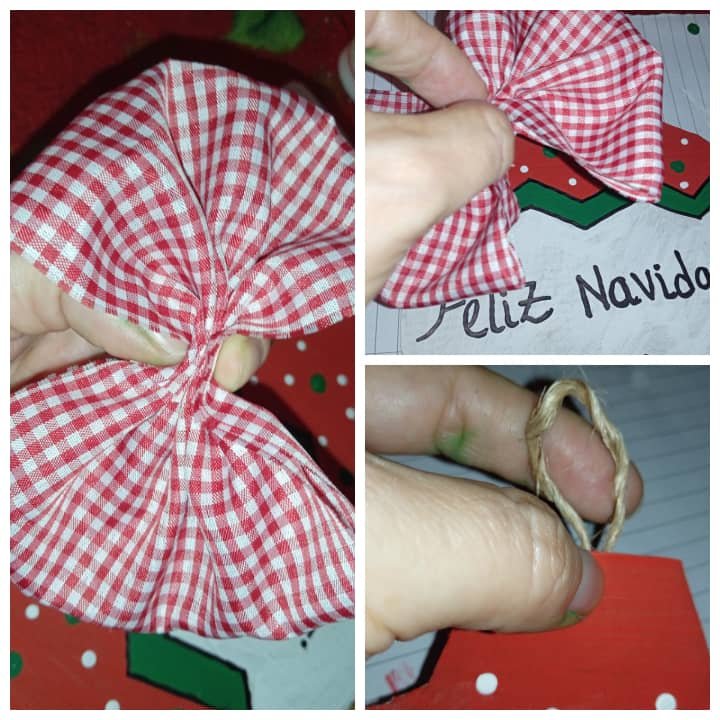
Por último con la tela estampada hacemos un lazo, la cual pegamos con el silicón en la parte superior y pegamos el yute en la parte de atrás y listo para colgar y decorar.
Step 6
Finally, with the printed fabric we make a bow, which we glue with the silicone on the top and glue the jute on the back and it is ready to hang and decorate.
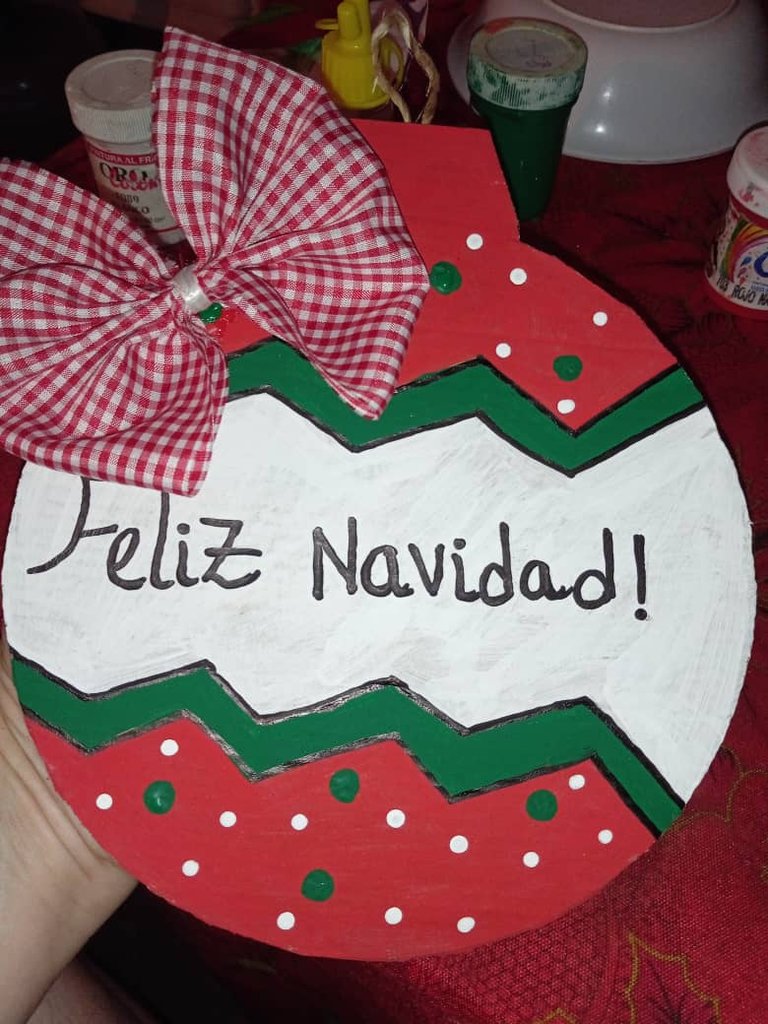
hermoso adorno Navideño!
beautiful Christmas ornament!
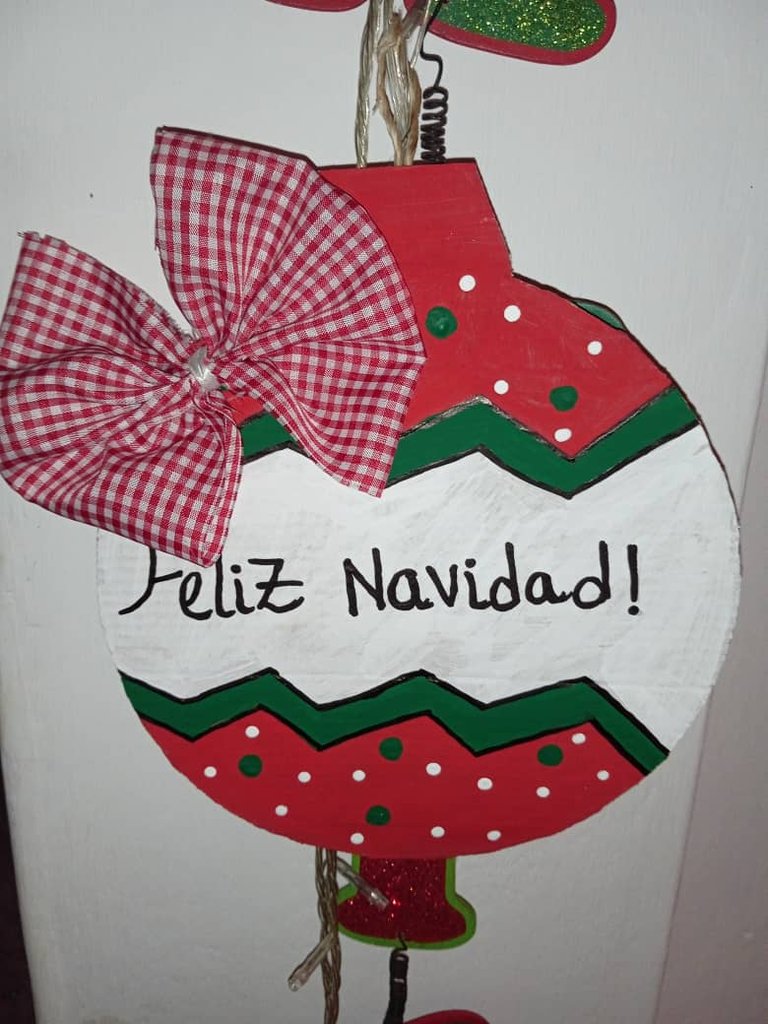
Hasta aquí mi Proyecto de este día, espero les haya gustado, muchas gracias por el apoyo brindado. Saludos 🎄🎀
So Project for this day, I hope you liked it, thank you very much for the support. Greetings🎄🎀
Todas las imágenes son de mi autoria por @mariarodriguez, tomadas especialmente para esta publicación.
All images are my own by @mariarodriguez, taken especially for this publication.
