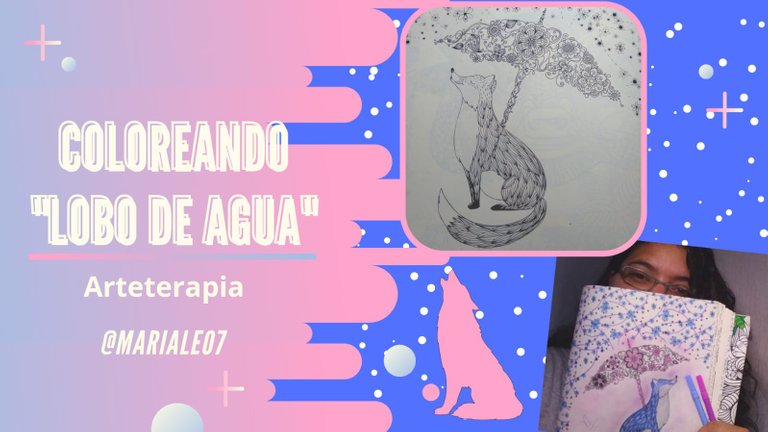
¡Hola amigos de la Comunidad Hive Diy!
Estoy aquí de nuevo para compartir el paso a paso de la realización de uno de mis dibujos para colorear de Arteterapia.
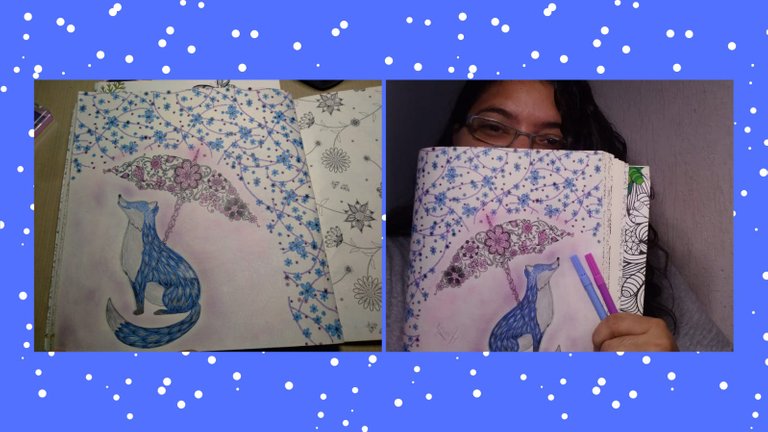
Se trata de un dibujo de un Lobo, el cual tiene un diseño que invita más a la fantasía que al realismo, por lo que para colorear utilicé colores de la naturaleza eligiendo una paleta de colores fríos estilo fantasía, al principio tenía en mente una idea pero a medida que avanzaba surgieron ideas y más ideas, e incorporé colores y técnicas que nunca imaginé utilizar pero que al final dieron un resultado maravilloso.
Como siempre, empecé observando mi dibujo, vi que podía hacer un contraste con el color azul real en el pelaje del lobo y añadir detalles de luz con el color blanco. Utilicé un lápiz blanco, algo difícil de manejar, porque este color no satura, pero si vemos el antes y el después del dibujo, la zona donde coloreé con blanco se ve que si marcó y dio brillo, sobre todo porque la hoja del libro es ligeramente amarillenta por lo que el efecto estaba conseguido.
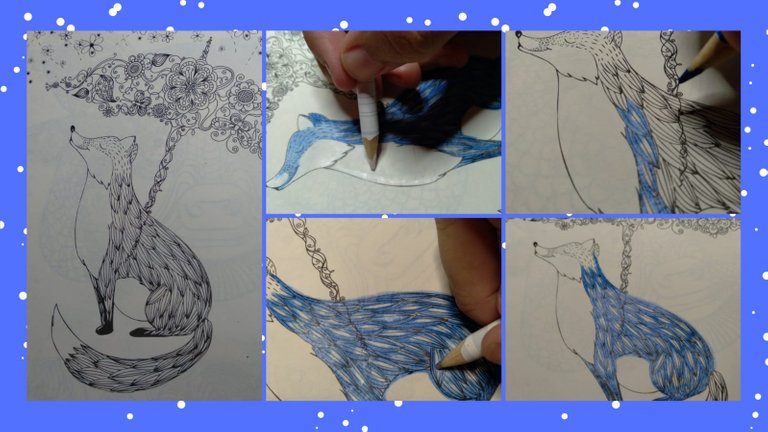
Coloreé en azul el pelaje del lomo y las extremidades de mi lobo, luego incorporé en la década central una mota de pelo blanco, y luego una camada de color plata. Luego pasé a colorear el pecho, la parte inferior de la cara y el vientre con blanco, y después añadí una capa de plata para darle un bonito efecto brillante. También perfiló los bordes para dar un sombreado y relieve al dibujo.
En el paraguas o sombrilla decorativa utilicé el negro para resaltar las formas, luego un poco de gris oscuro y finalmente el rosa, coloreando sin seguir estrictamente las formas, pero sombreando cada una.
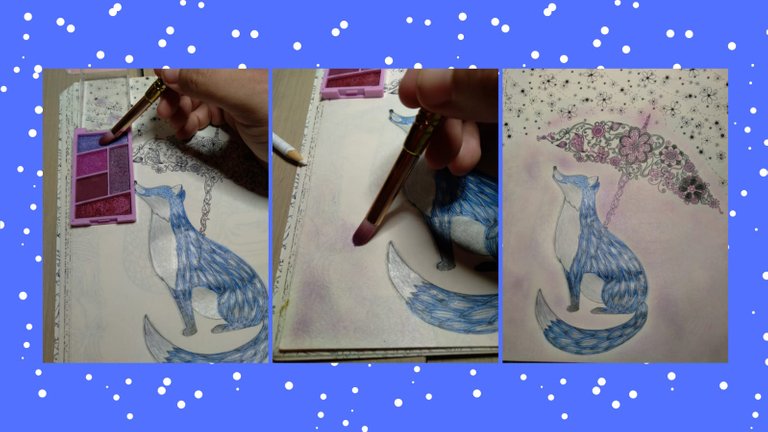
Se me ocurrió que quería dar una nube de color alrededor del lobo, pero al intentar hacerlo con lápices de colores, no me gusta como queda porque se ven las lineas, así que se me ocurrió una idea ingeniosa, colorear con maquillaje, sí, tengo una sombra de ojos en tonos fríos, como el morado, lila metálico, así que empecé a difuminar con el pincel de sombras alrededor del lobo, y para mi sorpresa fue un éxito, quedó realmente bonito y conseguí el efecto que quería, de una nube suave.
En el dibujo pueden ver que en la parte superior de la página, hay un dibujo de líneas y flores, que, en un principio no tenía intención de colorear, sin embargo al día siguiente, cuando había descansado, y volví a revisar el dibujo a la luz del día, pensé que era una buena idea incluir rotuladores para decorar esta parte. Hago la salvedad de que las páginas de este libro son muy finas, y la tinta del rotulador traspasa hasta el reverso de la página, sin embargo, revisé el dibujo que tenía detrás de esa página y no me gustó, así que no me importó que la tinta lo marcara con tal de que el dibujo en el que estaba trabajando fuera más bonito.
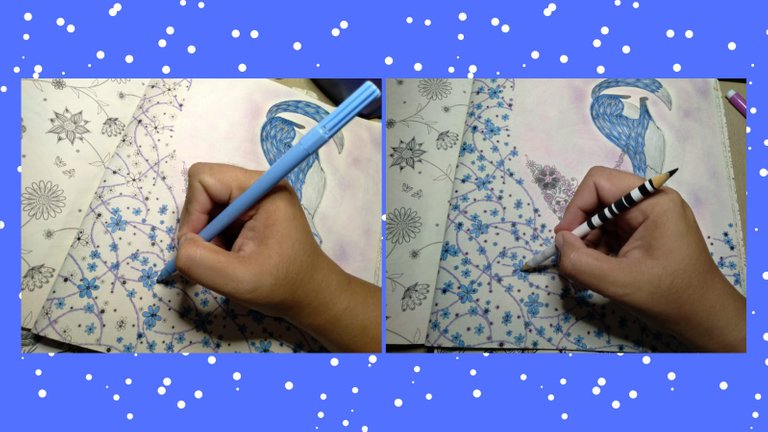
Así que repasé las líneas con rotulador de tinta lila, luego coloreé las flores con azul y otras más pequeñas con morado. El resultado fue muy bonito, me gusta mucho este dibujo monocromático de pequeñas flores, la combinación de azul y lila combinaba muy bien con el color del lobo, tambien incorpore unos detalles en color plata en el centro de las flores azules.
Titulé este dibujo con la ayuda de mi hija, le pregunté qué nombre le pondría y dijo "lobo de agua", por el color azul y la lluvia de flores y el paraguas. Me gustó, así que este es el título.
Terminé mi dibujo firmando con mi nombre, con el lapiz plateado, que me encanta!!! que color tan bonito, me encantaría que lo pudieras ver en vivo y en directo, porque la cámara del teléfono no hace justicia a mi dibujo, pero aun así lo puedes apreciar, tanto en las fotos como en el vídeo, que esta vez lo he publicado en Youtube. Aprovecho para decir que puedes seguirme allí en mi canal, también dedicado a este arte que tanto me gusta "Arteterapia".
Espero que les guste el vídeo, en la edición he añadido un tema musical inspirador llamado Spring Fling de TrackTribe, de la Biblioteca de audio de Youtube de uso comercial gratuito.
El dibujo pertenece al libro de Arteterapia Cores da Floresta.
Todas las imágenes y vídeos son de mi propiedad, tomadas y grabadas con la cámara de mi teléfono Samsung A01, el vídeo editado en la App CapCut, y la portada editada en CanvaPro.

Hello friends of the Hive Diy Community!
I'm here again to share the step by step of the realization of one of my Art Therapy coloring drawings.
This is a drawing of a Wolf, which is in a design that invites more to fantasy than realism, so for coloring I used colors out of nature choosing a palette of cool fantasy style colors, at first I had to mind an idea but as I progressed ideas and more ideas came, and incorporated colors and techniques that I never imagined using but in the end gave a wonderful result.
As always, I started by observing my drawing, I saw that I could make a contrast with the royal blue color in the wolf's fur and add details of light with the white color. I used a white pencil, something difficult to handle, because this color does not saturate, but if we see the before and after of the drawing, the area where I colored with white it is seen that if it marked and gave brightness, especially because the leaf of the book is slightly yellowish so the effect was achieved.
I colored in blue the fur of the back and extremities of my wolf, then I incorporated in the center decade speck of white hair, and then a litter of silver color. I then went on to color the chest, lower face and belly with white, then added a layer of silver to give it a nice shiny effect. He also outlined the edges to give a shading and relief to the drawing.
In the umbrella or decorative umbrella I used black to highlight the shapes, then a little dark gray and finally pink, coloring without strictly following the shapes, but shading each one.
It occurred to me that I wanted to give a cloud of color around the wolf, but when I tried to do it with colored pencils, I don't like how it looks because the nines show, so I came up with an ingenious idea, coloring with makeup, yes, I have an eye shadow in cold tones, like purple, metallic lilac, so I started to blur with the shadow brush around the wolf, and to my surprise it was a success, it was really beautiful and I achieved the effect I wanted, of a soft cloud.
In the drawing you can see that at the top of the page, there is a pattern of lines and flowers, which, at first I had no intention of coloring, however the next day, when I had rested, and went back to review the drawing in the light of day, I thought it was a good idea to include markers to decorate this part. I make the note that the pages of this book are very thin, and the ink of the marker goes through to the back of the page, however, I checked the drawing I had behind that page and I didn't like it, so I didn't mind that the ink would mark it as long as the drawing I was working on would be prettier.
So I went over the lines with lilac ink marker, then I colored the flowers with blue and other smaller ones with purple. The result was really nice, I really like this monochromatic pattern of small flowers, the combination of blue and lilac combined very well with the color of the wolf.
I titled this drawing with the help of my daughter, I asked her what name she would put on it and she said "water wolf", because of the blue color and the rain of flowers and the umbrella. I liked it, so this is the title.
I finished my drawing by signing my name, with the silver lapis, which I love! what a beautiful color, I would love that you could see it live and direct, because the phone camera does not do justice to my drawing, but you can still appreciate it, both in the photos and in the video, which this time I published it on Youtube. I take this opportunity to tell you that you can follow me there on my channel, also dedicated to this art that I like so much "Art Therapy".
I hope you like the video, in the edition I added an inspirational music track called Spring Fling by TrackTribe, from the Youtube Audio Library for free commercial use.
The drawing belongs to the Arteterapia book Cores da Floresta.
All images and videos are my property, taken and recorded with the camera of my Samsung A01 phone, video edited in the CapCut App, and the cover edited in CanvaPro.


