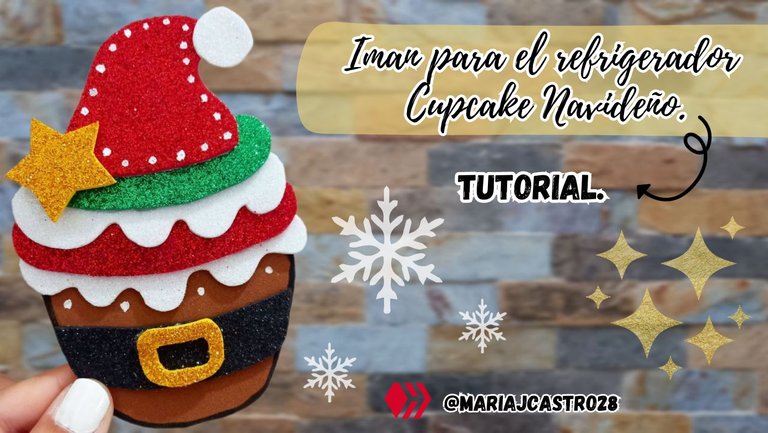

¡Feliz día amigos de Hive Diy! Espero que se encuentren muy bien. Este fin de semana finalmente es navidad y más emocionada no puedo estar por ello y para celebrarlo hoy comparto con ustedes un nuevo modelo de imán decorativo para el refrigerador con temática navideña, el primero que hice (que ya les compartí) era de Santa Claus y quería hacer otro con una temática diferente, estuve pensando en un diseño que fuera navideño y a su vez combinara con la cocina y fue cuando se me ocurrió hacer una especie de cupcake navideño que tuviera los colores representativos de esta bonita época y al mismo tiempo un pequeño toque que asemeja a Santa Claus, a continuación les mostraré el procedimiento y los materiales que utilice, espero como siempre que les guste, ahora sin más, ¡vamos a crear!
¡Happy day friends of Hive Diy! I hope you are good. This weekend it's finally Christmas and I couldn't be more excited about it and to celebrate it today I'm sharing with you a new model of decorative magnet for the refrigerator with a Christmas theme, the first one I made (which I already shared with you) was of Santa Claus and I wanted to make another one with a different theme, I was thinking about a design that was Christmas and at the same time combined with the kitchen and that's when it occurred to me to make a kind of Christmas cupcake that had the colors representative of this beautiful time and at the same time a small touch that resembles Santa Claus, below I will show you the procedure and the materials I use, I hope as always that you like it, now without further ado, let's create!

★ Foami marrón sin escarcha.
★ Pintura al frío blanca y negra.
★ Pincel.
★ Lápiz.
★ Tijera.
★ Silicón.
★ Imán.
★ Frost-free brown foam.
★ Black and white cold paint.
★ Brush.
★ Pencil.
★ Scissors.
★ Silicone.
★ Magnet.


★ PASO 1. Lo primero que hice fue hacer todas las piezas para formar el cupcake navideño, fue un total de 9 piezas, cada una la hice en foami de color diferente (como se muestra en la siguiente imagen) y luego recorté.
★ STEP 1. The first thing I did was make all the pieces to form the Christmas cupcake, it was a total of 9 pieces, each one I made in foam of a different color (as shown in the following image) and then cutout.


★ PASO 2. Con un pincel fino tomé un poco de pintura negra y remarqué los bordes de la pieza de foami marrón y dejé secar bien.
★ STEP 2. With a fine brush I took a little black paint and highlighted the edges of the brown foam piece and let it dry well.


★ PASO 3. Formé el cinturón de Santa con las piezas de foami negro y dorado y luego lo pegué sobre la pieza de foami marrón, justo en el centro.
★ STEP 3. I formed Santa's belt with the black and gold foam pieces and then glued it on the brown foam piece, right in the center.


★ PASO 4. Comencé a darle forma al cupcake uniendo las demás piezas de foami, partiendo desde abajo hacia arriba, pegando cada pieza sobre la otra hasta pegar la última (en mi caso lo hice de esta forma y con estos colores pero ustedes pueden variarlos a su gusto).
★ STEP 4. I began to shape the cupcake by joining the other pieces of foam, starting from the bottom up, gluing each piece on top of the other until gluing the last one (in my case I did it this way and with these colors but you can vary them to your liking).


★ PASO 5. Formé el gorrito de navidad uniendo sus 2 piezas y lo pegué en la parte superior del cupcake navideño.
★ STEP 5. I formed the Christmas hat by joining its 2 pieces and glued it to the top of the Christmas cupcake.


★ PASO 6. Pegué la última pieza de foami que es la estrella dorada y la ubiqué a un lado del gorrito de navidad pegándola sobre este, luego con pintura blanca le hice unos pequeños detalles al cupcake dibujando pequeños puntos en los bordes del gorro de navidad y otros en la pieza de foami marrón.
★ STEP 6. I glued the last piece of foam, which is the gold star, and placed it on one side of the Christmas hat, gluing it on top of it, then with white paint I made some small details on the cupcake by drawing small dots on the edges. of the Christmas hat and others in the brown foam piece.


★ PASO 7. Como último detalle pegué el imán en la parte trasera del cupcake navideño, ubicándolo justo en el centro.
★ STEP 7. As a last detail, I glued the magnet to the back of the Christmas cupcake, placing it right in the center.


¡Y listo! De esta manera tan sencilla fue como elaboré este hermoso y colorido imán decorativo para mi refrigerador con temática de cupcake navideño, es bastante simple pero perfectamente adecuado tanto para la época como para la cocina, esto de decorar mi refrigerador con imanes decorativos me está gustando mucho porque realmente le dan un toque lindo a mi cocina, apenas tengo 2 de estos pero hacen la diferencia, ¿Qué les parece a ustedes? Espero que les haya gustado esta idea y este tutorial, nos vemos pronto con una nueva idea creativa.
¡And ready! In this simple way, I made this beautiful and colorful decorative magnet for my refrigerator with a Christmas cupcake theme. It is quite simple but perfectly suitable for both the season and the kitchen. I really like decorating my refrigerator with decorative magnets. because they really add a nice touch to my kitchen, I only have 2 of these but they make a difference, what do you think? I hope you liked this idea and this tutorial, see you soon with a new creative idea.


Todas las fotografías son de mi propiedad.
Fotografías capturadas con mi Samsung Galaxy A12
Separador de texto elaborado en Canva.
Nos vemos en mi próxima publicación.
¡Tengan un feliz día!
All photographs are my property.
Photos captured with my Samsung Galaxy A12
Text separator made in Canva.
See you in my next post.
¡Have a happy day!


