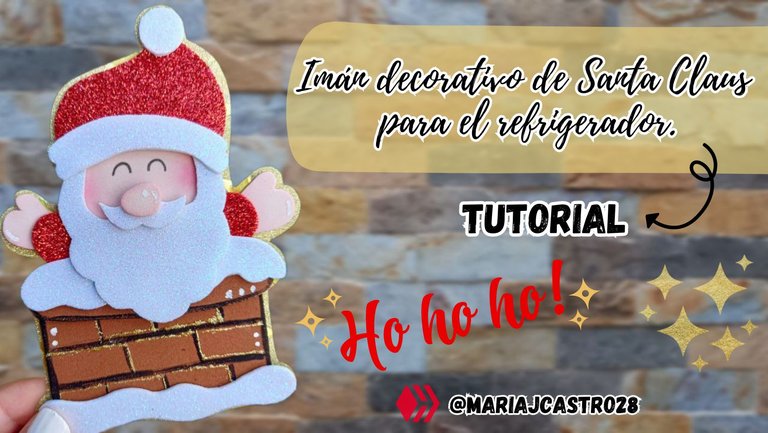

¡Feliz día amigos creativos de Hive Diy! Deseo que tengan un muy feliz inicio de semana, ya falta muy poco para navidad y aun me encuentro haciendo algunos detalles para decorar en esta linda época, como ya les había mencionado ahora estoy haciendo algunos adornos para mi cocina y algo que siempre había querido eran unos imanes para el refrigerador, hace poco conseguí algunos en casa y sin dudarlo me puse manos a la obra para crear un lindo adorno navideño para decorar el refrigerador, así que el día de hoy les comparto su elaboración esperando como siempre que les guste, sin más, ¡vamos a crear!
¡Happy day creative friends of Hive Diy! I hope you have a very happy start to the week, Christmas is almost there and I am still making some details to decorate during this beautiful time, as I had already mentioned, now I am making some decorations for my kitchen and something I had always wanted was some magnets for the refrigerator, I recently got some at home and without hesitation I got to work to create a nice Christmas ornament to decorate the refrigerator, so today I share its creation with you, hoping as always that you like it, without more, let's create!

• Foami color piel y marrón sin escarcha.
• Pintura al frío negra y blanca.
• Pintura dorada escarchada.
• Cartulina metalizada dorada.
• Rubor.
• Pincel.
• Lápiz.
• Tijera.
• Silicón.
• Imán.
• Skin-colored and brown foam without frost.
• Black and white cold paint.
• Frosted gold paint.
• Gold metallic cardboard.
• Blush.
• Brush.
• Pencil.
• Scissors.
• Silicone.
• Magnet.


🌟 PASO 1. Lo primero que hice fue elaborar las piezas en foami para formar la figura completa, en total consta de 14 piezas y cada una la hice en su color correspondiente, luego recorté.
🌟 STEP 1. The first thing I did was make the foam pieces to form the complete figure, in total it consists of 14 pieces and I made each one in its corresponding color, then I cut out.


🌟 PASO 2. Con un pincel delgado tomé un poco de pintura al frío negra y dibujé varias líneas a la pieza rectangular de foami marrón para darle el aspecto de una chimenea, además también remarqué las orillas de ambas piezas marrones y dejé secar bien.
🌟 STEP 2. With a thin brush I took a little black cold paint and drew several lines on the rectangular piece of brown foam to give it the appearance of a fireplace, I also highlighted the edges of both brown pieces and left dry well.


🌟 PASO 3. Dibujé delgadas líneas de pintura dorada escarchada sobre las líneas de pintura negra (en mi caso utilicé un esmalte de uñas de brocha fina), luego de secar pegué la pieza pequeña sobre la grande.
🌟 STEP 3. I drew thin lines of frosty gold paint over the black paint lines (in my case I used a fine brush nail polish), after drying I glued the small piece on top of the large one.


🌟 PASO 4. En la parte superior e inferior de la chimenea pegué dos piezas de foami escarchado blanco que simulan ser nieve.
🌟 STEP 4. At the top and bottom of the fireplace I glued two pieces of white frosty foam that simulate snow.


🌟 PASO 5. A las piezas de color piel les apliqué rubor en los bordes para darles algo de color y le dibujé las mejillas a la parte del rostro.
🌟 STEP 5. I applied blush to the edges of the skin-colored pieces to give them some color and I drew the cheeks on the face part.


🌟 PASO 6. Formé el rostro de Santa uniendo las piezas de la barba, bigote y nariz, luego formé el gorro de Santa y lo pegué en la parte superior de su cabeza.
🌟 STEP 6. I formed Santa's face by joining the pieces of the beard, mustache and nose, then I formed Santa's hat and glued it to the top of his head.


🌟 PASO 7. Pegué las piezas de las manos en los extremos de los brazos y esta pieza la pegué detrás de la nieve superior de la chimenea, sobre ella pegué la cabeza de Santa y le dibujé los ojos, además le hice algunos detalles con pintura blanca.
🌟 STEP 7. I glued the pieces of the hands at the ends of the arms and I glued this piece behind the upper snow of the chimney, on top of it I glued Santa's head and drew his eyes, I also made him some details with white paint.


🌟 PASO 8. Pegué el Santa sobre cartulina metalizada dorada y recorté el exceso de esta dejando un delgado borde alrededor de la figura, como último detalle le pegué el imán en su parte trasera.
🌟 STEP 8. I glued the Santa onto gold metallic cardboard and trimmed the excess leaving a thin border around the figure. As a last detail I glued the magnet on the back.


¡Y listo! De esta manera tan sencilla fue como elaboré este lindo imán decorativo de Santa Claus para mi refrigerador, debo confesar que tenía muchas ideas en mente y no me decía que temática darle a este adorno y ahora que está terminado estoy más que feliz con el resultado, es un lindo adorno para decorar un poco más mi cocina y luce muy bien en el refrigerador, ahora estoy pensando en nuevas ideas para seguir decorando y luego les iré compartiendo más sobre eso, espero que este tutorial les haya gustado, nos vemos pronto con una nueva idea navideña.
¡And ready! In this simple way I made this cute decorative Santa Claus magnet for my refrigerator. I must confess that I had many ideas in mind and I didn't know what theme to give this ornament and now that it is finished I am more than happy with the result. It is a nice ornament to decorate my kitchen a little more and it looks very good on the refrigerator, now I am thinking of new ideas to continue decorating and then I will share more about it, I hope you liked this tutorial, see you soon with a new Christmas idea.


Todas las fotografías son de mi propiedad.
Fotografías capturadas con mi Samsung Galaxy A12
Separador de texto elaborado en Canva.
Nos vemos en mi próxima publicación.
¡Tengan un feliz día!
All photographs are my property.
Photos captured with my Samsung Galaxy A12
Text separator made in Canva.
See you in my next post.
¡Have a happy day!