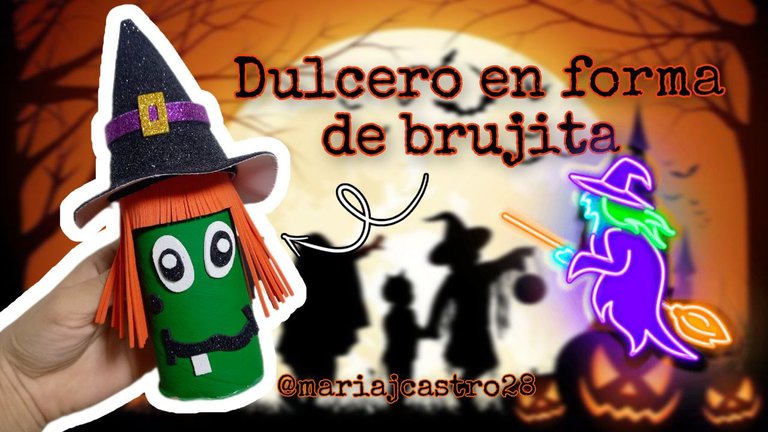
¡Saludos Abejitas Creativas! | ¡Greetings Creative Bees!
¡Feliz inicio de semana! Espero que tengan una semana muy linda llena de cosas buenas, hoy quiero compartir con ustedes una nueva manualidad para Halloween una que hice utilizando un tubo de cartón de papel higiénico como base y el resultado es muy bonito, se trata de un dulcero de brujita muy fácil de hacer y con un diseño muy divertido, espero que les guste, aquí les comparto el procedimiento para su elaboración, sin más, ¡a trabajar!
¡Happy start of the week! I hope you have a very nice week full of good things, today I want to share with you a new craft for Halloween one that I made using a cardboard tube of toilet paper as a base and the result is very nice, it is a Witch candy very easy to make and with a very fun design, I hope you like it, here I share the procedure for its preparation, without further ado, get to work!

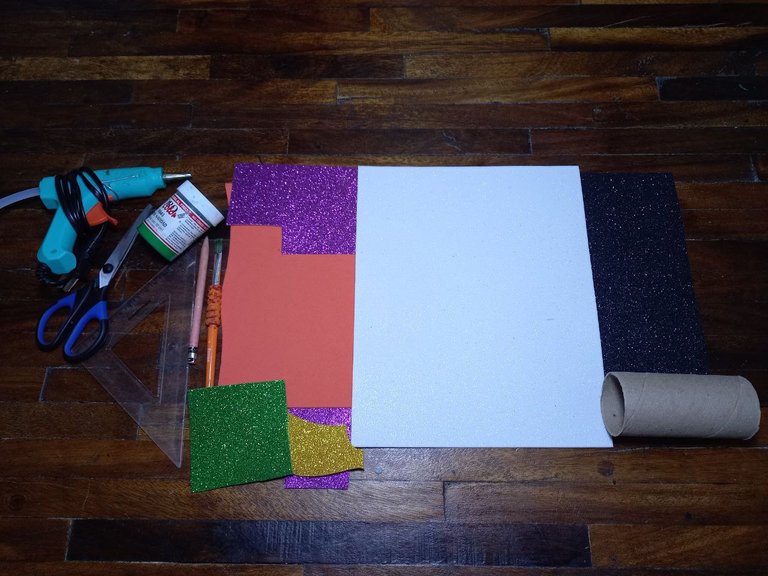
🍬 1 Tubo de cartón.
🍬 Foami naranja sin escarcha.
🍬 Foami escarchado negro, morado, verde, dorado, blanco.
🍬 Pintura al frío verde
🍬 Silicón caliente.
🍬 Pincel.
🍬 Regla.
🍬 Lápiz.
🍬 Tijera.
🍬 1 cardboard tube.
🍬 Orange foami without frost.
🍬 Frosted foami black, purple, green, gold, white.
🍬 Green cold paint
🍬 Hot silicone.
🍬 Brush.
🍬 Rule.
🍬 Pencil.
🍬 Scissor.

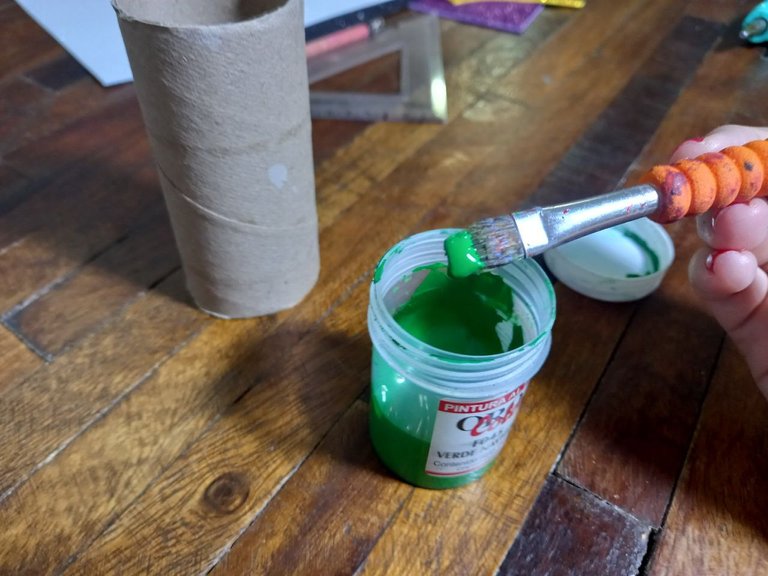
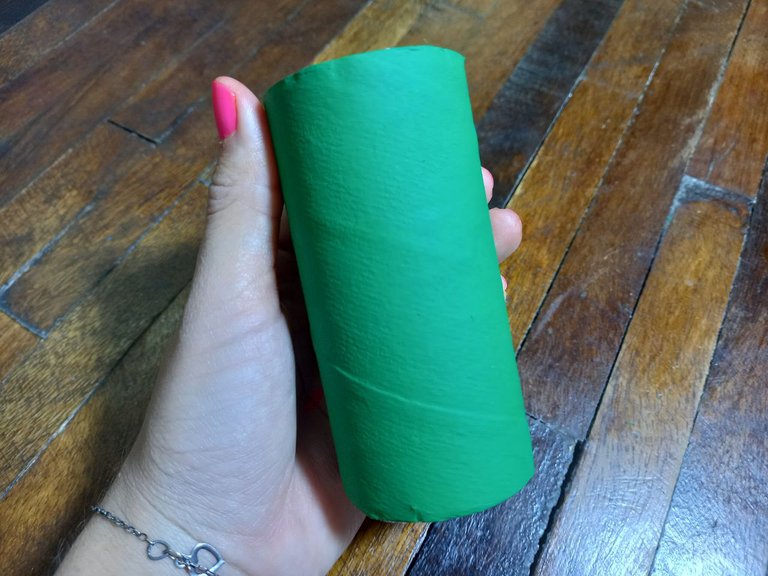
🍬 PASO 1. Comenzamos pintando el tubo de cartón con la pintura verde asegurándonos de que quede bien cubierto, luego dejamos secar bien por unos minutos.
🍬 STEP 1. We start by painting the cardboard tube with the green paint, making sure it is well covered, then let it dry for a few minutes.


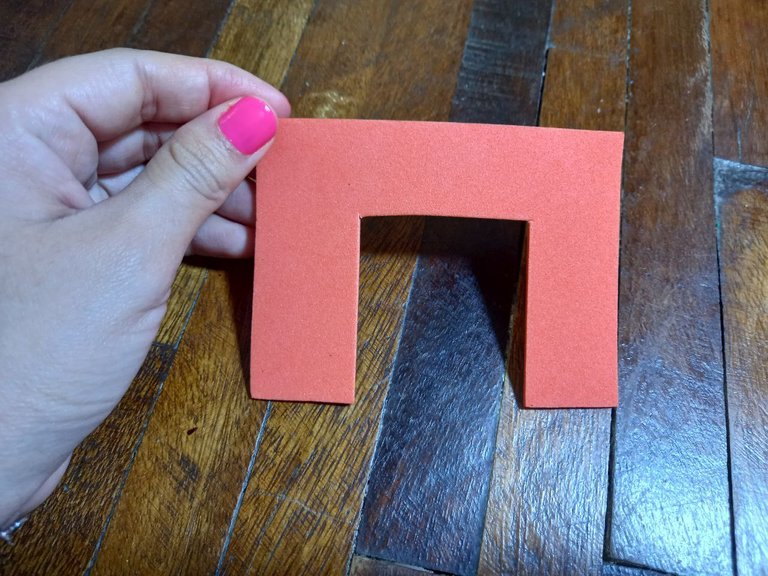
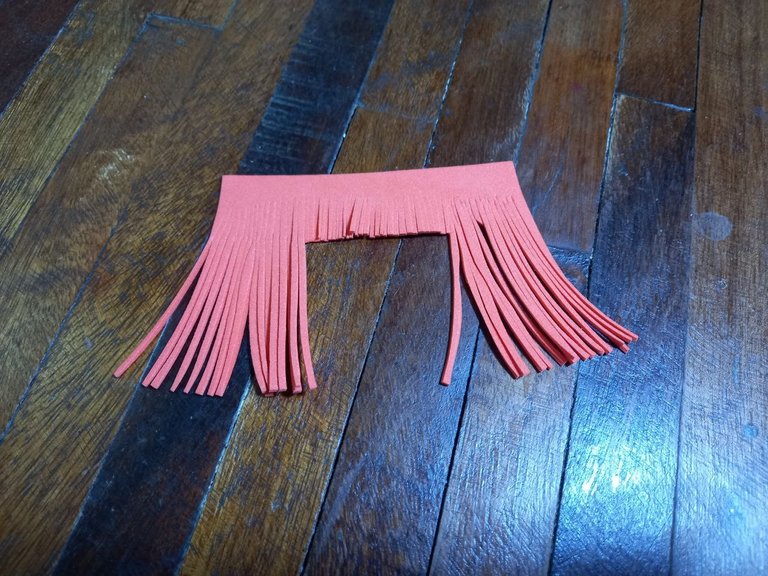
🍬 PASO 2. Mientras se seca la pintura recortamos un rectángulo de foami naranja al que luego le recortaremos la parte del centro, una vez hecho esto hacemos cortes muy finos verticalmente sin llegar hasta el final, de esta manera tendremos el cabello de nuestra brujita.
🍬 STEP 2. While the paint dries, we cut out a rectangle of orange foami to which we will then cut the center part, once this is done we make very fine cuts vertically without reaching the end, in this way we will have the hair of our little witch.


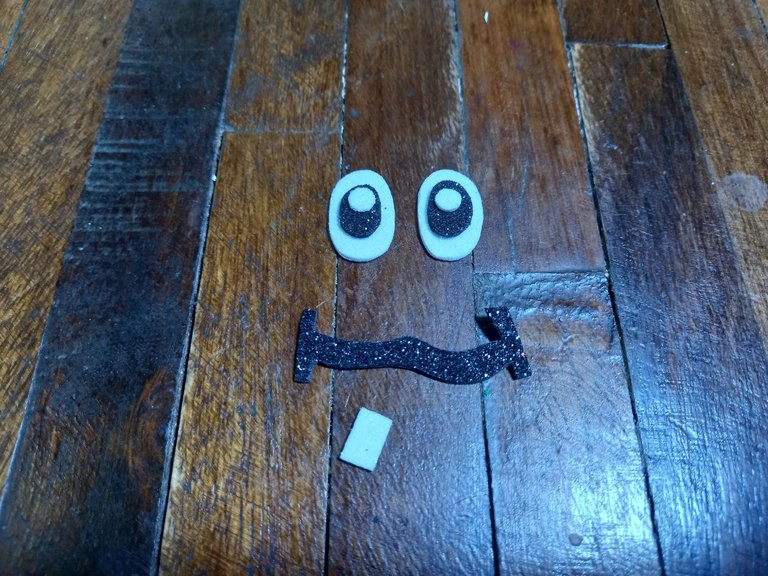
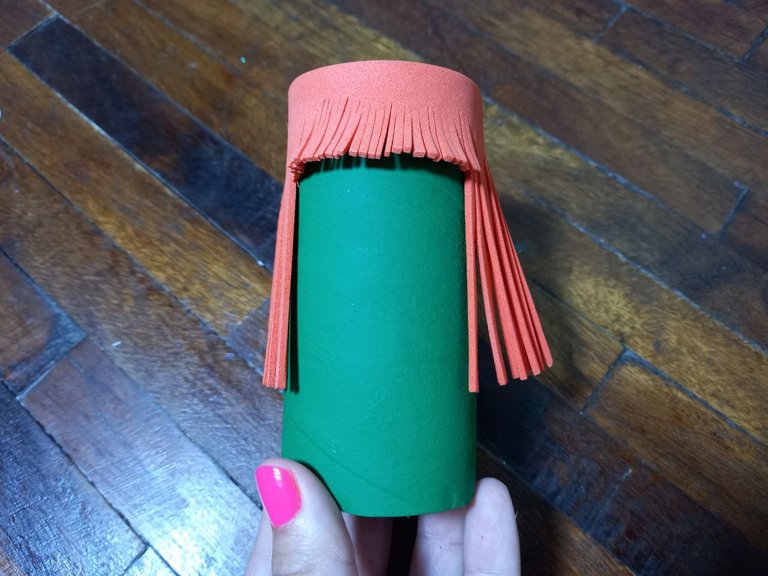
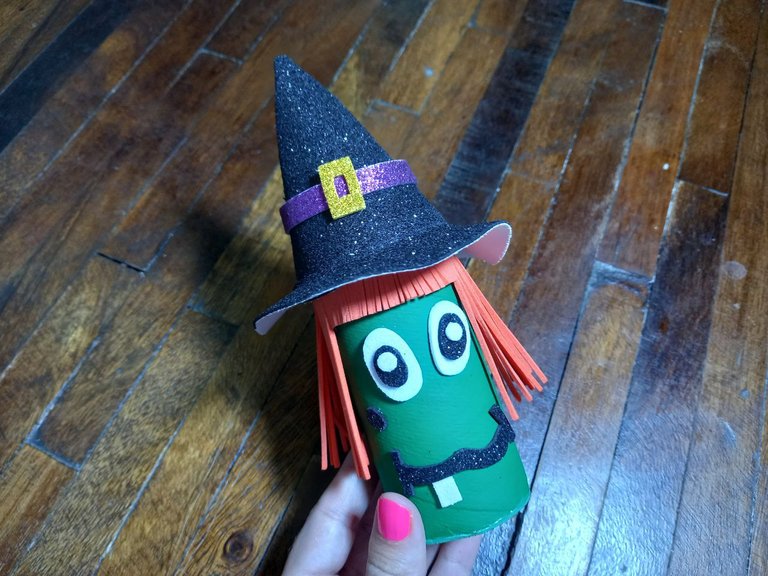
🍬 PASO 3. Hacemos los ojos y boca con foami escarchado blanco y negro de la forma que más nos guste, una vez que se haya secado bien la pintura del tubo de cartón pegaremos el cabello desde la orilla superior del tubo de cartón y luego pegamos las otras piezas para formar el rostro.
🍬 STEP 3. We make the eyes and mouth with black and white frosted foami in the way we like best, once the paint on the cardboard tube has dried well we will glue the hair from the upper edge of the tube cardboard and then we glue the other pieces to form the face.

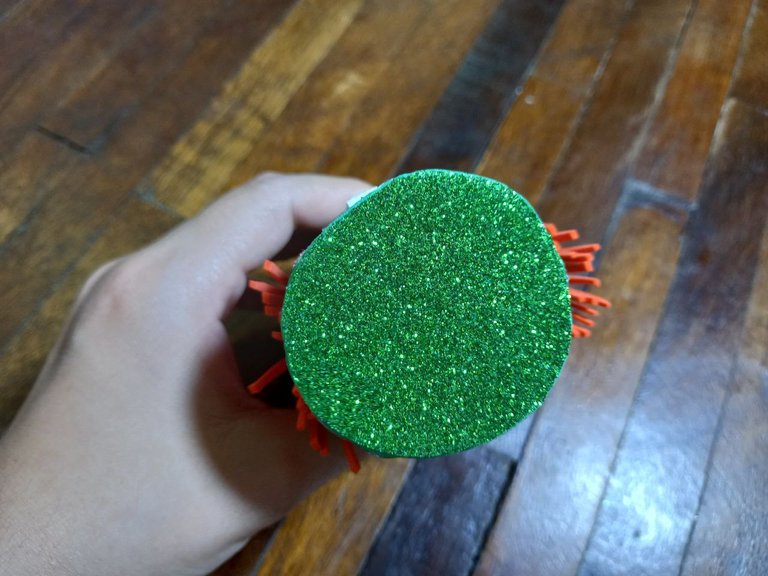
🍬 PASO 4. Aplicamos silicón en la orilla inferior del tubo de cartón y lo pegamos sobre foami escarchado verde dejando la parte escarchada en el exterior, luego recortamos el exceso dejando el foami al ras del tubo de cartón.
🍬 STEP 4. We apply silicone to the lower edge of the cardboard tube and stick it on green frosted foami, leaving the frosty part on the outside, then we cut off the excess, leaving the foami flush with the cardboard tube.


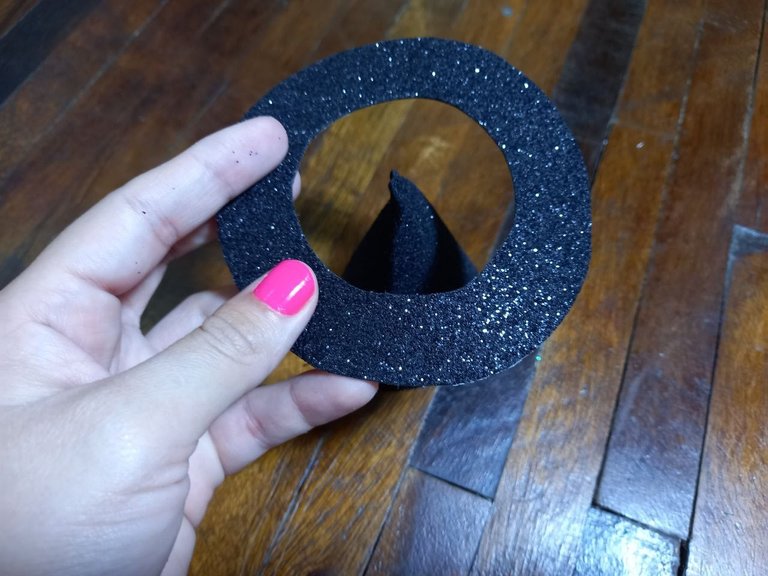
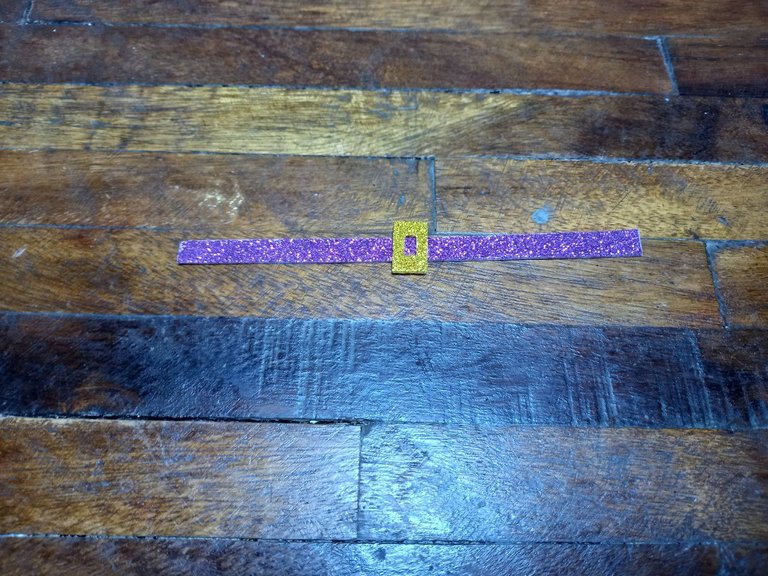
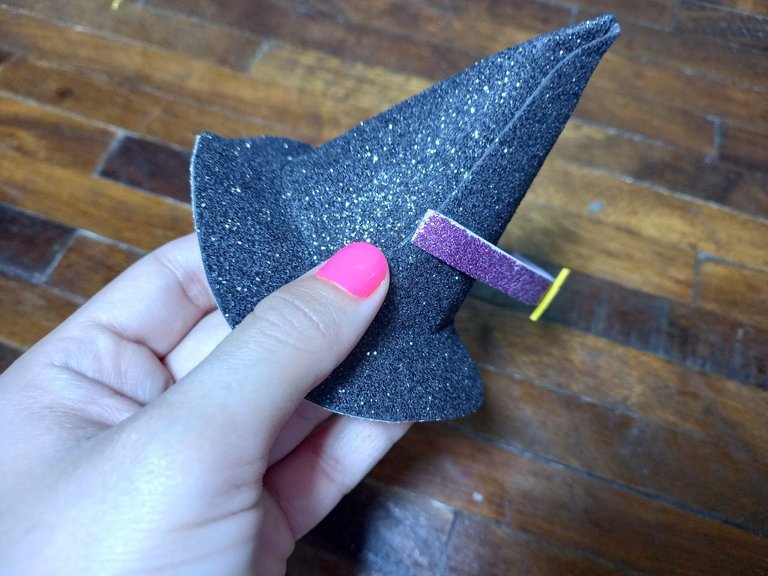
🍬 PASO 5. Ahora haremos el sombrero de la bruja que a la vez será la tapa del dulcero, en el foami escarchado negro haremos un triángulo con las puntas de los lados anchas y un circulo con el centro hueco, unimos los dos lados anchos del triángulo formando un cono, luego pasamos el circulo hueco por el centro hasta abajo quedando como el borde del sombrero, debemos asegurarnos de que el sombrero tenga el ancho adecuado para encajar en el tubo de cartón de tal forma que quede a su vez como la tapa, luego recortamos una tira delgada de foami escarchado morado y un triángulo pequeño con el centro hueco, pegaremos este en el centro de la tira de foami morado y pegamos la tira alrededor del sombrero para decorarlo, una vez que esté listo se lo colocamos a la brujita.
🍬 STEP 5. Now we will make the witch's hat, which at the same time will be the lid of the candy box, in the black frosted foami we will make a triangle with the tips of the wide sides and a circle with a hollow center, join the two wide sides of the triangle forming a cone, then we pass the hollow circle through the center to the bottom, remaining as the edge of the hat, we must make sure that the hat has the right width to fit in the cardboard tube in such a way that it is at your Once as the lid, then we cut a thin strip of purple frosted foami and a small triangle with a hollow center, we will stick this in the center of the purple foami strip and stick the strip around the hat to decorate it, once it is ready it will be We put it on the little witch.


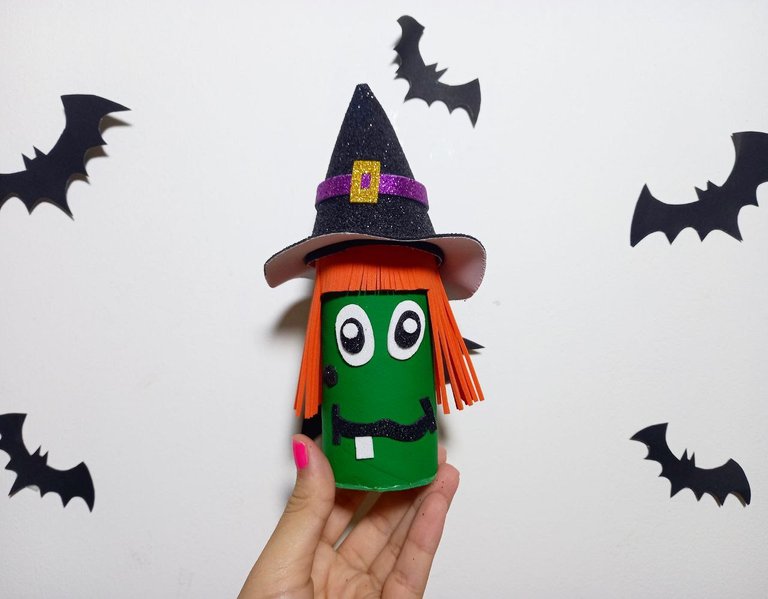
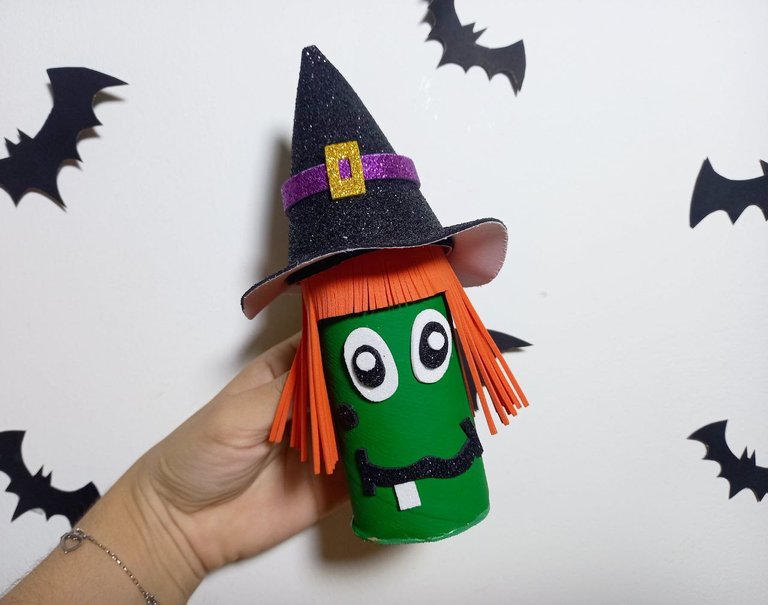
Y es de esta manera tan sencilla como he elaborado este lindo dulcero de brujita para Halloween utilizando un tubo de cartón como elemento principal, es un dulcero muy fácil de hacer e ideal para obsequiar a los niños, espero que les haya gustado esta idea y puedan elaborarla en casa, nos vemos en un siguiente post con una nueva idea creativa.
And it is in this simple way that I have made this cute little witch candy box for Halloween using a cardboard tube as the main element, it is a very easy candy box to make and ideal to give to children, I hope they liked it this idea and can make it at home, see you in a next post with a new creative idea.


Todas las fotografías son de mi propiedad.
Fotografías capturadas con mi Samsung Galaxy A12
Separador de texto elaborado en Canva.
Nos vemos en mi próxima publicación.
¡Tengan un feliz día!
All photographs are my property.
Photos captured with my Samsung Galaxy A12
Text separator made in Canva.
See you in my next post.
¡Have a happy day!