¡Saludos Comunidad Creativa! | ¡Greetings Creative Community!
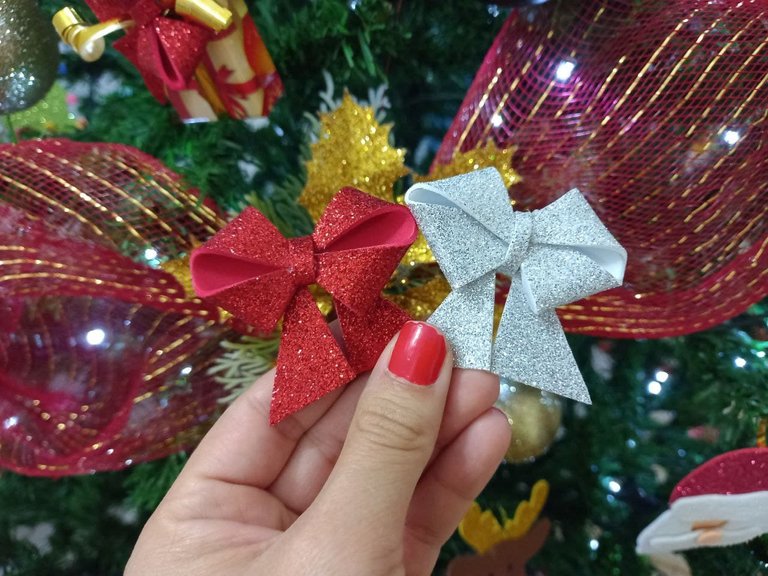
¡Feliz viernes para todos! En este hermoso día les traigo un tutorial muy fácil para elaborar unos lindos lazos de foami para colocar a los obsequios de navidad o cualquier ocasión especial, le dan un toque muy lindo a nuestros regalos y sin duda los hacen más llamativos, espero que les guste y los puedan elaborar en casa para sus obsequios de navidad.
¡Happy Friday for everyone! On this beautiful day I bring you a very easy tutorial to make some beautiful foami bows to put on Christmas gifts or any special occasion, they give a very nice touch to our gifts and without a doubt make them more striking, I hope you like it and they can make them at home for their Christmas gifts.

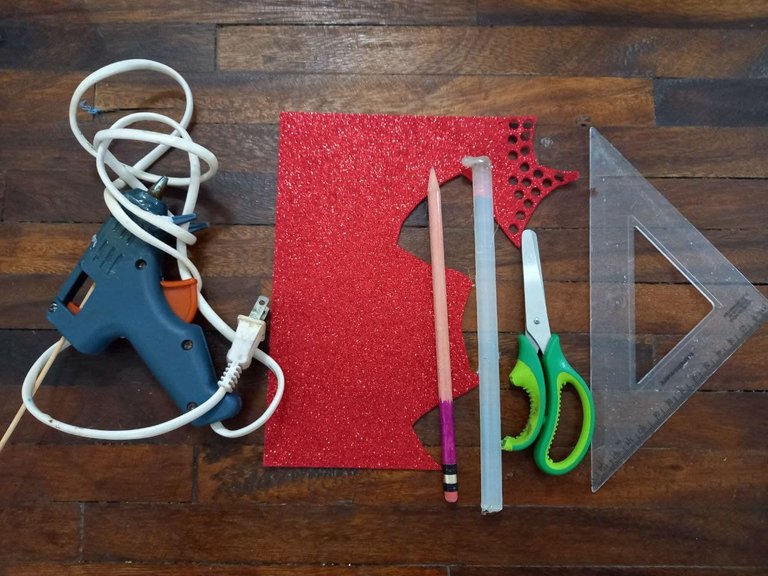
- Foami escarchado de cualquier color.
- Tijeras.
- Lápiz.
- Hoja de papel.
- Silicón.
- Pistola de silicón.
- Regla.
- Frosted foam of any color.
- Pair of scissors.
- Pencil.
- Paper sheet.
- Silicone.
- Silicone gun.
- Rule.

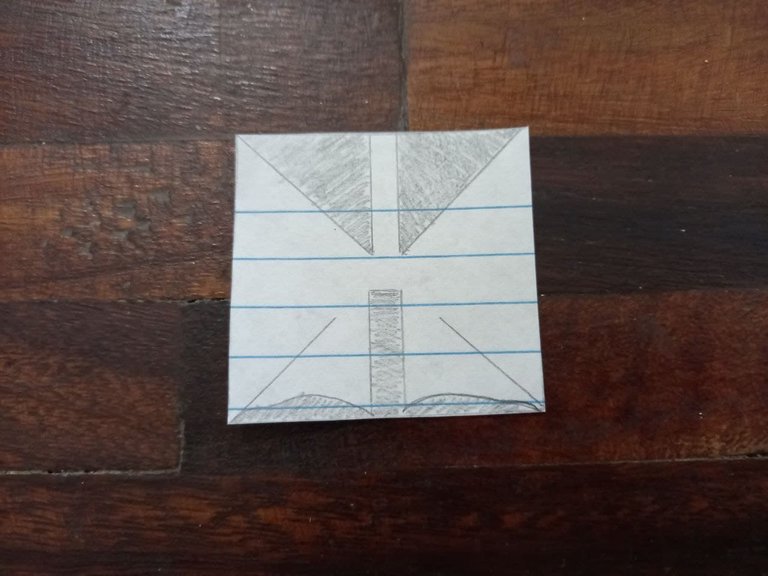
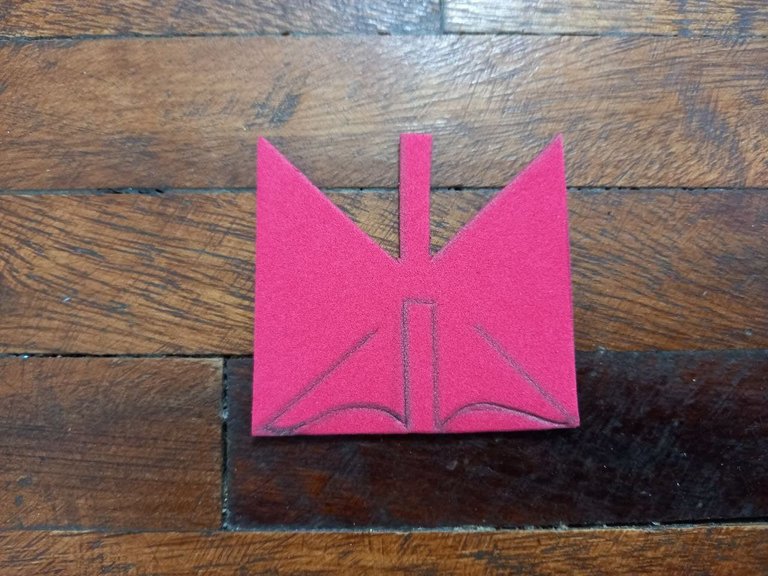
🎄 PASO 1. Vamos a necesitar un patrón y es este que les dejaré en la siguiente imagen, las partes sombreadas las vamos a recortar y retirar.
🎄 STEP 1. We are going to need a pattern and it is this that I will leave you in the next image, the shaded parts we are going to cut out and remove.

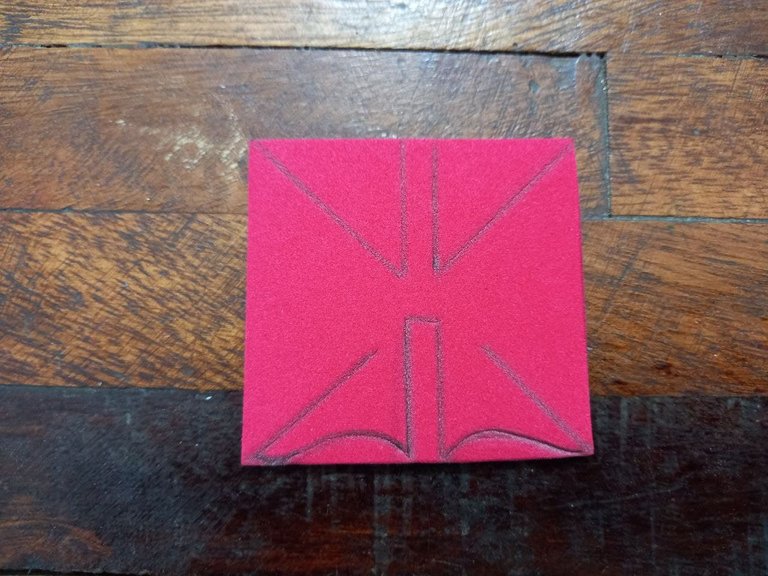
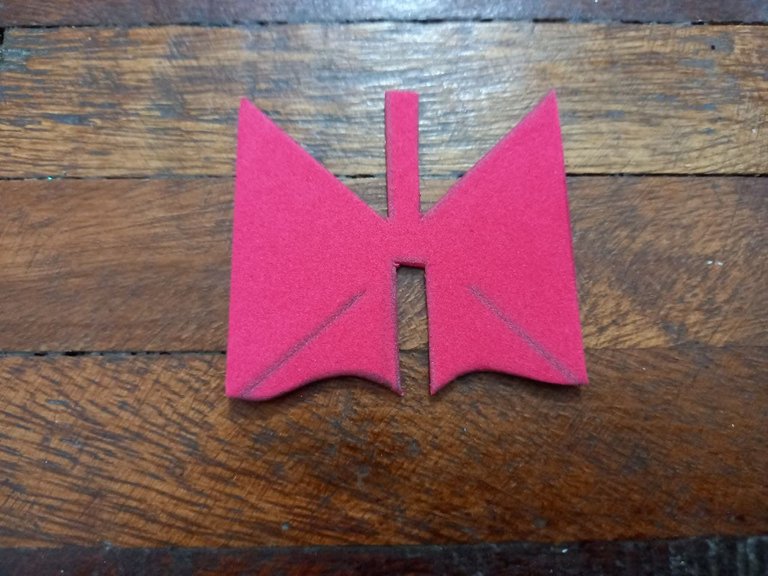
🎄 PASO 2. Hacemos la forma del patrón en el foami.
🎄 STEP 2. We make the shape of the pattern in the foami.
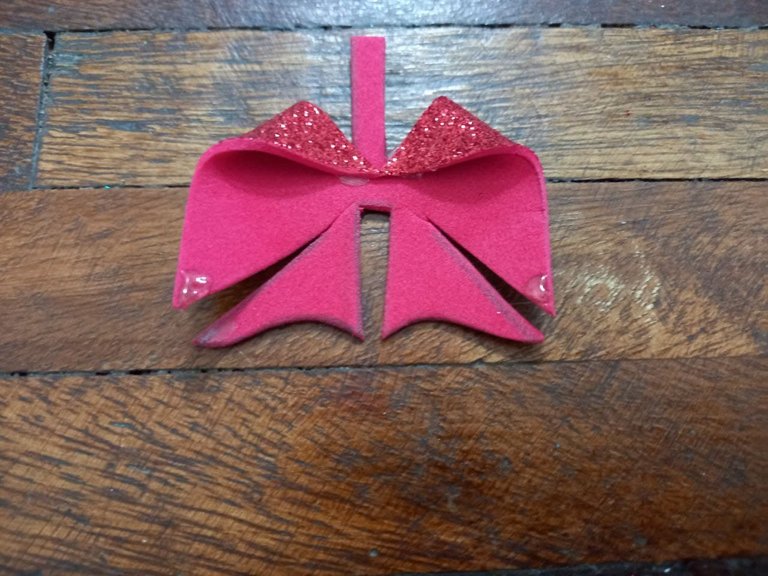
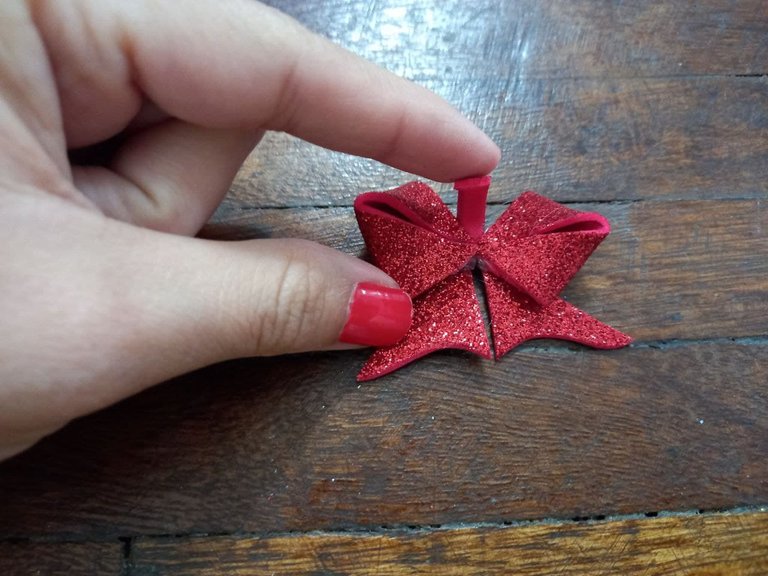
🎄 PASO 3. Retiramos los 2 triángulos de arriba, luego la parte de abajo y finalmente hacemos un corte en las 2 líneas de abajo.
🎄 STEP 3. We remove the 2 upper triangles, then the lower part and finally we make a cut in the 2 lines below.
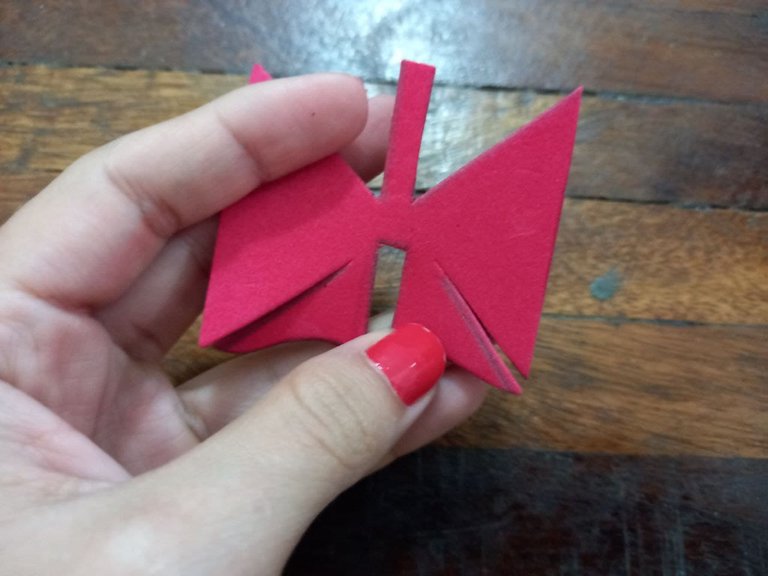
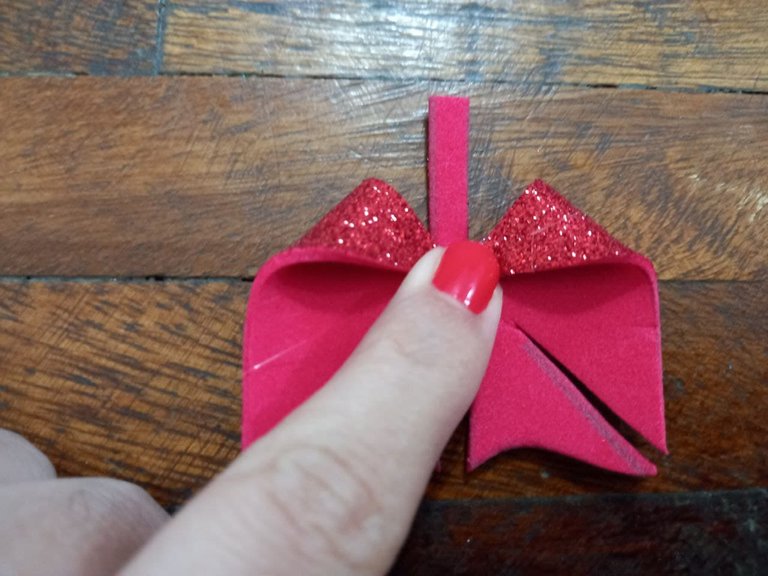
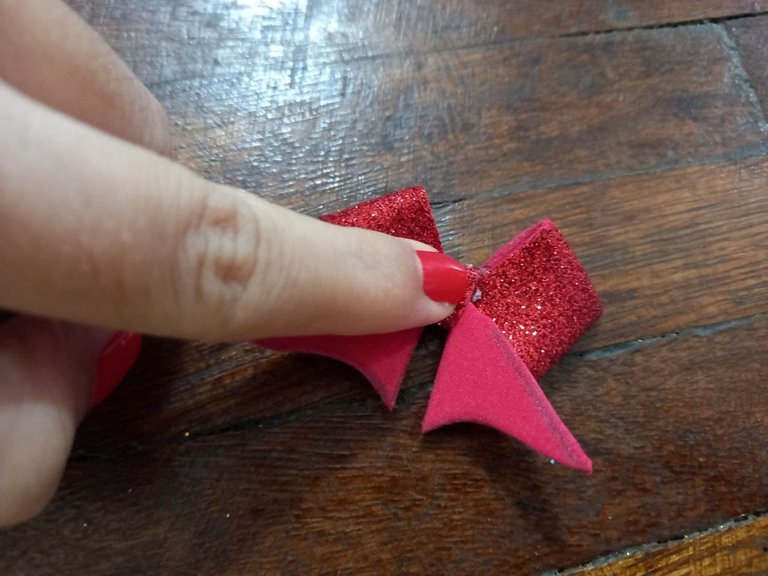
🎄 PASO 4. Aplicamos silicón en las puntas de arriba y las llevamos hacia el centro haciendo presión para que se peguen, luego hacemos lo mismo con las puntas de abajo hasta unir todas en el centro.
🎄 STEP 4. We apply silicone to the top tips and bring them to the center making pressure so that they stick, then we do the same with the bottom tips until they all join in the center.
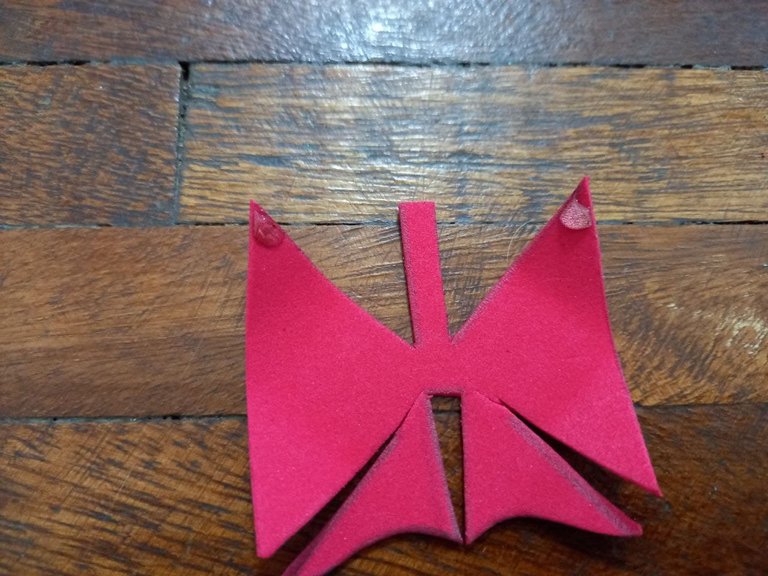
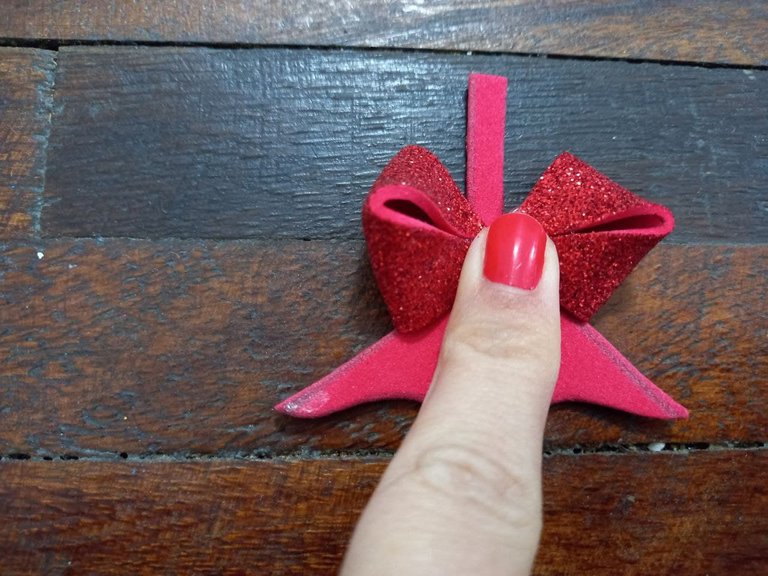
🎄 PASO 5. Volteamos el foami colocándolo hacia abajo y vamos a doblar la parte donde están unidas las cuatro puntas hacia arriba y pegamos.
🎄 STEP 5. We turn the foami by placing it down and we are going to fold the part where the four ends are joined up and glue.

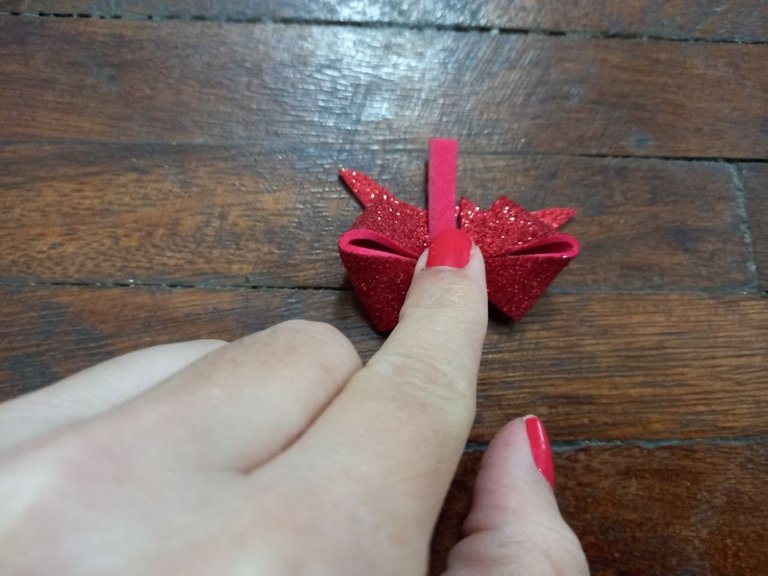
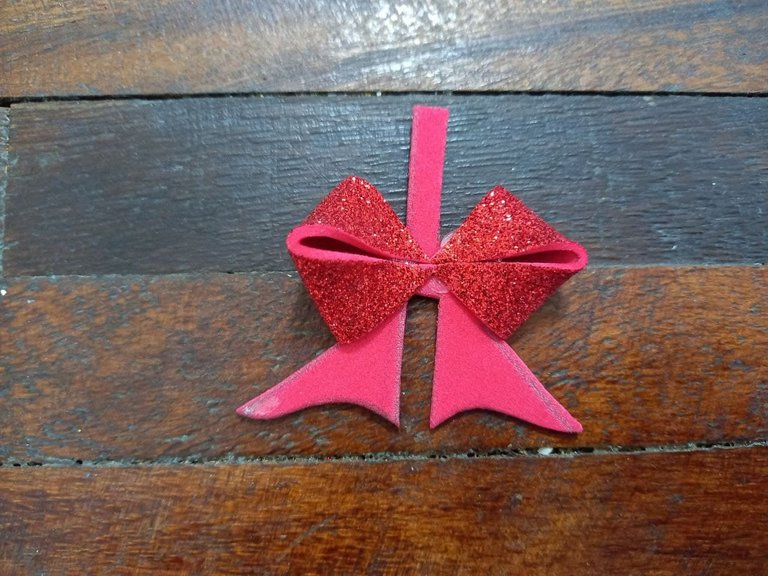
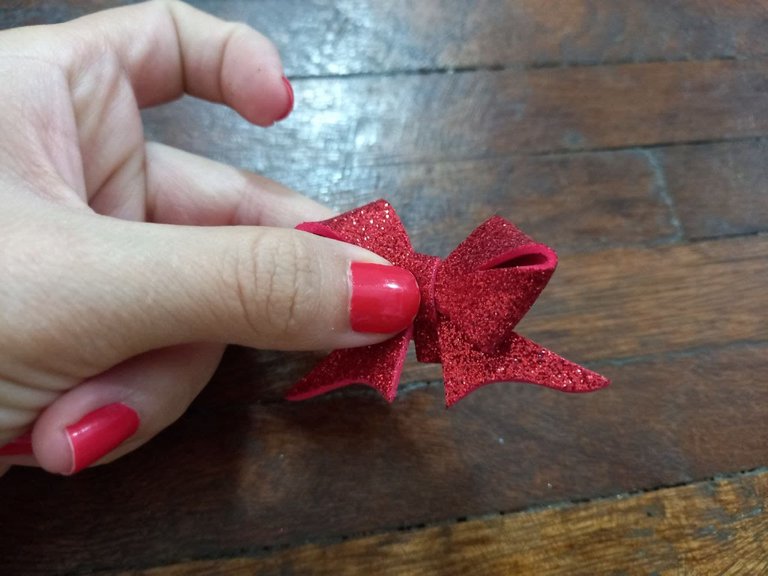
🎄 PASO 6. Por último, vamos a tomar la pieza de foami restante, es decir la que queda arriba y la vamos a doblar hacia abajo cubriendo el centro del lado y finalizando en la parte de atrás y pegamos, de esta manera ya tenemos listo nuestro lindo lazo.
🎄 STEP 6. Finally, we are going to take the remaining piece of foami, that is, the one that is left on the top and we are going to fold it down covering the center of the side and ending in the back and glue, of this way we already have our cute bow ready.
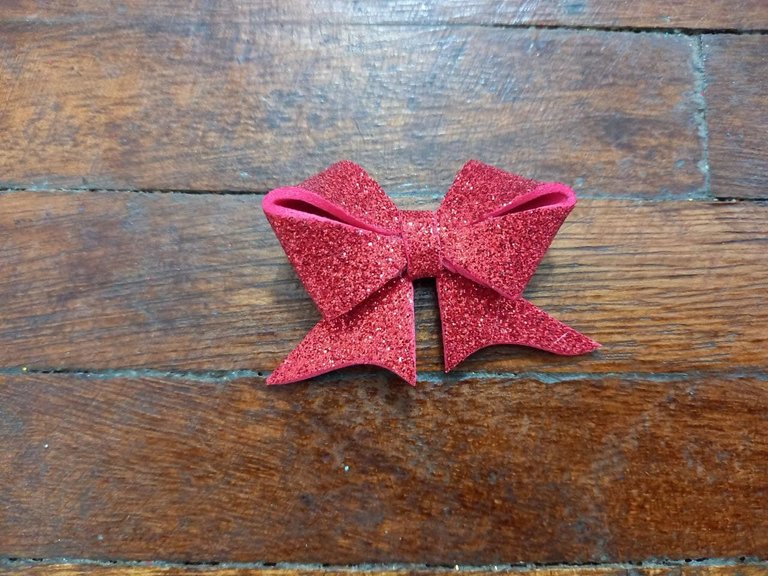
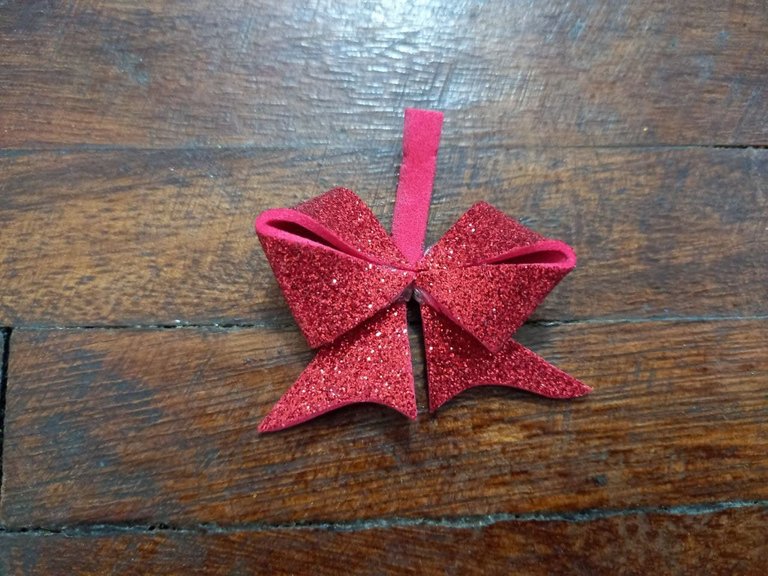
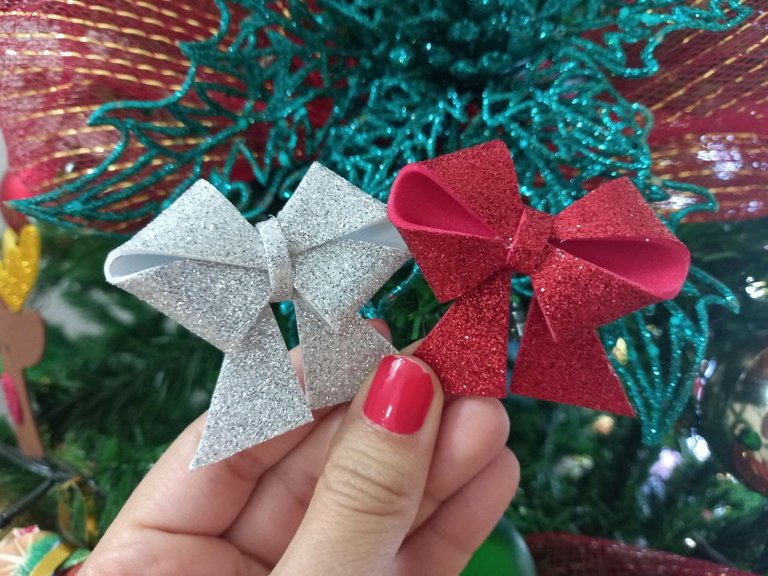
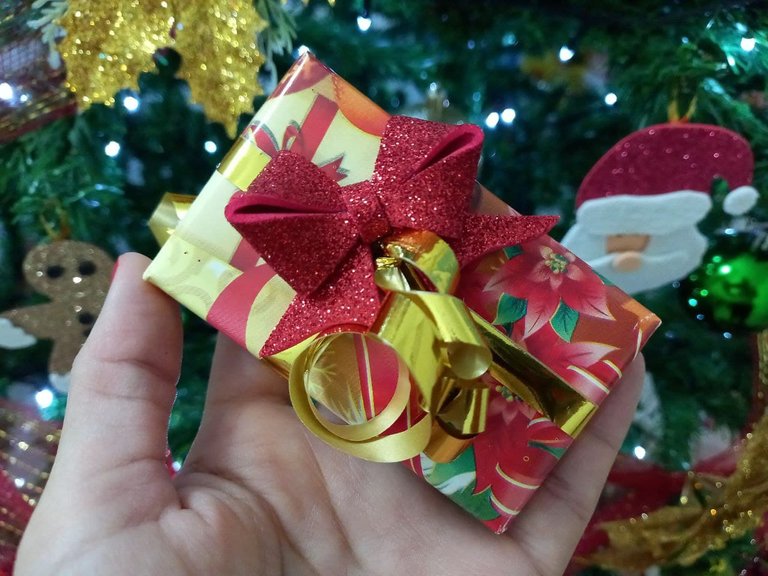
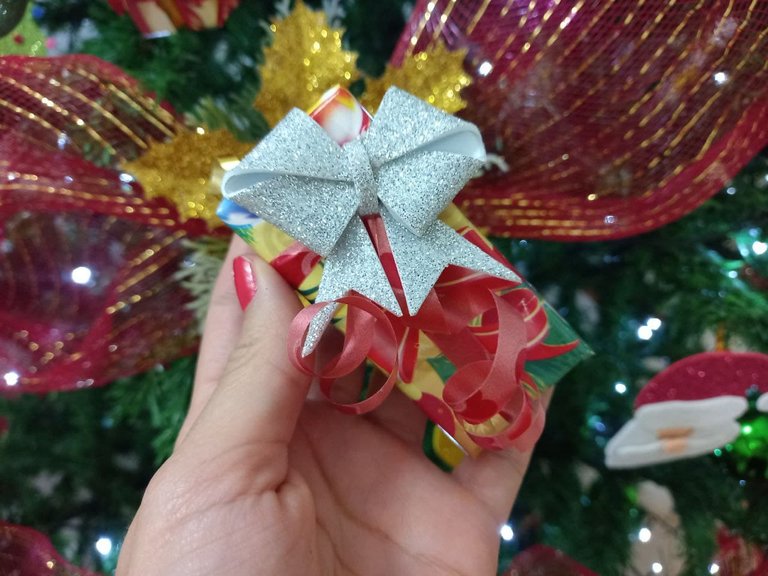
¡Y listo! Ya tenemos un hermoso lazo para colocarle a los obsequios de navidad, son muy lindos y llamativos, sin duda le dan un toque especial a nuestros obsequios bien sea en cajas o bolsas de regalos estos lucen muy bien de cualquier forma que se usen, en mi caso, yo le coloqué estos lazos a unas cajitas que decoré como regalos para colgar en el árbol y con ellos se ven muchísimo mejor y me encantan, aquí les dejo el tutorial para hacer esas cajitas y espero que les guste y puedan usar ambos tutoriales.
¡And ready! We already have a beautiful bow to place on Christmas gifts, they are very cute and eye-catching, without a doubt they give a special touch to our gifts either in gift boxes or bags, these look great in any way they are used, in my Anyway, I attached these bows to some boxes that I decorated as gifts to hang on the tree and with them they look much better and I love them, here I leave the tutorial to make those boxes and I hope you like it and can use both tutorials.


Todas las fotografías son de mi propiedad.
Fotografías capturadas con mi Samsung Galaxy A12
Separador de texto elaborado en Canva.
Nos vemos en mi próxima publicación.
¡Tengan un feliz día!
All photographs are my property.
Photos captured with my Samsung Galaxy A12
Text separator made in Canva.
See you in my next post.
¡Have a happy day!

