Hello my dear hive friends, I am very happy to be here again in this wonderful community, for me it is a pleasure to share with each of you my recent creation a nice recycled portrait holder great to decorate or place in any are of your home, without further ado I will start with my step by step:
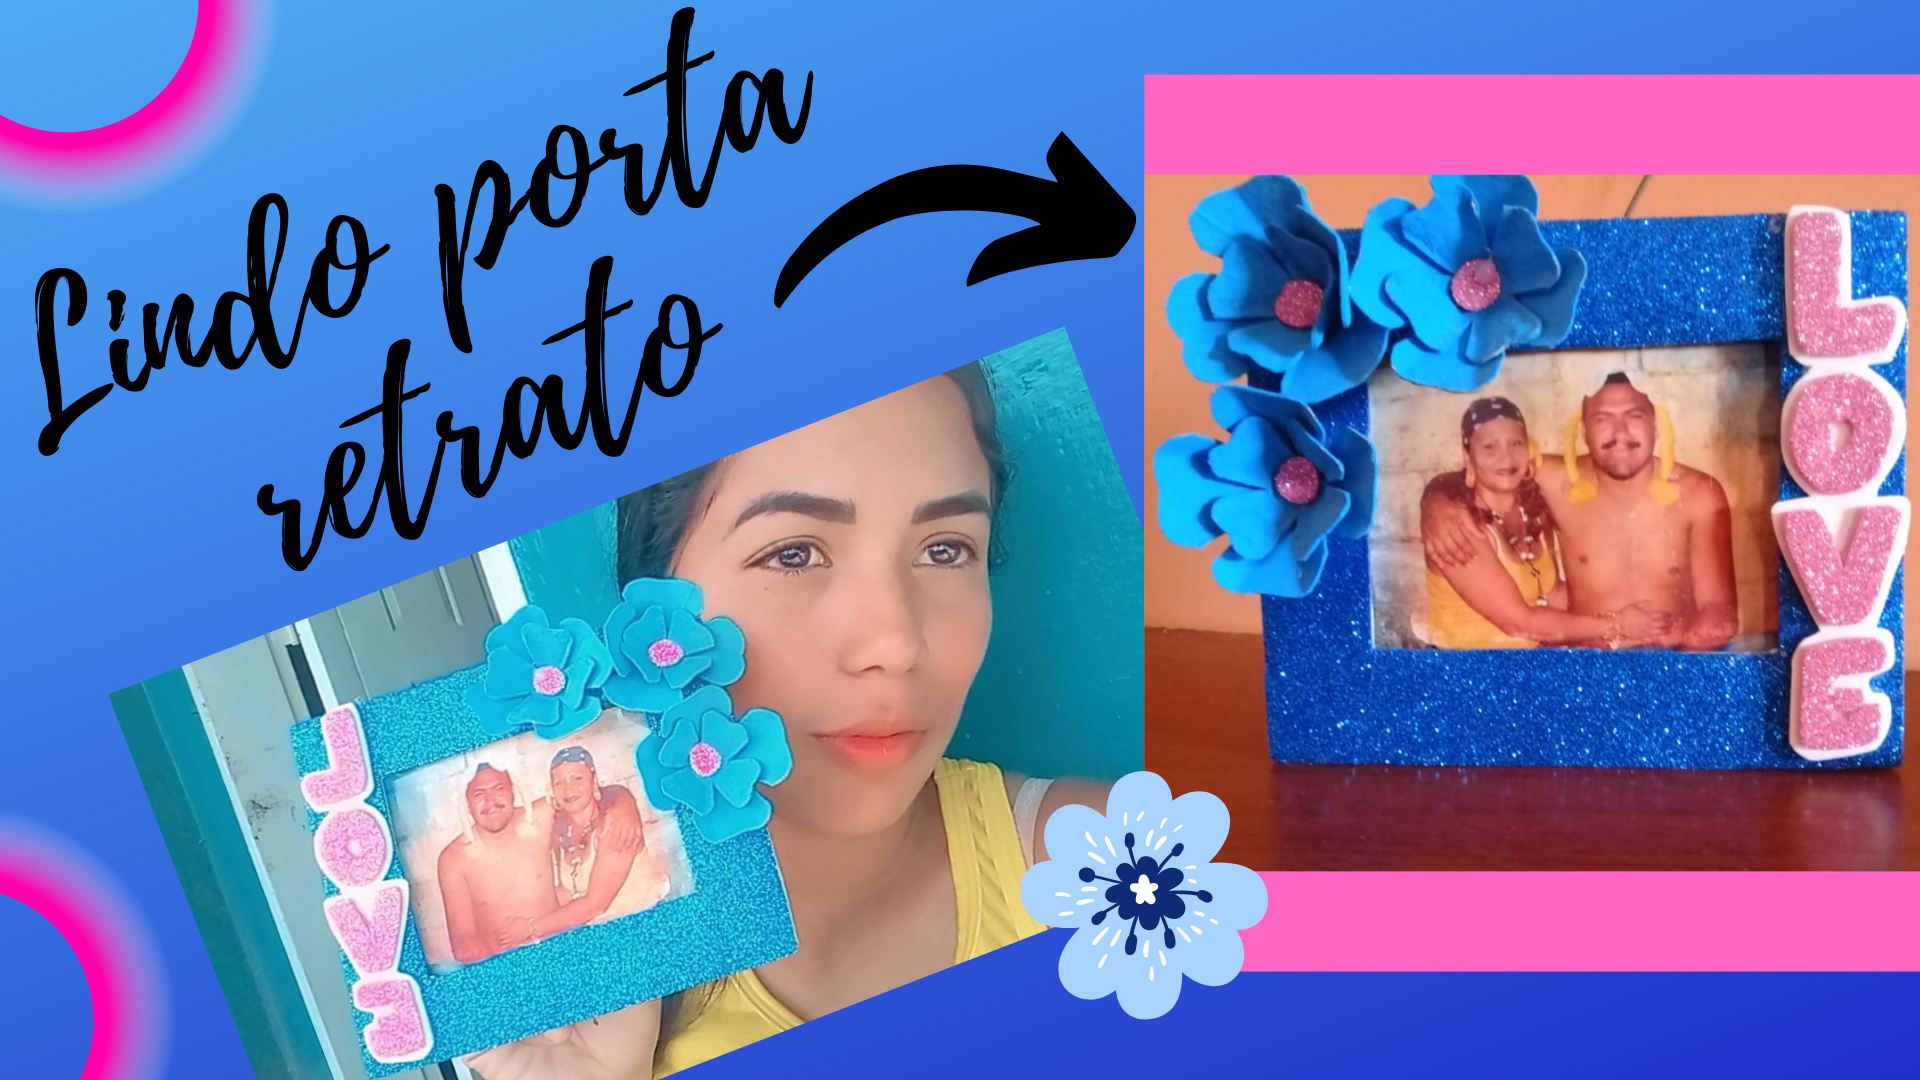 Foto tomada desde mi teléfono inteligente Samsung J2 Prime.
Edición hecha por mi desde canva


- Cartón.
- Cartón de huevos.
- Foami o goma eva escarchada rosada y azul.
- Foami o goma eva blanco.
- Pintura.
- Tijera.
- Regla.
- Lápiz.
- Cartulina azul.
- Pincel.
- Hoja en blanco.
- Silicona.
- Cardboard.
- Egg carton.
- Foami or frosted pink and blue eva rubber.
- Foami or white eva rubber.
- Paint.
- Scissors.
- Ruler.
- Pencil.
- Blue cardboard.
- Paintbrush.
- Blank sheet.
- Silicone.
.png)
.png)
Paso 1: Iniciaremos tomando las medidas correspondiente de la fotografía, en mi caso tengo las siguientes medidas 7.5 cm por 10.0 cm. Para empezar a realizar el porta retrato vamos a necesitar dos piezas de cartón, una que sera la parte trasera y la otra que va hacer el frente, considerando 2.5 cm en cada uno de sus lados, luego con mucho cuidado vamos a recortar la parte del centro.
Step 1: We will start by taking the corresponding measurements of the photograph, in my case I have the following measurements 7.5 cm by 10.0 cm. To start making the portrait holder we will need two pieces of cardboard, one that will be the back and the other that will make the front, considering 2.5 cm on each of its sides, then carefully we will cut out the center part.
.png)
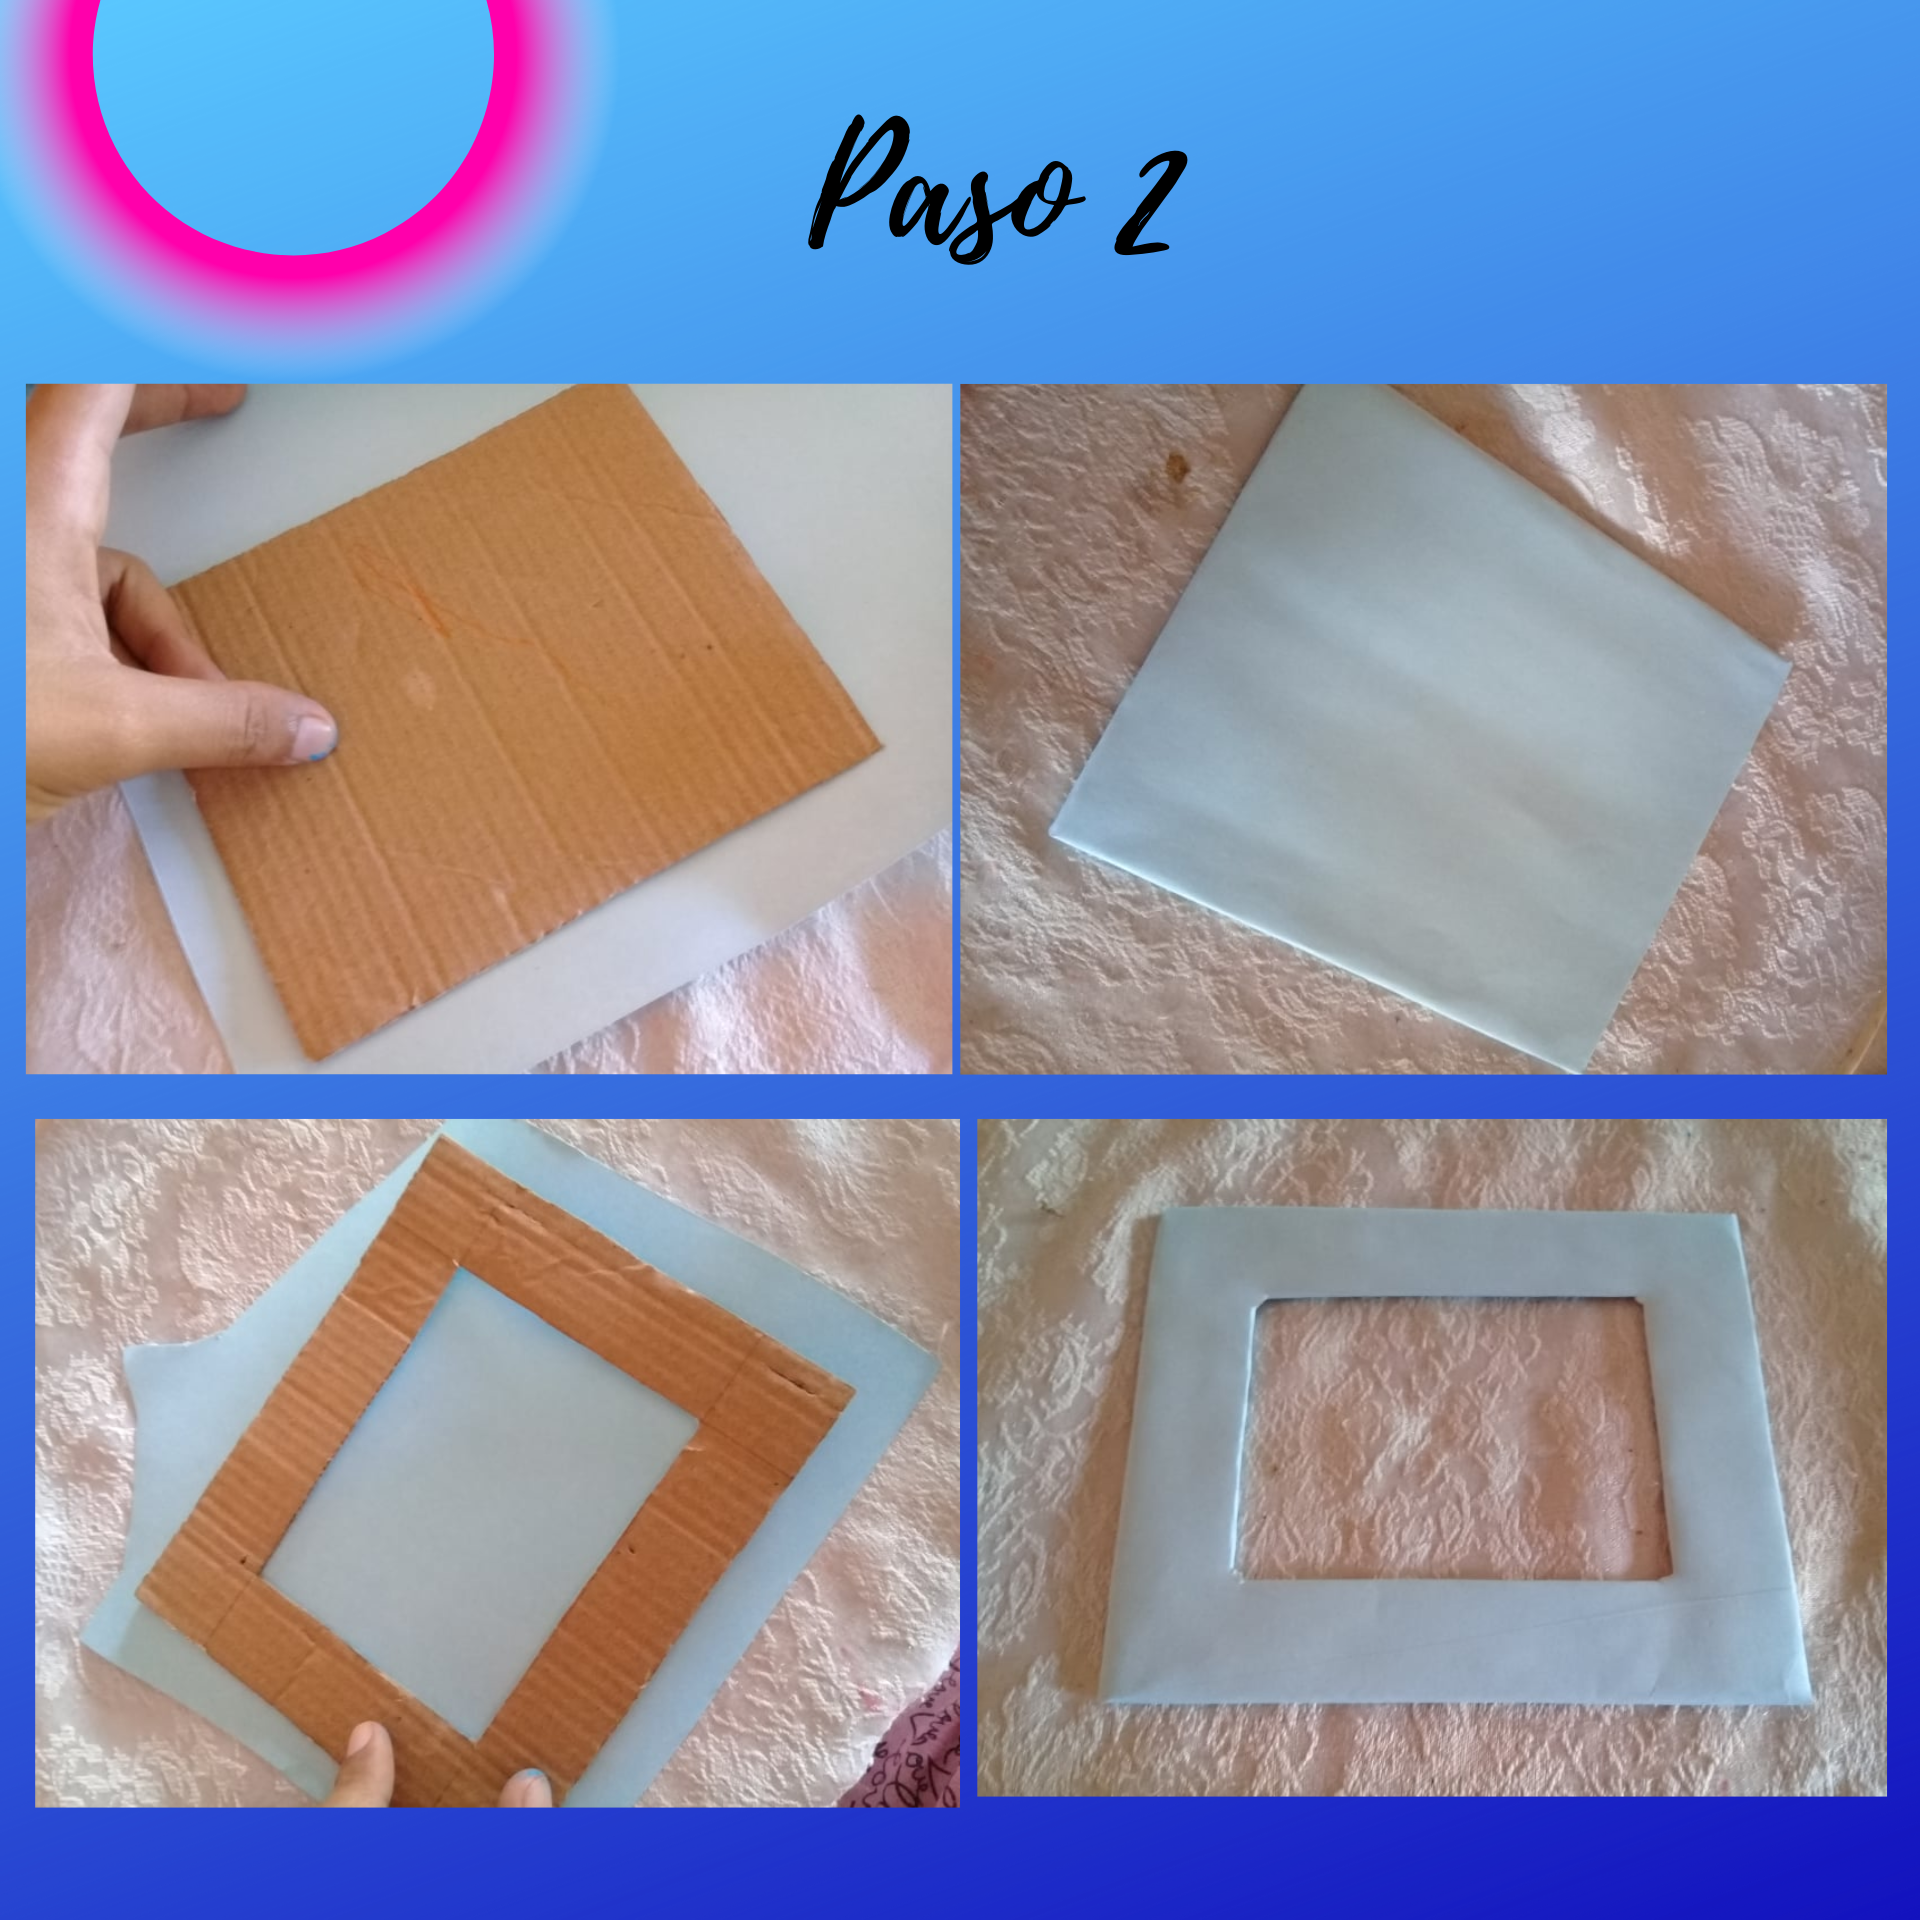
Paso 2: Después forraremos unos de sus lados las dos piezas la trasera y la del frente del porta retrato con cartulina azul.
Step 2: Then we will line one of the sides of the two pieces, the back and the front of the portrait holder with blue cardboard.
.png)
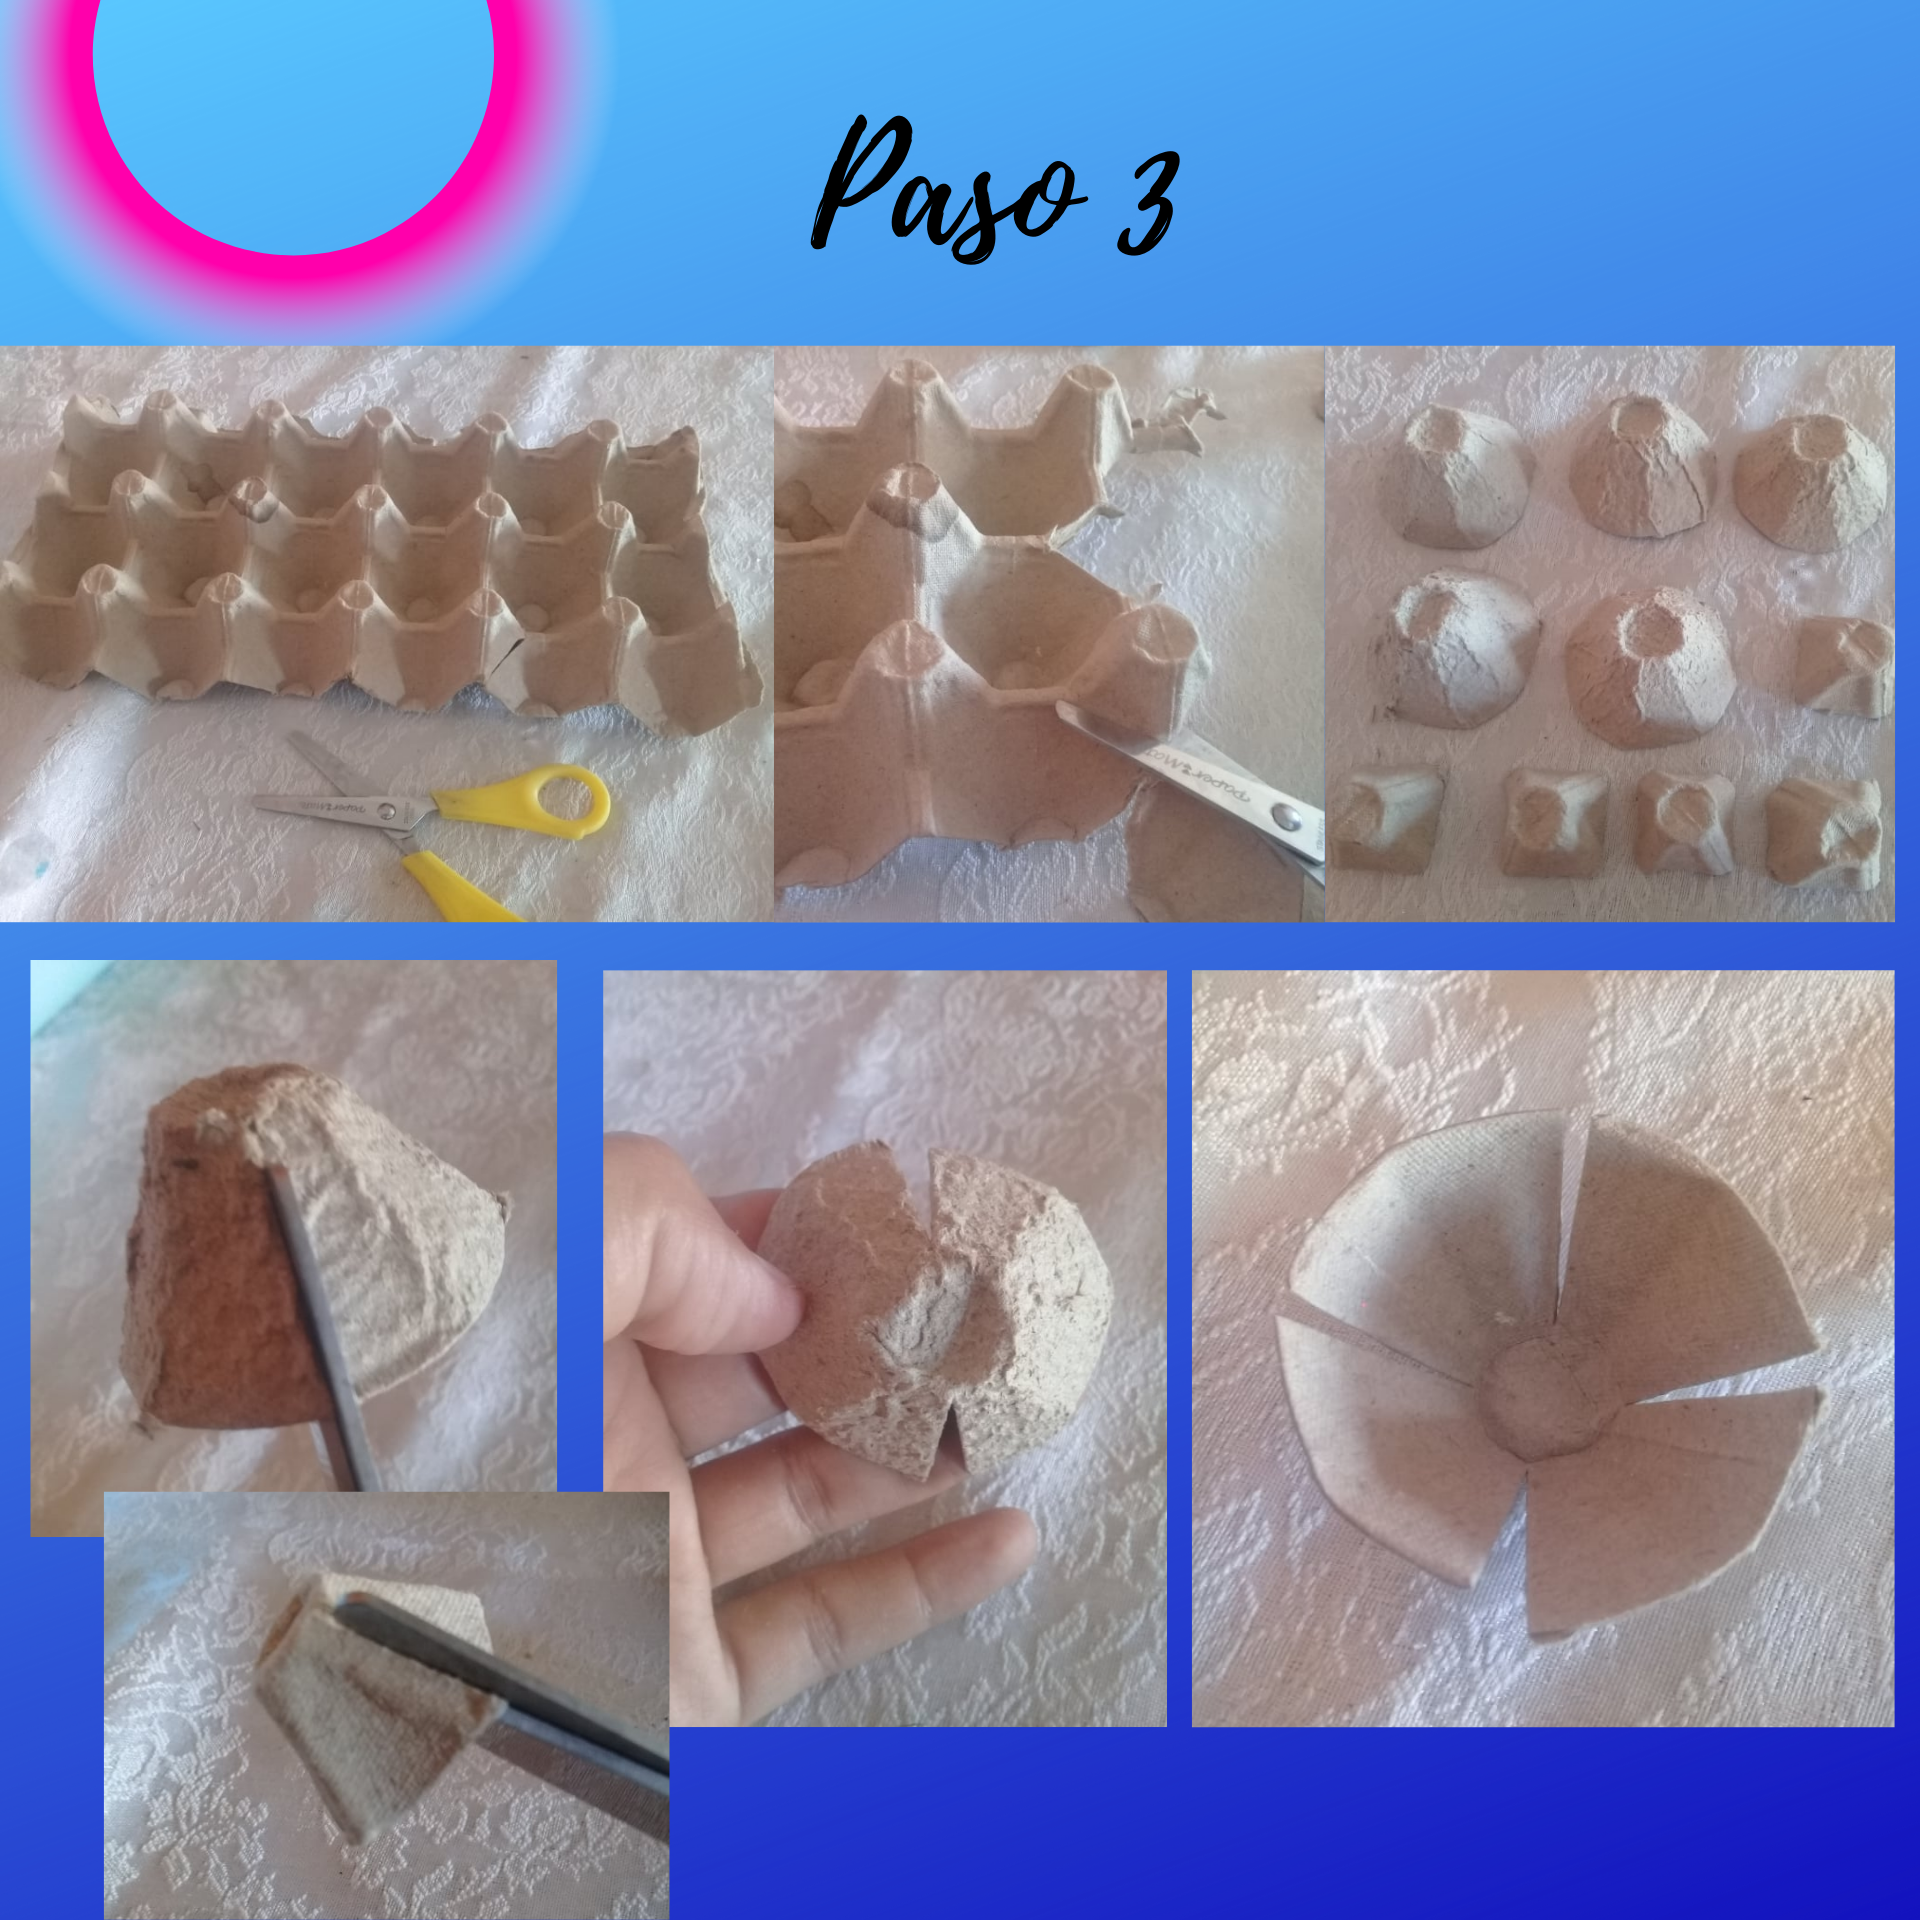
Paso 3: Ahora es el turno de realizar las flores, para eso necesitaremos el cartón de huevos y comenzaremos de esta manera recortando tres conos pequeños y tres grandes de forma individual con mucho cuidado. Para realizar los pétalos de las flores nos vamos a guiar por unas lineas que normalmente están marcada en el cono por donde recortaremos de la siguiente manera que les muestro en las imágenes.
Step 3: Now it is the turn to make the flowers, for that we will need the egg carton and we will start this way by cutting out three small and three large cones individually very carefully. To make the petals of the flowers we will be guided by some lines that are usually marked on the cone where we will cut in the following way that I show you in the images.
.png)
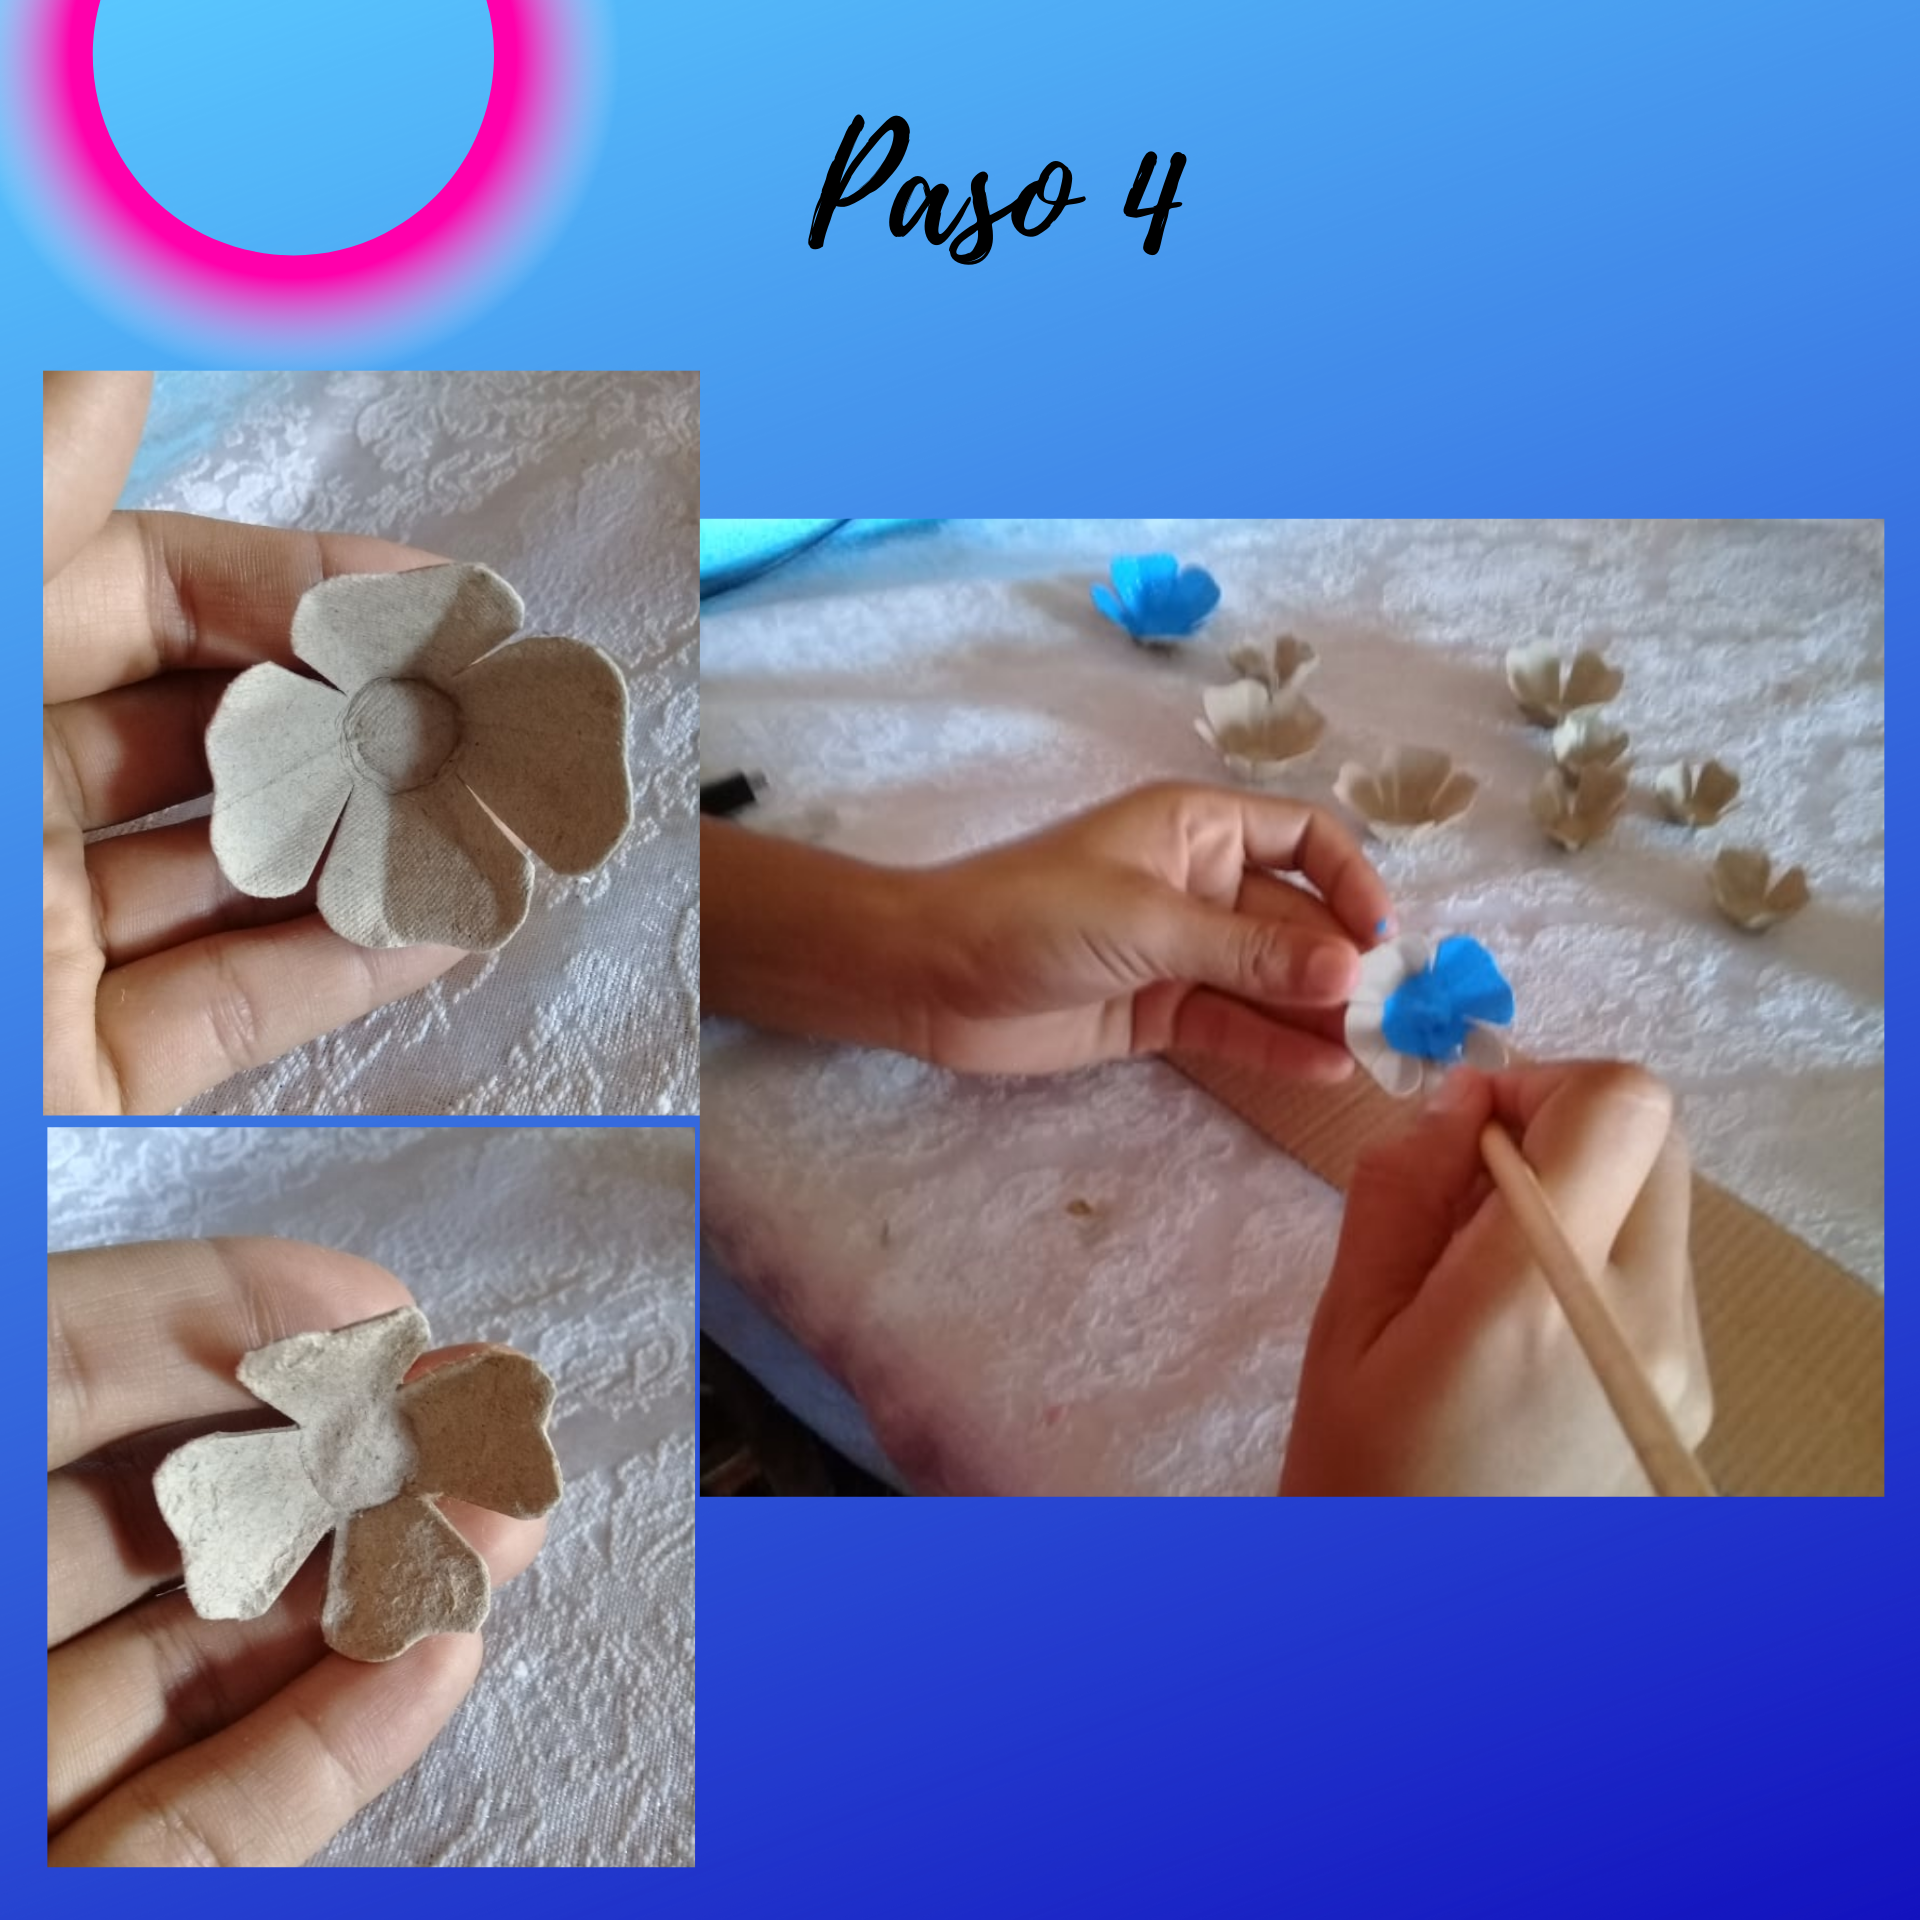
Paso 4: Ya recortadas las cuatros partes de cada cono con mucho cuidado y paciencia le vamos a dar forma a los pétalos de las flores, luego la pintaremos de color azul y dejamos sacar muy bien.
Step 4: Once the four parts of each cone have been cut out, carefully and patiently shape the petals of the flowers, then paint them blue and let them take out very well.
.png)
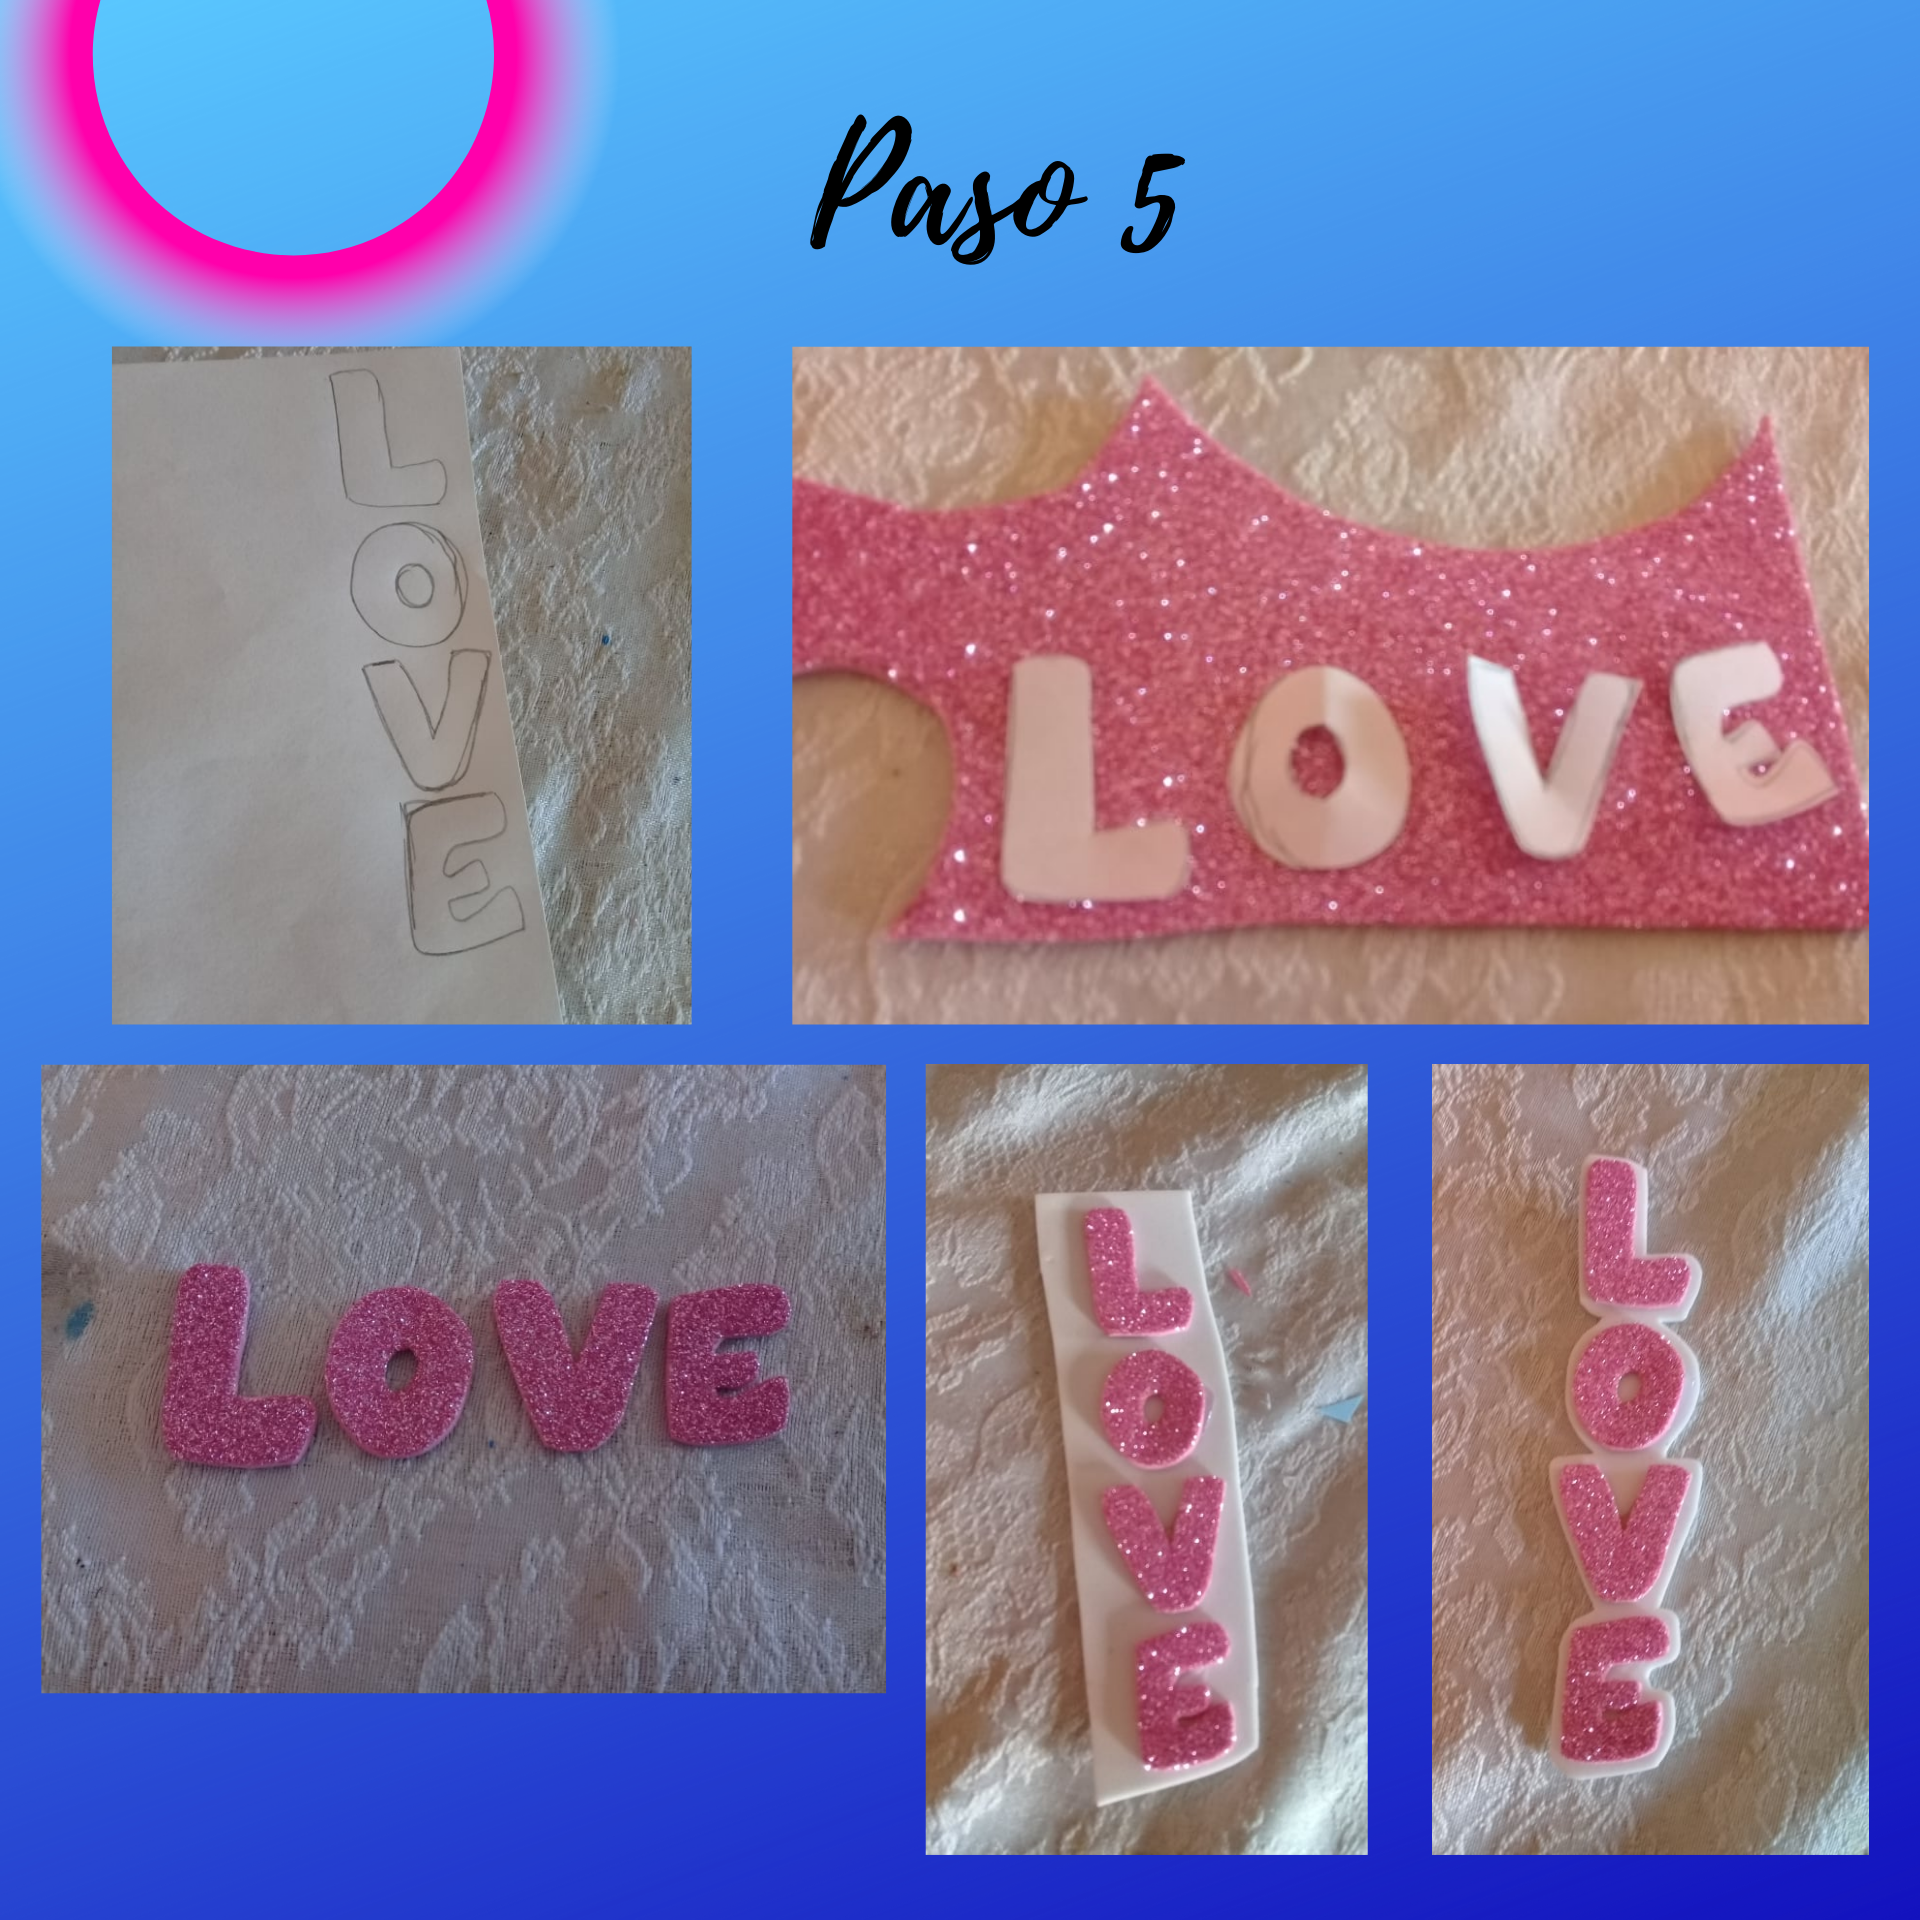
Paso 5: Lo siguiente seria realizar una plantilla con la siguiente frase Love o lo que ustedes decidan, luego la recortamos en foami o goma eva escarchada rosada.
Step 5: The next step would be to make a template with the following phrase Love or whatever you decide, then cut it out in foami or pink frosted eva rubber.
.png)
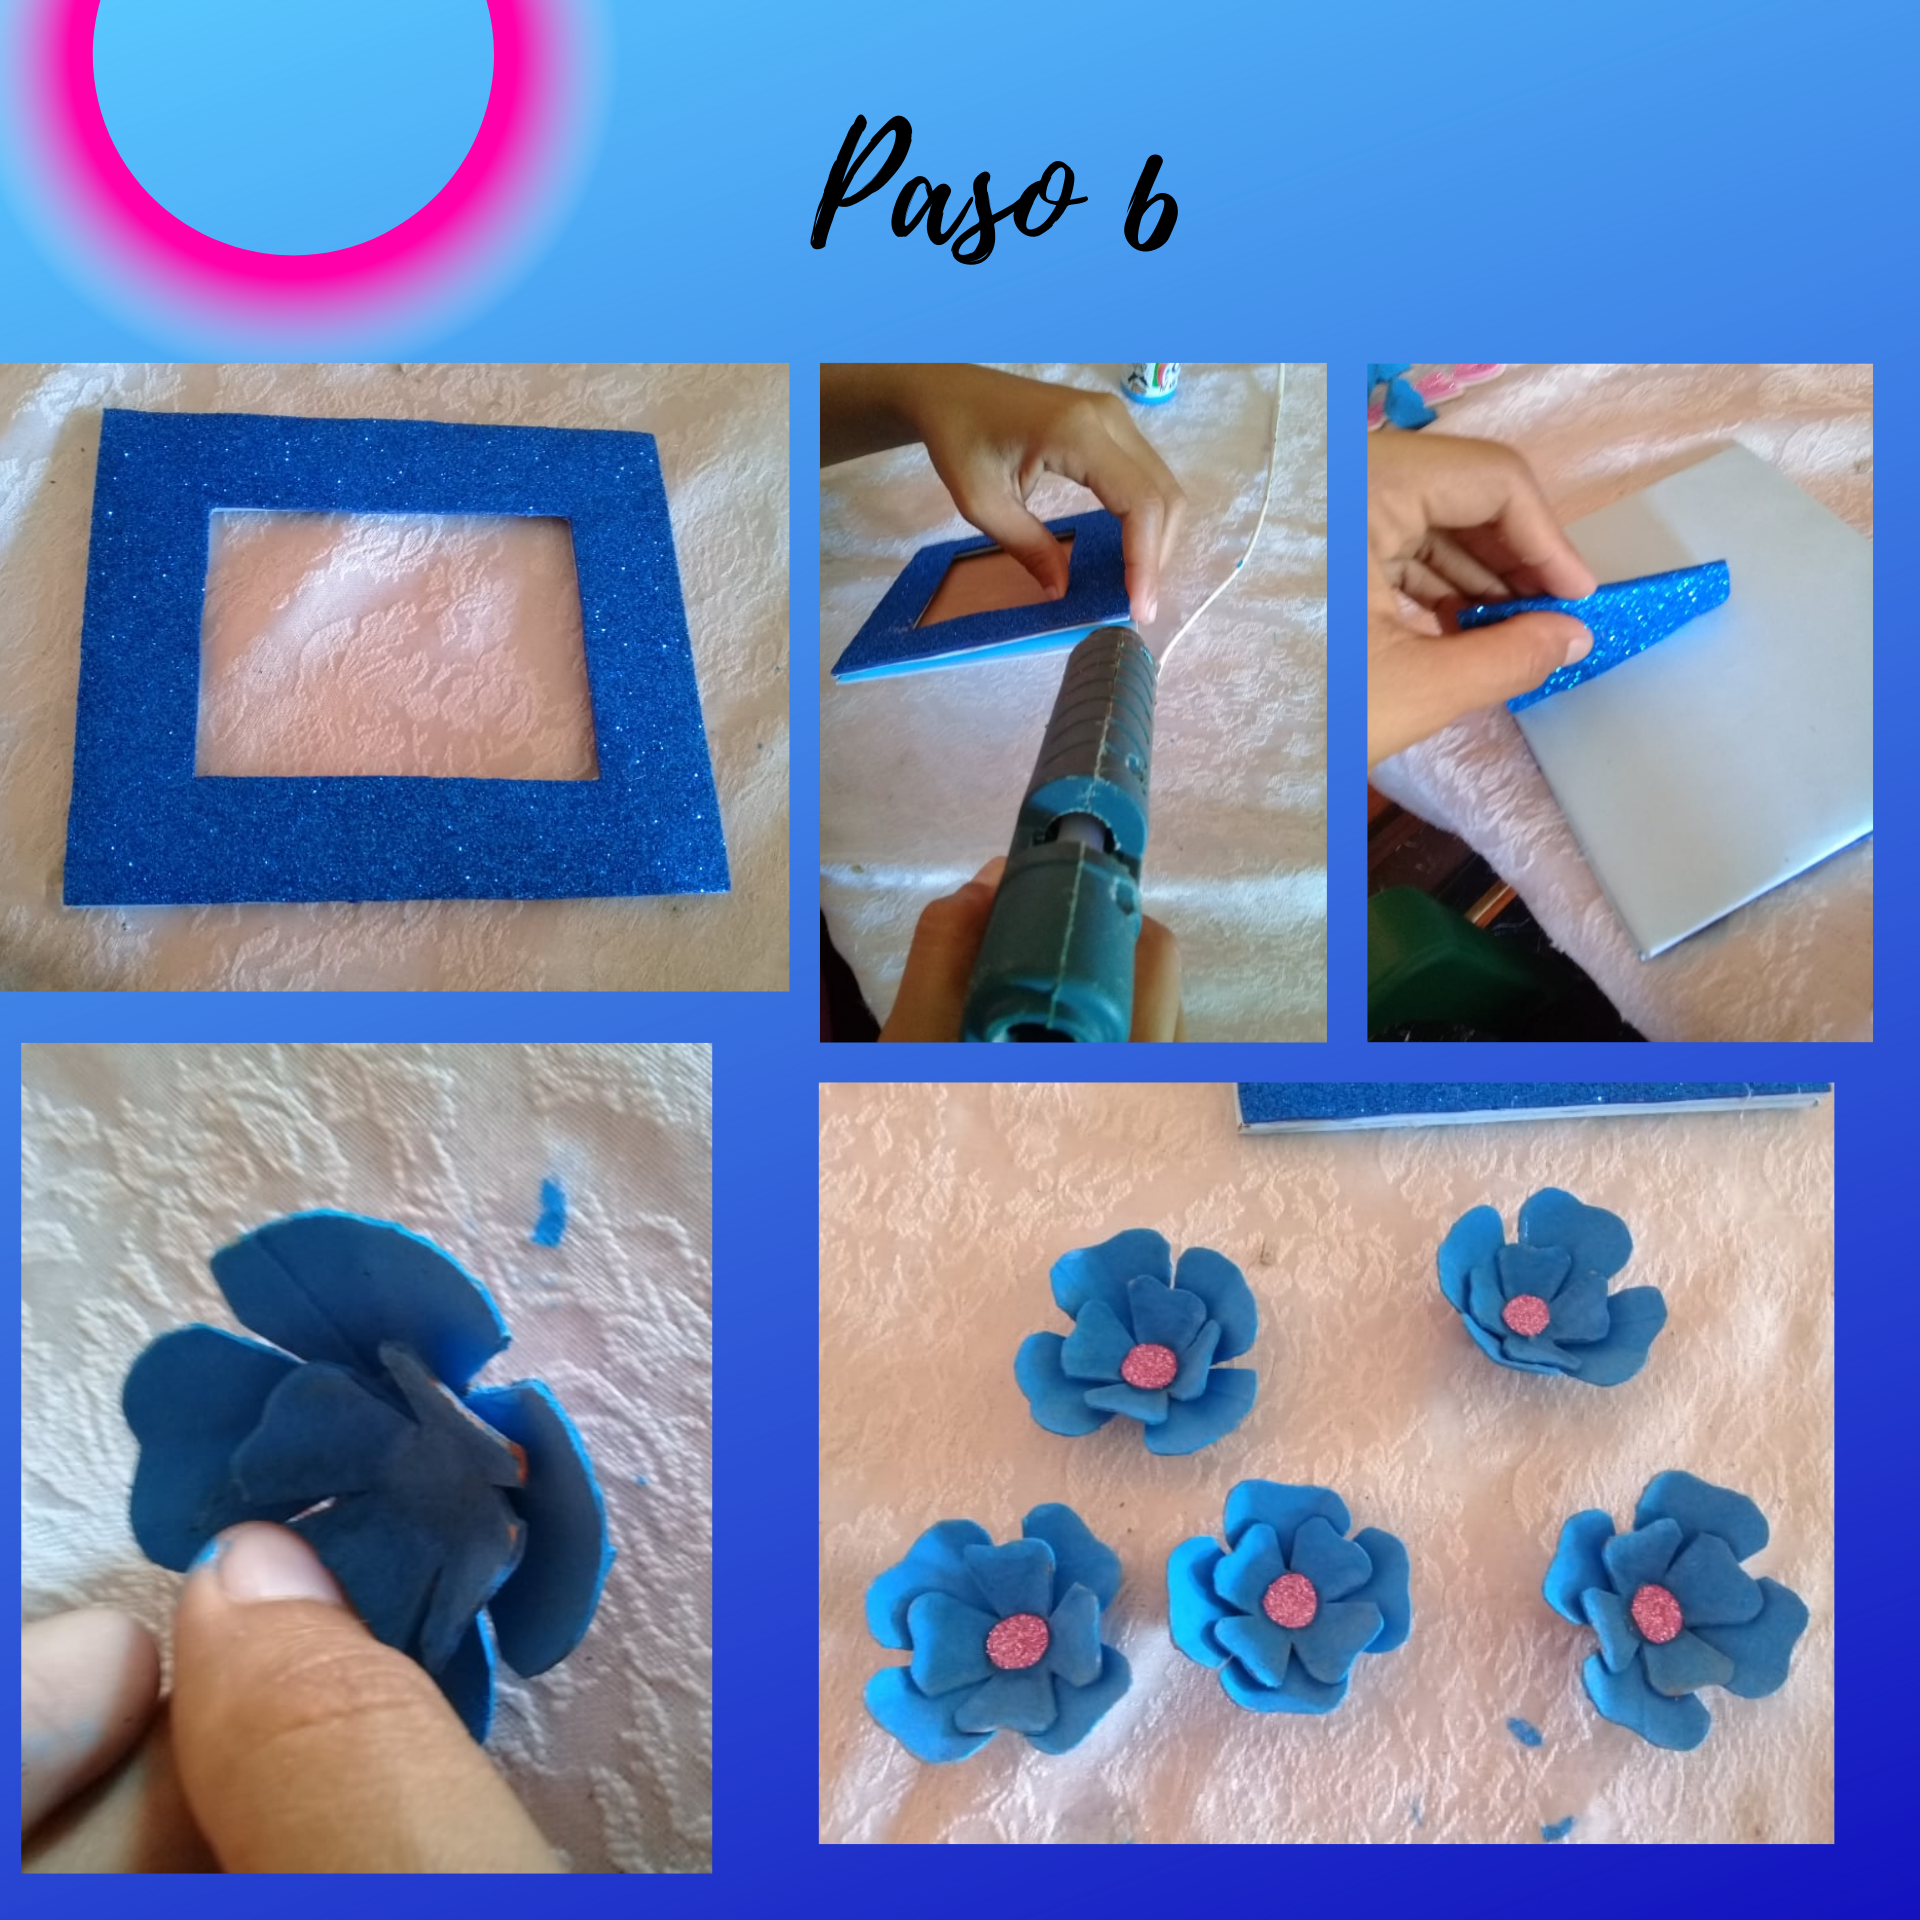
Paso 6: Para finalizar vamos a decorar con foami o goma eva escarchada azul la parte del frente, luego pegaremos las dos piezas del porta retrato con silicona y su soporte en la parte trasera, y en este orden pegamos las flores pequeñas encima de las flores grande y en el centro un pequeño circulo de foami o goma eva escarchado rosado y para terminar y darle ese toque especial le pegaremos nuestra linda frase love.
Step 6: To finish we will decorate with foami or blue frosted eva rubber the front part, then we will paste the two pieces of the portrait holder with silicone and its support in the back, and in this order we paste the small flowers on top of the big flowers and in the center a small circle of foami or pink frosted eva rubber and to finish and give it that special touch we will paste our cute phrase love.
.png)


My dear friends this was my result I was really surprised with how nice and striking it looks the portrait holder and best of all it was so simple to perform, I hope you liked it until a new publication Greetings!
.png)
