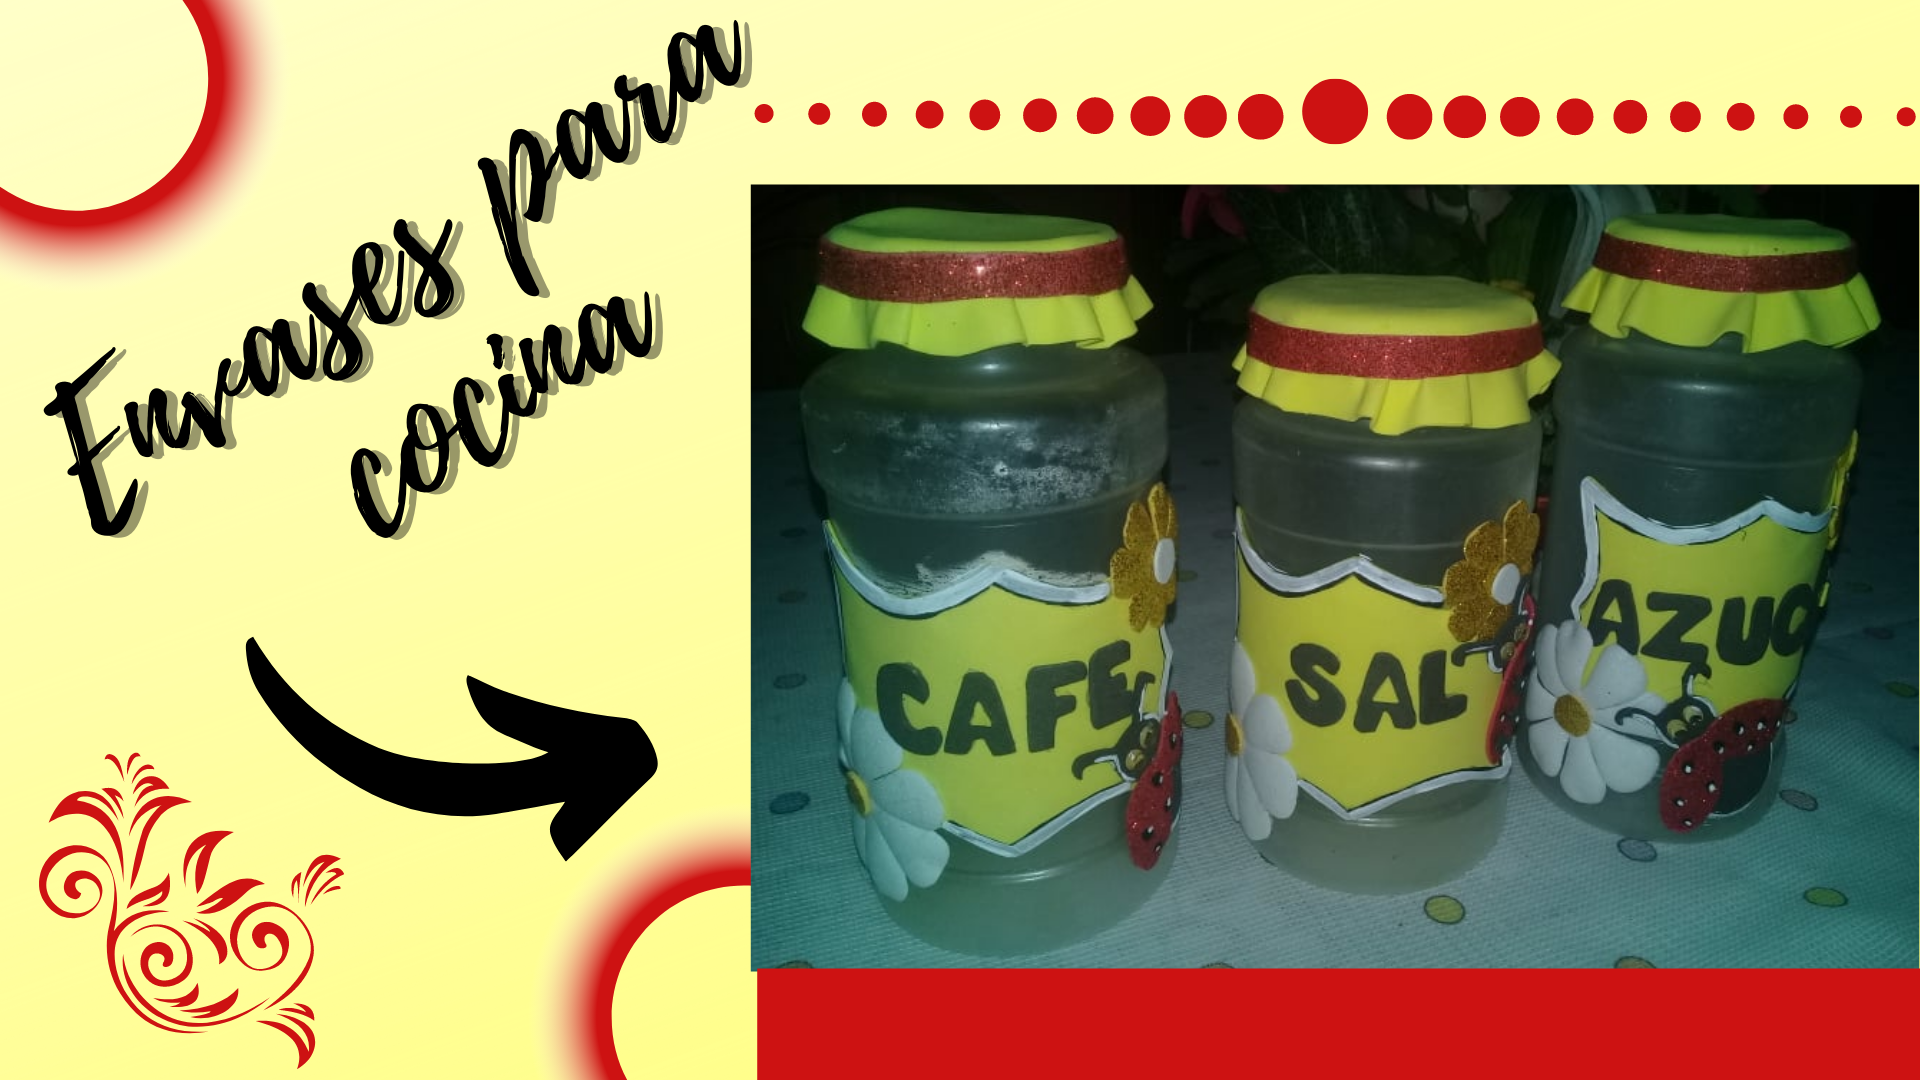
Hello my dear friends of hive, I hope you are in good health, today I am very happy because I will share with each of you a creative tutorial of my recent creation, since I am a lover of crafts this ves I bring you a beautiful set of kitchen containers of 3 pieces made with recycling materials, an easy and economical idea, perfect for decorating your kitchen, a very sweet design of ladybugs that give a unique shine, without further ado I will begin:
 Foto tomada desde mi teléfono inteligente Samsung J2 Prime.
Edición hecha por mi desde canva
.png)

- 3 envases de plástico.
- Foami escarchado amarillo, blanco y rojo.
- Foami negro y amarillo.
- Hoja en blanco.
- Lápiz.
- Tijera.
- Silicona.
- Pincel.
- Ojos movibles.
- Pintura negra y blanco
- Plancha para ropa.
- 3 plastic containers.
- Yellow, white and red frosted foami.
- Black and yellow foami.
- Blank sheet.
- Pencil.
- Scissors.
- Silicone.
- Paintbrush.
- Movable eyes.
- Black and white paint
- Iron for clothes.

.png)
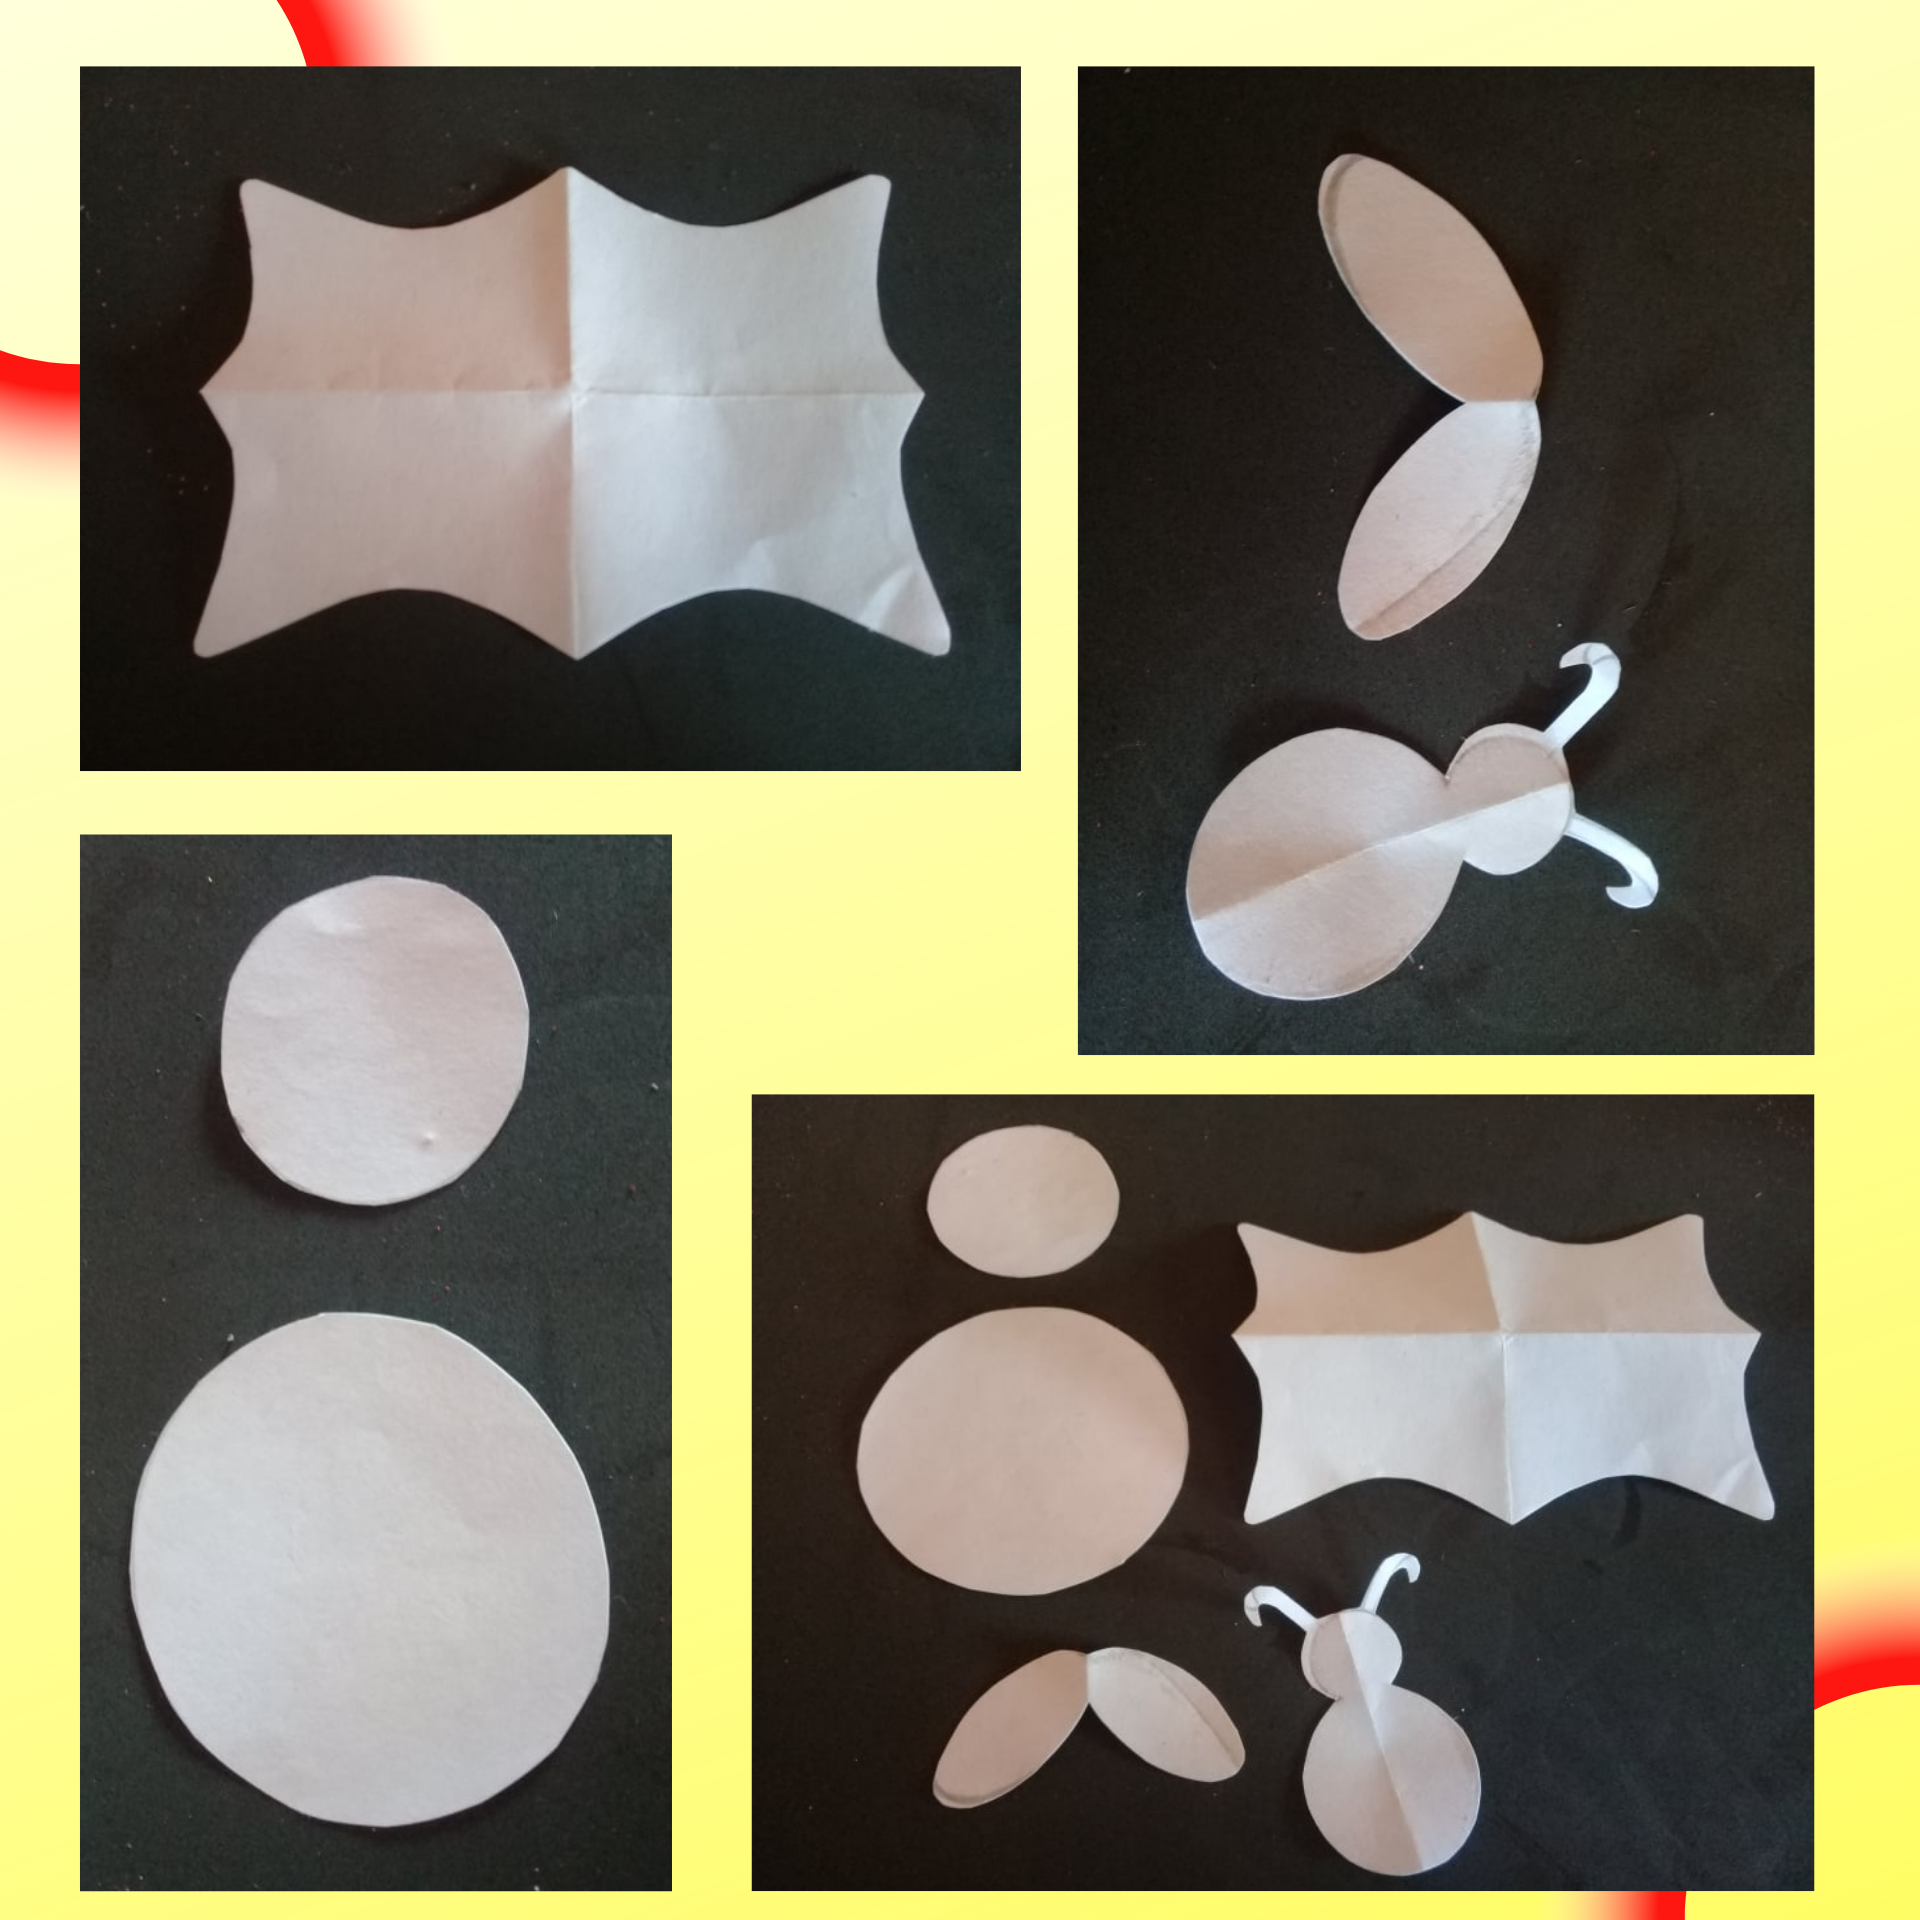
Empezaremos realizando las plantillas en hoja en blanco, la cual necesitaremos el marco, un circulo grande y otro mas pequeño, el cuerpo y las alas de la mariquita.
We will start by making the templates on a blank sheet of paper, which we will need the frame, a large and a smaller circle, the body and the wings of the ladybug.

.png)
En foami amarillo aremos 3 marcos, recortamos y pegamos en el centro con silicona en cada uno de los envases.
In yellow foami we will make 3 frames, cut out and glue in the center with silicone on each of the containers.

.png)
Para realizar las flores empezaremos remarcando en el foami escarchado blanco 3 círculos grande y en el foami escarchado amarillo 3 circulo pequeño, recortamos cada unos de ellos, luego iniciaremos formando los pétalos, en cada círculos haremos 8 cortes iguales, después con la tijera recortamos cada esquina y de esa manera se irán formando los pétalos, ponemos a calentar la plancha para ropa darle esa forma de relieve a las flores.
To make the flowers we will start marking in the white frosted foami 3 large circles and in the yellow frosted foami 3 small circles, we cut each of them, then we will start forming the petals, in each circle we will make 8 equal cuts, then with the scissors we cut each corner and in that way the petals will be formed, we heat the iron to give that form of relief to the flowers.

.png)
Ya terminada todas las flores pegamos una en cada envase y luego agregamos el nombre de su utilidad a cada uno. Luego en foami negro remarcamos el cuerpo de las mariquita y en foami escarchado rojo las alas, unimos las dos partes y cuando ya este completamente armada la figura pegamos los ojos movibles.
Once all the flowers are finished, we glue one in each container and then we add the name of its utility to each one. Then in black foami we outline the body of the ladybug and in red frosted foami the wings, we join the two parts and when the figure is completely assembled we glue the movable eyes.

.png)
Para decorar la tapa del envase necesitamos foami amarillo pegamos por todo el borde la tapa del envase con pequeños puntos de silicona quitando lo sobrante, luego cortamos luego cortamos tiras finas de foami escarchado rojo y pegamos.
To decorate the lid of the container we need yellow foami, we glue all around the edge of the container lid with small dots of silicone removing the excess, then we cut then cut thin strips of red frosted foami and glue.

.png)
Para finalizar por todo el borde del marco de cada envase pintamos con pintura de color negro y blanco, de esta manera damos por terminada mi creación.
Finally, around the entire edge of the frame of each container we paint with black and white paint, thus finishing my creation.


My dear friends I hope you liked my new creation, perfect to give that unique shine to your kitchen, until a new publication Greetings!
