Happy Wednesday! A warm greeting to all my dear friends of hive, I hope you are in good health, today I will teach you how to make a beautiful cosmetic organizer using a cardboard box, I love this new idea that I will share with you, because we can use it to put the lipsticks, jewelry, makeup or whatever you need to have in a well ordered place, friends it is easy and economical to perform, without further ado I will begin with my step by step:
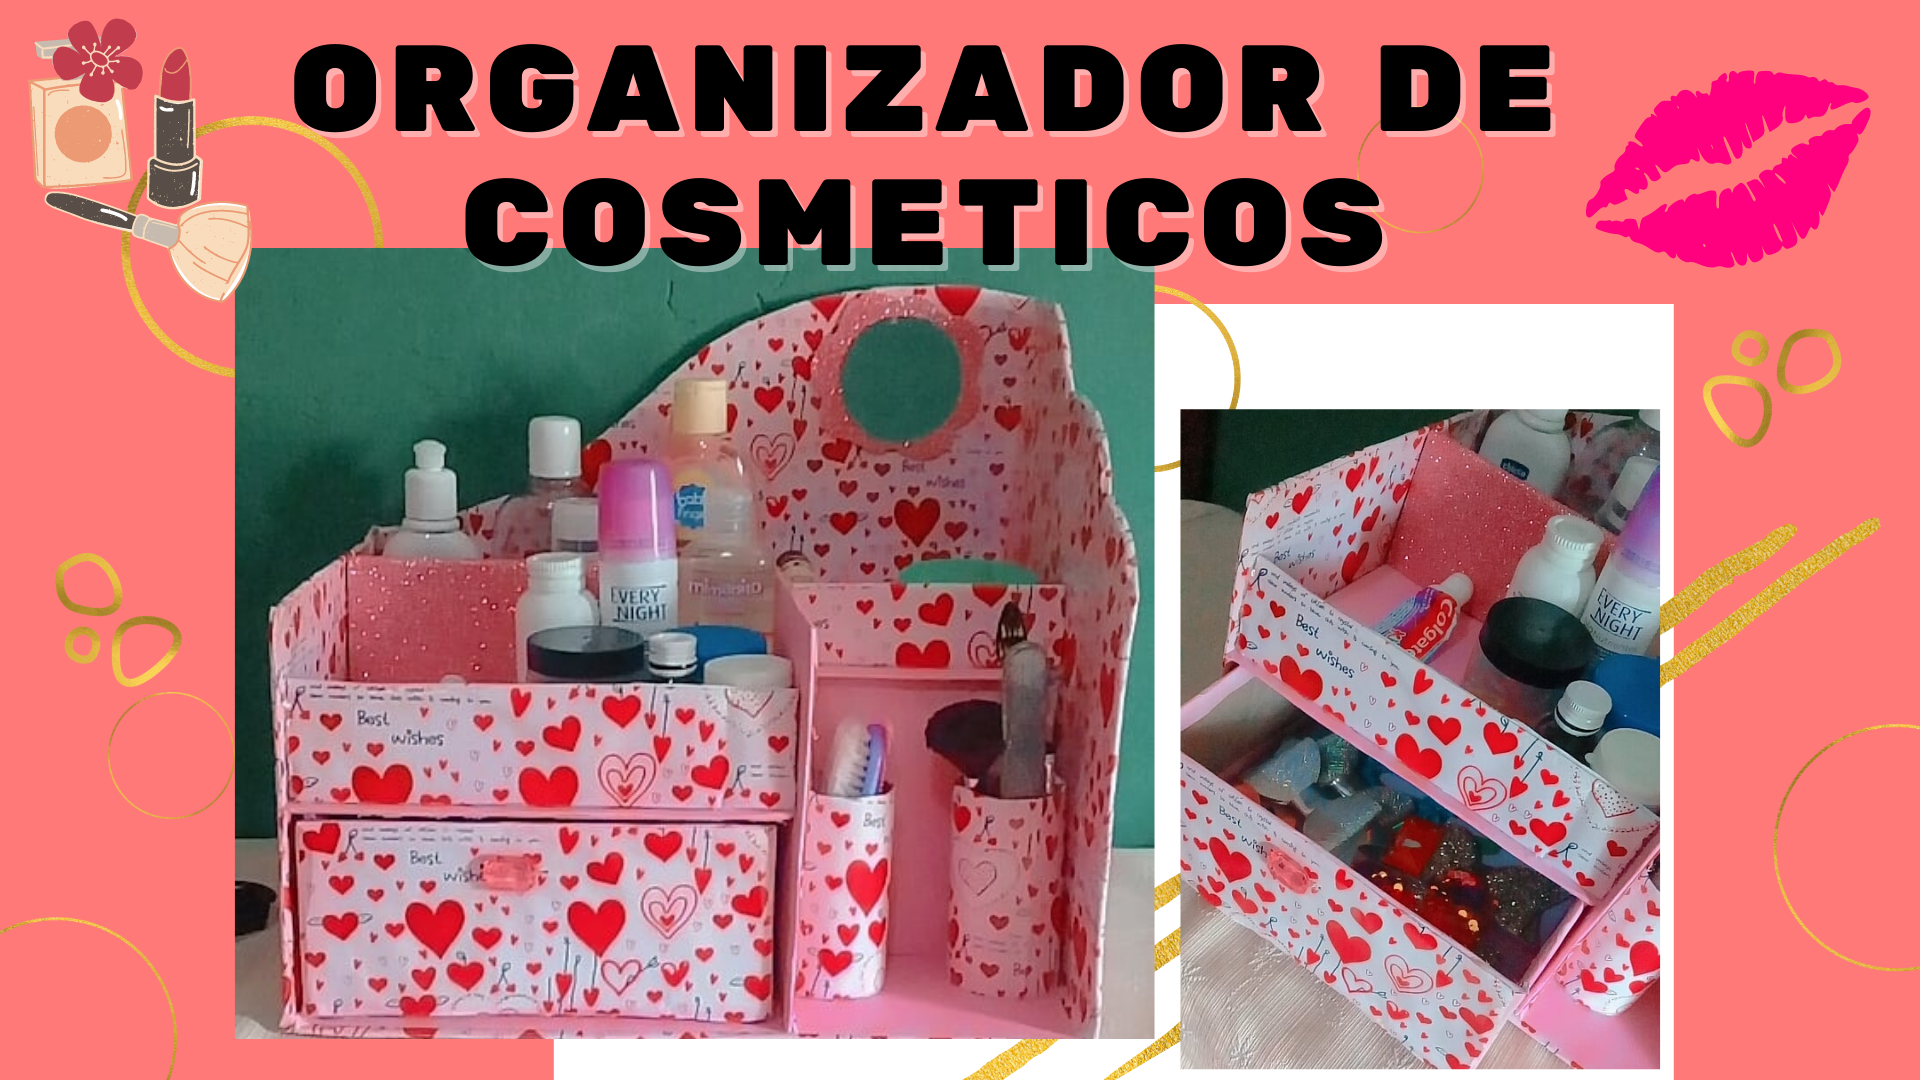
Foto tomada desde mi teléfono inteligente Samsung J2 Prime.
Edición hecha por mi desde canva
.png)
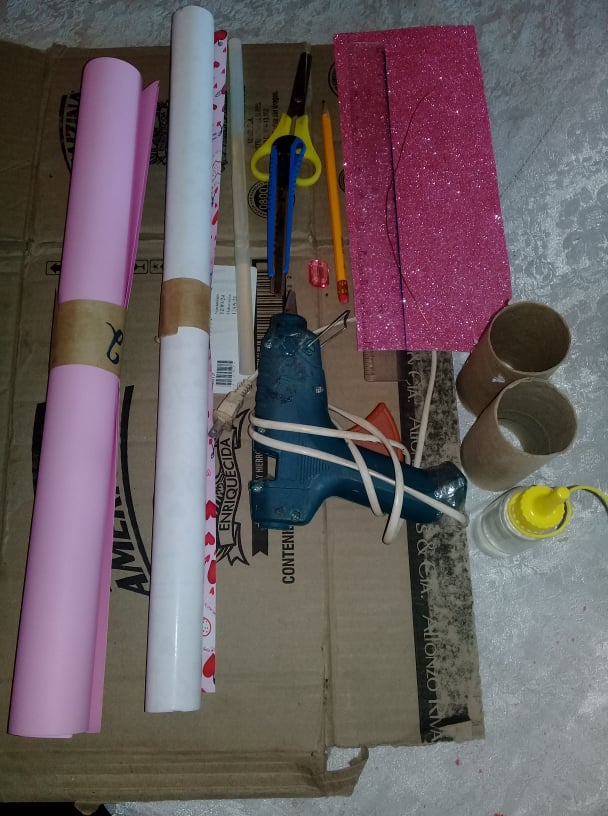

❤️ 2 tubo de papel higiénico.
❤️ Una caja de cartón.
❤️ Foami escarchado rosado.
❤️ Cutter.
❤️ Tijera.
❤️ Lápiz.
❤️ Regla.
❤️ Papel de regalo.
❤️ Cartulina rosada
❤️ Silicona caliente.
❤️ Silicona al frió.
❤️ Una perla grande.
❤️ Cobre.
❤️ 2 tube of toilet paper.
❤️ 1 cardboard box.
❤️ Pink frosted foami.
❤️ Cutter.
❤️ Scissors.
❤️ Pencil.
❤️ Ruler.
❤️ Wrapping paper.
❤️ Pink card stock.
❤️ Hot silicone.
❤️ Cold silicone.
❤️ One large bead.
❤️ Copper.

.png)

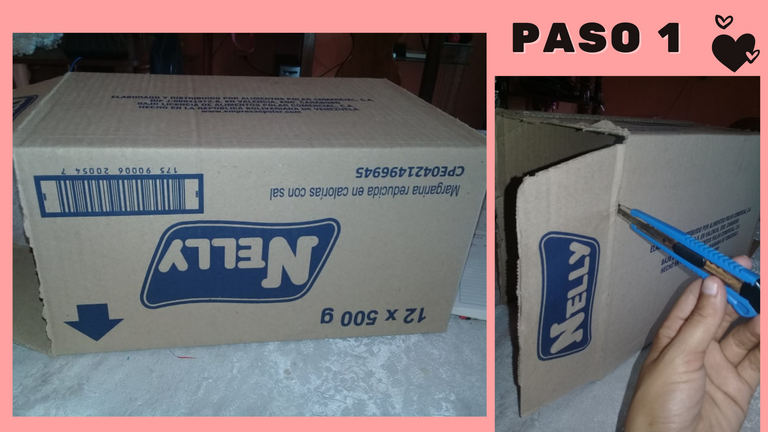
Paso 1: Lo primero que aremos es quitarle todas las orejas de la caja con la ayuda del cutter quedándonos una forma de un cubo, luego abrimos la caja para poder recortar cada uno de los lado del organizador.
Step 1: The first thing we will do is to remove all the ears of the box with the help of the cutter leaving us a cube shape, then open the box to cut out each side of the organizer.
.png)
.png)
.png)
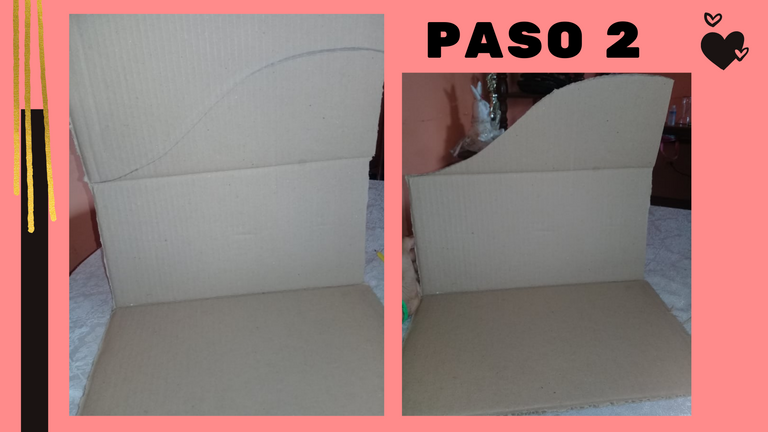
Paso 2: Para empezar armar el organizador necesitaremos 4 piezas de cartón con las medidas que les muestro en la imagen, dándole una forma curva a la parte trasera y al lateral izquierdo del organizador, al tener recortadas cada una de las piezas empezamos a pegarla con silicona. Realizando una ventana en la parte trasera con las siguientes medidas 12.0 cm de alto y 9.0 cm de ancho.
Step 2: To start assembling the organizer we will need 4 pieces of cardboard with the measures that I show in the image, giving a curved shape to the back and left side of the organizer, having cut out each of the pieces we start to glue it with silicone. Making a window in the back with the following measures 12.0 cm high and 9.0 cm wide.
.png)
.png)

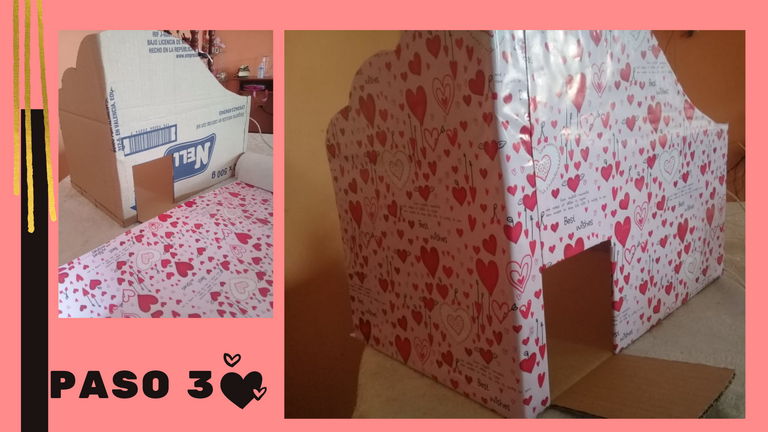
Paso 3: Luego cubrimos con papel de regalo cada uno de los lados del organizador tanto por fuera como por dentro.
Step 3: Then cover each side of the organizer with wrapping paper, both inside and out.


.png)
.png)
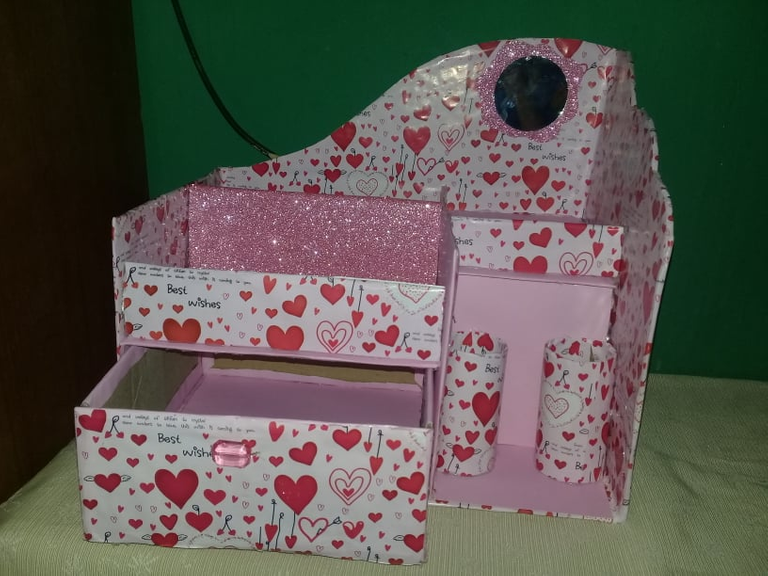
Paso 4: Comenzamos hacer la gaveta de el organizador y para eso necesitaremos 5 piezas con las medidas que muestro en la imagen, luego la forramos con cartulina de color rosado por la parte de afuera y la pieza que va al frente de la gaveta le pegamos por unos de sus lado papel de regalo para darle un toque diferente, luego pegamos cada una de ellas formando la gaveta.
Step 4: We start making the drawer of the organizer and for that we will need 5 pieces with the measurements shown in the image, then we line it with pink cardboard on the outside and the piece that goes to the front of the drawer we glue on one of its sides gift paper to give it a different touch, then we glue each of them forming the drawer.
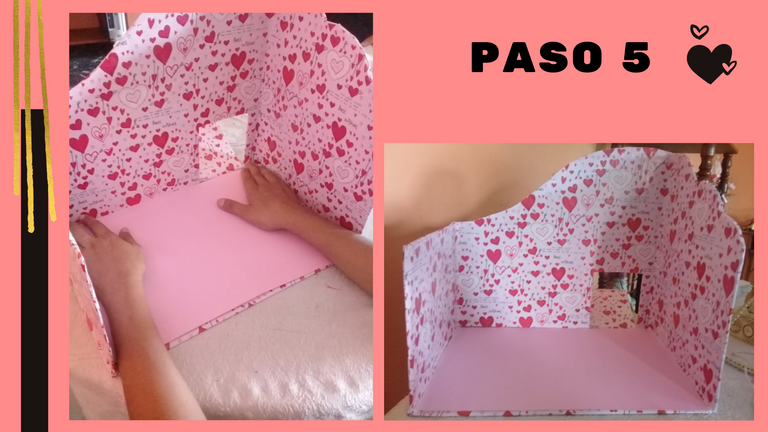
Paso 5: Para la base del organizador la forraremos con cartulina de color rosado.
Step 5: For the base of the organizer we will line it with pink cardboard.
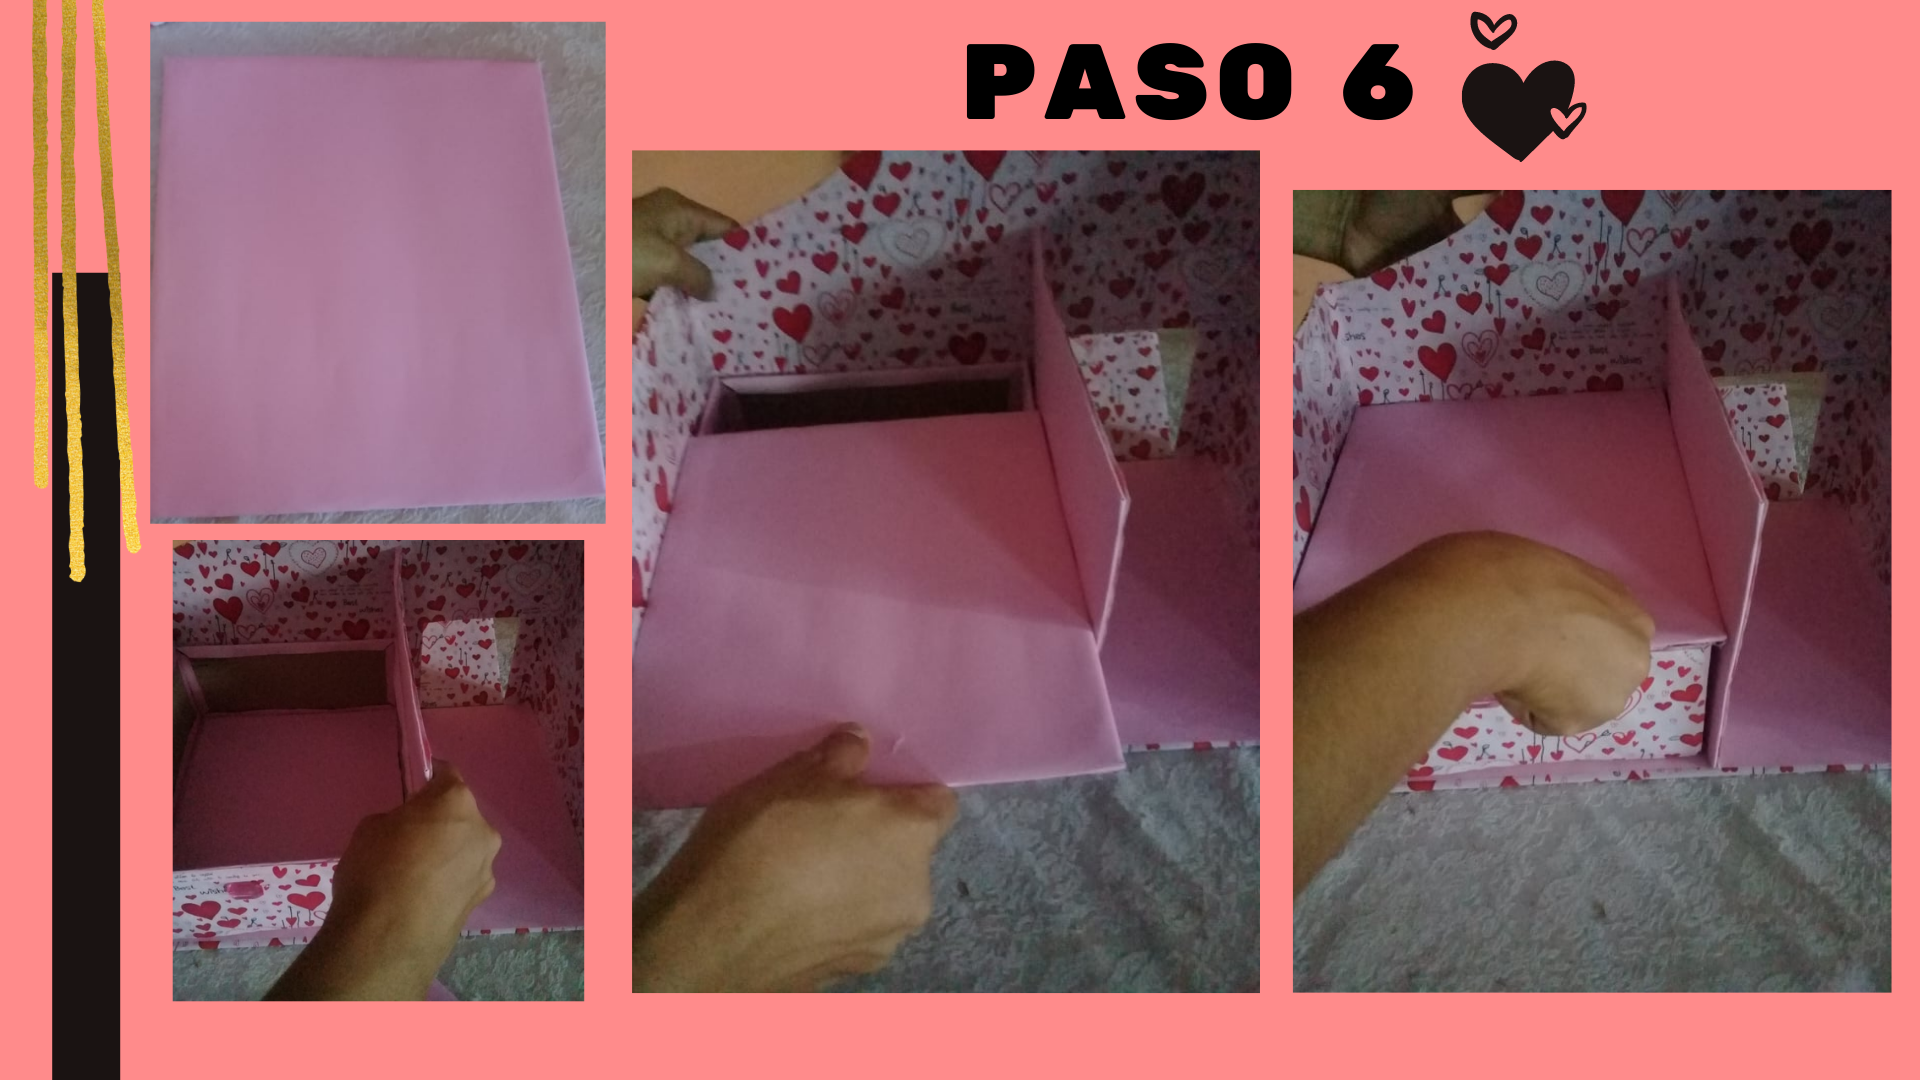
Paso 6: Para realizar las divisiones del organizador necesitaremos dos piezas una de ellas de 25.0 cm de largo y 21.7 cm de ancho, la otra de 25.0 cm de largo y 19.5 cm de alto, forramos las piezas y pegamos de esa manera vamos a ir formando el organizador.
Step 6: To make the divisions of the organizer we will need two pieces, one of them 25.0 cm long and 21.7 cm wide, the other 25.0 cm long and 19.5 cm high, line the pieces and glue them together to form the organizer.
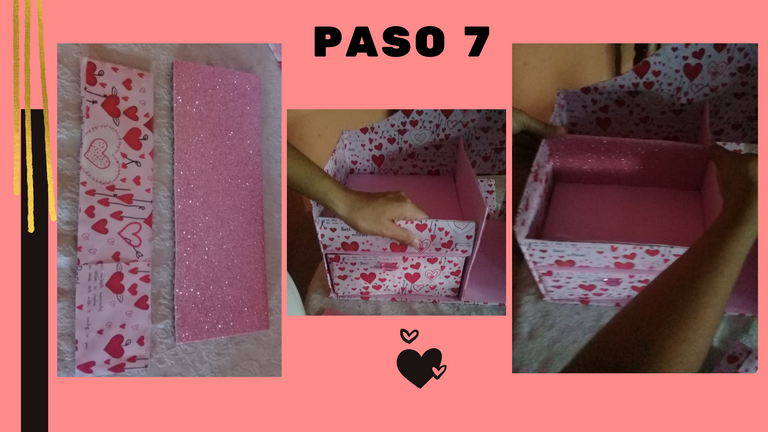
Paso 7: Para la división de arriba de la gaveta necesitaremos dos piezas la primera 5.0 cm de alto y 21.7 cm de largo, la segunda 7.0 cm de alto y 21.7 cm de largo. La segunda pieza la forraremos con foami escarchado rosado y la primera con papel de regalo, ya lista la pegamos con silicona.
Step 7: For the top division of the drawer we will need two pieces, the first one 5.0 cm high and 21.7 cm long, the second one 7.0 cm high and 21.7 cm long. The second piece will be lined with pink frosted foami and the first one with wrapping paper, once ready we glue it with silicone.
.png)
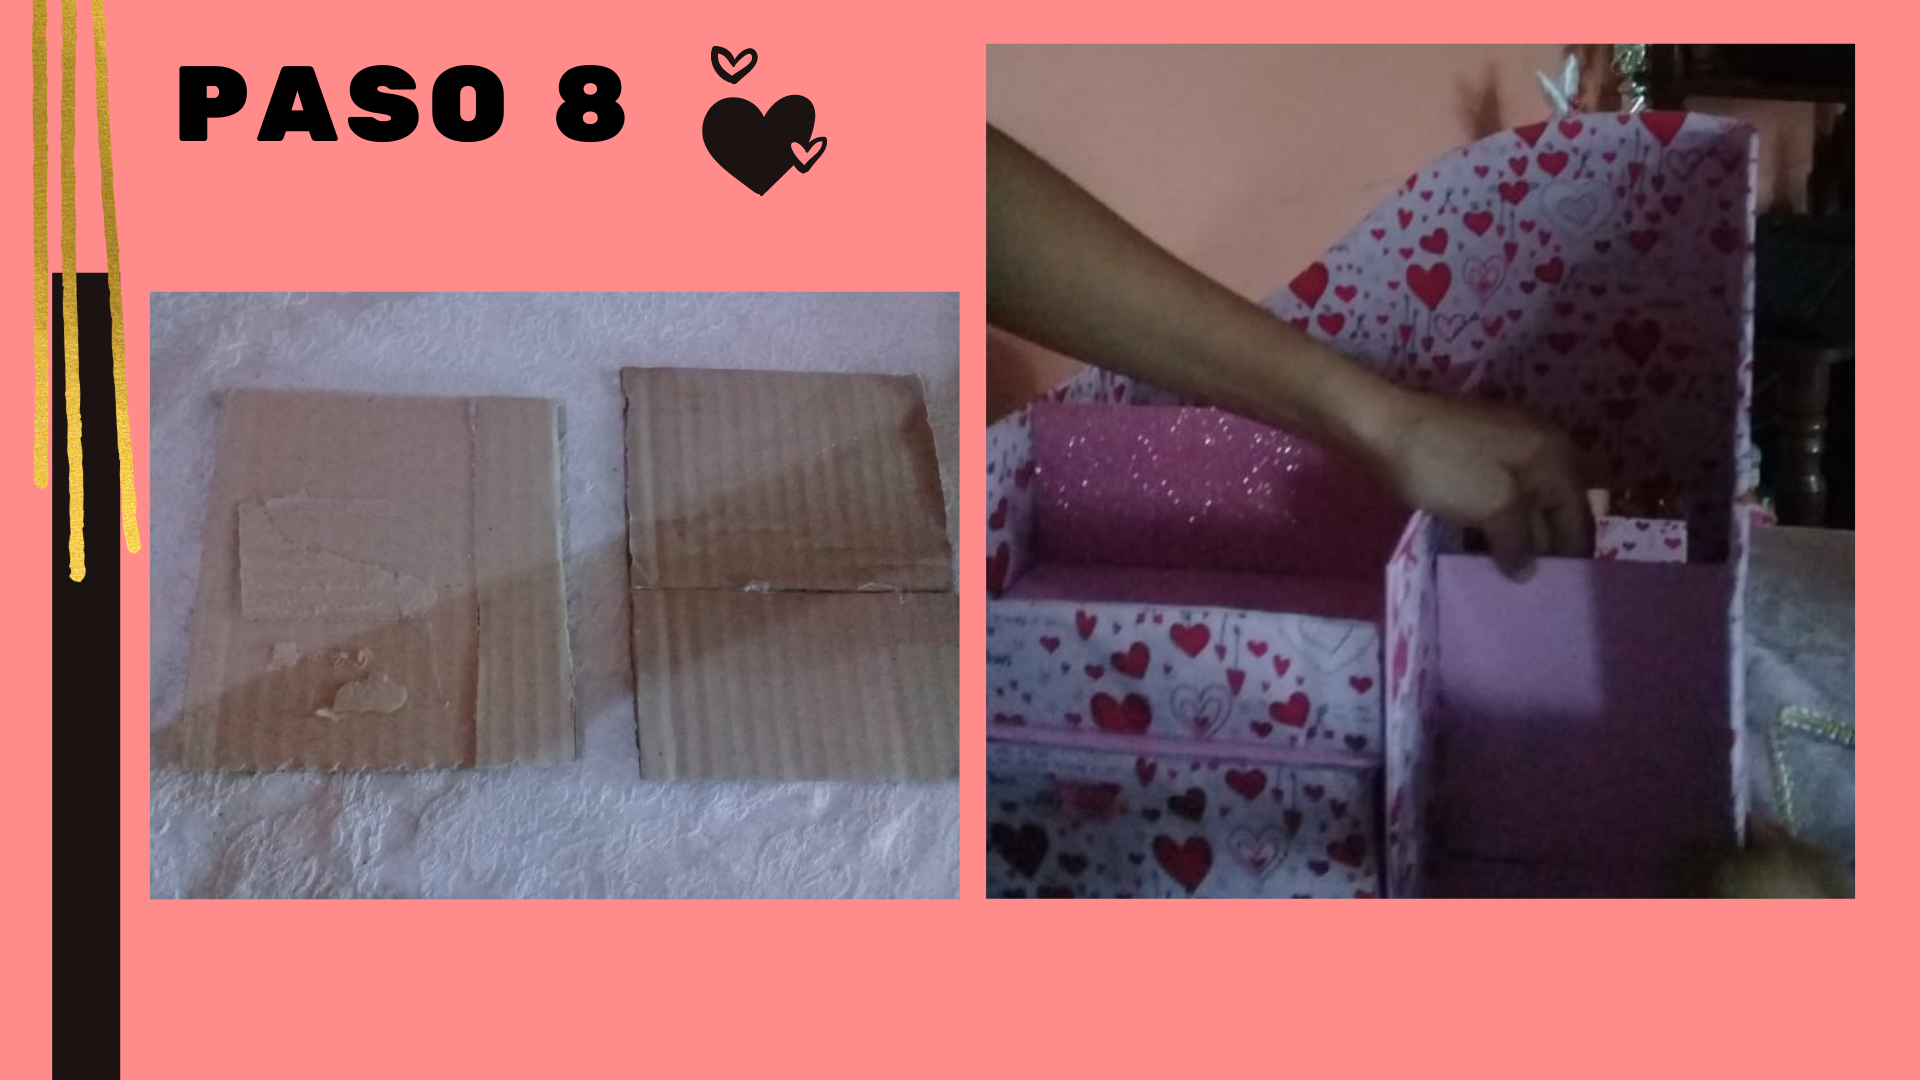
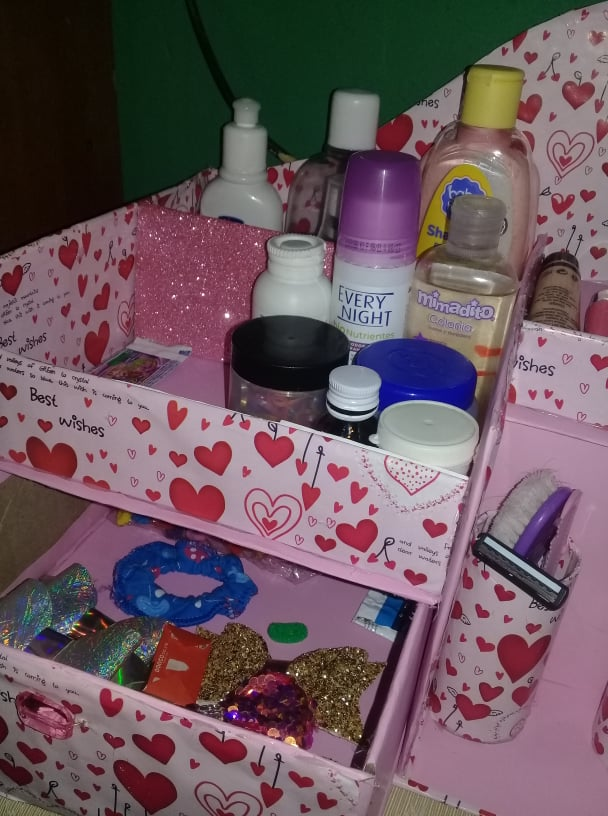
Paso 8: A la segunda división del organizador necesitamos dos piezas con las siguientes medidas la primera 15.0 cm de largo y 13.3 cm de alto, la segunda 17.0 cm de alto y 13.3 cm de largo, lo forramos con cartulina color rosado y pegamos.
Step 8: For the second division of the organizer we need two pieces with the following measurements: the first one 15.0 cm long and 13.3 cm high, the second one 17.0 cm high and 13.3 cm long, we line it with pink cardboard and glue it.
.png)
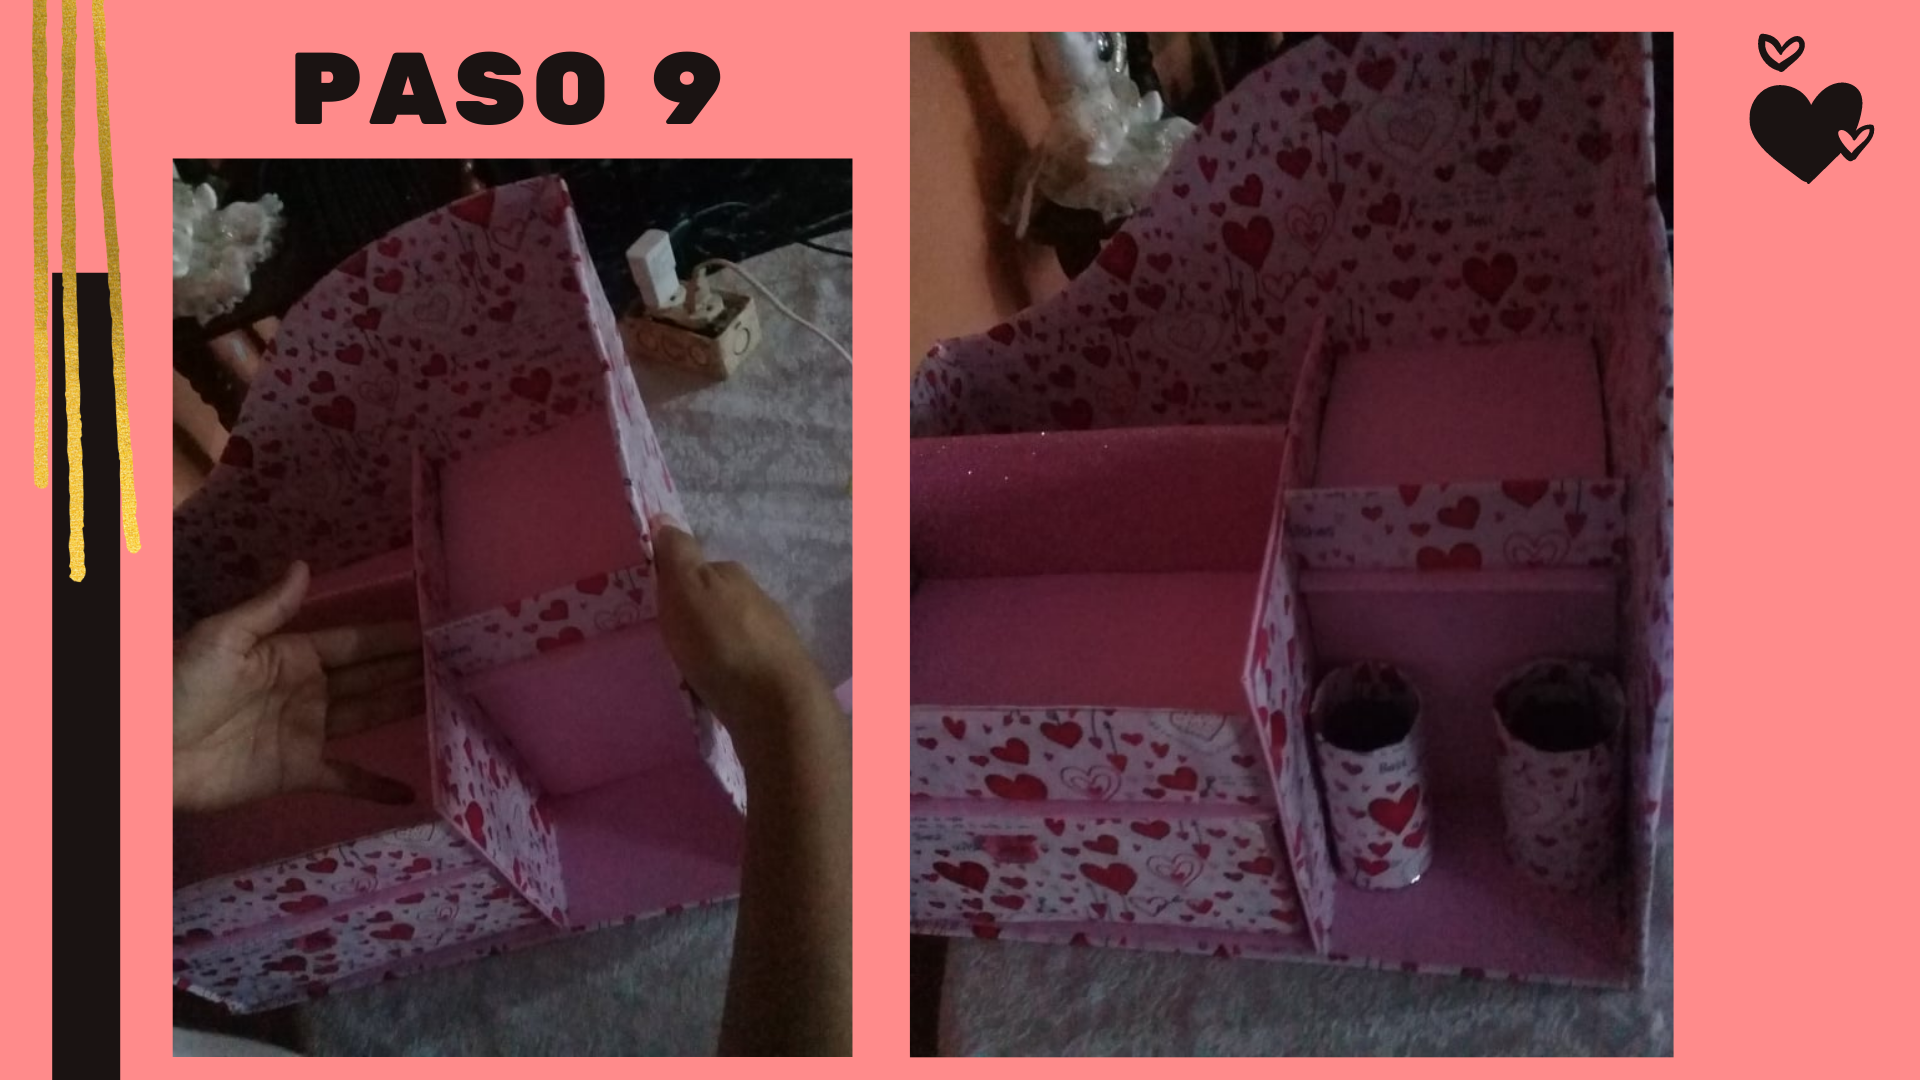
Paso 9: Necesitaremos una pieza de 2.5 cm de alto y 13.3 cm de largo, lo forramos con papel de regalo y pegamos, los tubo de papel higiénico también lo forramos con papel de regalo y para darle ese toque personal le pegaremos un pequeño espejo.
Step 9: We will need a piece of 2.5 cm high and 13.3 cm long, we line it with wrapping paper and glue, the toilet paper tube is also lined with wrapping paper and to give it that personal touch we will glue a small mirror
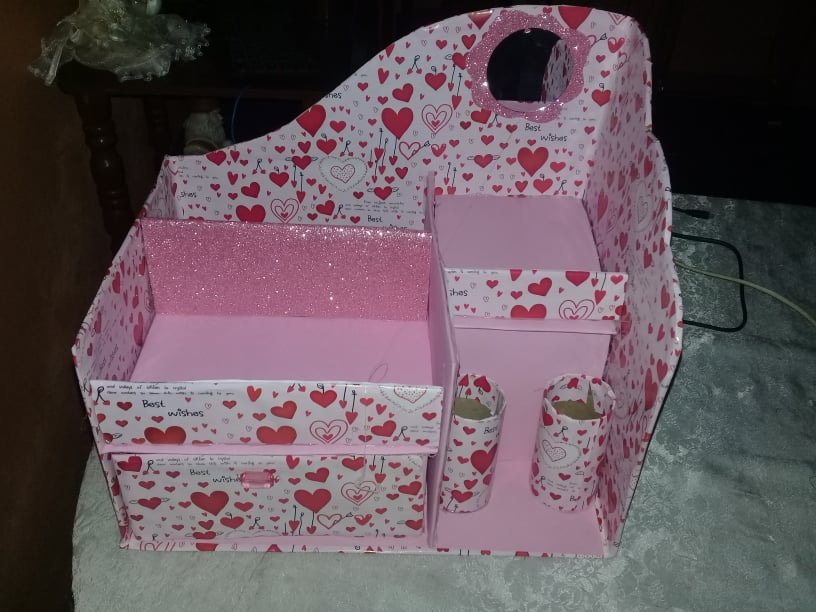
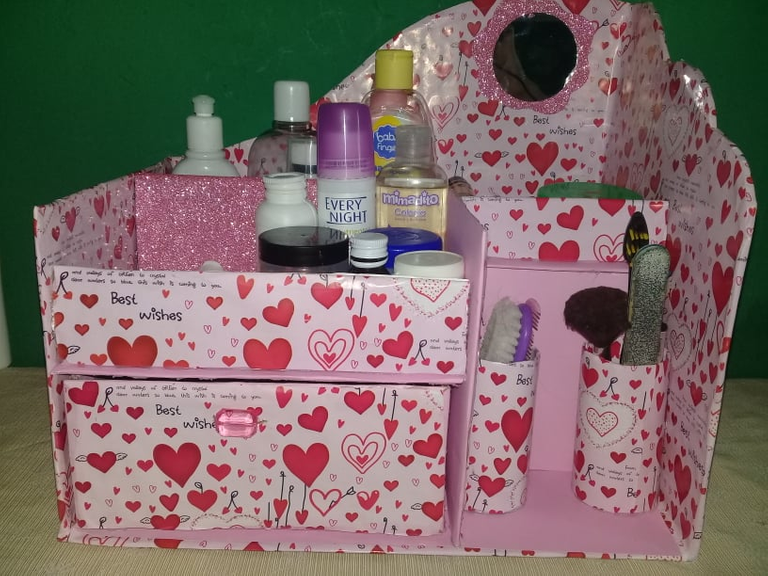
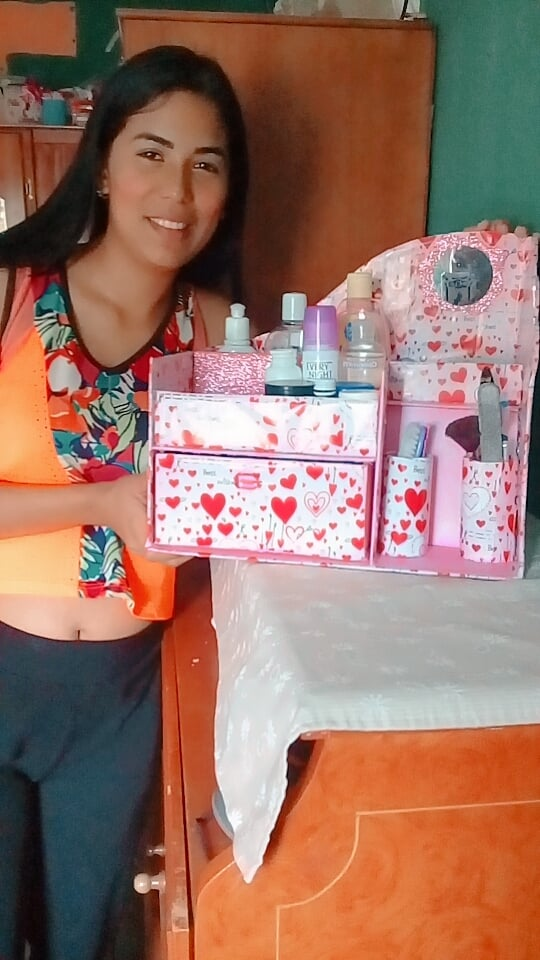
Friends I was impressed with the result of this beautiful cosmetic organizer, I am very happy because I could share with you one more of my creations, I personally liked very much to make this type of crafts, until a next publication Greetings!