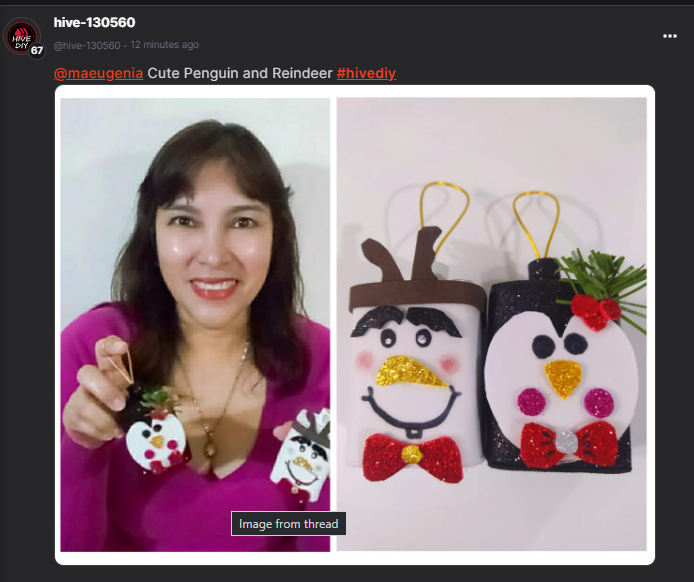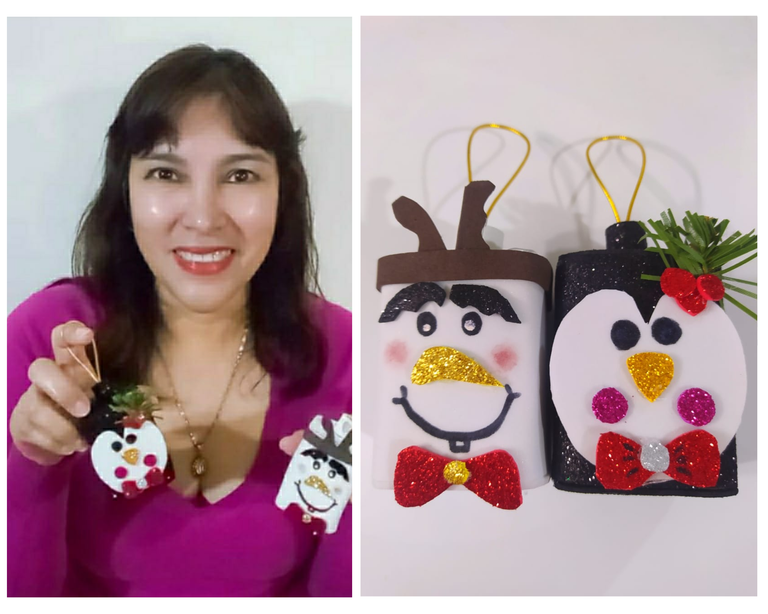
Saludos queridos hivers, bienvenidos a mi blog, esperando se encuentren bien y tengan un fabuloso día. Reciclar es una de las actividades que más me gusta hacer, ya que es una manera de colaborar aunque sea un poquito con el planeta, estos adornos para el árbol de navidad que hoy les traigo los hice con rollos de papel higiénico, yo los guardo ya que se hacen cosas hermosas con este material, espero les guste y se animen a hacerlo en casa. Hice dos animales que me gustan mucho, un reno y un pingüino, quedaron muy lindos y acá les explico el paso a paso para su elaboración.
Greetings dear hivers, welcome to my blog, I hope you are well and have a fabulous day. Recycling is one of the activities that I like to do the most, since it is a way to collaborate even a little with the planet. I made these decorations for the Christmas tree that I bring you today with rolls of toilet paper, and I'm saving them now. You can make beautiful things with this material, I hope you like it and are encouraged to do it at home. I made two animals that I really like, a reindeer and a penguin, they turned out very cute and here I explain the step by step for making them.
Materiales Utilizados/Used materials:
- Foami escarchado color negro, dorado, rojo, plateado. fuscia. Foami liso color blanco y marrón/ Frosted foam in black, gold, red, silver. fuscia. Smooth white and brown foam.
- Pistola de silicón, barra de silicón/ Silicone gun, silicone stick/ Silicone gun, silicone stick/ Silicone gun, silicone stick.
- Marcador negro, polvo para colorear las mejillas/ Black marker, cheek coloring powder .
- Follaje verde, cordón color dorado/ Green foliage, gold lace.
Procedimiento/Procedure:
Paso/Step 1:
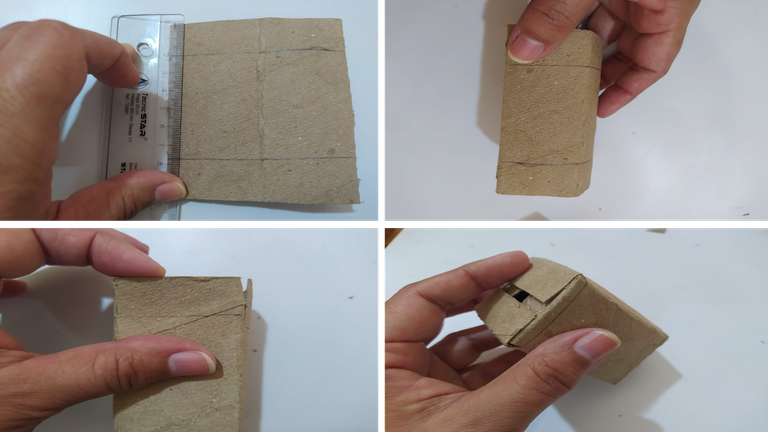
Para hacer el pingüino tomé un rollo de papel higiénico e hice dos dobles de manera que el rollo tomara una forma cuadrada. Con una regla marqué dos centímetros sobre los extremos del rollo e hice una línea. Luego con unas tijeras hice cuatro cortes en ambos extremos del rollo como se muestra en la foto, después doblé y pegué las aristas de manera que me quedara una especie de cajita.
I took a roll of toilet paper and made two doubles so that the roll took a square shape. With a ruler I marked two centimeters on the ends of the roll and made a line. Then with some scissors I made four cuts at both ends of the roll as shown in the photo, then I folded and glued the edges so that I had a kind of little box.
Paso/Step 2:
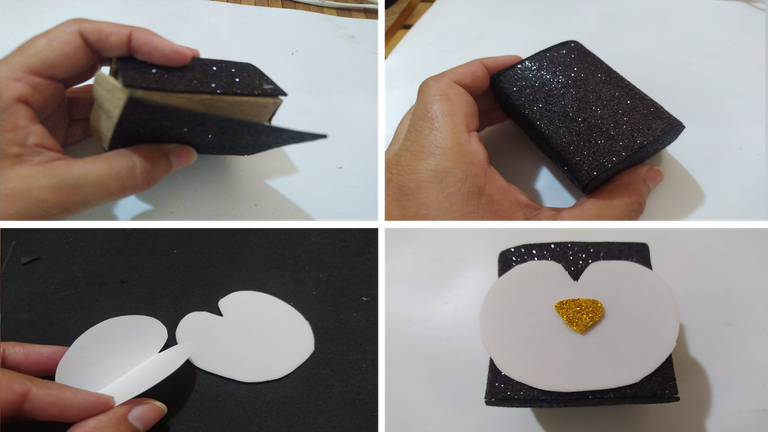
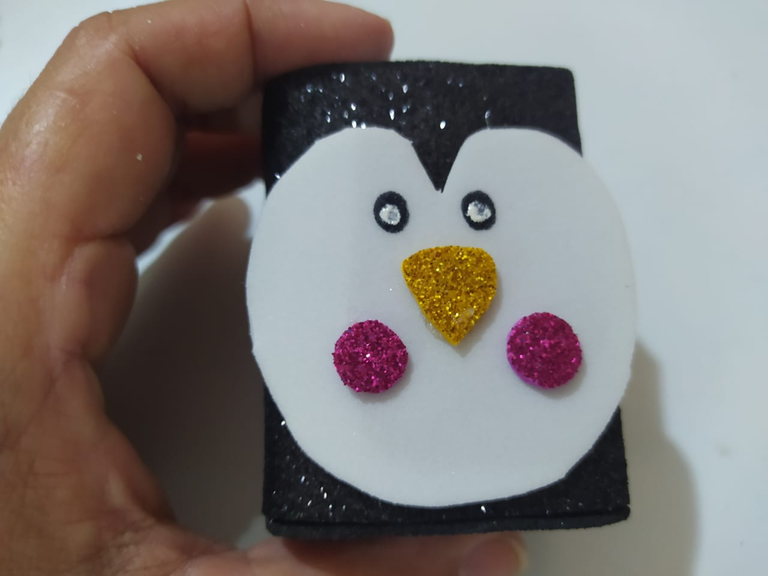
En foami escarchado color negro medí y corté para forrar la cajita por completo utilizando pistola de silicona. En una hoja de papel hice un molde de la cara del pinguino, luego transfería al foami liso color blanco, corté y pegué la cara a la cajita. Corté un pequeño triángulo en foami escarchado color dorado para la nariz, con marcador negro dibujé los ojos e iluminé con un punto de pintura blanca. Corté dos pequeños círculos en color fuscia para las mejillas y pegué a la cara.
I measured and cut black frosted foam to completely cover the box using a silicone gun. On a sheet of paper I made a mold of the penguin's face, then I transferred it to smooth white foam, cut and glued the face to the box. I cut a small triangle out of gold frosted foam for the nose, with a black marker I drew the eyes and highlighted them with a dot of white paint. I cut two small fuscia circles for the cheeks and glued them to the face.
Paso/Step 3:
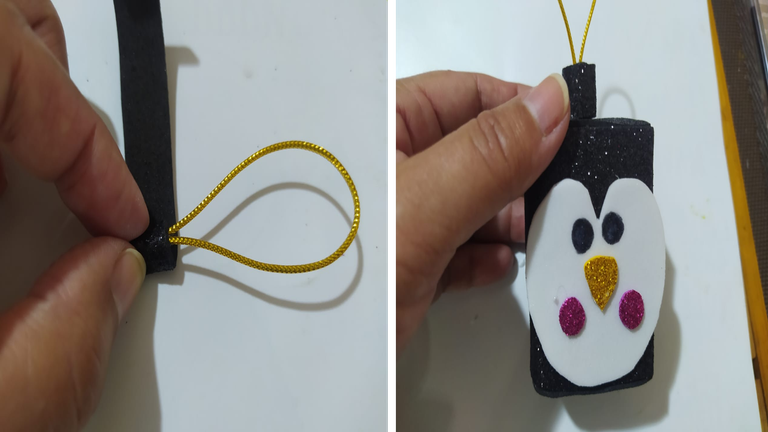
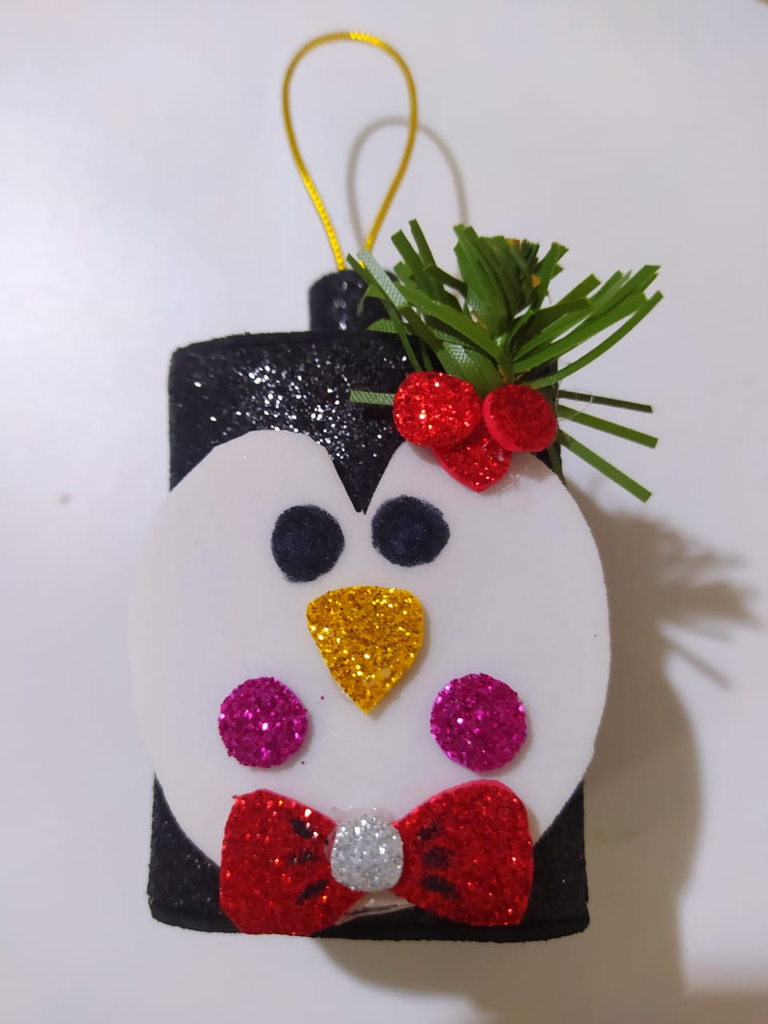
Corté una tira de 1 centímetro de ancho y la enrollé sobre una cordón color dorado, luego pegué sobre el pinguino, de manera de poder colgarlo en el árbol de navidad. Tenía en casa follaje verde e hice un pequeño detalle para la cabeza del pinguino, También decoré con un lazo que hice en foami escarchado rojo y plateado. Así queda terminado este lindo pingüino para decorar tu árbol.
I cut a 1 centimeter wide strip and wound it on a gold cord, then glued it onto the penguin, so I could hang it on the Christmas tree. I had green foliage at home and I made a small detail for the penguin's head. I also decorated it with a bow that I made in red and silver frosted foam. This is how this cute penguin is finished to decorate your tree.
Para hacer el Reno/ To make the Reindeer:
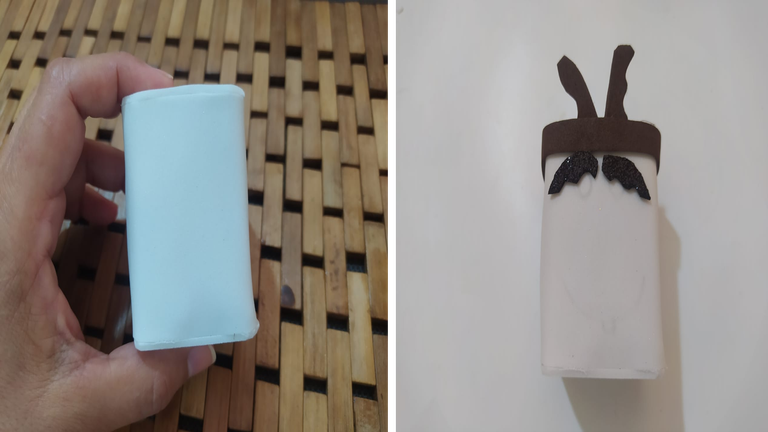
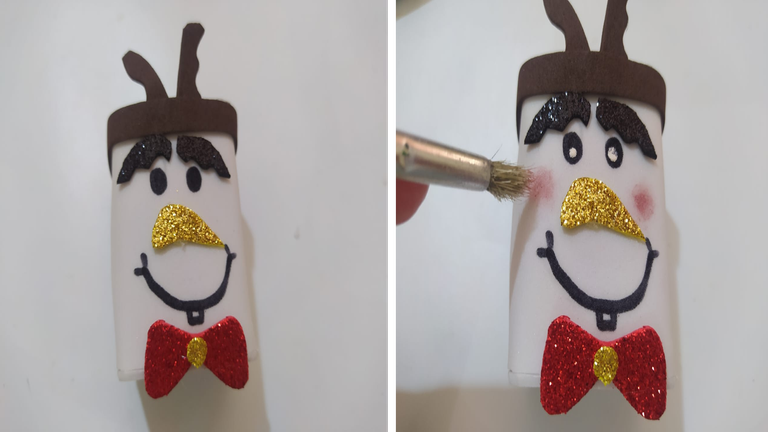
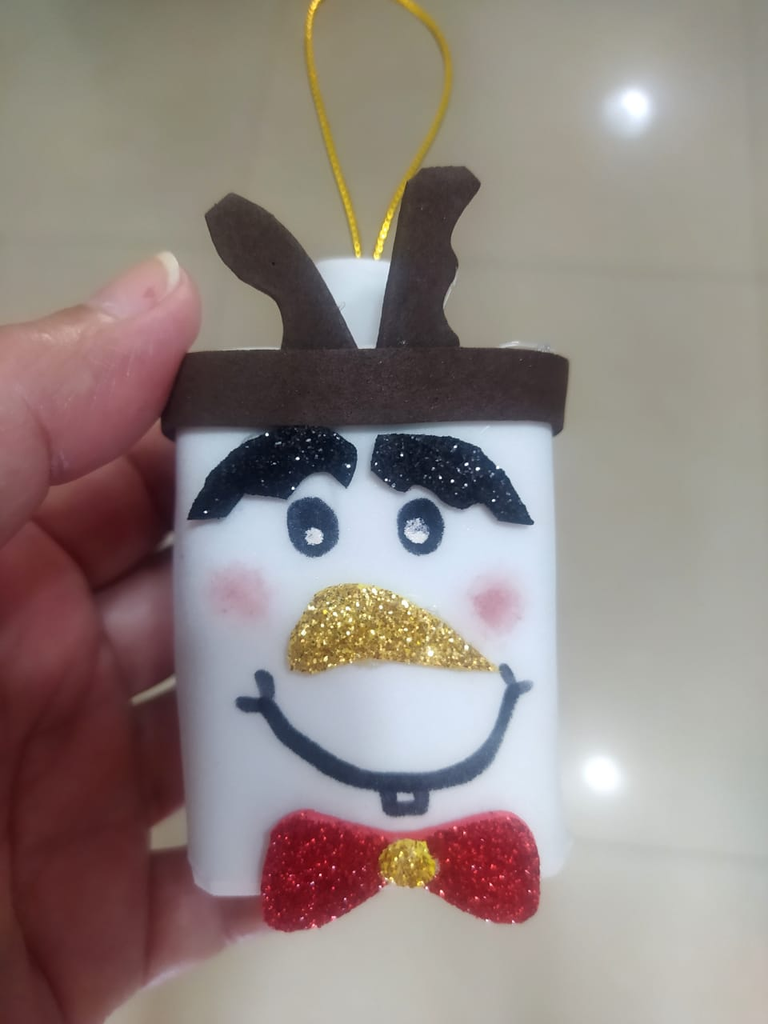
Para hacer el reno forramos la cajita en foami liso color blanco, luego cortamos una tira fina en color marrón y la pegamos en un extremo de la cajita. también cortamos y pegamos dos trozos de foami para simular los cachos de nuestro reno. Después cortamos en foami los rasgos de la cara según el color que corresponda sobre el foami, luego pegamos con pistola de silicón.
Para las mejillas utilicé colorete de mi maquillaje y por último decoré el reno con un lindo lazo que hice en foami color rojo.
To make the reindeer, we lined the box with smooth white foam, then we cut a thin brown strip and glued it to one end of the box. We also cut and glued two pieces of foam to simulate the legs of our reindeer. Then we cut the facial features out of foam according to the corresponding color on the foam, then we glue them with a silicone gun.
For the cheeks I used blush from my makeup and finally I decorated the reindeer with a cute bow that I made in red foam.
Espero les haya gustado esta manualidad, es muy fácil de hacer y la verdad es que te ahorras mucho dinero en comprar adornos para el árbol. Me despido de ustedes queridos hivers, nos vemos pronto, abrazos.
I hope you liked this craft, it is very easy to do and the truth is that you save a lot of money on buying decorations for the tree. I say goodbye to you dear hivers, see you soon, hugs.
Fotos de mi propiedad tomadas con mi celular Redmi 9, editadas con PowerPoint y Photoshop CS5 // Texto traducido por Google Translate.
Photos of my property taken with my Redmi 9 cell phone, edited with PowerPoint and Photoshop CS5 // Text translated by Google Translate.
