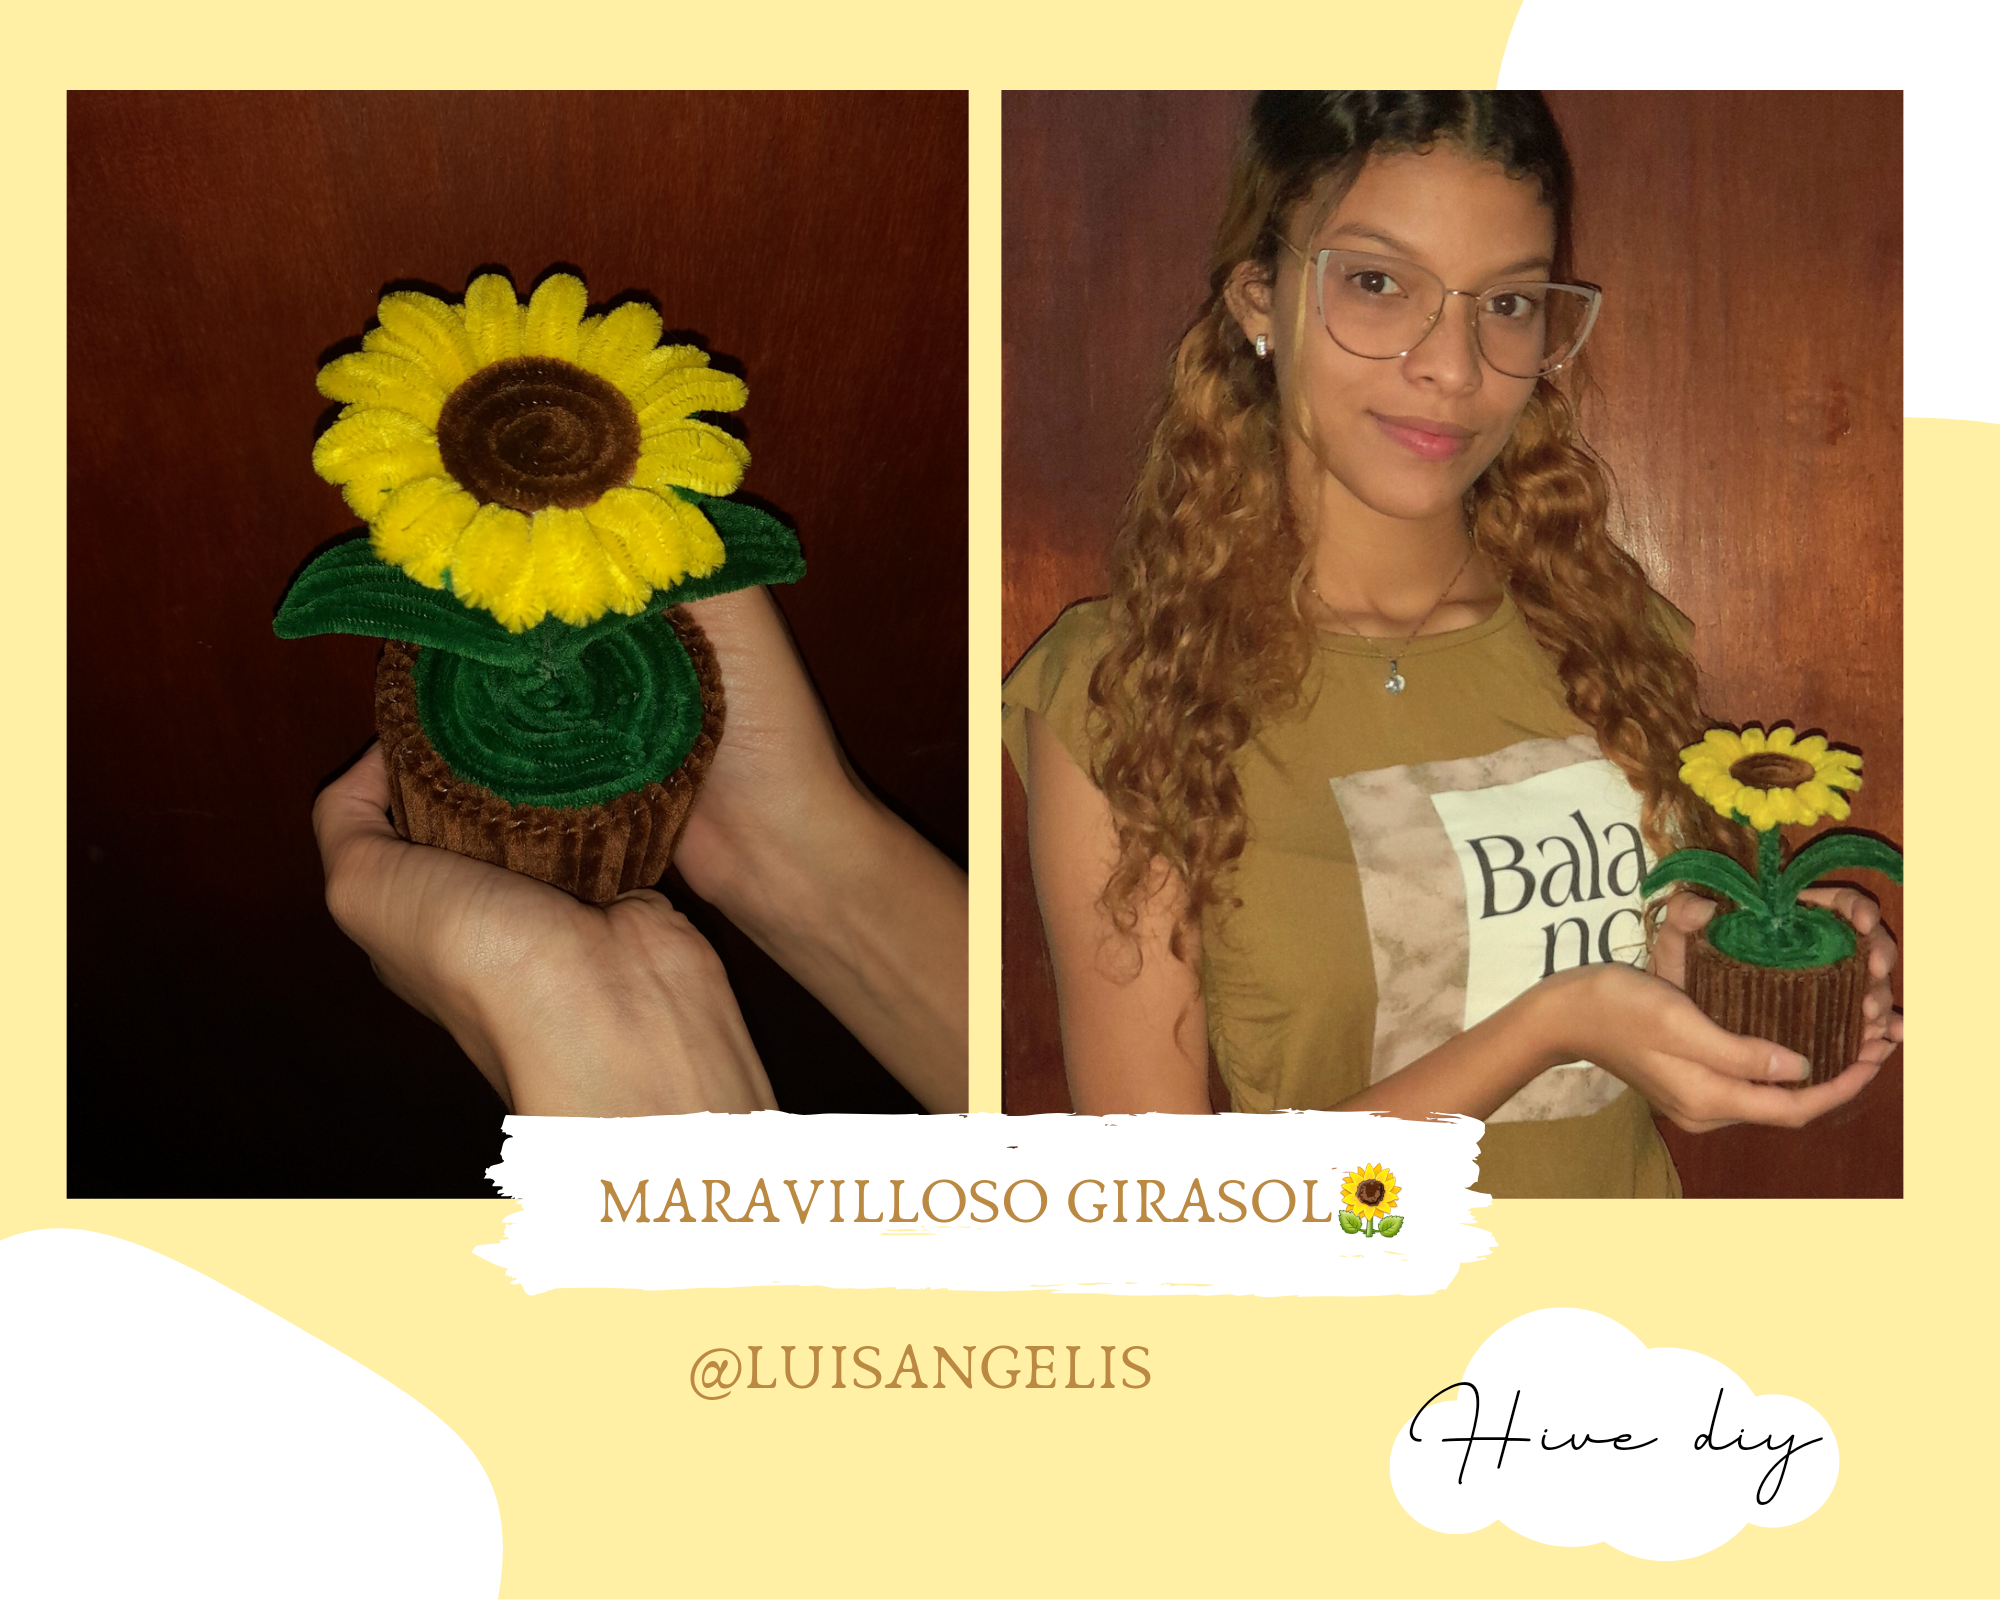
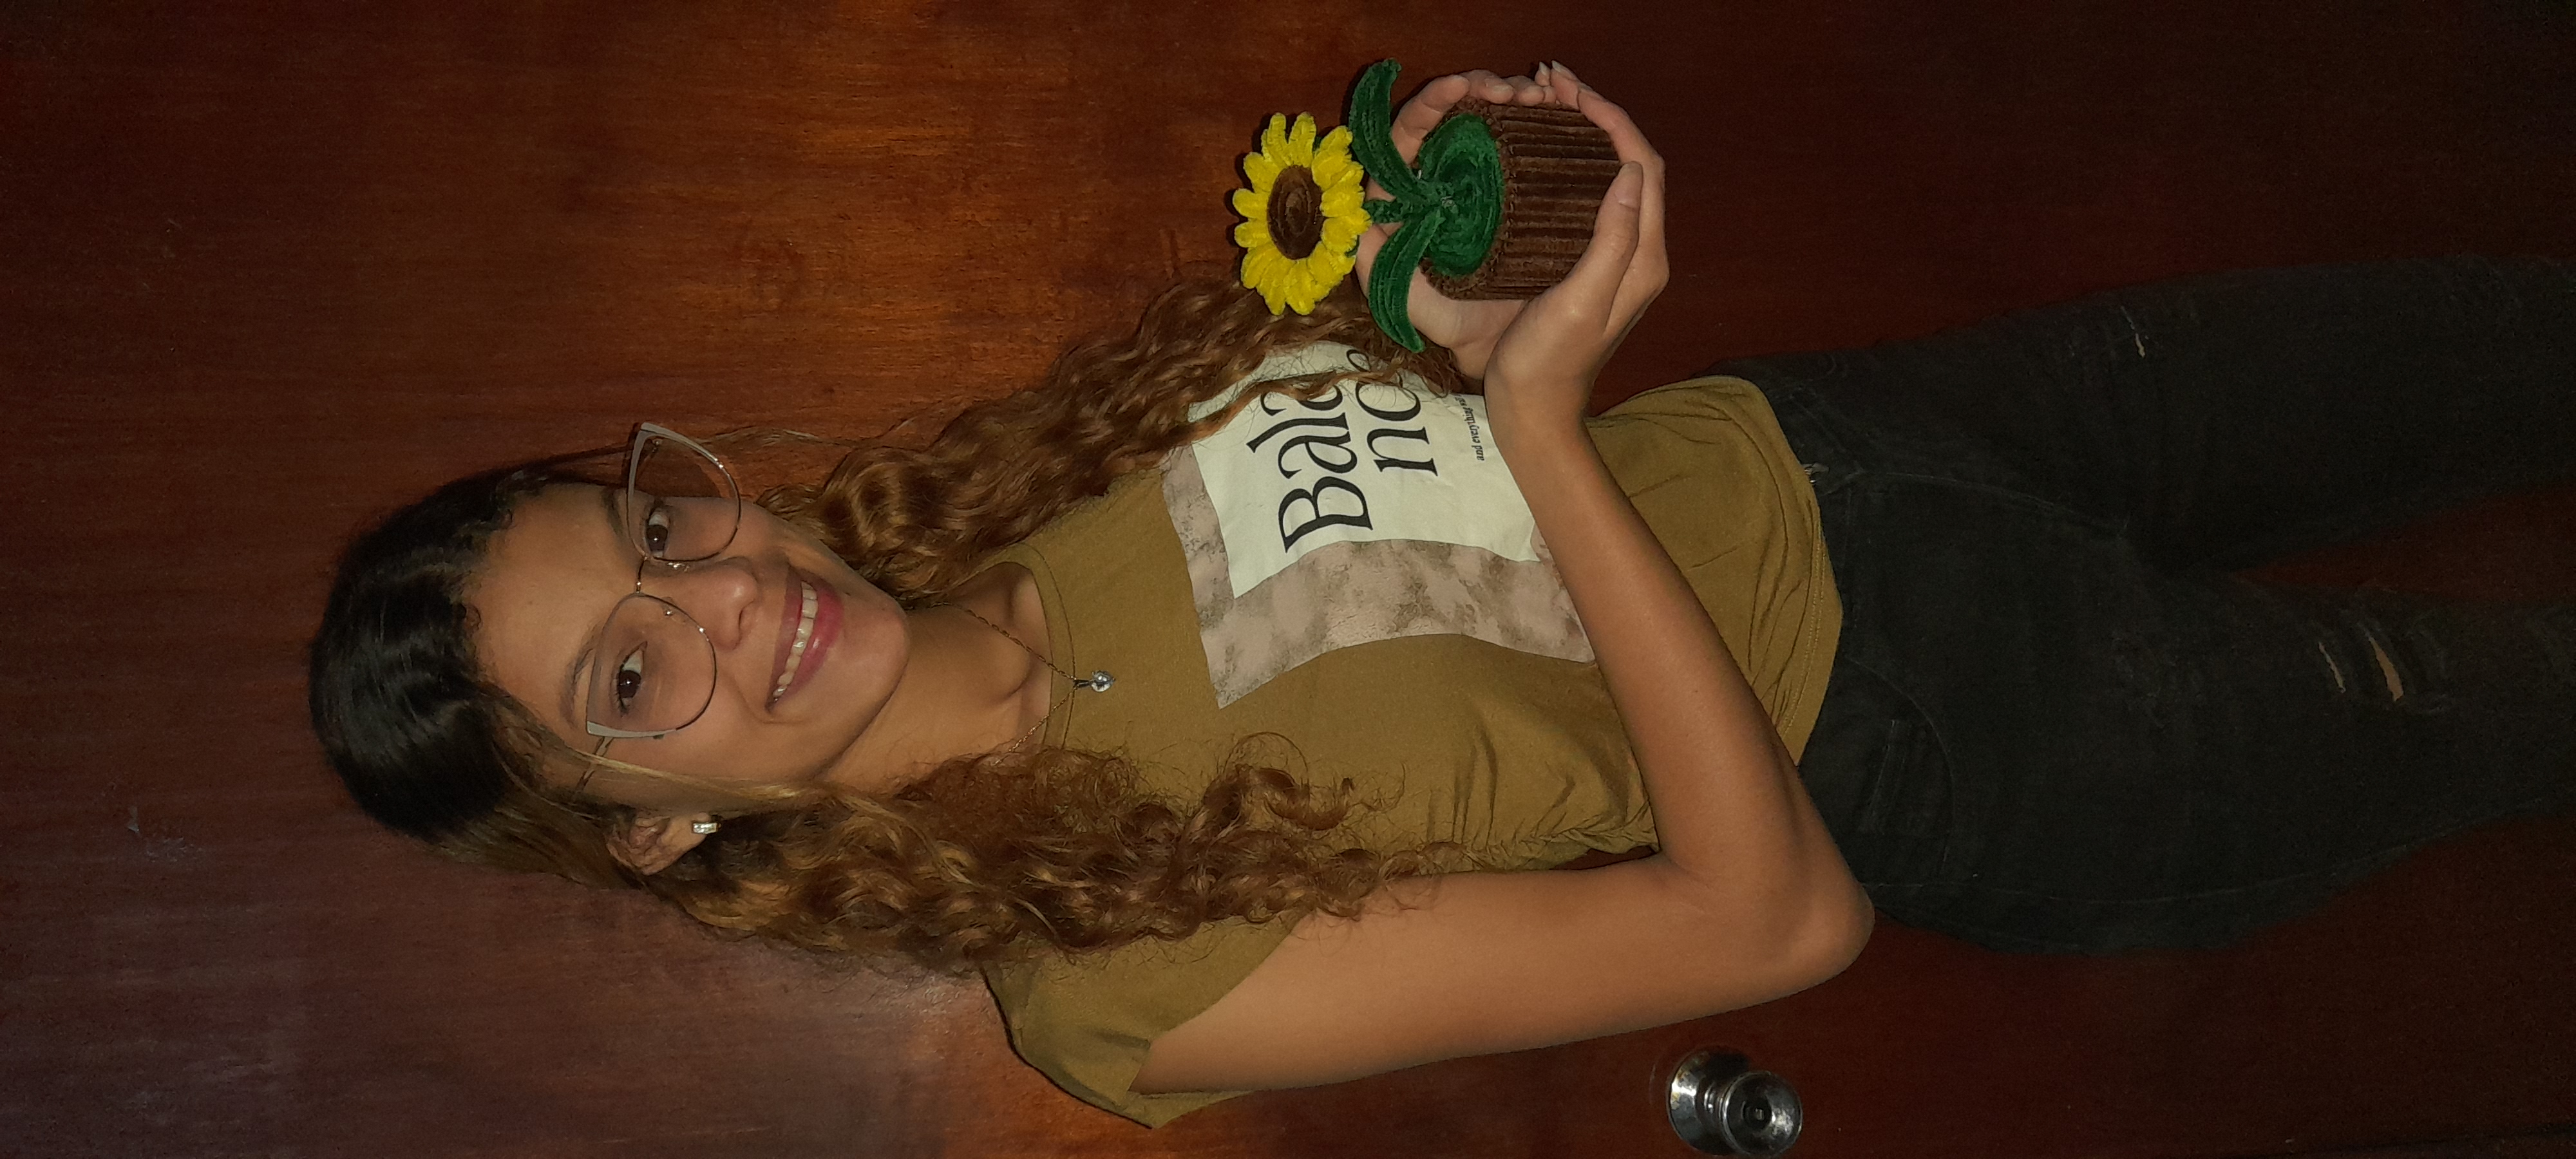
Saludos amigos de hive, bienvenidos a una nueva publicación, debo comentarles que en esta gran oportunidad les traigo un nuevo trabajo realizado con diversos materiales, espero te guste mi girasol 🌻 que con mucho esfuerzo y dedicación elaboré. Me inspiré a realizarlo ya que me encantan los girasoles, son muy llamativos y preciosos, con este material también puedes hacer otras flores si deseas, si quieres que realice otra flor de tu preferencia déjame saber en los comentarios, empecemos con el trabajo... 🌻🌻🥰
Greetings friends from hive, welcome to a new publication, I must tell you that in this great opportunity I bring you a new work made with various materials, I hope you like my sunflower 🌻 that I made with a lot of effort and dedication. I was inspired to make it since I love sunflowers, they are very striking and precious, with this material you can also make other flowers if you want, if you want me to make another flower of your choice, let me know in the comments, let's start with the work... 🌻🌻🥰
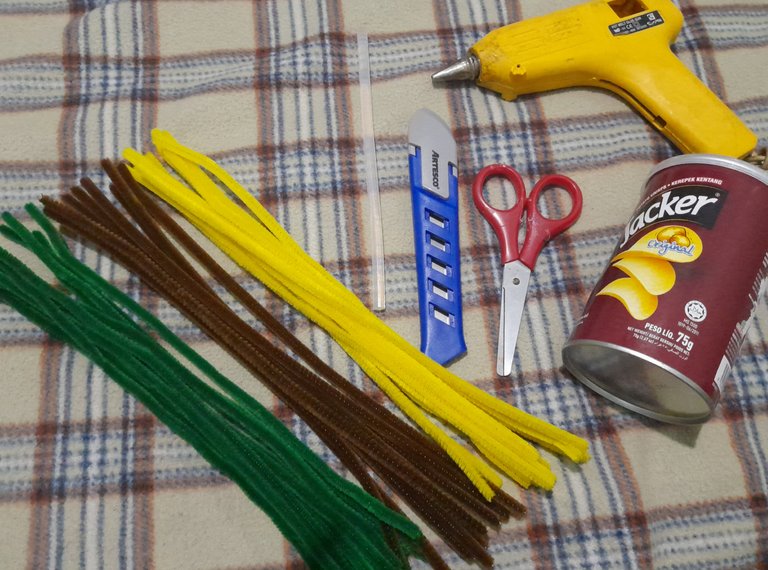
Materiales:
♧Limpia pipas (6 amarillos,13 verdes, 14 marrón)
♧Envase
♧Silicón
♧Cúter
♧Tijera
Materials:
♧Pipe cleaners (6 yellow, 13 green, 14 brown)
♧Container
♧silicone
♧cutter
♧Scissors
Proceso / Process
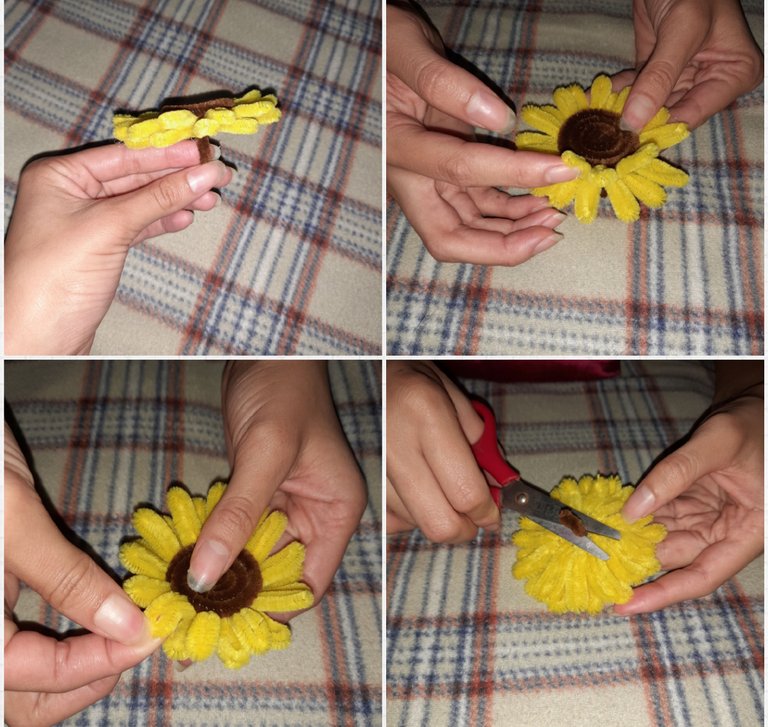
paso 1: Primeramente empecé recortando un limpia pipas amarillo por la mitad para así darle forma de U, luego volvemos a doblar a la mitad y trenzar para darle firmeza, estos serán los pétalos de la flor, tal como se observa en el collage.
step 1: Firstly I started by cutting a yellow pipe cleaner in half to give it a U shape, then we fold it in half again and braid to give it firmness, these will be the petals of the flower, as seen in the collage.
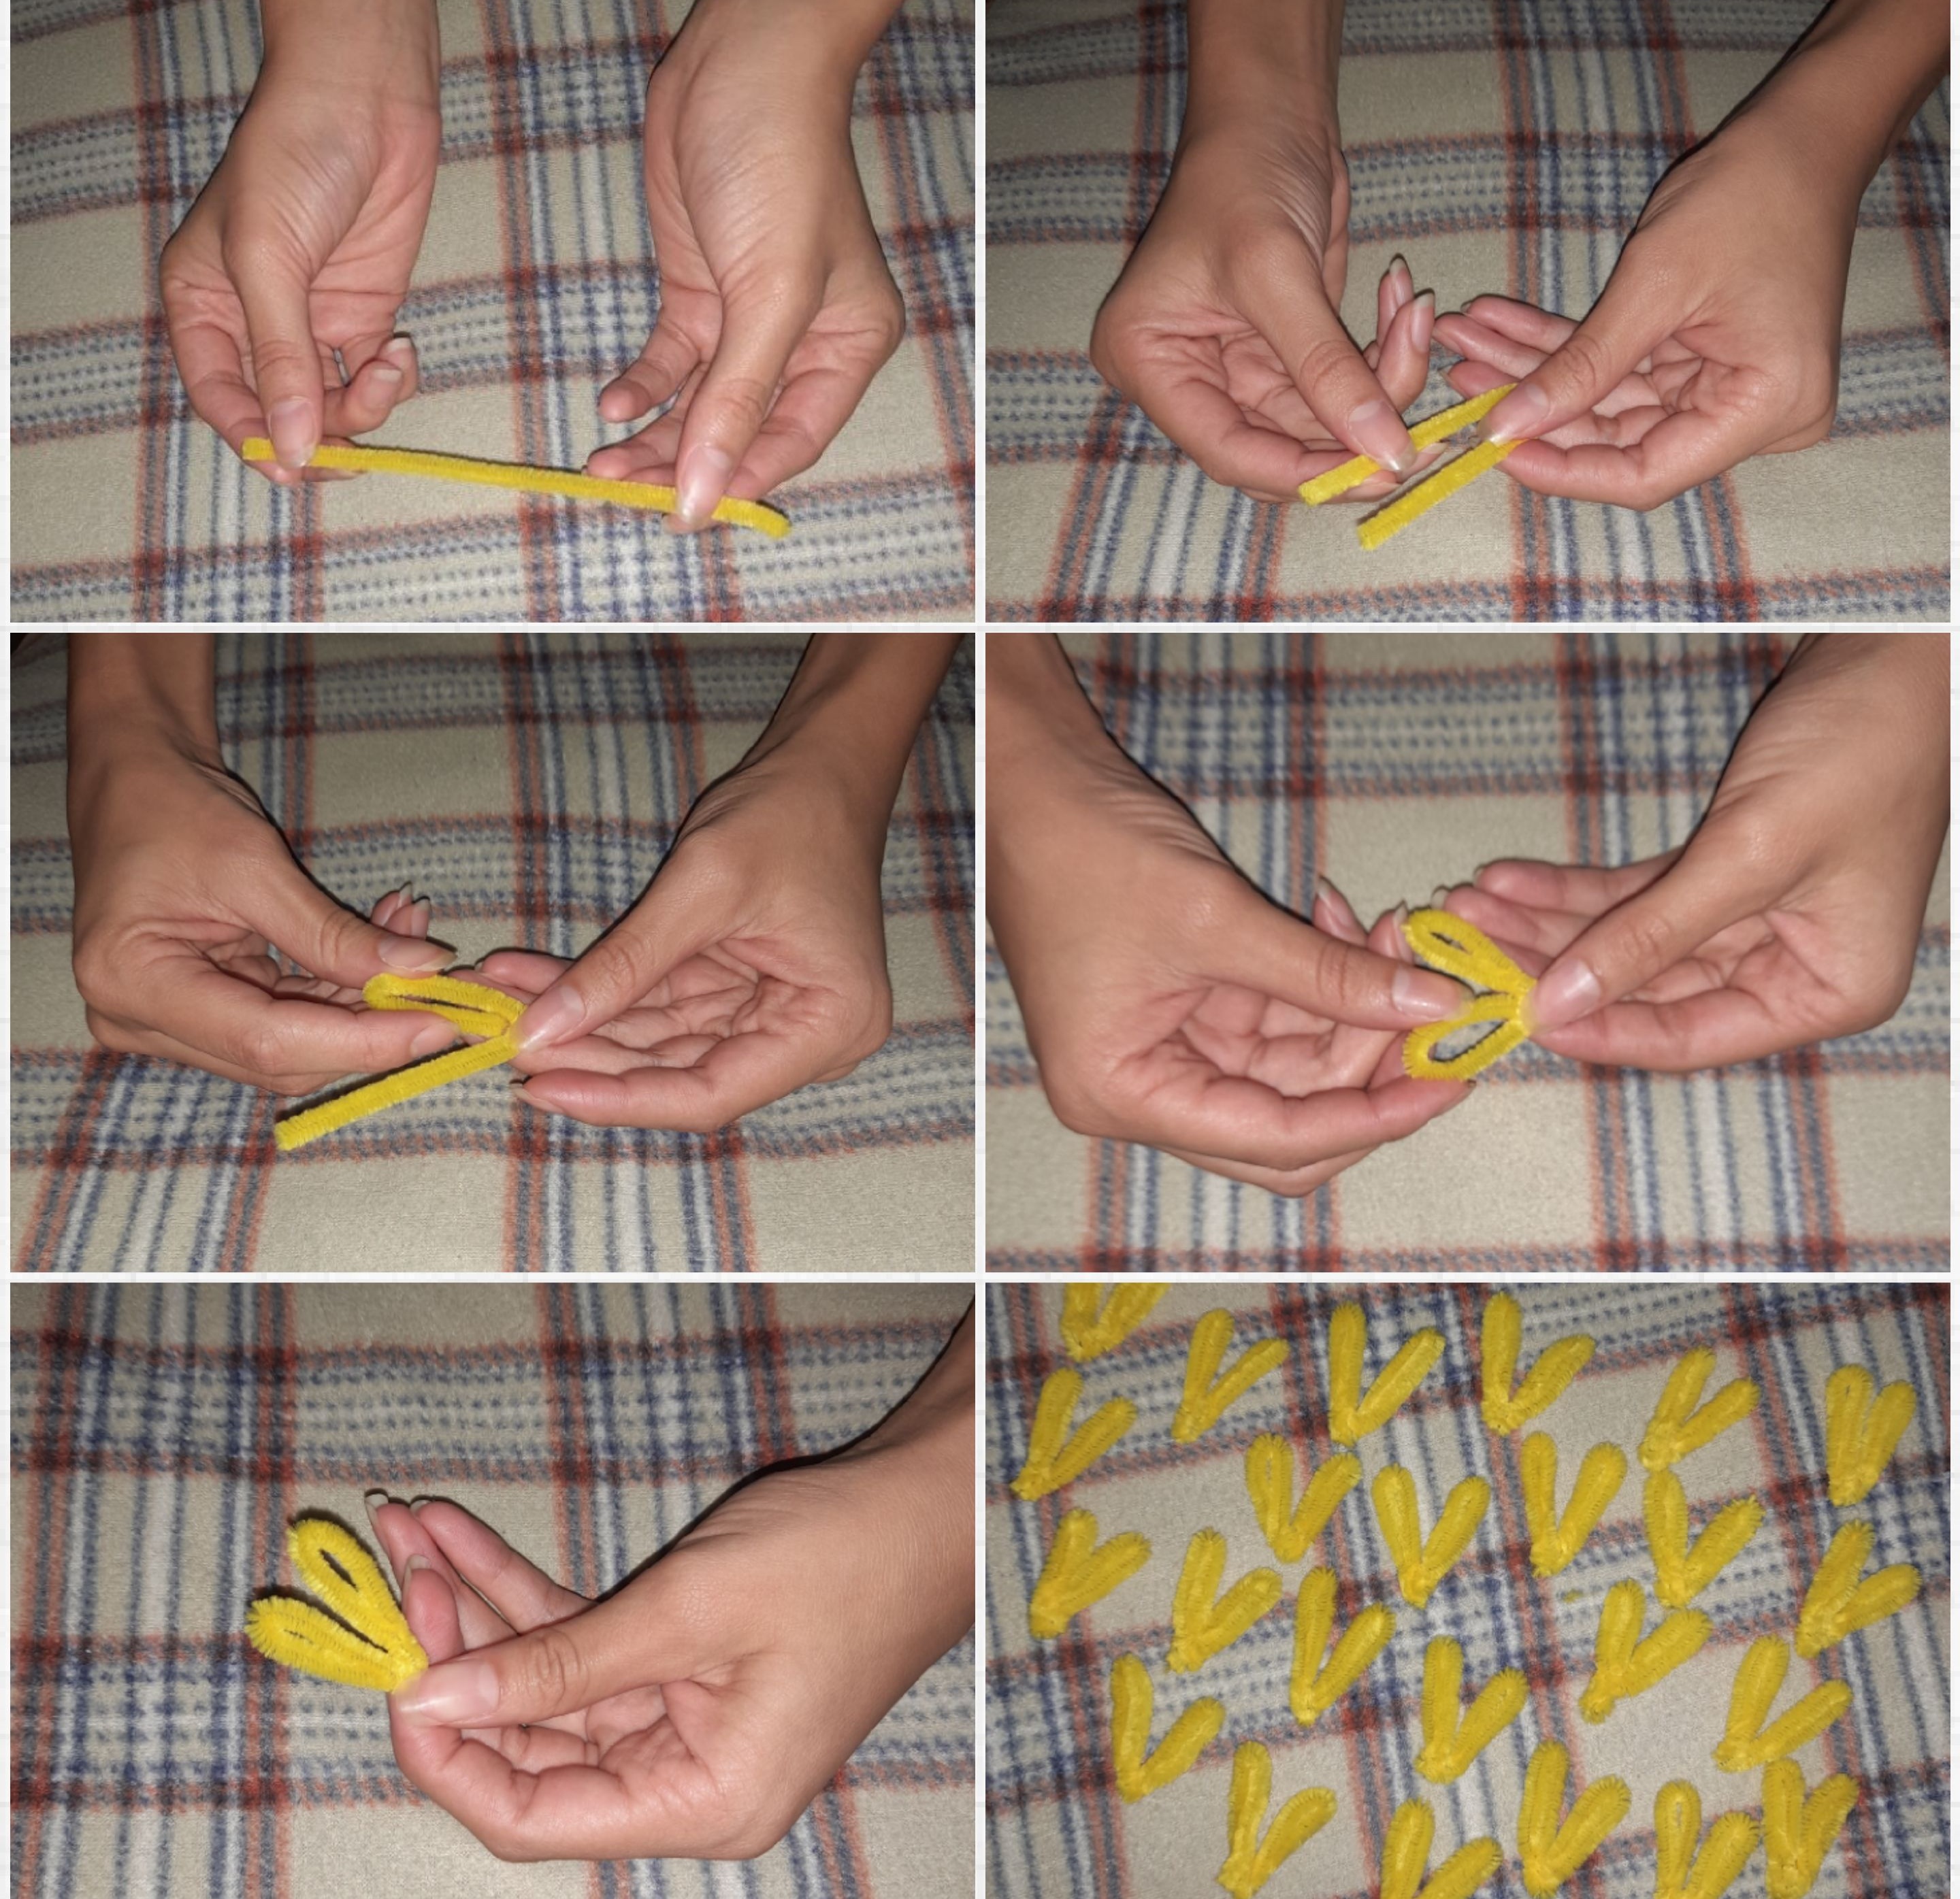
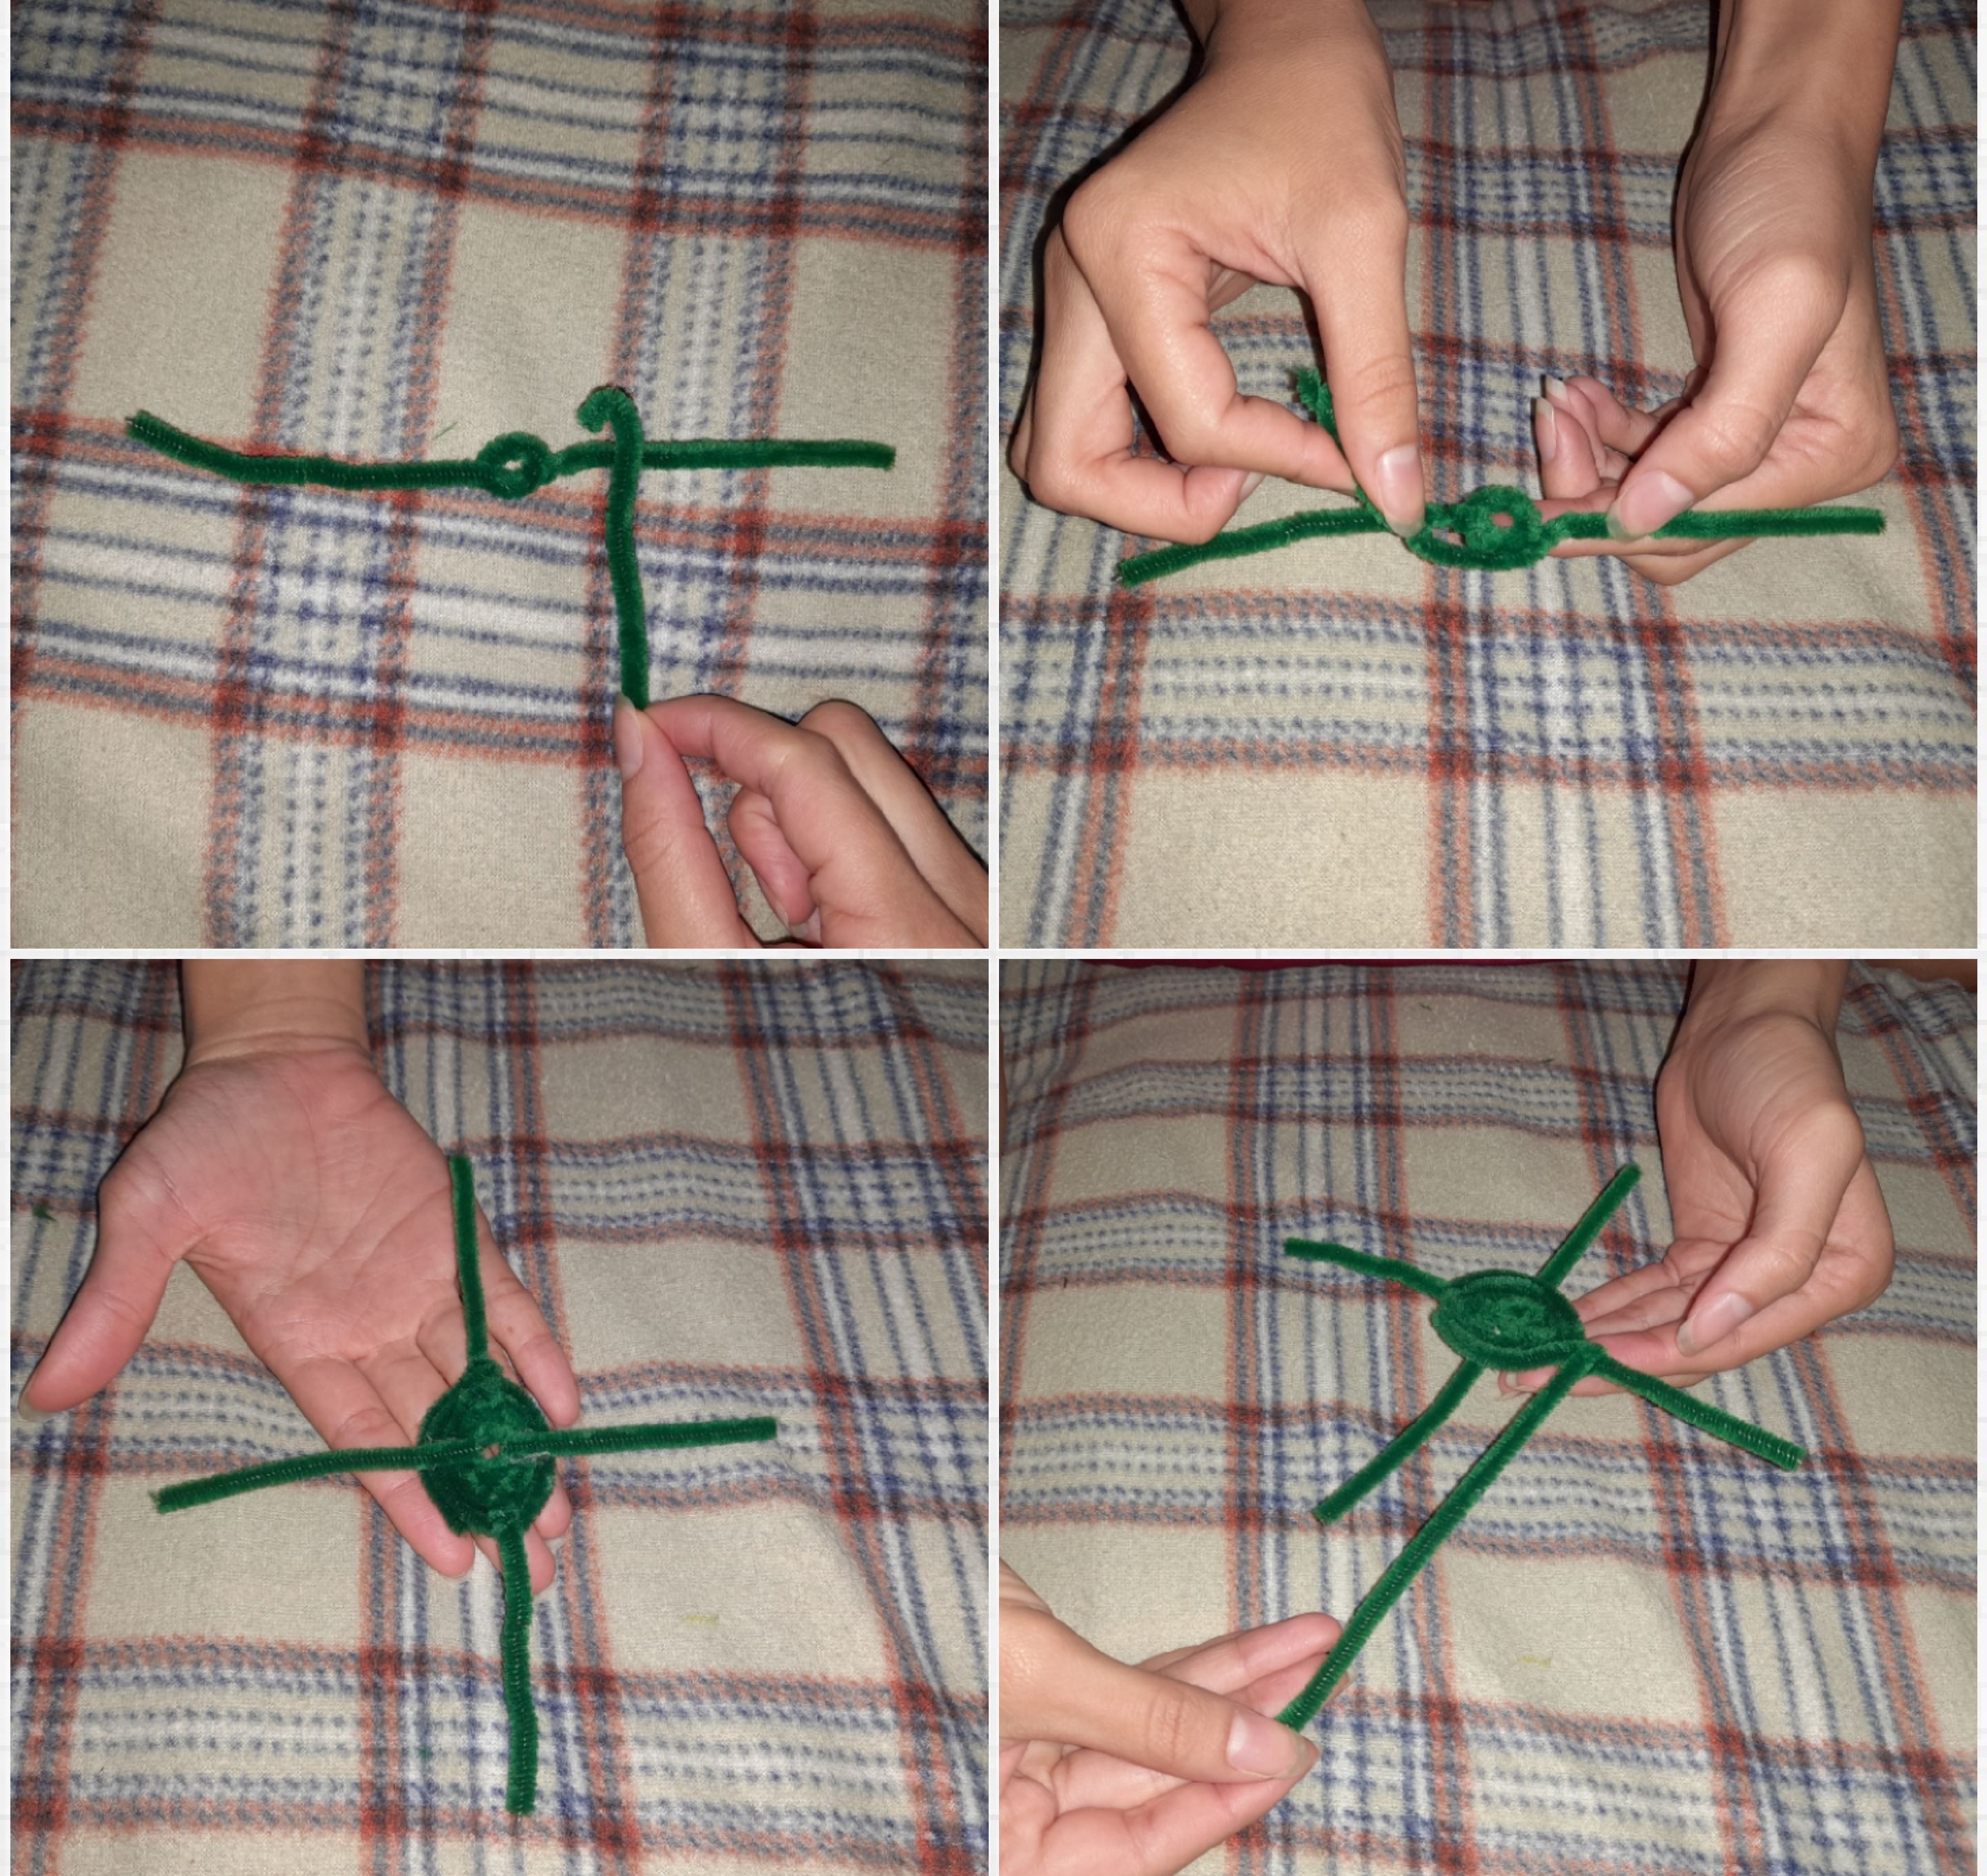
Paso 2:Tomamos uno de color marrón y enrollamos de principio a fin de forma circular, dejando al final una pequeña parte la cuál pegaremos en la base, esta será la semilla de la flor, como se vé en la imágen.
Step 2: We take a brown one and roll it from beginning to end in a circular way, leaving a small part at the end which we will glue to the base, this will be the seed of the flower, as seen in the image.

Paso 3: Posteriormente, tomaremos cada uno de los pétalos y los pegaremos uno al lado de otro de forma ordenada en la semilla, tal y como está plasmado en la gráfica.
Step 3: Subsequently, we will take each of the petals and glue them one next to the other in an orderly manner on the seed, as shown in the graph.
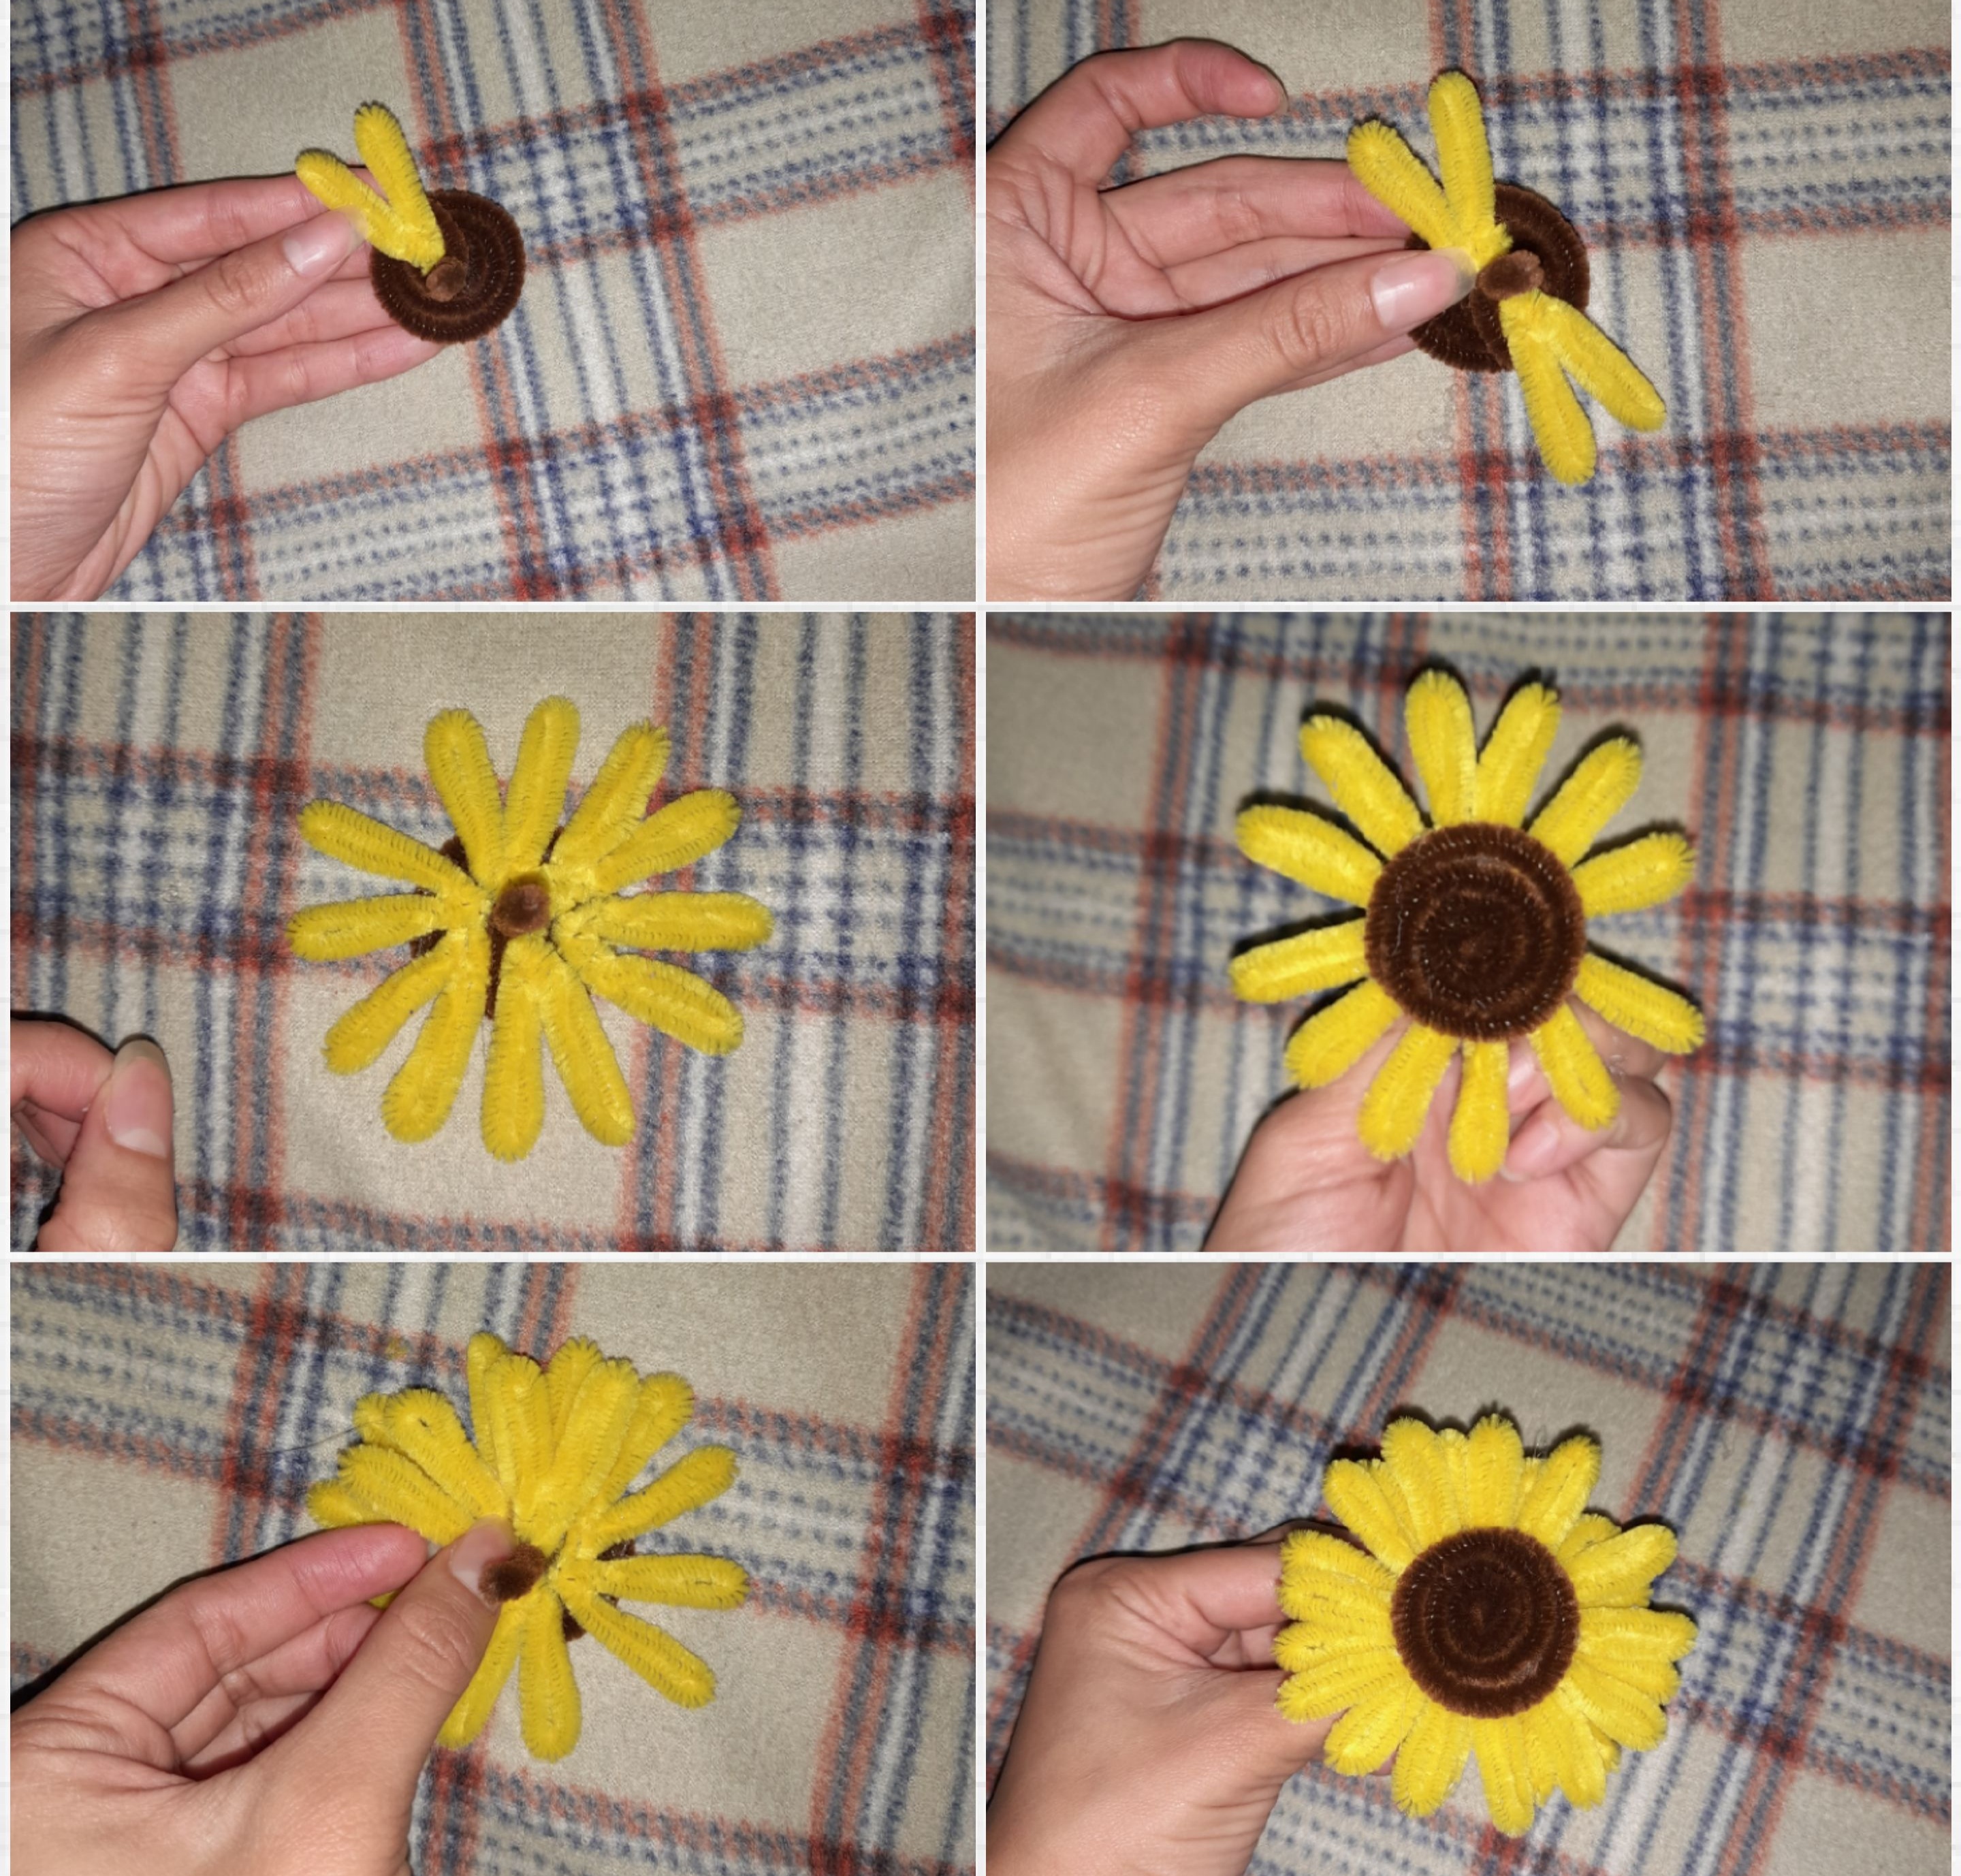
Paso 4: A continuación levantamos cada uno de los pétalos para así darle el doblaje que toda flor tiene, luego de esto se verá diferente, después volteamos y recortamos el sobrante que quedó en la parte baja de la semilla, como se mira en la fotografía 😊.
Step 4: Next we lift each of the petals to give it the doubling that every flower has, after this it will look different, then we turn and cut the excess that was left in the lower part of the seed, as seen in the photograph 😊.
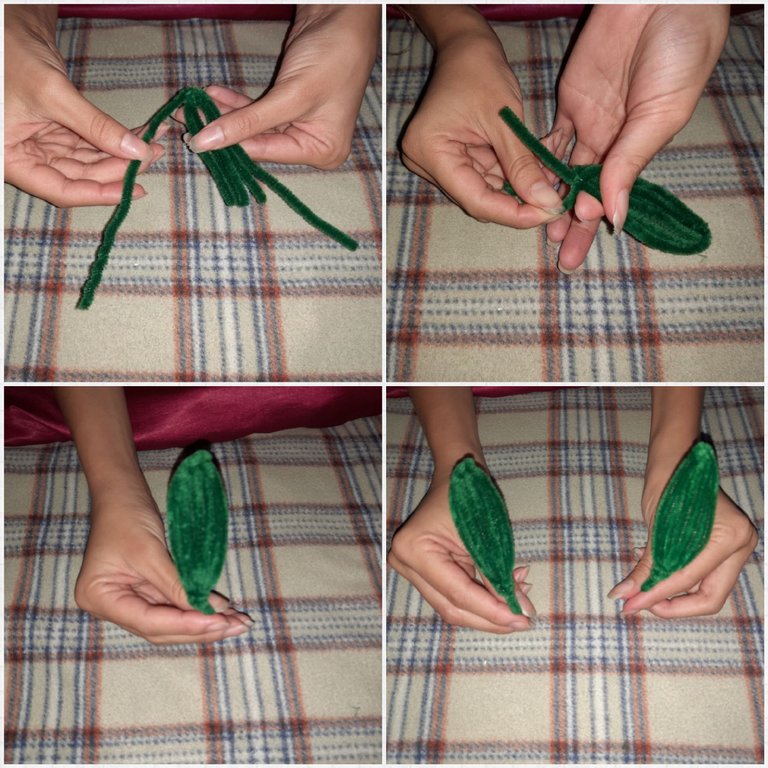
Paso 5:Tomamos un limpia pipas verde y lo cortamos a la mitad, para nuevamente doblar a la mitad, a continuación tomamos otro limpia pipas y lo atravesamos en medio de los dos que ya cortamos, y ponemos ambas en sentido opuesto como se mira en la fotografía. Seguidamente, torcemos ambas partes para dar firmeza a la pieza, y giramos las patitas mas largas hacia el otro lado, uniendo así las cuatro patitas de limpia pipas, y así darle forma de hoja, que irán a un costado de la flor.
Step 5: We take a green pipe cleaner and cut it in half, to fold it in half again, then we take another pipe cleaner and cross it in the middle of the two that we already cut, and we put both in the opposite direction as seen in the photograph. Next, we twist both parts to give firmness to the piece, and we turn the longest legs to the other side, thus joining the four pipe cleaner legs, and thus giving it the shape of a leaf, which will go to one side of the flower.

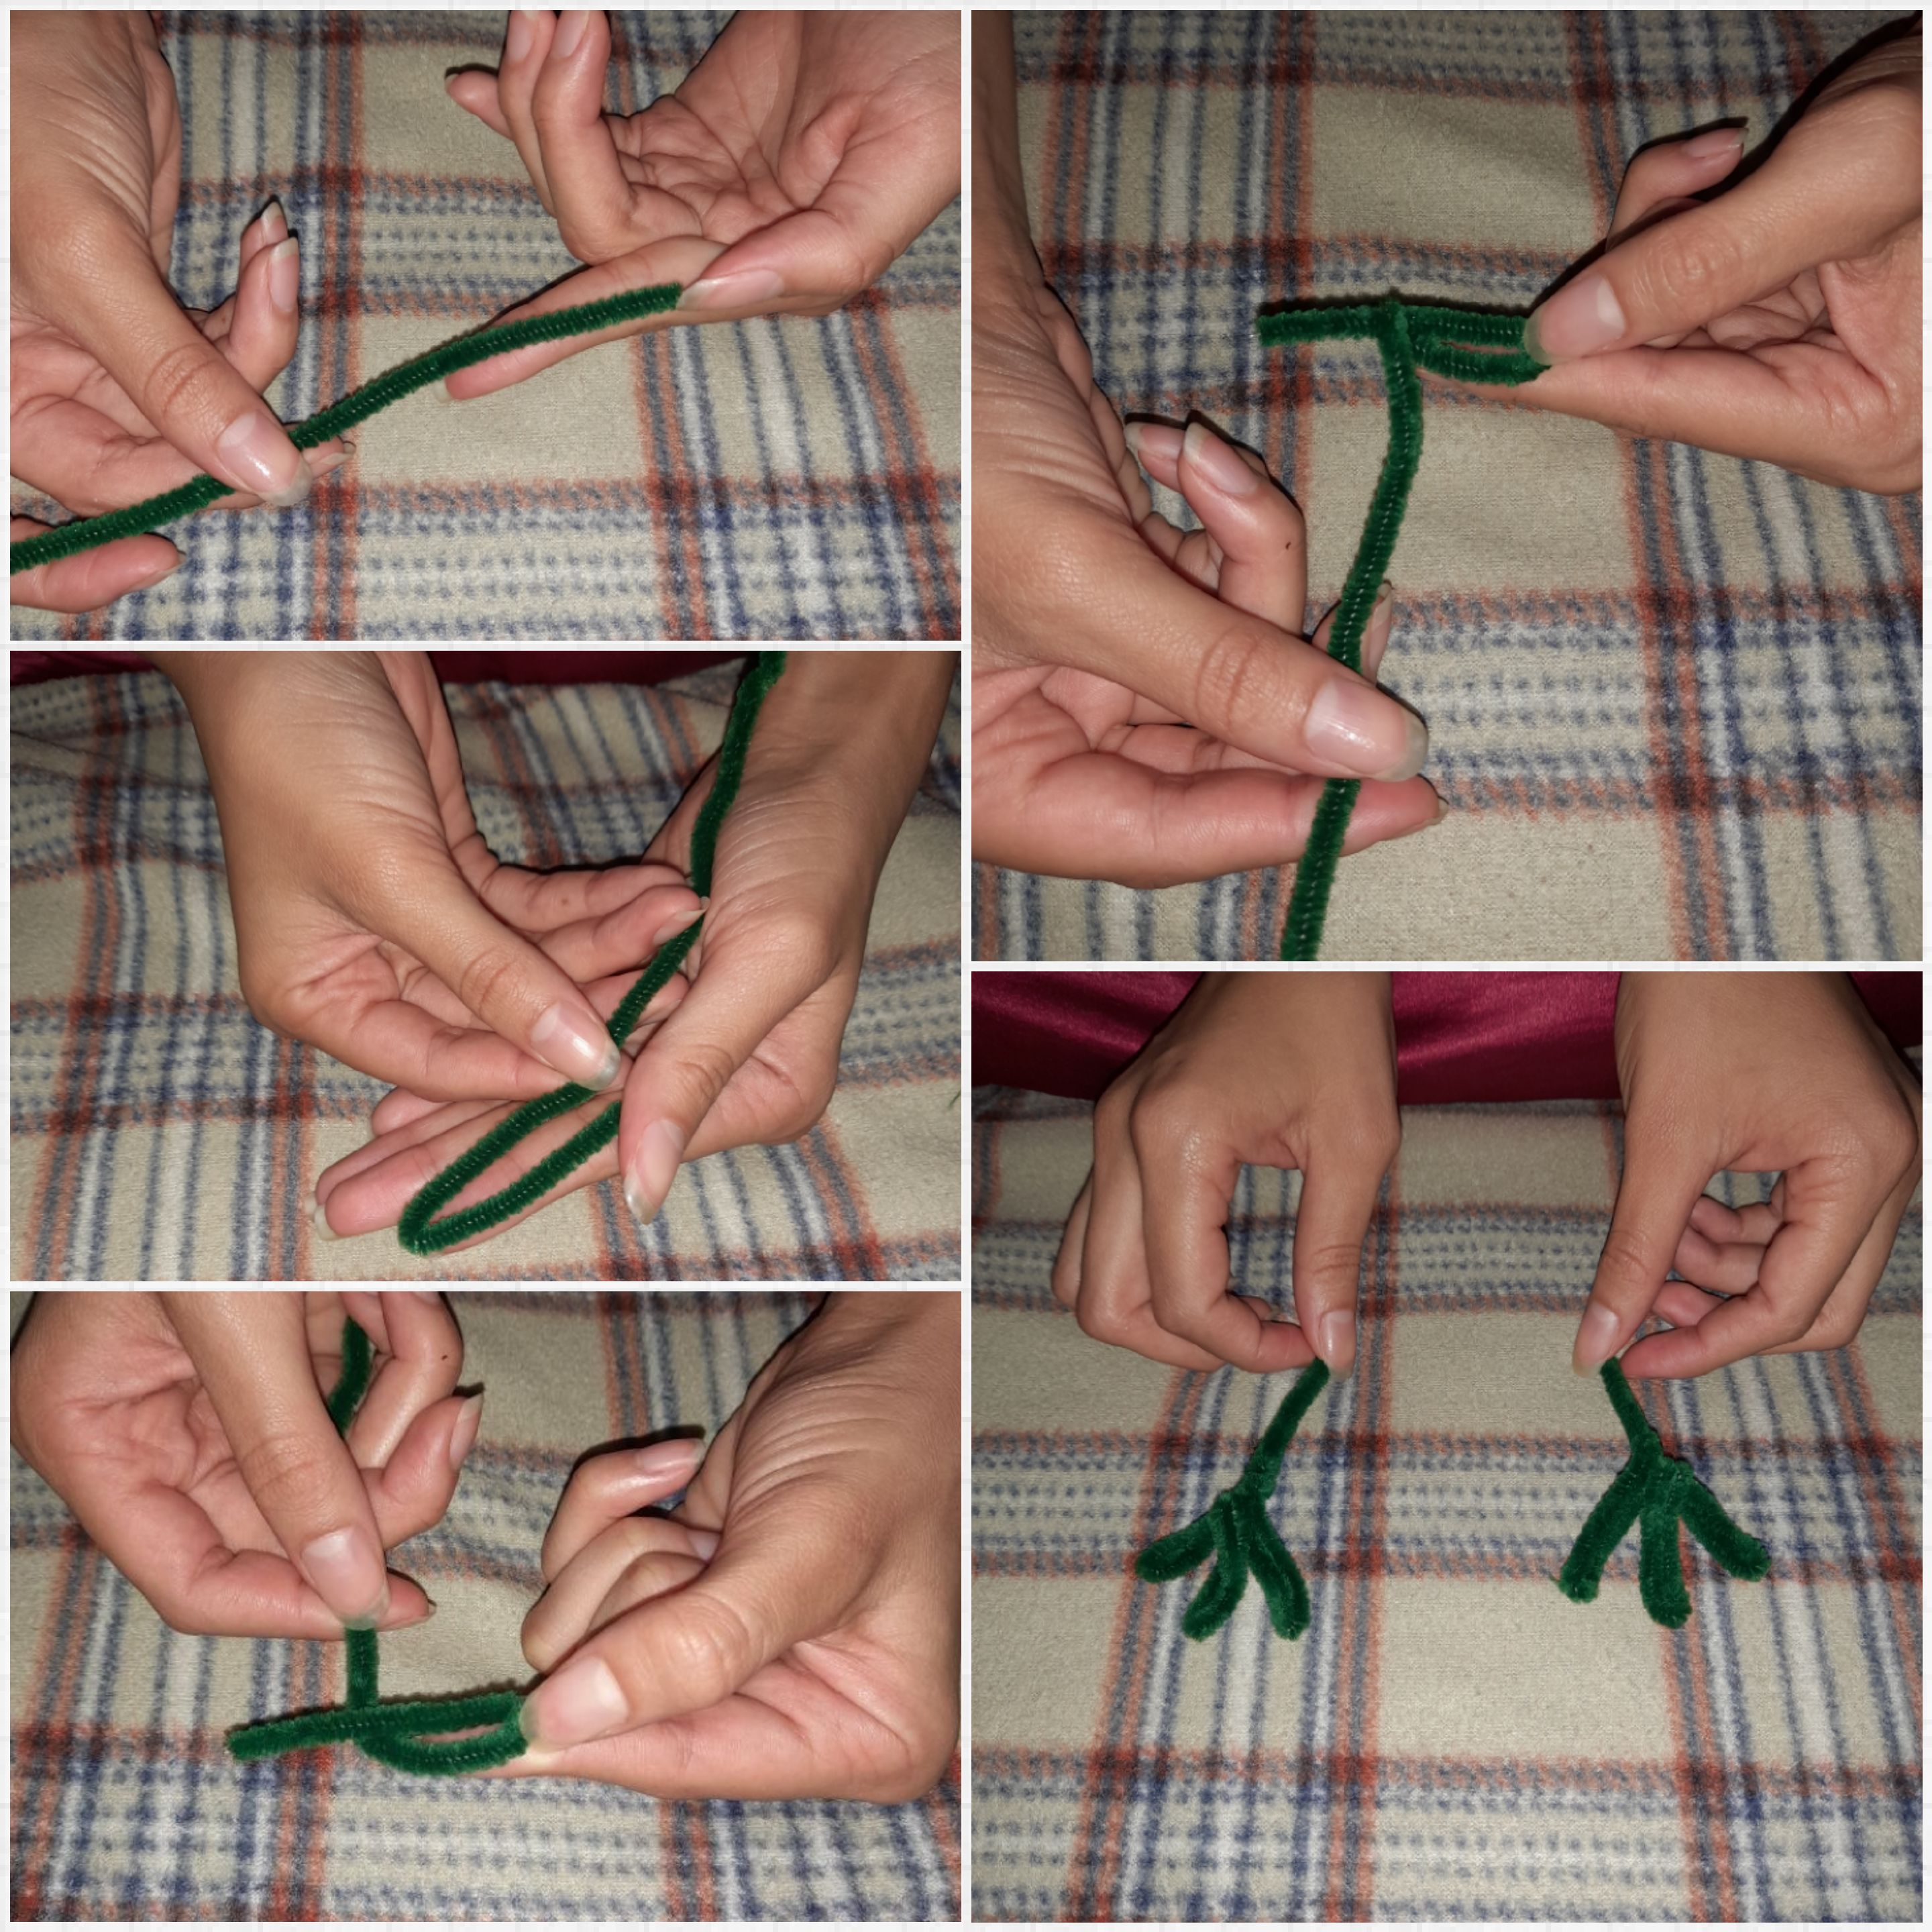
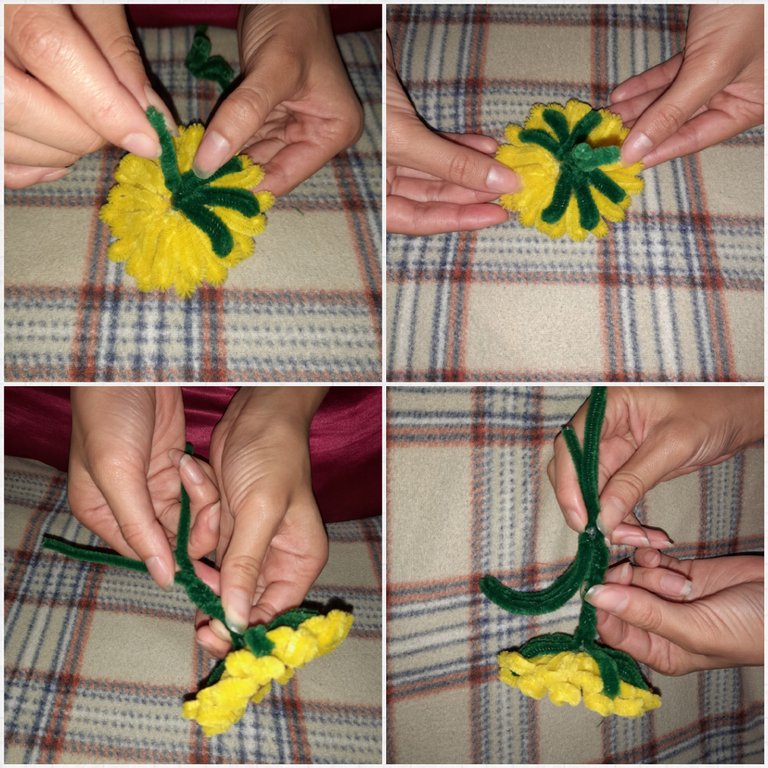
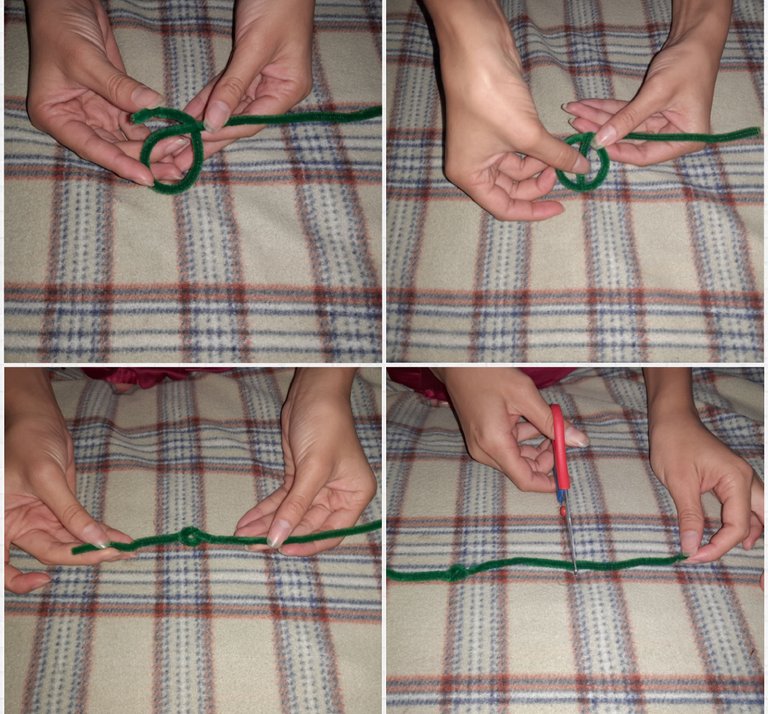
Paso 6: Próximamente, tomamos un limpia pipas de color verde y hacemos un doblés a la medida del dedo índice, y hacemos un nudo en su propio eje como se ve en la imágen, y así sucesivamente realizamos tres nuditos, los cuáles serán el tallo de nuestra flor, de estos haremos dos. Una vez hechas las tomamos y las pegamos con silicón debajo de nuestra flor, y a un costado les pegamos las hojitas hechas anteriormente.
Step 6: Next, we take a green pipe cleaner and we make a double to the size of the index finger, and we make a knot in its own axis as seen in the image, and so on we make three little knots, which will be the stem of our flower, of these we will make two. Once done, we take them and glue them with silicone under our flower, and on one side we glue the leaves made previously.
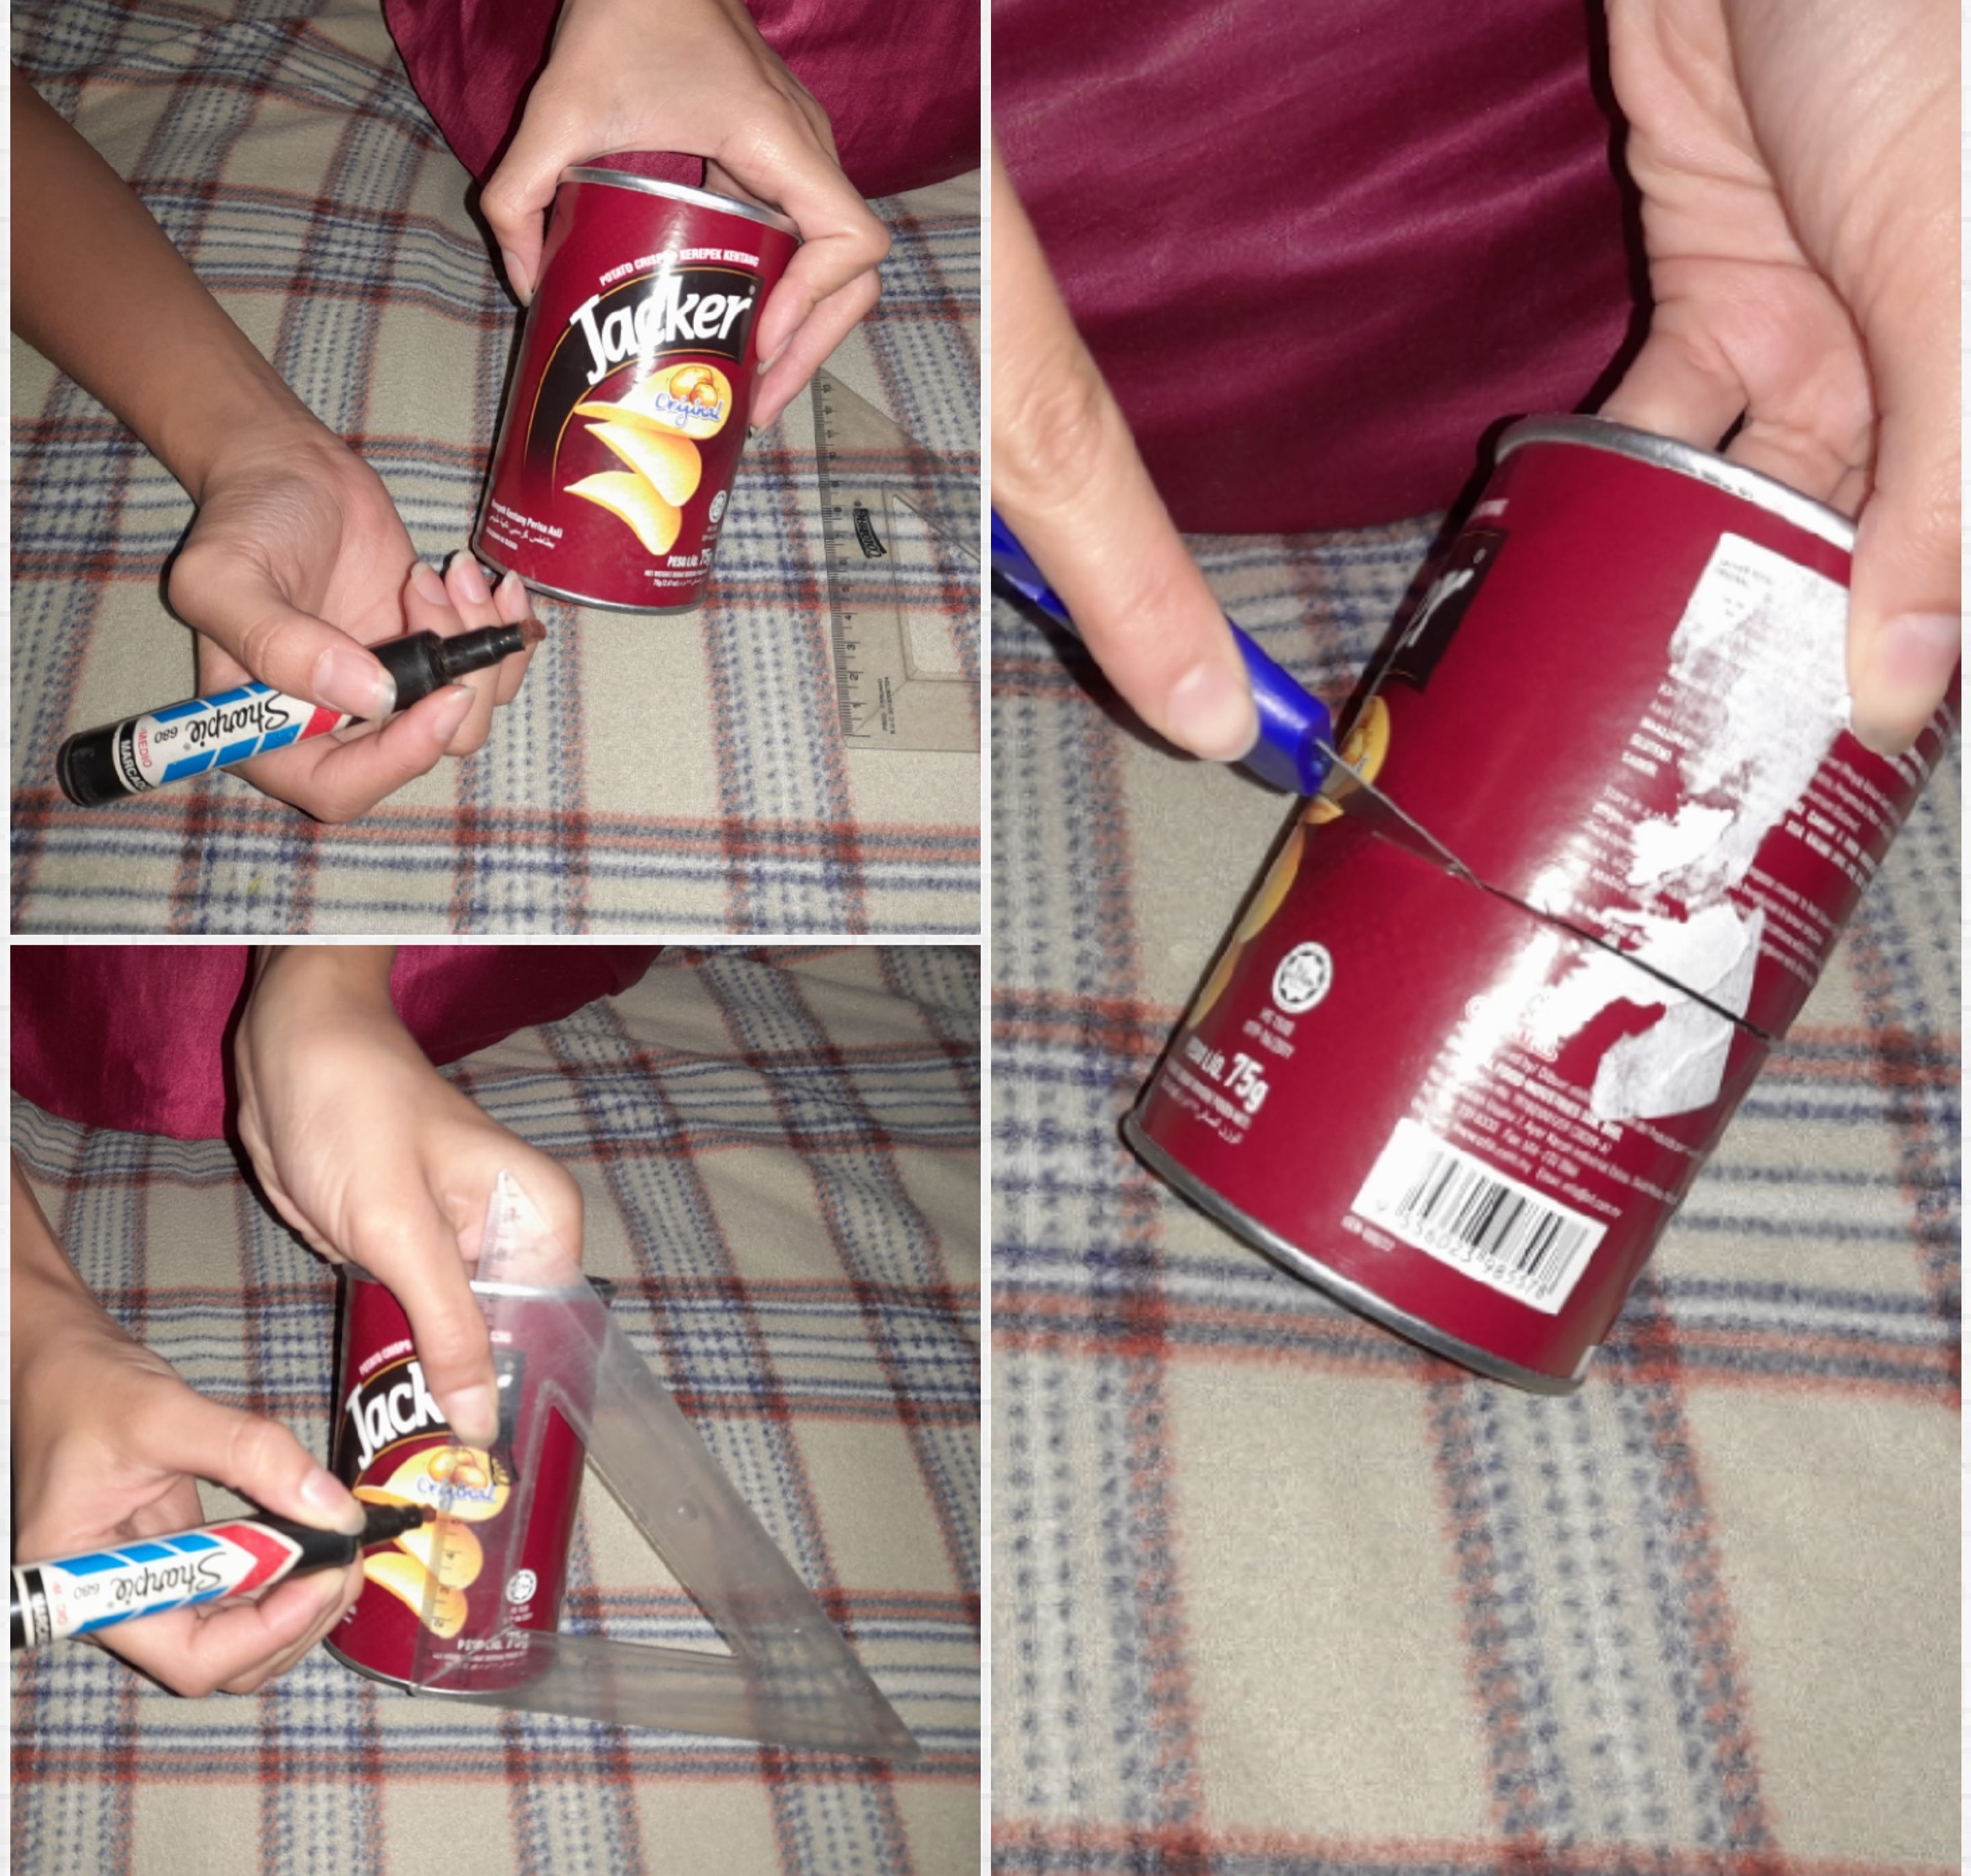
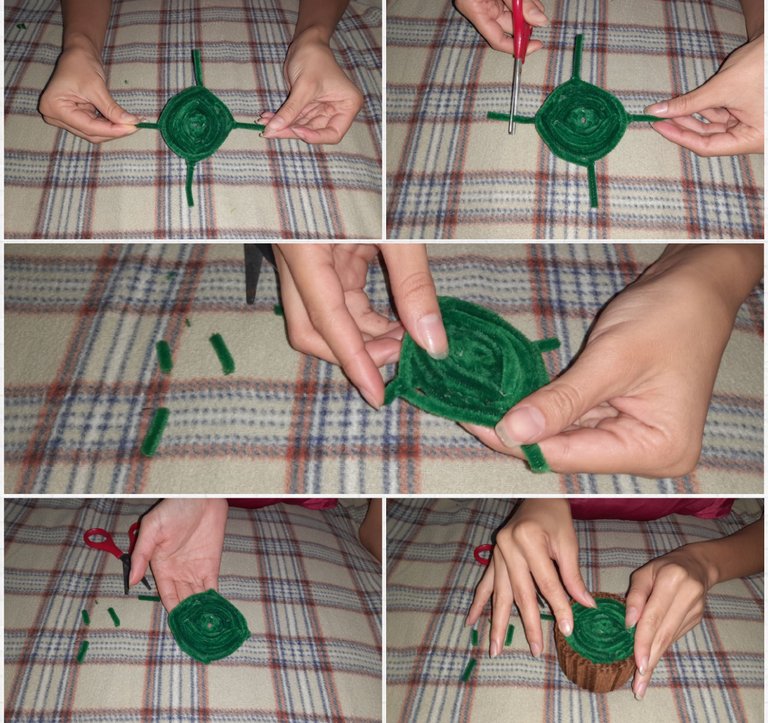
Paso 7: Luego tomamos nuestro envase y cortamos a la medida de 5cm, como está plasmado en la foto.
Step 7: Then we take our container and cut it to the size of 5cm, as shown in the photo.
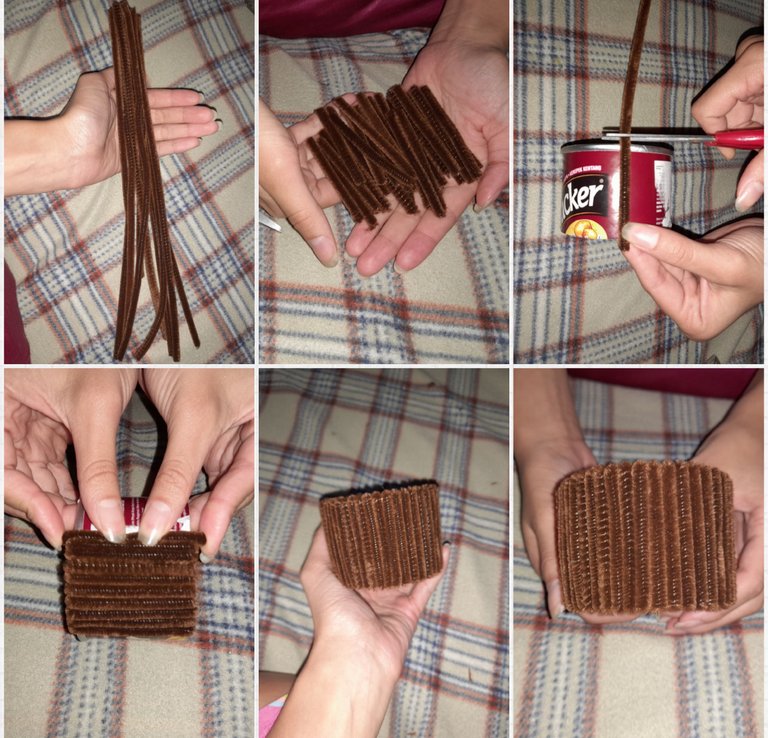
Paso 8: Posteriormente, cogemos nuestros limpia pipas de color marrón, y cortamos a la altura de 5,5cm, para pegar a los lados del envase, y darle forma de maceta.
Step 8: Later, we take our brown pipe cleaners, and cut at a height of 5.5cm, to stick to the sides of the container, and give it the shape of a pot.
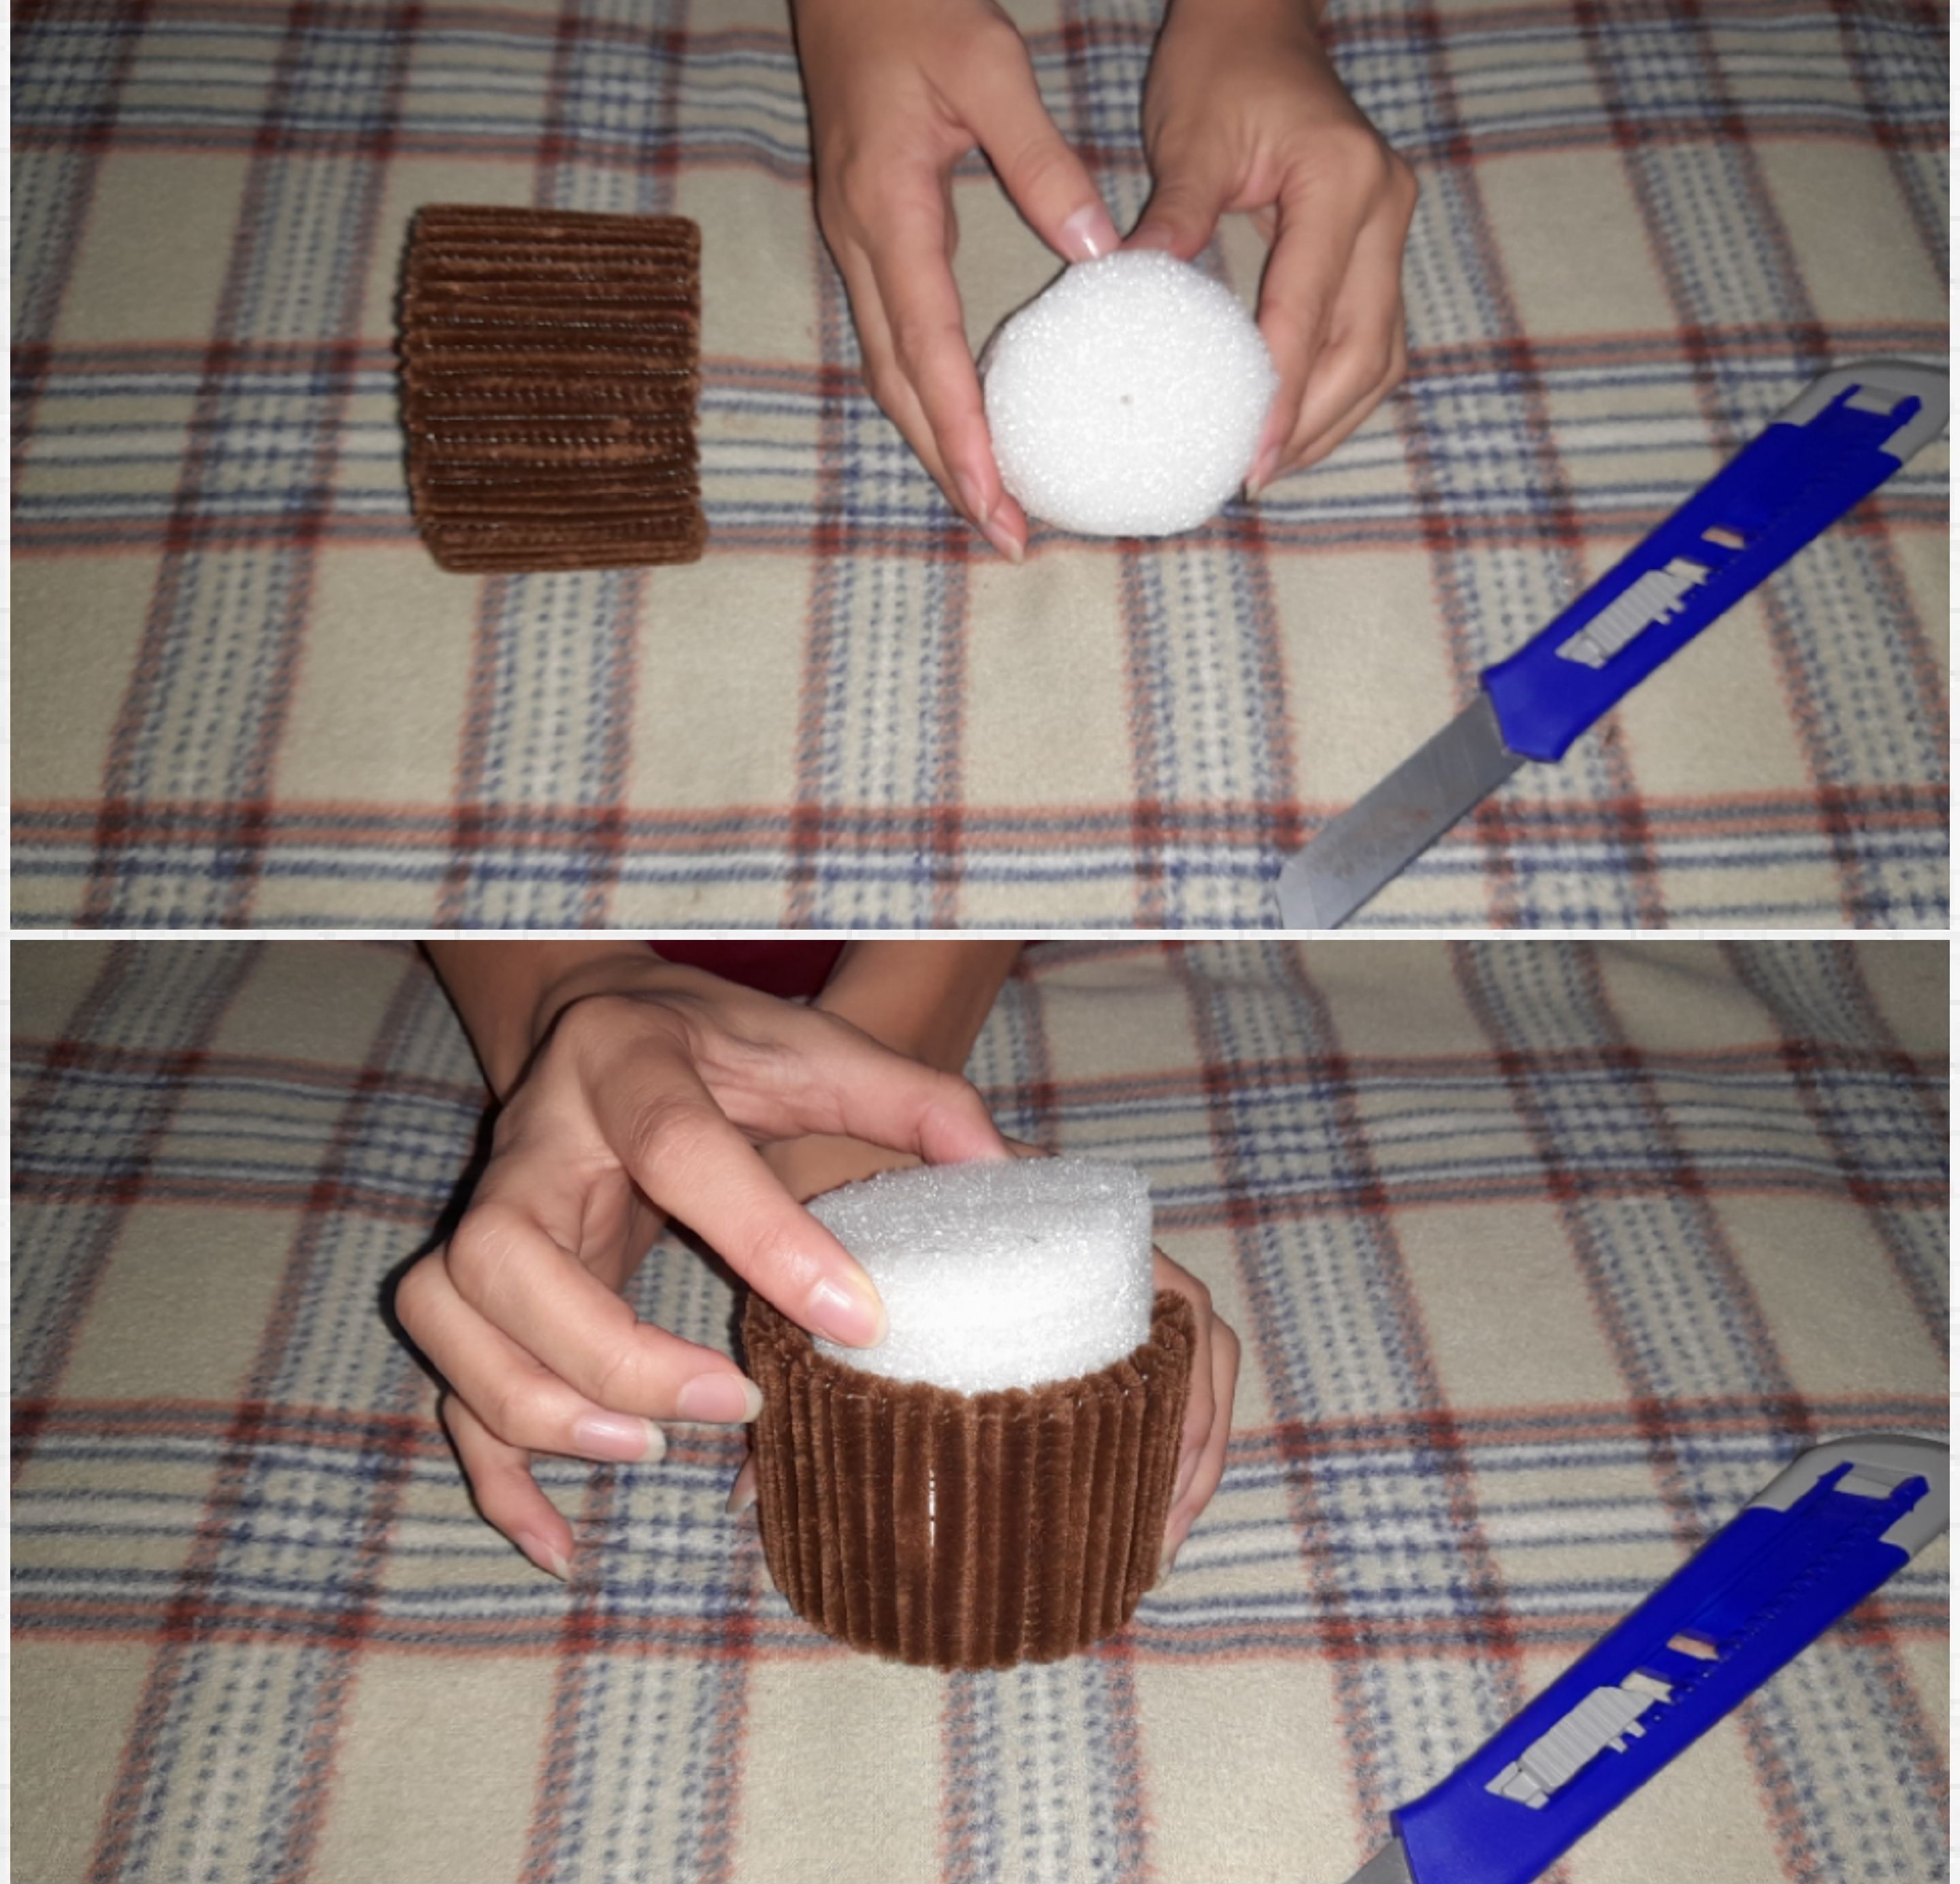
Paso 9: Luego, cortamos un pedazo de anime lo suficientemente grande para que entre en nuestra maceta y le de fuerza al momento de insertar nuestra flor.
Step 9: Next, we cut a piece of anime big enough to fit our pot and give it strength when inserting our flower.
Paso 10: A continuación realizaremos la grama de nuestra maceta, para este paso tomaremos un limpia pipas de color verde y le haremos un nudo que dejaremos a un costado del material, luego cortamos dejando partes iguales a partir del nudo, al cual le iremos añadiendo de forma circular mas material, para que al final nos de una forma circular capaz de cubrir la maceta como se ve en la fotografía, por último cortamos el sobrante, pegamos a la maceta, e insertamos nuestra flor en el medio, obteniendo como resultado un hermoso girasol, con materiales muy económicos.😊🤗
Step 10: Next we will make the grass for our pot, for this step we will take a green pipe cleaner and we will make a knot that we will leave on one side of the material, then we cut leaving equal parts from the knot, to which we will add more material in a circular way, so that in the end we have a circular shape capable of covering the pot as seen in the photograph, finally we cut the excess, glued to the pot, and inserted our flower in the middle, obtaining as a result a beautiful sunflower, with materials very cheap.😊🤗
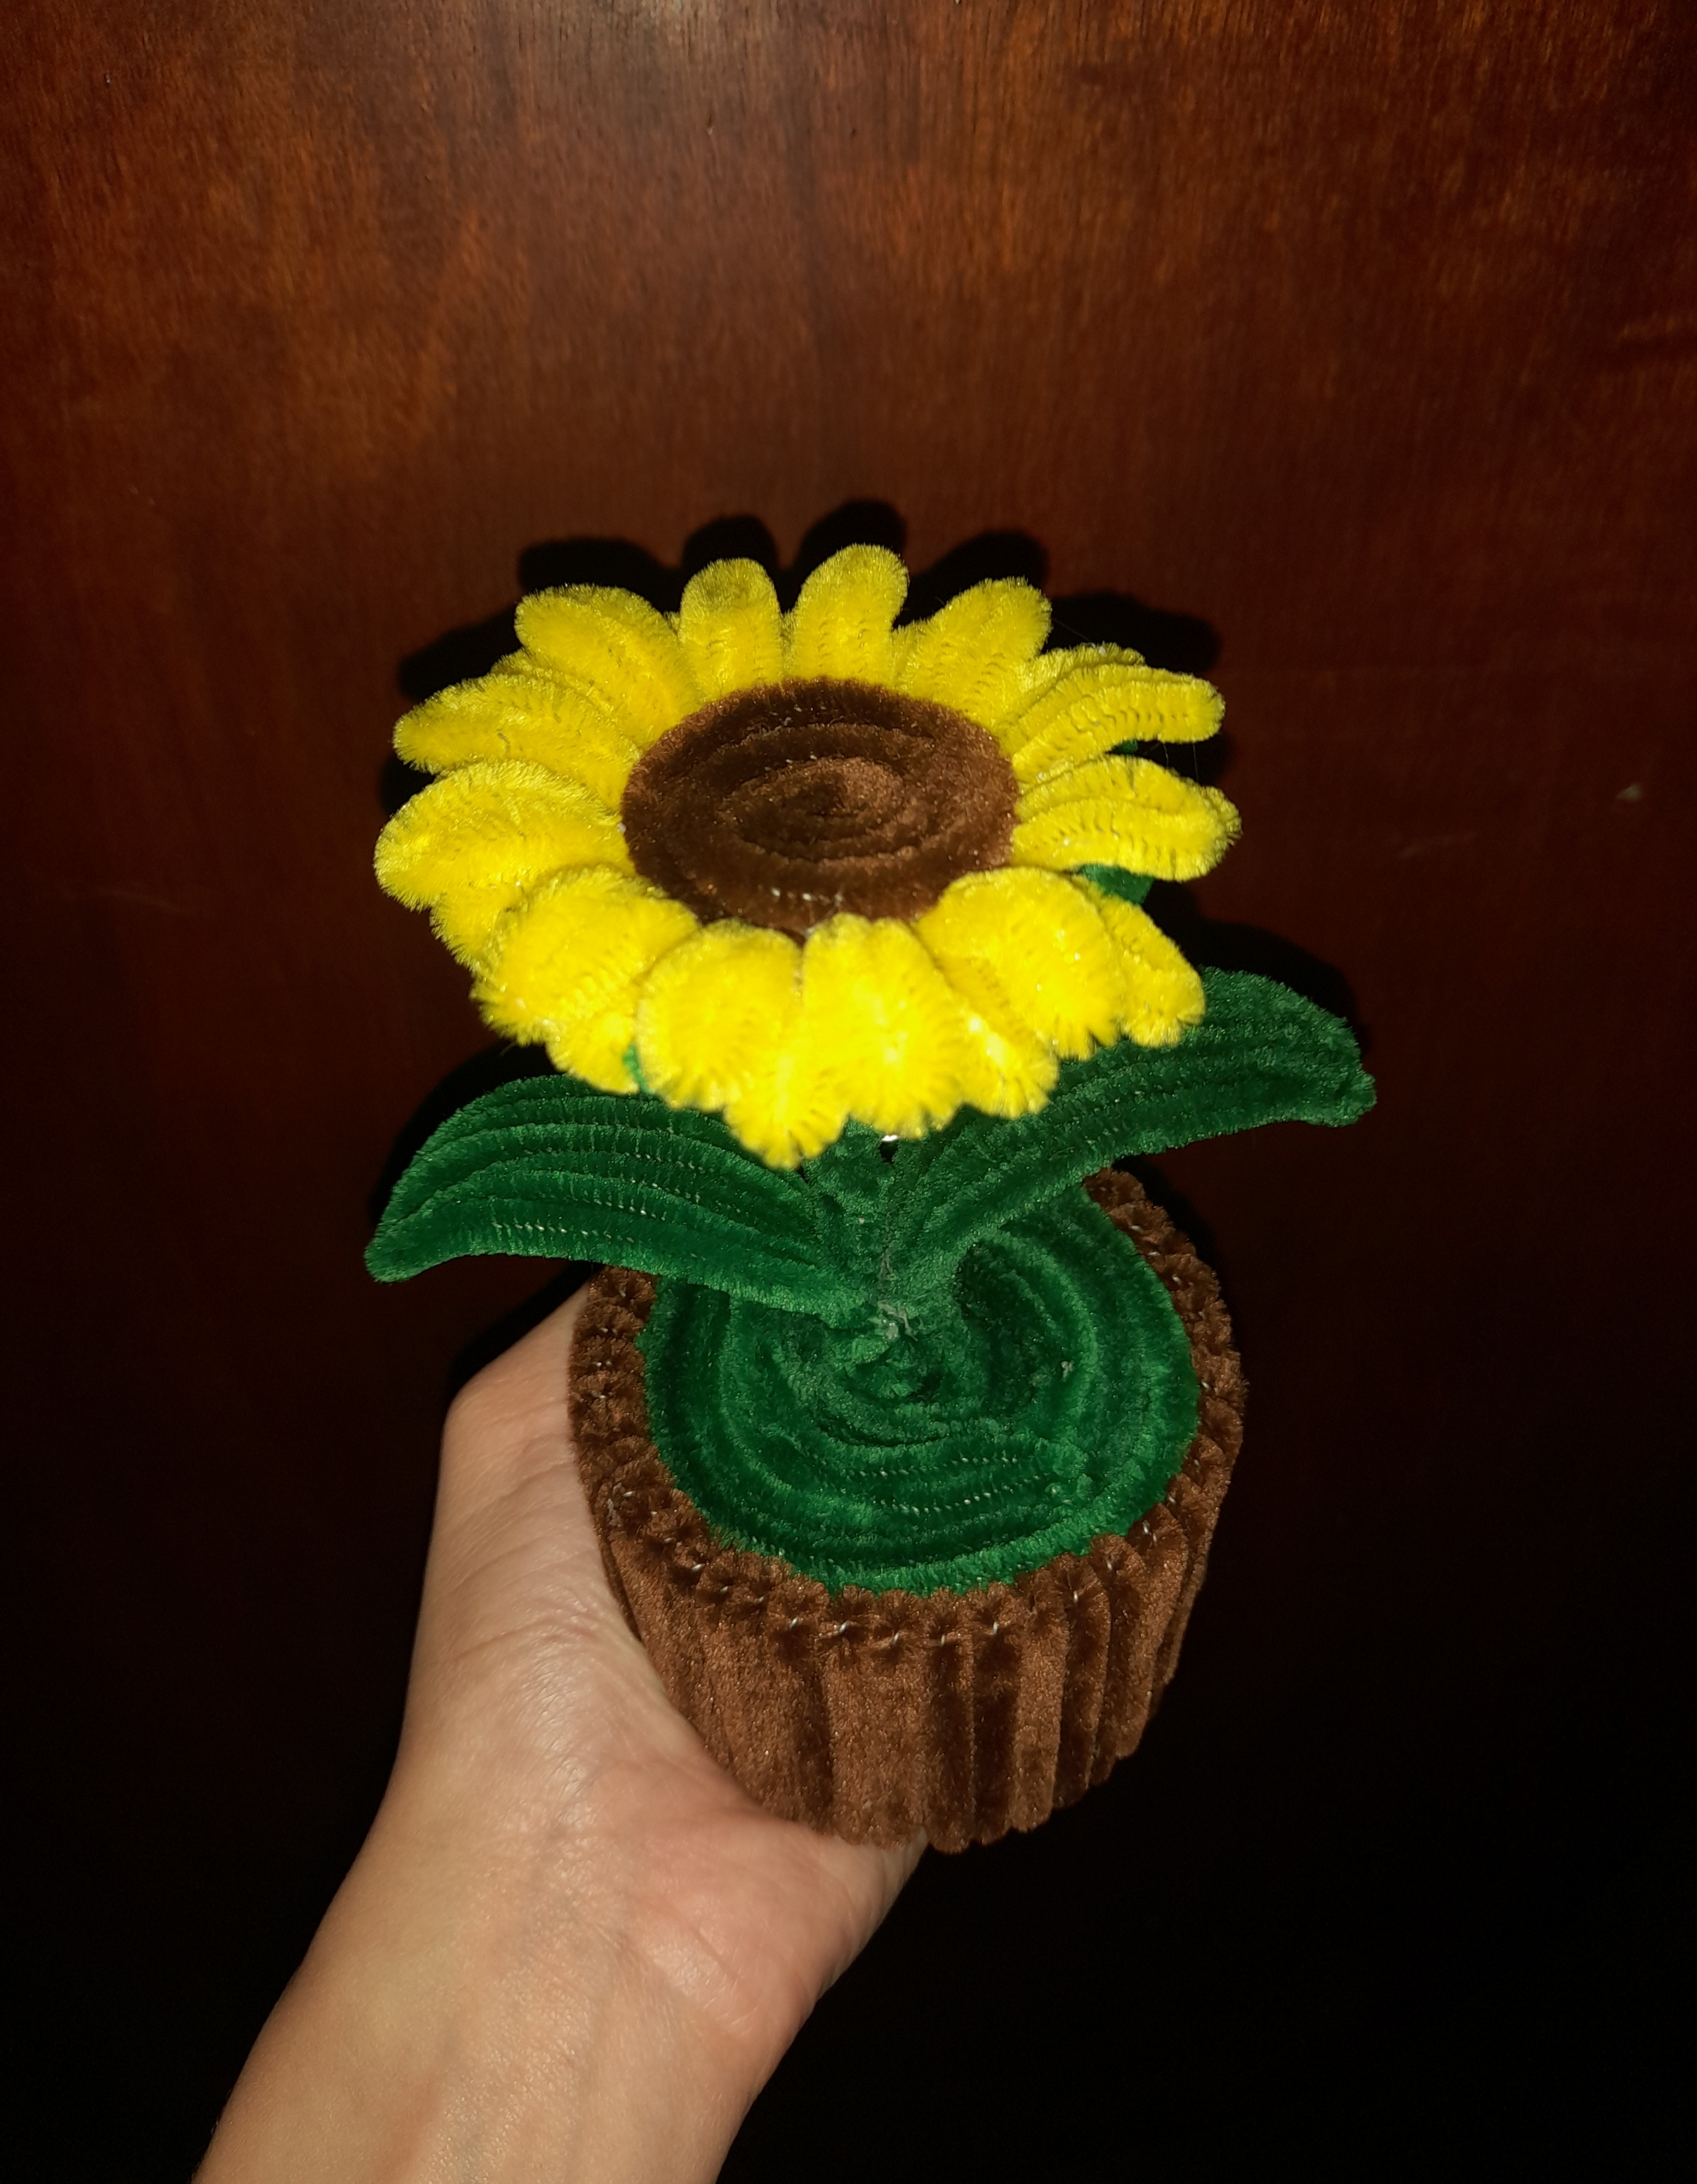
Amigos acá pueden observar el resultado, reconozco que da mucho trabajo jaja pero al final obtenemos una hermosa flor para obsequiar o adornar cualquier parte del hogar, besitos.😘😘
Friends here you can see the result, I admit that it takes a lot of work haha but in the end we get a beautiful flower to give as a gift or decorate any part of the home, kisses.😘😘
GRACIAS POR VISITAR MI POST, QUE TENGAN UN LINDO DÍA
THANKS FOR VISITING MY POST, HAVE A NICE DAY
Todo el contenido es de mi autoría y las imágenes son de mi propiedad @luisangelis
All content is my own and the images are my property @luisangelis