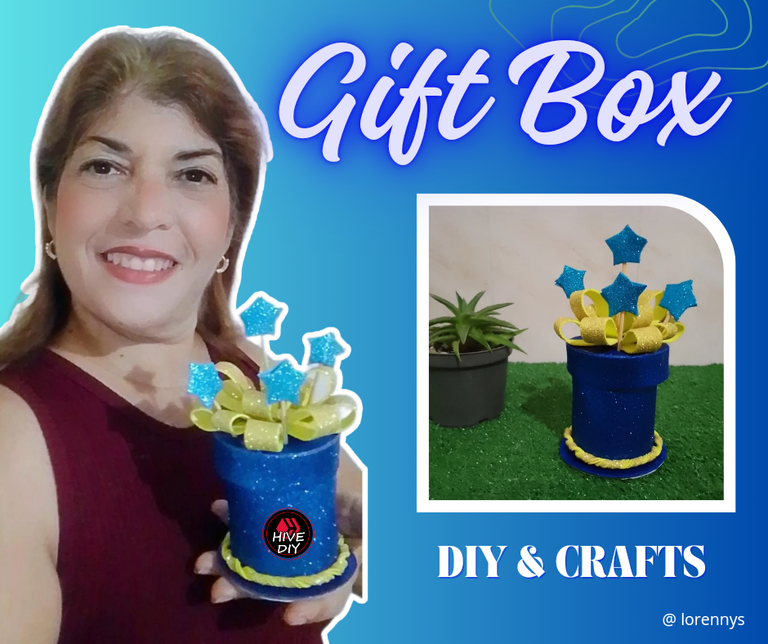
Saludos amigos de Hive y de esta estupenda comunidad, espero que todos se encuentren sanos y felices, es para mí un placer compartir con ustedes una vez más este proyecto creativo que espero sea de su agrado.
A veces las finanzas están cuesta arriba y se complica a la hora de tener un detalle especial con alguien, así que si no tienes dinero puedes sorprender con este regalo lindo y económico.
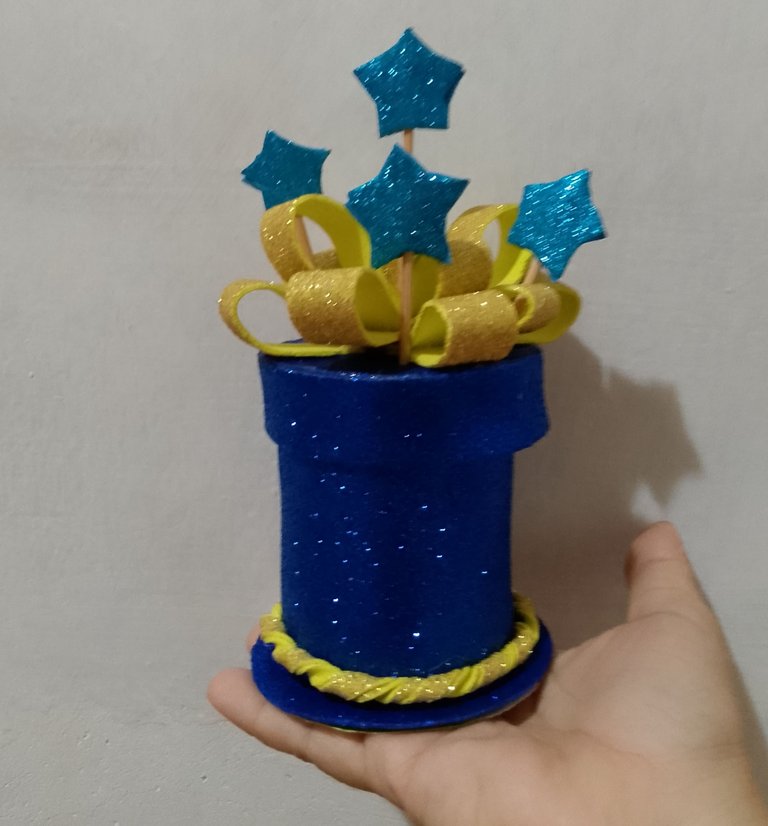
Esta caja tiene una bonita presentación y solo debemos colocar adentro el obsequio que pueden ser golosinas, lazos, prendas o cualquier otro detalle que queramos ofrecer. Quédate conmigo hasta el final y verás qué fácil y bonita es esta caja de regalo.
Greetings friends of Hive and this great community, I hope everyone is healthy and happy, it is a pleasure for me to share with you once again this creative project that I hope will be to your liking.
Sometimes finances are uphill and it gets complicated when it's time to have a special detail with someone, so if you don't have money you can surprise with this nice and economical gift.
This box has a nice presentation and we only have to put inside the gift that can be sweets, ribbons, clothes or any other detail that we want to offer. Stay with me until the end and you will see how easy and beautiful this gift box is.
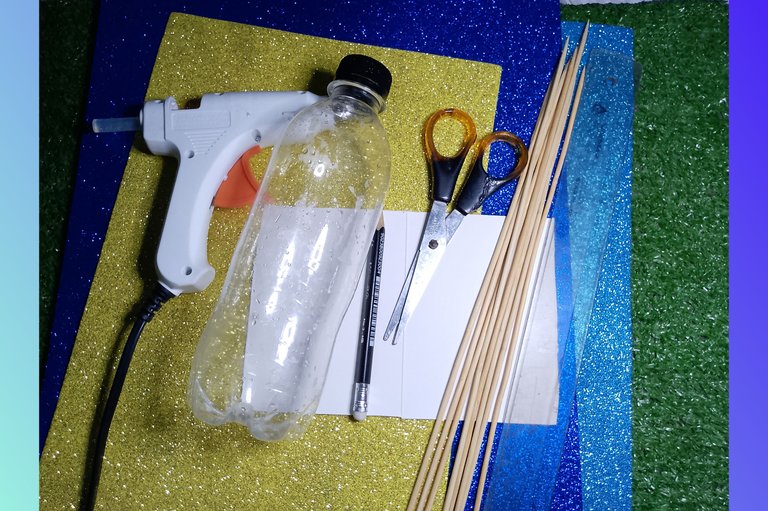
Materiales que utilicé para realizar esta hermosa caja de regalo.
✓ Foami diversos colores
✓ Botella Plástica
✓ Tijeras
✓ Lápiz
✓ Regla
✓ Silicón
✓ Palillos
✓ Molde de Estrella
✓ Cartón
Materials I used to make this beautiful gift box.
✓ Foami various colors
✓ Plastic bottle
✓ Scissors
✓ Pencil
✓ Ruler
✓ Silicone
✓ Chopsticks
✓ Star Mold
✓ Cardboard
Paso a paso para realizar este proyecto creativo.
Paso Uno:
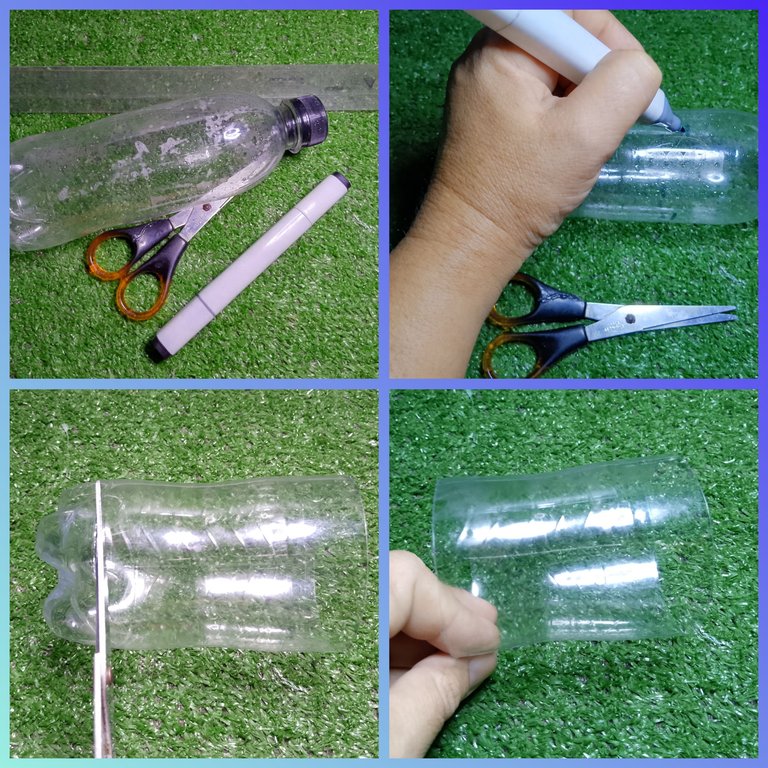
Con la botella plástica pequeña, desprendí la parte superior e inferior de la misma, tomando el centro con una medida de 8 cm.
Step by step to make this creative project.
Step One:
Using the small plastic bottle, I peeled off the top and bottom of the bottle, taking the center measuring 8cm.
Paso Dos:
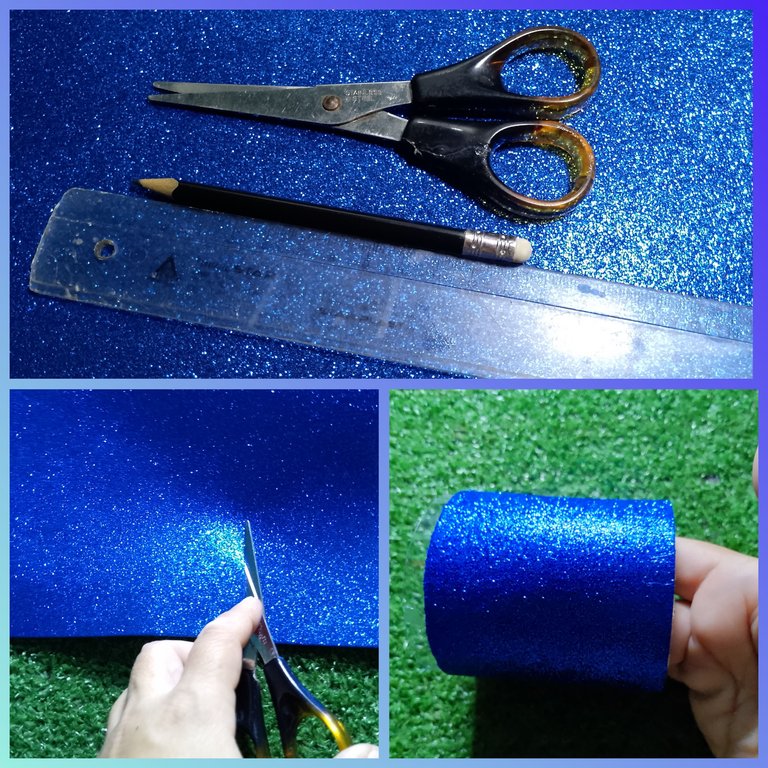
Tomé el foami y elaboré un listón de 6 cm por 20 cm y con él cubrí la parte del centro de la botella que obtuve en el paso anterior.
Step Two:
I took the foami and made a 6 cm by 20 cm ribbon and with it I covered the part in the center of the bottle that I obtained in the previous step.
Paso Tres :
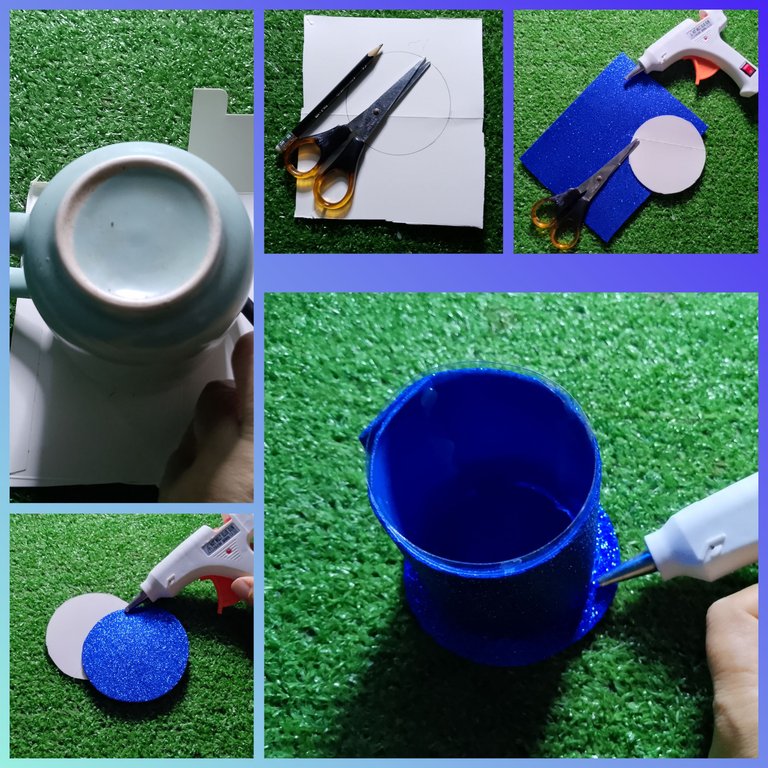
Con la ayuda de una taza, realicé un círculo de 10 cm de radio que utilicé como base del centro de la botella que ya recorte y forré con el foami en el paso anterior como muestra la imagen.
Step Three :
With the help of a cup, I made a circle of 10 cm radius that I used as the base of the center of the bottle that I already cut out and lined with the foami in the previous step as shown in the image.
Paso Cuatro:
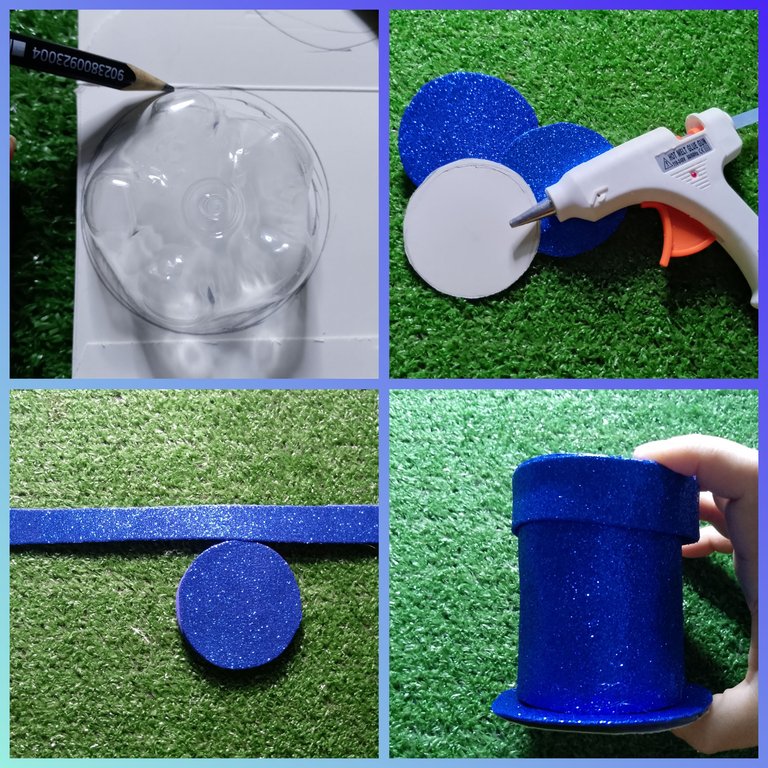
En este paso tomé lo que era la parte inferior de la botella, realicé un círculo de cartón y lo forré por ambas caras con el foami además realicé una tira de 1.5 cm por 25 CM que le coloqué alrededor para hacer una tapa.
Step Four:
In this step I took what was the bottom of the bottle, made a cardboard circle and lined it on both sides with the foami and also made a strip of 1.5 cm by 25 CM that I placed around it to make a lid.
Paso Cinco:
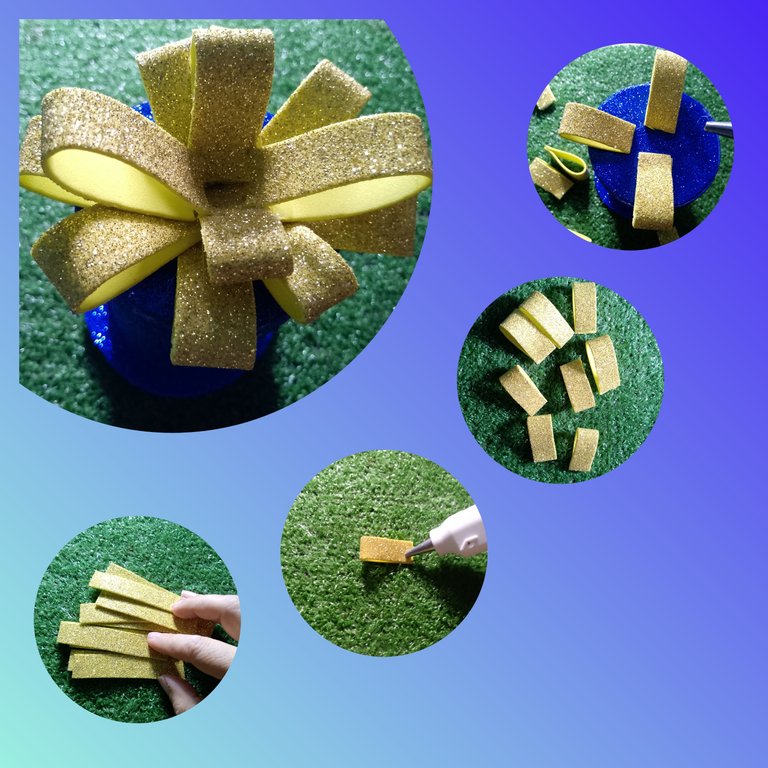
Ya estamos llegando casi al final de nuestro proyecto en vista de que la caja está lista, solo nos queda decorar la tapa lo cual haremos cortando cintas de foami que serán de 28 * 5 cm a ellas las pegaremos en los extremos para colocarlas sobre la tapa hasta formar un moño, adicional estaremos haciendo dos tiras de medio centímetro por 25 de largo que iremos enrollando y pegando en la parte inferior.
Step Five:
We are almost at the end of our project in view of the fact that the box is ready, we just have to decorate the lid which we will do by cutting foami ribbons that will be 28 * 5 cm to them we will glue them at the ends to place them on the lid to form a bow, in addition we will be making two strips of half a centimeter by 25 long that we will be rolling and gluing at the bottom.

Paso Seis:
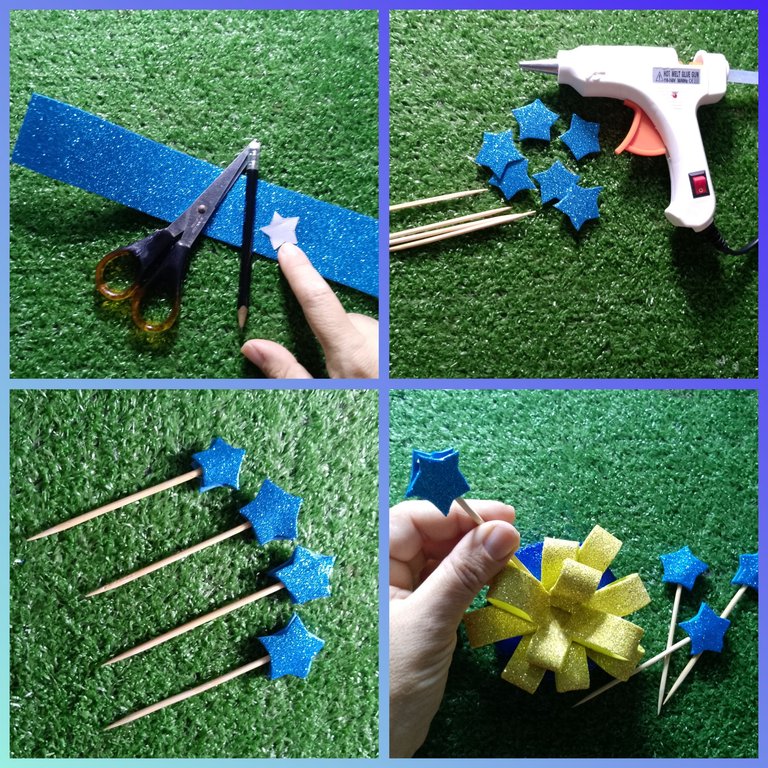
En este último paso realicé ocho estrellas ya que las pegaría en los palillos por ambas caras para que decoraran el moño de la tapa superior para darle un toque de más elegancia y vistosidad a nuestra hermosa cajas de regalo.
Step Six:
In this last step I made eight stars as I would glue them on the toothpicks on both sides to decorate the bow on the top lid to give a touch of more elegance and showiness to our beautiful gift boxes.
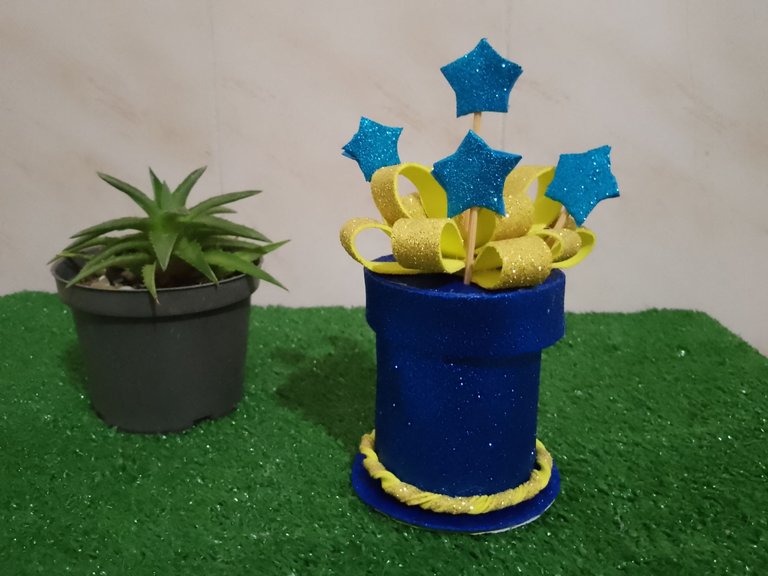
Siguiendo estos sencillos pasos hemos llegado al final de nuestra hermosa tarea creativa del día de hoy el cual espero les haya gustado y que sirva de inspiración a otros para que se animen a realizarlo.
Recuerden que lo más importante es dejar volar la imaginación y divertirnos puedes añadirle cualquier otro detalle que sea de tu preferencia y se adapte más a lo que deseas regalar.
Hasta la próxima publicación éxitos y bendiciones para todos.
Todas las imágenes son de mi propiedad, capturadas con mi Tecno Spark 10 pro.📸 Editadas con GridArt versión gratuita.
Imagen principal y Banner final editado con Canva versión libre.
🔁Deeptraductor fue utilizado para esta publicación.📶
Following these simple steps we have reached the end of our beautiful creative task today which I hope you liked it and that it will inspire others to do it.
Remember that the most important thing is to let your imagination fly and have fun, you can add any other detail that is of your preference and adapts more to what you want to give as a gift.
Until the next publication success and blessings to all.
All images are my property, captured with my Tecno Spark 10 pro.📸 Edited with GridArt free version.
Main image and final Banner edited with Canva free version.
🔁Deeptranslator was used for this publication.📶
