
This week at my daughter's elementary school is Reading Across America Week. Each day of the week is designated to a various spirit day that corresponds with books. After Gabby was dressed and ready to go on Monday, I remembered it was pajama day on our way out the door. I was sick on Monday night and couldn't muster the strength, or creativity, on Tuesday morning for crazy socks day. I did manage to pull something together last-minute for dress wacky day on Wednesday.
I knew I would have to go hard or go home for crazy hat day. I managed to have all the materials at home. While I didn't have a compass to draw perfect circles, I did manage to find some traceable household items that were round and about the same size as I wanted the hat to be. Check out the process below ⬇️
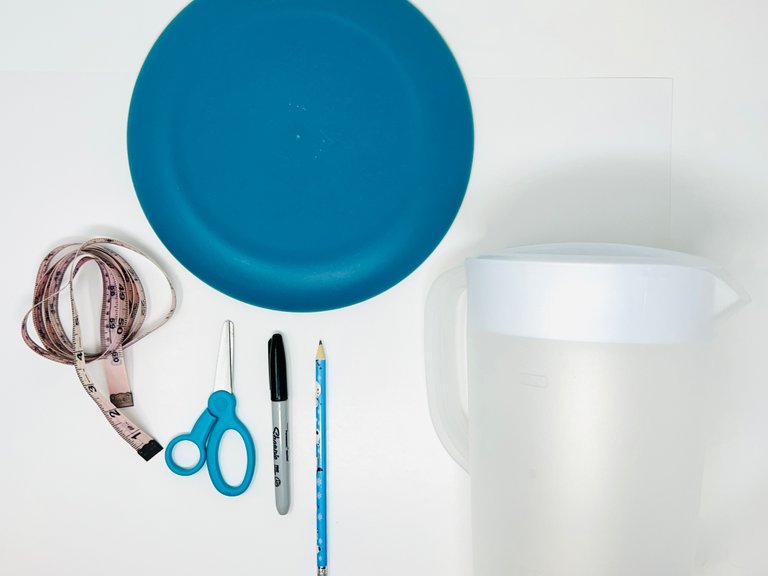
Materials:
- White cardstock poster board paper
- Scissors
- Hot glue gun
- Ruler
- Compass (or circular items to trace)
- Pencil
- Marker
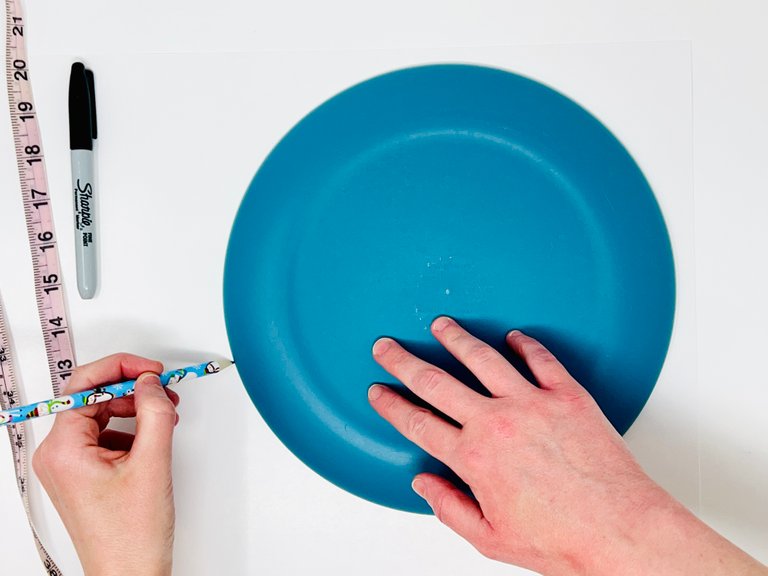
Step 1: Draw the large outer circle (hat brim).
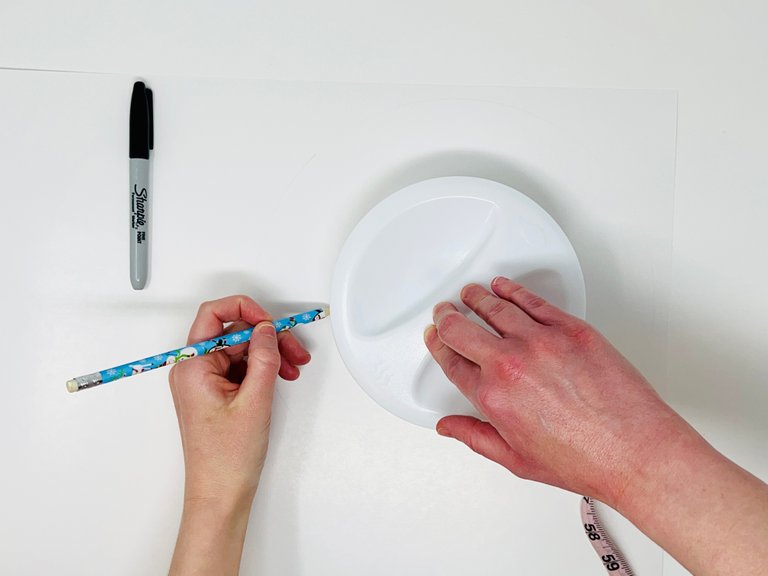
Step 2: Draw the smaller inner circle (hat crown) in the center of the large circle from step one.
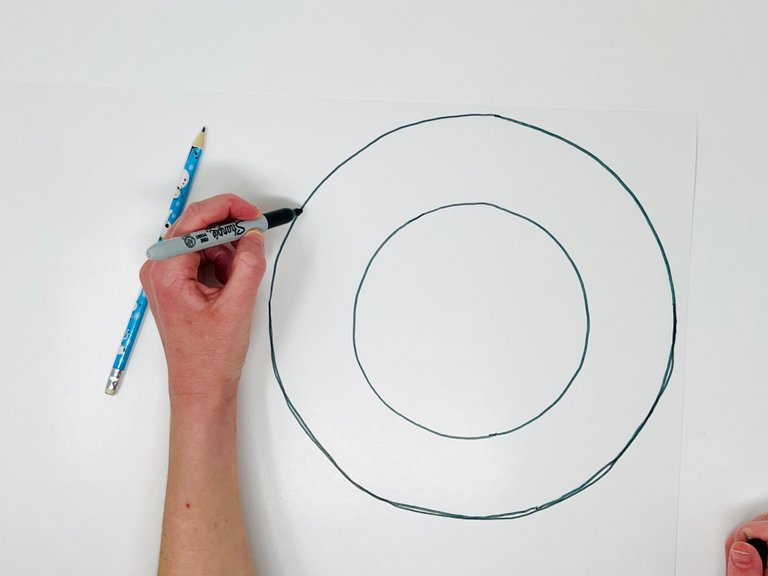
Step 3: Trace your pencil drawing with the marker.

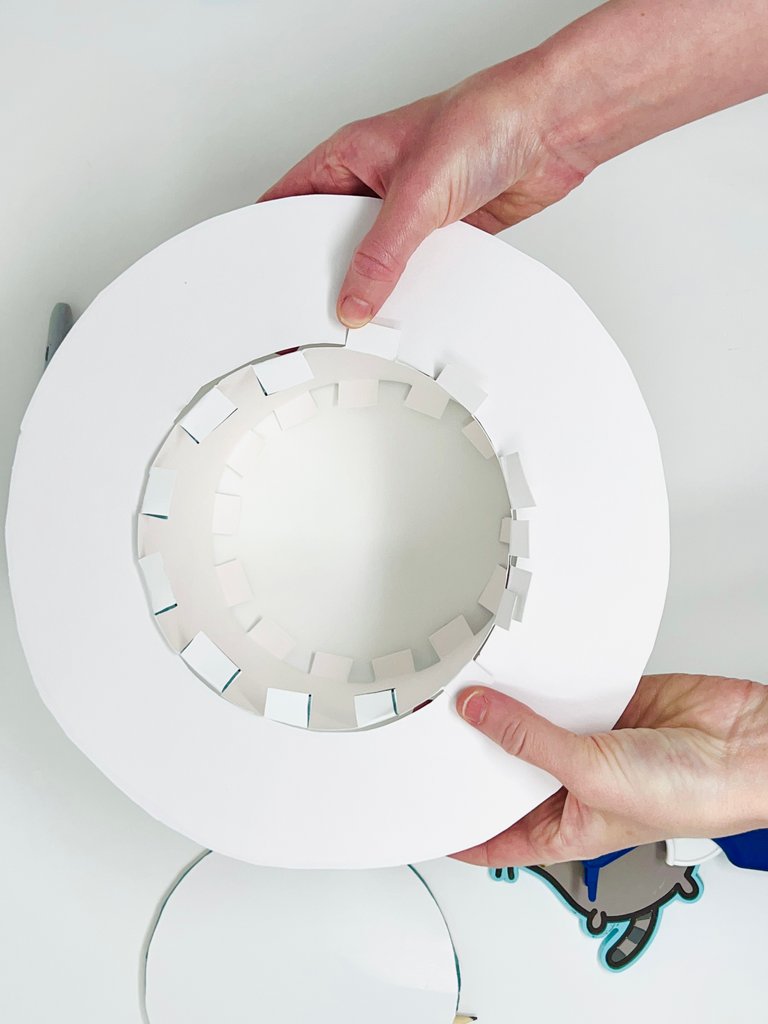
Step 4: Cut out the inner circle (crown) and save it to glue on the top.
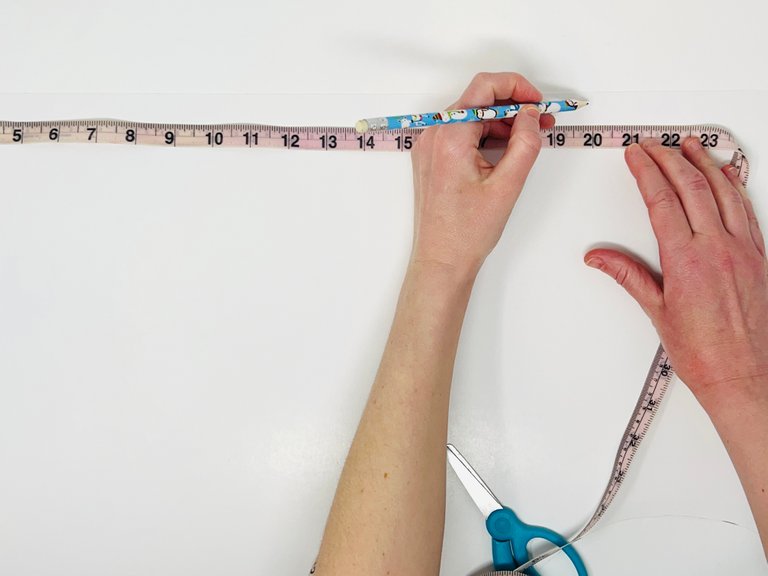
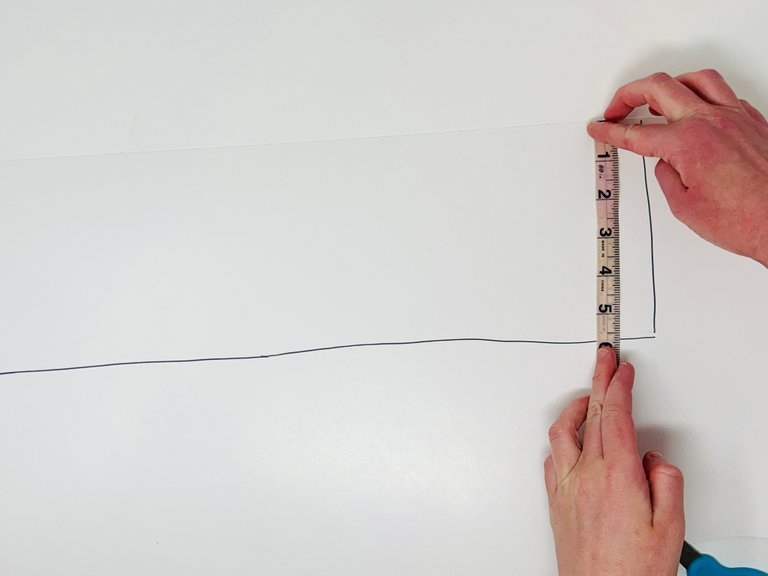
Step 5: Measure out a strip of cardstock paper that is the same length as the circumference of the inner circle. The height should be about 1.5" higher than you want the hat crown to be (for cutting the glue tabs).
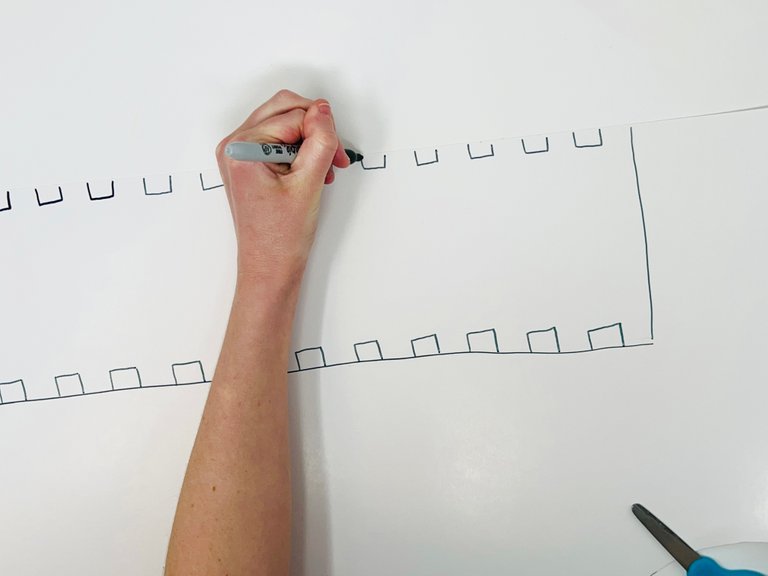
Step 6: Draw half-inch squares length-wise along both sides of the strip of cardstock paper (See pictured above).
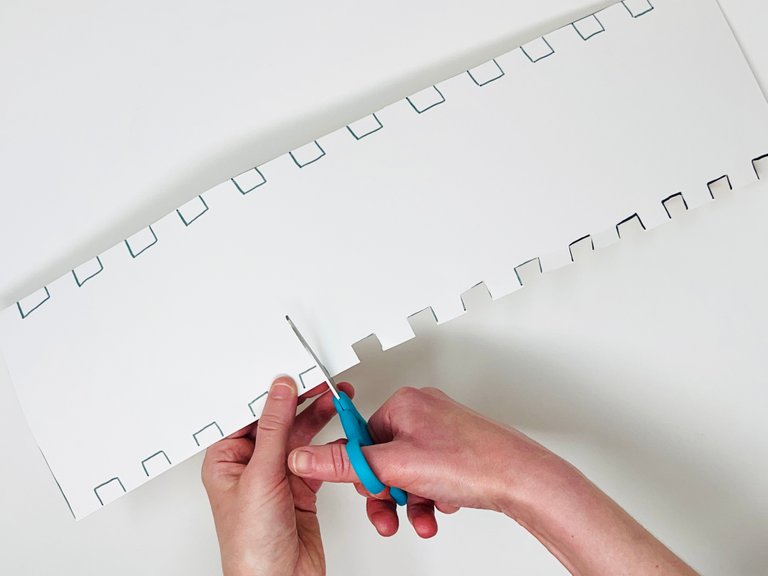
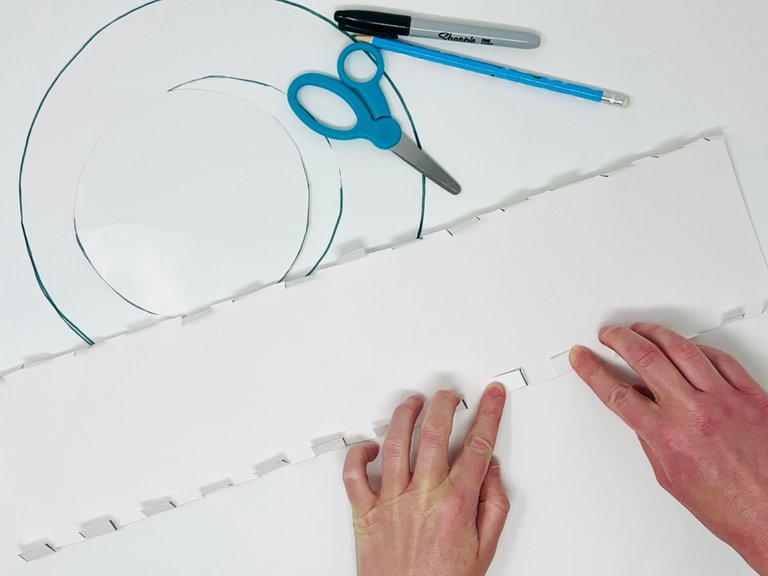
Step 7: Cut out the squares to create the glue tabs. Fold the tabs.
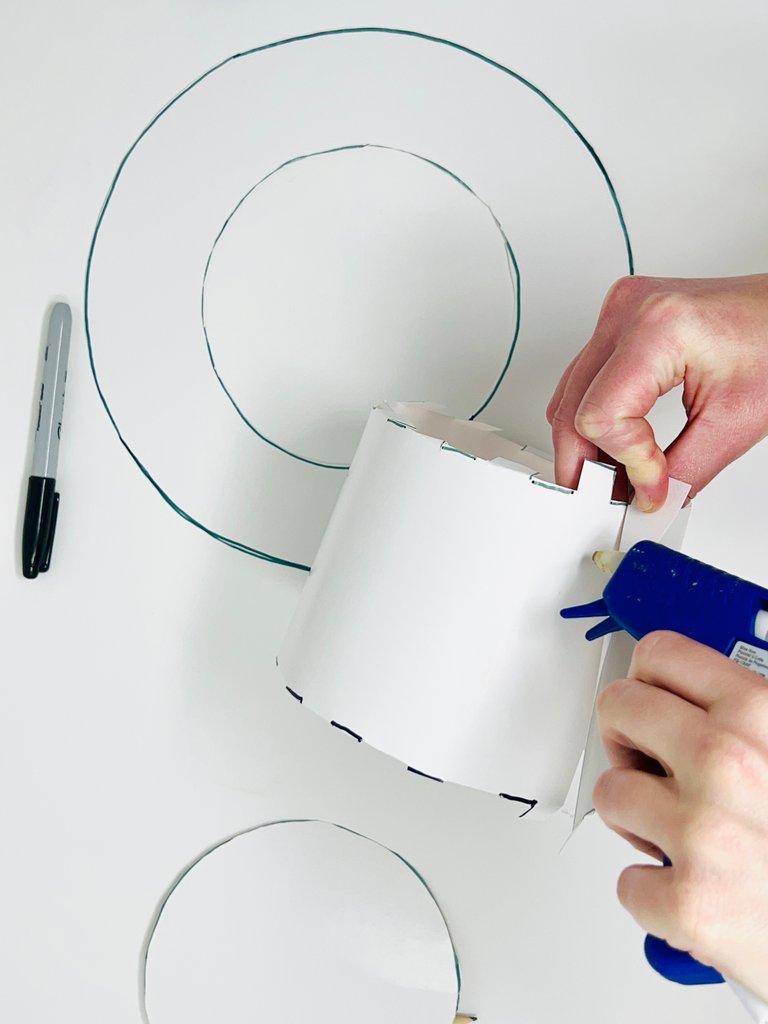
Step 8: Glue the two ends of the paper strip together. Insert the tube into the bottom part of the hat. Fold back the tabs and glue them.
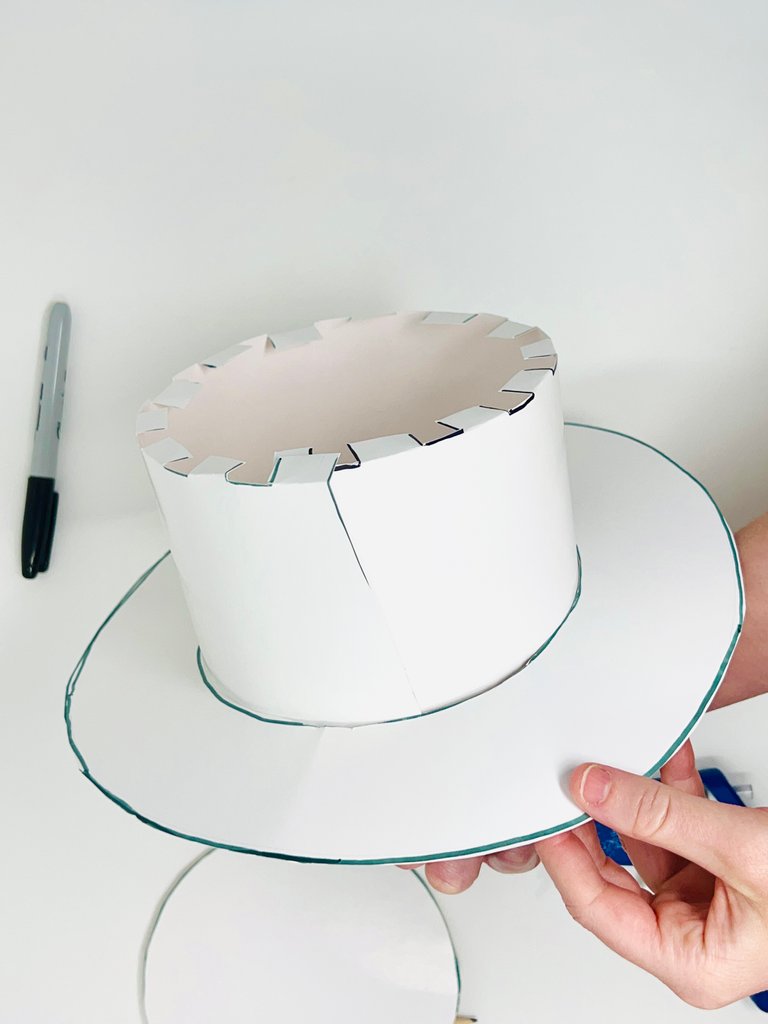

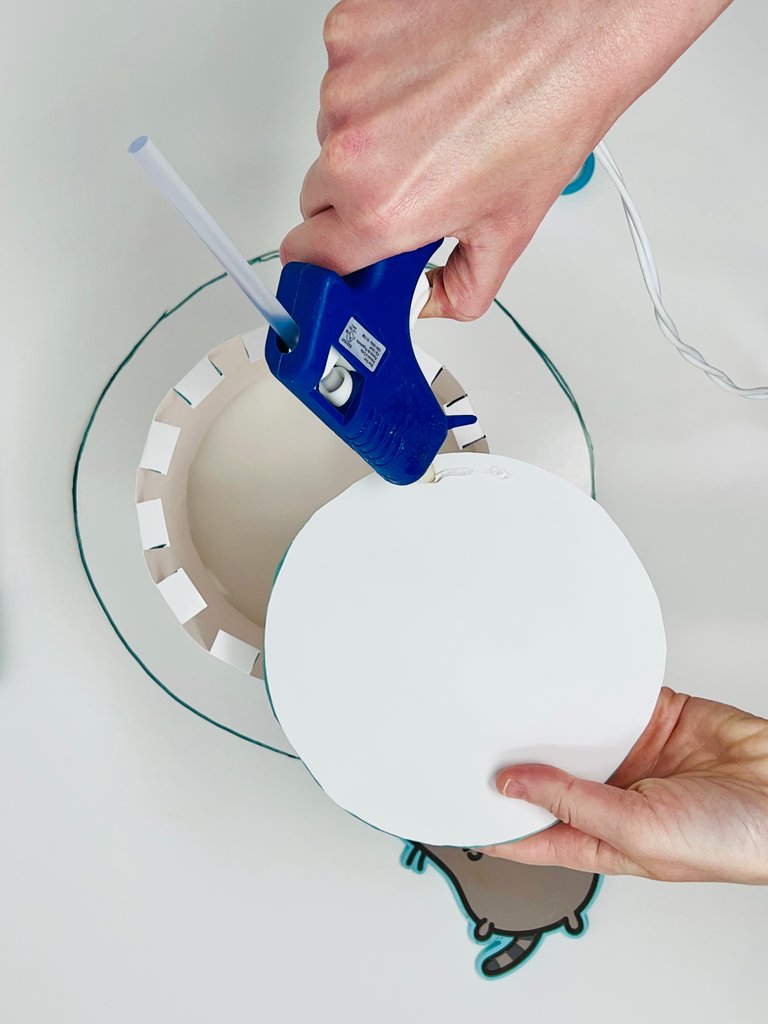
Step Nine: Glue the smaller circle to the glue tabs at the top of the hat.
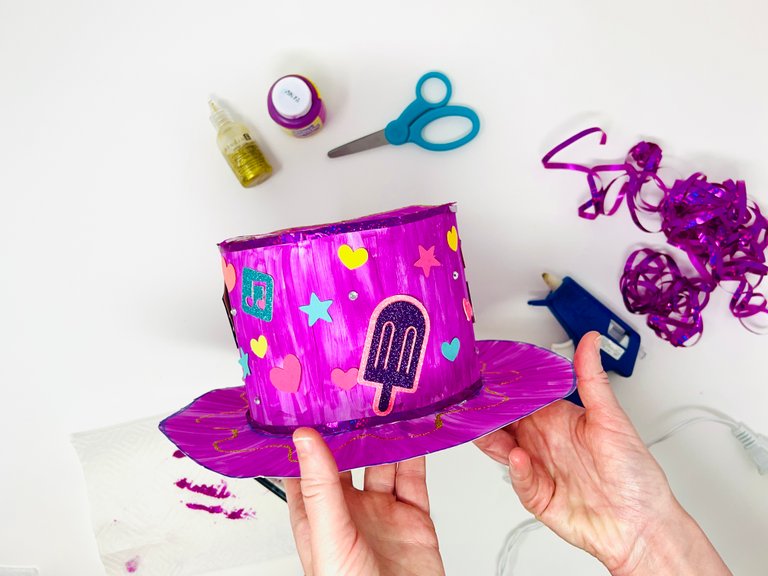
Now you can decorate the hat however you want 🎩
See how I did it below ⬇️

I painted it with kid's paint that I had around the house.

I tied some ribbon around the edges, added some glitter glue, and glued on rhinestones and random cute paper cut-outs that I had in my craft supplies.
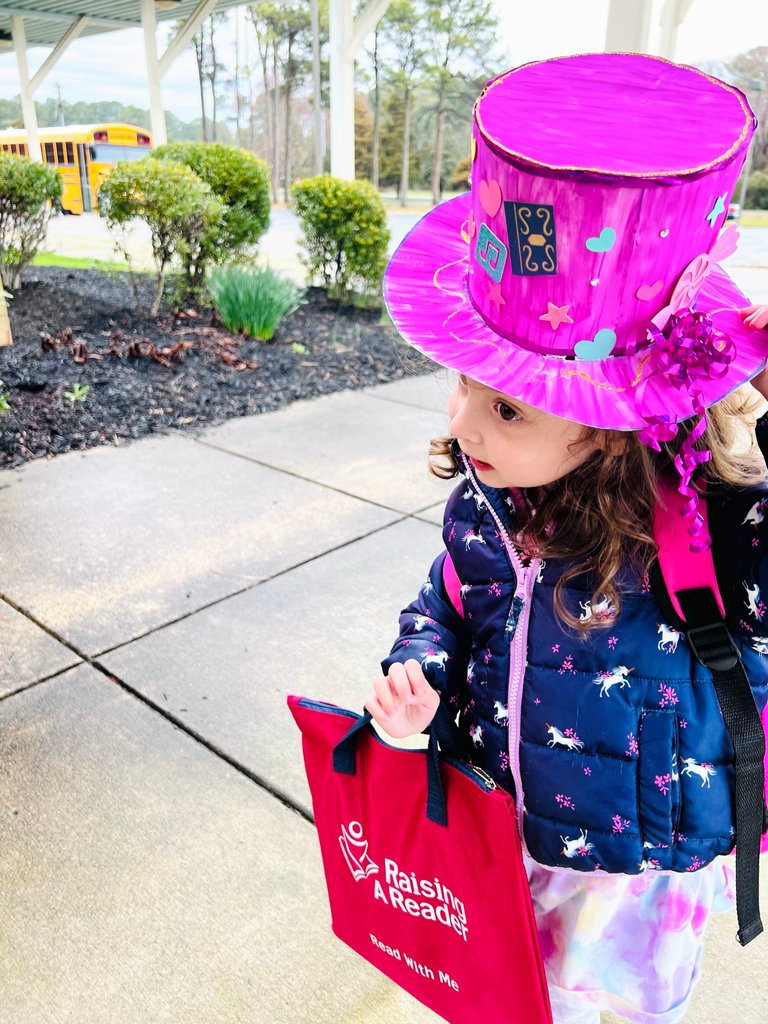
I can't promise she'll wear it all day, or it will come home in one piece, but it's the thought that counts😅

