Hola buenas tardes a todos mi queridos amigos de la colmena de hive blog, espero todos se encuentren muy bien hoy quiero darle muchas gracias a Dios por darme la oportunidad de todos los días compartir con ustedes, hoy les vengo con un nuevo bricolaje muy fácil y rápido de realizar en casa.
Hello good afternoon to all my dear friends of the hive blog hive, I hope everyone is very well today I want to thank God very much for giving me the opportunity to share with you every day, today I come with a new DIY very easy and quick to do at home.
Se trata de un:
It's about a:
Hermoso y creativo teléfono para nuestros niños realizado con material de provecho.
Beautiful and creative phone for our children made with useful material.

Para poder realizar esta manualidad vamos a necesitar estos siguientes materiales que les mencionaré a continuación.
To be able to make this craft we are going to need these following materials that I will mention below.
- silicón
- cartón
- pintura
- pincel
- lápiz
- tijera
- silicone
- paperboard
- painting
- Brush
- pencil
- scissor
- rule
- regla

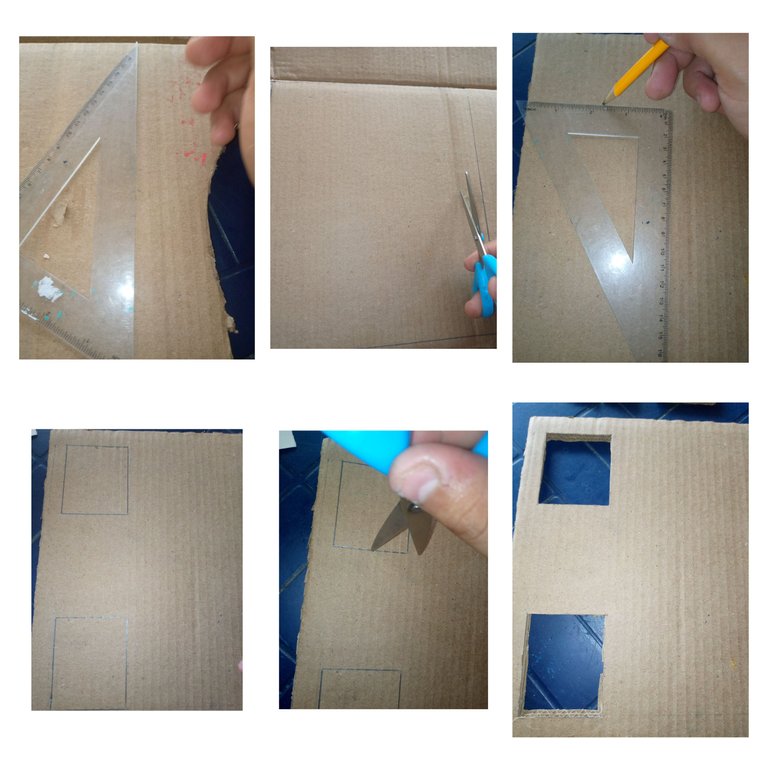
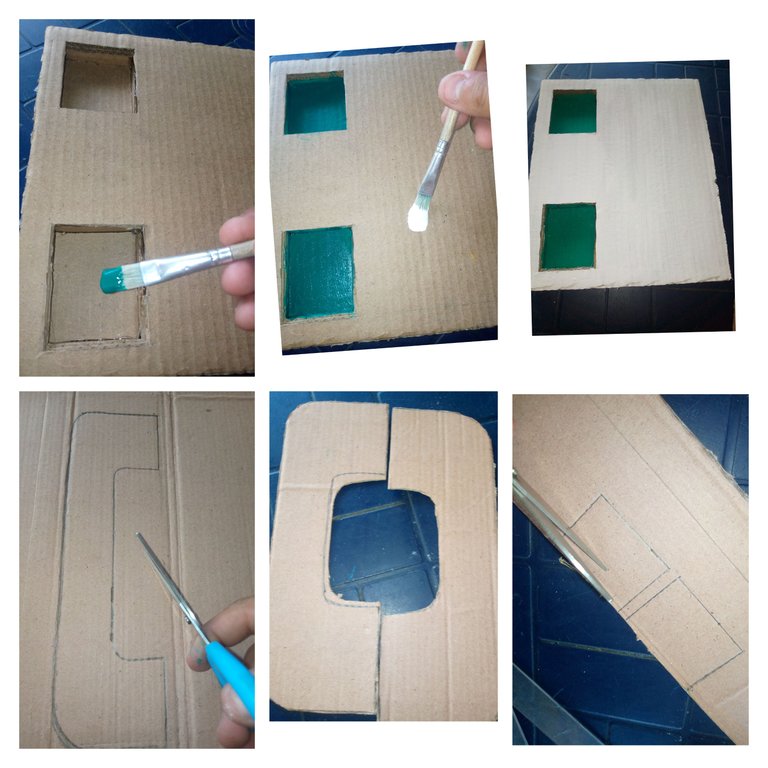
En este primer paso: tomaremos el carton y con el lápiz dibujamos un cuadrado luego recortamos, ahora con la regla dibujamos 2 cuadrados pequeños de 6x5 y con la tijera sacamos los cuadrados de la siguiente forma que les mostraré a continuación.
In this first step: we will take the cardboard and with the pencil we draw a square then we cut it, now with the ruler we draw 2 small squares of 6x5 and with the scissors we take out the squares in the following way that I will show you below.

En este segundo paso: ya dibujado y obtenido Todos nuestros recortes tomamos el silicón y con el mismo pegamos cada uno de ellas de la forma correcta y a continuación les mostraré como quedó.
In this second step: already drawn and obtained All our cutouts we take the silicone and with it we glue each one of them in the correct way and then I will show you how it turned out.
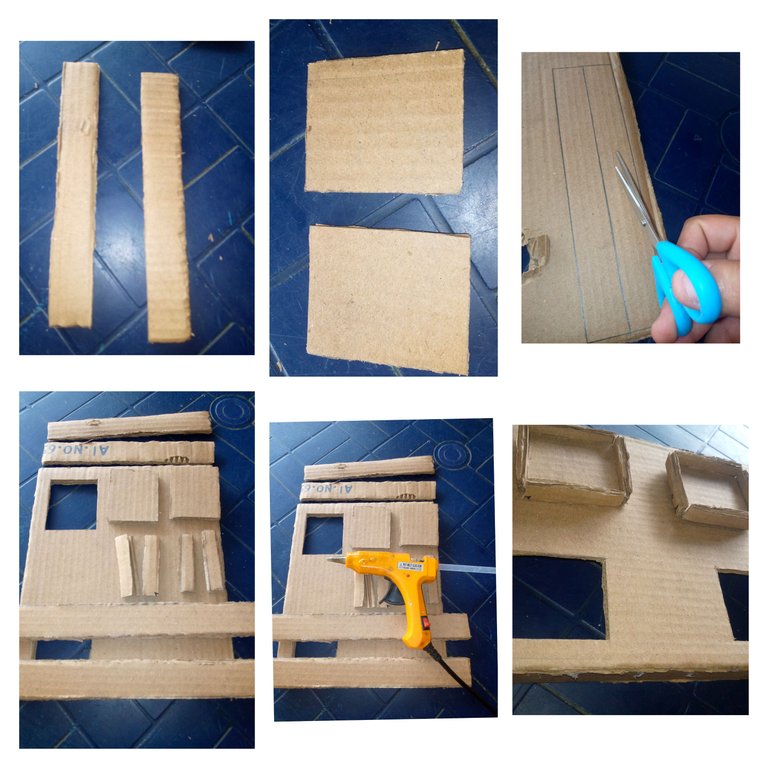

En este tercer paso: ya una vez pegada todas nuestras formas, proseguimos a tomar el pincel y pintaremos en color verde y blanco, luego ya listo procedemos hacer el celular en una cartón comenzaremos a pintar los lados y después los recortaremos.
In this third step: once all our shapes have been glued, we continue to take the brush and paint in green and white, then when we are ready we proceed to make the cell phone on a piece of cardboard, we will begin to paint the sides and then we will cut them out.

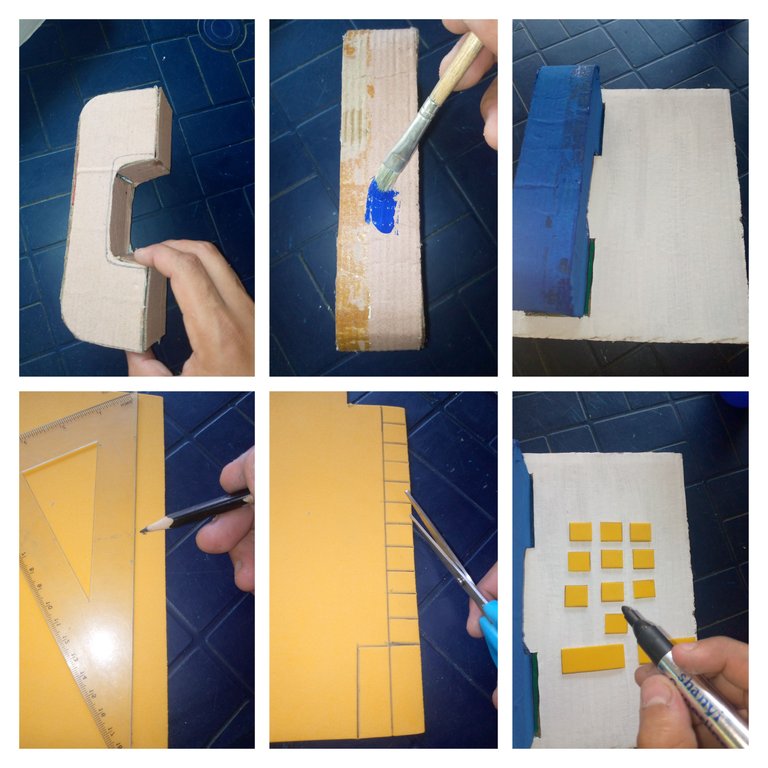
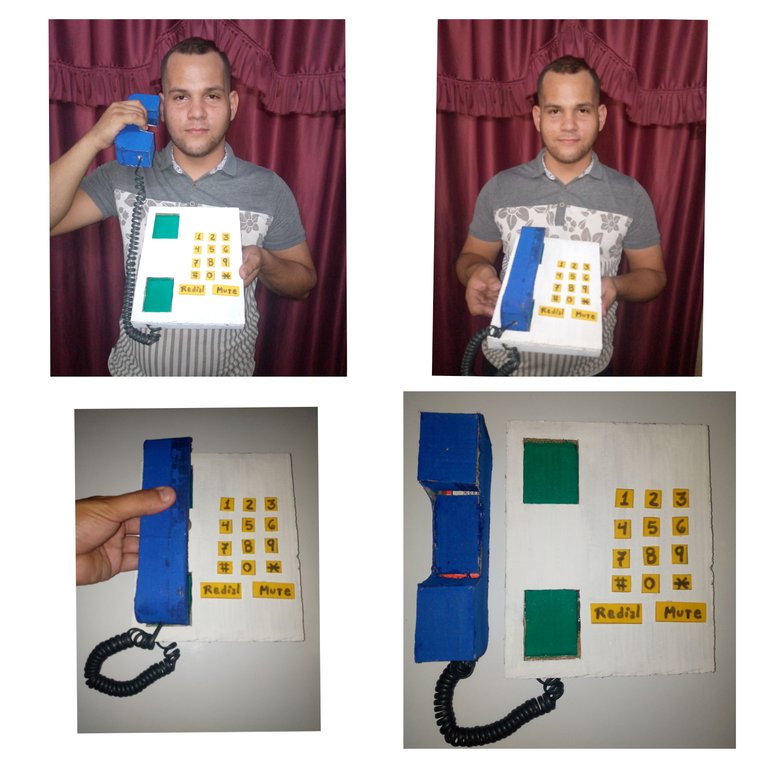
En este cuarto y último paso: ya listo y pegado nuestro teléfono con el pincel pintaremos en color azul, luego en foami le haremos los números con marcador y con el silicón pegamos y a continuación les mostraré como quedó.
In this fourth and last step: when our phone is ready and glued with the brush we will paint it in blue, then we will make the numbers with a marker on foami and with the silicone we paste and then I will show you how it turned out.
