Mudroom Reno: Tiling the Floor

in #hive-130560last year

Time for another update on my forever project; the thing that keeps me busy most weekends and some occasional evenings after work; my mudroom renovation. At this point I finally finished installing the tile floor. I thought that it would only take me a day or two but in the end it took about four days in total to complete. Let me explain...

Layout
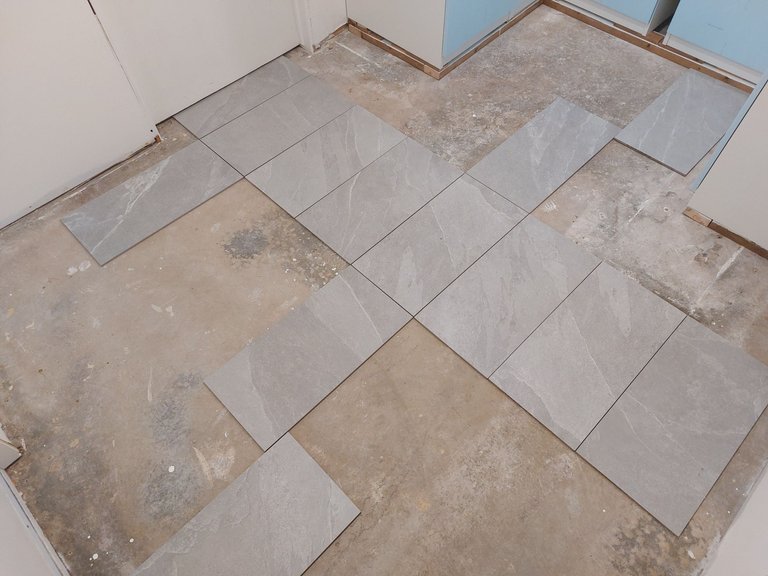

20230625_103436.jpg

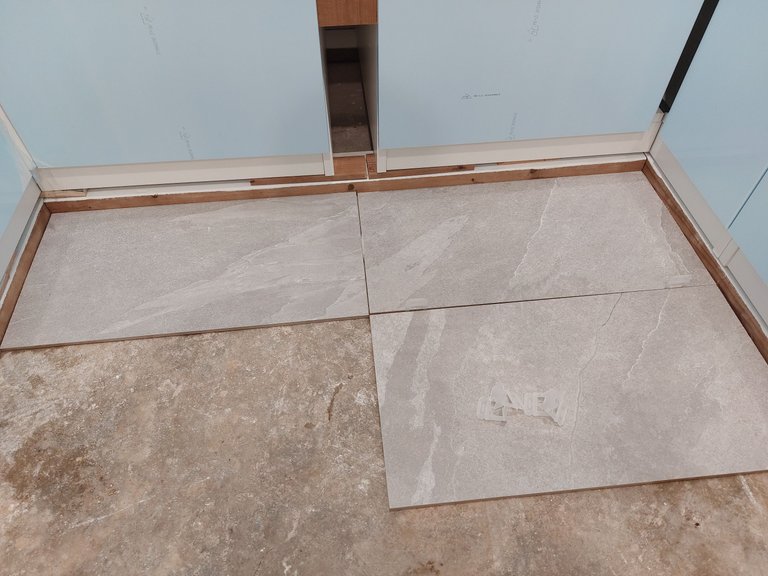
I started by laying out the tiles to see what pattern and layout would work best for the space.
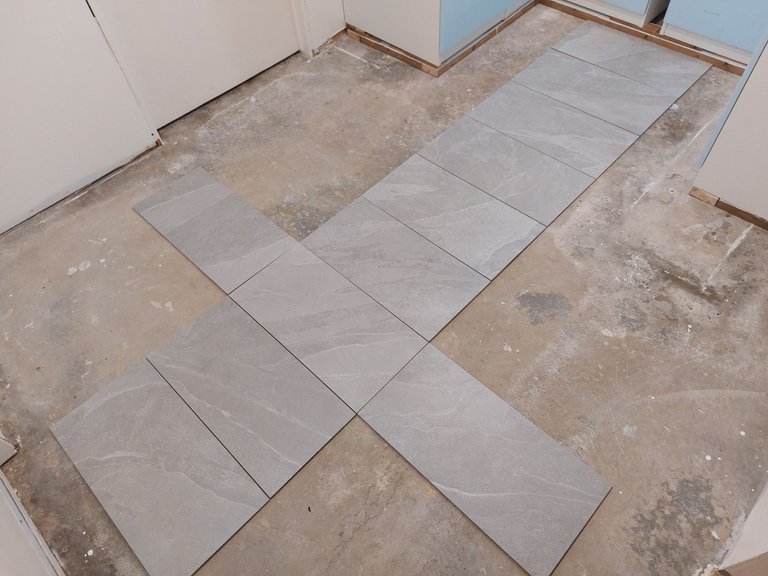
20230625_185442.jpg

I figured it would only take like 20 minutes or so but it ended up taking a few hours by the time I was satisfied.
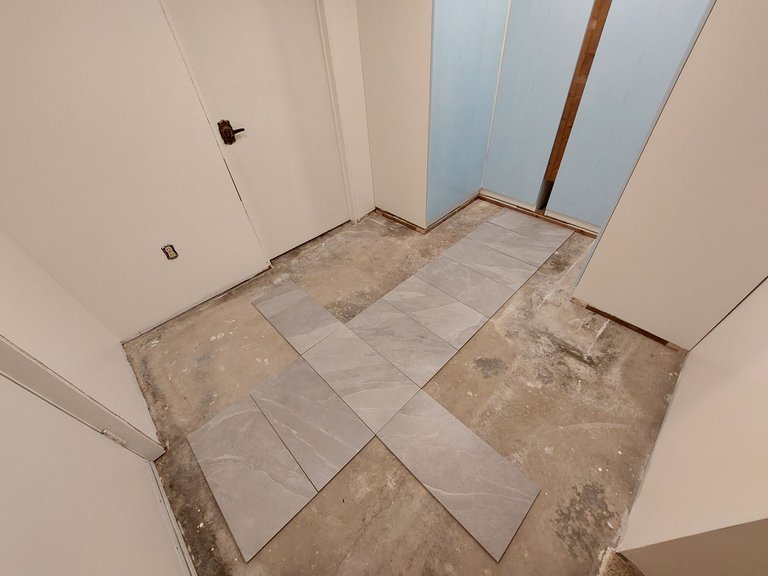
20230625_185434.jpg

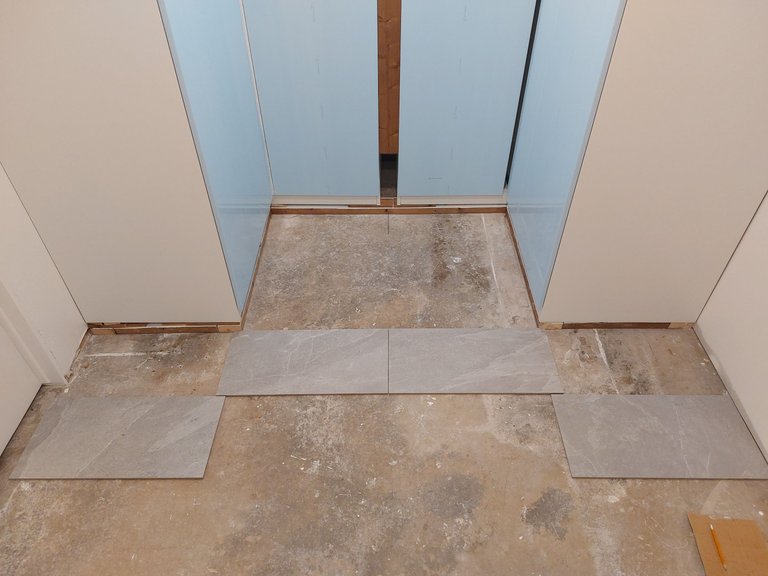
I tried multiple different layouts and even after I had made my choice I second guessed myself and went back through them again. Then I figured out a different option altogether and went with that layout. As you can see, I wanted the tiles lined up together in a stack bond pattern not a subway or running brick pattern. Stack bond is slightly more difficult I think because it requires more symmetry and more precision when laying the tiles as it's easier to see flaws at the corners if the tiles aren't laid evenly or spaced correctly.
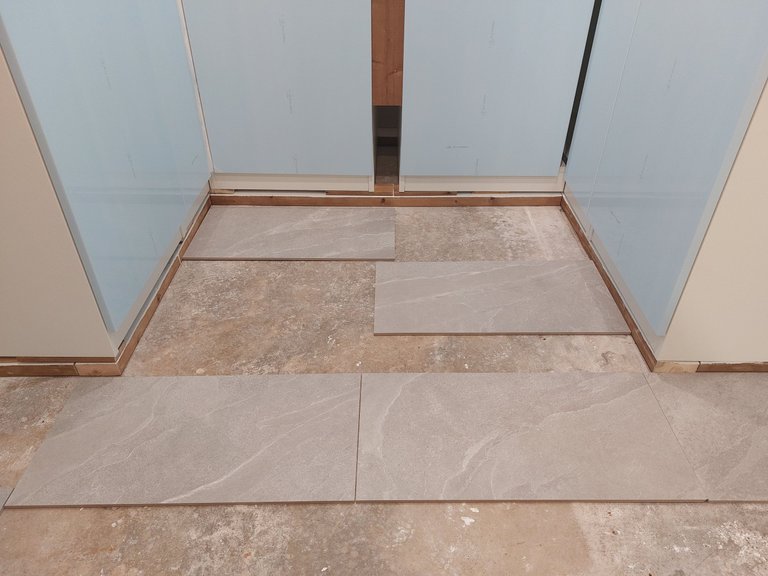
20230625_100433.jpg

I drew everything out on paper so that I wouldn't forget and then called it a day. I could have kept going but I wasn't motivated enough to start cutting so late in the afternoon.
20230625_193136.jpg

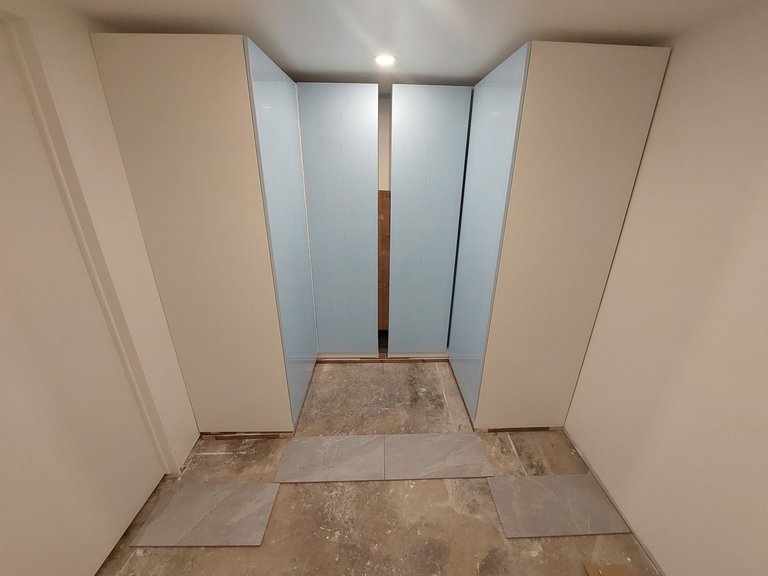
The trick to laying out the tiles is to get a pattern that is asthetically pleasing for the space and one which has some symmetry to it. You want the tiles at the ends near the wall to be roughly even. You also want to make the job easier for yourself by reducing the amount of cuts you make and thereby also reducing the amount of wasted tiles.
20230625_193152.jpg

When you think about it, there is a lot to consider when laying out the tiles so it makes sense that it took a long time I think. I should have realized that before hand.

Cutting

20230703_104840.jpg

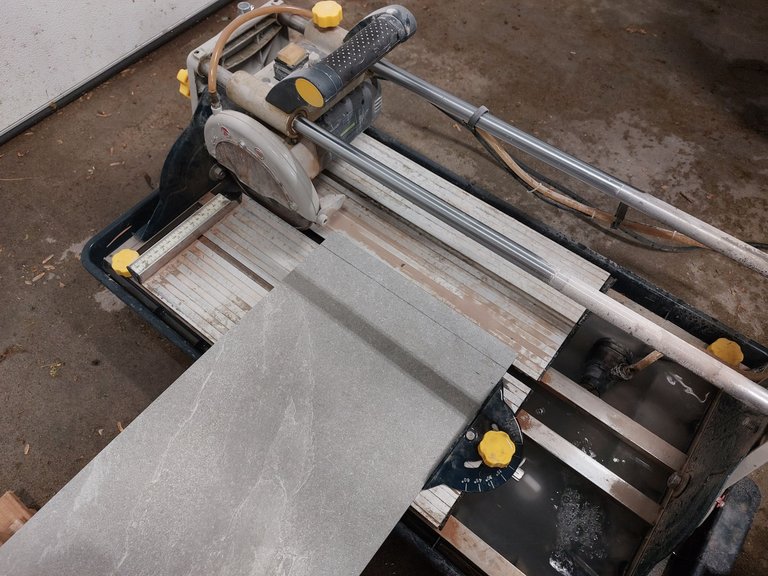
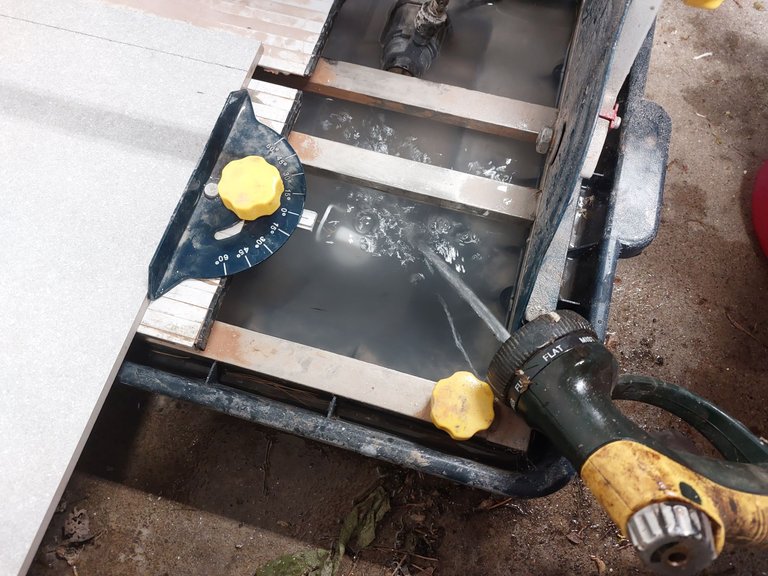
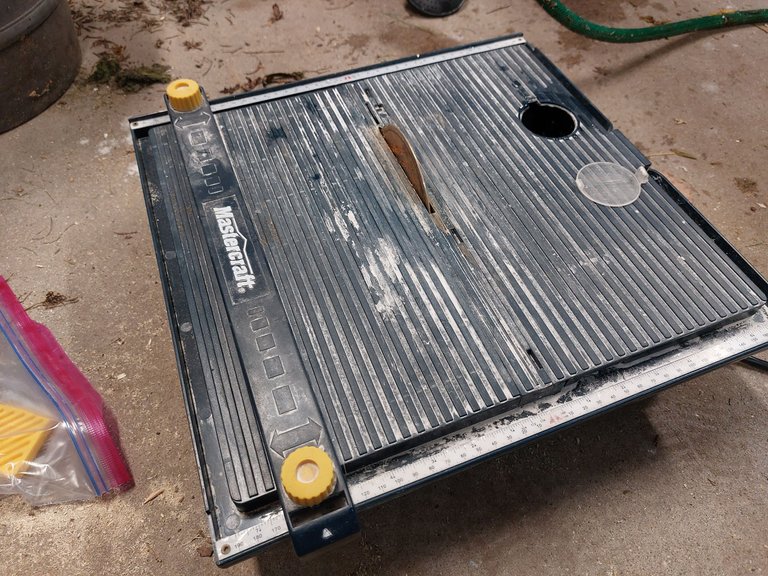
The next day I set up the tile cutter that I borrowed from my father in law and began cutting the tiles. The gasket on the drain plug was old and broken so the water kept leaking out the bottom of the cutter.
20230703_104847.jpg

At one point I just used a garden hose at a slow pour to keep the water going but that got annoying so I Jerry-rigged a plug and things were smooth sailing from there. Sort of...
20230703_145003.jpg

The tiles I used were 12x24 inch ceramic and the tile cutter couldn't cut them length ways because of the guard, so I had to go back to my in laws and grab their other cutter. I should have grabbed it to begin with really.
20230703_104316.jpg

I wore safety goggles of course but the cermic tiles shot tiny chips into my face so I put on a plastic face shield that I had which helped a lot.
20230703_115604.jpg

The tile cutter being a wet saw also shot water up everywhere and I got soaking wet while doing the job. It shot water into my face shield making it hard to see what I was doing as well.
20230703_115555.jpg

I was doing everything on the ground so my legs and especially my knees were absolutly killing me by the end and stayed stiff for several days afterwards and I breathed in a bunch of ceramic dust even though I was wearing a dust mask. After that day I bought a respirator to avoid breathing in wood and tile dust for future projects. Safety equipment is key, right?
20230703_162923.jpg

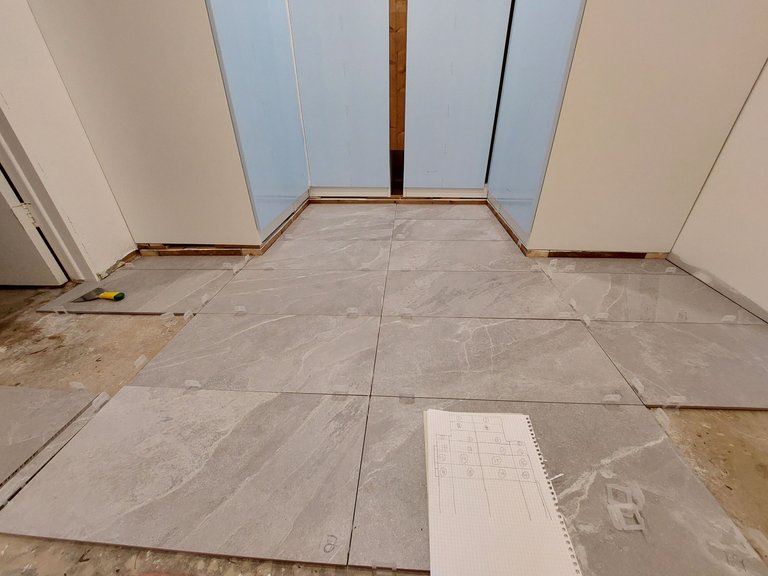
By the end of the day I had about 85% of the tiles cut for the project and I figured I'd save the rest for the day I did the installing. Again, I should have just finished it that same day, but I got lazy.
20230703_162955.jpg

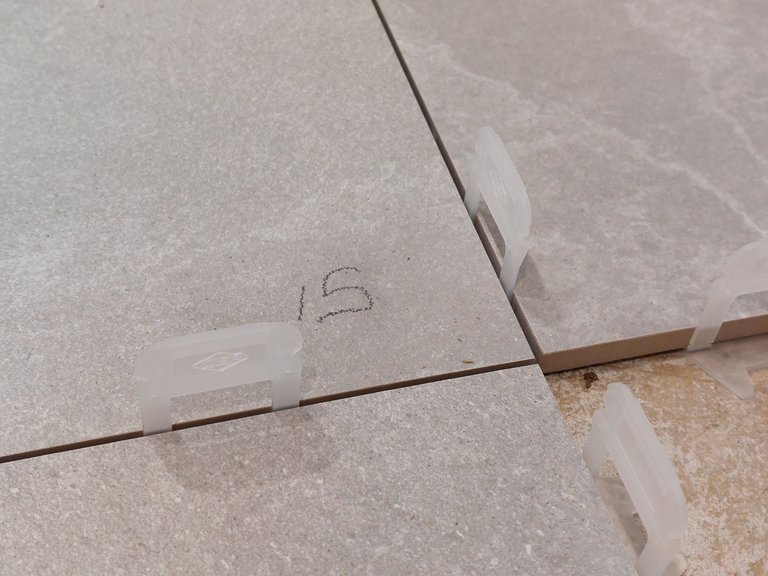
It took a lot of time because I also laid the tiles out with the spacers in to get exact measurements.
20230703_162934.jpg

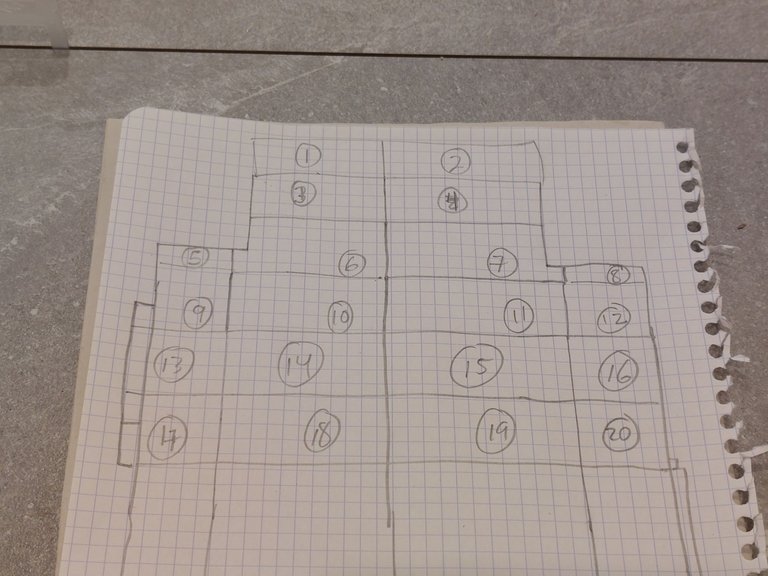
Oh one more thing that I did was number the front of the tiles in pencil and draw a diagram so that I knew which tile went where. That saved me a lot of time and heartache for the installation.

Installing the Tiles


I started the installation on the Saturday of another weekend, decently early in the morning.
20230715_102040.jpg

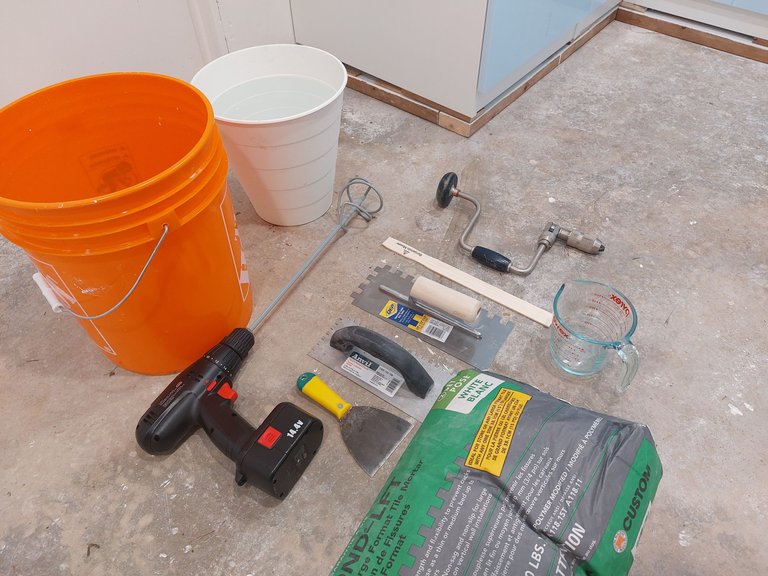
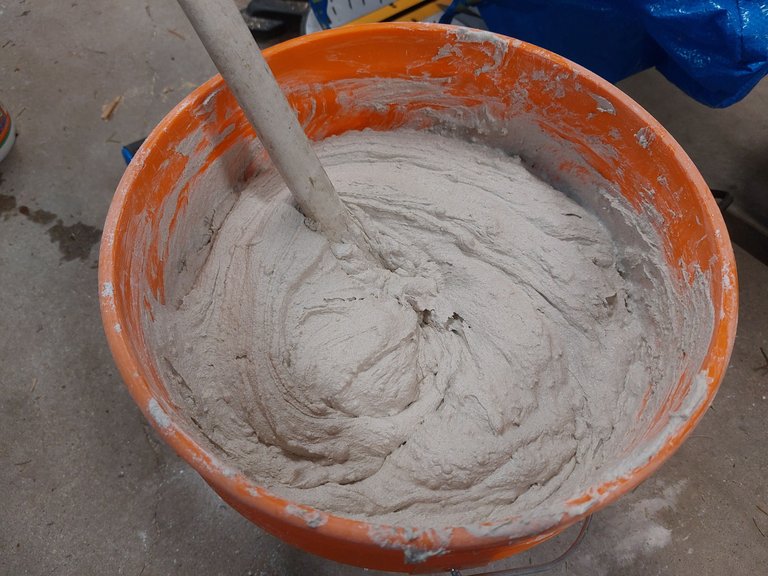
I started by mixing my mortar with water. You can buy pre-mixed mortar but it costs double or even triple the price so I mixed it myself. One thing you need to make the job easier though (which I didn't have) is an electric drill. My 14V battery powered drill didn't have the power to mix the mortar with the mixing rod so I basically had to do it by hand, which was very difficult.
20230715_105830.jpg

I just used a wooded broomstick. It worked fine but was tiring as hell. I didnt use half the stuff in that photo above by the way.
20230715_110453.jpg

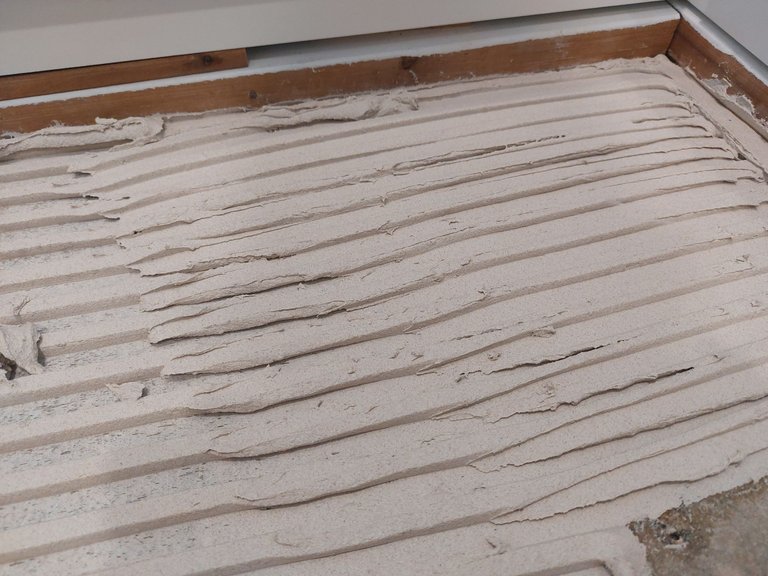
I used a 1/2 inch notched trowel to spread the mortar, which is the minimum that the tiles I'm using called for.
20230715_113553.jpg

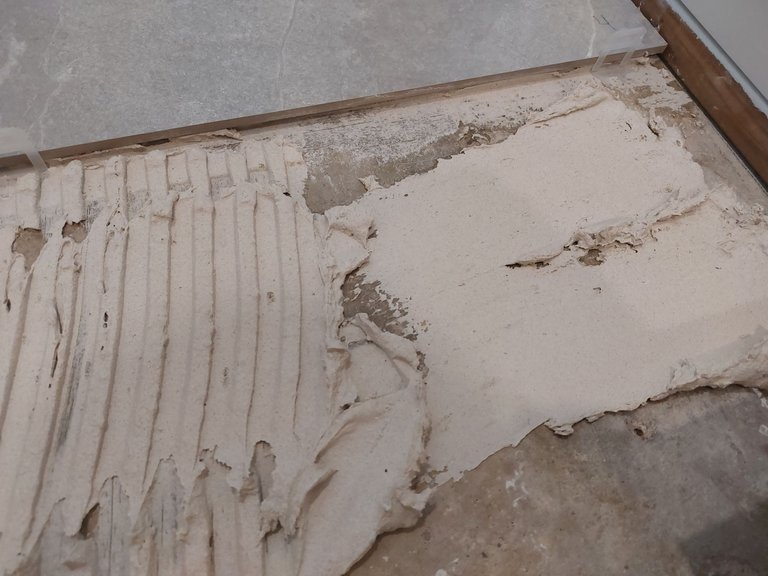
I spread the mortar on the ground and also the back of the tile because some videos online suggested it. They called it "back buttering" the tiles.
20230715_113547.jpg

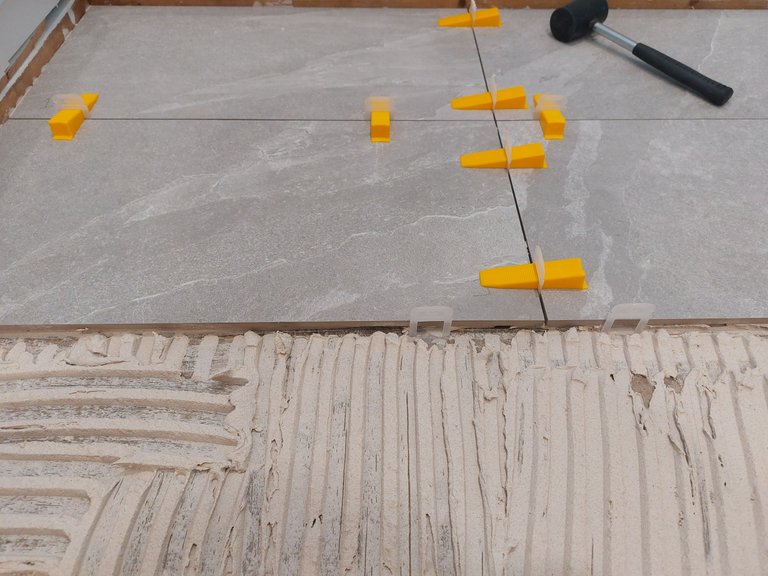
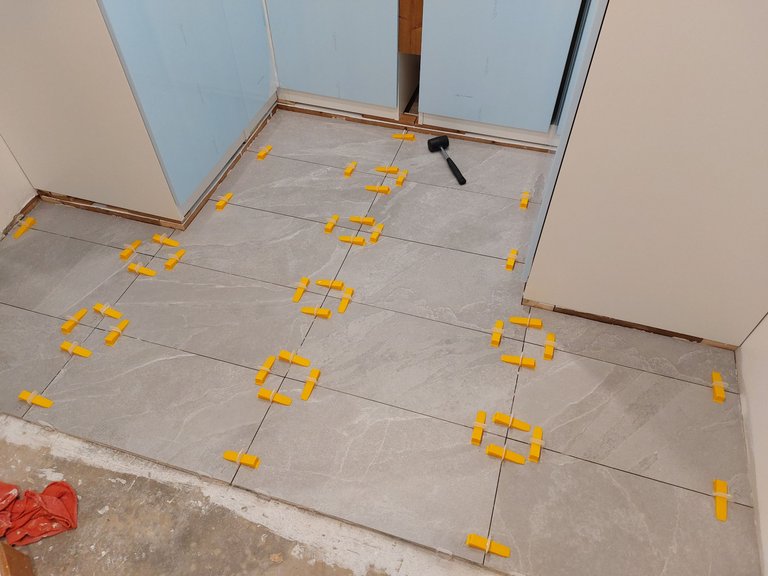
I didn't want a thick grout line so I used 1/16 inch spacers, which is the smallest option available other than no grout lines at all.
20230715_144504.jpg

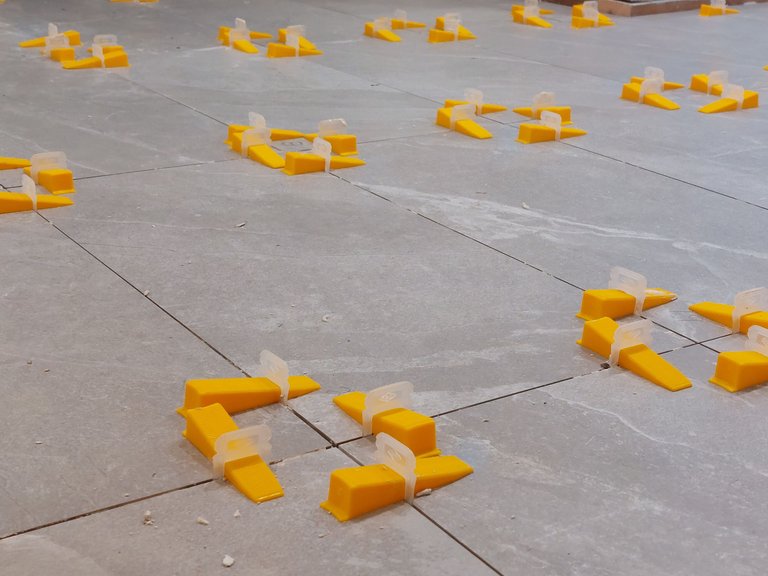
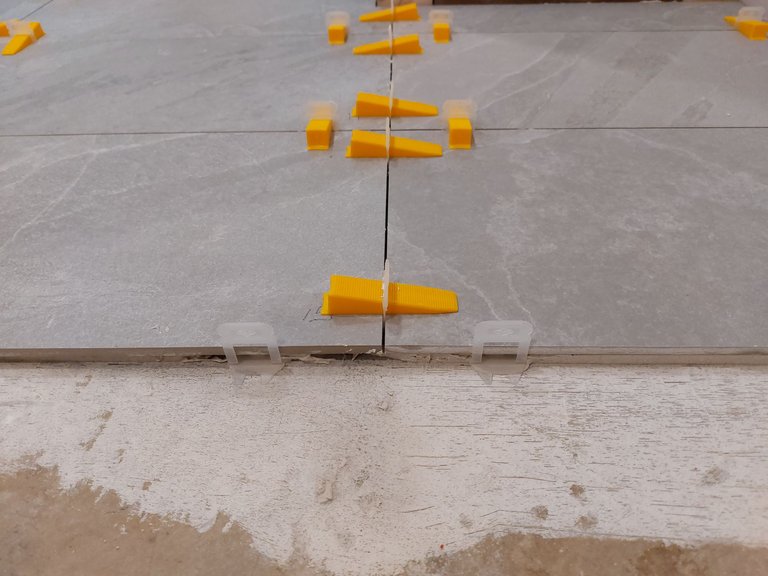
I also used a leveling system which I didn't plan to use originally but was so glad that I did once I got started. I wouldn't do a tiling job without them in the future. They basically lift and lower the tiles as needed to make them even on the surface so that you don't end up with a raised tile to stub your toe on.
20230716_160633.jpg

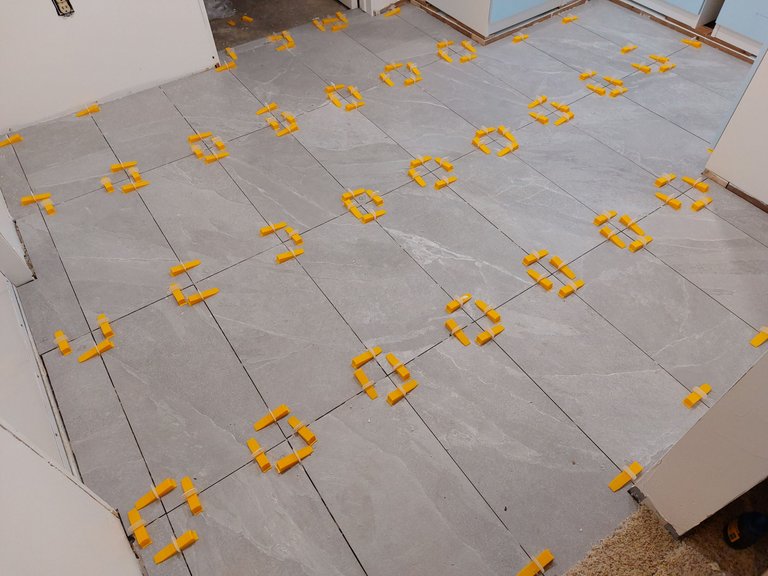
They're super easy to use and they weren't that expensive in the end and made a huge difference overall. There is no way that I would have been able to get the tiles even without them, especially because the floor in that room slopes down to a drain so the surface is uneven in a lot of places to begin with. I ended up with a smooth even surface in the end, other than just a few locations (i.e. 1. that I made a mistake on and 2. near the biggest slope in floor near the drain).
20230715_144512.jpg

A few extra tips and notes would be to always clean the mortar up as you go because once it dries its hard to clean and will effect the next tile being laid. You basically have to chisel away any dried mortar left behind.
20230716_160602.jpg

Another thing I would recommend is to finish the job in one day and to not leave any portion for the next day after the mortar has dried. I left the last row for the next day and that resulted in a few unevenly laid tiles where the hard dried mortar met the new. That was my mistake. The leveling system doesn't work when the mortar is dried - which is obvious in hindsight.

Grout


I let the mortar dry for about 48 hours or so before I started grouting between the tiles.
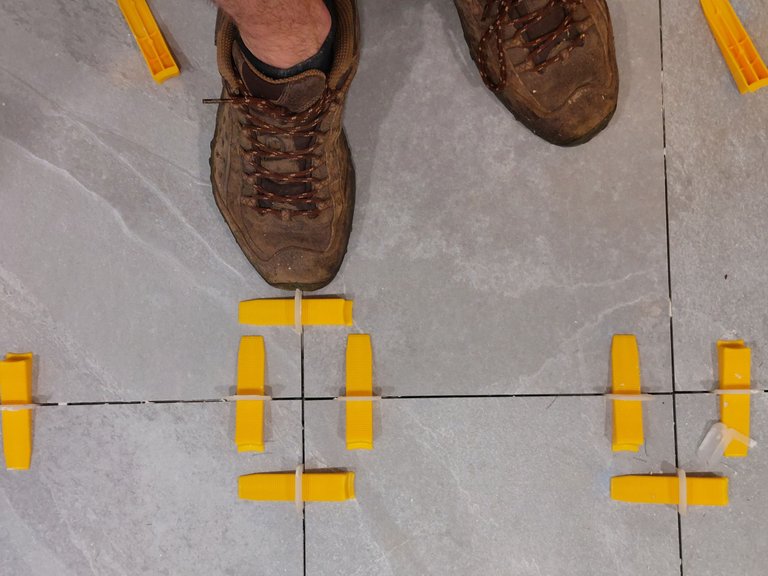
20230719_181220.jpg

To get rid of the self leveling system you basically kick the wedge along the grout line to break the plastic piece off at the weak spot. Some didn't break properly and poked up above the surface of the tile so I had to cut them out with a knife. It wasn't a big deal or anything. (Note: You can see the knee pads I bought for when I laid the tiles. They helped with the rest of the work quite a bit).
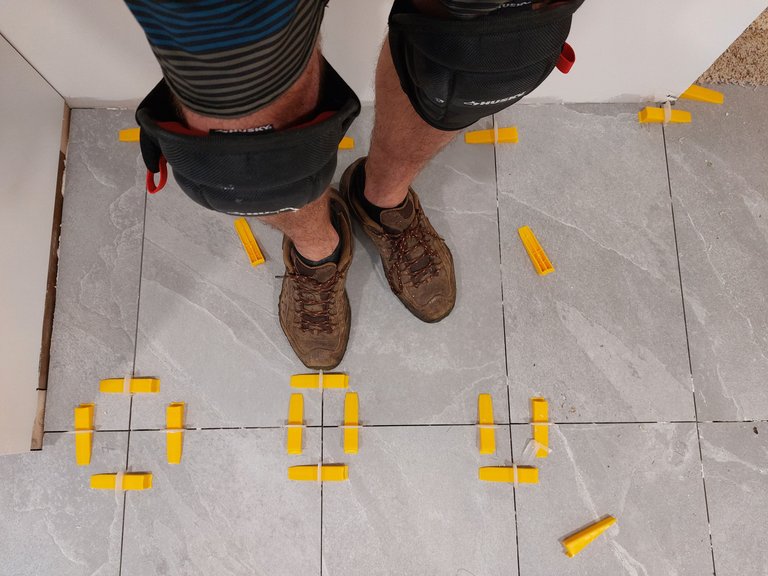
20230719_181210.jpg

I chose premixed grey grout, which is a product that I've used in the past and have been very satisfied with.
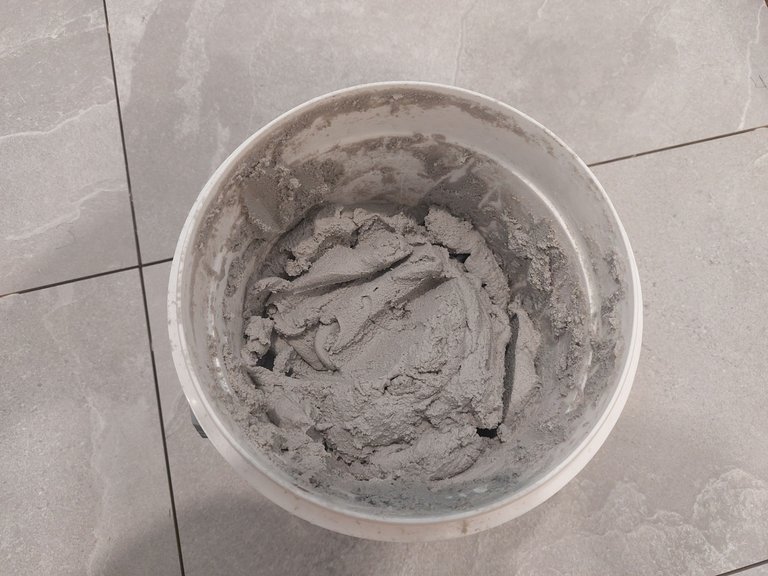
20230720_102719.jpg

I didn't want the lines to stand out so that's why I went with grey.
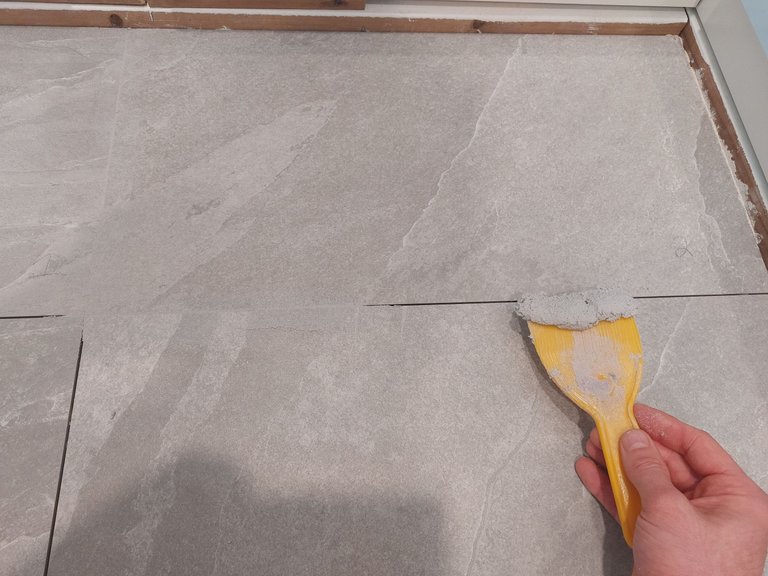
20230720_102744.jpg

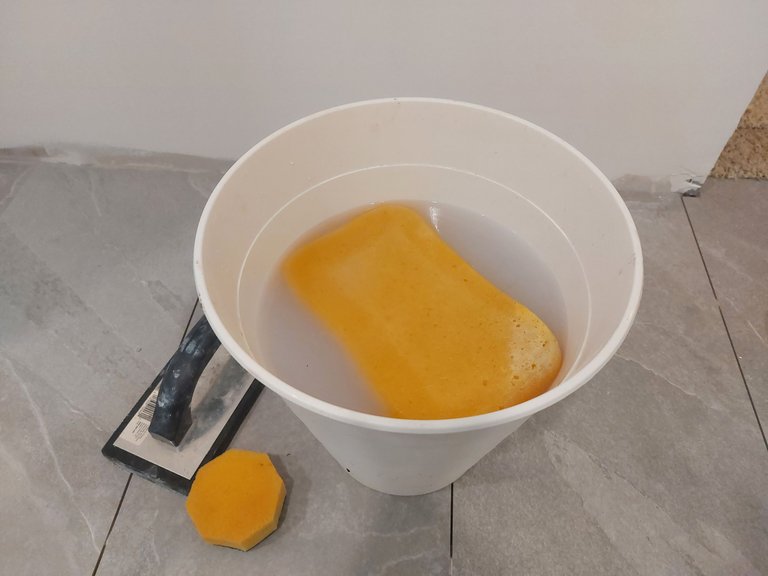
I used a plastic construction spatula to spread the grout and a rubber float to wipe away the excess as needed. I cleaned up with a damp sponge after each line of tiles.
20230720_111049.jpg

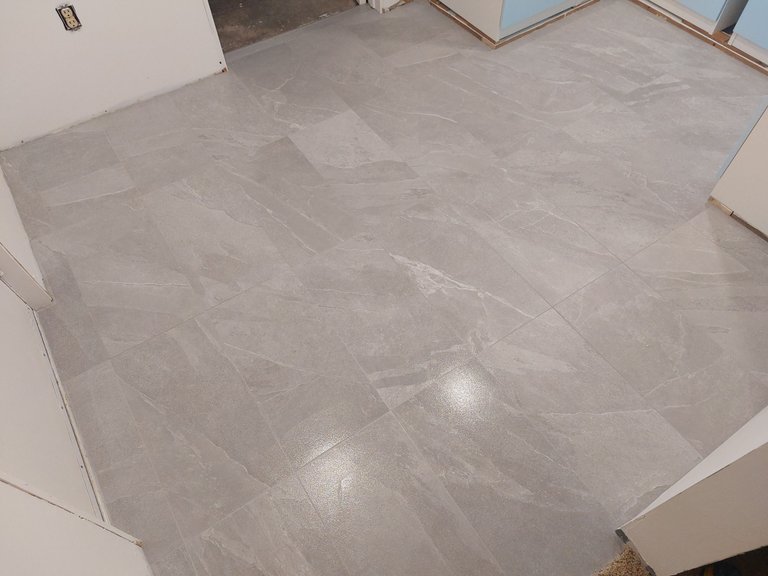
Grouting is very easy work actually. It's just tedious. Here is what it looked like in the end.
20230720_132716.jpg

Transition


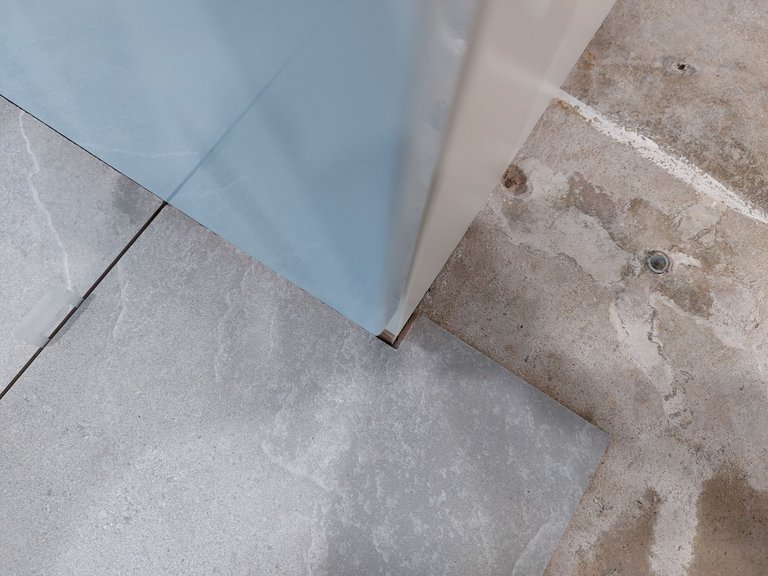
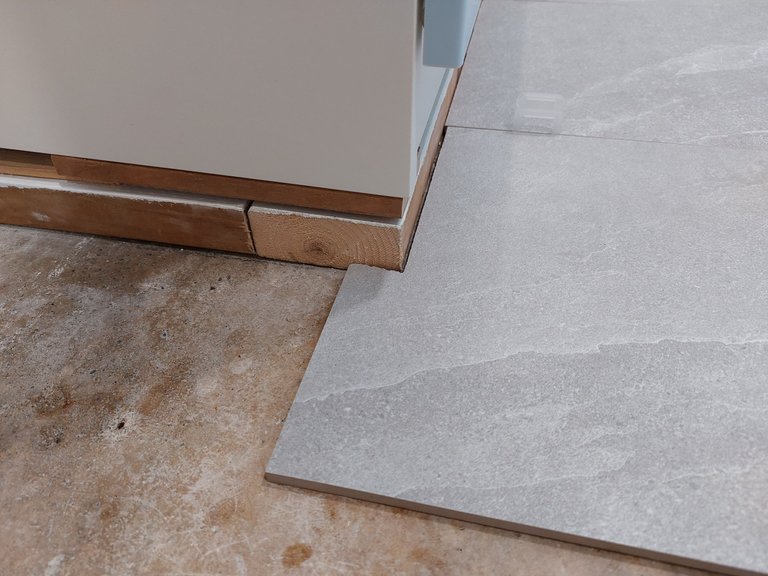
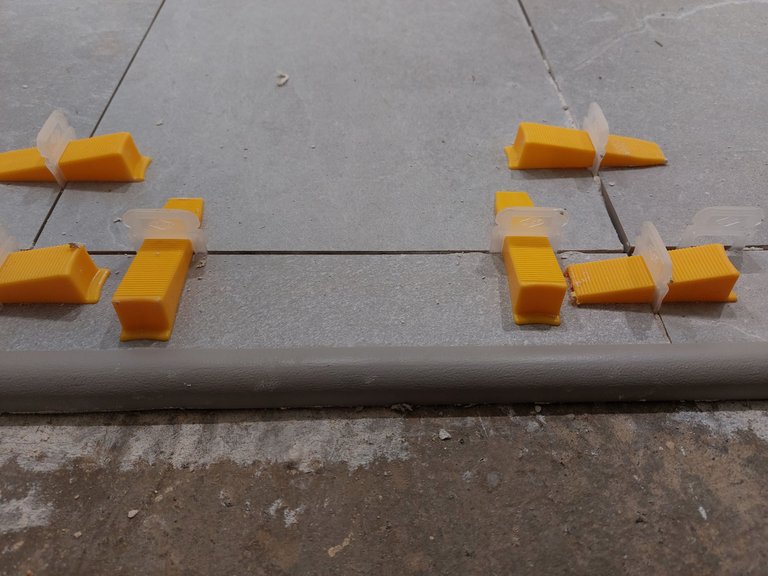
Another thing I did was install a transition piece at the end of the tiled space.
20230716_160711.jpg

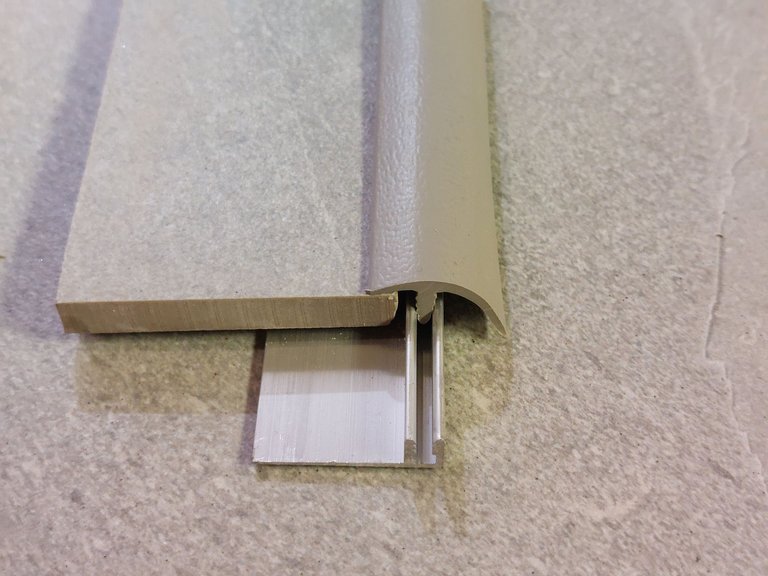
The adjacent room is just a furnace room so the transition didn't need to be anything fancy, just a cap to protect the tiles really. I don't have a lot to say on the subject but here is a picture of how it connects together.
20230716_160916.jpg

So the floor is complete and now I'm working on the baseboard in the room and the trim moulding and crown at the top of the cabinets. After that I still need to build a bench. This project is taking me forever but I hope to be finished by the time fall rolls around. Keep wishing me luck!

Well thats it for now. Until next time, thanks for stopping by.

Sort:  

It looks very pro, it's amazing what YouTube can teach you nowadays. Which part of the house is this?

Yeah you can learn a lot online for sure. It's great. You save so much money doing it yourself... that is unless you do such a poor job that you have to pay someone else to come in and fix it or re-do it lol.

This is a mudroom I'm building in the basement off the garage. The room used to be an outdated bar area with carpet. It didn't make a lot of sense to walk in from the garage with wet or dirty shoes and onto carpet so the room is like a mini foyer to put shoes and coats and stuff. They are pretty common in Canada, we call them a mudroom. Not sure if they are common in Europe?

You're doing a good job to cover your floor with a new coat @leaky20

Thanks 👍 I appreciate it 😊

This is actually a lot of work and I must commend you for your neat work
Not everyone will be able to make it as neat as this.

Thanks. It certainly was a ton of work. It's a project that never ends! 😵‍💫

Bloody hell man, that there is some quality work! It sounds daft but I have only laid tiles twice and never even thought to lay them in a pattern or plan it in any way. I just splobbed them on from a straight wall outward but yours looks magic. If I am ever cursed with having to do it again I will plan it properly~!

I just splobbed them on from a straight wall outward

Haha that's funny. How did it look in the end?

Yeah I read a few articles and watched a YouTube video or 2 on the subject and got a few tips. That helped quite a bit.

It looked alright, it was a narrow kitchen so it was relatively straight lines till I got to the end wall which involved a lot of cutting about four inches and it was slightly not straight which was a slight pain. But I was happy enough. Until about four months later when the Good Lady dropped a mug on one and it cracked it and I had to wrench it off and put another spare down but it never sat quite right, sob!

I see. Yeah that sounds good. Minor mistakes are generally only noticed by the installer. No one else every notices small things like that.

Yeah once the mortar dries its impossible to make any adjacent tiles straight. Even with chiseling away the dried mortar - it's impossible to get all of it. I had a few spots like that on my floor but they are minor so I'm satisfied

That's what it was, getting the old mortar off to put new stuff on and it was just impossible to get perfect.

That's why in my current page I have steered well clear of tiles!

Yeah live and learn I guess. I've been burnt on other types of projects as well and have said "never again"

Manually curated by brumest from the @qurator Team. Keep up the good work!

Thanks you. I appreciate you checking out the post

those tile levellers are clever little things, In have never seen them before, nice job

Yeah they are super helpful and easy to use. This was the first time I've ever taken notice of them too.

They obviously worked well tbh

Dang man, helluva job documenting that. There's only a few things I've never tried my hand at; tile is one of them. Never poured concrete either.

I got some I'd like to learn on. When we landed back in the states, though, we started from zero. When we left 2017, we sold everything we owned, didn't even have a screwdriver when we got back.

Saws and ladders and shovels and... Starting from scratch.

The experience would definitely be worth the new begining no doubt. Nonetheless it would be a challenge to start from scratch. Hopefully you can just pick things up as you go in bits and pieces as you need them.

PIZZA!

$PIZZA slices delivered:
@littlebee4(2/10) tipped @leaky20

Looking really good. I like the small grouts.
It is so important to have a plan and see what pattern works best. As one can make many mistakes just putting the tiles down. Lines can get annoying.
You did a great job!
Never seen those yellow levelling things. Interesting.
Have a great Wednesday 👋🏻😊

Yeah a plan really helps.
The leveling system isn't needed with small tiles but larger tiles are much more difficult and much mlre prone to being uneven. With the 12x24 inch tiles there is no way that I would have been able to make it completely even. That became apparent to me right away, pretty much after laying the second tile. I'm a beginner though. Others might be fine to do it without. For beginners like me they make a huge difference.

Oh I know…
Luckily I can feel the level.
But I tell you, I never ever put terracotta hand made tiles down for anyone hahaha they were horrible. All uneven, different sizes, thickness and all angles were off. Give me ceramic ones every day… !LOL
Myself, I prefer natural floors, like wood and earthen floors. Next year I start building our house myself 😉 we got big plans…

You did an awesome job! Can’t tell you are a beginner at all.
Keep going it will look amazing when finished. Nice we can follow along. Thanks for that.
Have a wonderful Thursday 👋🏻

The inventor of autocorrect has died
His funnel is tomato

Credit: reddit
@leaky20, I sent you an $LOLZ on behalf of littlebee4

(1/8)
ENTER @WIN.HIVE'S DAILY DRAW AND WIN HIVE!

Yeah the uneven and irregular tiles would still work in a cottage or farm house or anything that has a rustic look about it. That would just be more character.
I like wood floors as well but generally you don't put them in Canadian basements, especially older homes, because basements can leak over time. Our upstairs has wood floors though.

Building your own house is next level. That will be quite the project I'm sure. You'll have all kinds of Hive content to share 👍

Sorry with my late reply, we were busy with the importation of the car… still not fully done. Hopefully next week.

Yep, they do look better when one wants to achieve the rustic look in a house that it fits well in.

I fully understand. It needs to be practical.

Yes, we can’t wait… we are gathering information now and ideas and soon I start sketching the building and drawing the plans.
We will be using natural materials and I probably will experiment with earthen floors next to wooden ones.
I guess I will have lots to share once that project starts. It won’t be fast though… but over a couple of years probably. Living on the site in a cabin or static caravan…
How fast it will go is also depending on if we ask volunteers to help or just do it our selves.
Now first finding that special plot 😉

Have a great weekend 👋🏻😊

Wow that sounds like quite the project. Good luck with everything! Enjoy your weekend

It will be 😎 thank you so much!
Will do, you do the same 👋🏻
!PIZZA

It looks neat like the work of a true professional and it's more accurate than what my Mason at the hotel used to do. Oh, and in the Philippines, my tiler left his cement mixture, with 2 final tiles left to lay, because it was 5 pm on a Friday, and he needed to leave work on time. He came back on Monday morning and mixed more cement. I went prematurely grey 😏
Keep going, you're doing a brilliant job 💪

That's sounds like it would be frustrating. I'd be stressed over that as well.

Thanks. It was my first time doing ceramic tiles. I have done vinyl in the past which are way easier. This turn out alright though. I'd do it again I think.

You'd make a great handyman 😁

Thanks. It takes me along time but it's saves me money in the end so that's a plus

I think it's a good creative project, plus it's your home, so you'll always feel good when you look at it.
I just came home after walking for 4 hours, on a rainy day through the woods. You see see my shoes. I wish I had a mudroom 😆

Haha yeah exactly. They are handy. Imagine walking into a room with new carpet with those shoes... the previous set up made no sense at all

The previous set-up made no sense at all

Ah, I see where you got the inspiration.
No mud and carpet is not a good combo at all 🙁

No definitely not

Congratulations @leaky20! You have completed the following achievement on the Hive blockchain And have been rewarded with New badge(s)

You got more than 14000 replies.
Your next target is to reach 14500 replies.

You can view your badges on your board and compare yourself to others in the Ranking
If you no longer want to receive notifications, reply to this comment with the word STOP

Check out our last posts:

Our Hive Power Delegations to the July PUM Winners
Women's World Cup Contest - Recap of day 14
Feedback from the August Hive Power Up Day

This post has been manually curated by @steemflow from Indiaunited community. Join us on our Discord Server.

Do you know that you can earn a passive income by delegating to @indiaunited. We share more than 100 % of the curation rewards with the delegators in the form of IUC tokens. HP delegators and IUC token holders also get upto 20% additional vote weight.

Here are some handy links for delegations: 100HP, 250HP, 500HP, 1000HP.

image.png

100% of the rewards from this comment goes to the curator for their manual curation efforts. Please encourage the curator @steemflow by upvoting this comment and support the community by voting the posts made by @indiaunited.

Thanks for the support 🙏 🙌