Improve Your Blog: DIY Photo Editing

in #hive-1305603 years ago

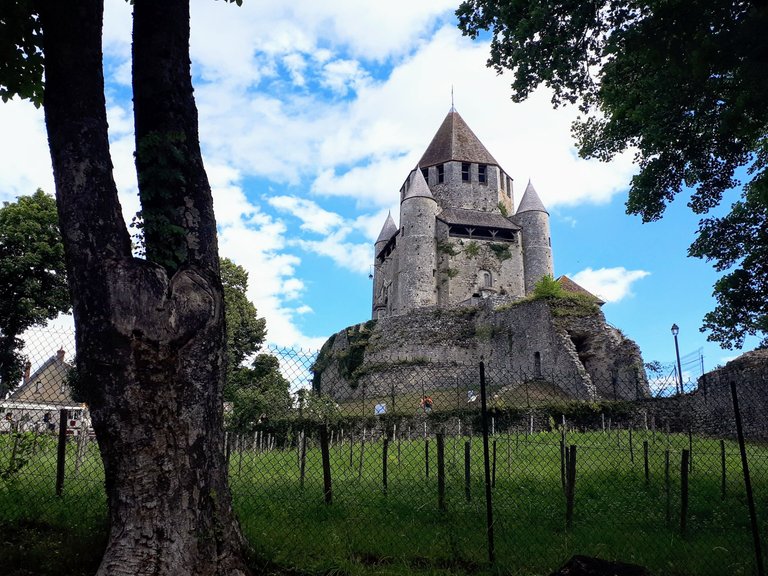
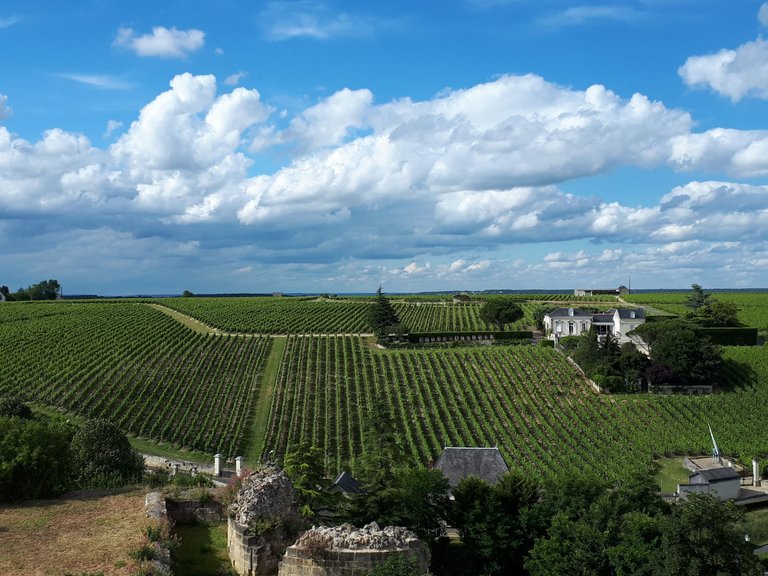
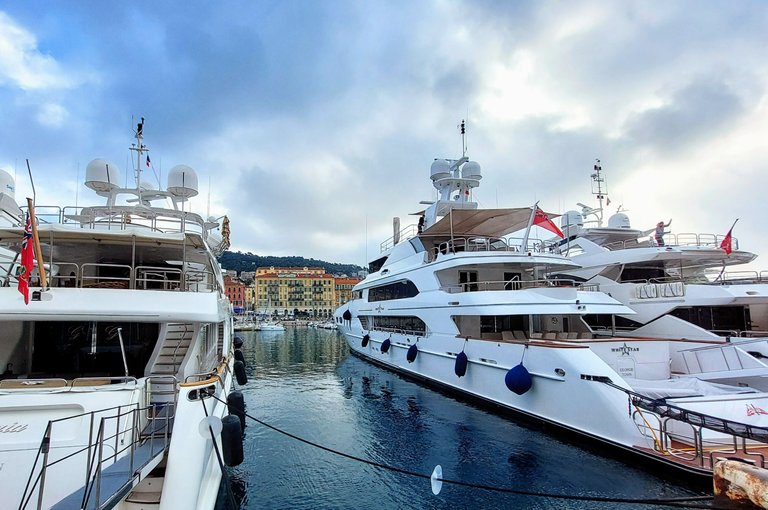
I sometimes get asked on Hive about the type of camera I use for my travel blog. Maybe people are just being friendly or maybe they are generally curious, but it's happened a half dozen times or more in the past year so I can't help but think that there is some general interest there. I always tell people the same thing though, that I'm using my inexpensive Samsung phone and then doing some light editing with the standard Google photos app that came with it pre-loaded.

Screenshot_20220317-102619_Chrome.jpg

What I'm trying to convey by my reply and more importantly, this post right now, is that I'm not a particularly great photographer and I don't use fancy equipment. That being said, I personally think that anyone can create beautiful images with just about any device. All its takes is some time and effort.

Ultimately, you don't need a special camera to improve your photos and your blog, you just need the aspiration and a bit practice.

When I edit I mostly just sharpen things up a bit and bump up the color in an attempt to make the image look more realistic, i.e. closer to what it would look like to the naked eye. I do this with all of my photos, regardless of how well the raw image comes out or the subject matter of my post (ex. travel, recipe or life update...etc).

Generally, I spend about 30 seconds to 1 minute per photo and I typically publish 20-40 photos per blog post, so you can imagine just how much time I spend on this process. Overall though, I think that it's worth it.

In the end it could be the difference between a good blog and a great one or better yet, between being unrecognized for curation and recognized.

I guess what I'm trying to say is that you don't need special equipment to take great photos for your blog, you just need dedication and a bit of know how. Maybe your posts have a lot of potential too, but are lacking that small boost to make them truly excellent. If either of these are the case then perhaps this post will be helpful to you.

Today I'm going to show you how to edit photos using a basic photo editing app, as well as share any tips and tricks I can think of along the way that could be helpful. Please feel free to share your ideas and suggestions in the comments to help others and myself improve further.

Let's get started.

Filters


20220317_093148~2.jpg

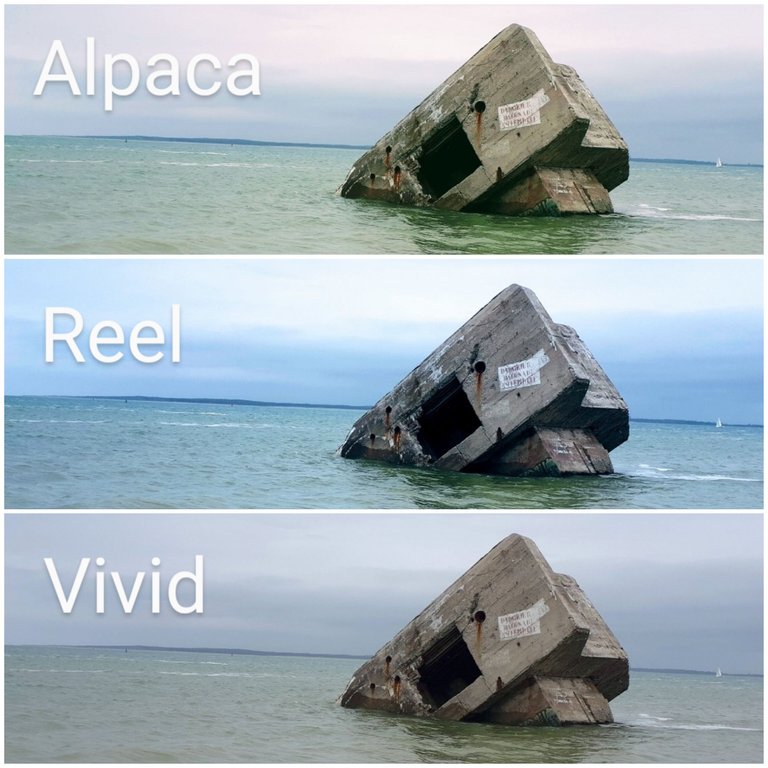
When I begin editing I always start with a filter but I generally try to keep the image as consistent as possible to the original. Each filter highlights a different aspect of a particular photo and generally emphasize its innate qualities such as its texture and color; because of this, there is usual one or two filters that will work best to enhance a particular image but they may not be the same for each photograph.

20200522_122947.jpg
Raw Image

I try to avoid anything drastic and I generally like my blog to look consistent so I always use the same filter for every image. This has the added bonus of saving me time as well because I dont need to scroll through the options to decide what works. That being said, I always choose the "vivid" filter because it is the most basic and subtle and doesn't add any additional color to the raw image. All it does is brighten and crisp it up slightly. You can't even tell the difference some of the time, which is sort of the point.

20200522_122947~5.jpg
Vivid Filter

From there I edit the photo manually to make it a little brighter, slightly more colorful and always sharper and more clean.

Basic Editing


I've done these basic edits so many times that I can now do it very quickly and I've noticed that I generally do the same thing for each image, staying within about 1-5 degrees on any given tool.

20220317_120818.jpg

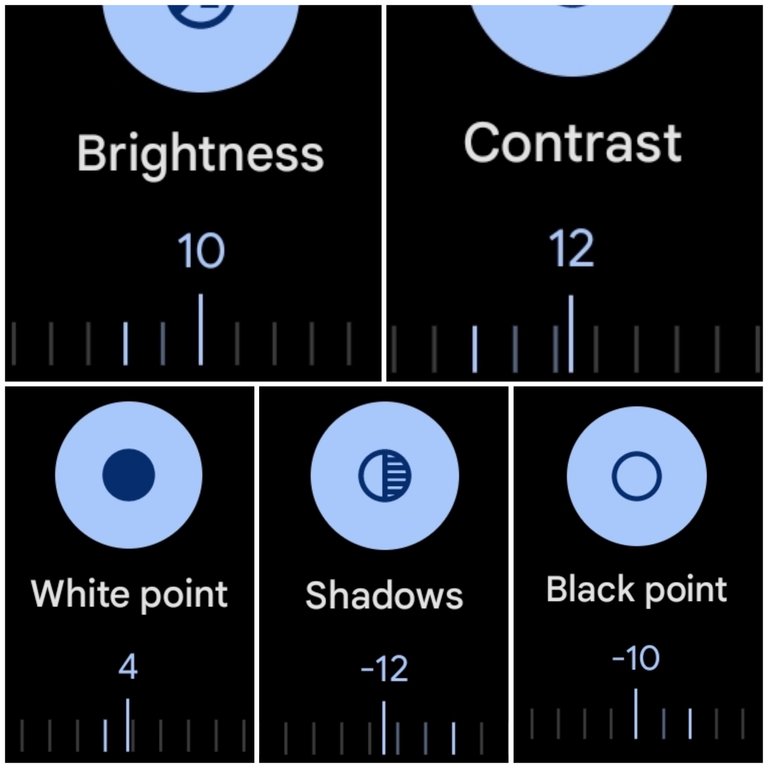
This first block of tools for me is mostly about brightening up the image and adding depth via shadows and black. I generally use these tools sparingly though and stay with 12° in the (+/-).

20220317_120914.jpg

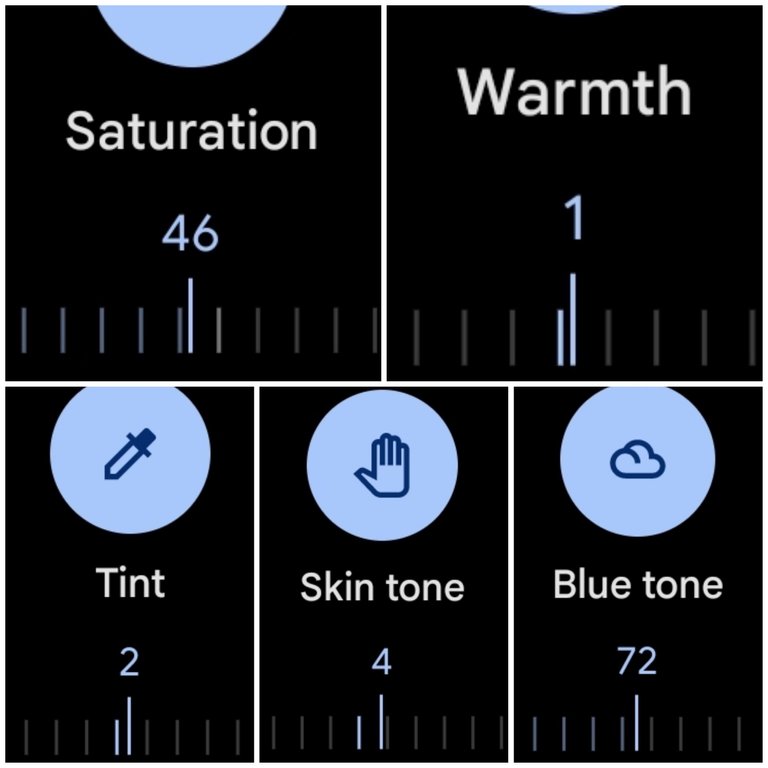
The next block of tools are obviously about adding color to the image. This block is a bit of an exception in that it can vary significantly by photo in how much you can get away with. For instance, on a grey and cloudy day a photo like this can take a lot more saturation but a sunny day photo of grass and red flowers will only need a very small amount. Greens and reds become oversaturated pretty easily in fact.

I recommend playing with an image and over exaggerating everything in the begining so that you can get an idea of what the tools actually do. For instance, go too far and then pull back, and pretty soon you will get a natural sense of where things should be.

You will also start to recognize when an image has too much of something. For instance, too much skin tone will make peoples faces glow and reds and oranges look neon. Too much green begins to look neon and fake as well, and so on.

20220317_120945.jpg

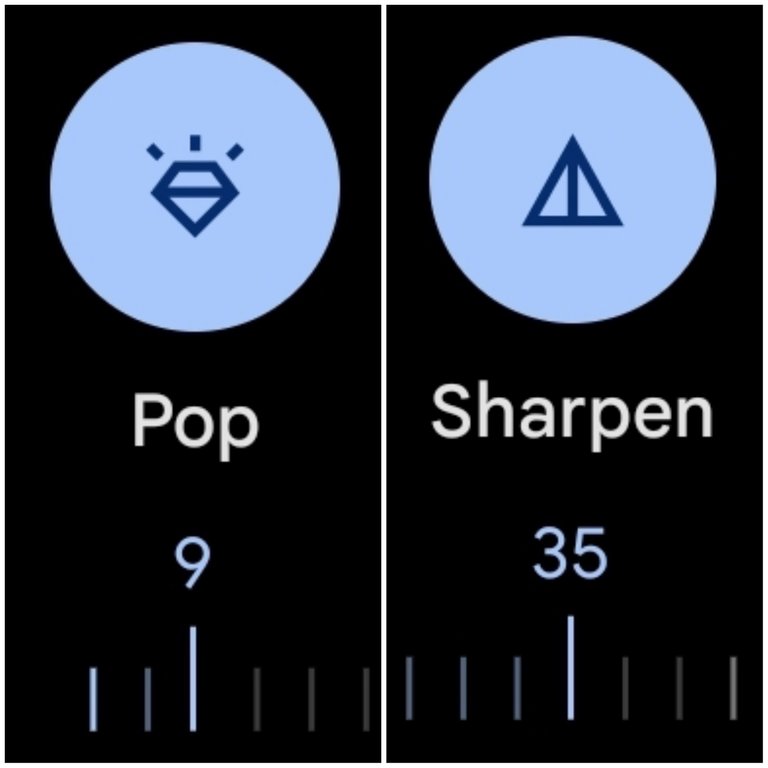
The last block of tools sharpens the image. I only use the Pop and Sharpen tool and always stay within 7-12 with the Pop tool and 20-40 with the Sharpen one. If you go too far with these it adds too much detail to the photo and begins to hurt your eyes or generally look, off.

For instance, too much of the Sharpen feature will separate every single brick in a wall or leaf in a tree and make the image appear way too busy.

20200522_122947~2.jpg

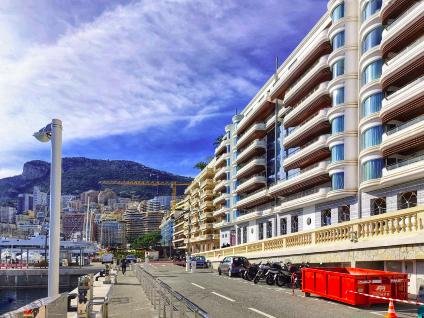
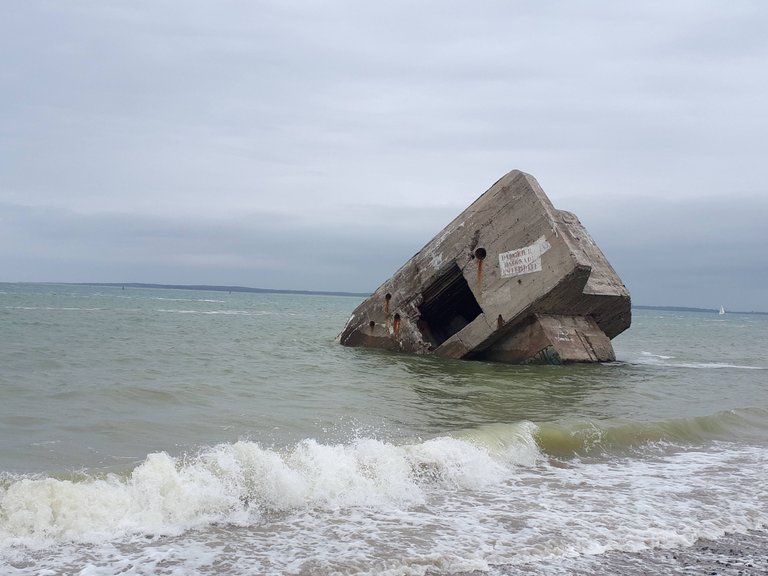
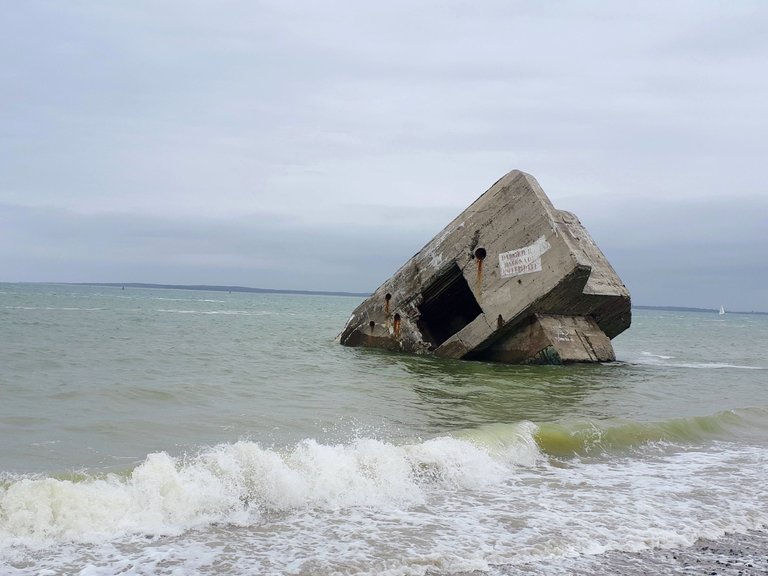
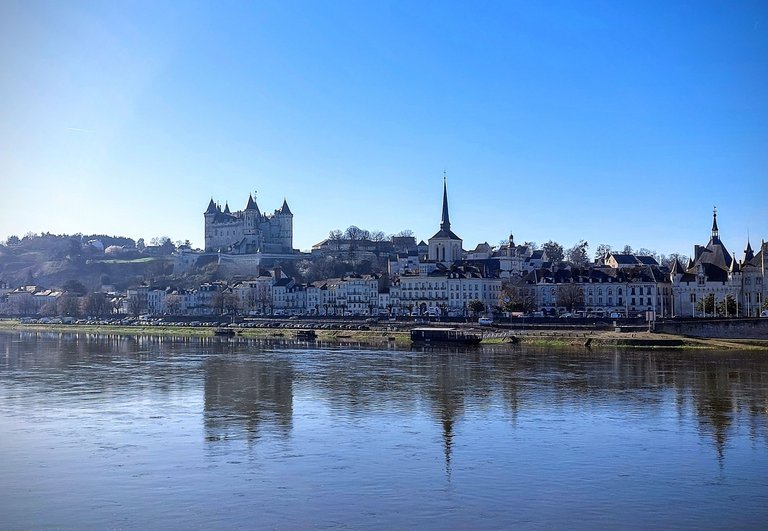
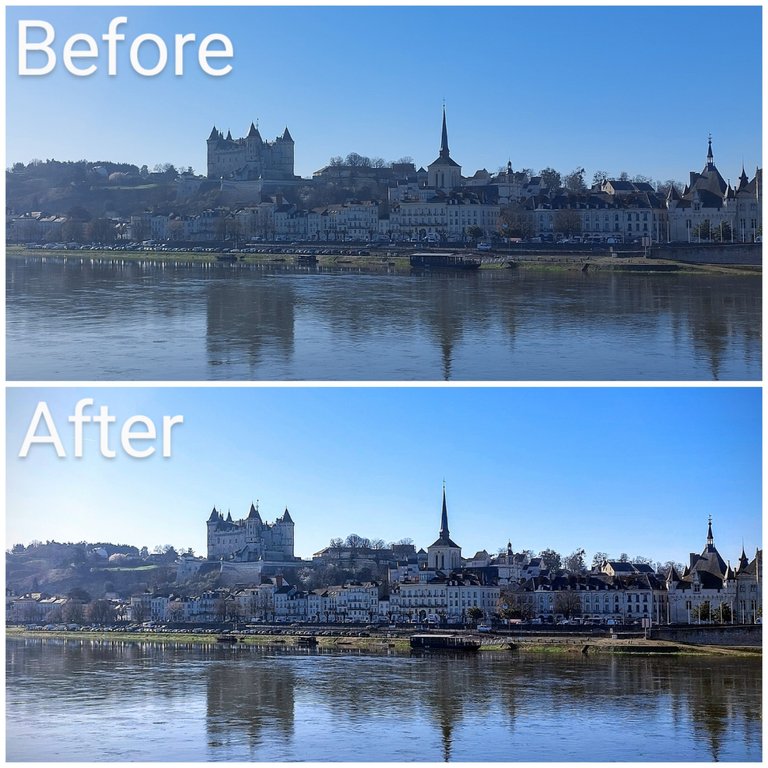
Here is an example of the final product after editing. I don’t think its too far off from where we started. It's just a little brighter and a little more lively.

Going Too Far


Here is example of going too far on some of the features. These examples are quite exaggerated but they give you an idea of what the tools do and can help you recognize what going too far actually looks like.

20210612_153447~2.jpg
Too Much Saturation

20210612_153447~3.jpg
Too Much Pop

20210612_153447~4.jpg
Too Much Filter

The example above is close to where I would want it to be but it's just a bit too much of the filter and is starting to look fake, or at least like a poor representation of the location. If I were to only use this filter I would probably tone it down a little, which is another option for a "quick fix," i.e. pulling back on the filter itself.

20210612_153447~5.jpg
Just Right

The photo above is my personal preference. The editing is quite subtle and it doesn't look fake. Overall I think it's a good representation of the location.

Sharpening


20220226_102610.jpg

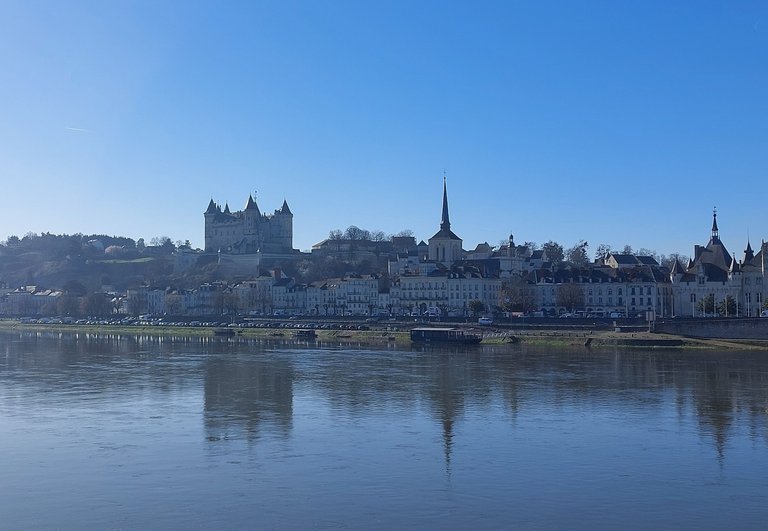
The image above was taken under poor conditions. It was early in the morning when I took the photo and I was facing the sun, but it was my only chance of getting a shot of the full city that day so it had to be done. In my opinion, the photo is almost unusable in its current state and I personally wouldn't bother to add it to a blog post as is. But after some editing just like above I know that I can make it somewhat passable. The main thing is sharpening it up a little to remove the hazy look to it.

image.jpg

It's still not an amazing photo by any means but I think that it's better than where it started. I wouldn't treat this as a cover shot or a highlight to a post but definitely as content, i.e. as a visual aid to the written portion.

20220317_092628~2.jpg

Brightening


Here are a few more examples but a little less drastic. In these cases, the raw image would be usable but editing definitely livens them up a bit and makes them brighter and more colorful.

20200627_115045.jpg

20200627_115045~2.jpg

To me this is what I was referring to at the begining of the post of going from "good to great," or at a minimum from okay to decent.

image.jpg

20220215_095811~2.jpg

The changes aren't huge but hopefully just enough to give them that extra something something.

20200620_180800~2.jpg

20200620_180800.jpg

Cropping


I actually don't crop my images very often and when I do it's typically to make a small change to shift the focal point, remove an object from the frame or maybe reduce the amount of sky or something in order to create balance. I generally like all of the images in a post to be formatted the same as well i.e. rectangular, horizontal landscape shots, so I generally won't crop a photo into a square. If I take some off the side then I'll also take some off of the top and/or bottom to maintain it's original shape.

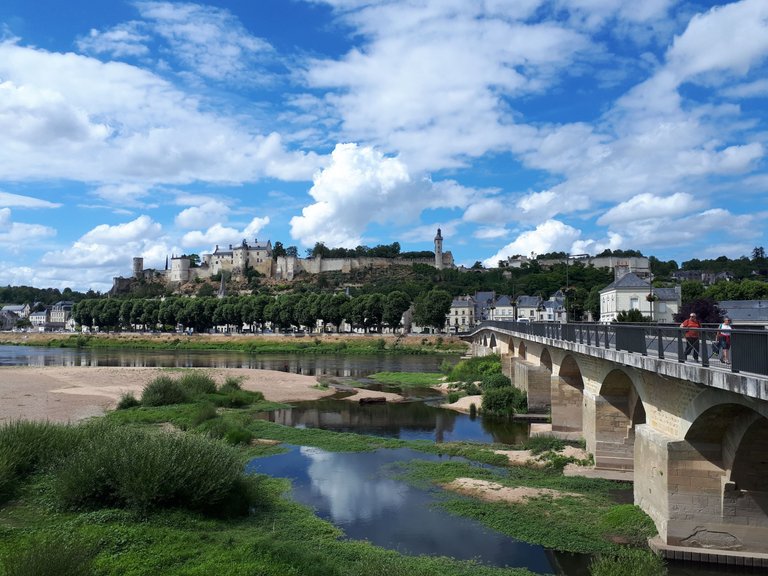
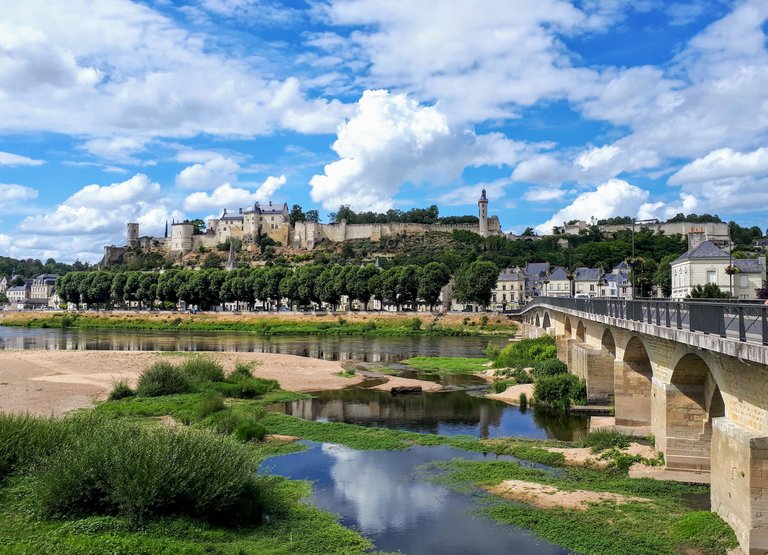
As an example, in the photo below I wanted to remove the people on the bridge so I also removed some of the sky to maintain that rectangular shape.

20200620_164009~2.jpg

20200620_164009.jpg

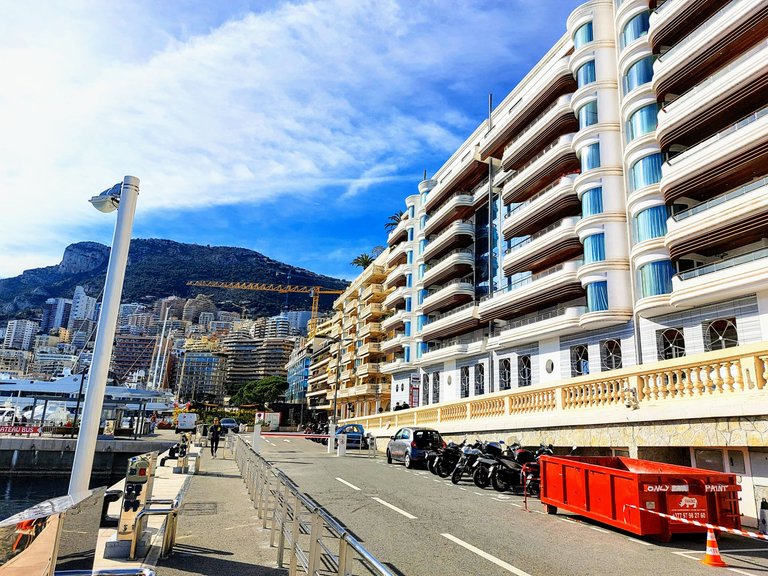
I don't like this next photo at all. It was taken with a wide angle lens and the turned out all wonky to me - maybe a little distorted. But I'm wondering if I can find a usable image somewhere within it?

20220215_093807.jpg

After editing it and cropping, I think that its a little better. I'm still not a huge fan and probably wouldn't post it unless I needed more content but I think it's a good example of what you could do with the cropping tool.

20220215_093807~2.jpg

Combining Techniques


This next technique is something that I don't do very often (almost never) but it's an example of how far you could go if you combine all the above in a basic photo app and without straight up using photo shop.

20220216_145035~2.jpg
Raw Image

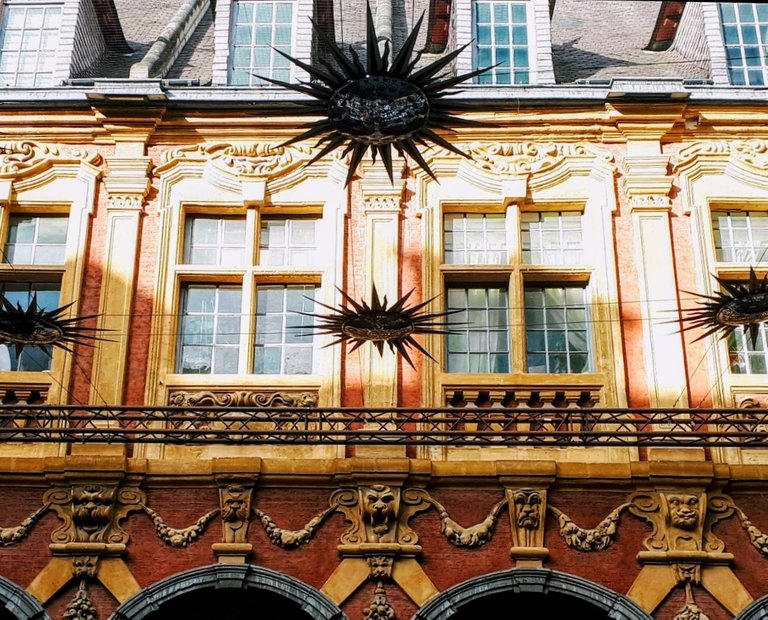
The above photo is complete garbage in my opinion. In fact, the photo itself contains a garbage in it and I retrieved it from the trash bin for the sake of this post. I don't know what I was seeing when I took it but now I'm a bit curious to see if I can make something out of it.

20220216_145035~3.jpg
Basic Editing

First I'll start by editing it to make it as clean and bright and sharp as I can.

Screenshot_20220317-094535_Photos.jpg
Zoom In and Screenshot

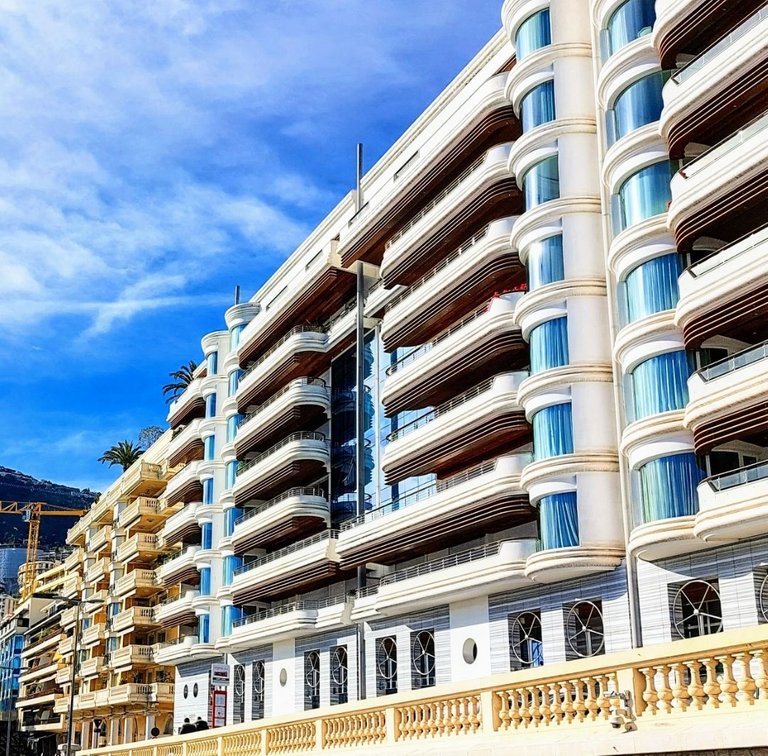
Then I zoom in on a particular spot of the photo that I like, for instance the 70's looking futuristic balcony, and I take a screen shot of just that area. I don't just crop it here because that generally makes the photo turn out very blurry but for some reason screen-shotting it seems to maintain its integrity.

Lastly, as you can see below I'll crop just the area that I like and rotate it to a position that works and voila! We turned a garbage photo in something somewhat interesting.

Screenshot_20220317-094535_Photos~2.jpg
Crop, Rotate and Re-Sharpen

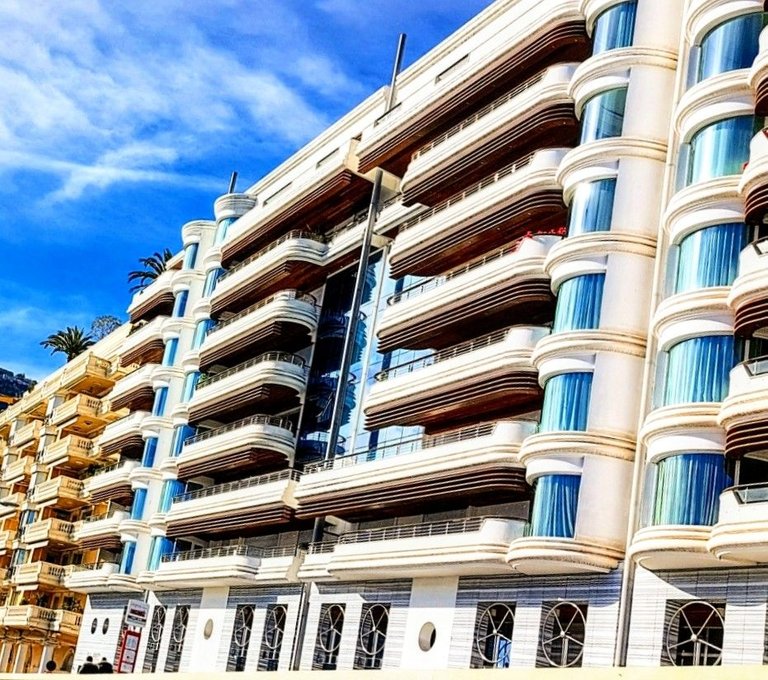
I'm still not entirely pleased with the end product because the cropping made it blurry anyway, but you get the idea of what you could do if you combine multiple techniques.

Screenshot_20220309-203924_Photos~2.jpg

I might do this to highlight some detail of a building like the windows or doors for example or maybe a carving within a facade.

Well thats it for now. Let me know your thoughts in the comments and please feel free to share any suggestions or additional tips on how you edit your photos.

Sort:  

I am bookmarking this post!
It needs to be well studied 😃🙌

Hopefully it's helpful 😁
I'm sure everyone has their own tips and tricks that they use.

Secret: I really don't use these filters and all, so I should learn it 😇

Your photos are quite good for not being edited at all. It's not a necessary thing to edit by any means, but it's an option.🙂

Quite good and super good is not the same hehe :)

But I admit, I dont do it as I sometimes just make the photo worse, as I have to learn first what is the purpose of each filter and what you can achieve and what not.

So, it is better for me if I leave a photo unedited than making more harm trying to edit it but not knowing what and how!

First to learn (and your post will come very welcome in that learning process) and then try :)

That makes sense.
Good luck if you do decide to give it a go 😁

Thanks

I hope that day will come 😅


I really enjoy reading your comments, that's why I'm always following your interaction work. Keep adding value to our blockchain.


Banner Firma inglés.gif

@elcomentador is a Comment Curation Project.

We reward valuable feedback. We encourage engagement on Hive.

Earn passive income while supporting engagement. Join our curation trail.

|| Direct link ➡️ HERE. || 👩‍🏫 See our tutorial guide.

💬 Do you like our work? 😀 Consider voting this comment and help us grow! 💬
Si quieres saber más sobre los comentarios y su importancia en la blockchain Hive, visit the hashtag #hivecomments

Thank you @elcomentador 😇

I know editing makes a massive difference to your images, especially to the likes of us who take crappy photos, but sometimes I'm just too lazy to do it. No pain no gain is so true here. Must up my game and start posting regularly again. I still got tonnes of content from my cruise last month that I haven't posted yet.

Yeah it's a ton of work so I get it for sure. I try to do it during transport if I can, like when my wife drives, or on a plane or a train for instance. But there are times that I need a break from editing. Thats why I post about a place weeks or even months after we went there haha.

Excellent post, great tips for us mortals who don't have sophisticated equipment.

Yeah, it's nice that you don't need a special camera anymore to take good photos.

Great photo editing tips right here. I haven't used the Google photo app but I use Snapseed on my phone for instant editing where one can customize personalized filters too. It has tons of tools.

Generally, any editor is an improvement and each person has their own preferences but you're the second person to recommend snapseed to me, so it must be good 👍

I tried many apps but some presets are often paid or require a subscription so I like Snapseed because it's completely free. It's perfect when I feel lazy transferring photos from my phone to laptop but for blogging, Lightroom is by far the quickest editing tool.

I want the magic eraser feature from lightroom but it's only in the premium version and I'm not will to pay money for an editor lol. But it's a pretty awesome tool.

Snapseed has a Healing tool to erase unwanted objects and spots on the photo.

that's probably what I'm referring to. Different apps call it different things i think. Do you know if that's on the free version or the paid version?

Yes, it's available on the free version including all of the other tools like HDR, Lens Blur, Saturation, Drama, and more. It's fun to experiment and you can create and save your own custom settings so you don't need to do each adjustment on the photo every time.

Okay good to know. Thanks 😊

I agree with you. there is no need to have a good camera because today with some software you can rework the photographs and then put them in our posts to enrich the post. Congratulations for this post, great article, in which you made some excellent examples

Yes I agree. Thanks, I'm glad you liked the post.

Great post for those who need it! Realistic and good advices too! I do same as you do with editing photos, but I often edit them in Photoscape LOL! I use this easy editing program from my childhood 🤣🤣

I think any editor is fine, whatever a person is comfortable using. Even the very simple apps can improve photos significantly.

I'm more comfortable doing it on my PC, that's the reason I use this easy photo editior. Though editing photos via google photo app is really easy too.

I used to do it on my pc as well but I find it takes a lot longer - for me. I hate he extra step of uploading the photos and all that. I don't have a good system to do it, is all. But each to their own. Its definitely best to do what works for you.

Yeah, I get it. Everyone has his own way of making things.

For instance, I hate it posting from my phone. I dont know how you do it 😆. I couldnt write so much using my phone. And the uploding part is DEFINETELY something I just can't.😐

There are definitely times when posting from my phone is a real pain. Like now for instance, Peakd is giving me a lot of grief at the moment lol. It's definitely easier to do the bulk of a post from a pc though.

Great tips. It's amazing what these modern cellphones can do. I'd totally switch a DSLR + Lightroom for a proper cellphone, especially when my pc is old as hell and takes for ever to process photos.

Yeah it's pretty awesome what they do these days.
Yeah I used to edit on my pc and I found that it took a lot longer.

This is a great and I'm sure very helpful post for those who may not be familiar with it. Admittedly, I almost never edit my photos unless they're really, really drab and dark. And when I edit them, it often doesn't work out the way I'd like, but I guess I make it too easy for myself with just a few swipes of my fingers.. amazing that you don't need any special equipment and just do it with your phone and the app .. Thanks for your guidance!

Yeah the standard apps make it pretty easy and unnecessary for special equipment.

Excellent informative post about editing with great before and after photo examples! @leaky20

I don't know about you, but I truly enjoy editing images. Sometimes I lose track of time for hours at a time once I start going through my digital images. It's fun, relaxing and gives me a sense of artistic achievement.📸

Congratulations on the well deserved success of your post!💯

I generally do like it but it can be overwhelming because I usually have so many photos lol. It's super time consuming.

Good tips! As an alternative to the "preloaded" Google photo app there is Snapseed (which is owned by Google) available on Android and iOS. Snapseed is FREE (no ads), small, fast, and incredibly powerful - it can even import and process RAW photos, from other cameras if your phone doesn't support RAW.

https://play.google.com/store/apps/details?id=com.niksoftware.snapseed
https://apps.apple.com/de/app/snapseed/id439438619

One of my favorite (of countless useful) features is the ability to deal with perspective distortion. As you can see on your own "garbage" photo, it does this quite masterfully, filling in the keystoning intelligently so no crop is required in many instances:

ksnip_20220320-124119.jpg

Alas, it can't correct pincushion and barrel distortions, which is the only feature I find lacking. Give it a whirl and see what you think.

Sounds like a good app. One feature that I've been looking for that is hard to find in a free app is a magic eraser that can delete parts of a photo. I've tried a few different apps and none have worked very well at all do I got rid of them. Do you know of snapseed has that feature?

Yes, it does. It's called "Repair" and automagically removes smaller items and blemishes. Removing the red trash container in your picture for example would be a stretch, though.

There is a double exposure feature that can fill in items off another (or a copy of the same) photo which could be helpful. Just about any function can be brushed on with adjustable brushes, the double exposure, too.

It's all done via zoom level. Remember, everything is geared towards fat fingers on a tiny phone screen. Try it, you'll like it.

P.S. You can make changes (brushed, too) steps down the unlimited undo ladder without losing edits that came after. That's pretty great.

removes smaller items and blemishes. Removing the red trash container.

I'm looking for something that can remove the trash container lol. My friend used lightroom and it has that feature. He removed like 25 people from a photo he took and you can't tell at all. He has the paid premium version though and I'm too cheap to pay money for something like that. It uses AI to match the area with the surrounding scenery or you can use a stamp taken from a different part of the photo.

Snapseed does sound interesting though. I'll have to give it a go.

Sorry, no AI. If I wanted that I'd use Luminar AI on the PC which is cheaper than Adobe and very good. That thing can replace the entire sky including the lighting and shadows, turning a cloudless noon sky into a dramatic sunset. To me, that's not "improving" anymore, that's cheating (or "painting" if you want to be charitable).

you can use a stamp taken from a different part of the photo

That we can do: Double exposure, load the original photo as the overlay, size/rotate/move the overlay, set transparency to 0 (shows ONLY the overlay anymore). Then go to the undo history, select the double exposure you just did and begin to "brush on" only the area where the overlay covers the undesired feature. Zooming in makes the brush smaller in relation to the surroundings, so you can be quite precise.

You can double expose anything, any photo, and even do multiple exposures. The power is hidden in the UNDO chain, that's a bit counterintuitive, but you get used to it.

Here is my quick and dirty removal of the red container. Investing a few more minutes, you could do it a lot cleaner and better matched. You could also use the UNDO-brush system to selectively change the color of the overlaid car etc.:

test-01.jpeg

Oh shit man! That's super cool. I think that its you who should be the one to do a post on the subject.

Also the way you are explaining things is going way over my head. I think that you think I am way more technical than I actually am hahaha 😆 🙃

To me, that's not "improving" anymore, that's cheating

I agree with this part of what you said as well. In my post I tried to convey that I like to provide a good representation of a place and not over do it on the editing. Online you often see photos that ramp up the color or whatever, so much that you think the town is painted like a rainbow or something, but then you get there and it's like:
meh...😒 I didn't need to see this.

Here, I changed the color of the car and had a cat I painted a while ago photobomb the scene. It is not complicated at all, you just need to download the app and play with it. It also comes with a ton of instructions and tips built right in. Again, the real power is in the undo history, icon top right, view changes. (Mine is labeled in German, so I can't tell you exactly what yours says).

test-01-01.jpeg

ksnip_20220322-092434.png

Hahaha😆 nice!
Yeah I downloaded the app now and am working through it. I love the healing function. Once I figure the ins and outs of that it will be a game changer lol. The tutorial videos are helpful and the brush for individual edits is super cool as well. There's so much that it's a bit overwhelming but I know that is just because it's new. Once I mess with it a little it will be fine.