Hola amigos de
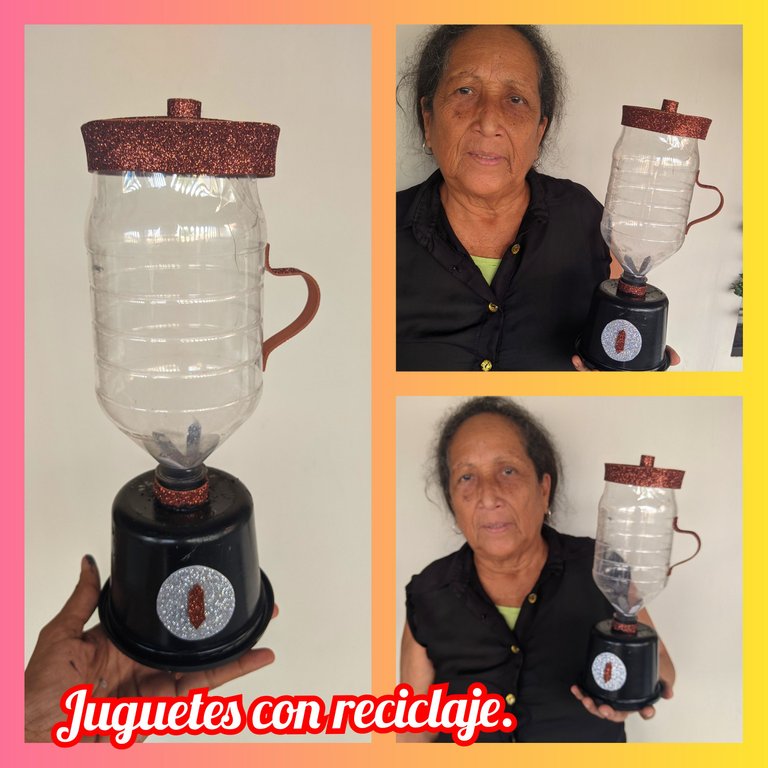
#hive espero que estén bien todos ustedes, por supuesto en compañía de sus familiares, yo feliz porque estás fiestas me sirven para sacar toda la creatividad que tengo, y hablando de eso, les cuento que mi post del día de hoy se trata de un trabajo de reciclaje que hice a una sobrinita.
Les cuento, resulta que a la hija de mi sobrina le mandaron hacer un trabajo que consiste en realizar un electrodoméstico pero con materiales de reciclaje, la niña y su mamá no saben hacer estás manualidades y yo me ofrecí hacer está tarea, pero eso sí, con la condición de que la niña se quedará conmigo trabajando para que aprenda, porque no se trata de hacerle los trabajos a los más pequeños, se trata de enseñarlos, y así fue que hice.
Acá la lista de materiales, el paso a paso y las fotos finales, espero que les guste el trabajo.
♻️ MATERIALES♻️
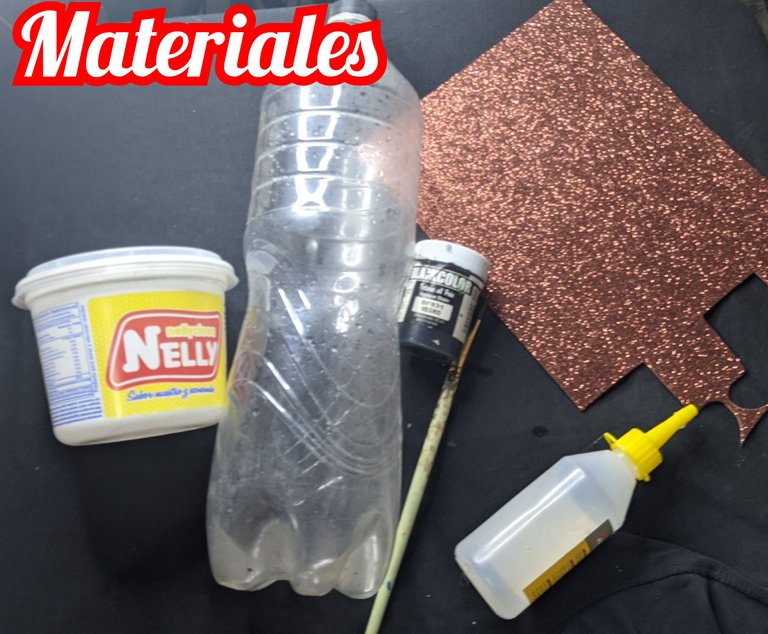
♻️ Botella plástica de refresco.
♻️ Envase de mantequilla.
♻️ Silicón líquido.
♻️ Foami escarchado marrón.
♻️ Foami escarchado plateado.
♻️ Pintura negra.
♻️ Cartulina.
♻️ Tijera.
♻️ Pincel.
♻️ Regla.
♻️ Lápiz.
♻️ Paso a paso ♻️
♻️ Paso 1:
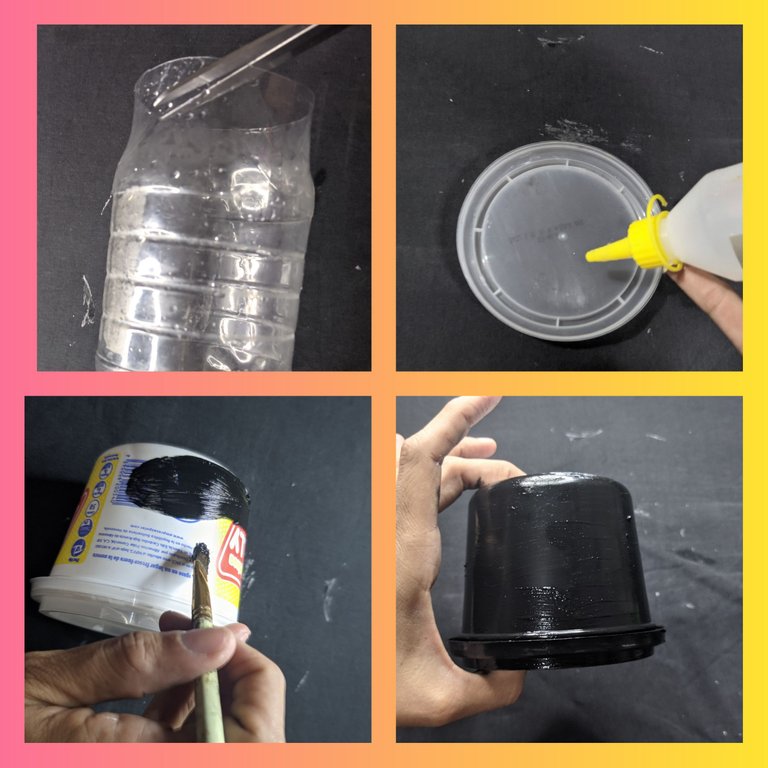
Tome la botella de plástico y con ayuda de la tijera recortamos a la mitad, luego tome el envase de mantequilla previamente lavado y retire la tapa a la que le coloque un poco de silicón líquido en los bordes y procedí a pegar nuevamente. Cuando está lista tome el pincel y la pintura negra y pintamos el envase de mantequilla y dejamos secar.
♻️ Paso 2:
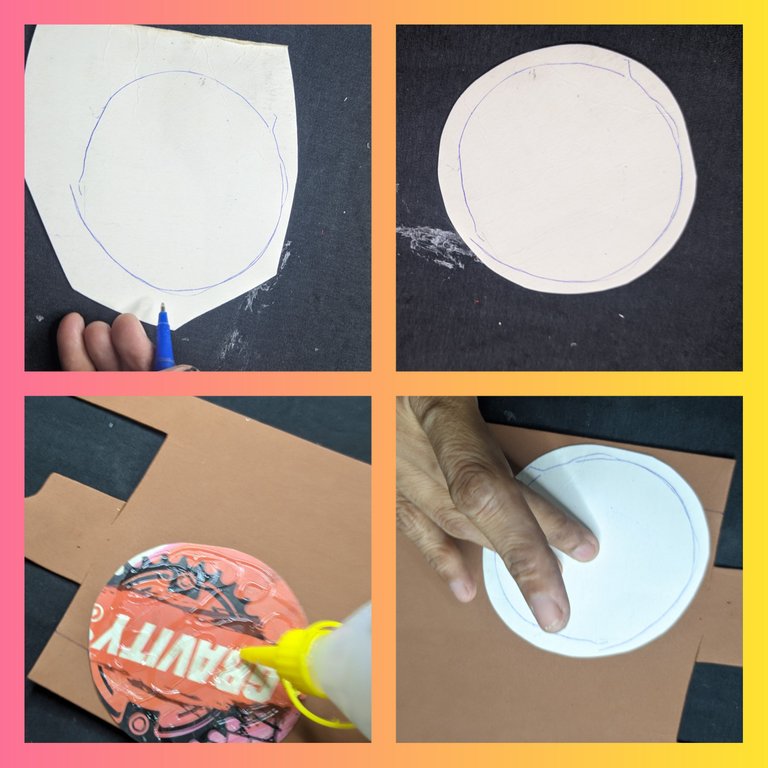
Tome el pedacito de cartulina y marcamos un círculo del tamaño de la botella de refresco, luego recortamos y pegamos encima del foami escarchado marrón y luego recortamos.
♻️ Paso 3:
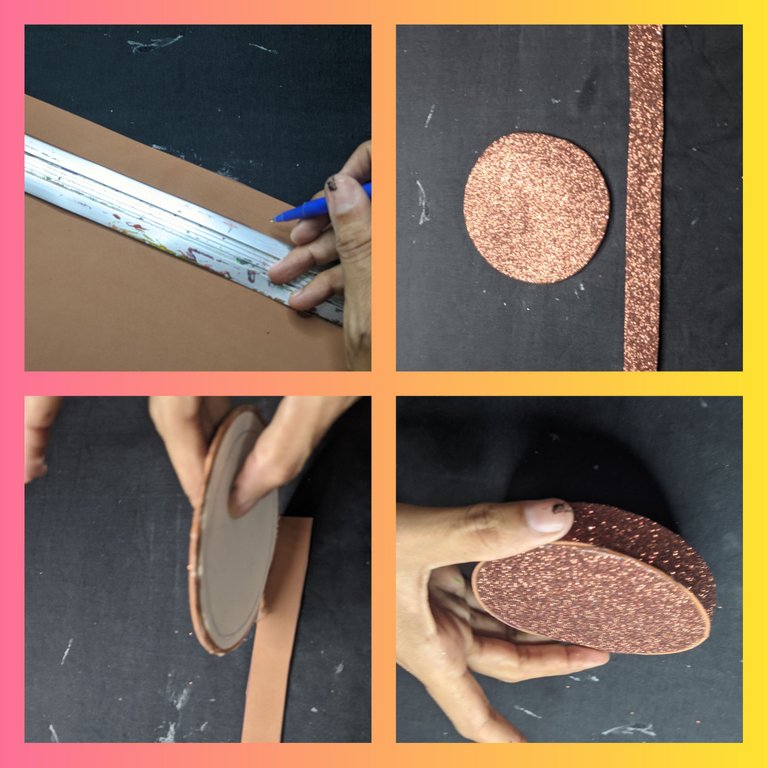
Luego en el mismo foami con ayuda de la regla marcamos una tira de unos 2 cm de ancho por 20 cm de largo y recortamos, después al círculo que forramos le aplique silicón líquido por los bordes y pegamos la tira que recorté y dejé secar.
♻️ Paso 4:
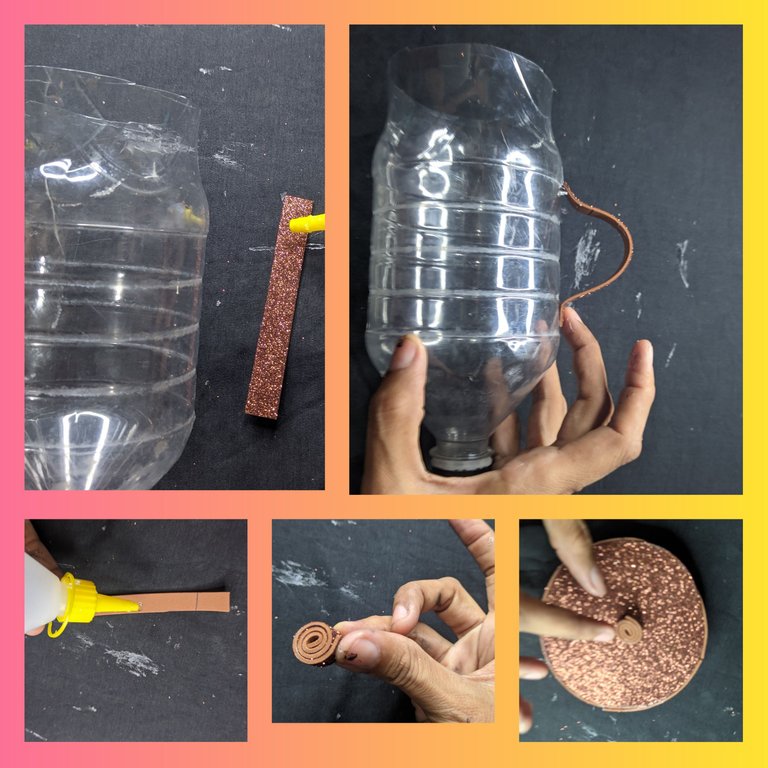
Ahora recorté dos tiras de 2 cm de ancho y 10 cm de largo, en una de las tiras, en cada extremo aplicó silicón líquido y pegamos en uno de los lado y dejamos secar, ahora tome la otra tira y procedi a enrollar y pegamos con silicón líquido encima de la tapa que hicimos antes.
♻️ Paso 5:
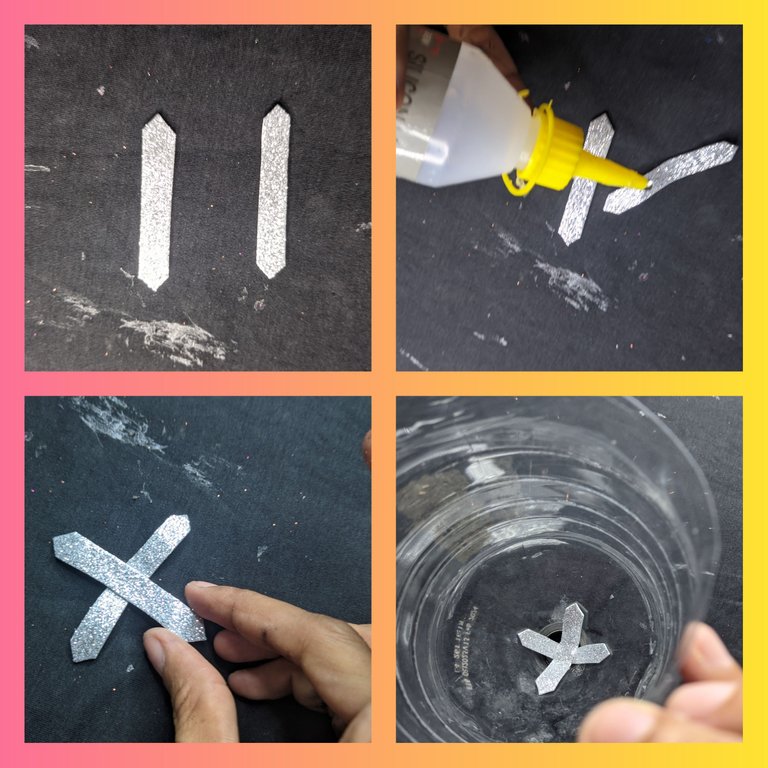
Del foami plateado recorté dos pequeñas tiras y recortamos las puntas, luego pegamos en el centro las dos tiras y cuando está seca pegamos dentro de la botella, para que se vea como el aspa de la licuadora.
♻️ Paso 6:
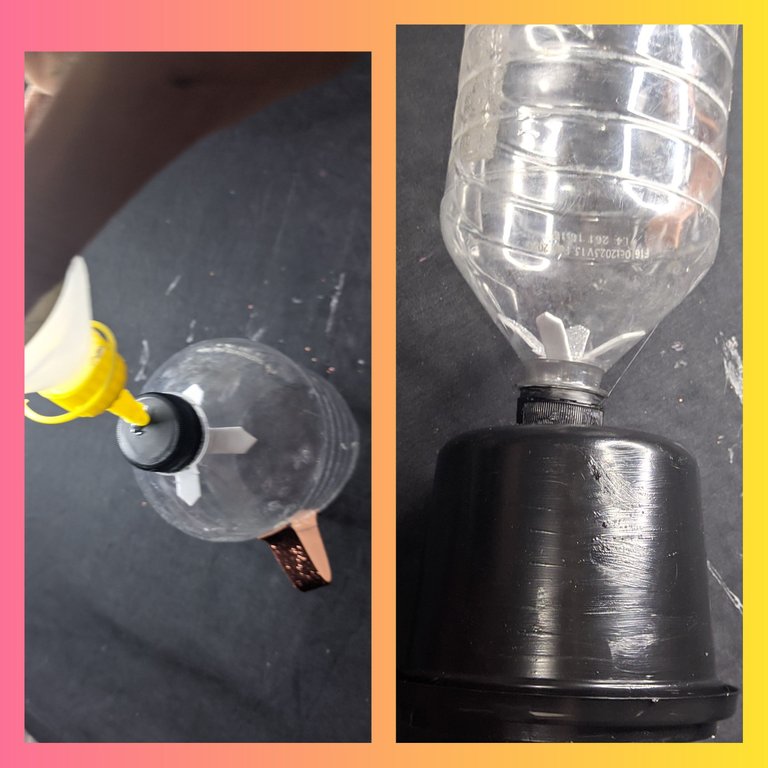
Cuando las dos piezas están listas procedemos a pegarlas con el silicón líquido y dejamos secar.
♻️ Paso 7:
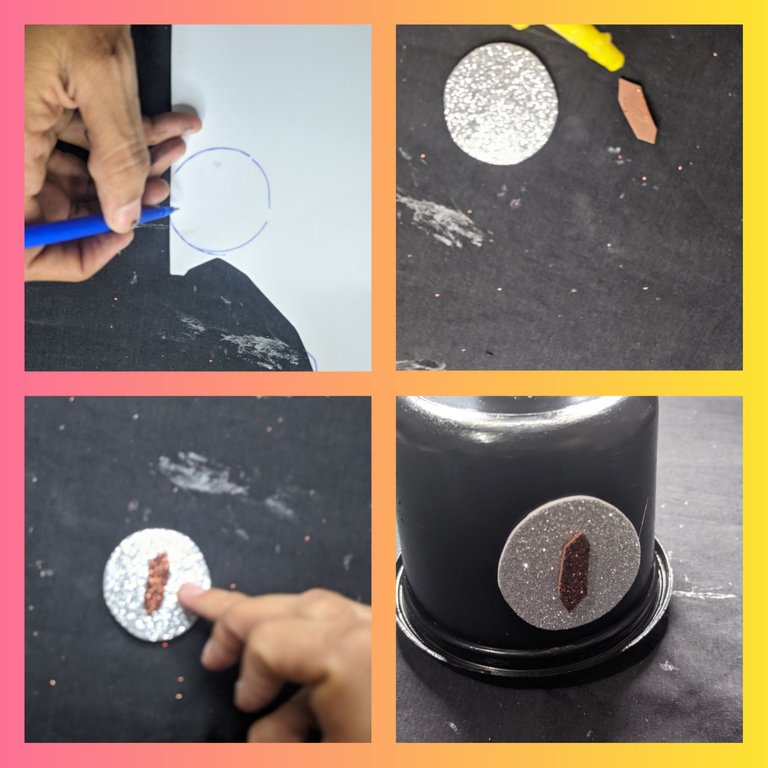
En el foami plateado marque y recorte un pequeño círculo y luego pegamos silicón líquido y del foami marrón recorte una pequeña tira y pegamos en el centro del círculo.
♻️ Paso 8:
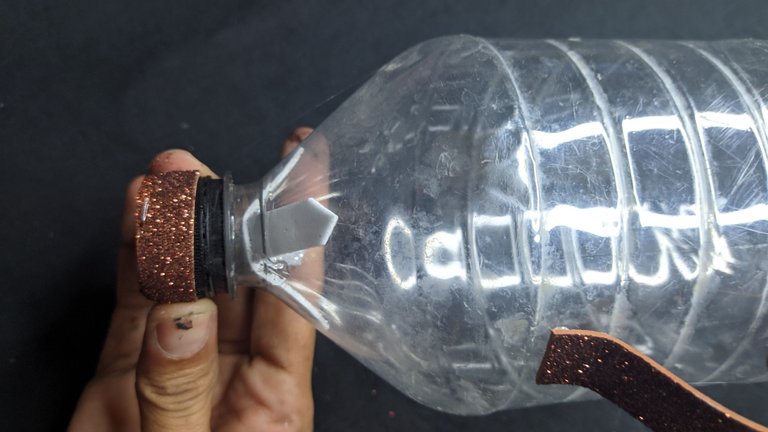
Finalmente recorte una pequeña tira de foami marrón escarchado y con el silicón líquido pagamos en la unión de la botella de plástico de refresco y el envase de mantequilla, y listo hemos terminado.
♻️ FOTOS FINALES ♻️
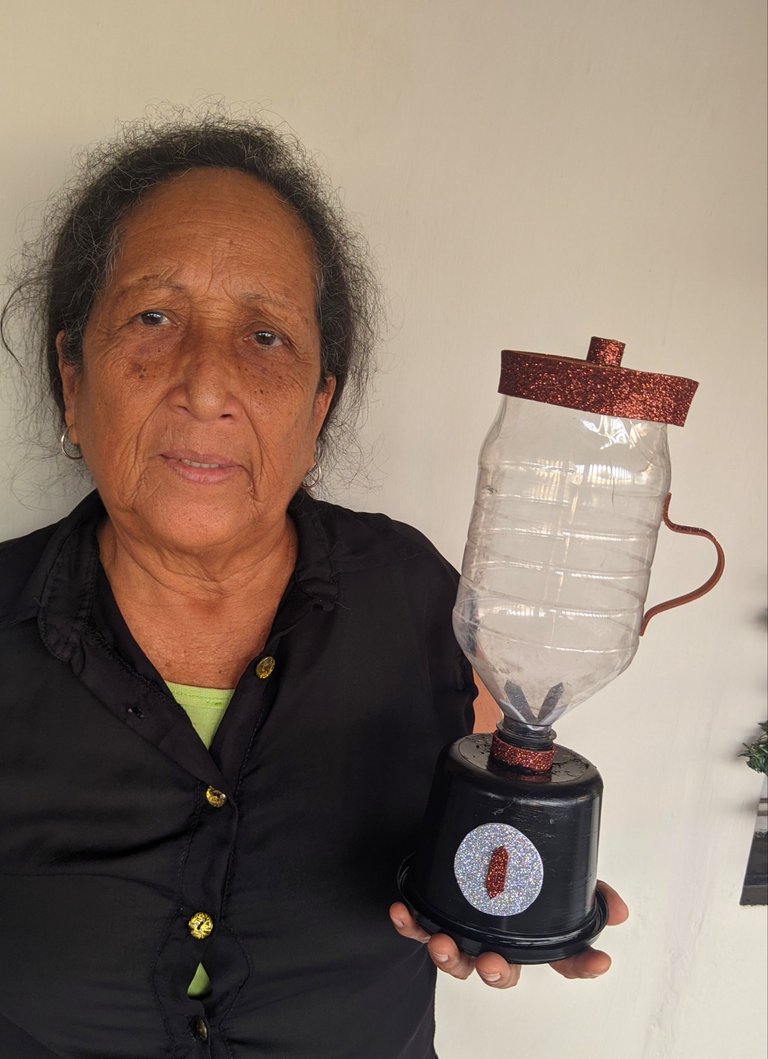
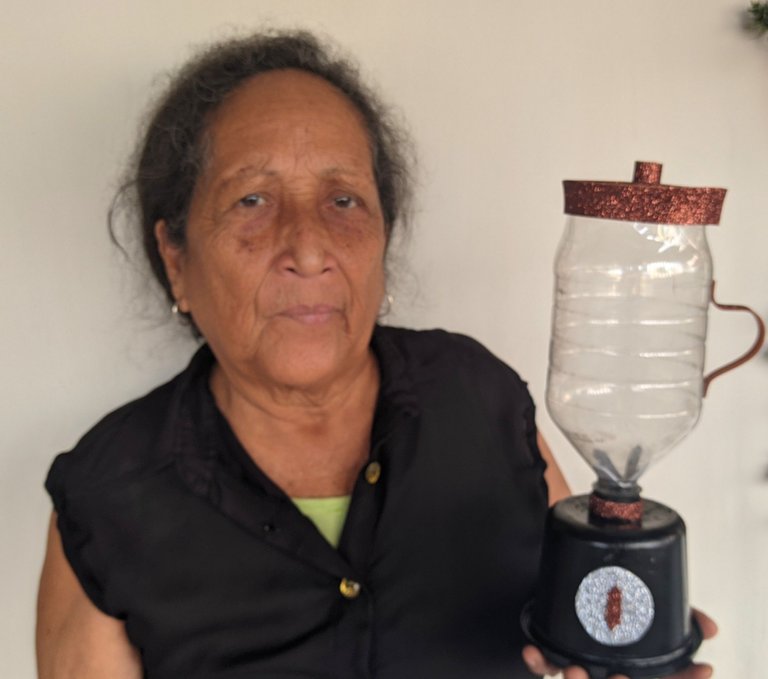
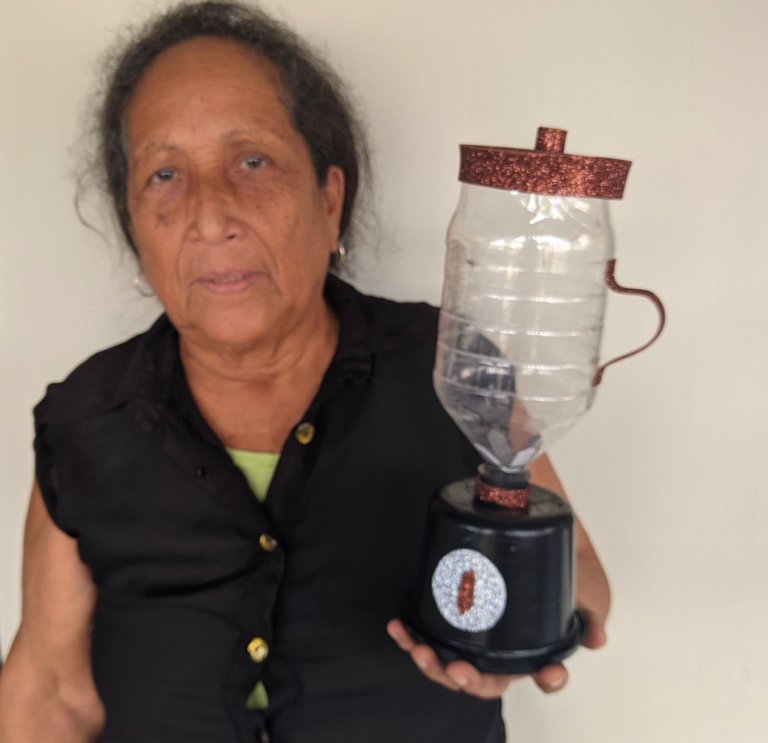
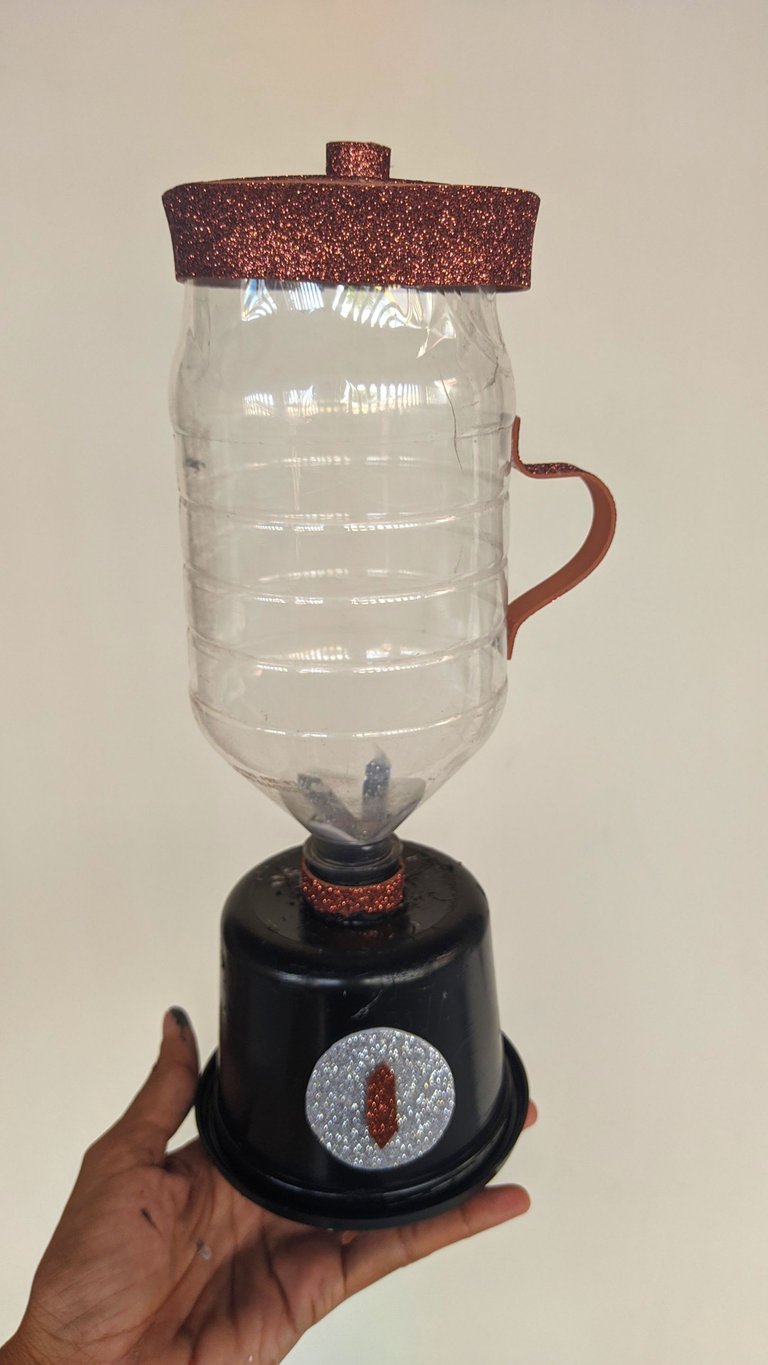
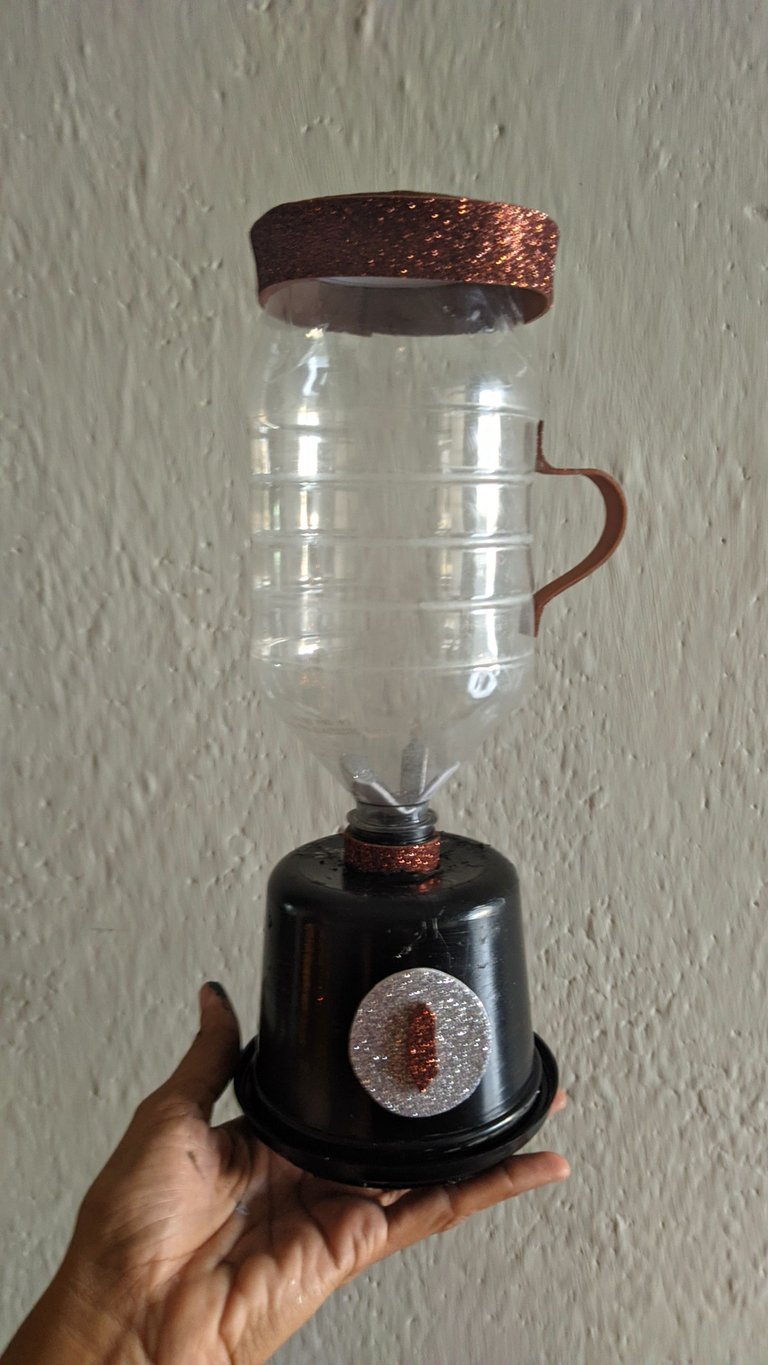
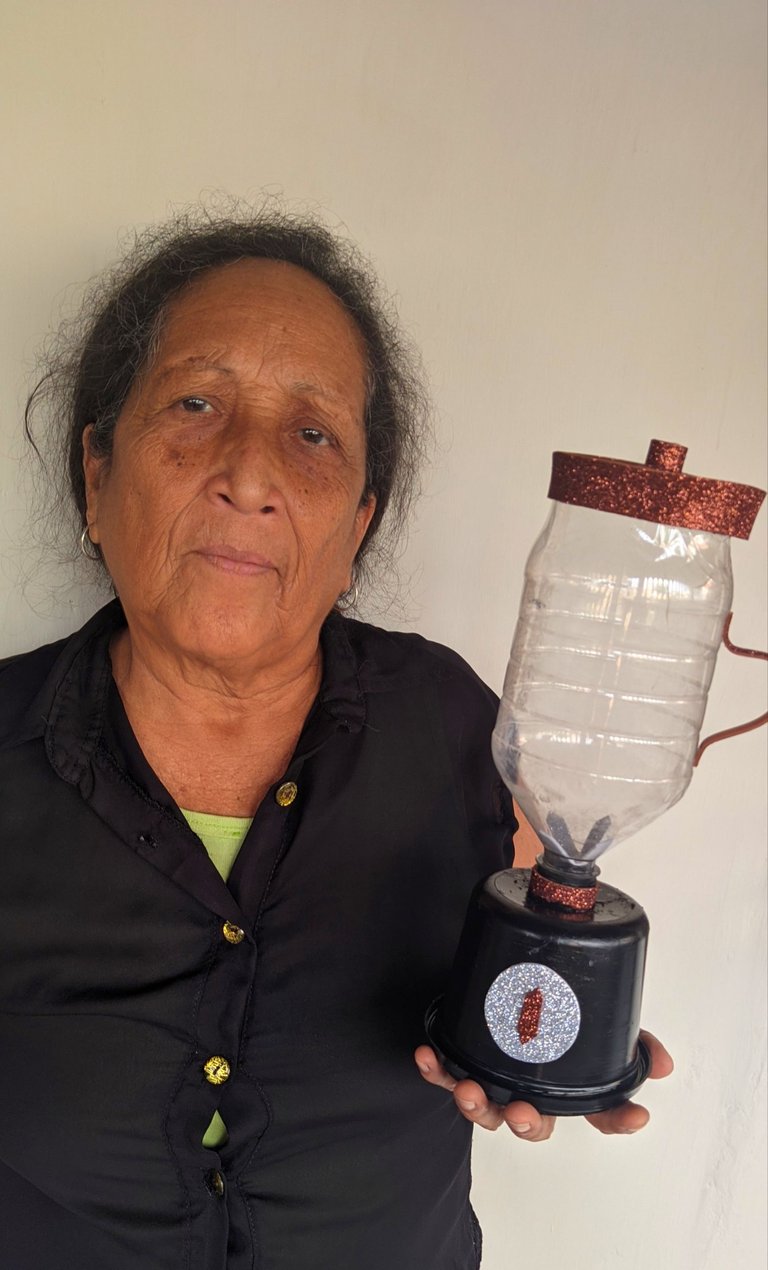
Díganme qué les pareció este trabajo manual de reciclaje, ven que se pueden realizar increíbles trabajos con objetos que tenemos en nuestros hogares, por ahora es todo, espero de todo corazón que les guste, si es así házmelo saber, para este post utilice el programa polish y el traductor deepl versión gratis, y todas las fotos fueron tomadas con mi teléfono Xiaomi y son mías.
Dios me los bendiga


♻️ ENGLISH ♻️

Hello friends of
#hive I hope you are well all of you, of course in the company of your families, I am happy because these holidays serve me to get all the creativity I have, and speaking of that, I tell you that my post today is about a recycling work I did to a little niece.
I tell you, it turns out that my niece's daughter was asked to do a job that consists of making a household appliance but with recycling materials, the girl and her mother do not know how to do these crafts and I offered to do this task, but yes, on the condition that the girl will stay with me working to learn, because it is not about doing the work to the little ones, it is about teaching them, and so I did.
Here is the list of materials, the step-by-step and the final photos, I hope you like the work.
♻️ MATERIALES♻️

♻️ Plastic soda bottle.
♻️ Butter container.
♻️ Liquid silicone.
♻️ Brown frosted foami.
♻️ Silver frosted foami.
♻️ Black paint.
♻️ Cardboard.
♻️ Scissors.
♻️ Brush.
♻️ Ruler.
♻️ Pencil.
♻️ Step-by-step ♻️
♻️ Step 1:

Take the plastic bottle and with the help of the scissors cut it in half, then take the butter container previously washed and remove the lid to which I put some liquid silicone on the edges and proceeded to glue it again. When it is ready, take the brush and the black paint and paint the butter container and let it dry.
♻️ Step 2:

Take the small piece of cardboard and mark out a circle the size of the soda bottle, then cut out and glue on top of the brown frosted foami and then cut out.
♻️ Step 3:

Then on the same foami with the help of the ruler we mark a strip about 2 cm wide by 20 cm long and cut it out, then we apply liquid silicone to the circle that we lined and stick the strip that I cut out and let it dry.
♻️ Step 4:

Now I cut two strips of 2 cm wide and 10 cm long, on one of the strips, on each end I applied liquid silicone and glued it on one side and let it dry, now take the other strip and proceed to roll it up and glue it with liquid silicone on top of the cover we made before.
♻️ Step 5:

From the silver foami I cut out two small strips and cut off the ends, then glue the two strips in the middle and when it is dry glue them inside the bottle, so that it looks like the blender blade.
♻️ Step 6:

When the two pieces are ready we proceed to glue them with the liquid silicone and let them dry.
♻️ Step 7:

On the silver foami mark and cut out a small circle and then stick liquid silicone and from the brown foami cut out a small strip and stick it in the centre of the circle.
♻️ Step 8:

Finally I cut a small strip of frosted brown foami and with the liquid silicone I put it on the joint of the plastic soda bottle and the butter container, and I'm done.
♻️ FINAL PHOTOS ♻️


Tell me what you thought about this manual recycling work, you see that you can make incredible works with objects that we have in our homes, for now is all, I hope with all my heart that you like it, if so let me know, for this post I used the polish program and the translator deepl free version, and all the photos were taken with my Xiaomi phone and are mine.
God bless you


