Hola a todos mis nietecitos de
#hive, saludos y bendiciones para todos en la mejor blockchain de todas, la única que me permite publicar contenido que va a perdurar en el tiempo, por sus características propias, a diario leo y aprendo más de este ecosistema tan interesante, sobre todo para personas de mi edad.
Hoy continuamos con las manualidades, y quiero mostrarles lo fácil, bonito y práctico que es reparar y reciclar una piñata, que ya estaban a punto de desechar, y que decidí acomodar para tenerla lista, ya que pronto se acerca la celebración de cumpleaños de mi bella flor Lupita, quien este próximo 2 de Diciembre cumplirá 7 añitos llenos de preguntas y mas preguntas.
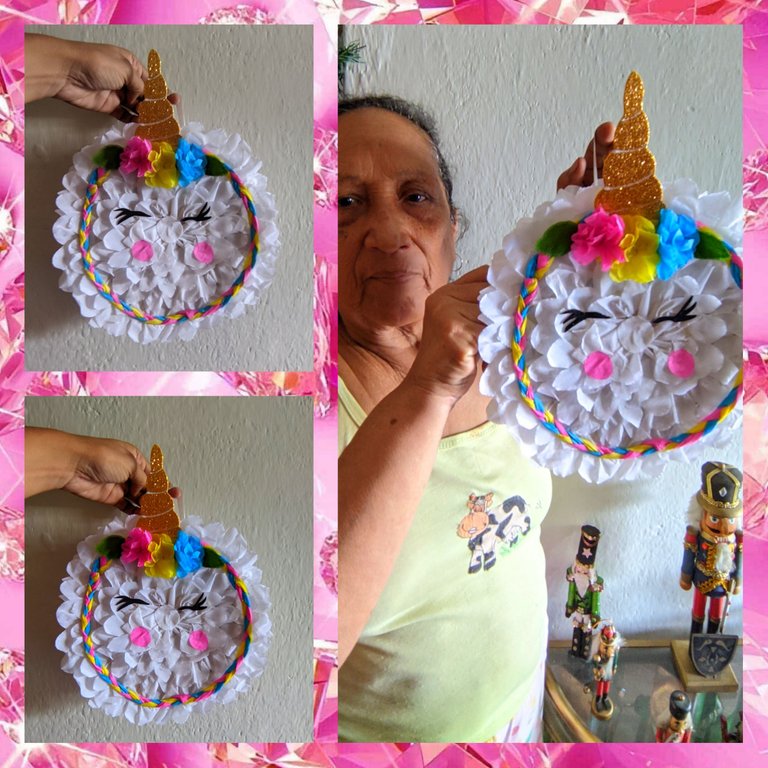
A la fiestecita que su mamá le está preparando solo acudiran sus tres primitos y una vecinita, razón por la cual no le van a colocar piñata para esta celebracion, lo que puso un poco triste a la niña, fue allí cuando decidí que le haría una aunque sea pequeña y he allí el motivo de mi publicación, el día de hoy vamos a aprender como reciclar una piñata, yo esta vez la voy a realizar del motivo de la fiesta que es de unicornios, como siempre aquí les dejo los materiales, el paso a paso y las fotos finales.
🦄 Materiales 🦄
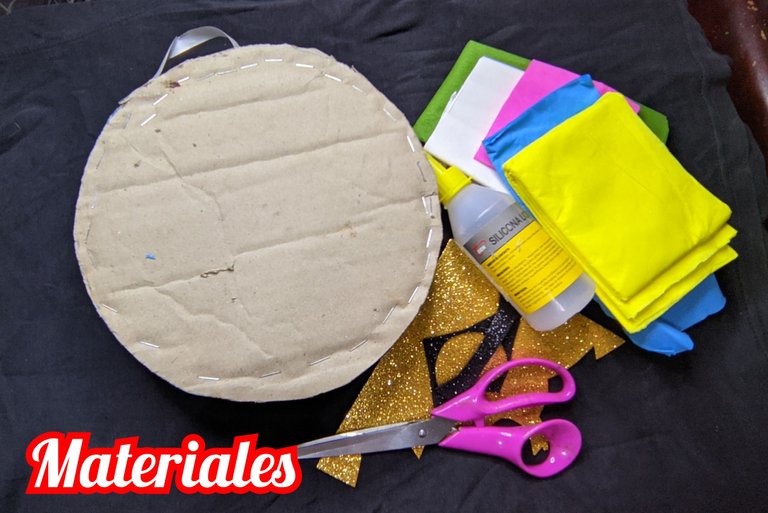
🦄 Armazón de piñata viejo.
🦄 Papel crepé blanco.
🦄 Papel crepé rosado.
🦄 Papel crepé azul.
🦄 Papel crepé amarillo.
🦄 Papel crepé verde.
🦄 Foami escarchado amarillo.
🦄 Foami negro.
🦄 Silicón líquido.
🦄 Pintura al frío blanca.
🦄 Tijera
🦄 Pincel fino.
🦄 Lápiz.
🦄 Regla.
🦄 Paso a paso 🦄
🦄 Paso 1:
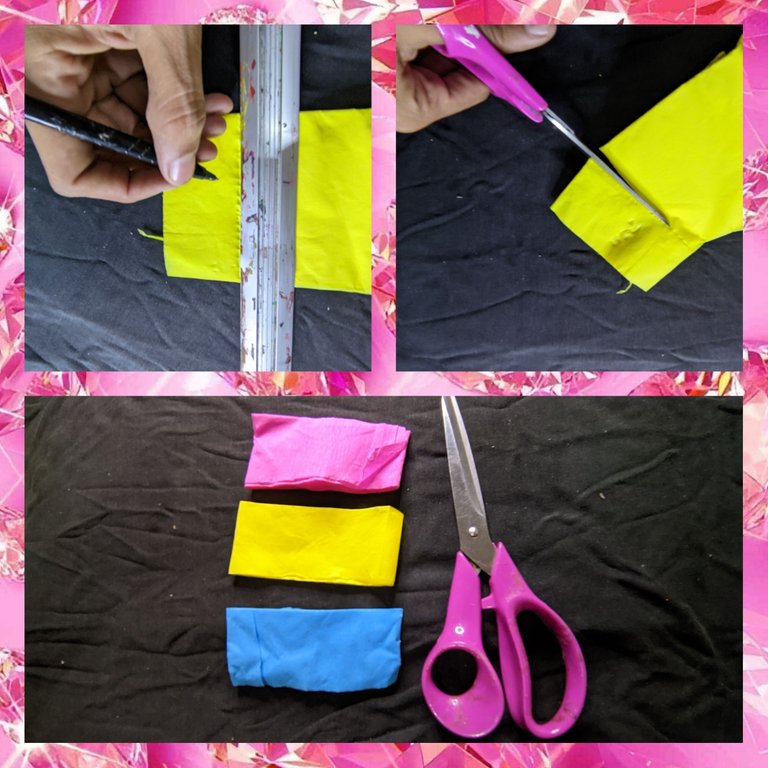
Tome la regla y medimos 5 cm y lo marcamos en el papel crepé, en esta oportunidad lo vamos a marcar en el papel crepé rosado, azul y amarillo, luego las recorté.
🦄 Paso 2:
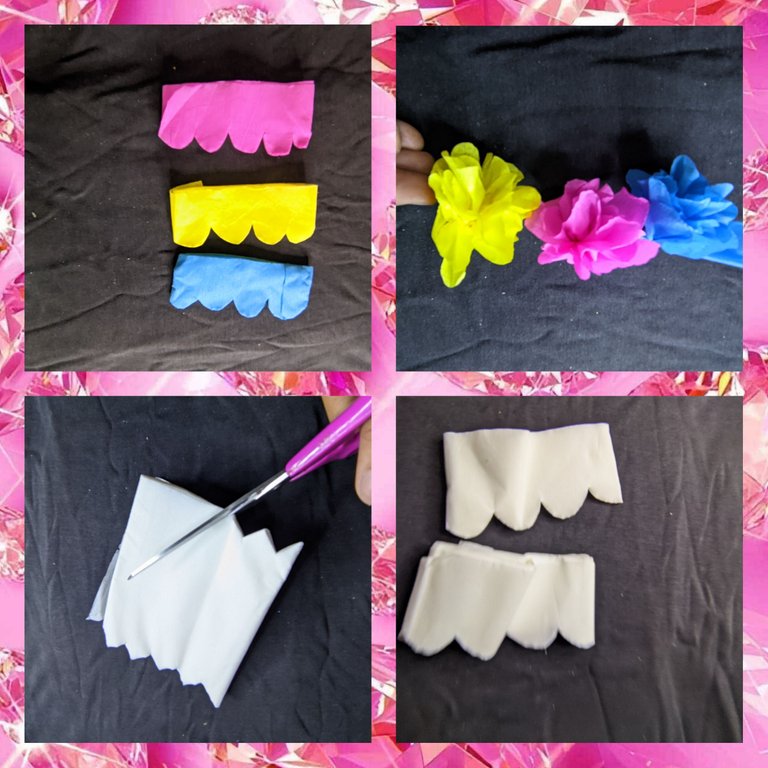
Ahora las tres tiras que recortamos le vamos a recortar el borde, para realizar las flores, y vamos a armar una flor de cada color.
Ahora el papel crepé blanco y recortamos dos tiras una, de 7 cm de ancho, a este le recortamos uno de los bordes de forma circular y una de 20 cm de ancho la cual vamos a recortar por ambos bordes pero estás serán recortadas en forma.de picos.
🦄 Paso 3:
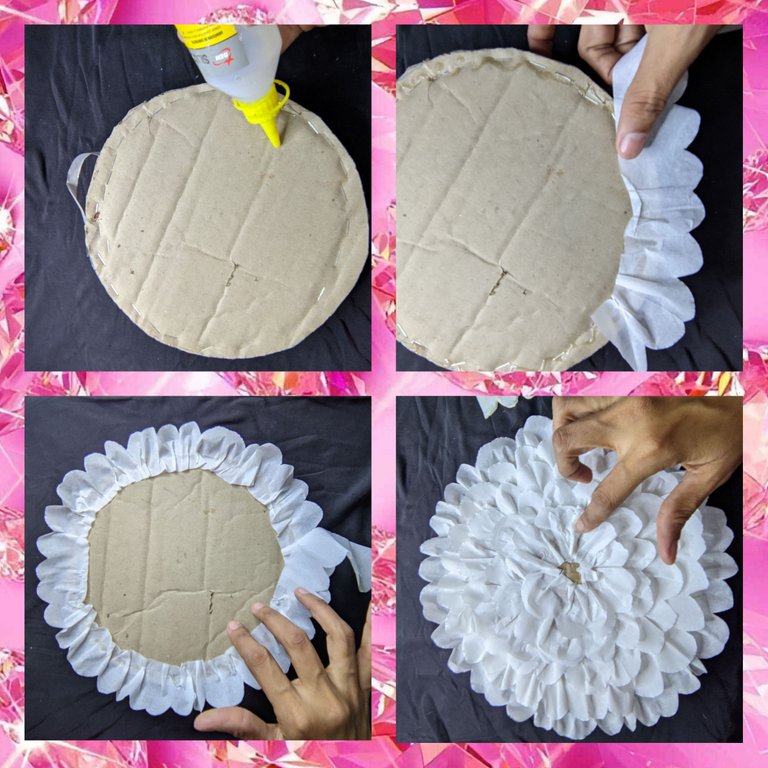
Ahora vamos a proceder con la decoración de la piñata, a la que previamente le retiramos los restos de otra decoración, luego aplicó silicón en la piñata y vamos pegando el papel crepé, este paso lo repetimos hasta cubrir por completo ambas tapas de la piñata.
🦄 Paso 4:
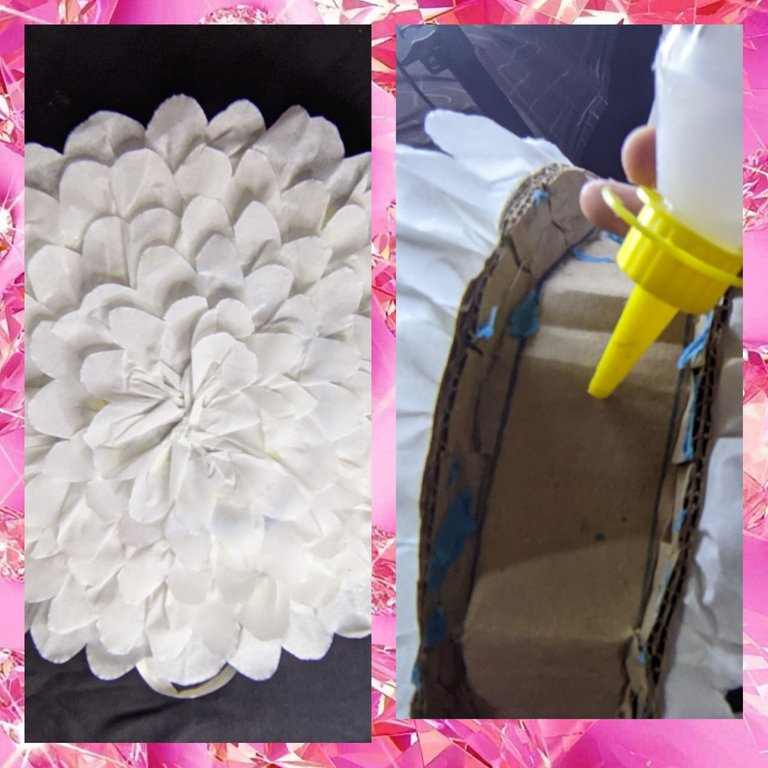
Luego aplicó silicón líquido a los lados de la piñata y procedi a pegar el papel crepé blanco más ancho que recorté y que tiene los extremos de picos.
🦄 Paso 5:
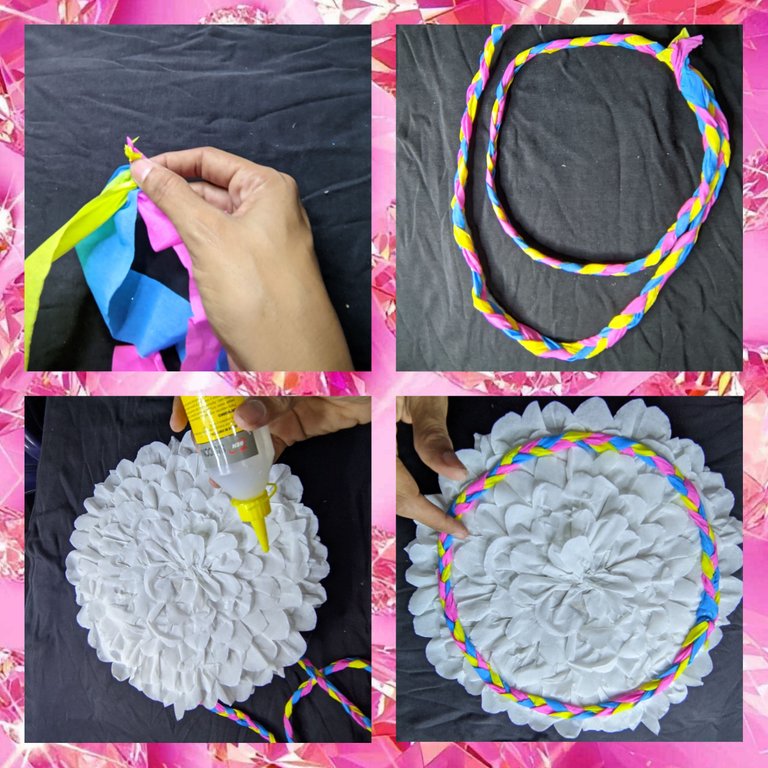
Ahora recortamos tres tiras de 5 cm de ancho cada una, y anudamos las tres y proceso a tejer, cuando ya está lista, aplicamos silicón líquido en el borde y procedemos a pegar el tejido que hicimos.
🦄 Paso 6:
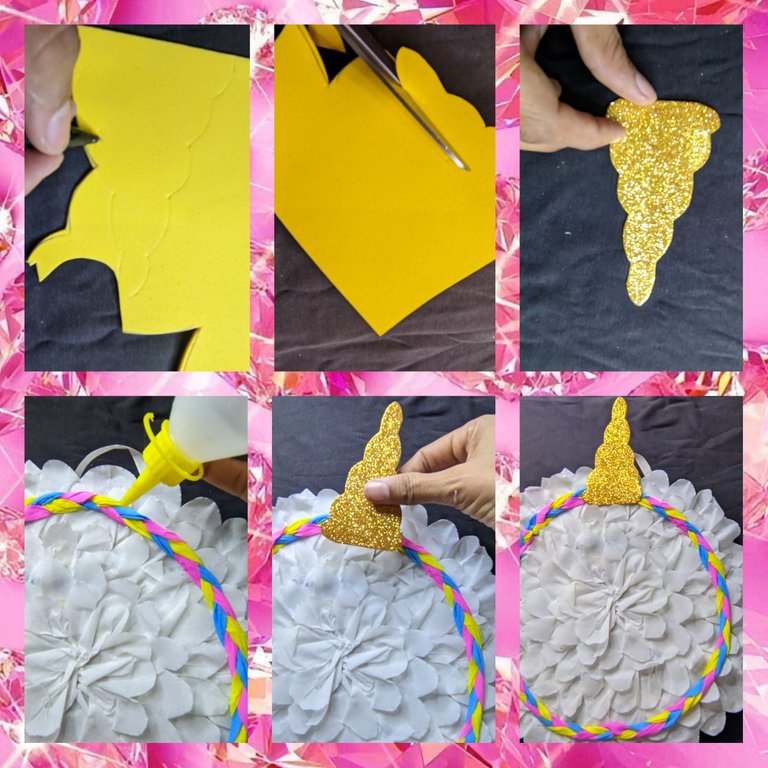
Después tomé el foami escarchado amarillo y dibuje y recorté un cuerno de unicornio, al que le aplicó silicón líquido y pegamos a la piñata.
🦄 Paso 7:
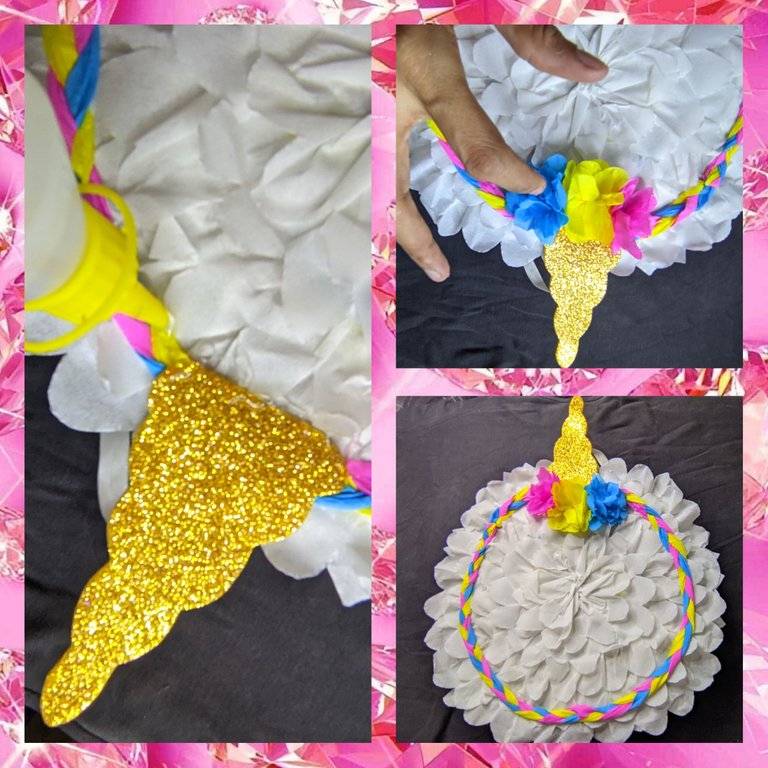
Ahora agarre las flores que hice, les aplique silicón líquido y pegamos en la orilla del cuerno.
🦄 Paso 8:
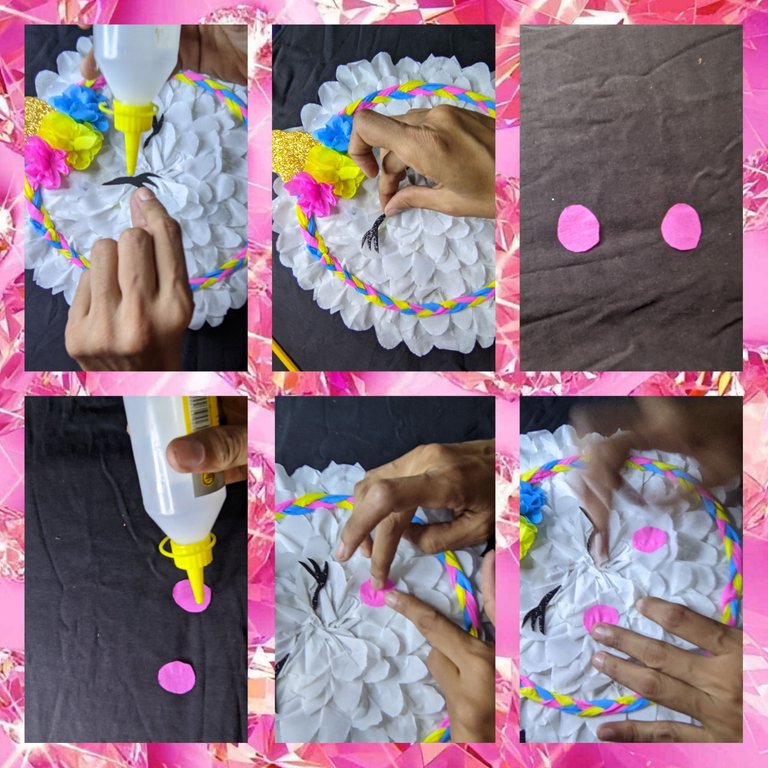
Después en el foami negro dibuje y recorte los ojitos le aplicó silicón líquido y pegamos, también recorte dos pequeños círculos y pegamos en la piñata.
🦄 Paso 9:
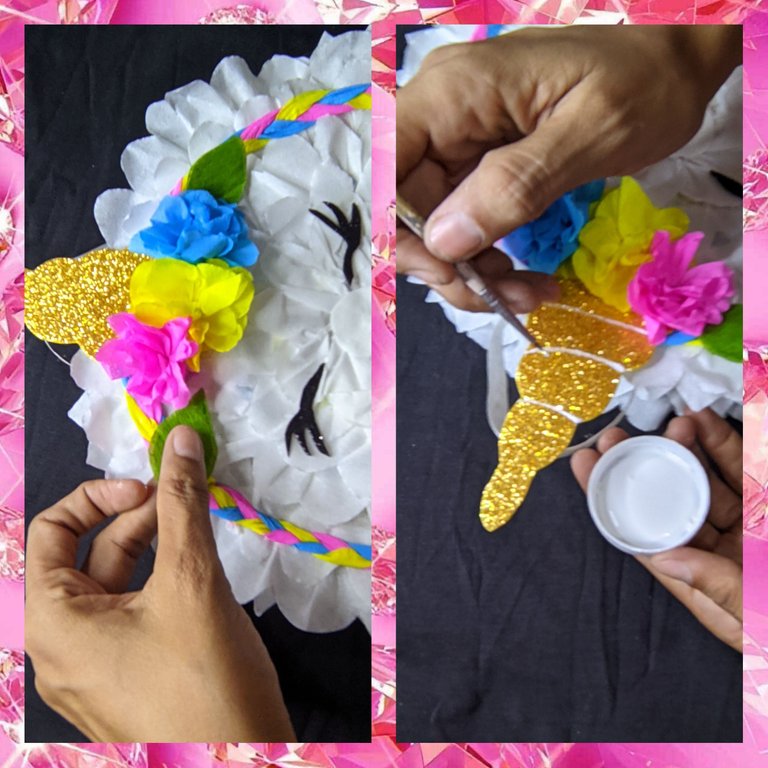
Recorte unas hojitas del papel crepé verde las cuales pegue debajo de la flores, y finalmente con la pintura blanca y el pincel fino delineamos las líneas en el cuerno y listo.
🦄 Fotos finales 🦄
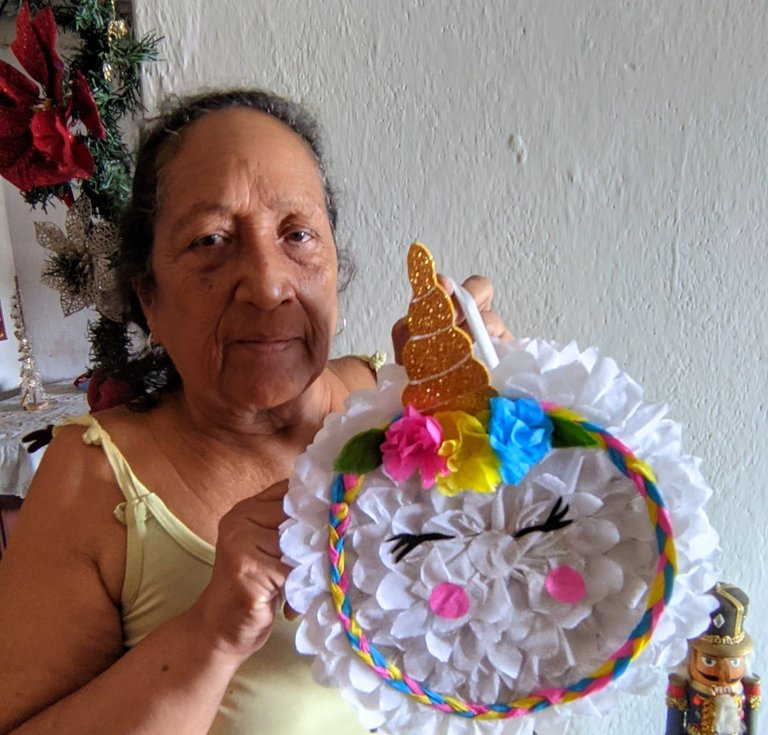
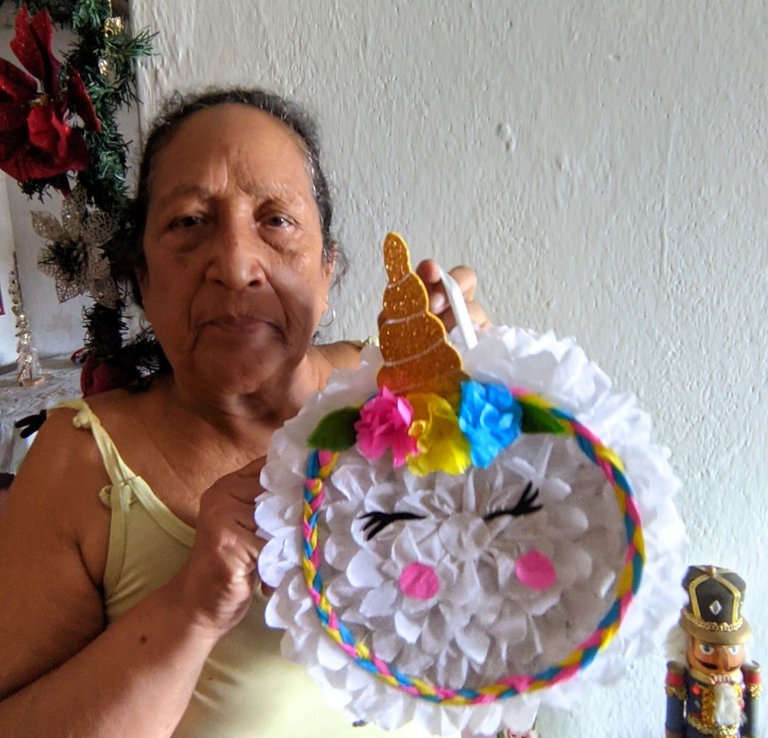
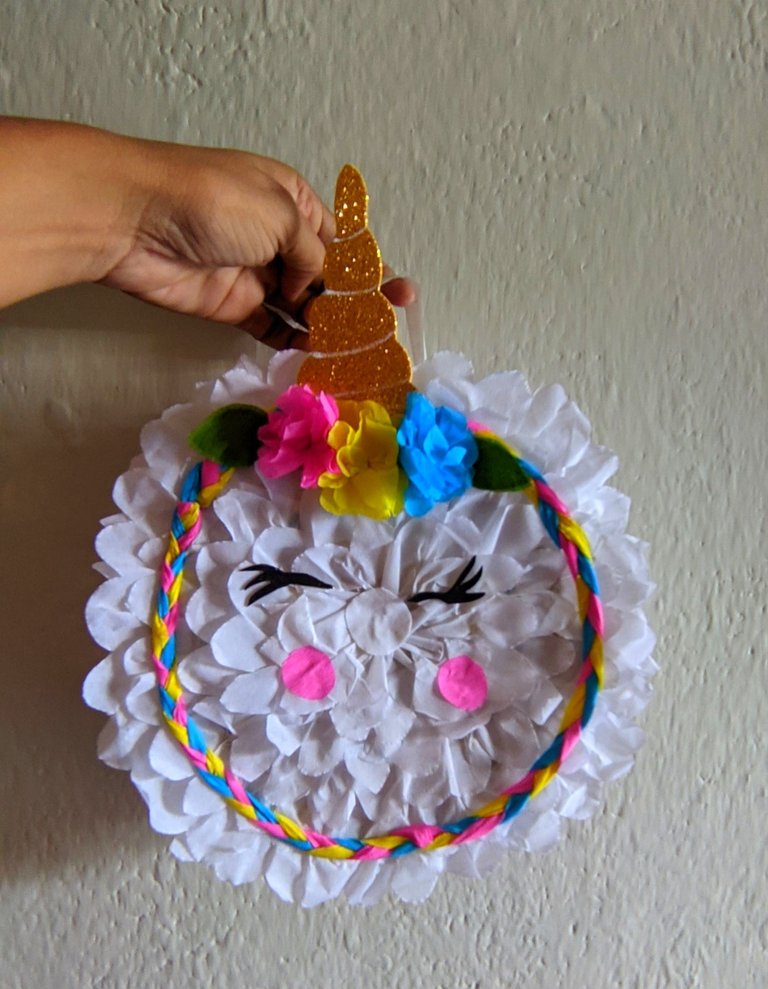
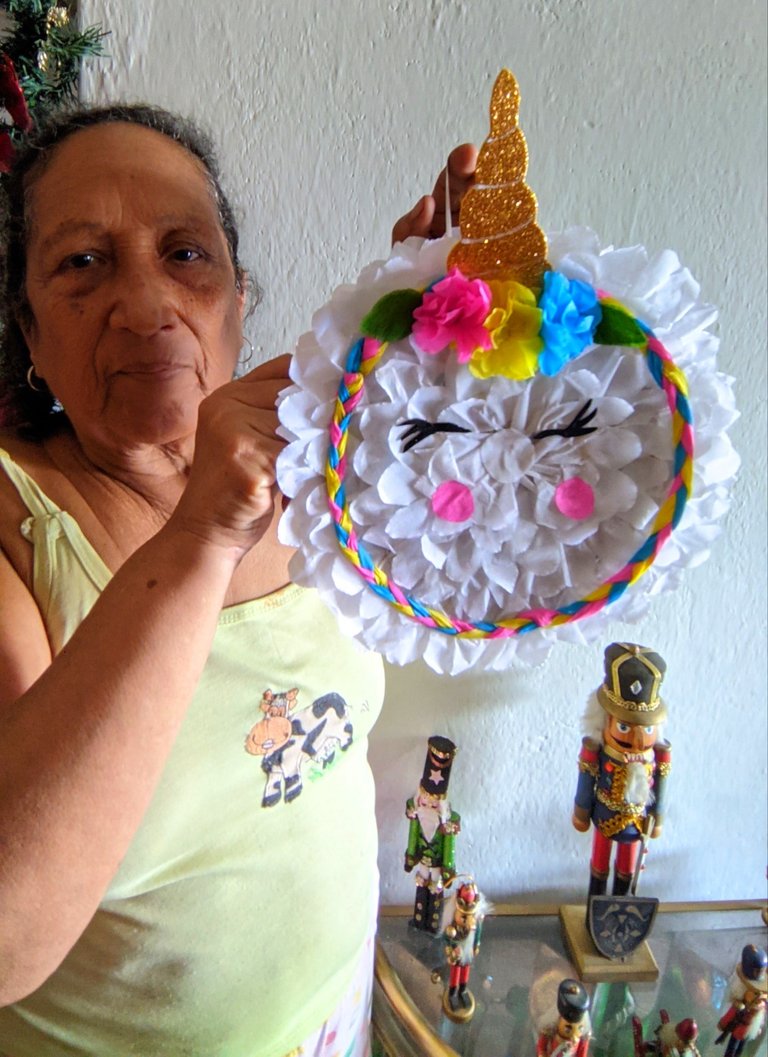
Que les pareció esta linda piñata, yo la hice de unicornio, pero bien puede realizarse del motivo de su preferencia, está es pequeña porque será solo para cuatro niños que va asistir al pequeño compartir que vamos hacer a Lupita, en estos días voy a estar realizando otros detalles que vamos a usar para su celebración, todo enmarcado en esta temática, de unicornio, espero que les haya gustado, y ya saben si tienen elementos de fiesta de años anteriores pueden renovarlos y adaptarlos a la temática que deseen, saludos y que Dios los bendiga a todos.


🦄❄️🦄 ENGLISH 🦄❄️🦄

Hello to all my
#hive grandchildren, greetings and blessings to all on the best blockchain of all, the only one that allows me to publish content that will last in time, because of its own characteristics, every day I read and learn more about this interesting ecosystem, especially for people of my age.
Today we continue with the crafts, and I want to show you how easy, beautiful and practical it is to repair and recycle a piñata, which were about to be discarded, and I decided to accommodate to have it ready, because soon the birthday celebration of my beautiful flower Lupita, who this coming December 2 will be 7 years old full of questions and more questions.
Only her three little cousins and a neighbour will attend the party that her mother is preparing for her, which is why they are not going to give her a piñata for this celebration, which made the little girl a bit sad, It was there when I decided that I would make one even if it is small and there is the reason for my publication, today we will learn how to recycle a piñata, this time I am going to make the reason for the party that is unicorns, as always here I leave the materials, the step by step and the final photos.
🦄 Materials 🦄.

🦄 Old piñata frame.
🦄 White crepe paper.
🦄 Pink crepe paper.
🦄 Blue crepe paper.
🦄 Yellow crepe paper.
🦄 Green crepe paper.
🦄 Yellow frosted foami.
🦄 Black crepe paper.
🦄 Liquid silicone.
🦄 White cold paint.
🦄 Scissors
🦄 Fine brush.
🦄 Pencil.
🦄 Ruler.
🦄 Step by step 🦄
🦄 Step 1:

Take the ruler and measure 5 cm and mark it on the crepe paper, this time we are going to mark it on the pink, blue and yellow crepe paper, then I cut them out.
🦄 Step 2:

Now the three strips that we cut out we will cut the border, to make the flowers, and we will make a flower of each colour.
Now the white crepe paper and cut out two strips, one 7 cm wide, we will cut one of the edges in a circular shape and one 20 cm wide which we will cut on both edges but these will be cut in the shape of spikes.
🦄 Step 3:

Now we are going to proceed with the decoration of the piñata, to which we previously removed the remains of another decoration, then applied silicone on the piñata and we are sticking the crepe paper, this step we repeat until completely cover both tops of the piñata.
🦄 Step 4:

Then I applied liquid silicone to the sides of the piñata and proceeded to glue on the wider white crepe paper that I cut out and that has the spiky ends.
🦄 Step 5:

Now we cut three strips of 5 cm wide each, and we knot the three and process to weave, when it is ready, we apply liquid silicone on the edge and proceed to glue the fabric we made.
🦄 Step 6:

Then I took the yellow frosted foami and drew and cut out a unicorn horn, applied liquid silicone to it and glued it to the piñata.
🦄 Step 7:

Now I took the flowers I made, applied liquid silicone to them and glued them to the edge of the horn.
🦄 Step 8:

Then on the black foami I drew and cut out the little eyes, applied liquid silicone and glued them on, I also cut out two small circles and glued them on the piñata.
🦄 Step 9:

Cut some leaves out of the green crepe paper and glue them under the flowers, and finally with the white paint and the fine brush we outline the lines on the horn and that's it.
🦄 Final photos 🦄


What do you think of this cute piñata, I made it as a unicorn, but it can be made with the motif of your choice, it is small because it will only be for four children who will attend the small sharing that we are going to do for Lupita, these days I will be making other details that we will use for your celebration, all framed in this theme, unicorn, I hope you liked it, and you know if you have party elements from previous years can renew them and adapt them to the theme you want, greetings and God bless you all.


