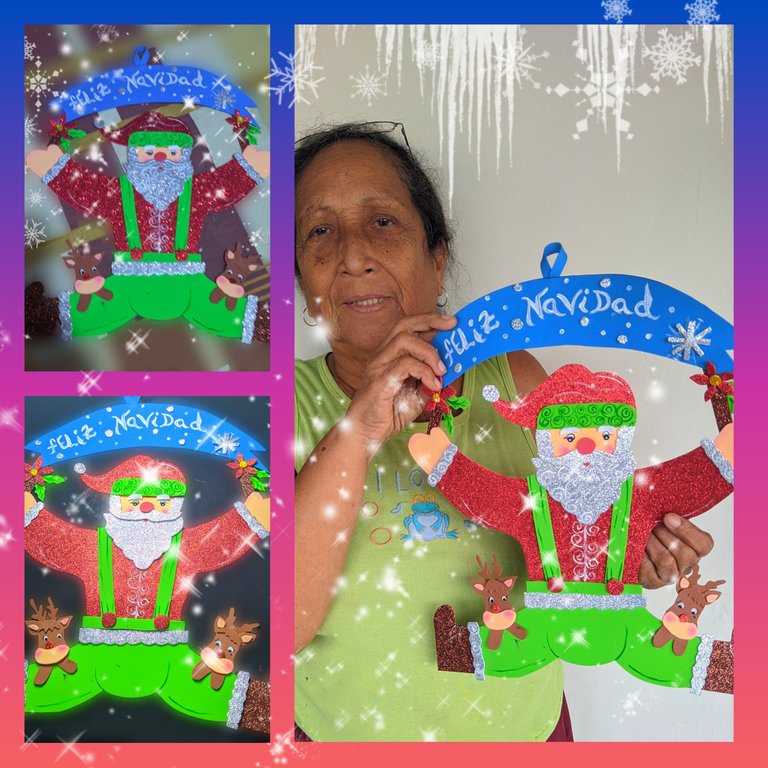
Feliz inicio del fin de semana para todas esas linda personitas que día a día aportan su granito de arena, para la web 3 especialmente para
#hive, seguimos en la onda navideña, por tal motivo les traje un tutorial de cómo podemos elaborar una linda corona decorativa, elaborada en foami y que todos podemos realizar, como siempre les digo es cuestión de atreverse, son pasos fáciles, así que manos a la obra, por acá te dejo los materiales que vas a utilizar y el paso a paso, y claro no puede faltar las fotos finales, iniciamos.
❄️🎅❄️ Materiales ❄️🎅❄️
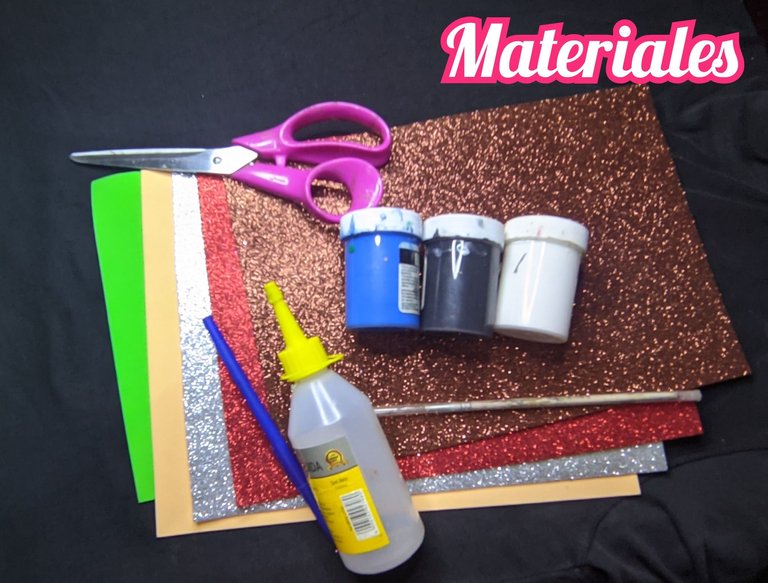
❄️ Foami rojo escarchado.
🎅 Foami blanco escarchado.
❄️ Foami marrón escarchado.
🎅 Foami verde manzana.
❄️ Foami color piel.
🎅 Foami azul.
❄️ Silicón líquido.
🎅 Pintura blanca, rojo, azul y negra.
❄️ Rubor.
🎅 Pinceles.
❄️ Tijera.
❄️🎅❄️ Paso a paso ❄️🎅❄️
❄️🎅❄️Paso 1:
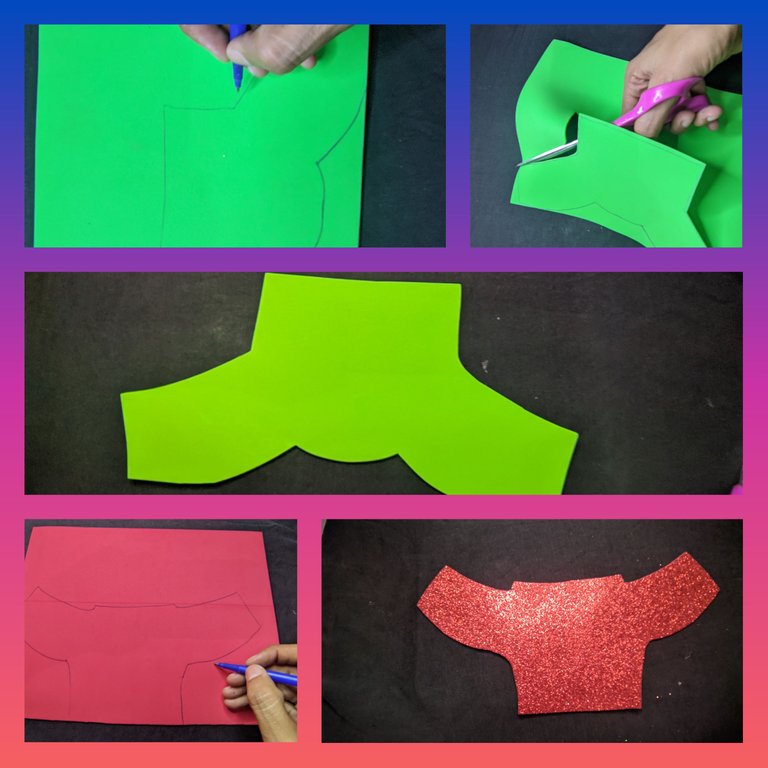
Primero sacamos las piezas del cuerpo de santa y para eso agarre el foami verde manzana y dibujo el pantalón, luego en el foami rojo dibuje la camisa, y con ayuda de la tijera recortamos ambas piezas.
❄️🎅❄️ Paso 2:
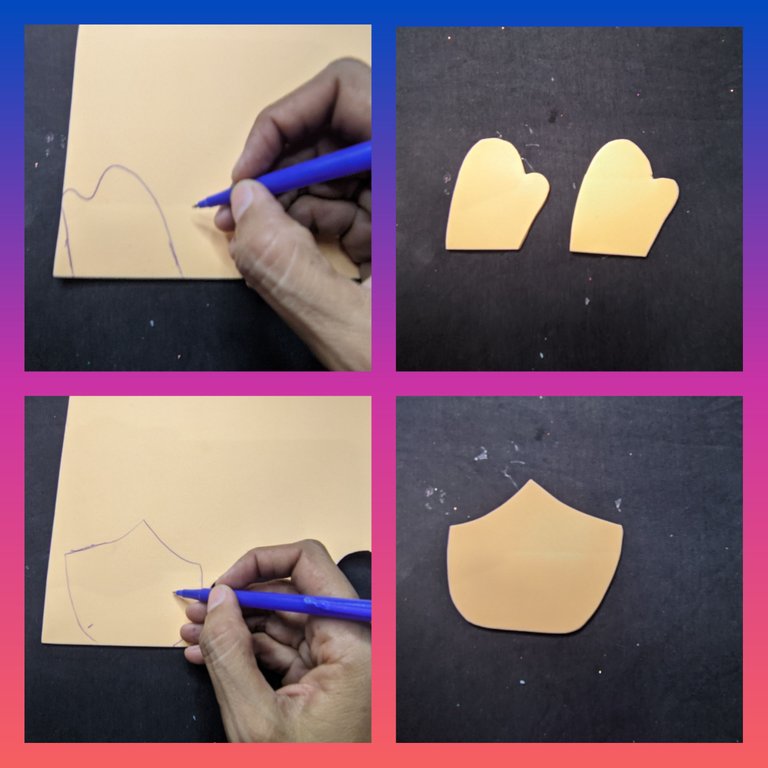
En el foami color piel dibuje las manitos y por supuesto el rostro de nuestro personaje, y recortamos.
❄️🎅❄️ Paso 3:
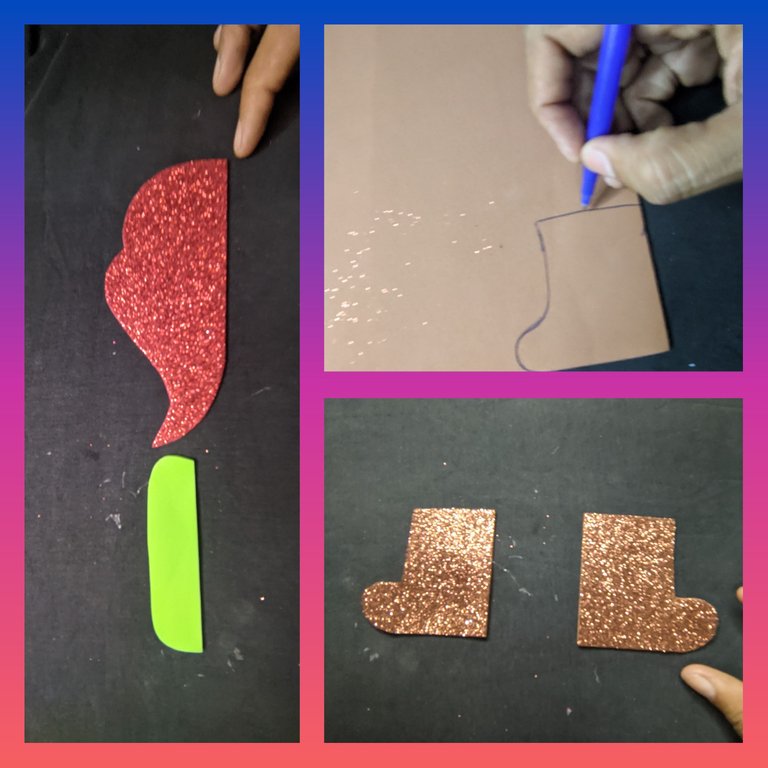
Del foami rojo recorte el gorrito, del foami verde manzana recortamos una tira que nos va a servir para armar el gorro de santa, pero también del foami marrón marque y recorte las botas de santas.
❄️🎅❄️ Paso 4:
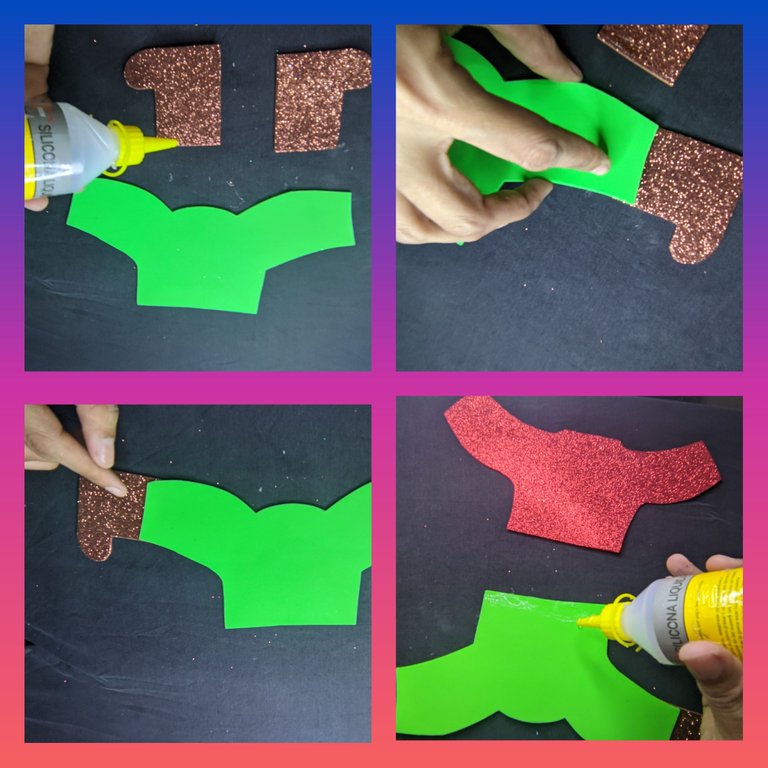
Cuando ya tengo todas las piezas vamos a armarlo, primero tomó el pantalón y con ayuda del silicón líquido pegamos las botas y dejamos secar bien, después le aplicó silicón líquido a la pieza de la camisa y pegamos al pantalón.
❄️🎅❄️ Paso 5:
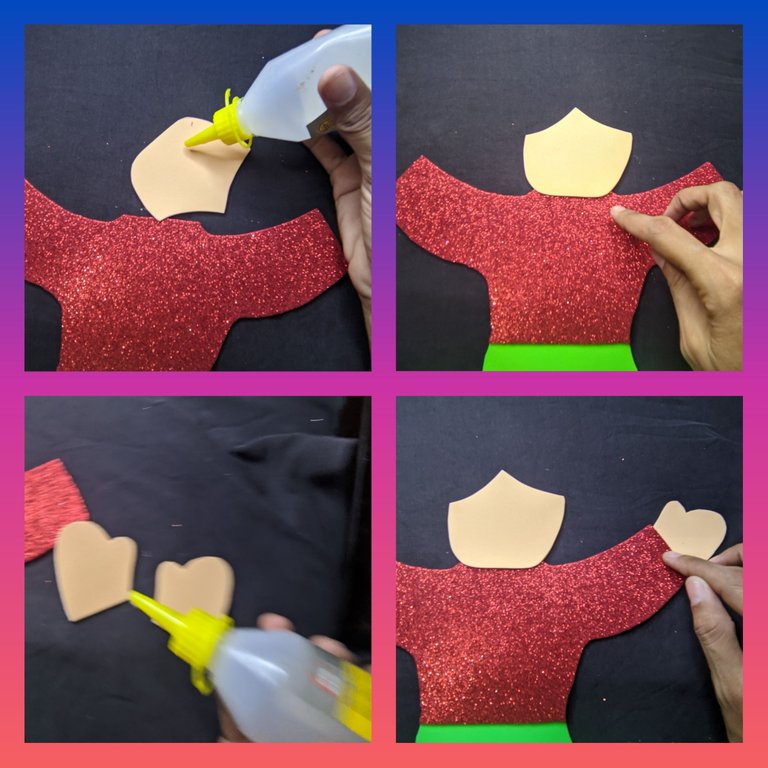
Aquí en este paso tomamos la carita y la pegamos con el silicón líquido, así como las manitas de Santa Claus, y dejamos secar bien, ya de a poco se va formando nuestro personaje.
❄️🎅❄️ Paso 6:
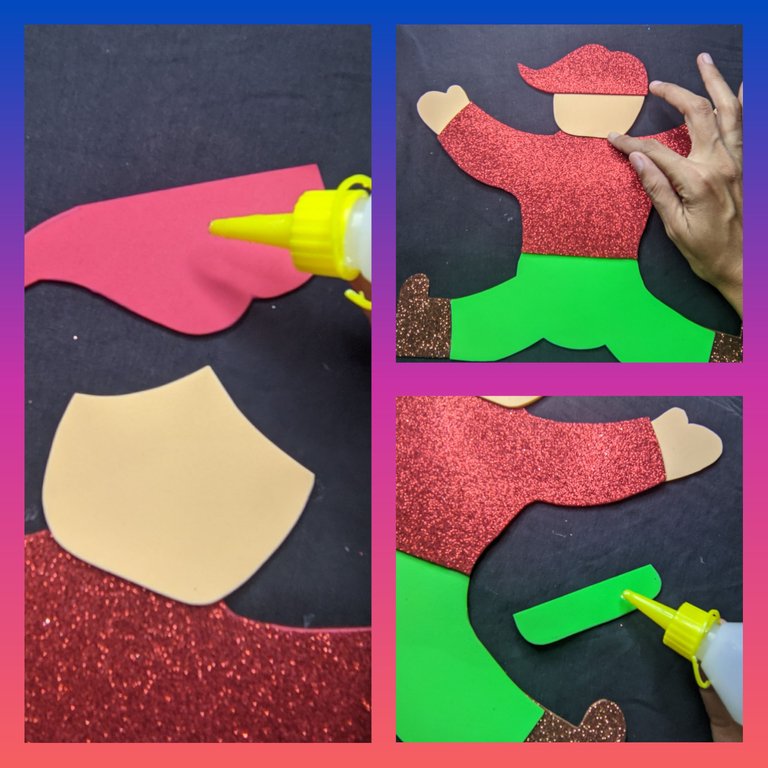
Ahora pegamos el gorrito de santa, recordando pegarle por el borde la tira de foami verde que recortamos anteriormente y dejamos secar.
❄️🎅❄️ Paso 7:
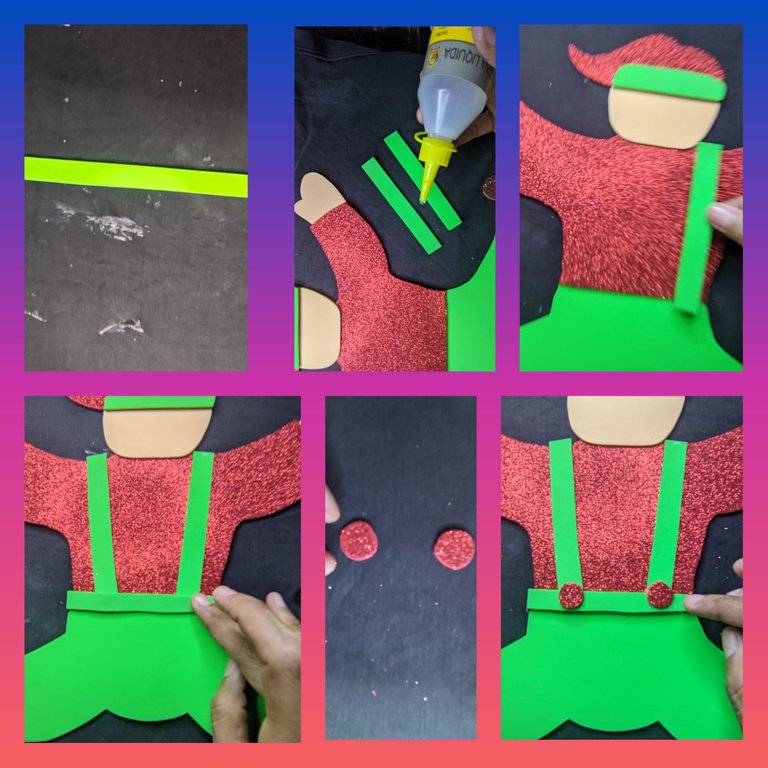
En el foami verde manzana recorté 3 tiras que van a ser los tirantes de santa y el borde del pantalón, y los pegamos con el silicón líquido, luego recorté de los retazos del foami rojo dos pequeños círculos que pegué a modo de botón.
❄️🎅❄️ Paso 8:
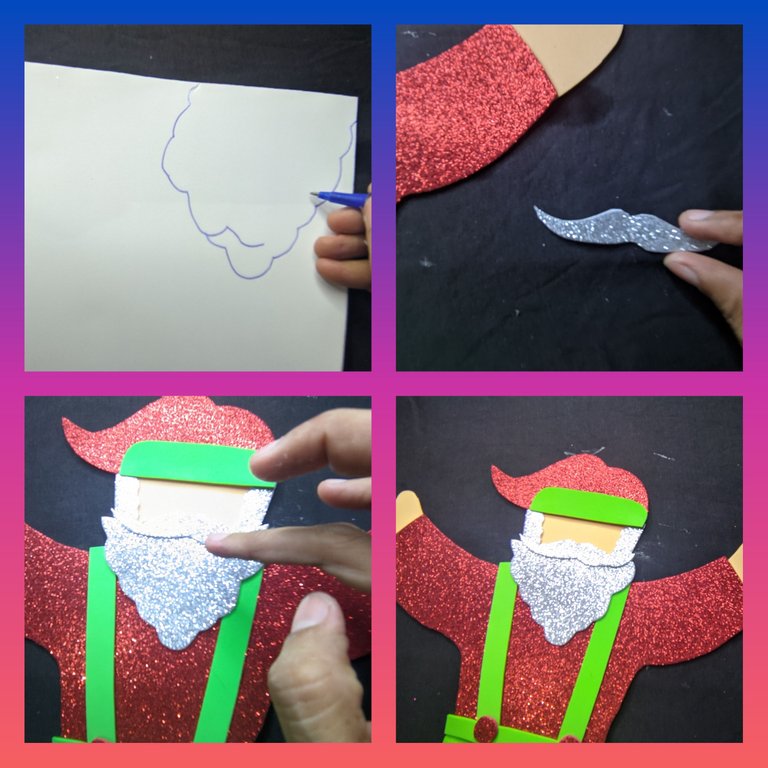
Agarre el Foami blanco y dibujé la barba de santa, así como también los bigotes, y recortó y pegó con el silicón líquido.
❄️🎅❄️ Paso 9:
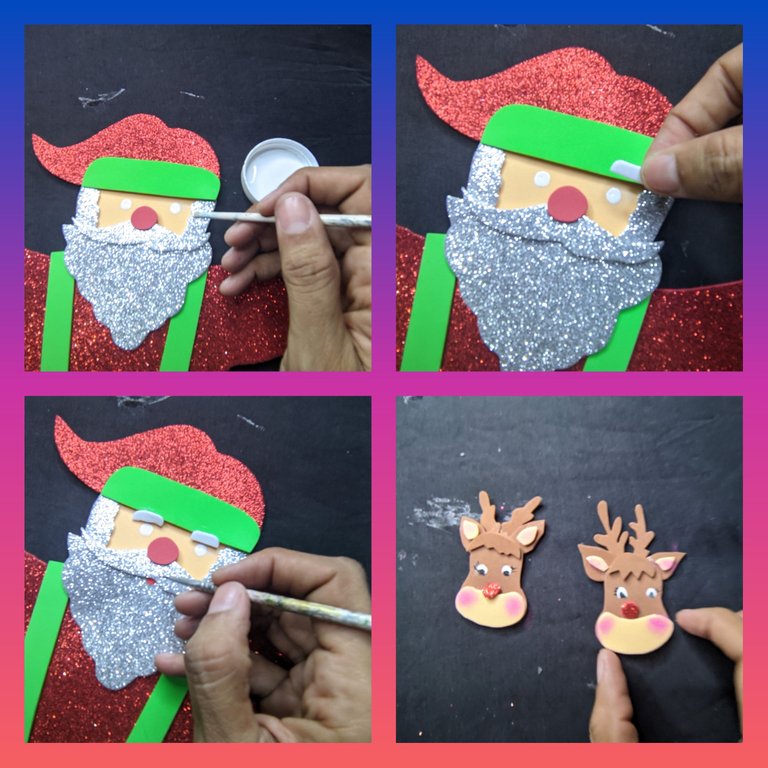
Ahora vamos a darle los detalles del rostro, así que tomé la pintura blanca y dibuje dos círculos que serán los ojos, seguí dándole forma así que recorté dos pequeños rectángulos que serán las cejas y pegamos.
Después recorté y pegué el cabello de santa y también un círculo de el foami rojo y pegamos para formar la nariz, y luego pintamos la boca.
Y elaboramos dos pequeños renos, esos los enseñé cómo hacerlo en otro post.
❄️🎅❄️ Paso 10:
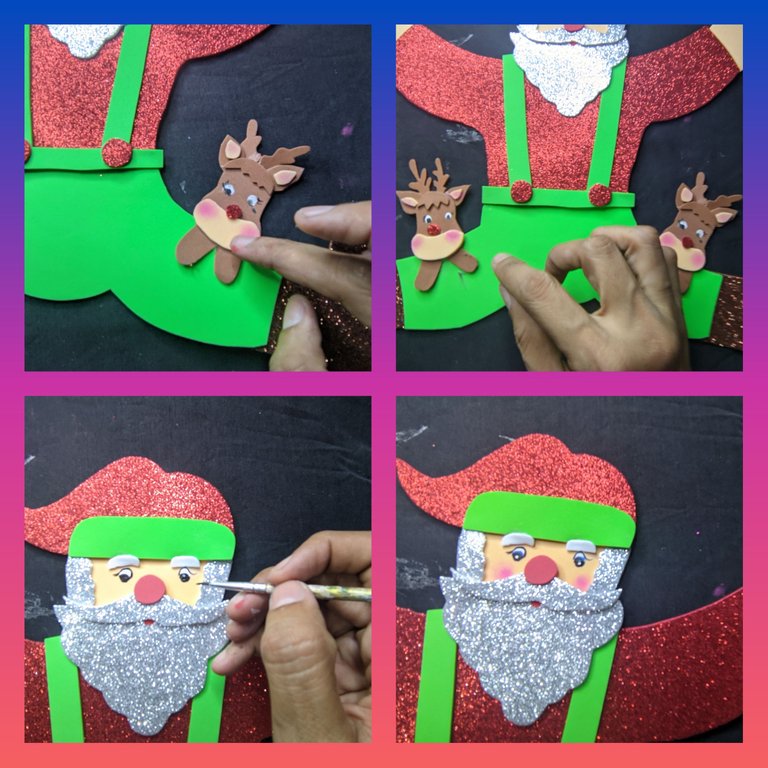
Después le pintó con pintura negra el centro de los ojos, y aplicamos rubor en las mejillas, y con el silicón líquido pegamos los renos, uno en cada pierna de santa.
❄️🎅❄️ Paso 11:
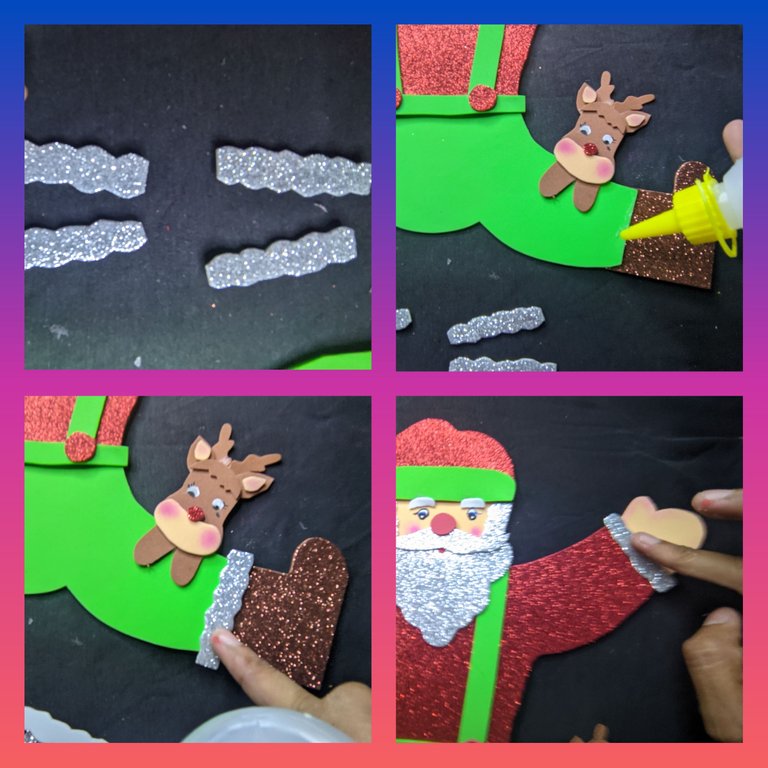
Recorté tiras de Foami blanco y pegamos en las mangas de la camisa, y el el borde del pantalón.
❄️🎅❄️ Paso 12:
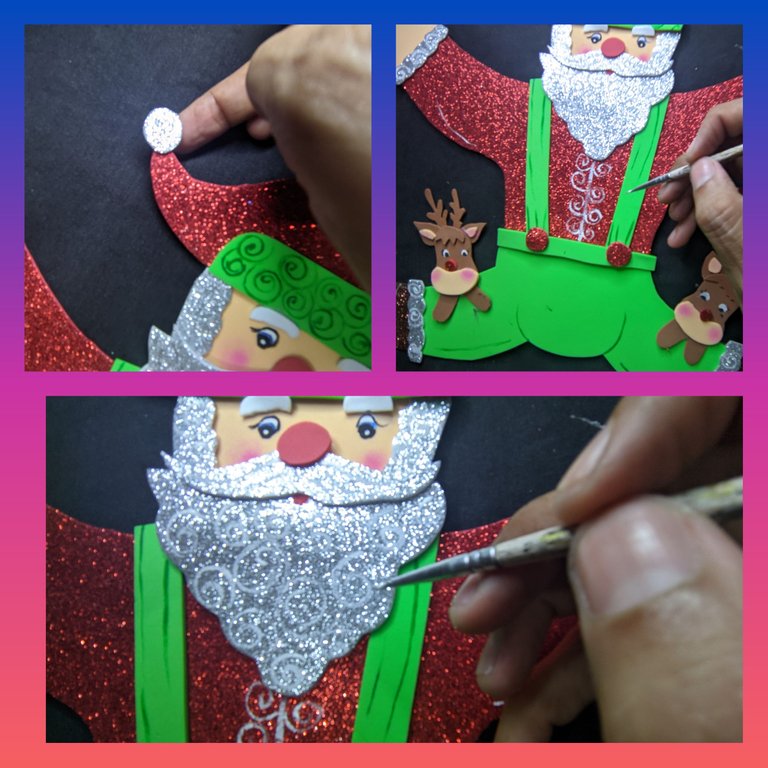
Recorté y pegué un círculo en la punta del gorro, luego con la pintura blanca y el pincel fino dibujamos la barba, así como la camisa a la que le dimos algunos detalles, luego con la pintura verde, le dimos detalles al gorro.
❄️🎅❄️ Paso 13:
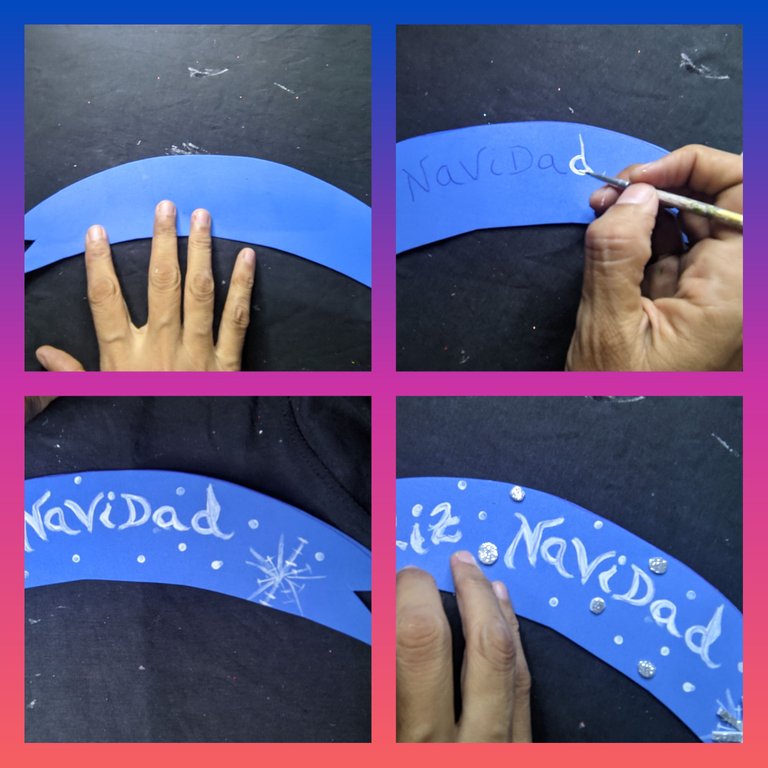
Recortamos del foami azul una especie de letrero, al que con la pintura blanca le dibujamos las palabras feliz navidad y también varios puntos y estrellas, los detalles serán los que tú quieras.
❄️🎅❄️ Paso 14:
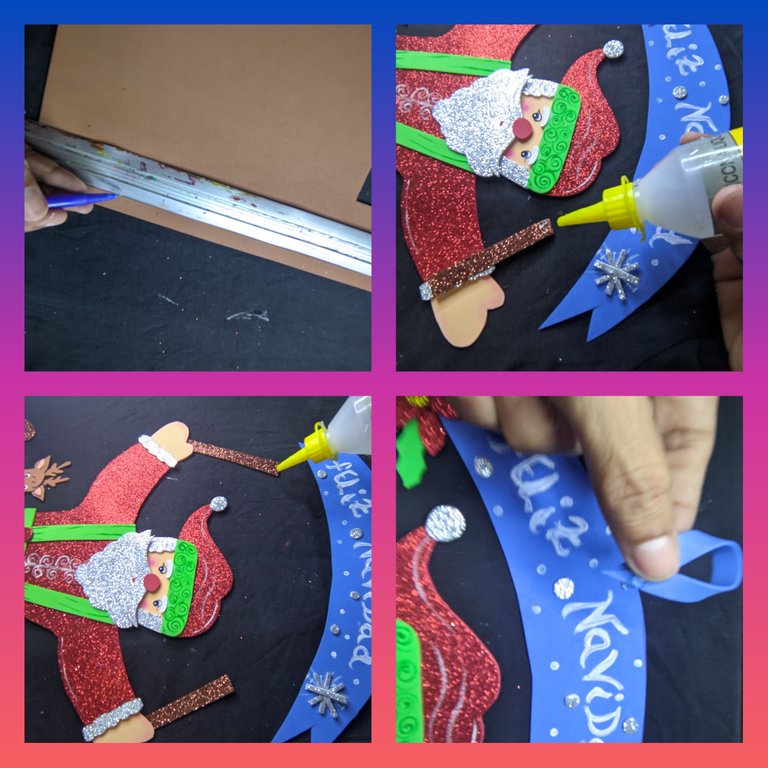
Recorté dos pequeñas tiras de Foami marrón escarchado que pegamos con el silicón líquido en las manos y el letrero, para ensamblar las dos piezas, también le pagamos una pieza para poder colgar.
❄️🎅❄️ Paso 15:
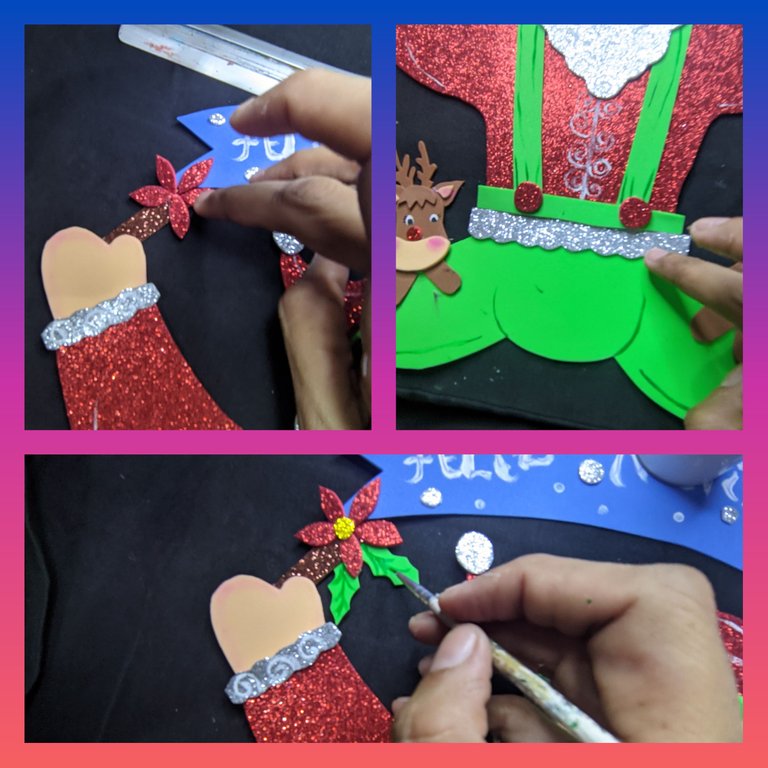
Quise darle más detalles navideños, así que elaboré unas flores de navidad y pegamos, y listo hemos terminado nuestra corona.
❄️🎅❄️ Fotos finales ❄️🎅❄️
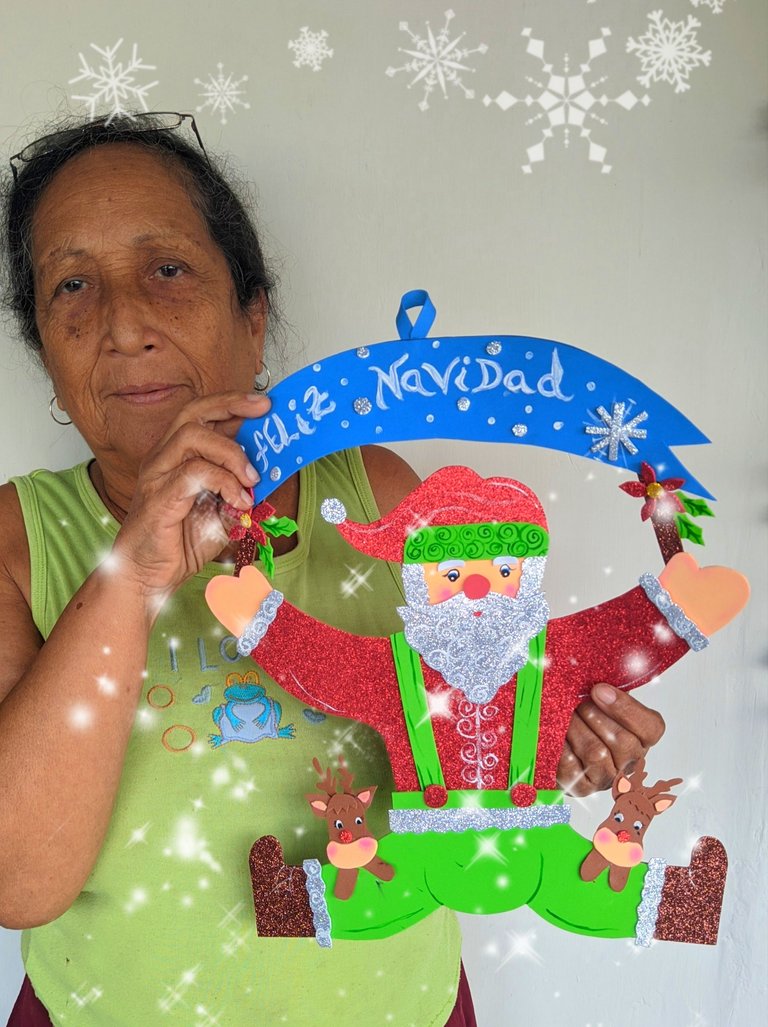
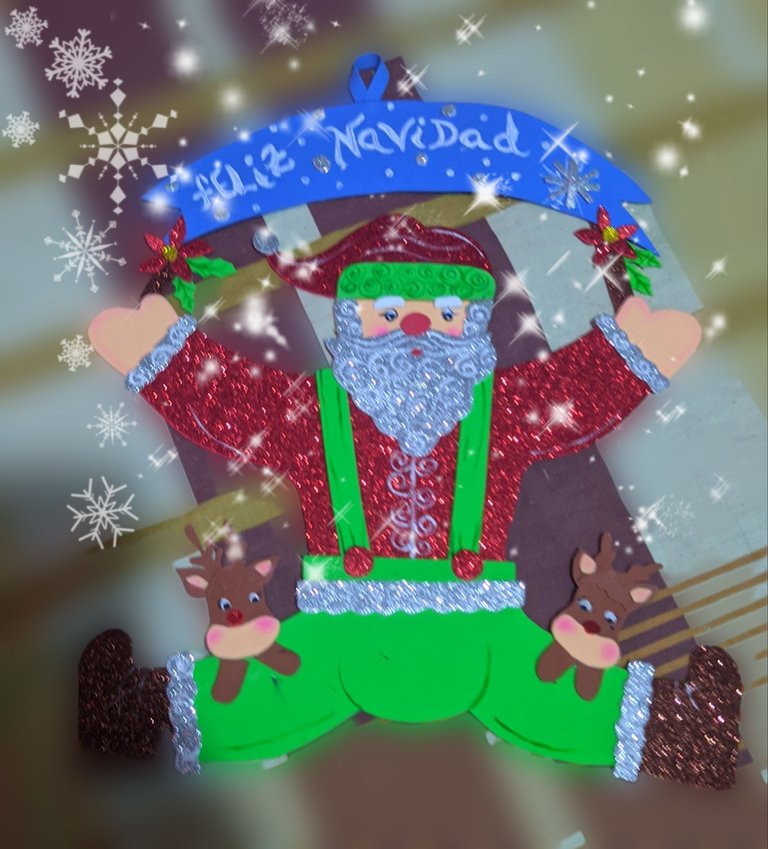
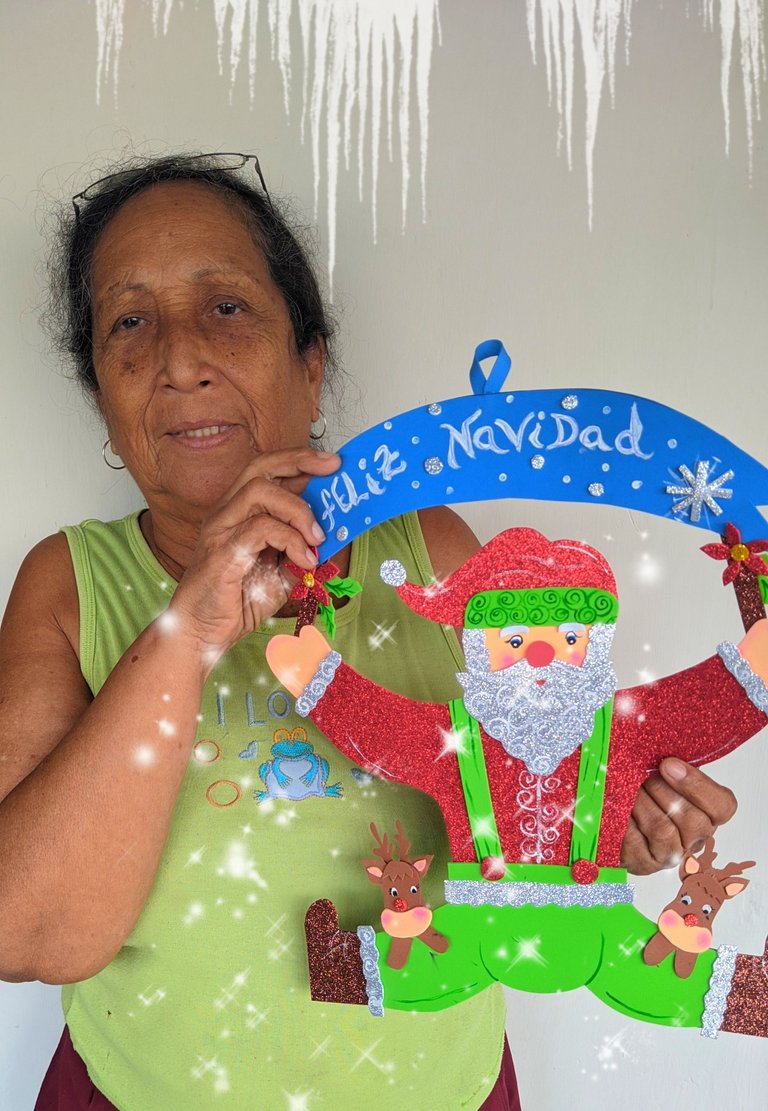
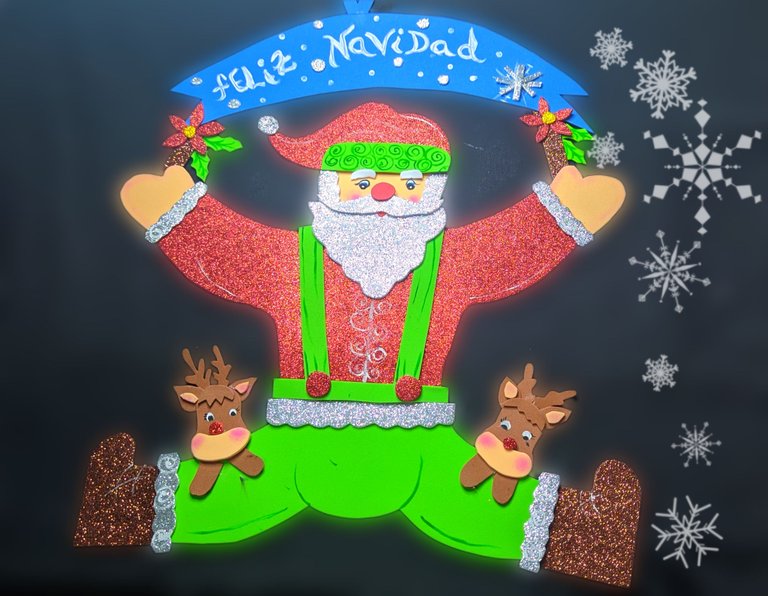
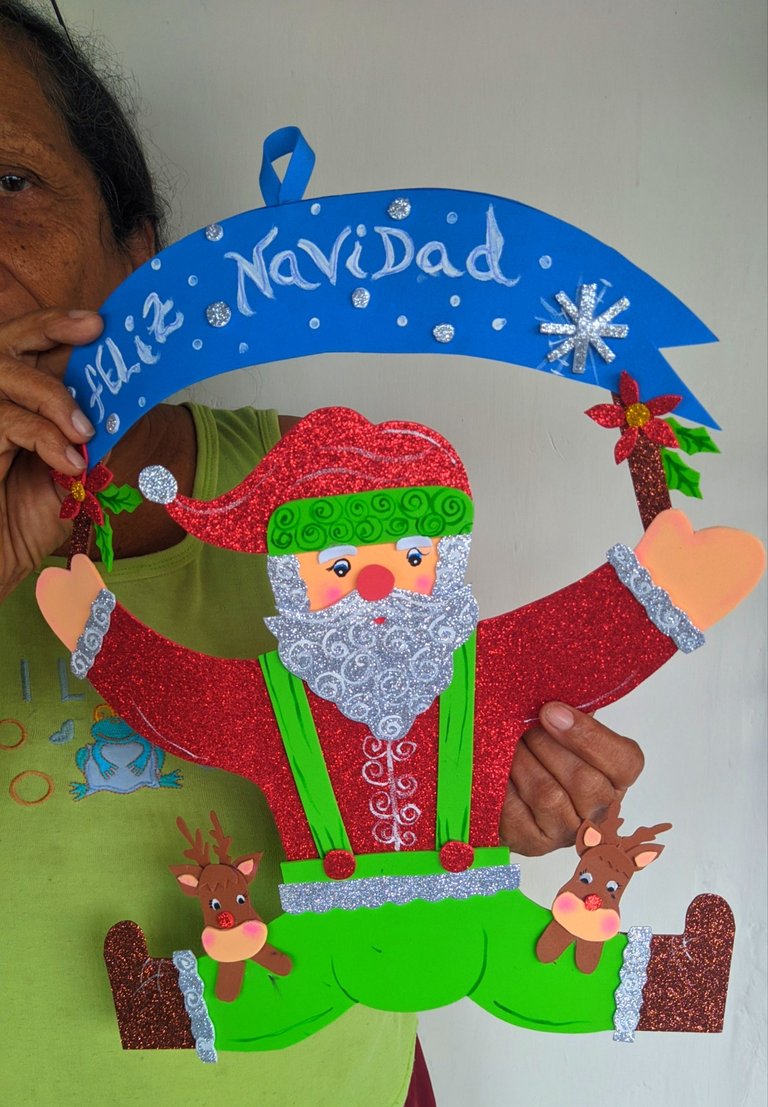
Díganme qué les pareció esta corona, totalmente diferente, algo divertido pero bonito, que nos va a servir para adornar las puertas de nuestro hogar, nuestra cocina, o cualquier espacio de la casa al que queremos darle el toque navideño, espero les haya gustado, lo hice en muchos pasos, para explicarles bien el proceso, y que de esta manera se pudiera entender mejor.
Para realizar este post utilice el programa polish y el traductor deepl versión gratis y las fotos fueron tomadas con mi teléfono Xiaomi y son mías.

❄️🎅❄️ ENGLISH ❄️🎅❄️

Happy start of the weekend for all those cute little people who every day contribute their bit for the web 3 especially for
#hive, we continue in the Christmas wave, for that reason I brought you a tutorial on how we can make a nice decorative wreath, made in foami and that everyone can do, as I always say is a matter of daring, are easy steps, so get to work, here I leave the materials you will use and the step by step, and of course can not miss the final photos, we started.
❄️🎅❄️ Materials ❄️🎅❄️

❄️ Red frosted foami.
🎅 White frosted foami.
❄️ Frosted brown foami.
🎅 Apple green foami.
❄️ Skin coloured foami.
🎅 Blue foami.
❄️ Liquid silicone.
🎅 White, red, blue and black paint.
❄️ Blush.
🎅 Brushes.
❄️ Scissors.
❄️🎅❄️ Step by step ❄️🎅❄️
❄️🎅❄️Paso 1:

First we draw the pieces of Santa's body and for that I took the apple green foami and drew the trousers, then on the red foami I drew the shirt, and with the help of the scissors I cut out both pieces.
❄️🎅❄️ Step 2:

On the skin-coloured foami draw the little hands and of course the face of our character, and cut them out.
❄️🎅❄️ Step 3:

From the red foami cut out the little hat, from the apple green foami cut out a strip that will be used to make the santa's hat, but also from the brown foami mark and cut out the santas boots.
❄️🎅❄️ Step 4:

When I have all the pieces we are going to assemble it, first took the trousers and with the help of the liquid silicone we glue the boots and let dry well, then applied liquid silicone to the piece of the shirt and glued to the trousers.
❄️🎅❄️ Step 5:

Here we take the face and stick it with the liquid silicone, as well as Santa's little hands, and let it dry well, and little by little our character will form.
❄️🎅❄️ Step 6:

Now we glue the Santa hat, remembering to glue the green foami strip that we cut out earlier around the edge and let it dry.
❄️🎅❄️ Step 7:

On the apple green foami I cut out 3 strips that are going to be Santa's braces and the edge of the trousers, and glued them with the liquid silicone, then I cut out two small circles from the red foami and glued them as a button.
❄️🎅❄️ Step 8:

I grabbed the white Foami and drew Santa's beard, as well as the whiskers, and cut out and glued with the liquid silicone.
❄️🎅❄️ Step 9:

Now we are going to give him the details of the face, so I took the white paint and drew two circles which will be the eyes, I continued shaping it so I cut out two small rectangles which will be the eyebrows and glued them.
Then I cut out and glued the Santa's hair and also a circle of the red foami and we glued to form the nose, and then we painted the mouth.
And we made two little reindeer, I showed you how to do that in another post.
❄️🎅❄️ Step 10:

Then we painted the centre of the eyes with black paint, applied blush to the cheeks, and with the liquid silicone we glued the reindeer, one on each of Santa's legs.
❄️🎅❄️ Step 11:

I cut out strips of white Foami and glued them on the sleeves of the shirt, and on the edge of the trousers.
❄️🎅❄️ Step 12:

I cut out and glued a circle on the tip of the hat, then with the white paint and the fine brush we drew the beard, as well as the shirt to which we gave some details, then with the green paint, we gave details to the hat.
❄️🎅❄️ Step 13:

Cut out of the blue foami a kind of sign, draw the words merry christmas on it with white paint and also some dots and stars, the details will be whatever you want them to be.
❄️🎅❄️ Step 14:

I cut out two small strips of frosted brown Foami that we glued with the liquid silicone on the hands and the sign, to assemble the two pieces, we also paid for a piece to hang it.
❄️🎅❄️ Step 15:

I wanted to give it more Christmas details, so I made some Christmas flowers and glued them on, and we have finished our wreath.
❄️🎅❄️ Final photos ❄️🎅❄️


Tell me what you thought of this wreath, totally different, something fun but nice, that will serve to decorate the doors of our home, our kitchen, or any space in the house that we want to give the Christmas touch, I hope you liked it, I did it in many steps, to explain the process well, and that this way you could understand better.
For this post I used polish and the free version of deepl translator and the photos were taken with my Xiaomi phone and are mine.


