(ENG)
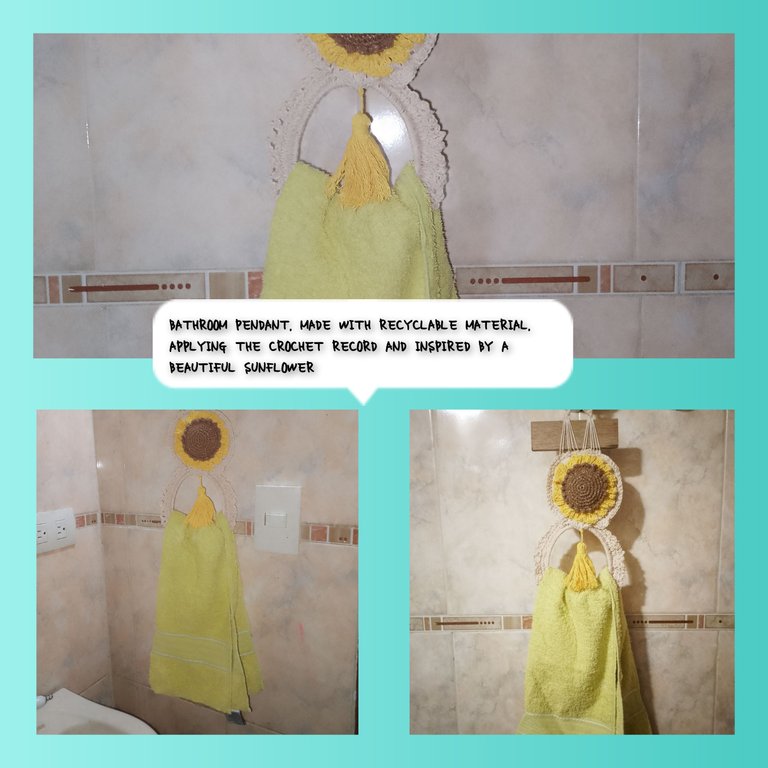
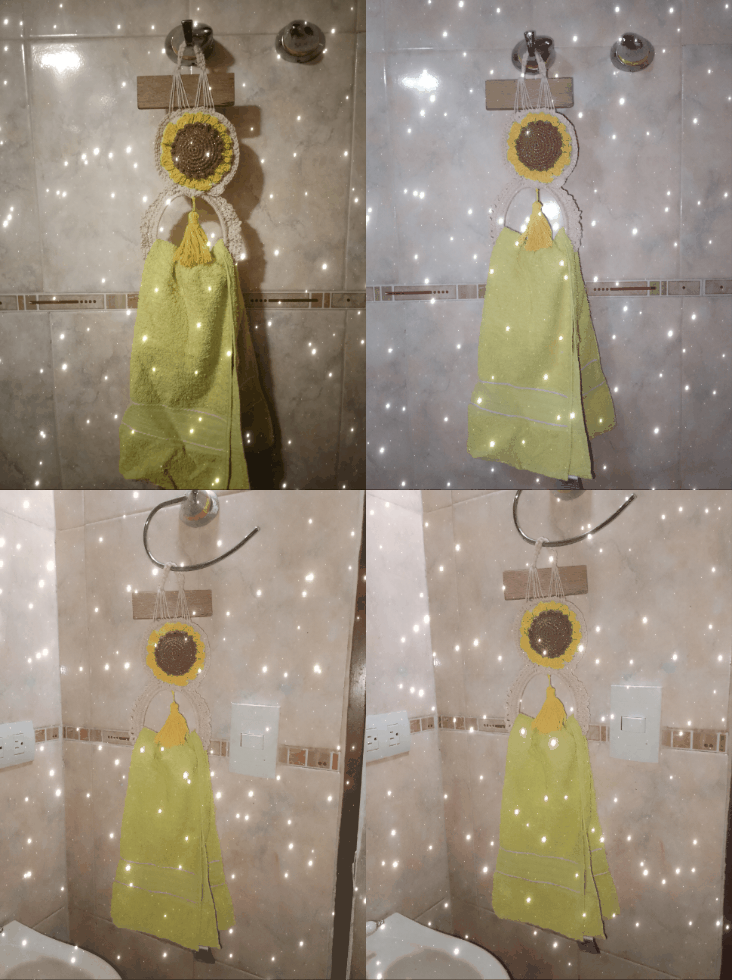
Hello everyone, you dear friends of @hivediy, I am pleased to be with you today, wishing with all my heart the best in the world. Today I come to show you a very nice project, where I used, the recycling technique and the great touch of crochet. So inspired by a beautiful Sunflower, I have made a very cute and decorative hand towel pendant, ideal to have in the bathroom of our house. I invite you to follow me and you will see how simple and practical it is to make it.
Materials:
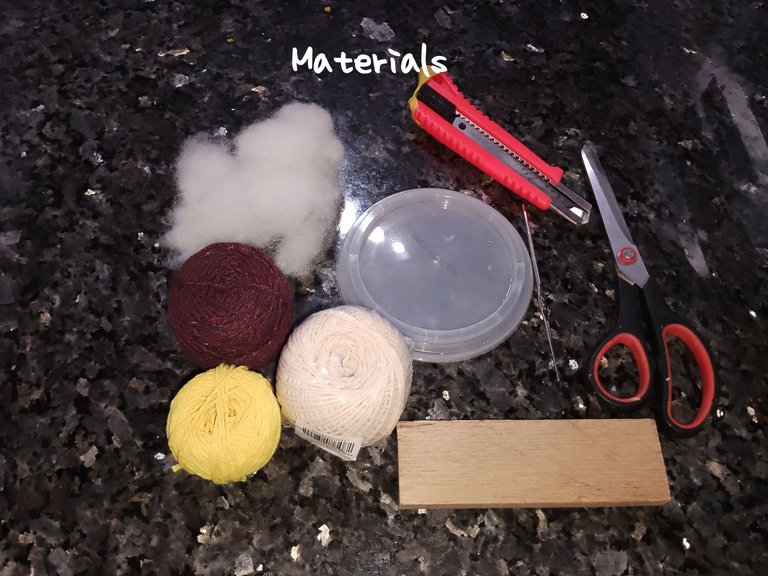
. 250gr plastic butter lid.
. Piece of wood.
. Wick thread, traditional color, brown, and yellow.
. Sewing needles.
. Wool needle.
. Scissors.
. Exact
. Stuffed.
Steps to follow:
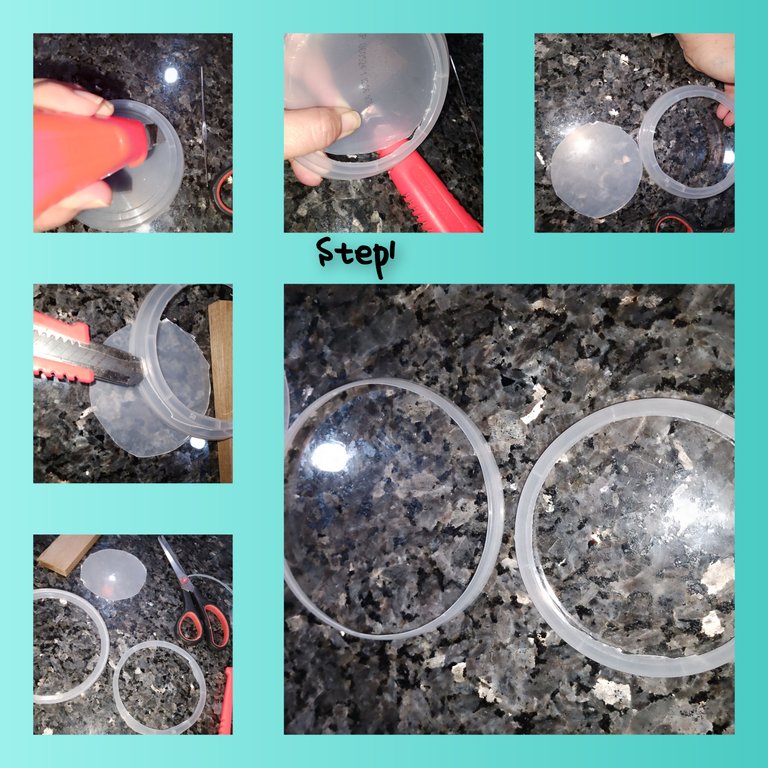
1.) Start by making a hole in the center of the plastic lid, using the Exacto, and carefully peel off the circle. If you can notice, this plastic circle has one circle, higher than the other, and which in turn are of different sizes, so the next thing to do will be to separate both circles. I try as much as possible to keep this as circular as possible, and without lumps that could cause cuts on my fingers when knitting.
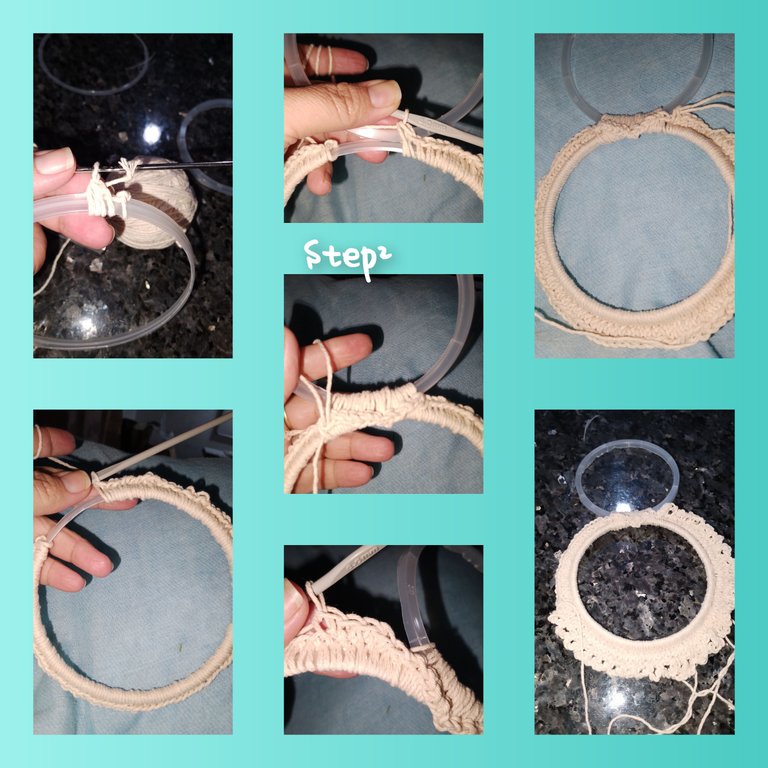
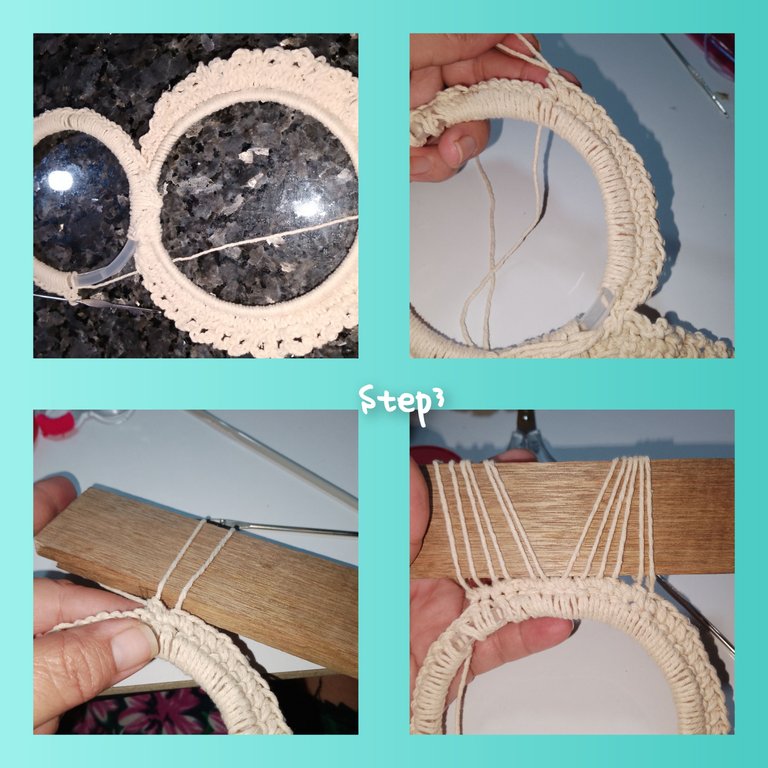
2.) I tie the thread in the largest circle, and begin to knit over the half stitches, until I cover it, almost in its entirety, centimeters from reaching the starting point, involving the next circle, using the same stitch , but taking both circles, when I reach the limit or starting point of the knitting, I knit a slipped stitch, and I knit a second pass, with half stitches, when I reach the union of the circles, I knit delicate stitches. For the next pass, I will knit three chain stitches, leaving a space and with a slip stitch, I go to the next one.
3.) I go around the circles and begin to cover the small circle with half stitches, the route is ready, I will now knit a row of half stitches, placing myself in the upper central part of the smaller circle, and verifying this is well centered, I will knit half stitches but going with the strand of thread around the piece of wood. I will repeat this eleven more times, for twelve strands that will surround the piece of wood.
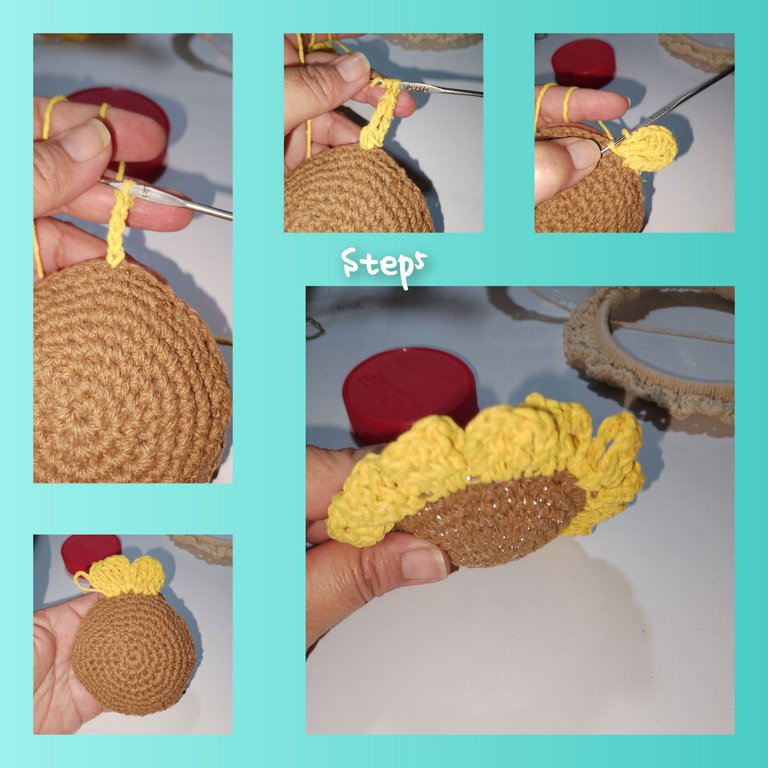
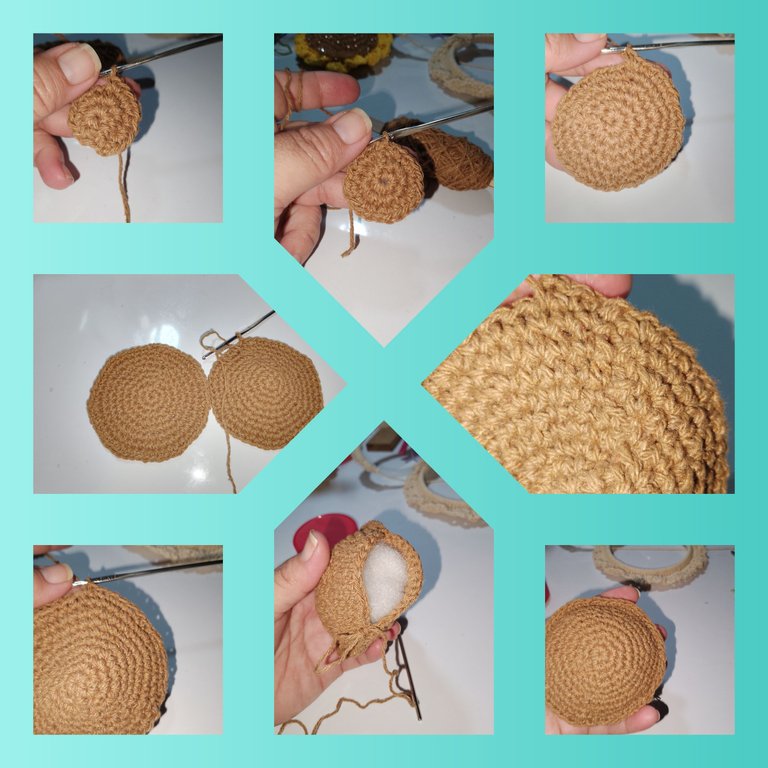
4.) using the colored thread, brown, I make a magic ring, inside it I knit six half stitches, the next pass, six increases, then one half stitches and one increase, then two, half stitches and one increase and This way, I complete seven turns. I repeat and obtain a second circle, to which without cutting the thread in this second circle, I glue half stitches together, without closing completely, I introduce the filling, and now I do close completely. Now I do cut and hide the residual strand.

5.) I place the yellow thread on one of the sides of the filled circle, I pick up five chain stitches, and carrying two triple stitches in this same place, I repeat in the next stitch, then five chain stitches and go down to this same space with slipped point. II go to the next space, and repeat the previous process, and in this way, I knit the sunflower.
6.) With the wool needle, stitching the petals of the sunflower, I glue the smaller circle, just below the wood. Now I separate, in a group of six, the strands over the strand, I tie the thread on one of the sides, I pick up fifteen, chain stitches, and I go to the other side, taking the next six stitches. I turn and knit, a half stitch in each chain stitch. Making a very pretty pendant.
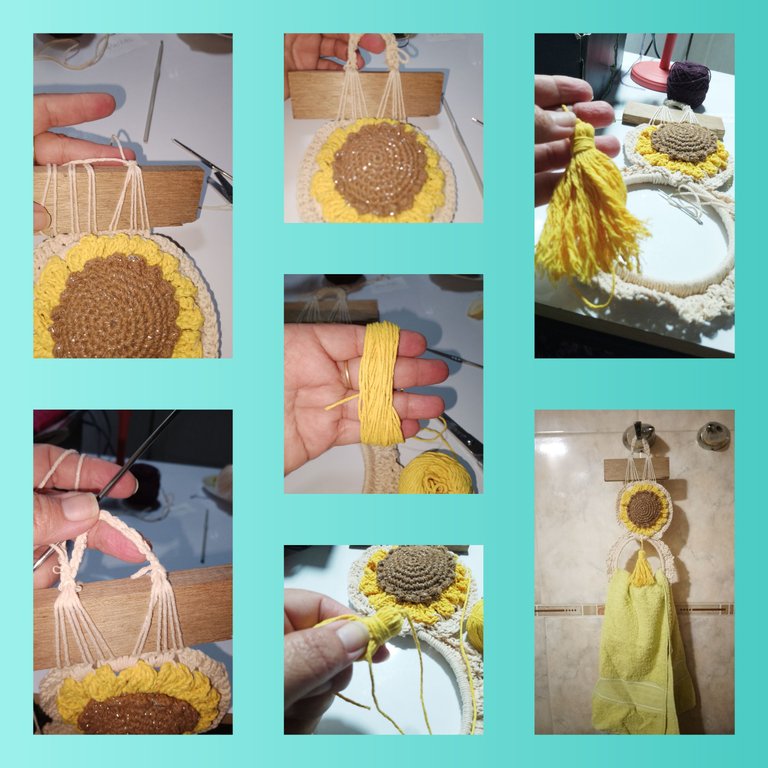
I turn it twenty times, between the little finger and index finger and put together a beautiful pendant, to which I tie, at the bottom of the sunflower.
. All photos were taken with my smartphone.
. Use incollage.
. Use language translator.
You will always be welcome to my blog, grateful for the view of my public.
(ESP)
Hola a todos, ustedes queridos amigos de @hivediy, me complace, estar hoy con ustedes, deseando de todo corazón, lo mejor del mundo.Hoy vengo a mostrarles un muy bonito proyecto, dónde use, la técnica de reciclaje y el gran toque de crochet. Así que inspirada en un hermoso Girasol, he elaborado un muy lindo y decorativo, colgante para toallas de mano, ideal para tener en el baño de nuestra casa. Les invito a seguirme y así verás lo sencillo y práctico de elaborarlo.

Materiales:
. Tapa plástica de mantequilla de 250grs.
. Trozo de madera.
. Hilo pabilo, color tradicional, marrón, y amarillo.
. Agujas para tejer.
. Aguja lanera.
. Tijeras.
. Exacto
. Relleno.

Pasos a Seguir:
1.) Comienzo, haciendo una perforación en el centro de la tapa plástica, usando el exacto, y desprendió cuidadosamente el círculo. Si puedes notar, este círculo plástico, tiene un círculo, más alto que el otro,y que a su vez son de diferentes tamaños, así que lo siguiente, por hacer, será, separan ambos círculos. Trato en lo posible este me quedé, lo más circular posible, y sin grumos, que puedan causar algún corte, en mis dedos al momento de tejer.

2.) Ato, el hilo en el círculo de mayor tamaño, y comienzo a tejer sobre el medios puntos, hasta recorrerlo, casi en su totalidad, a centímetros de llegar a el punto de partida, involucró el siguiente círculo, usando la misma puntada, pero tomando a ambos círculos, al llegar a el limite o punto de partida de el tejido, tejo un punto deslizado, y tejo una segunda pasada, con medios puntos, al llegar a la unión de los círculos, tejo puntos delicados. Para la siguiente pasada, tejere, tres puntos cadenas, dejo un espacio y con punto deslizado, voy a el siguiente.

3.) doy vueltas a, a los círculos y comienzo a cubrir el círculos pequeño, con medios puntos, listo el recorrido, tejere ahora, una pasada de medios puntos, al ubicarme en la parte central superior, de el círculo de menor tamaño, y verificando este bien centrado, tejere medios puntos pero recorriendo con la hebra de hilo, a el trozo de madera, esto, lo repetiré, once veces más, para doce hebras, que, rodearan el trozo de madera.

4.) usando el hilo de color, marrón, hago un anillo mágico, dentro de el tejo seis medios puntos, el la siguiente pasada, seis aumentos, luego un medio puntos y un aumento, luego dos, medios puntos y un aumento y de esta manera, completo siete vueltas. Repito y obtengo un segundo círculo, a quienes sin cortar en este segundo círculo el hilo, pego con medios puntos entre sí, sin cerrar en su totalidad, introduzco el relleno, y ahora sí cierro en su totalidad. Ahora sí corto y escondo la hebra residual.
5.) coloco el hilo de color amarillo, en uno de los lados de el círculo relleno, levanto cinco puntos cadenas, y llevando dos puntos triples en este mismo lugar, repito en el siguiente puntos, luego cinco puntos cadenas y bajo a este mismo espacio con punto deslizado. Me voy a el siguiente espacio, y repito, el proceso anterior, y de esta manera, tejo el girasol.

6.) Con la aguja lanera, dando puntadas en los pétalos de el girasol, pego en el círculo de menor tamaño, justo debajo de la madera. Ahora separó, en grupo de seis, las hebras sobre la hebra, ato el hilo en uno de los lados, levanto quince, puntos cadenas, y voy a el otro lado, tomando los siguientes seis puntos. Doy vuelta y tejo, un medio puntos en cada punto cadena. Haciendo un muy aza para colgar.

Doy veinte vueltas, entre los dedos meñique e índice y armó un hermoso colgante, a quien ato, en la parte inferior de el girasol.

. Todas las fotos, fueron tomadas con mí teléfono inteligente.
. Use incollage.
. Use traductor lenguaje.
Siempre serán bienvenidos a mí blog, agradecida por la vista a mí pública cion