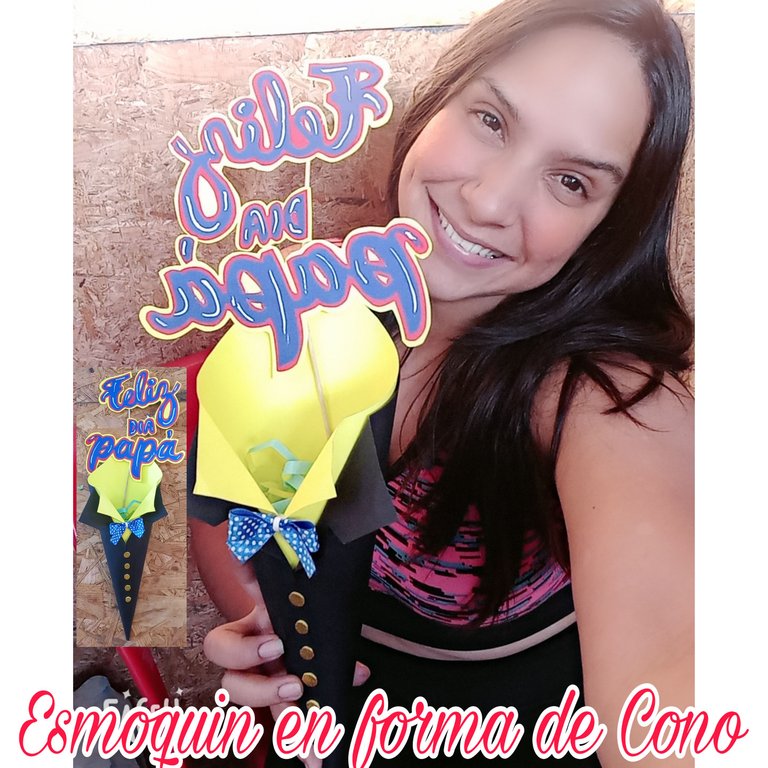
Hola, hola, feliz día mi linda familia de #Hive-Diy, es un gusto saludarlos una vez más y desearle de todo corazón que estén pasando un día muy agradable, con mucha salud y paz, en compañía de familia y amigos. Hoy Les traigo un nuevo tutorial para mostrarle ¿cómo elaborar un elegante esmoquin de cono? para sorprender a papá en su día, con un hermoso detalle, porque ellos también, merecen ser celebrados y agasajados con mucho amor.
Hello, hello, happy day my beautiful #Hive-Diy family, it is a pleasure to greet you once again and wish you from the bottom of my heart that you are having a very nice day, with lots of health and peace, in the company of family and friends. Today I bring you a new tutorial to show you how to make an elegant cone tuxedo to surprise dad on his day, with a beautiful detail, because they also deserve to be celebrated and entertained with love.

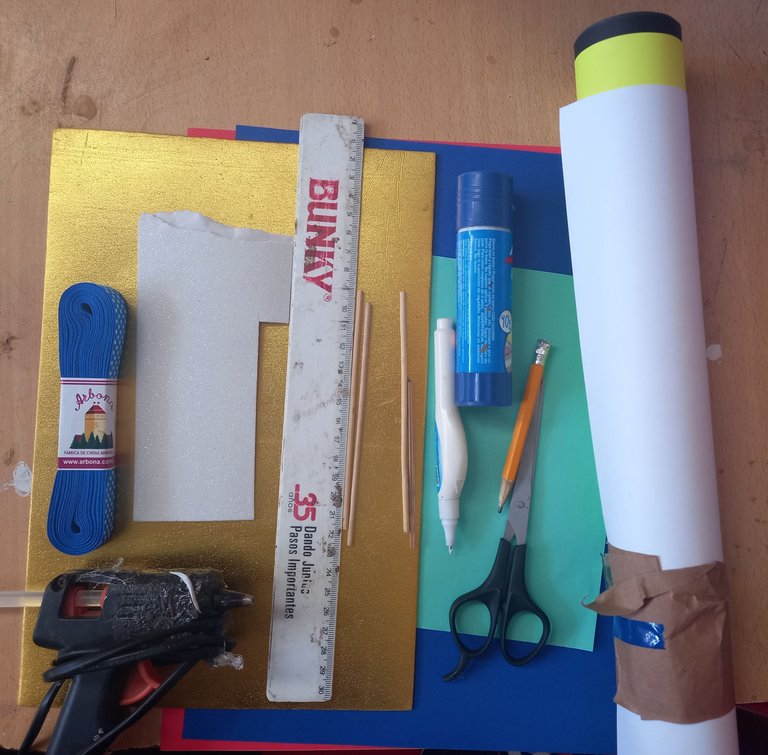
- Cartulina artcolor amarilla, negra, blanca, roja y azul.
- Foami metalizado dorado.
- Papel artcolor turquesa.
- Pegamento en barra.
- Cinta razo azul prusia.
- Corrector blanco.
- Pistola de silicón caliente.
Palillos de altura. - Regla.
- Tijeras.
- Lápiz.
- Yellow, black, white, red and blue artcolor cardboard.
- Gold metallized foami.
- Turquoise artcolor paper.
- Glue stick.
- Prussian blue ribbon.
- White corrector.
- Hot silicone gun.
Height sticks. - Ruler.
- Scissors.
- Pencil.

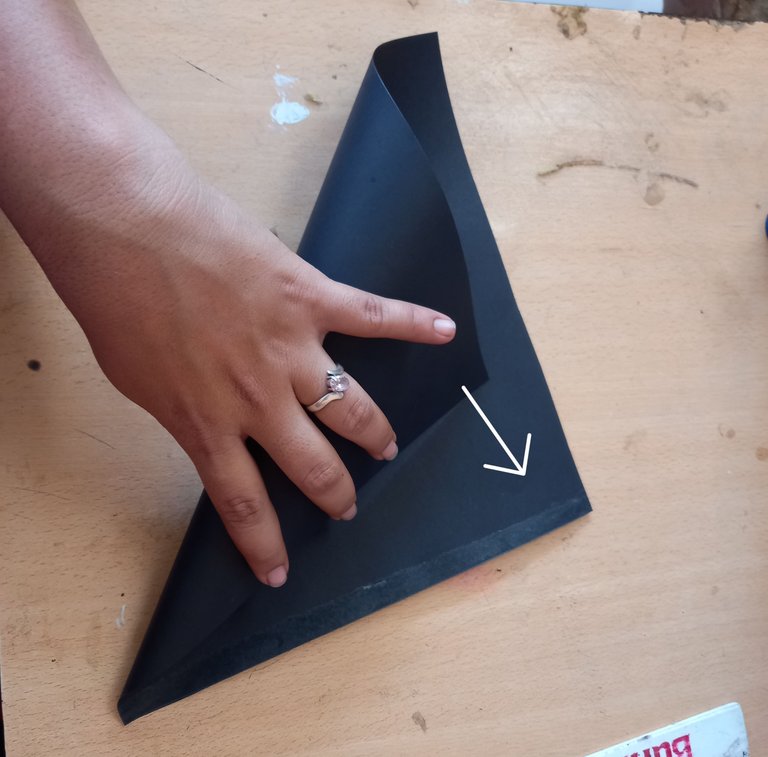
Primero haremos dos cuadrado, uno con cartulina negra y otro con cartulina amarilla con las mismas medidas de 20cm × 20cm.
First we will make two squares, one with black cardboard and the other with yellow cardboard with the same measurements of 20cm × 20cm.

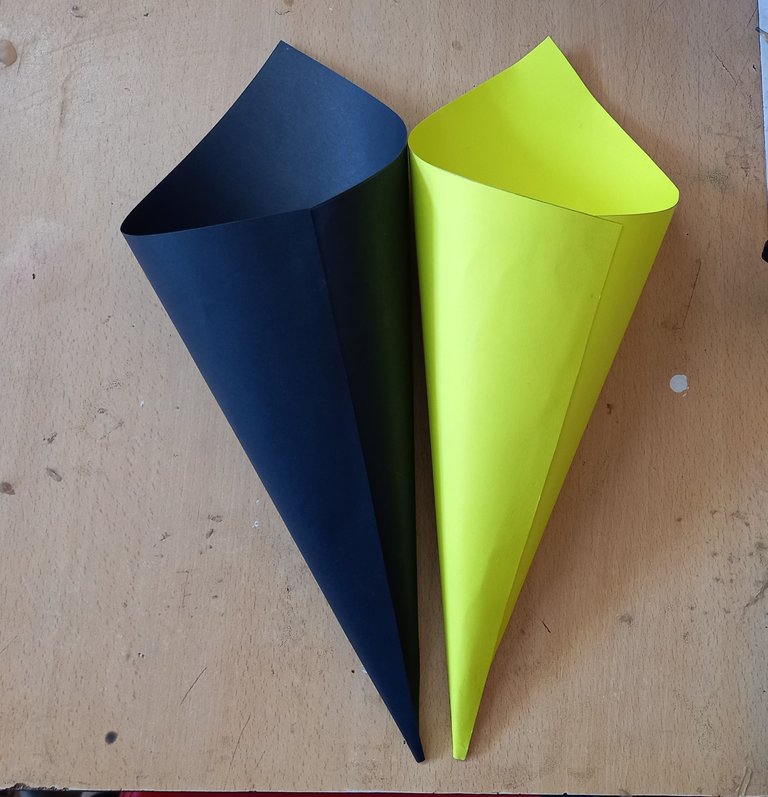
Luego con cada cuadrado haremos dos conos.
Then with each square we will make two cones
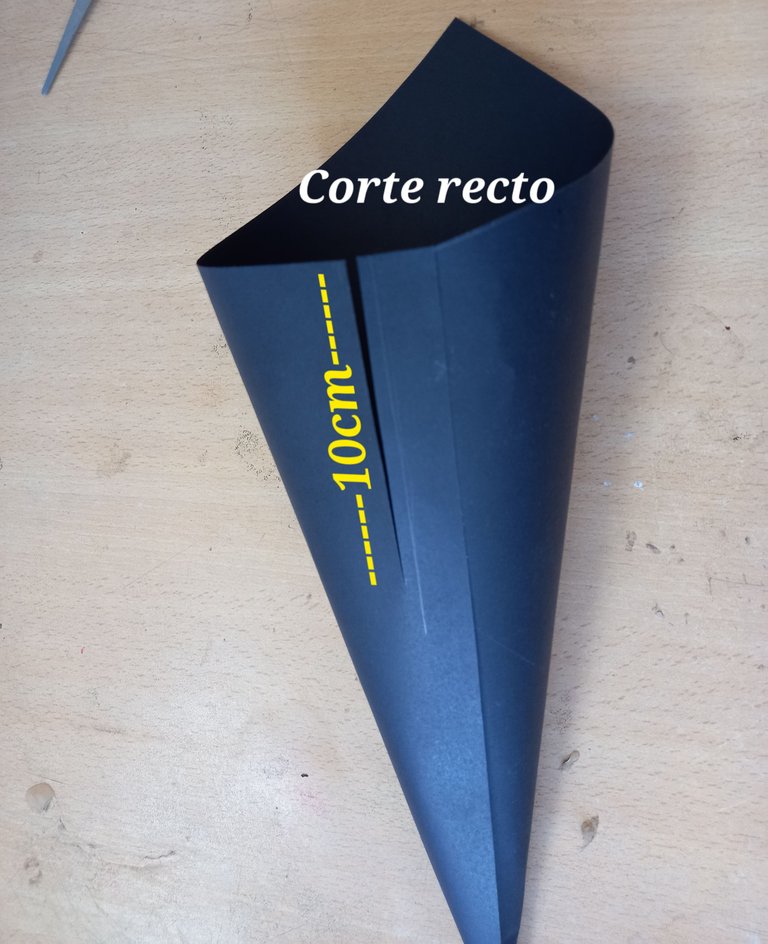
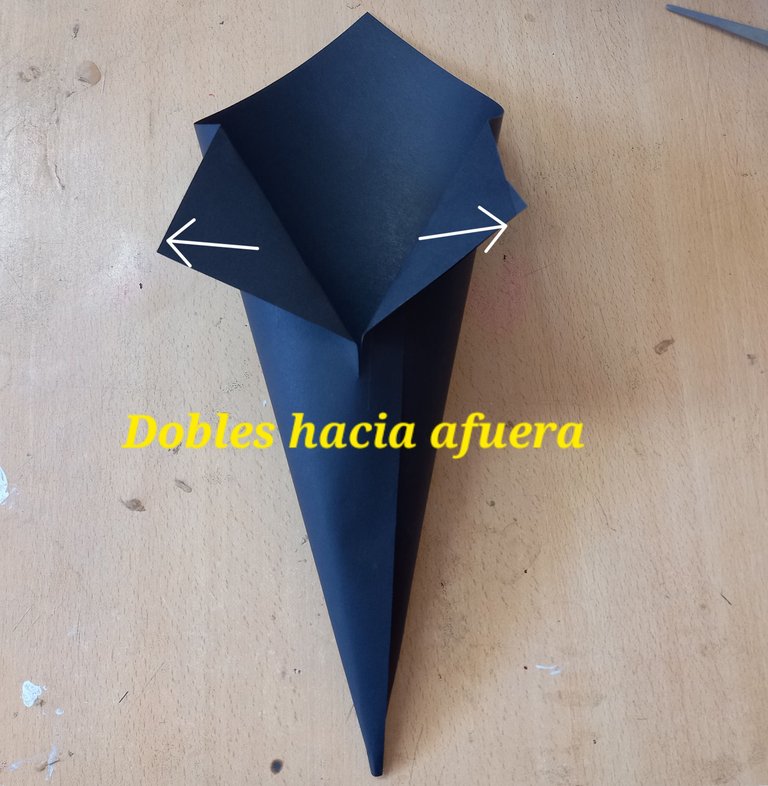
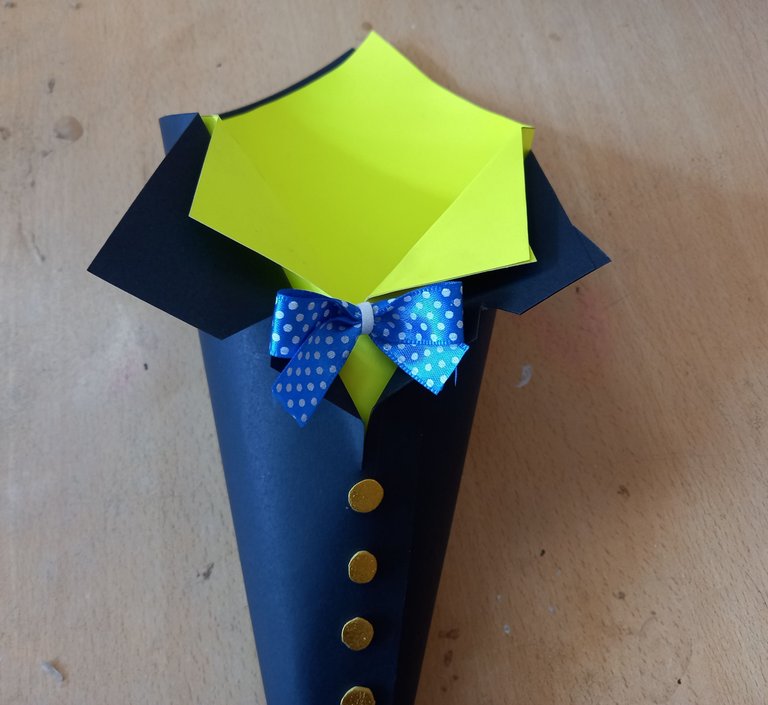
En la parte del frente del cono negro, realizaremos un corte recto de 10 cm de largo, doblamos hacia afuera las puntas, de tal manera que nos quede la forma del cuellos del esmoquin.
In the front part of the black cone, we will make a straight cut of 10 cm long, we fold out the ends, so that we have the shape of the tuxedo collar.
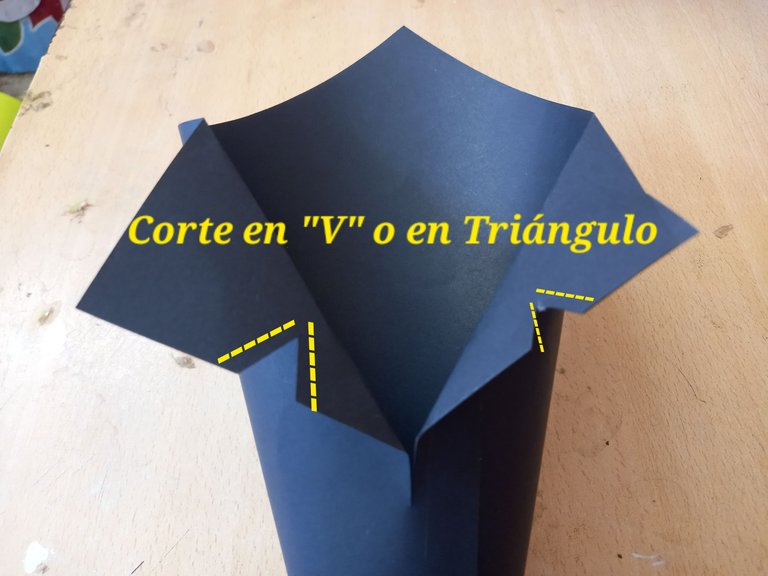
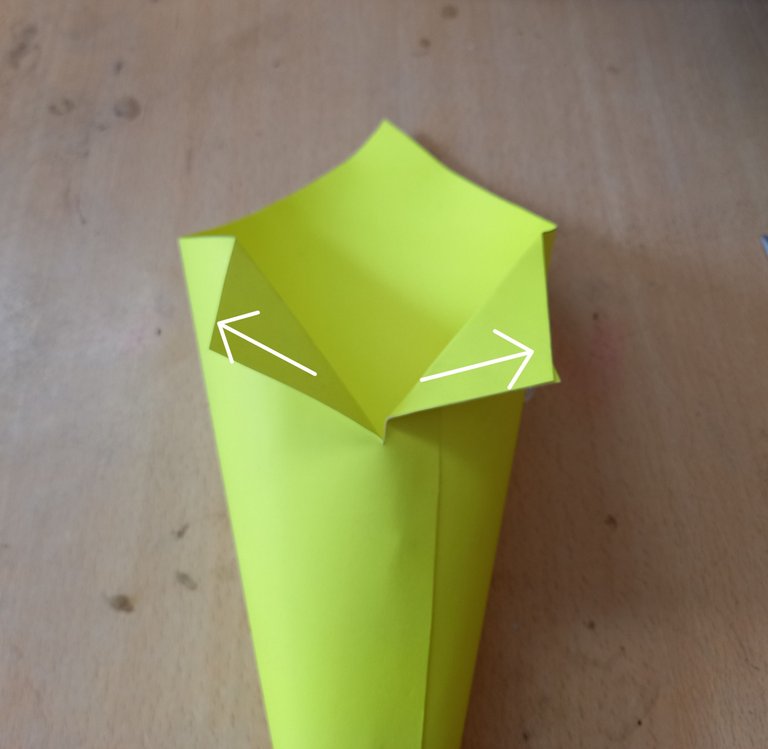
En el cuello del esmoquin, en la parte baja, casi a la mitad, haremos un pequeño corte, a cada lado en forma de triángulo.
On the collar of the tuxedo, at the lower part, almost in the middle, we will make a small cut, on each side in the shape of a triangle.
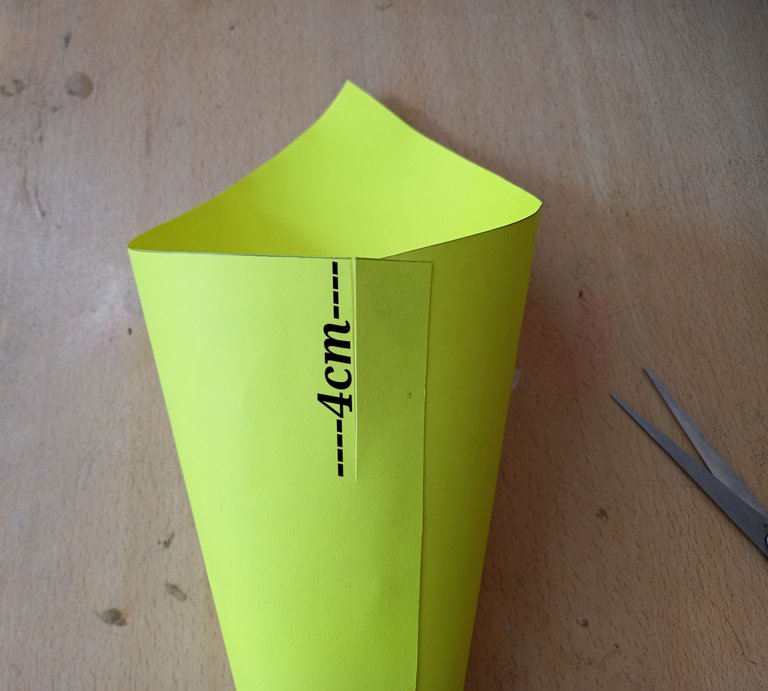
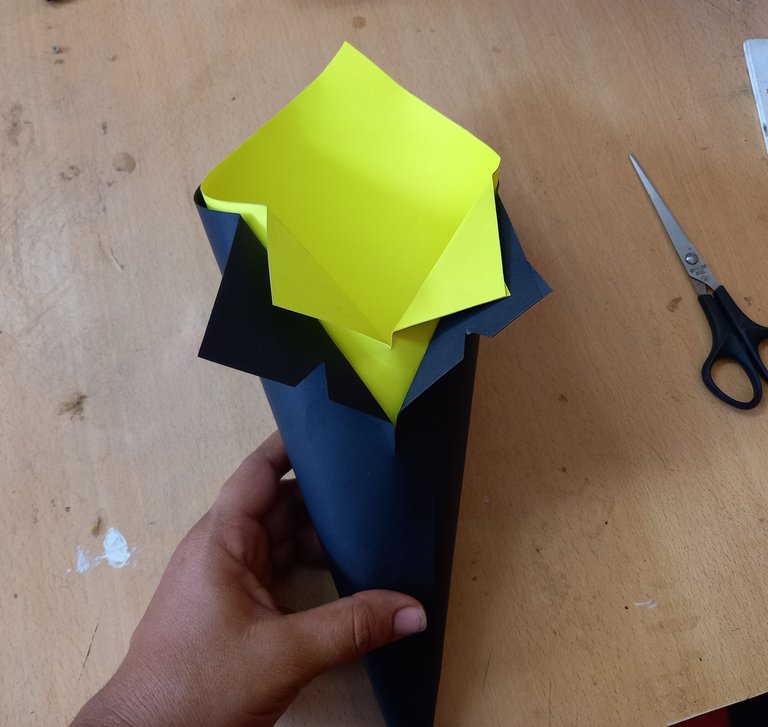
Una vez que hayamos terminado con el cono negro, procedemos hacerle un mismo corte recto, en la parte del frente, pero esta vez de 4 cm de largo, también doblaremos hacia afuera sus puntas y lo introducimos en el cono negro.
Once we have finished with the black cone, we proceed to make the same straight cut, in the front part, but this time 4 cm long, we will also fold out its ends and introduce it into the black cone.
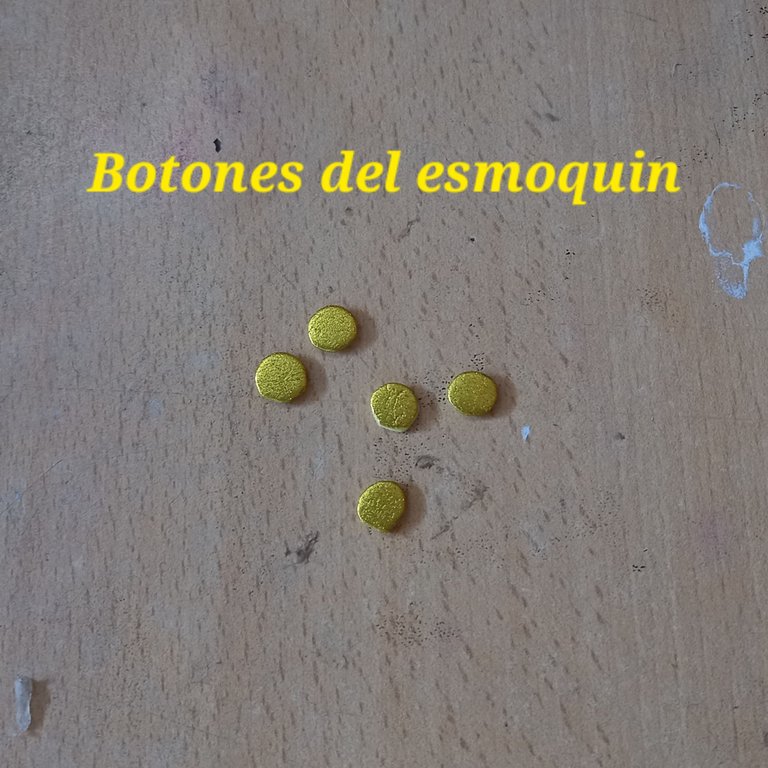
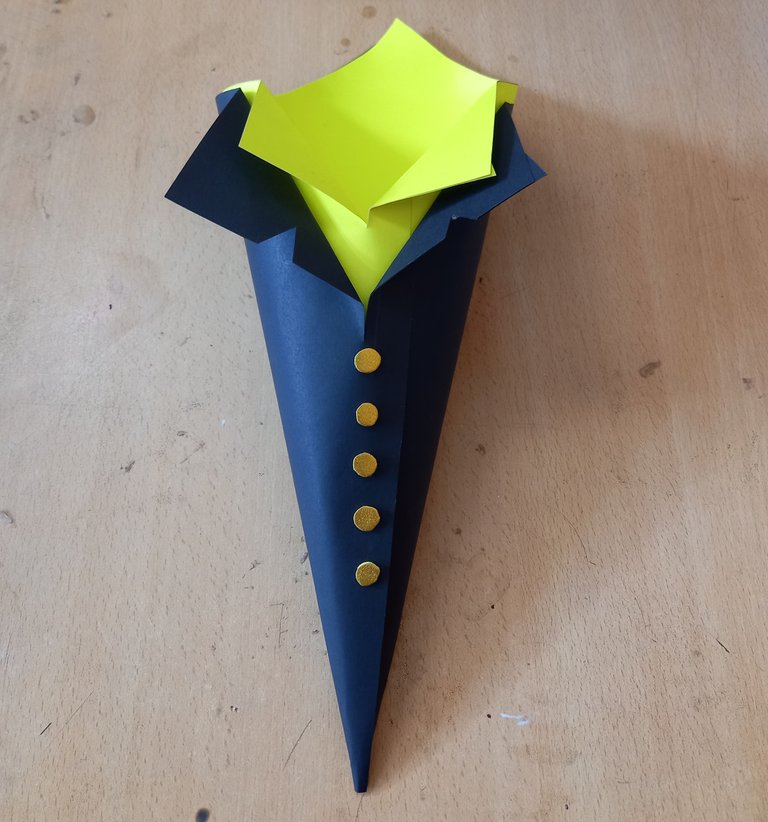
Posteriormente haremos 5 botones de foami metalizado dorado, los cuales pegaremos debajo debajo de la abertura del cono negro.
Then we will make 5 gold metallic foami buttons, which we will glue under the opening of the black cone.
Hacemos un lazos con cinta razo azul y lo pegamos en el término de la abertura del cono amarillo.
We make a loop with blue ribbon and glue it at the end of the opening of the yellow cone.
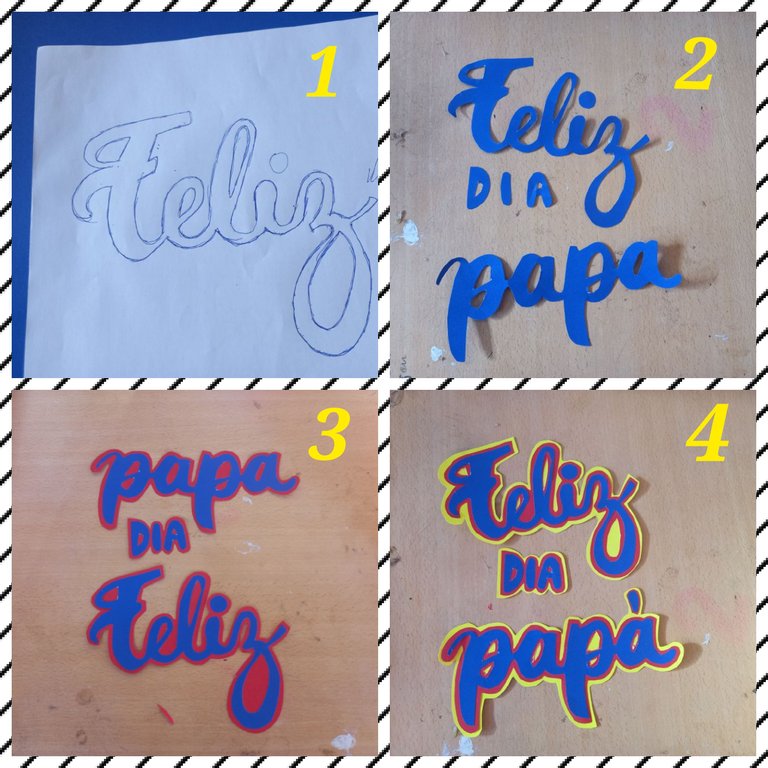
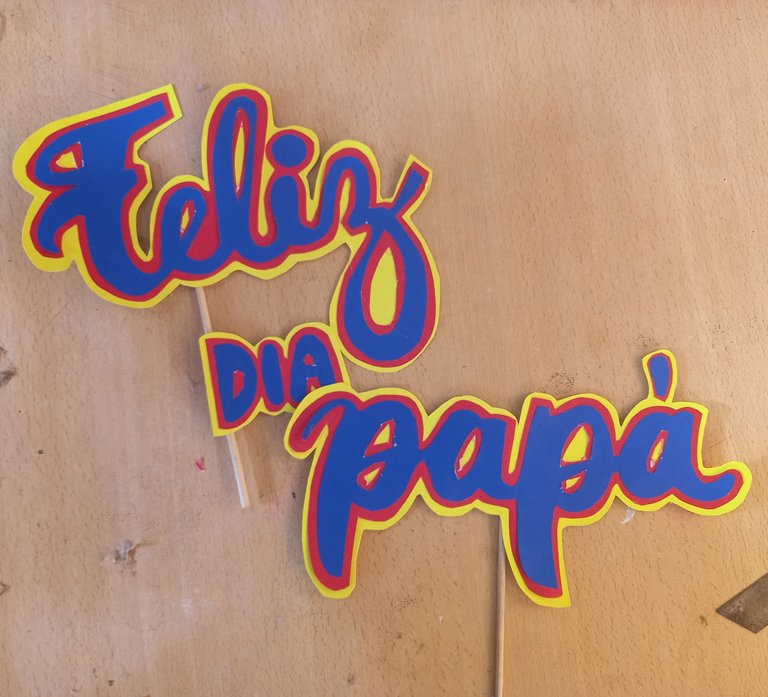
Para terminar de decorar nuestro esmoquin, realizaremos la palabra feliz día papá en cartulina azul con fondo rojo y amarillo.
To finish decorating our tuxedo, we will make the word happy daddy's day on blue cardboard with red and yellow background.
Pegamos las letras en palillos de altura dependiendo la distribución que queramos hacer y la fijamos en la parte superior de los conos.
We glue the letters on sticks of different heights depending on the distribution we want to make and we fix them on the top of the cones.
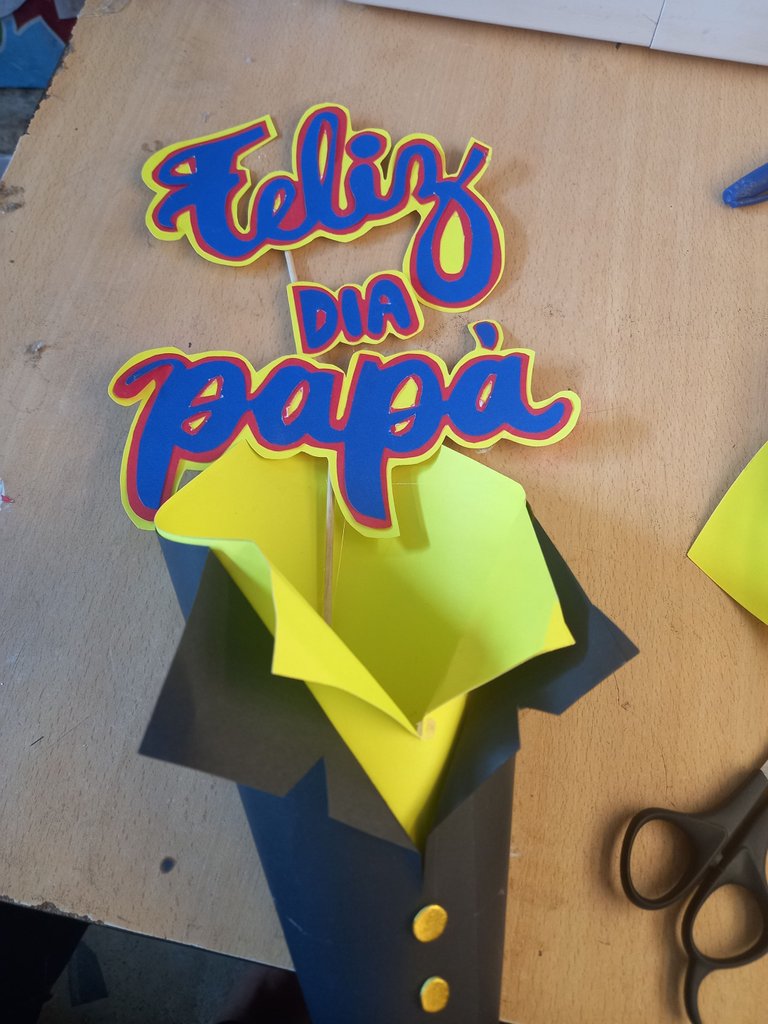
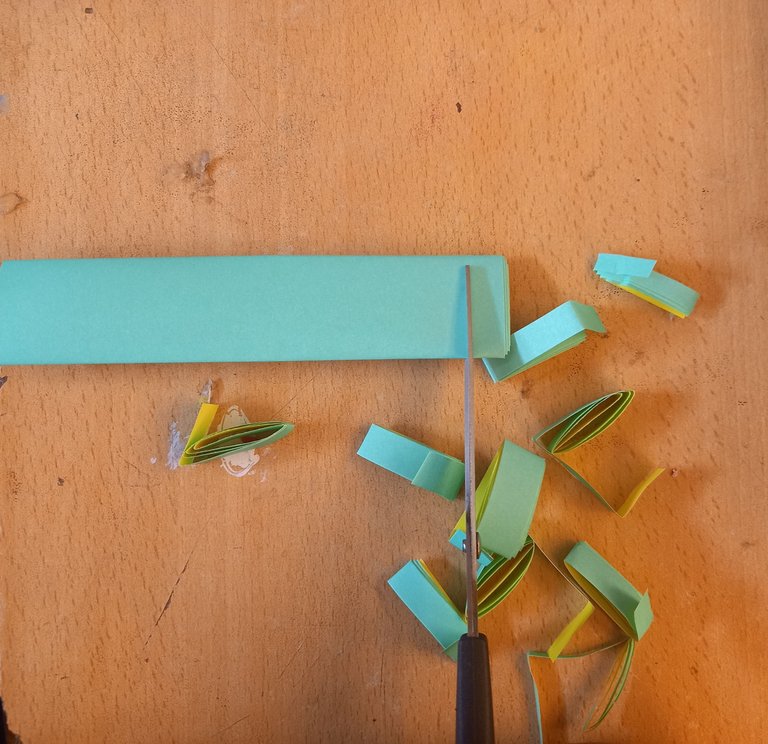
Enrollamos el papel turquesa y hacemos cortes, para sacar tiras enrolladas, las cuales vamos a introducir dentro del cono.
We roll up the turquoise paper and make cuts, to get rolled strips, which we are going to introduce inside the cone.
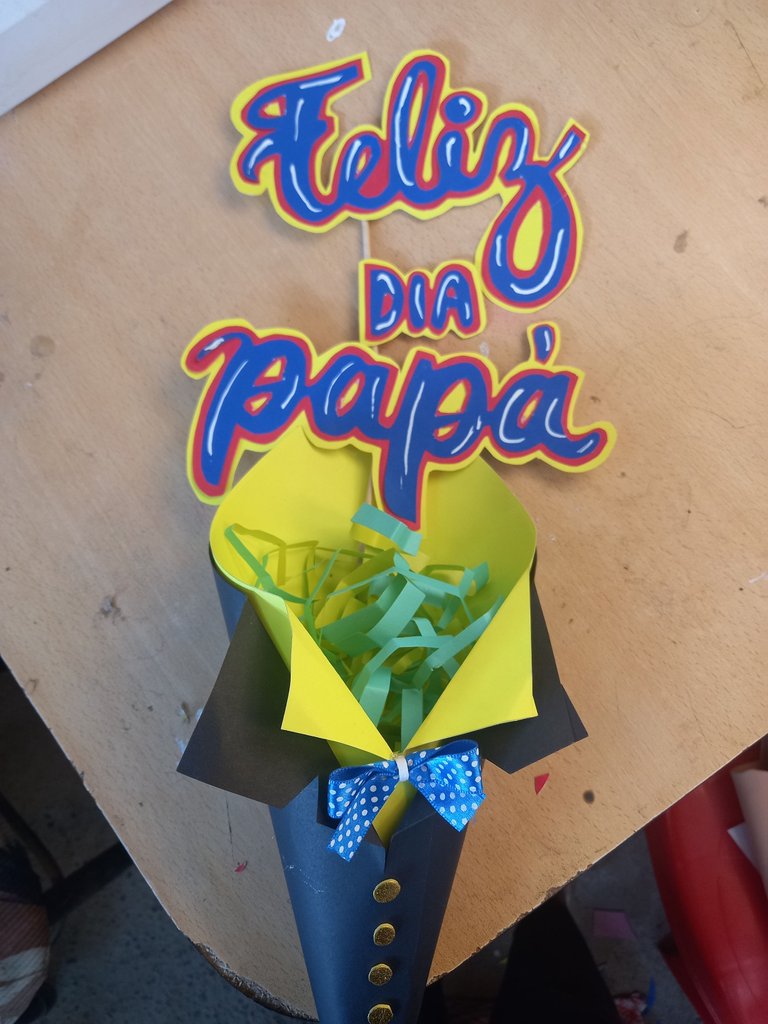
¡Veamos el resultado mis amigos!
¡Let's see the result my friends!

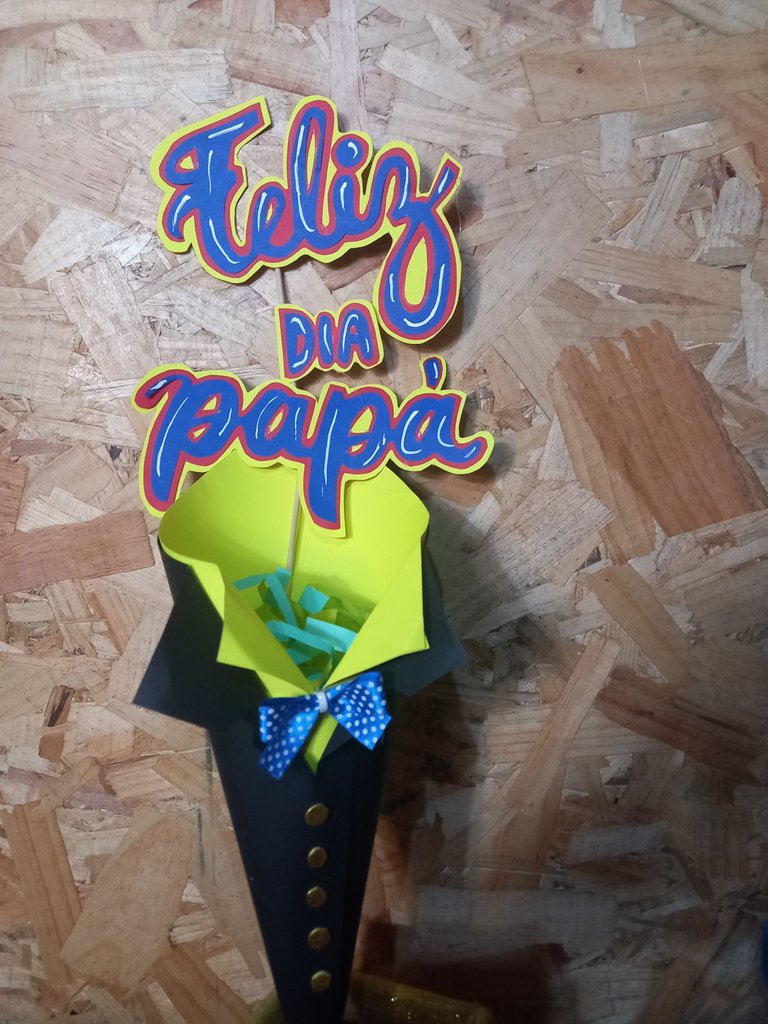

De esta manera, tendremos un hermoso obsequio para papá en su día, espero te haya gustado éste material y sea de gran utilidad. Hasta otra oportunidad mis queridos amigos. Bendiciones 😊 🙏🏻.
In this way, we will have a beautiful gift for dad on his day, I hope you liked this material and it will be very useful. Until another opportunity my dear friends. Blessings 😊 🙏🏻.