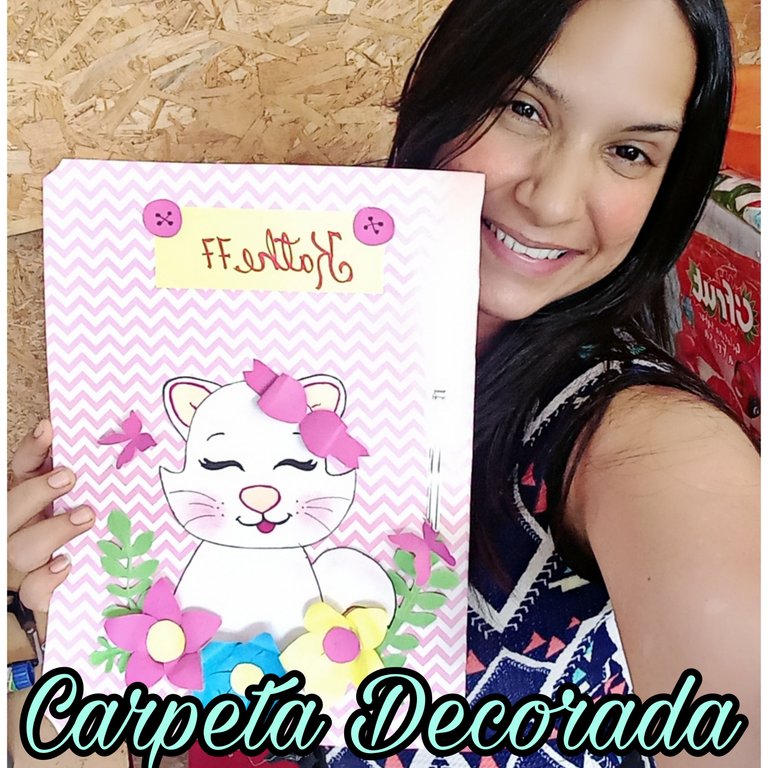
Hola queridos amigos de la colmena, deseo que estén pasando un lindo día, con buena salud y en compañía de la familia y amigos. Es un gusto saludarlos y compartir un nuevo proyecto crafts con ustedes, hoy les traigo un pequeño tutorial de cómo decorar una carpeta sencilla con un hermoso diseño de gatita. ¡Quédate hasta el final de éste tutorial!.
Hello dear friends of the hive, I hope you are having a nice day, in good health and in the company of family and friends. It's a pleasure to greet you and share a new crafts project with you, today I bring you a small tutorial on how to decorate a simple folder with a beautiful kitty design, stay until the end of this tutorial!.

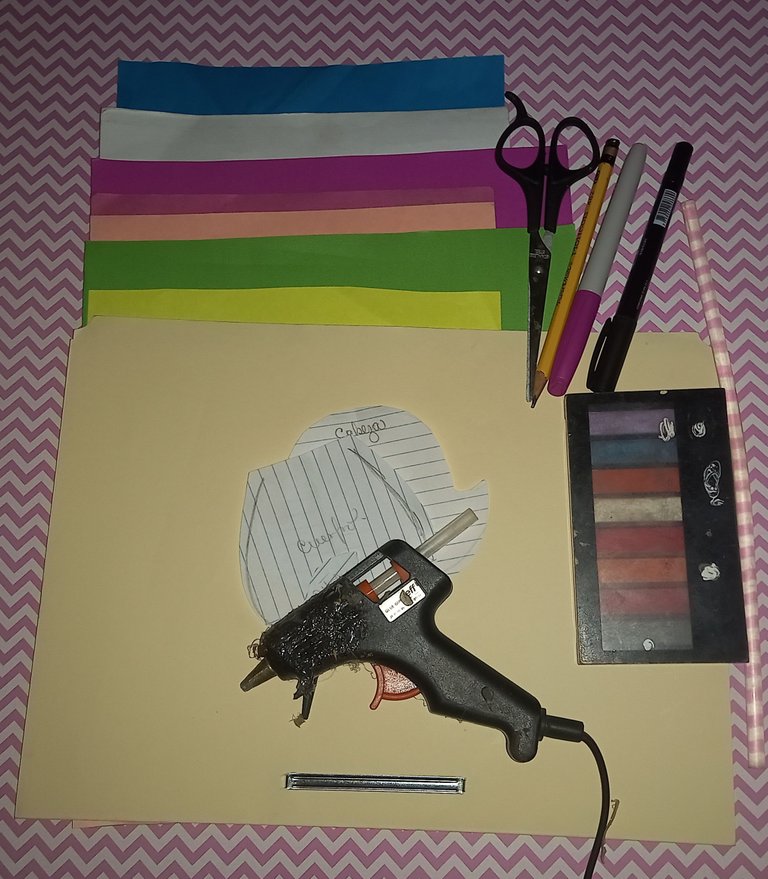
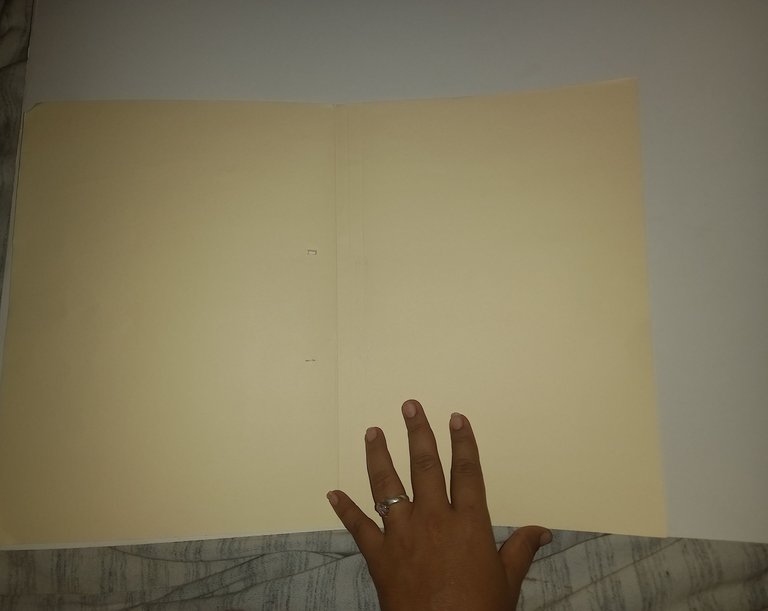
- Carpeta amarilla simple.
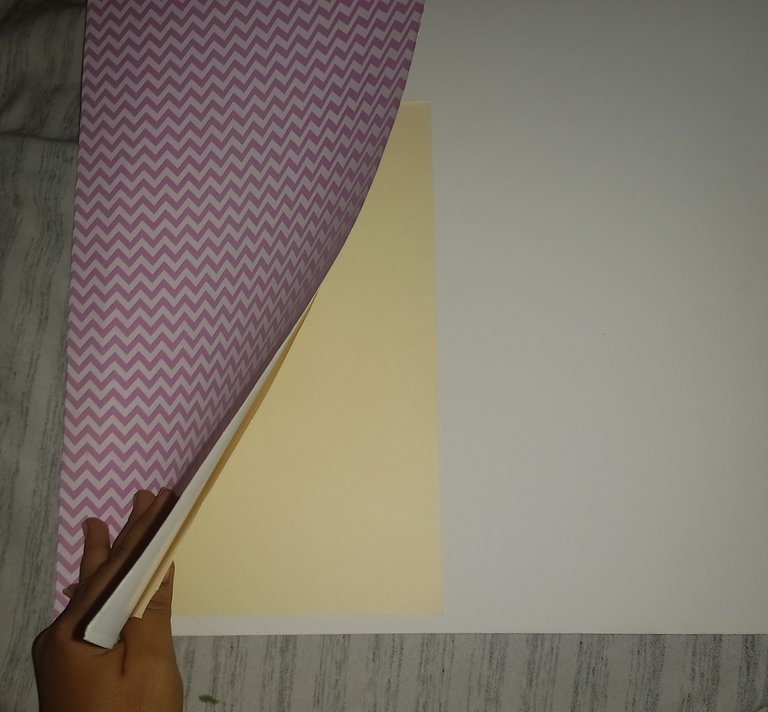
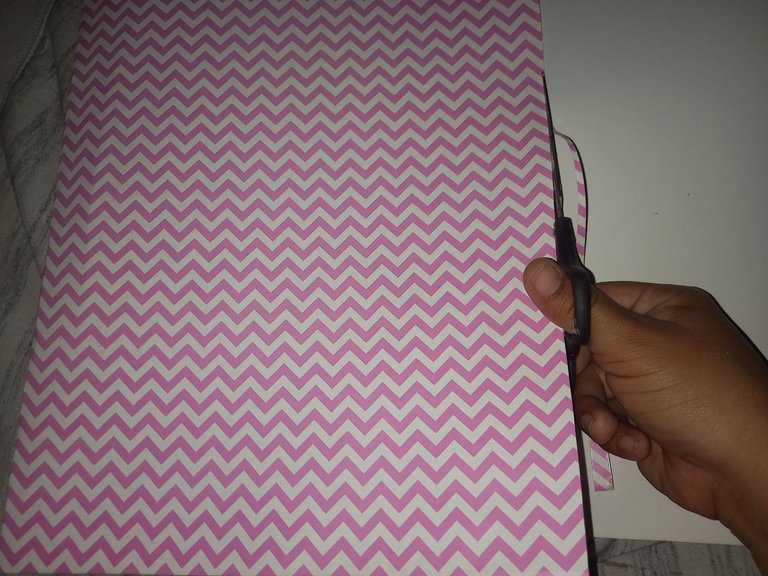
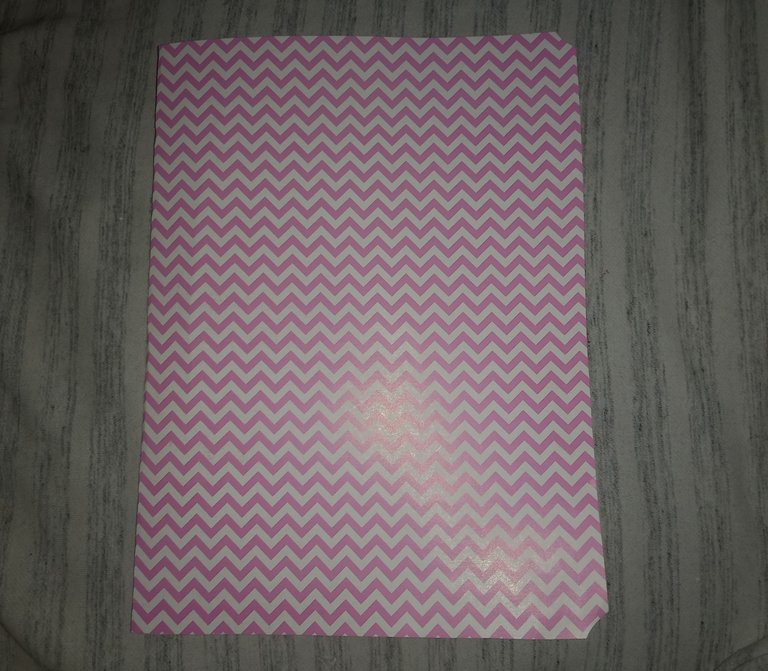
- Cartulina con diseño de zigzag rosados.
- Cartulina fucsia, rosada y verde.
- Papel artcolor rosa palo, azul y amarillo.
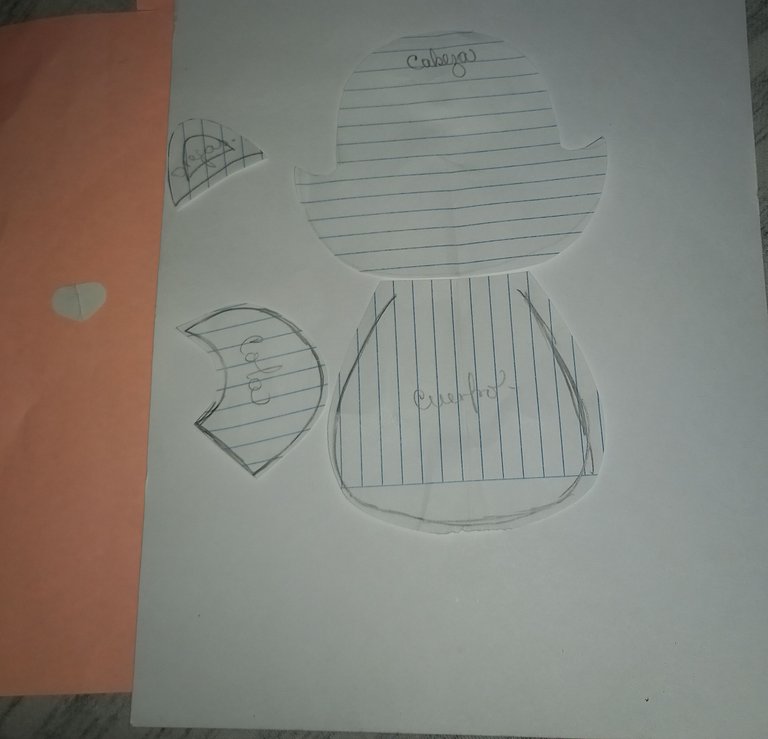
- Patrones del gatito(cabeza, cuerpo, cola, nariz y orejas); Patrón de pétalo.
- Marcador fucsia y negro.
- Pistola de silicón caliente.
- Tijeras.
- Sombras de maquillaje.
- Lápiz.
- Simple yellow folder.
- Pink zigzag design cardboard.
- Fuchsia, pink and green cardstock.
- Pale pink, blue and yellow artcolor paper.
- Kitty patterns (head, body, tail, nose and ears); Petal pattern.
- Fuchsia and black marker.
- Hot silicone gun.
- Scissors.
- Makeup shadows.
- Pencil.

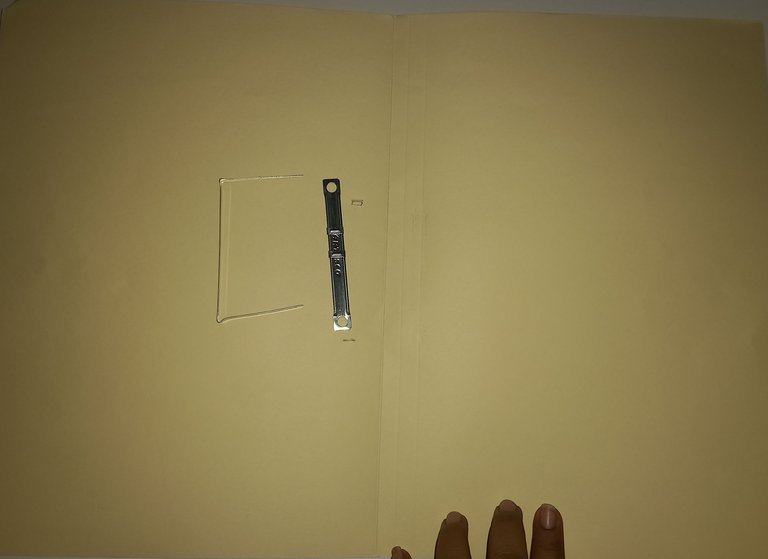
Primero retiramos el broche clip de la carpeta y la montaremos abierta sobre la cartulina con diseños por el revés.
First remove the clip from the folder and mount it open on the cardboard with designs on the reverse side.
Cerramos la carpeta junto con la cartulina, pegamos una cara primero y después la otra para que queden exactas al momento de abrir y cerrar.
Close the folder together with the cardboard, glue one side first and then the other so that they are exactly the same when opening and closing.
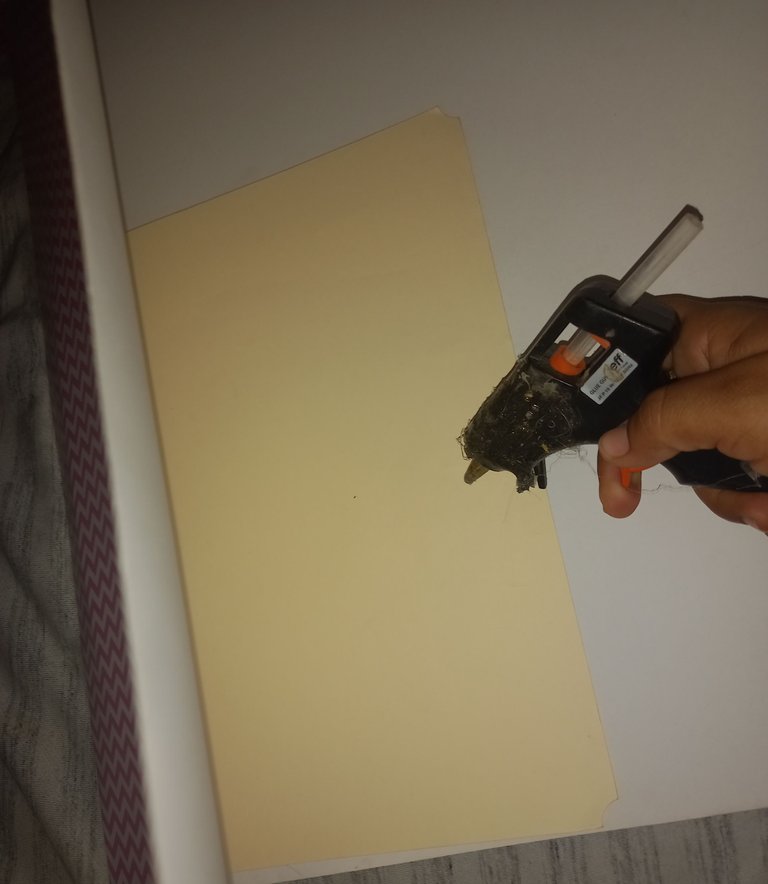
Luego recortamos el excedente de cartulina, guiándonos del tamaño de la carpeta.
Then we cut out the excess cardboard, taking the size of the folder as a guide.
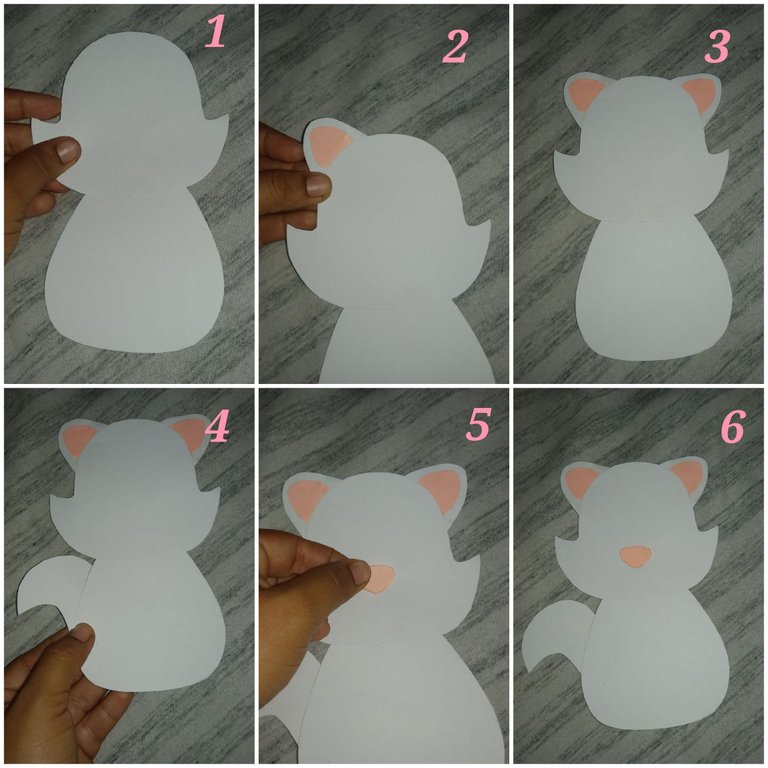
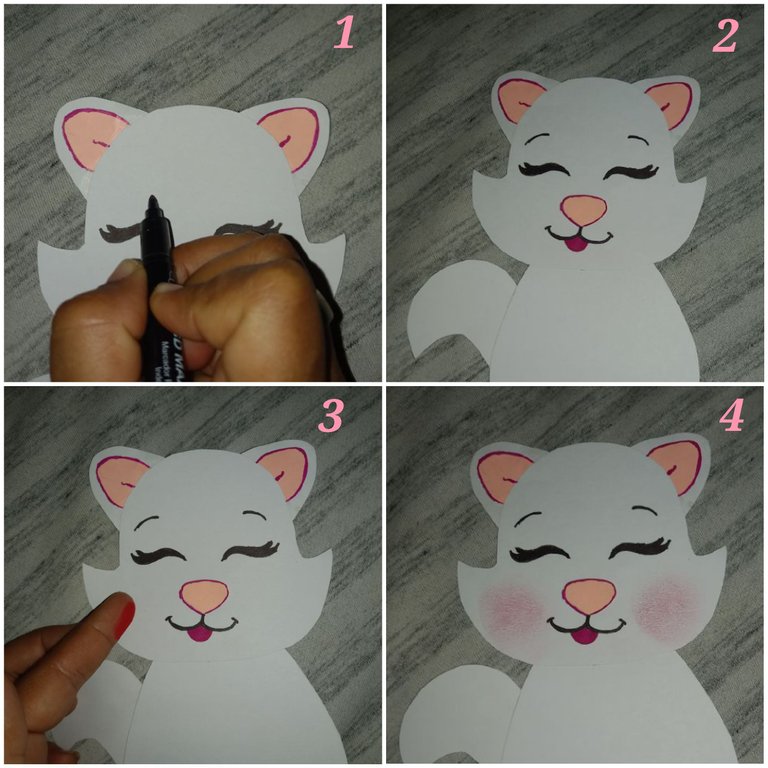
Una vez forrada la carpeta, procedemos a marcar los patrones de la gatita sobre la cartulina blanca, rosado palo para el fondos de las orejitas y fucsia para la nariz. Recortamos todo.
Once the folder is lined, we proceed to mark the patterns of the kitty on the white cardboard, pink stick for the bottom of the ears and fuchsia for the nose. Cut out everything.

Luego comenzaremos a armar la gatita uniendo el cuerpo con la cabeza, pegamos las orejas con su fondo a cada lado de la cabeza, pegamos la cola de un lado del cuerpo de la gatita y finalmente pegamos la nariz en el centro de la cara.
Then we will begin to assemble the kitten by joining the body with the head, glue the ears with their bottom on each side of the head, glue the tail on one side of the kitten's body and finally glue the nose in the center of the face.
Con un marcador negro dibujaremos las pestañas que simulan los ojos cerrados, con marcador negro y fucsia haremos la boca y marcaremos el borde de la nariz y el fondo de las orejas.
With a black marker we will draw the eyelashes that simulate the closed eyes, with black and fuchsia marker we will make the mouth and mark the edge of the nose and the bottom of the ears.
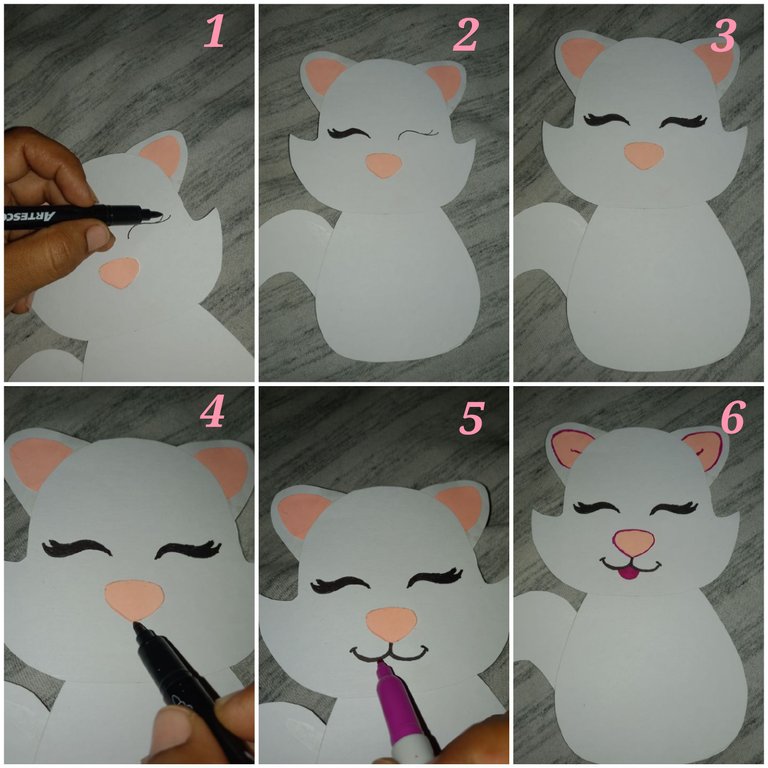
Pintaremos las cejas con marcador negro y con una sombra de maquillaje rojo haremos el rubor.
We will paint the eyebrows with black marker and with a red make-up shadow we will make the blush.
Para hacer los bigotes utilizaremos marcador negro y finalizamos los detalles de la gatita marcando todos sus bordes con el marcador del mismo color de los bigotes.
To make the whiskers we will use black marker and finish the details of the kitten by marking all its edges with the marker of the same color as the whiskers.
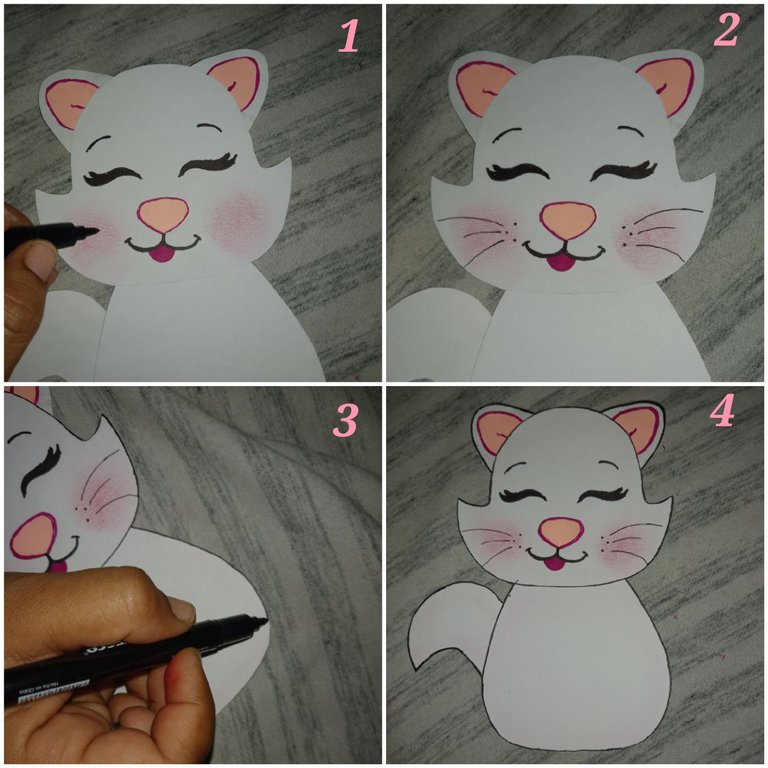
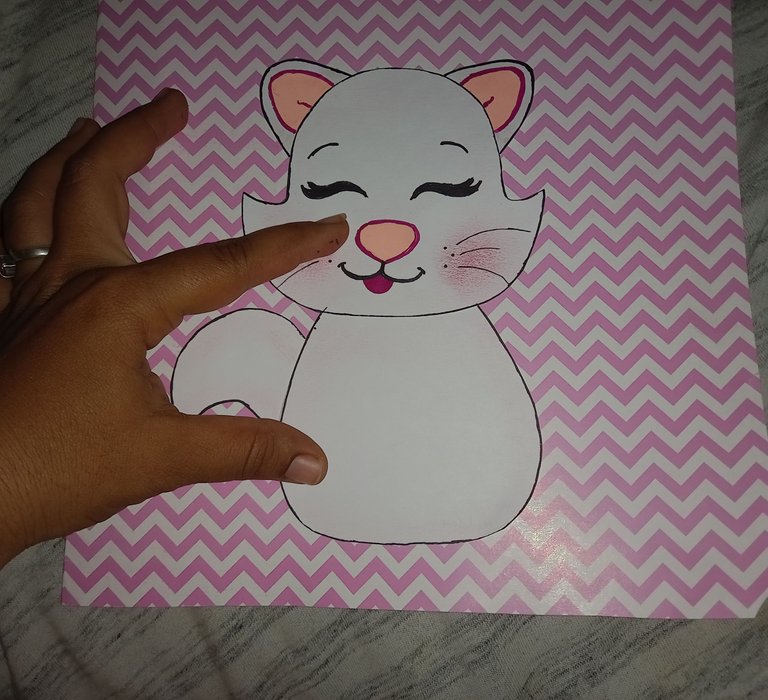
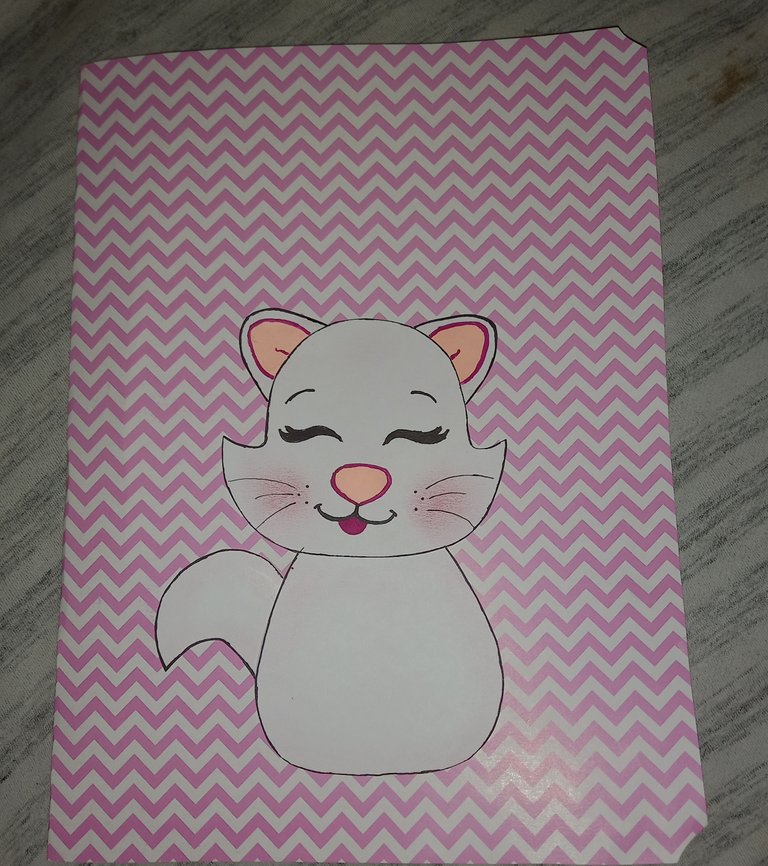
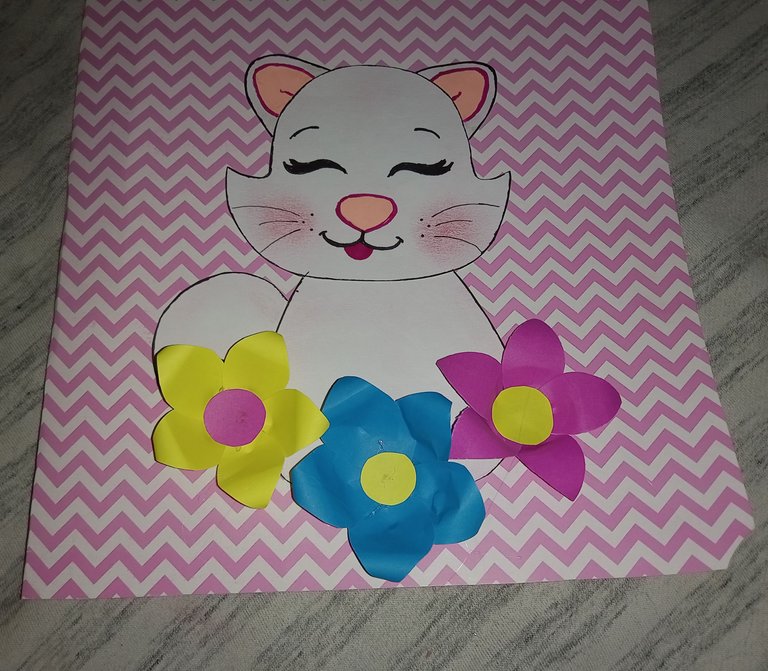
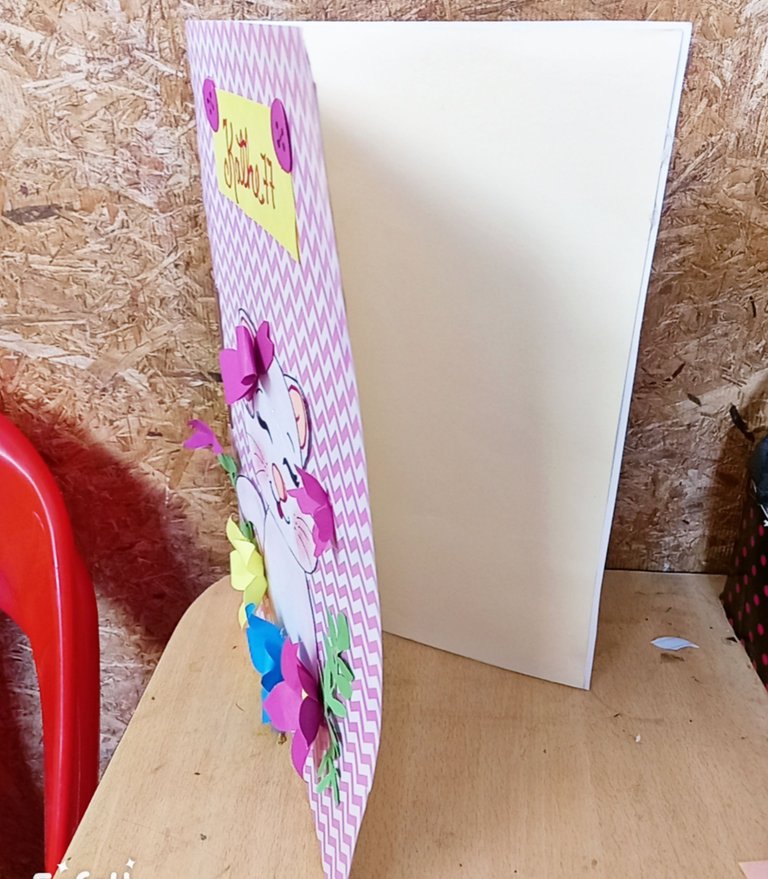
Pegamos la gatita en la parte inferior de la carpeta.
We glue the kitty at the bottom of the folder.
Ahora marcaremos los patrones de los pétalos para hacer unas flores de color fucsia, azul y amarillas. A estos pétalos le vamos a hacer un pequeño corte en la parte inferior para que al momento de pegar las queden un poco levantados.
Now we will mark the patterns of the petals to make fuchsia, blue and yellow flowers. We are going to make a small cut on the bottom of these petals so that when we glue them, they will be a little raised.
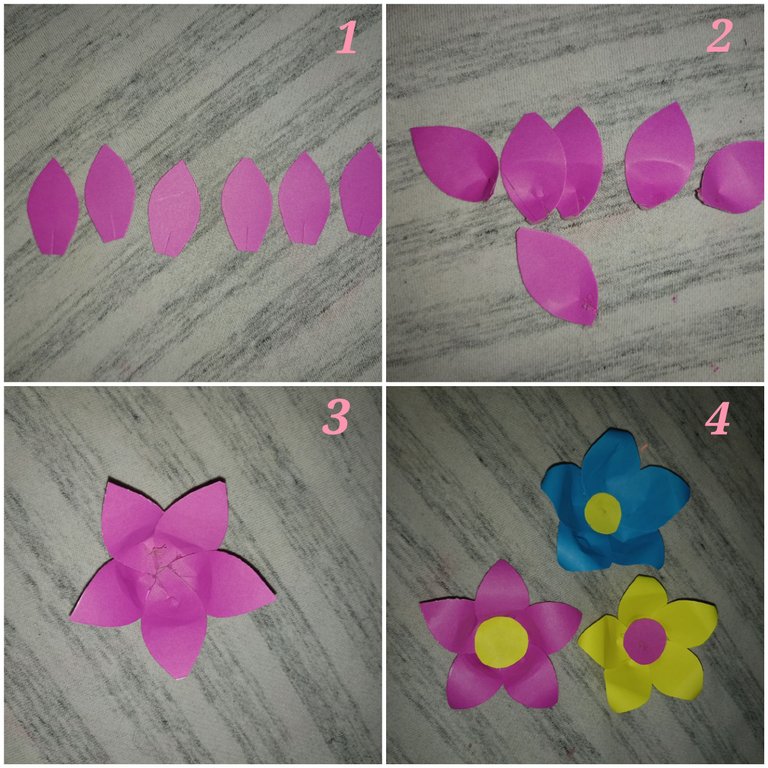
Pegamos las flores en la parte inferior del cuerpo de la gatita.
We glue the flowers on the lower part of the kitten's body.
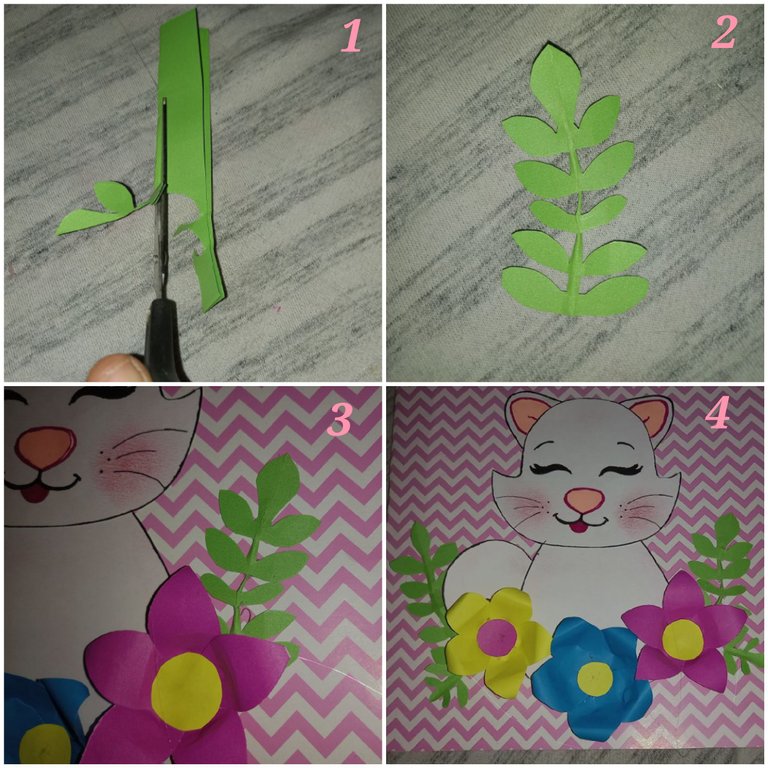
Después haremos unas ramitas doblando la cartulina en dos le vamos dando forma con la tijera y las pegamos una a cada lado, entre las tres flores.
Then we will make some twigs by folding the cardboard in two, shaping it with the scissors and gluing one on each side, between the three flowers.
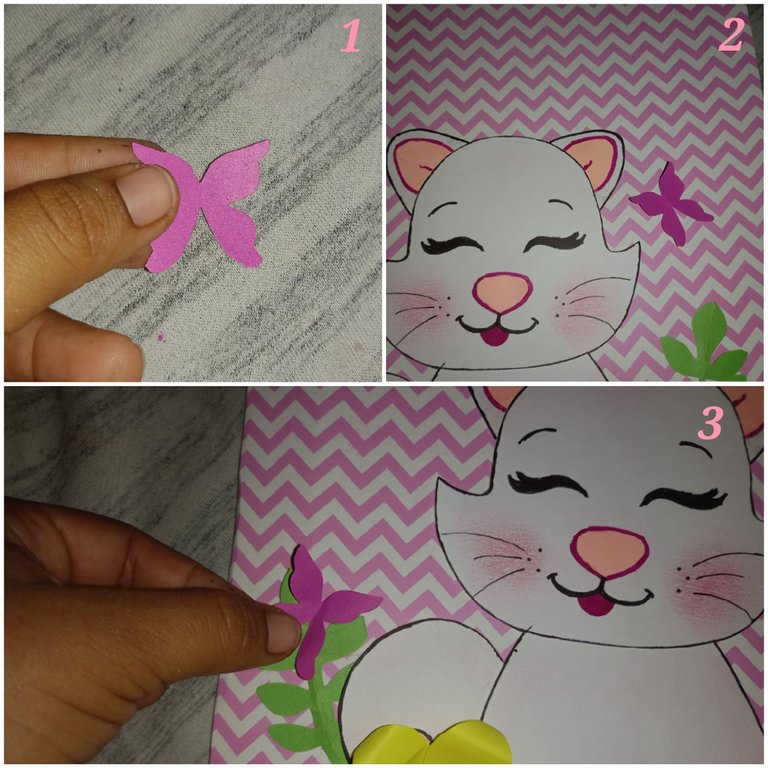
Luego con cartulina fucsia haremos unas mariposas y las pegaremos en el lugar que más nos guste.
Then with fuchsia cardboard we will make some butterflies and glue them in the place we like the most.
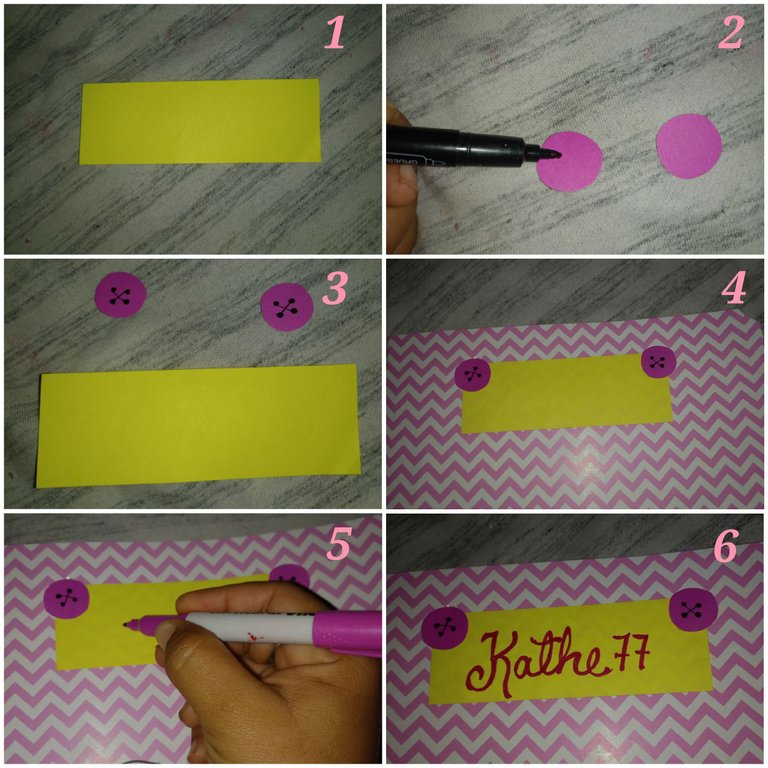
Para identificar la carpeta, cortaremos una tira de papel amarillo la pegamos en la parte superior de la carpeta y también haremos dos círculos de cartulina fucsia y la dibujaremos cuatro puntitos para simular la forma de unos botones esto lo pegaremos encima de las esquinas de la tira amarilla.
To identify the folder, we will cut a strip of yellow paper and glue it on the top of the folder and also make two circles of fuchsia cardboard and draw four dots to simulate the shape of buttons. This will be glued on top of the corners of the yellow strip.
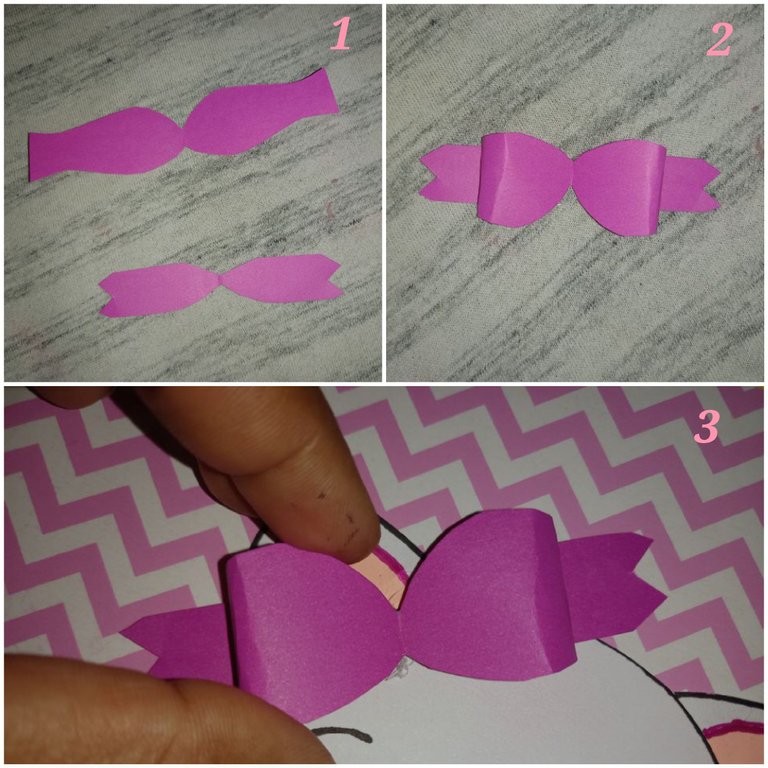
Hacemos un lazo con cartulina fucsia y lo pegamos en una de las orejitas de la gatita.
We make a bow with fuchsia cardboard and glue it on one of the kitty's ears.
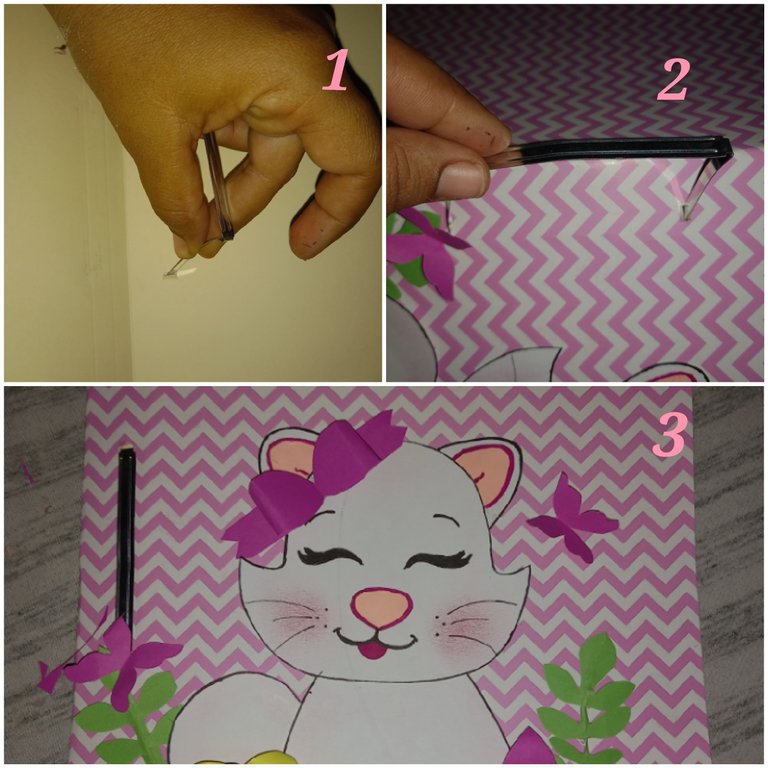
Finalizamos perforando con la punta del clip la cartulina de diseño por la parte de adentro de la carpeta para colocarla en el mismo lugar donde estaba cuando la retiramos.
We finish by punching with the tip of the paper clip the design cardboard on the inside of the folder to place it in the same place where it was when we removed it.
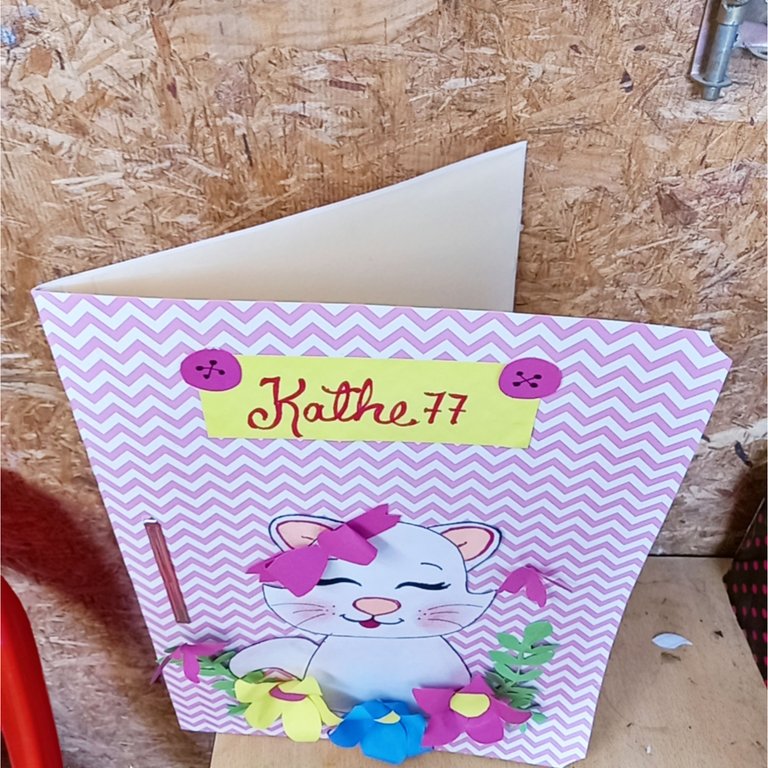
¡Veamos el resultado amigos!
Let's see the result folks!

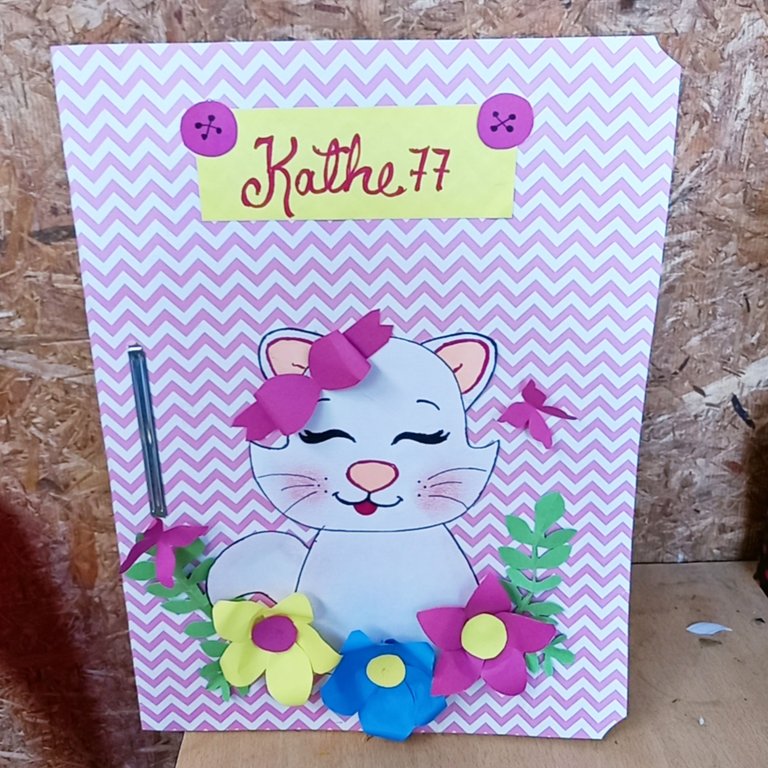
Así de ésta manera podemos hacer, de algo tan simple o sencillo, algo muy lindo y creativo. Espero les haya gustado el resultado queridos amigos. DIOS LOS SIGA BENDICIENDO🙏. ABRAZOS 🤗.
So this way we can make, from something so simple or simple, something very nice and creative. I hope you liked the result dear friends. GOD KEEP BLESSING YOU🙏. HUGS 🤗.