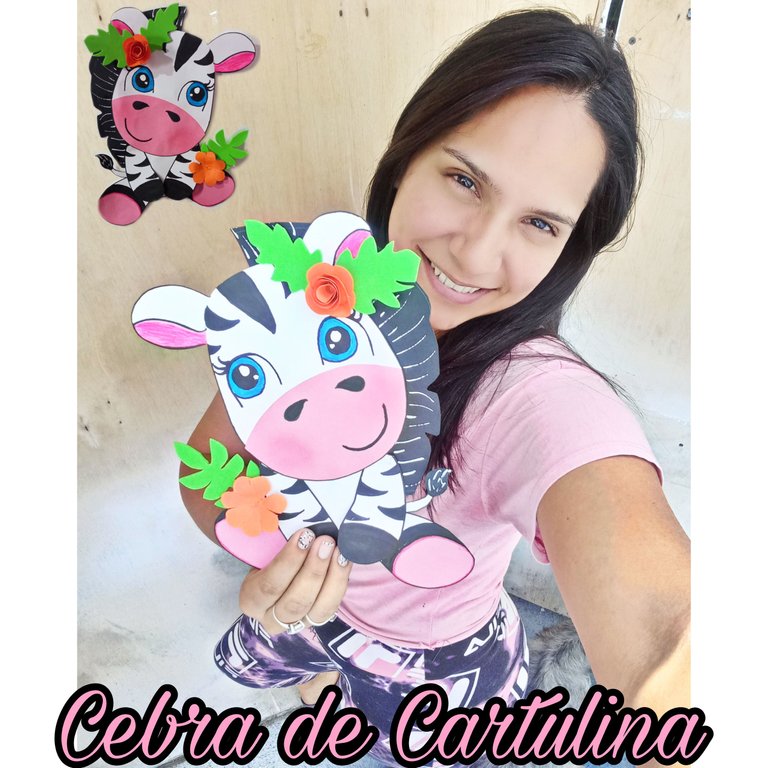
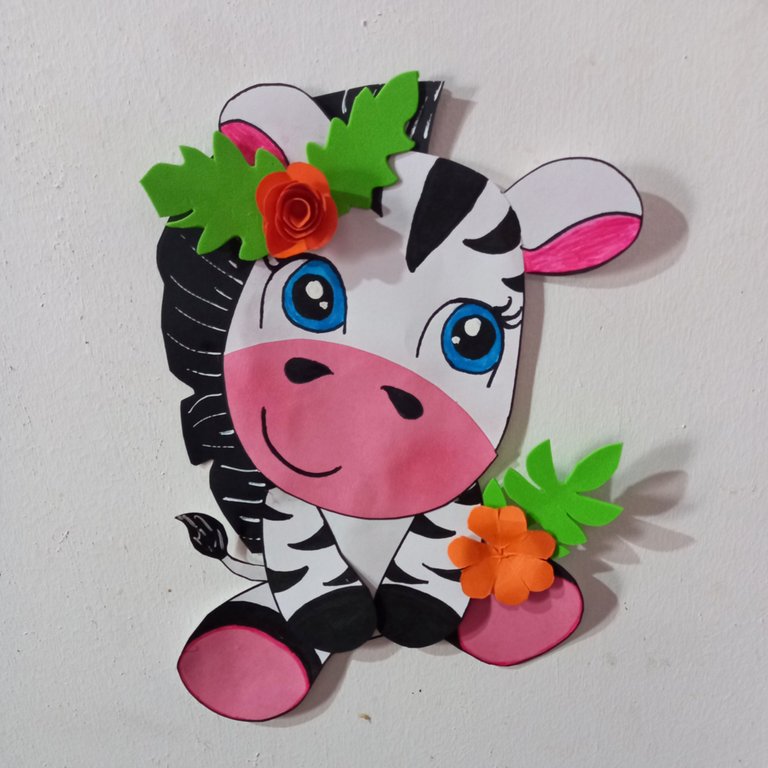
Hola queridos amigos artesanos, espero estén pasando un excelente día, con buena salud 🙏, hoy quiero mostrarle la elaboración de una Hermosa y Adorable Cebra de cartulina, espero les guste.
Hello dear crafting friends, I hope you are having an excellent day, with good health 🙏, today I want to show you the elaboration of a Beautiful and Adorable Cardboard Zebra, I hope you like it.

MATERIALES:
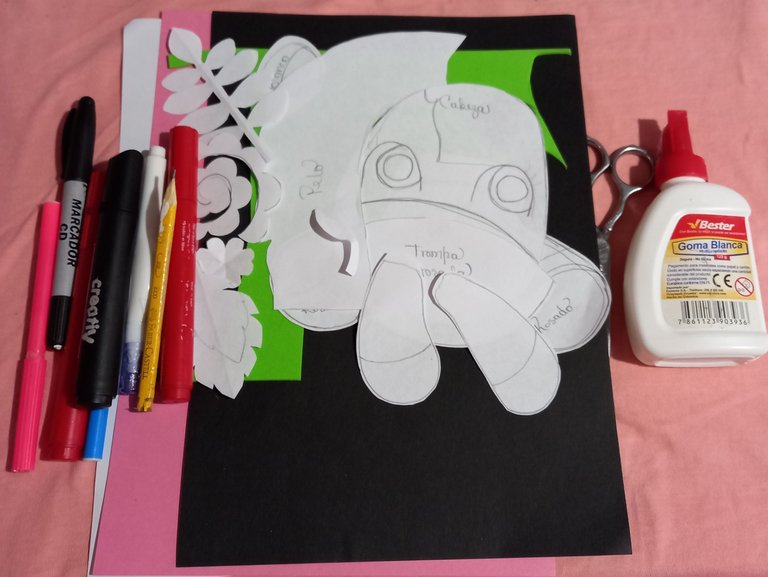
- Cartulina blanca, negra, rosada y anaranjada.
- Goma Eva verde.
- Patrones de la Cebra.
- Patrones de flores y hojas.
- Marcador negro, rojo y azul.
- Corrector blanco.
- Tijeras.
- Pegamento blanco.
- Lápiz.
MATERIALS:
- White, black, pink and orange cardboard.
- Green eva rubber.
- Zebra patterns.
- Flower and leaf patterns.
- Black, red and blue marker.
- White corrector.
- Scissors.
- White glue.
- Pencil.

PROCEDIMIENTO
PROCESURE
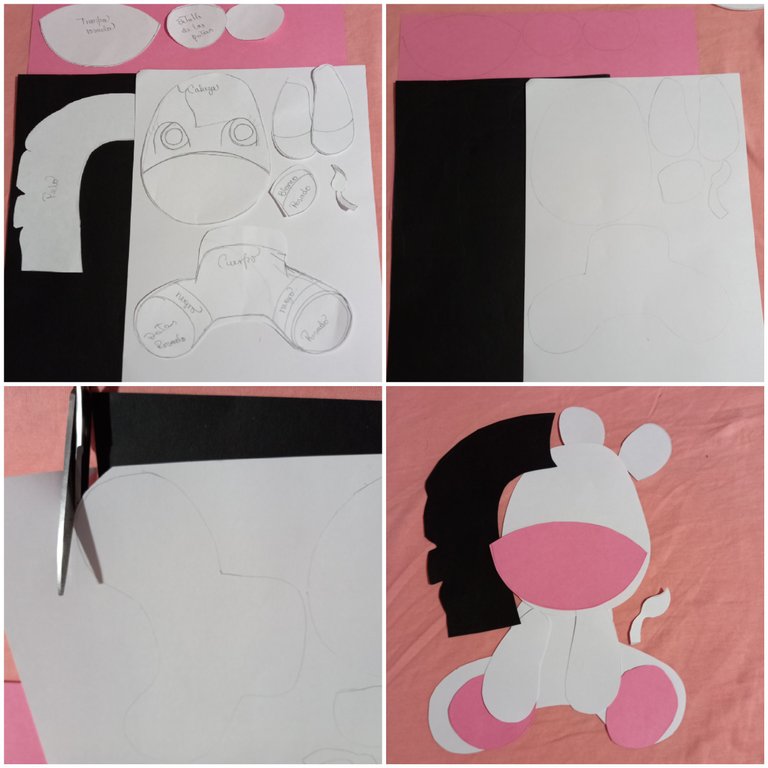
Comenzaremos marcando y recortando los patrones de la cabeza, las patas, el cuerpo y las orejas en la cartulina blanca y la trompa, los detalles de las patas en la cartulina rosada.
We will start by marking and cutting out the patterns of the head, legs, body and ears on the white cardboard and the trunk and the details of the legs on the pink cardboard.
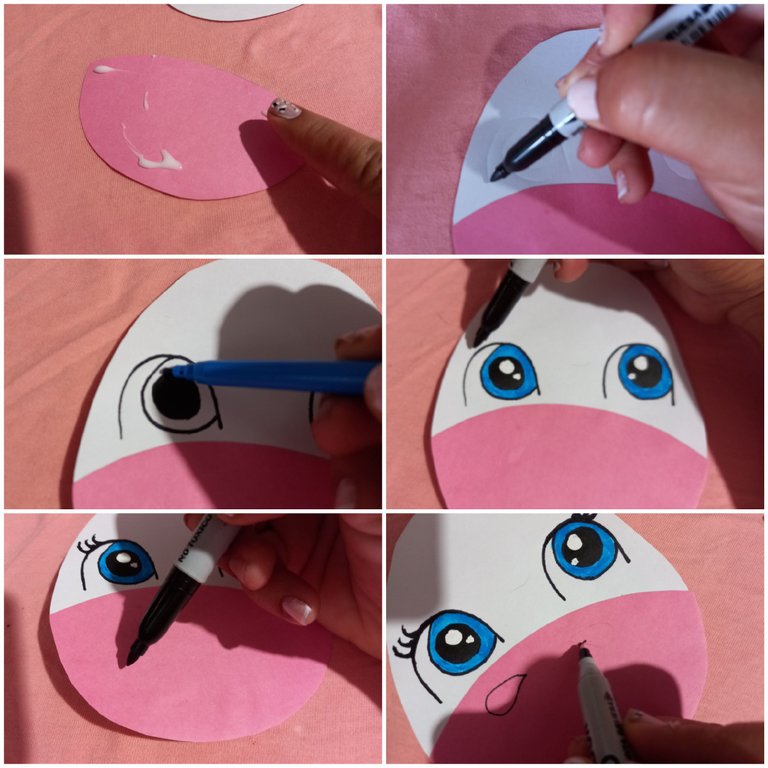
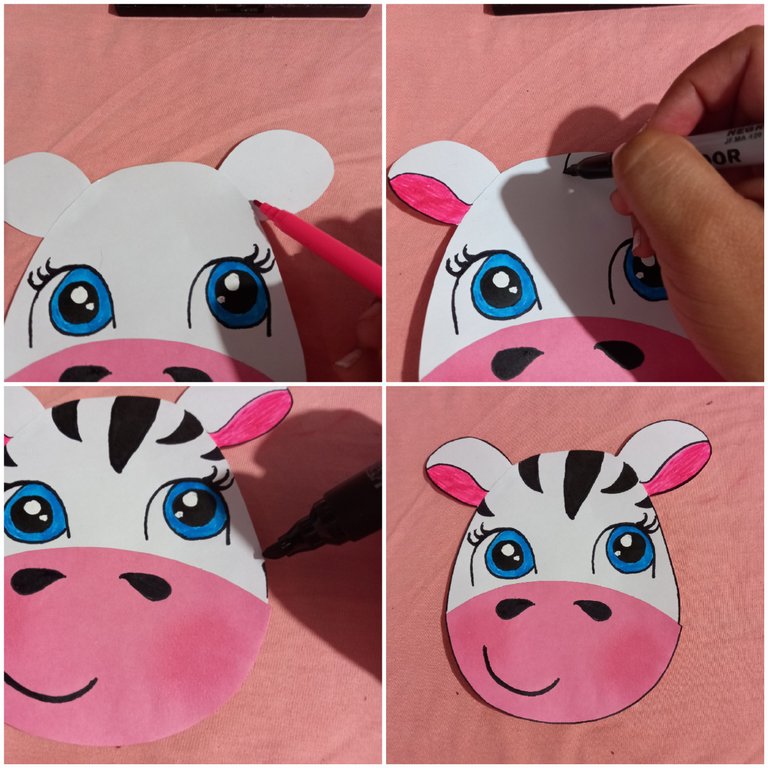
Después pegamos la trompa rosada y pintamos los ojos con marcador negro, azul y corrector blanco, asimismo mismo pintamos la boca y los agujeros de la nariz.
Then we glued the pink trunk and painted the eyes with black and blue marker and white concealer, as well as the mouth and nose holes.
Luego pintamos el detalle de la oreja con marcador rosado, las franjas negras y los contornos con marcador negro.
Then we painted the ear detail with pink marker, the black stripes and the outlines with black marker.
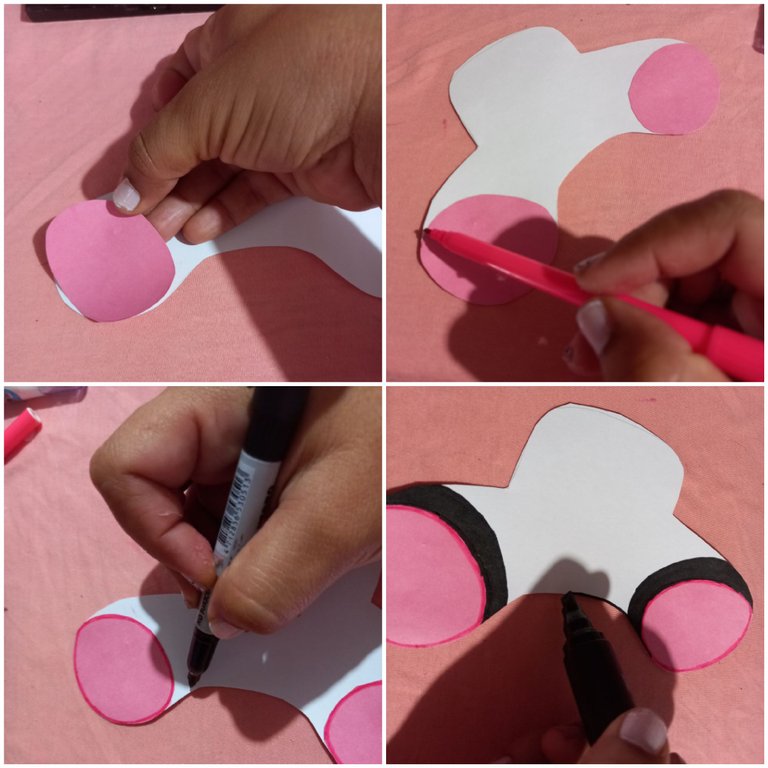
Posteriormente pegamos el detalle rosado y las mancha negras de las patas traseras y marcamos los contornos.
Then we glue the pink detail and the black spot on the back legs and mark the contours.
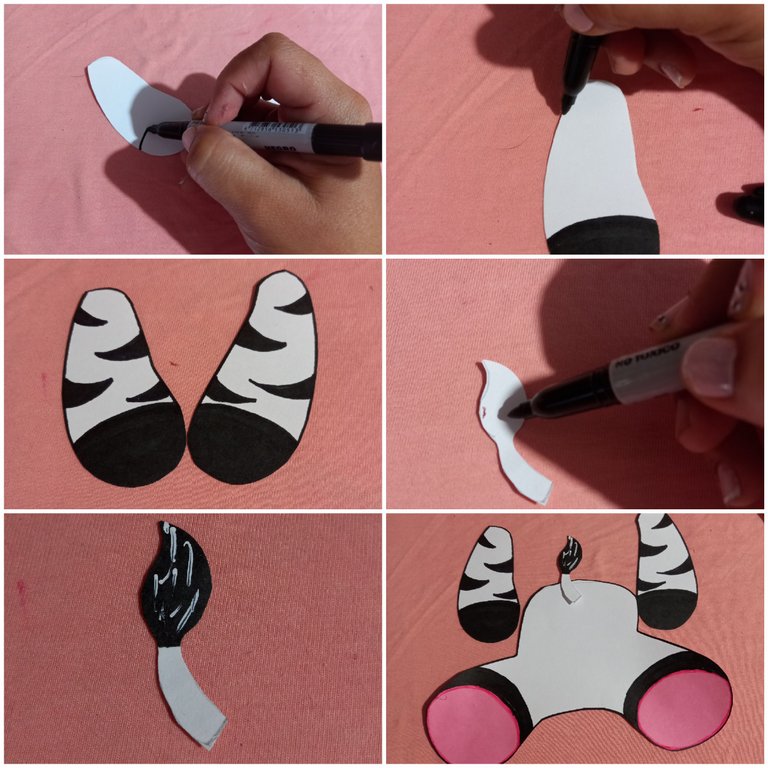
Después pintamos las franjas negras en las patas y los pelos negros de la cola.
Then we paint the black stripes on the legs and the black hairs on the tail.
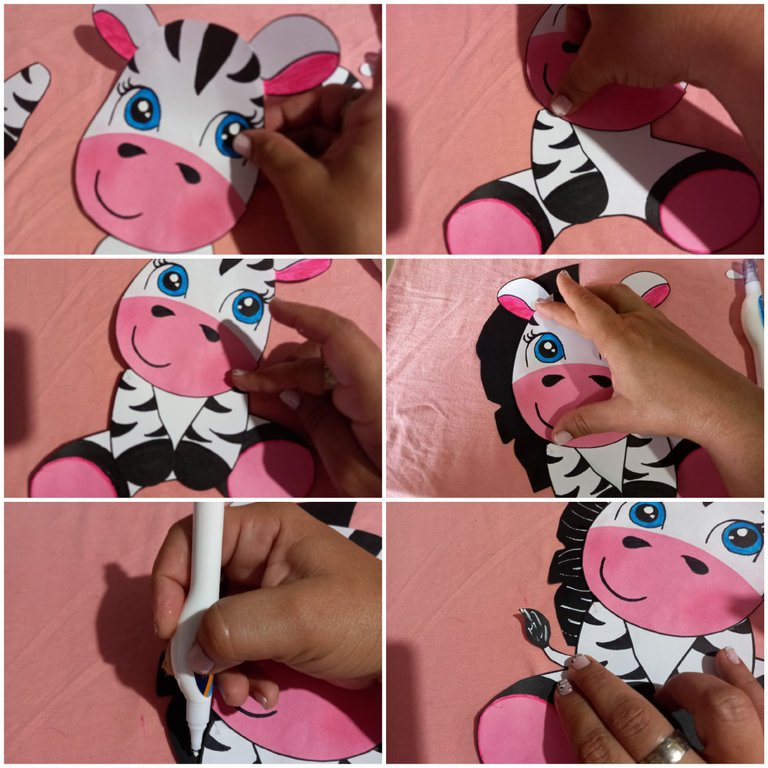
Ahora procedemos a pegar todas las partes de la Cebra empezando por la cabeza, el cuerpo, las patas, la melena y la cola.
Now we proceed to glue all the parts of the Zebra starting with the head, body, legs, mane and tail.
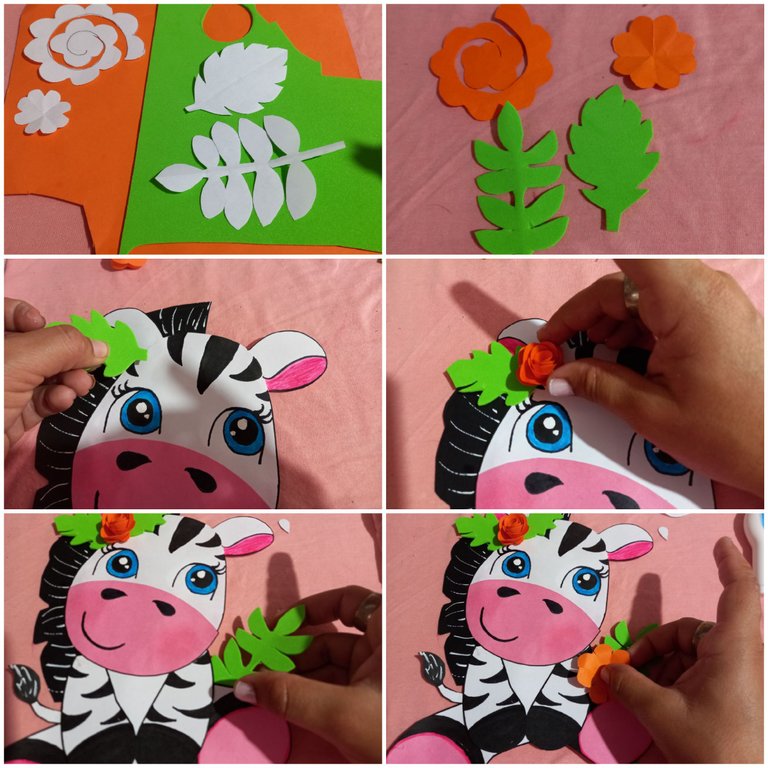
Finalizamos marcando, recortando , armando y pegando las flores y las hojas de la Cebra.
We finished by marking, cutting out, assembling and gluing the Zebra's flowers and leaves.

RESULTADO FINAL
RESULT FINALLY
Espero que éste material haya sido de su total agrado mis queridos amigos y puedan ponerlo en práctica.
DIOS LOS BENDIGA
I hope that this material has been to your total liking my dear friends and that you can put it into practice
