¡Hola Hermosuras! (づ ̄ ³ ̄)づ♥* que tal todo? Me emociona mucho compartir nuevamente en esta creativa comunidad. Hoy les quiero enseñar cómo elaborar un bellísimo forro de cuaderno, está hecho en tela por lo que es lavable y además pueden quitárselo y ponérselo al cuaderno cuando ustedes quieran. También pueden adaptar las medidas y forrar sus libros, agendas, carpetas... ¡Lo que ustedes quieran!
Hi beauties! (づ ̄ ³ ̄)づ♥* how's everything? I am very excited to share again in this creative community. Today I want to show you how to make a beautiful notebook cover, it is made of fabric so it is washable and you can also take it off and put it on the notebook whenever you want. You can also adapt the measurements and cover your books, diaries, folders... Whatever you want!

Decidí hacer este DIY porque una de las cosas que más me gusta hacer es escribir en mi diario, el cual siempre me ha encantado decorar a mi gusto, y para quienes les encanta tener sus cuadernos personalizados esta es una opción, además también sirve como alternativa de regalo
I decided to do this DIY because one of the things I like to do the most is write in my diary, which I have always loved to decorate to my liking, and for those who love to have their personalized notebooks this is an option, it also serves as gift alternative
✩⋆Materiales | Materials⋆✩
Paper, pencil, tape measure Fabric Scraps Needle and thread Scissors And lots of love

✩⋆Paso a paso | Step by Step⋆✩
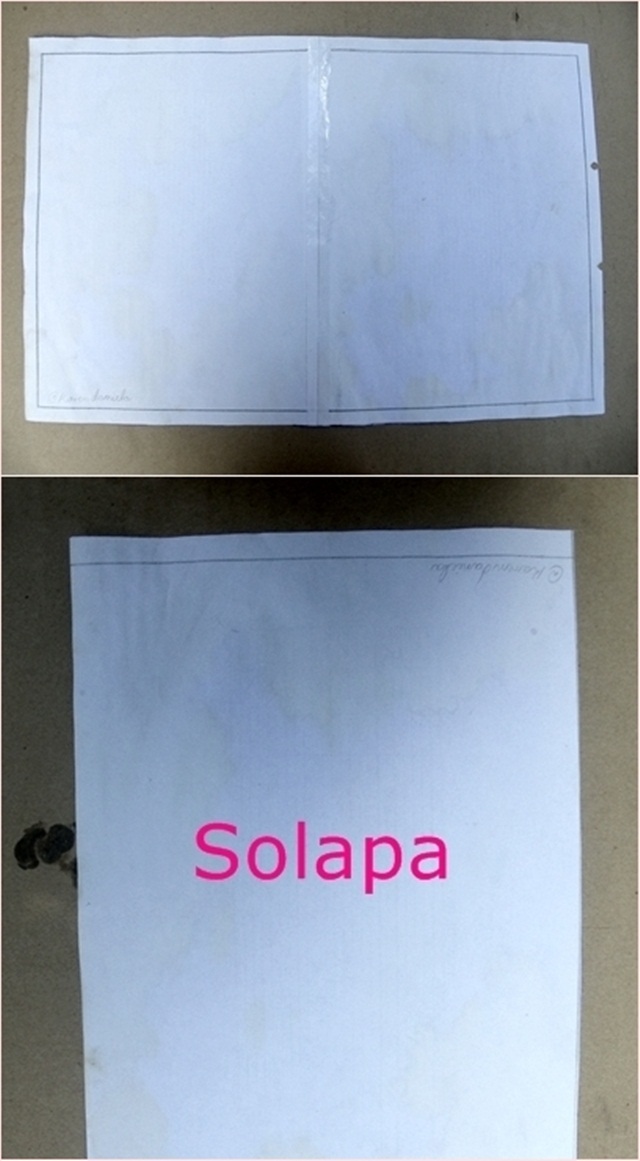
Paso 1 Elaboración de patrones. Mide la superficie del cuaderno: ancho y alto, y haz un rectángulo al cual debes aumentarle 1cm de cada lado para las costuras. Para realizar el patrón de la solapa solamente debes doblar la mitad del rectángulo anterior.
Step 1 Elaboration of patterns. Measure the surface of the notebook: width and height, and make a rectangle which you must increase 1cm on each side for the seams. To make the flap pattern you only have to fold half of the previous rectangle.
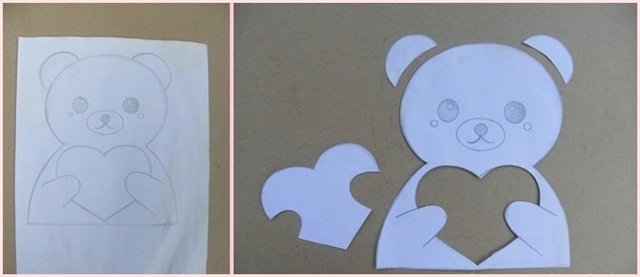
For the applique you only have to draw the figure of the bear with the heart and cut it around
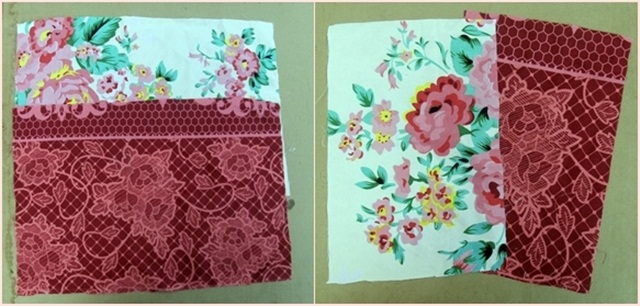
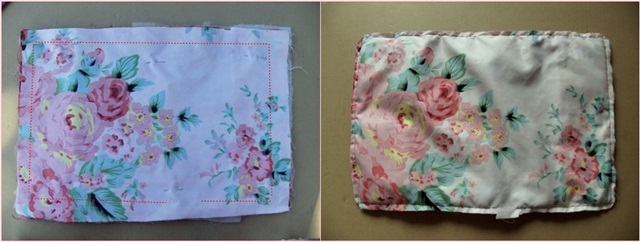
Paso 2. Corte y Confección. Procederemos a cortar dos piezas de tela por cada patrón...También recorta un rectángulo de guata. La guata la vamos a utilizar para acolchar nuestro forro de cuaderno y le dará más volumen y forma
Step 2. Cut and Sew. We will proceed to cut two pieces of fabric for each pattern... Also cut out a rectangle of wadding. We are going to use the wadding to pad our notebook cover and it will give it more volume and shape
Luego coloca las piezas en el siguiente orden: Primero el rectángulo de guata, luego la primera pieza, y después dobla las solapas a la mitad y colócalas a cada lado y encima pon la última pieza, como indico en las siguientes imágenes:
Then place the pieces in the following order: First the wadding rectangle, then the first piece, and then fold the flaps in half and place them on each side and put the last piece on top, as indicated in the following images:
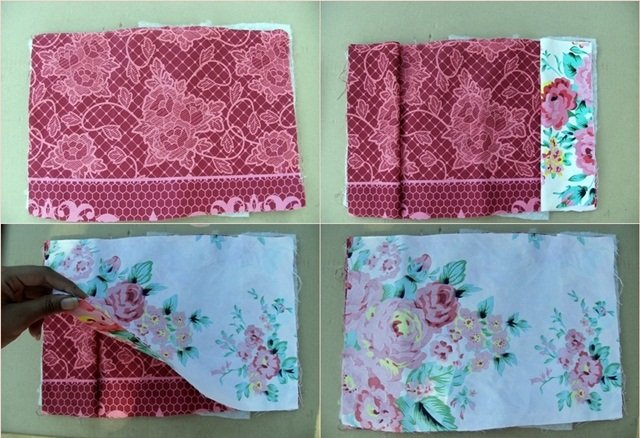
Pin all pieces together and sew around leaving a small opening to flip...
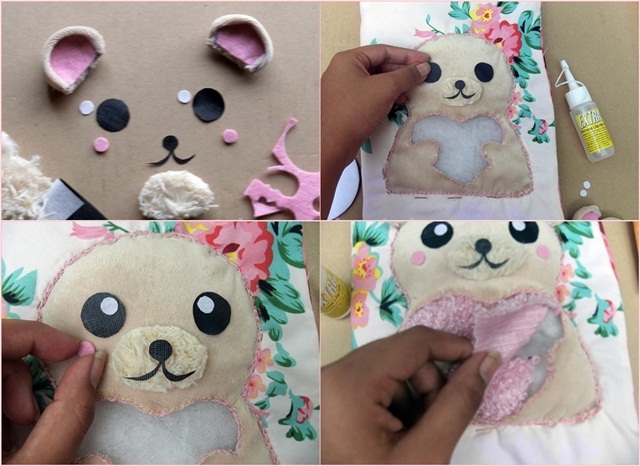
Paso 3. Decoración. Ahora viene una de las mejores partes, ¡Empecemos a crear nuestra osita! Coloca sobre la tela el patrón de la osita , recorta alrededor solo la primera capa de tela y pon un poco más de guata encima
Step 3. Decoration. Now comes a of the best parts, Let's start creating our bear! Place the bear pattern on the fabric, cut around only the first layer of fabric and add a little more wadding on top
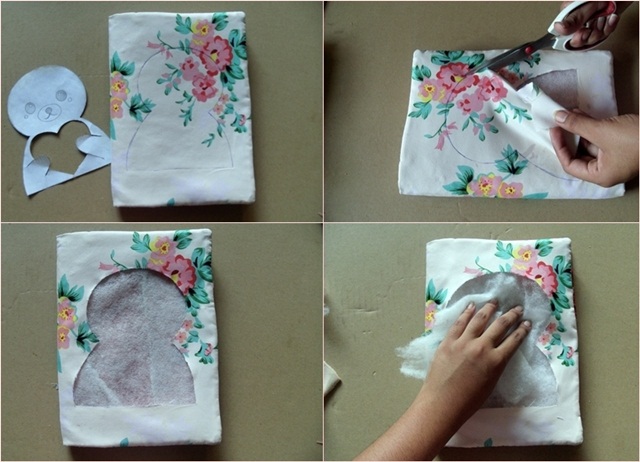
Mark and cut out the shape of the bear in fabric, place it on top of the lining and sew it around to hold it
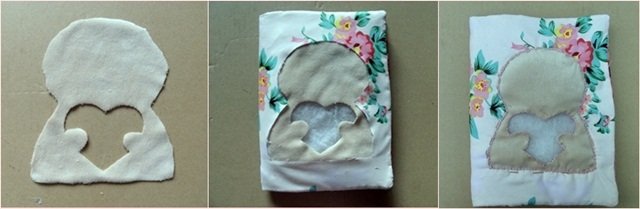
Cut out the other details and paste them to bring our little bear to life and fill the heart with the fabric of your choice
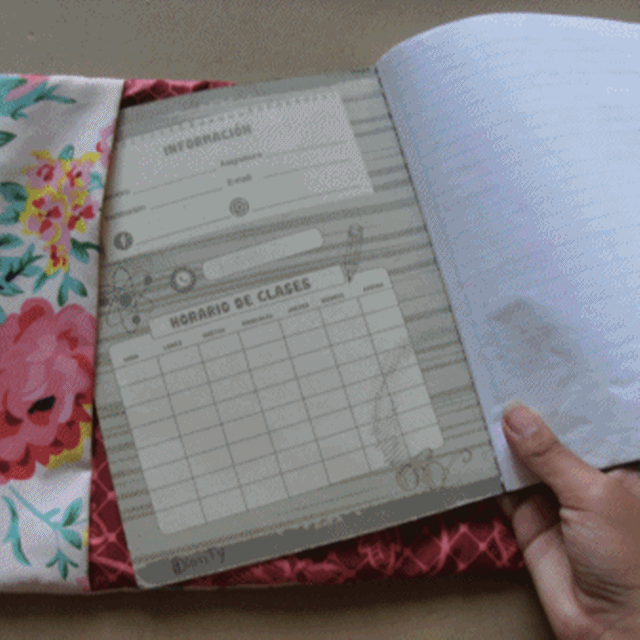
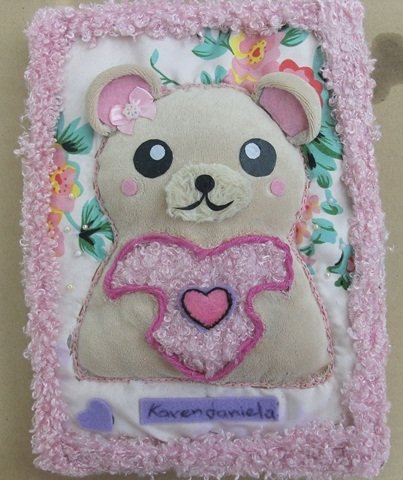
⋆✩⋆Resultado final | Final result⋆✩⋆
Esto a sido todo por hoy ... Les mando un abrazo de oso 💕 y hasta pronto😊👋
This has been all for today... I send you a bear hug 💕 and see you soon 😊👋