🇻🇪 !Hola comunidad!
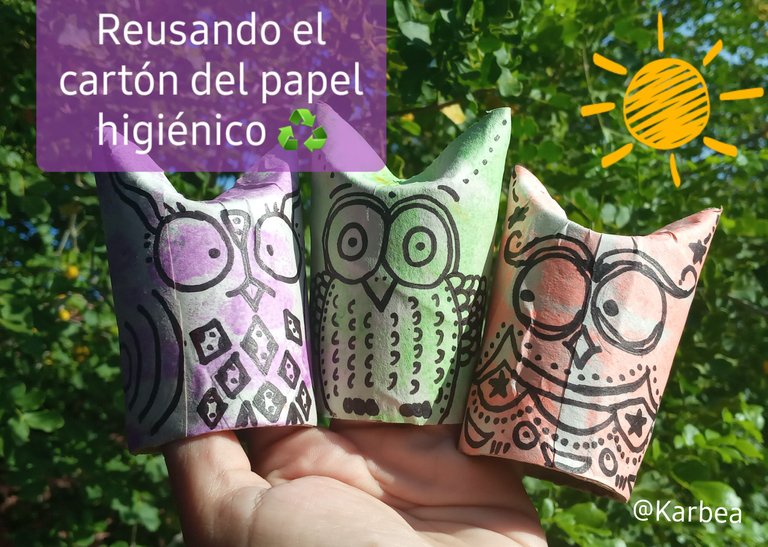
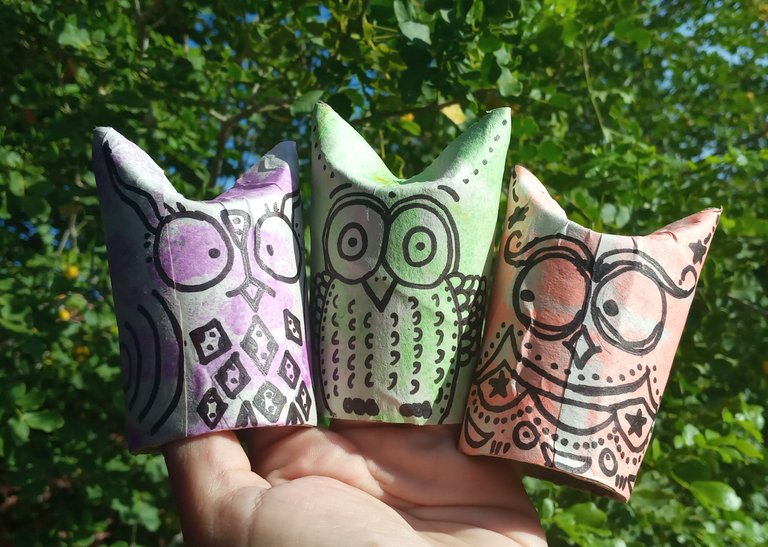
Yo creo que es el momento de definir esto de una vez ¿Es un búho o es una lechuza? Mi hija dice que es una lechuza y me canta la canción "la lechuza hace shhh". Yo digo que es un búho, evidentemente ganó con mucha ventaja mi hija por la evidencia irrefutable que aportó con su canto. Pero para los tecnicismos de este tutorial, lo llamaré búho. No le digan nada a mi hija por favor 🤫.
Esta manualidad es muy versátil, estos lindos y simpáticos búhos los puedes usar de diferentes maneras, y son geniales para darle uso a ese montón de cartón que dejan los rollos de papel higiénico.
Estos son los materiales sugeridos que yo usé:
• Cilindro de cartón del papel higiénico
• Hojas de papel
• Esponja
• Pinturas de diferentes colores
• Tijeras
• Pegamento
• Silicon
• Marcador negro
• Estambre
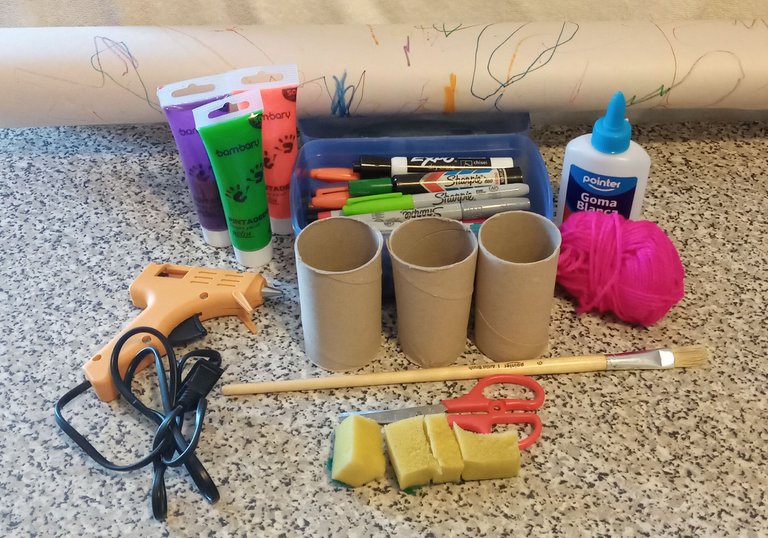
Para esta manualidad no sólo estoy reciclando los cilindros de cartón del papel higiénico, también estoy reusando una esponja vieja que ya no servía para su fin, y el papel son hojas grandes donde mi hija dibuja y lo pinté por el lado no usado.
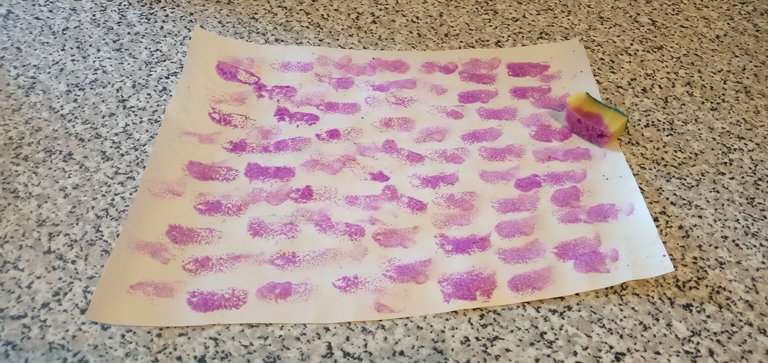
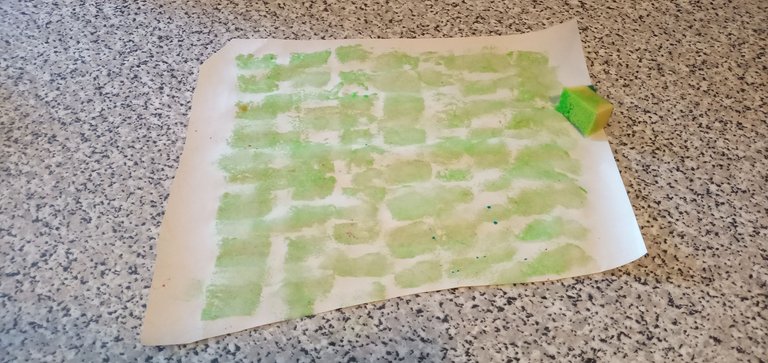
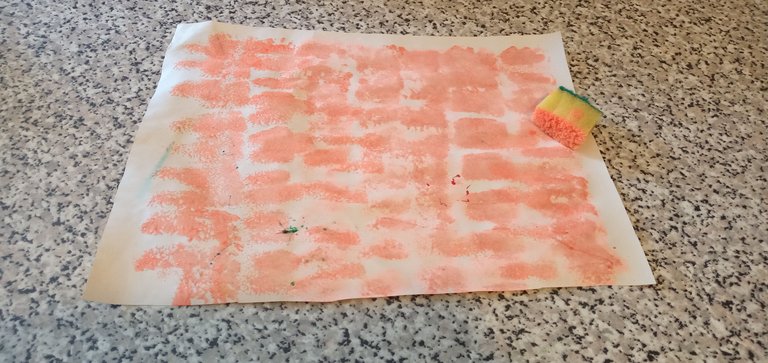
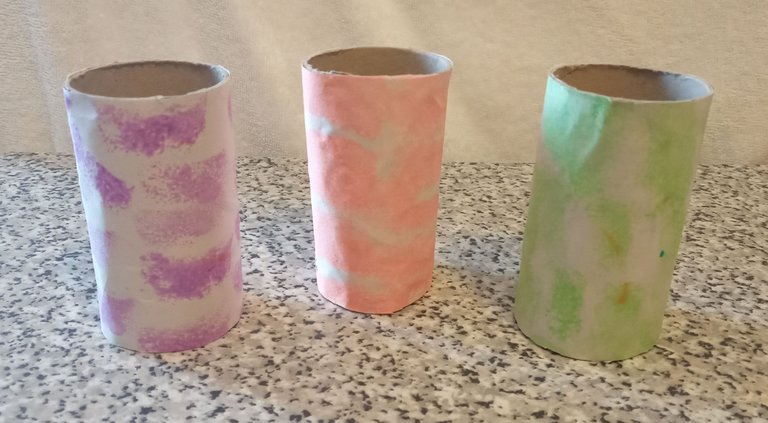
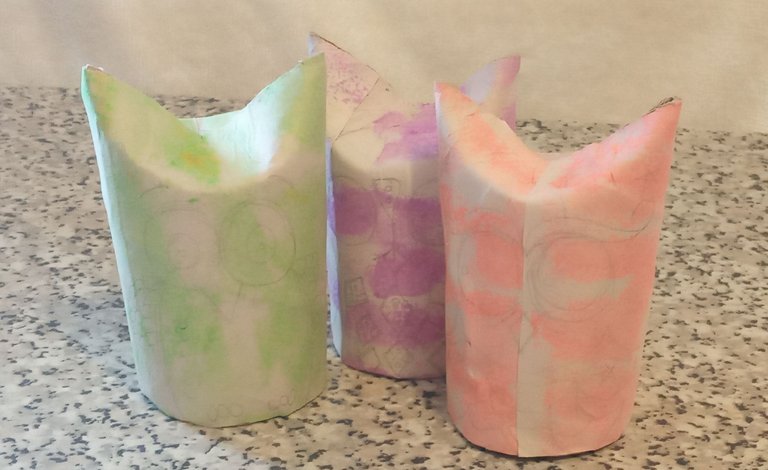
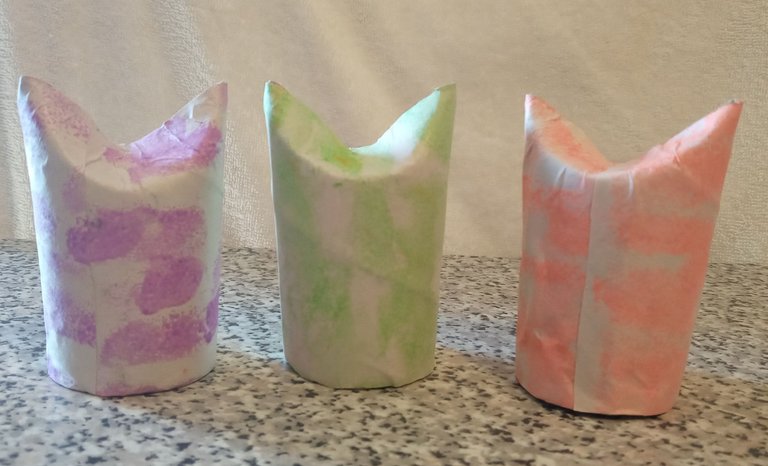
Lo primero es cortar la esponja en pequeños pedazos con la forma que desees, yo hice rectángulos. Con esas pequeñas esponjas vamos a pintar en la hoja de papel que tiene que ser un poco más grande del cilindro de cartón. Simplemente humedeces un poco las esponjitas con pintura y haces los patrones que quieras.
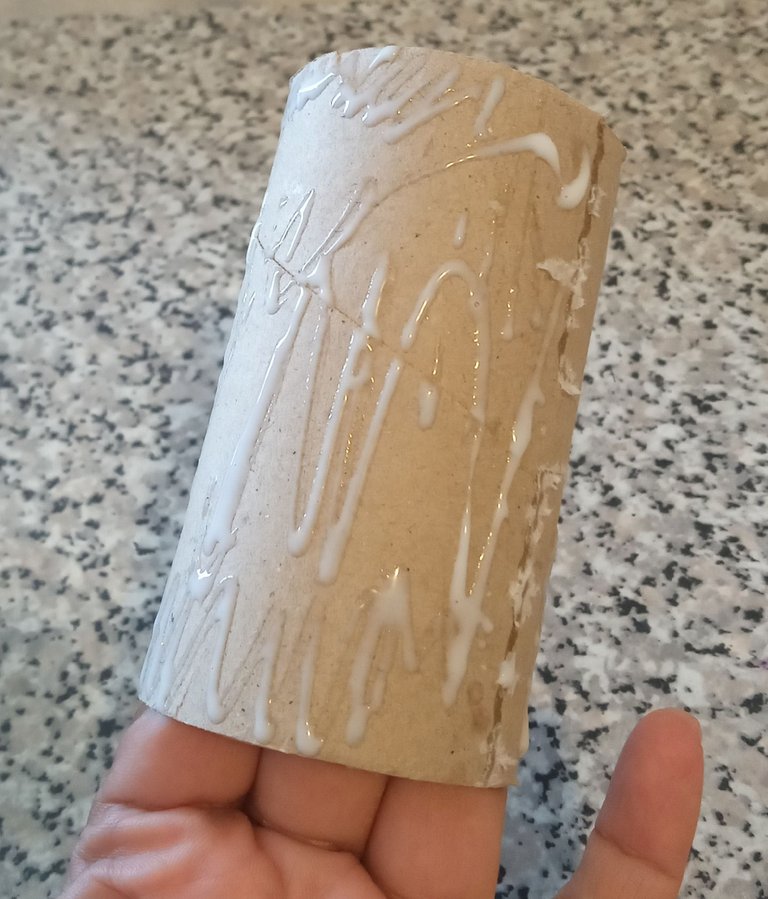
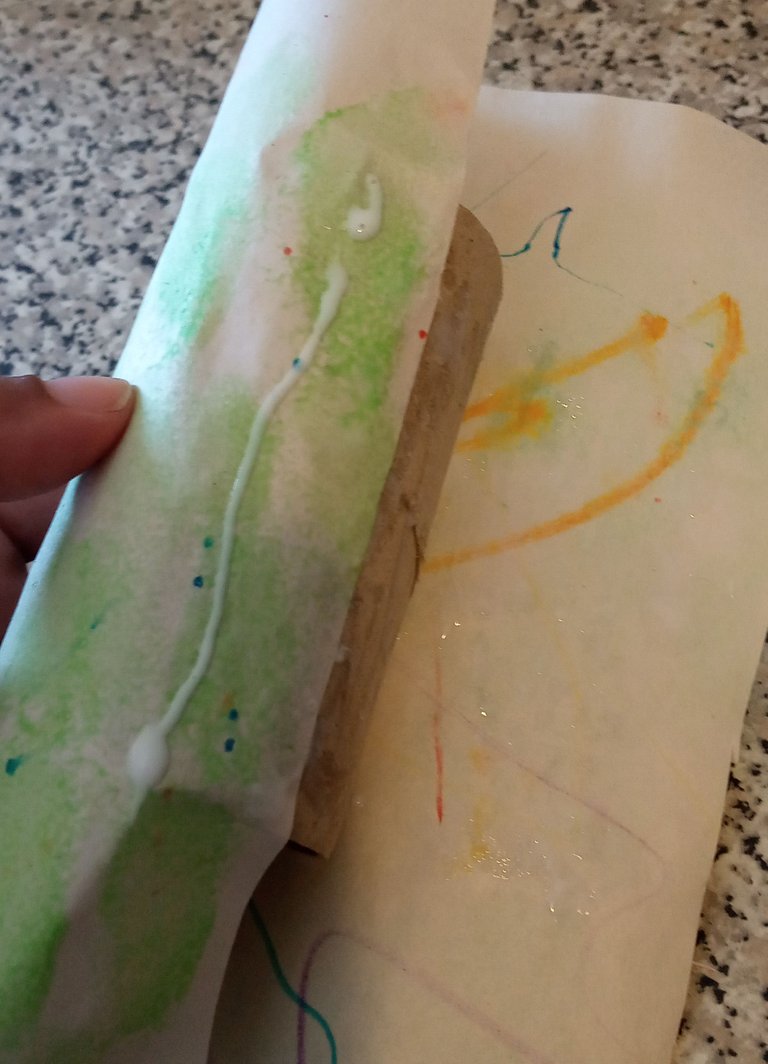
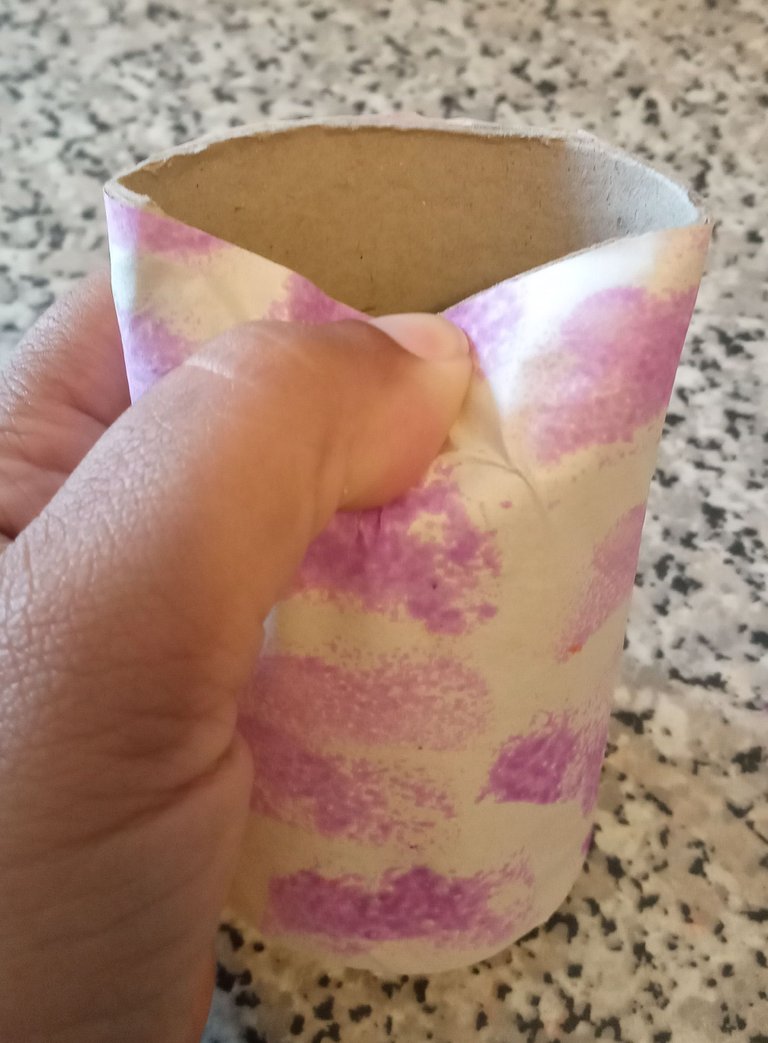
Cuando la pintura esté completamente seca, pones pegamento sobre el cilindro de cartón, y procedes a pegar el papel, poniendo especial cuidado en las orillas o bordes, ya que esa parte la vamos a doblar y tiene que estar muy bien pegado.


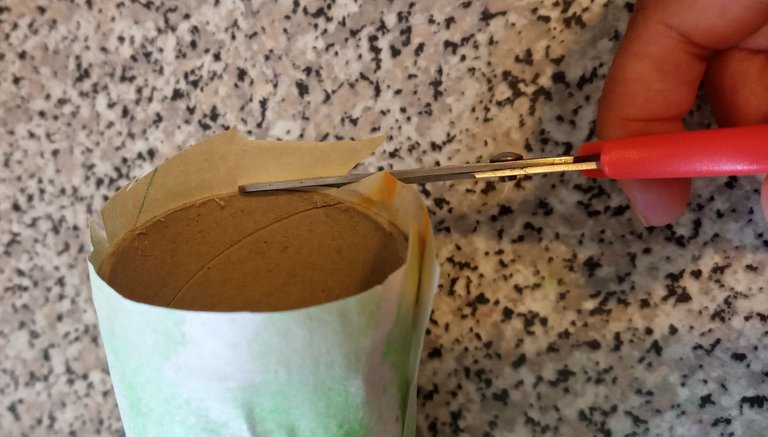
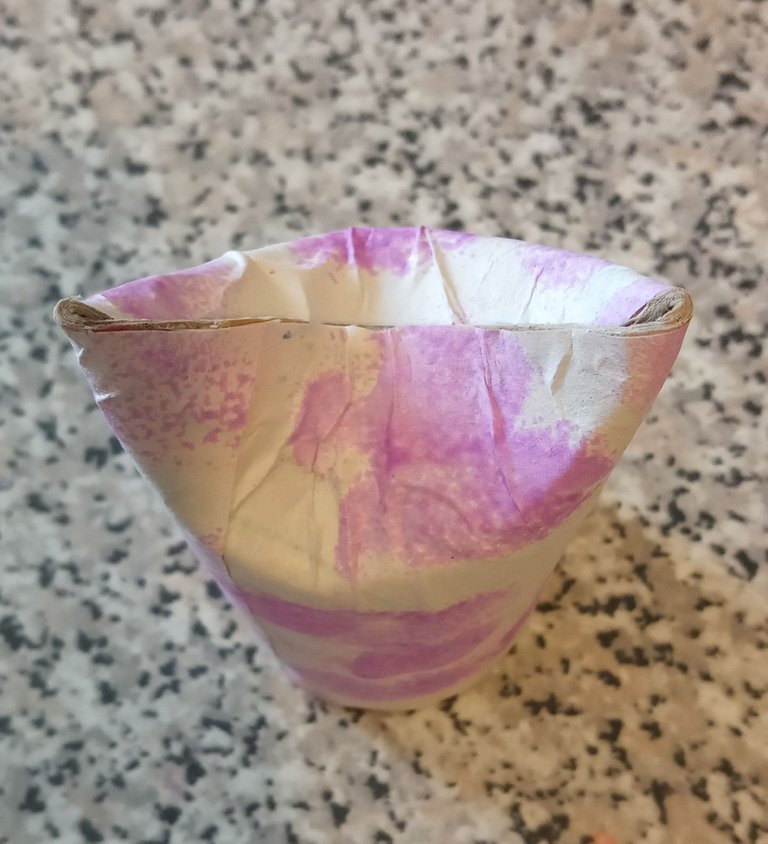
Una vez esté bien pegado el papel a lo largo de nuestro cilindro, cortamos con unas tijeras lo sobrante para que quede muy prolijo.
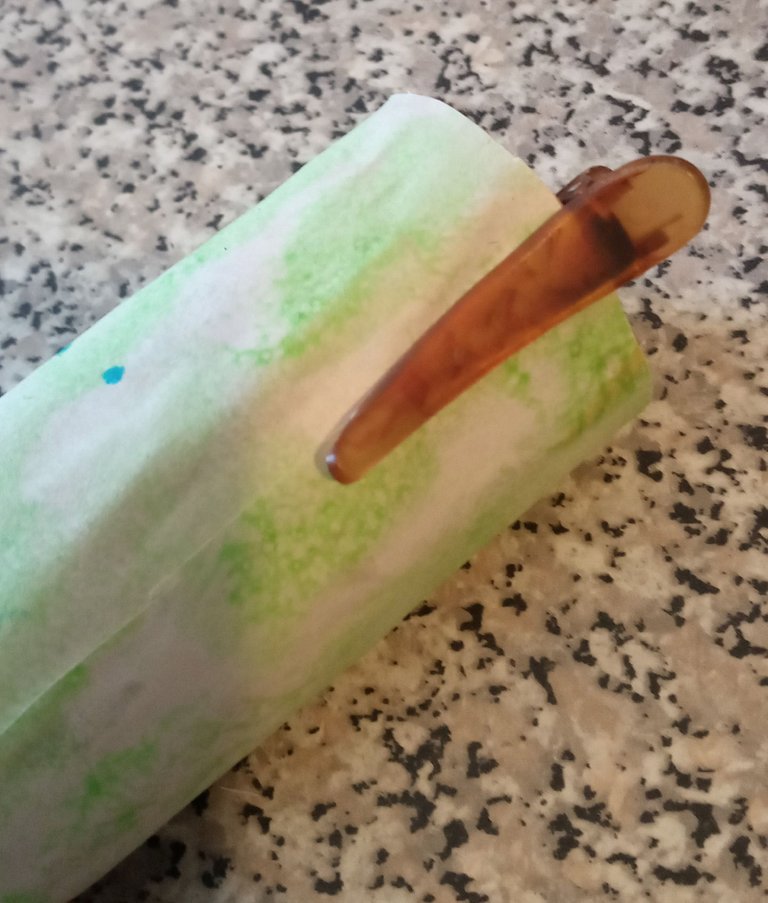
Para asegurar las uniones del papel yo usé una pinza plana de cabello, así no se levantarán las esquinas del papel, pero si eres minuciosa con el proceso de pegado, esto no será necesario.
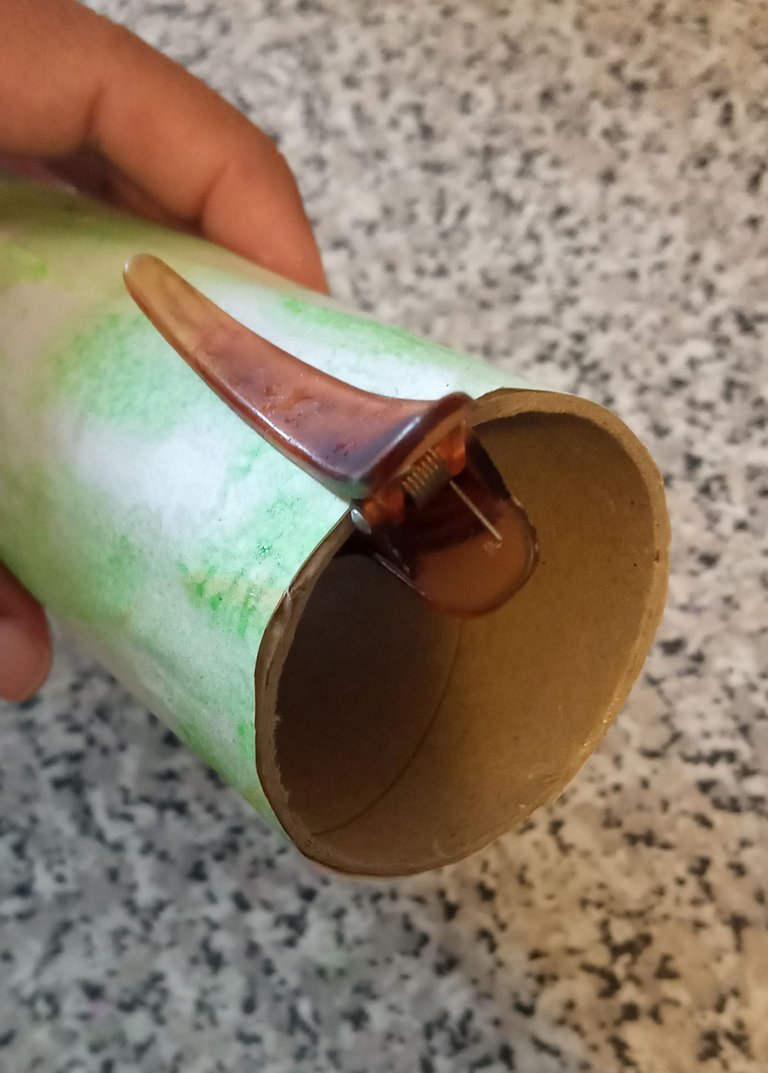
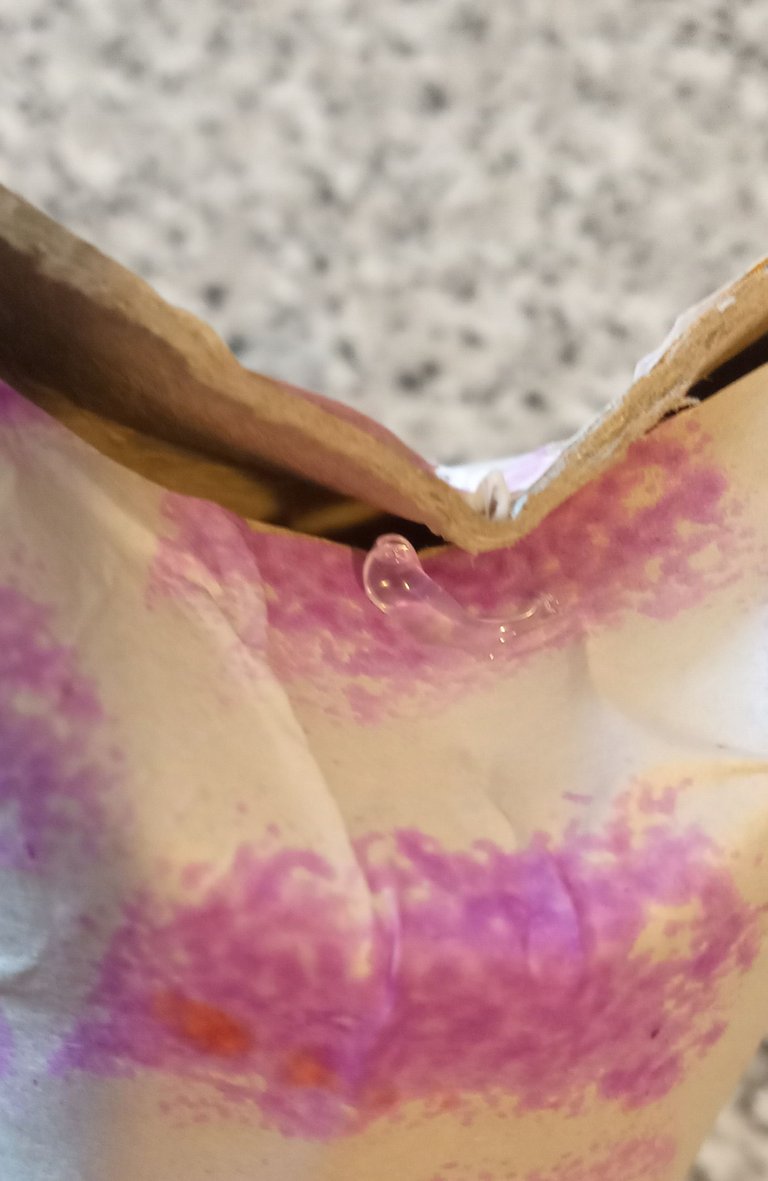
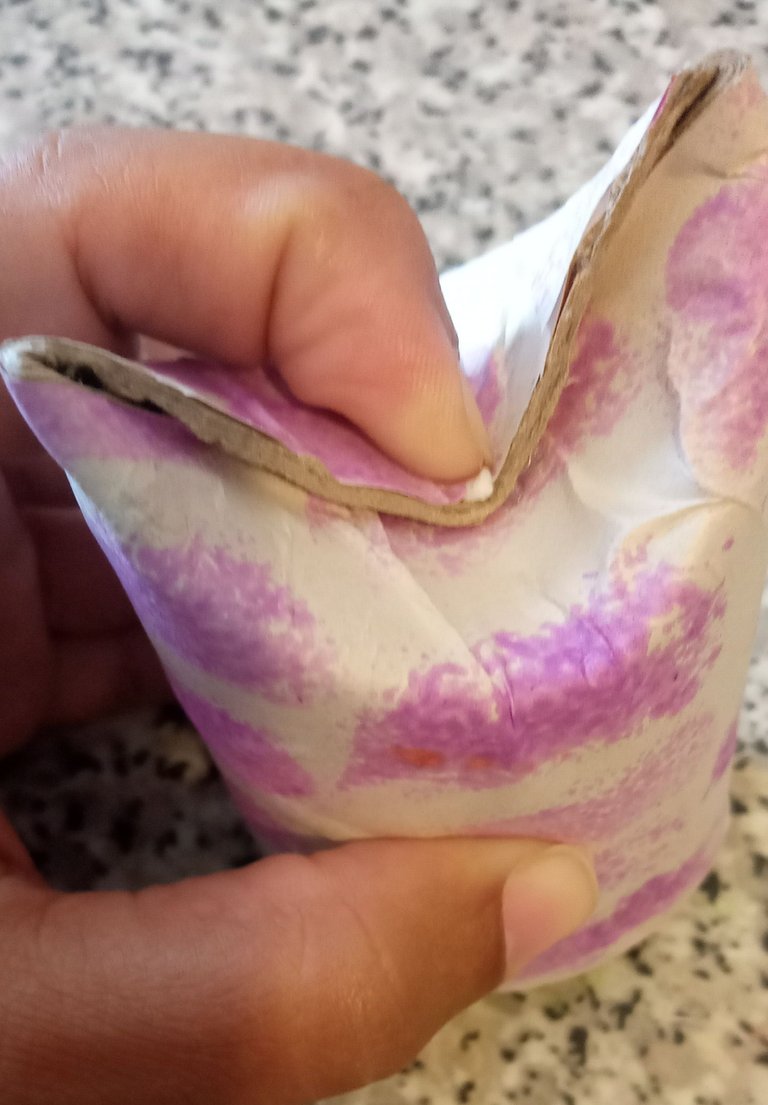
Cuando la pega haya secado tomamos el cilindro de cartón y doblamos uno de sus bordes hacia adentro, luego hacemos lo mismo del lado opuesto. La idea es que quedé un pedacito de cartón sobre el otro, esto hará que los extremos estén bien cerrados y sea fácil asegurar con el silicón caliente, que será el siguiente paso. Sólo coloca la cantidad suficiente para cerrar, te sugiero lo sostengas un par de segundos hasta que seque para que no se levante.

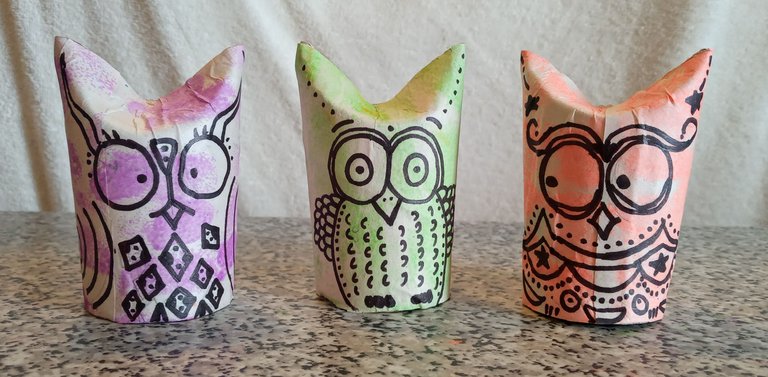
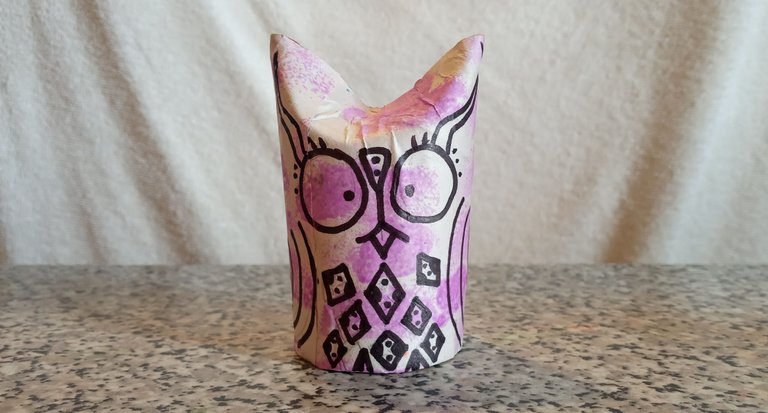
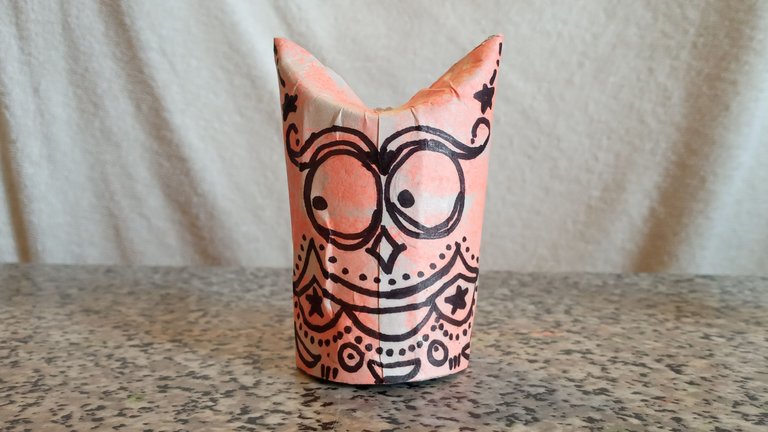
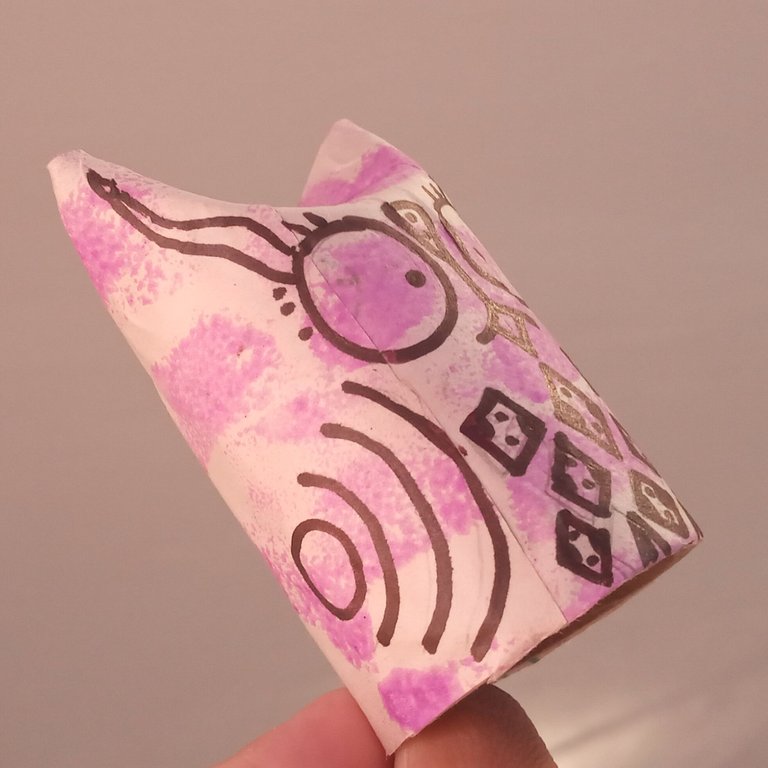
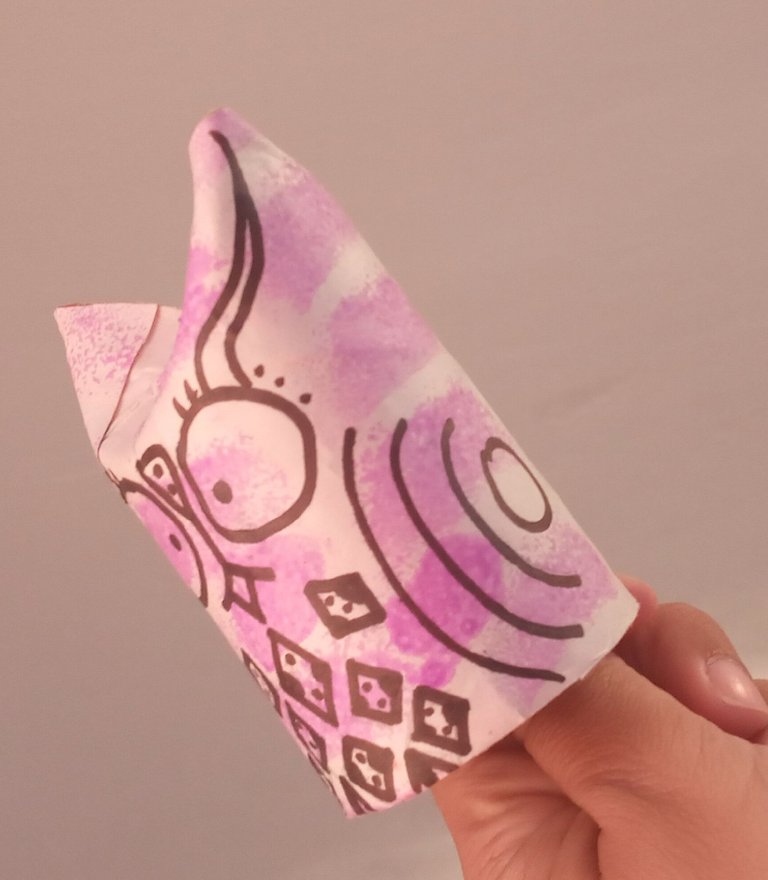
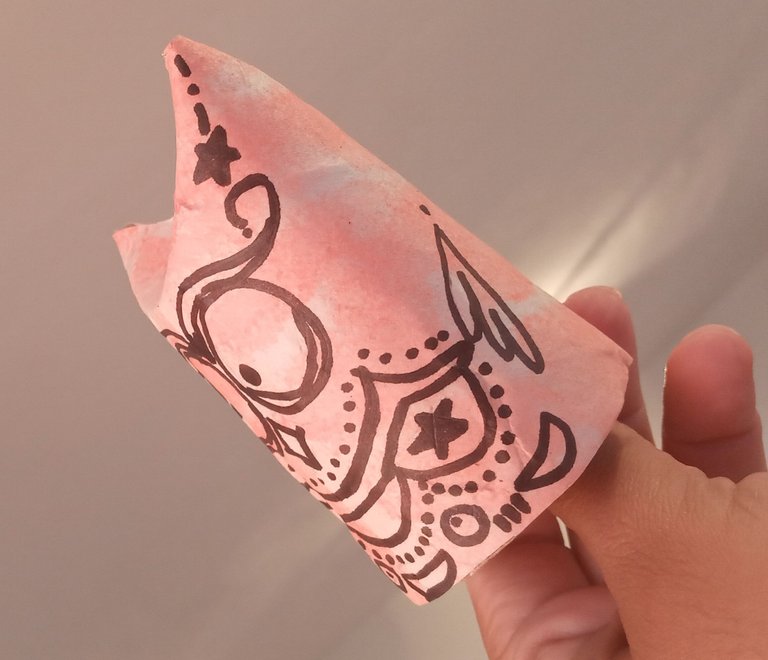
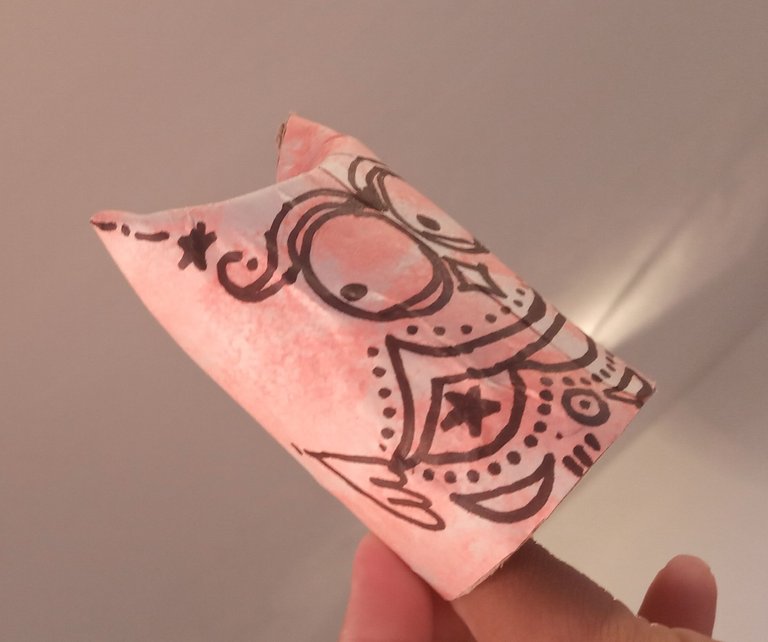
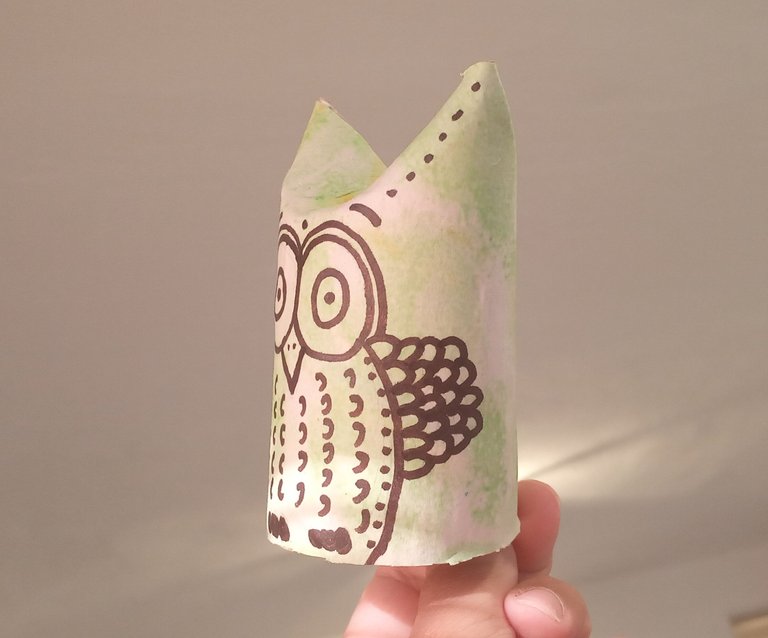
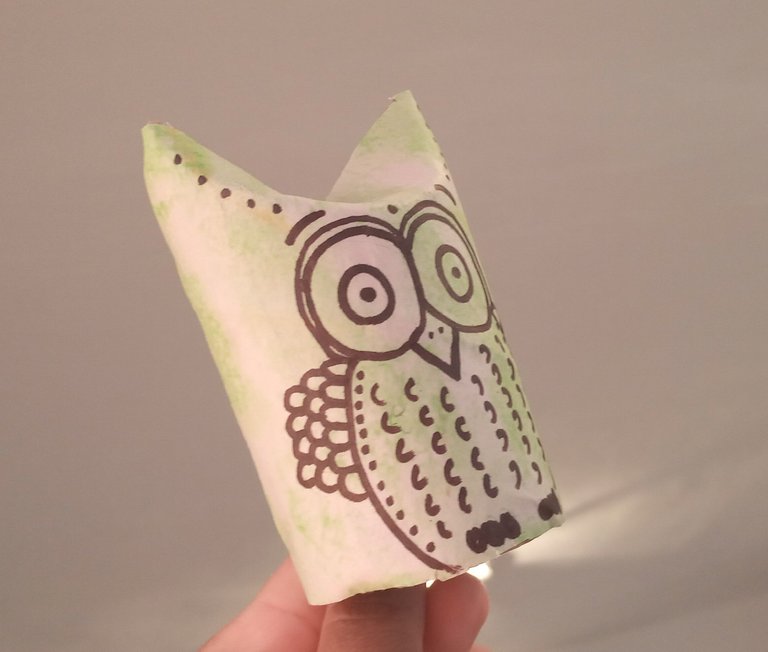
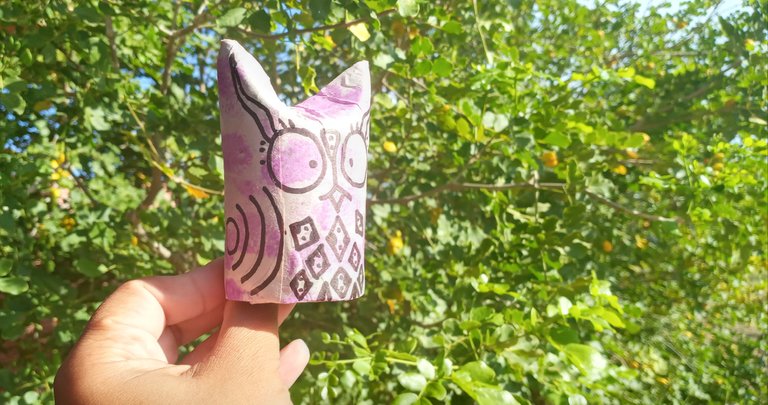
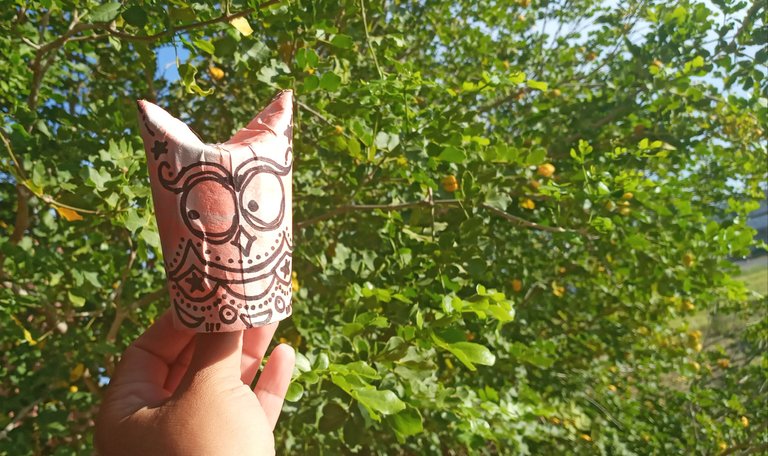
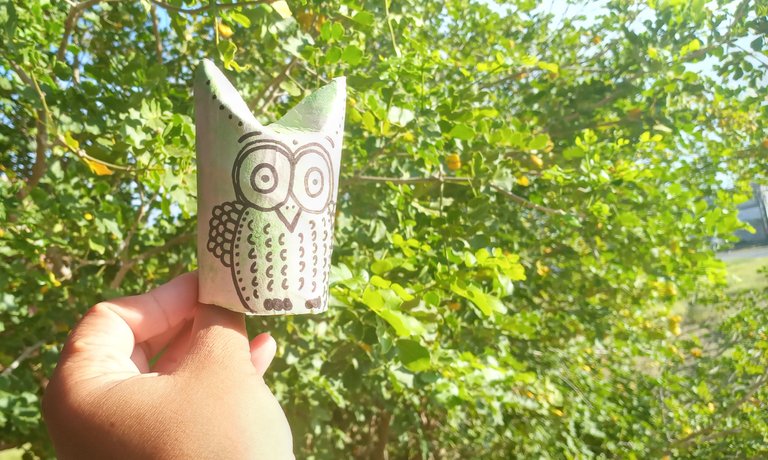
Continuamos nuestra manualidad trazando con un lápiz la cara del búho con un diseño creativo. Cuando estés segura de que así lo quieres, repasa el lápiz con un marcador negro. Así terminamos nuestro búho, perdón, lechuza (mi hija está aquí 😅)

Estos búhos los hice para jugar con mi hija, los uso como títeres y a ella le encanta, pero también lo puedes usar como decoración o adornar lo que quieras. Con un pedacito de estambre haz un bucle y asegurarlo cuando coloques el silicón caliente.

Gracias por acompañarme, visitar mi blog, leerme y apoyarme ¡Qué tengas un día maravilloso lleno de buena energía!
Información de las fotografías
Autor: @Karbea
Cámara: Samsung Galaxy A7
Locación: Isla de Margarita, Venezuela
🇺🇸 Hi community!
As an introduction I made a joke about how my daughter and I compete to see who is right about the correct name of the owl species, since in Spanish they are called differently, but in English it is not funny 🤭
This craft is very versatile, these cute and friendly owls can be used in different ways, and they are great to put that pile of cardboard left behind by toilet paper rolls.
These are the suggested materials that I used:
• Cardboard toilet paper cylinder
• Sheets
• Sponge
• Paints of different colors
• Pair of scissors
• Glue
• Silicon
• Black marker
• Stamen
For this craft I am not only recycling the cardboard cylinders of the toilet paper, I am also reusing an old sponge that no longer served its purpose, and the paper is large sheets where my daughter draws and I painted it on the unused side.
The first thing is to cut the sponge into small pieces with the shape you want, I made rectangles. With these small sponges we are going to paint on the sheet of paper that has to be a little larger than the cardboard cylinder. You just moisten the sponges a bit with paint and make the patterns you want.
When the paint is completely dry, you put glue on the cardboard cylinder, and proceed to glue the paper, paying special attention to the edges, since we are going to fold that part and it has to be very well glued.
Once it is well glued along our cylinder, we cut the excess with scissors so that it is very neat.
To secure the joints of the paper I used a flat hair gripper, so the corners of the paper will not lift, but if you are thorough with the gluing process, this will not be necessary.
When the glue has dried, we take the cardboard cylinder and fold one of its edges inwards, then we do the same on the opposite side. The idea is that I left a piece of cardboard on the other, this will make the ends are tightly closed and it will be easy to secure with the hot silicone, which will be the next step. Just put in enough amount to close, I suggest you hold it for a couple of seconds until it dries so it does not rise.
We continue our craft by tracing the owl's face with a creative design with a pencil. When you're sure you want it that way, go over the pencil with a black marker. So we finish our owl.
I made these owls to play with my daughter, I use them as puppets and she loves it, but you can also use it as decoration or decorate whatever you want. With a small piece of yarn, make a loop and secure it when you place the hot silicone.
Thank you for joining me, visiting my blog, reading and supporting me. Have a wonderful day full of good energy!
Photography information
Author: @Karbea
Camera: Samsung Galaxy A7
Location: Margarita Island, Venezuela