Hola estimados lectores de "Hive DIY", el día de hoy es compartiré una técnica sencilla para diseñar un feed de instagram compuesto por 9 imágenes en Photoshop 2020.
Hello dear readers of "Hive DIY", today is I will share a simple technique to design an instagram feed composed of 9 images in Photoshop 2020.
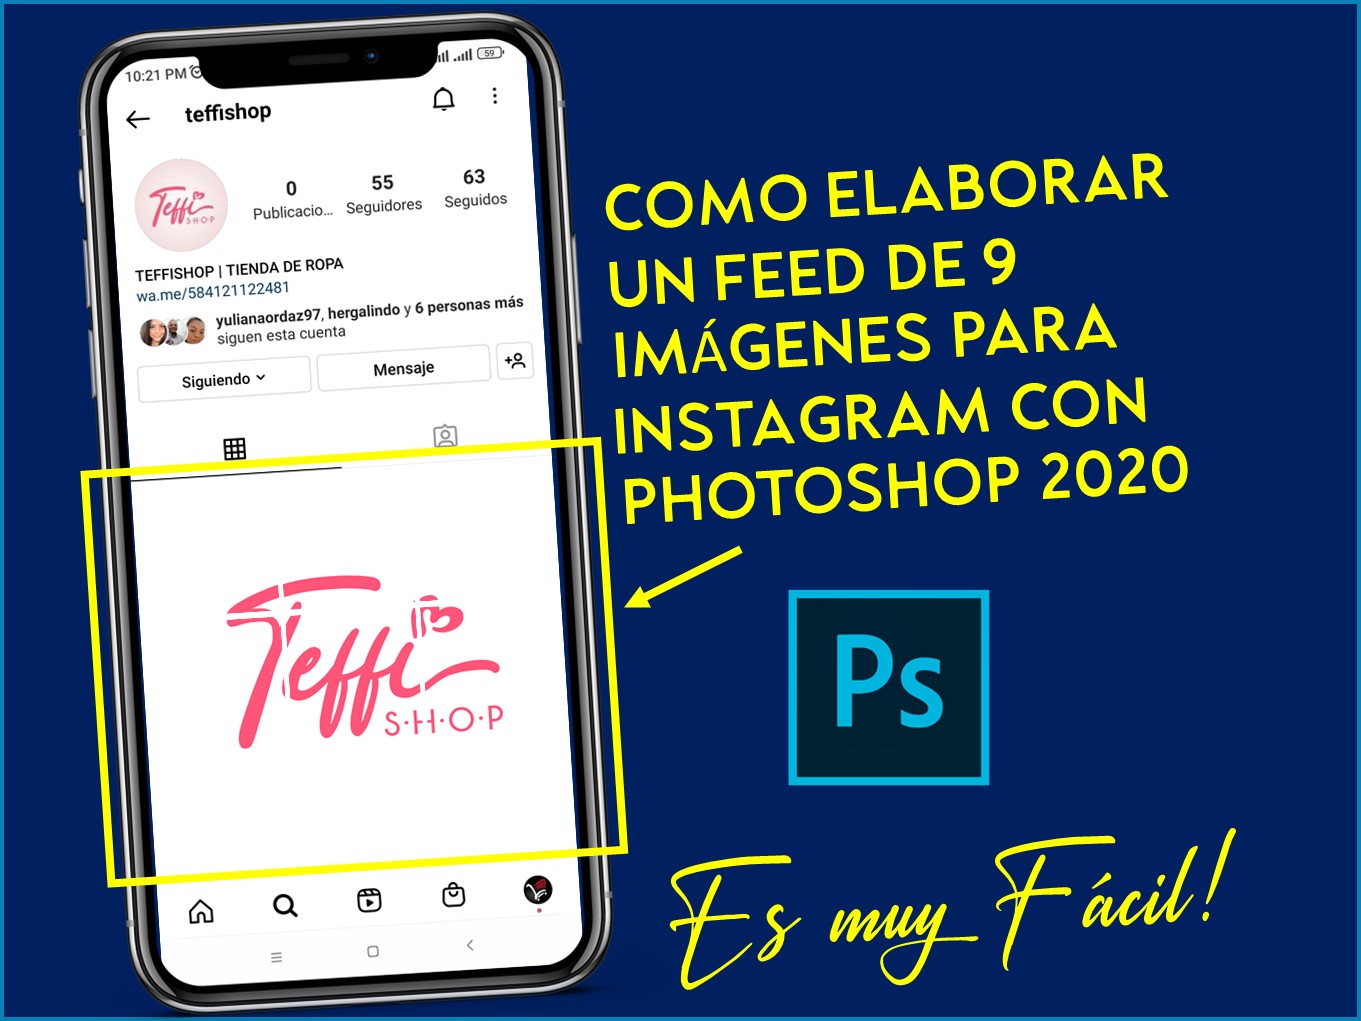
Si queremos tener un feed de instagram organizado, y que refleje profesionalismo debemos visualizar con anticipación muchas de las imágenes que vamos a ir publicando. Muchas personas utilizan como herramienta Canva, u otras aplicaciones. Pero en mi caso utilizo Adobe Illustrator y Adobe Photoshop ambas versión 2020.
If we want to have an organized instagram feed, and that reflects professionalism, we must visualize in advance many of the images that we are going to publish. Many people use Canva as a tool, or other applications. But in my case I use Adobe Illustrator and Adobe Photoshop both version 2020.
La técnica que mostraré a continuación se podría emplear al iniciar una marca de emprendedor en instagram donde lo pimero a mostrar sería el logotipo, para que al entrar al perfil se aprecie de que trata dicha marca.
The technique that I will show below could be used when starting an entrepreneur brand on instagram where the first thing to show would be the logo, so that when you enter the profile you can see what the brand is about.
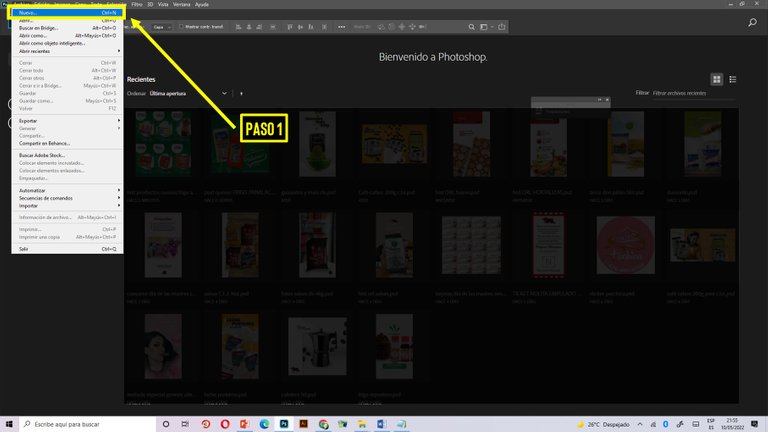
El paso 1 obviamente luego de abiri el programa Photoshop 2020 vamos a crear un archivo nuevo.
Step 1 obviously after opening Photoshop 2020 we are going to create a new file.
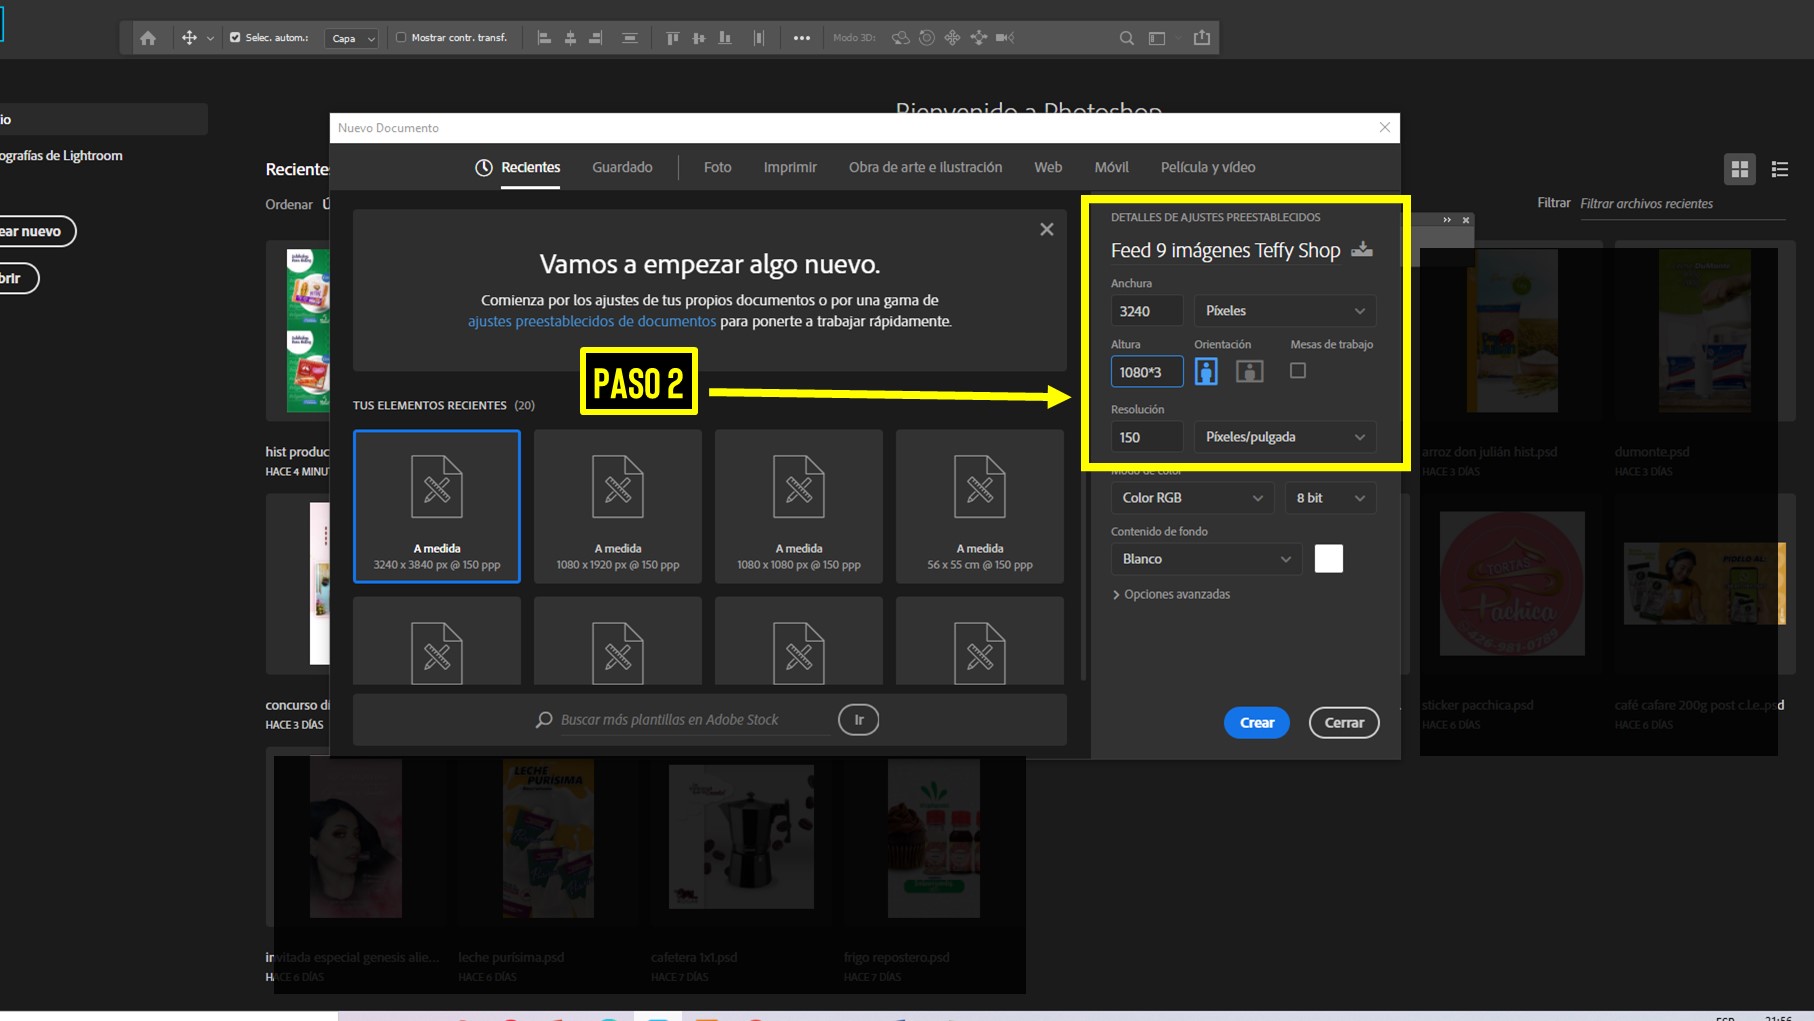
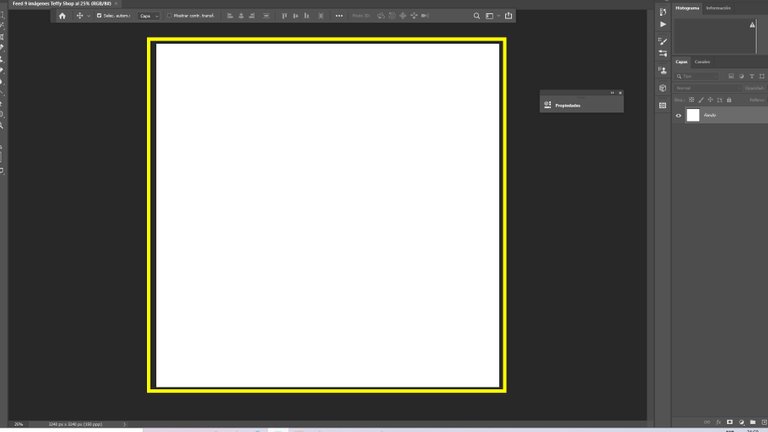
Paso 2; aquí vamos a colocar el nombre de nuestro proyecto, y las dimensiones. En cuanto a las dimensiones es muy importante que tomemos en cuenta que cada imagen por separada será de 1080x1080 (entonces 1080 * 3 = 3240 px de alto y 1080 * 3 = 3240 px de ancho) ya que luego se dividirán en 9. Yo acostumbro a usar una resolución de 150.
Step 2; here we are going to place the name of our project, and the dimensions. Regarding the dimensions it is very important that we take into account that each image separately will be 1080x1080 (so 1080 * 3 = 3240 px high and 1080 * 3 = 3240 px wide) and then they will be divided into 9. I usually use a resolution of 150.
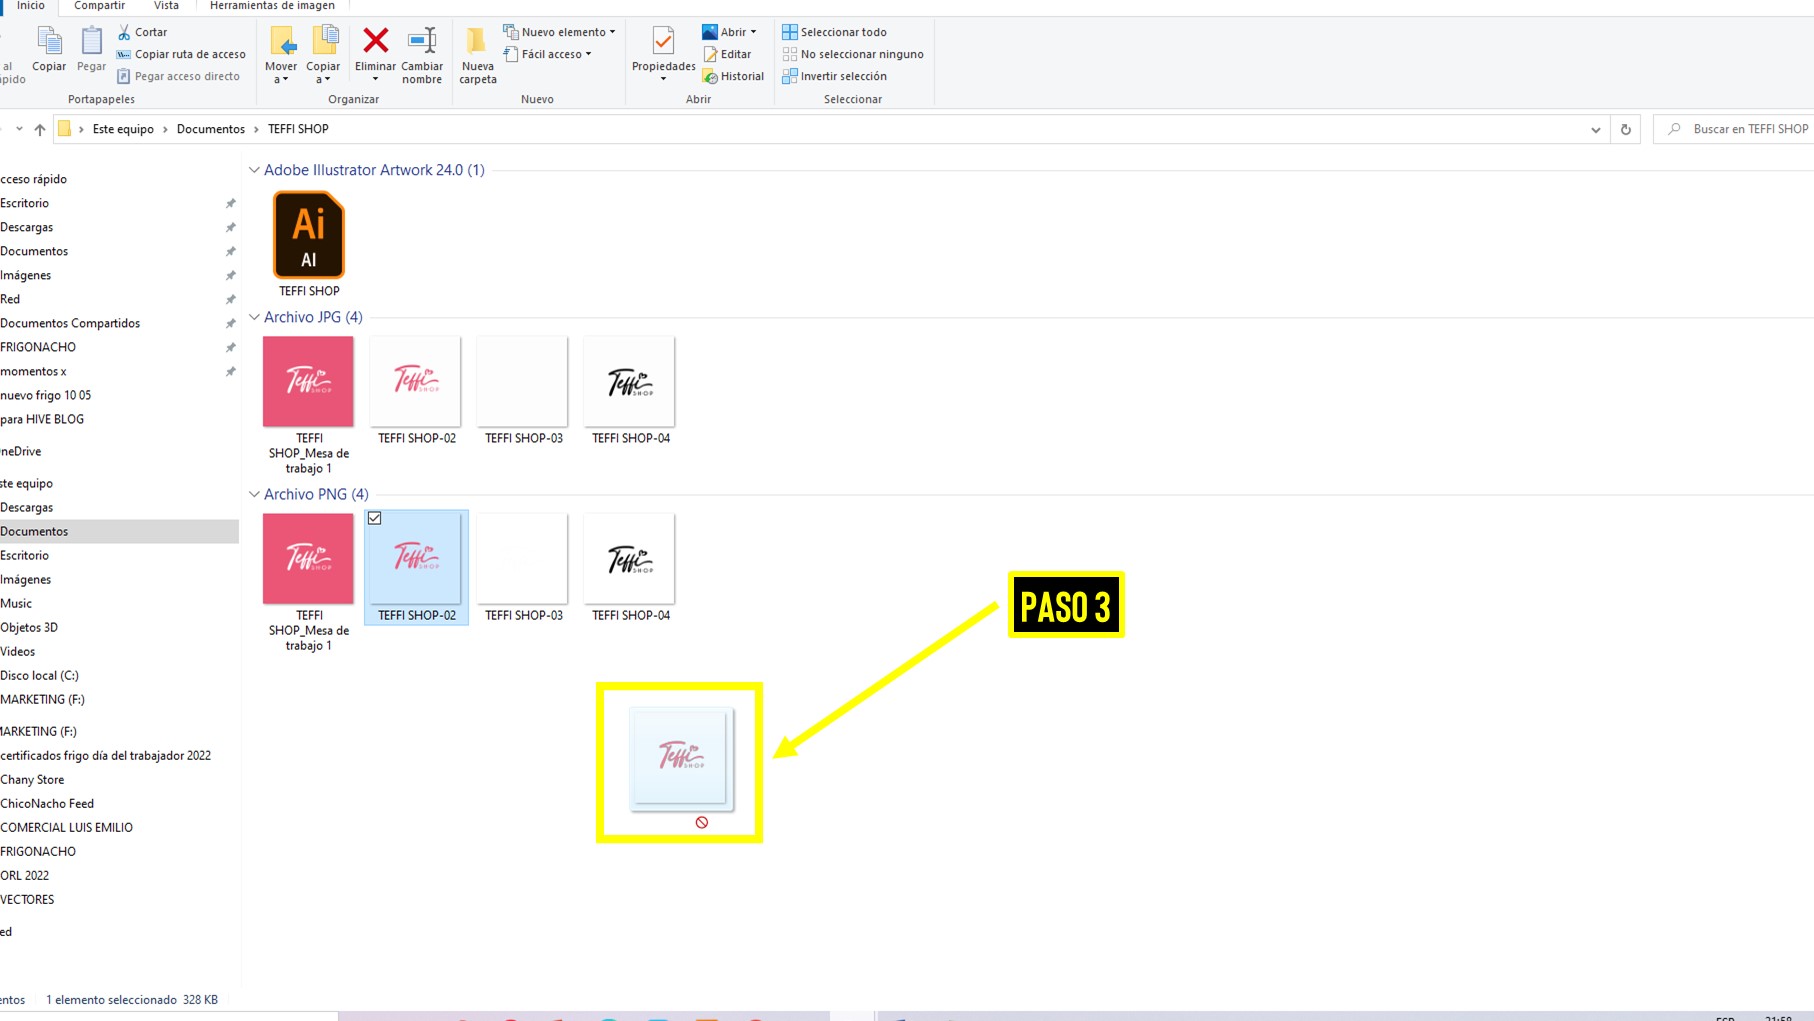
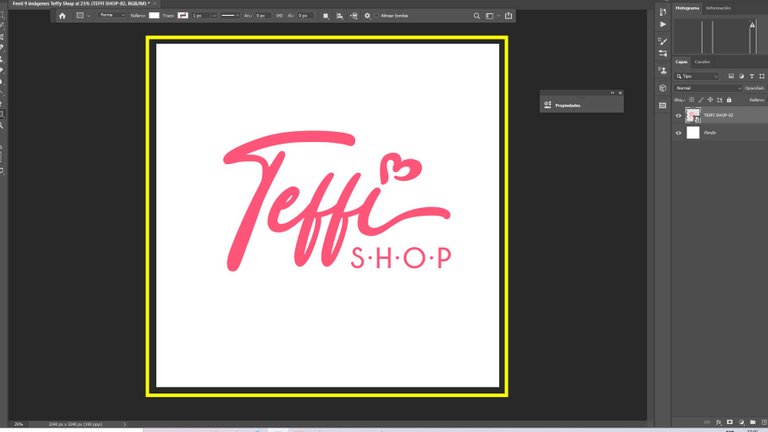
El paso 3 consiste en arrastrar la imagen hasta la plantilla nueva que creamos en el programa.
Step 3 consists of dragging the image to the new template created in the program.
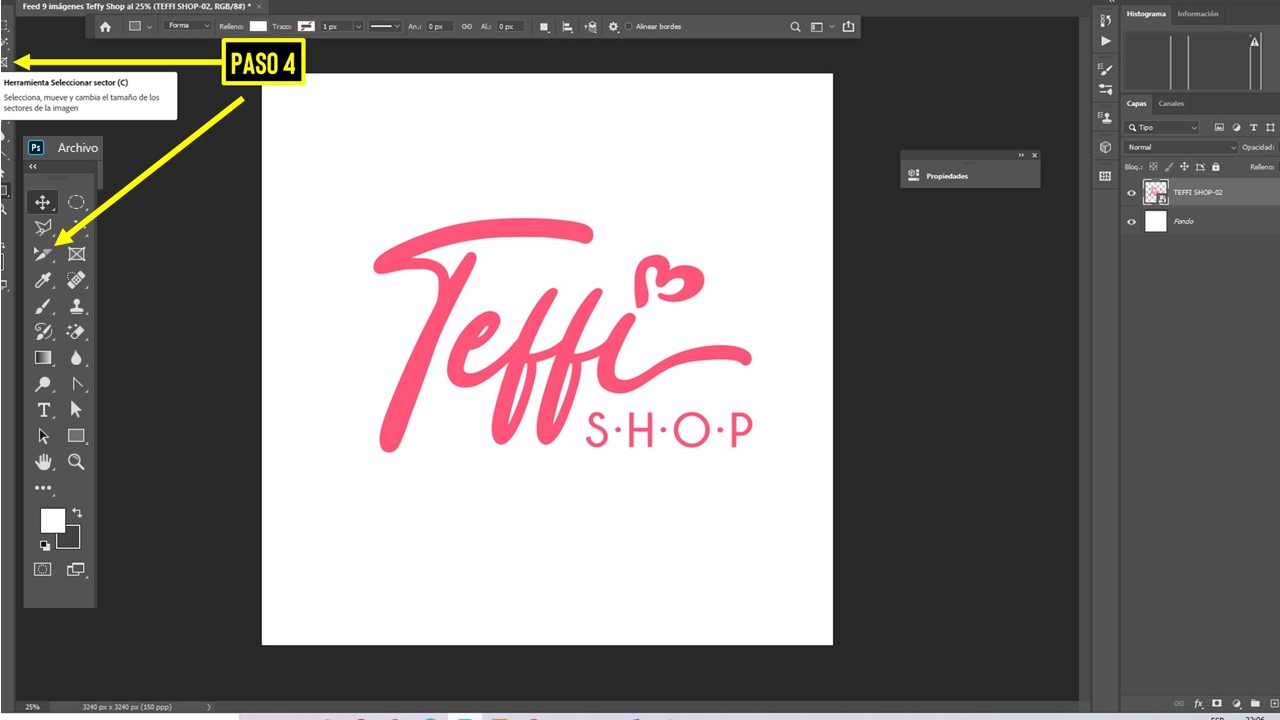
En el paso 4 vamos a seleccionar la herramienta SELCCIONAR SECTOR.
In step 4 we are going to select the SELECT SECTOR tool
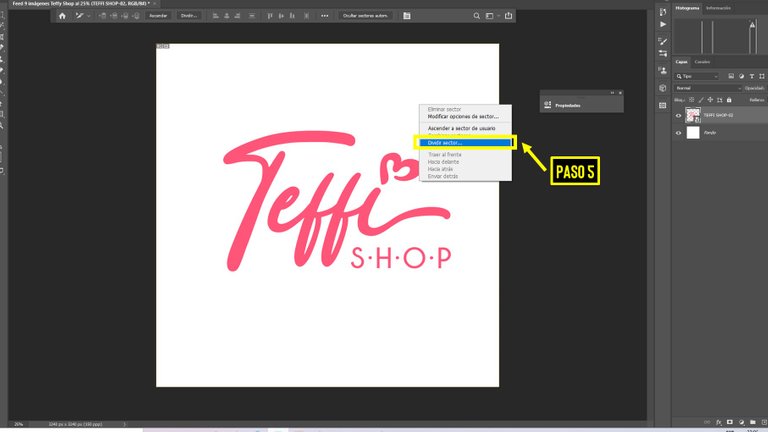
Paso 5: una vez seleccionada la herramienta que mencioné vamos a hacer clic derecho y nos aparecerán estas opciones, y vamos a elegir DIVIDIR SECTOR.
Step 5: once the tool I mentioned is selected, we will right click and these options will appear, and we will choose SPLIT SECTOR.
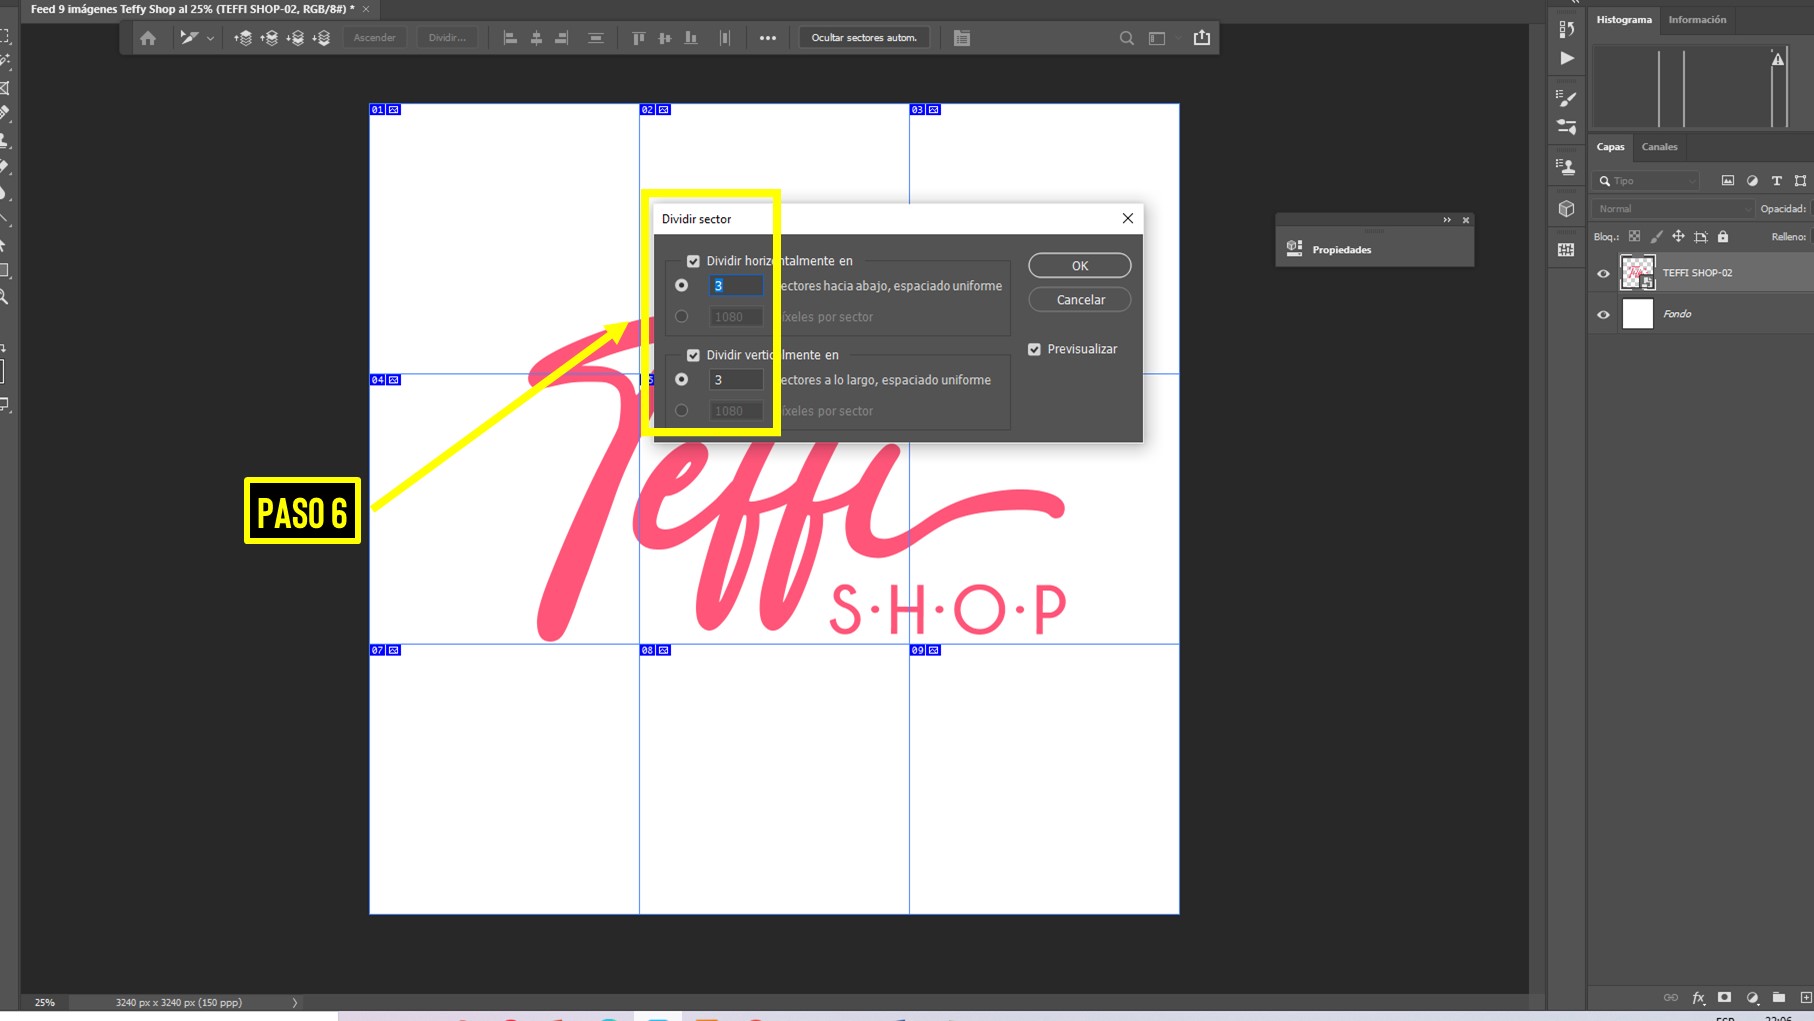
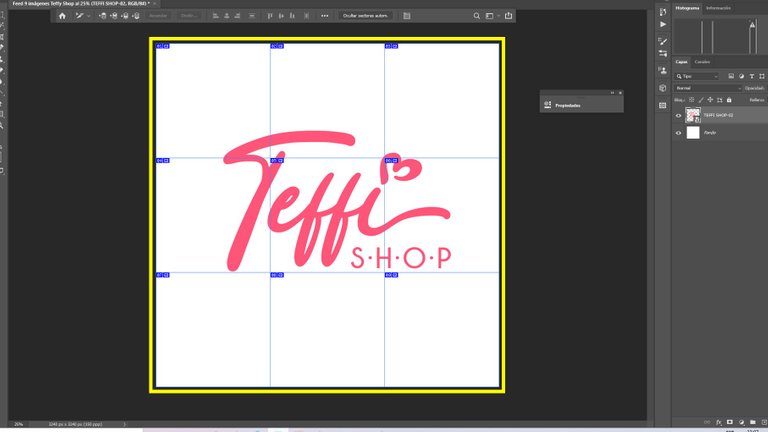
Paso 6, nos saldrá este recuadro, y vamos a dividir la plantilla en 9, para ello vamos a dividir horizontalmente en 3 y verticalmente en 3. Nos quedarán 9 sectores.
Step 6, we will get this box, and we will divide the template in 9, for this we will divide horizontally in 3 and vertically in 3. We will have 9 sectors.
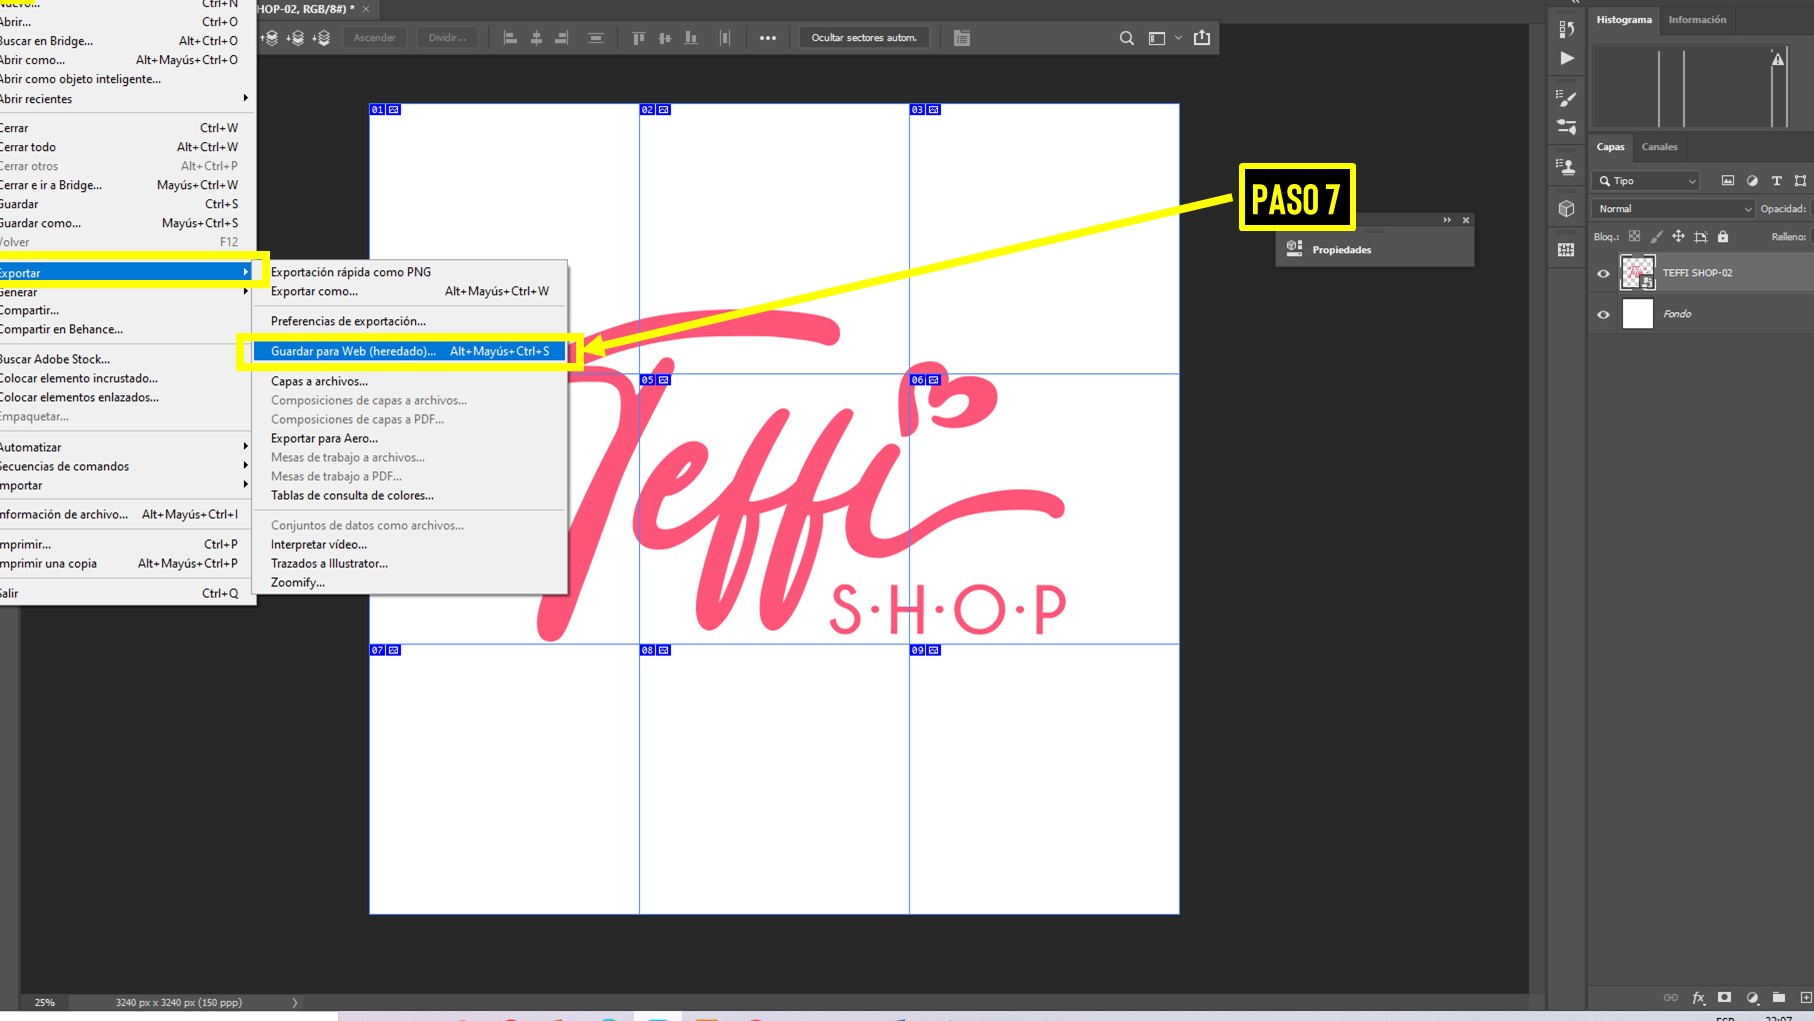
Paso 7: ya en este momento les muestro como guardar su proyecto de modo que les queden separadas todas las imágenes de una vez y no tener necesidad de recortarlas una a una. Seleccionamos en Archivo, Exportar, Guardar para Web (heredado)...
Step 7: At this point I show you how to save your project so that you have all the images separated at once and no need to crop them one by one. Select in File, Export, Save for Web (legacy)...
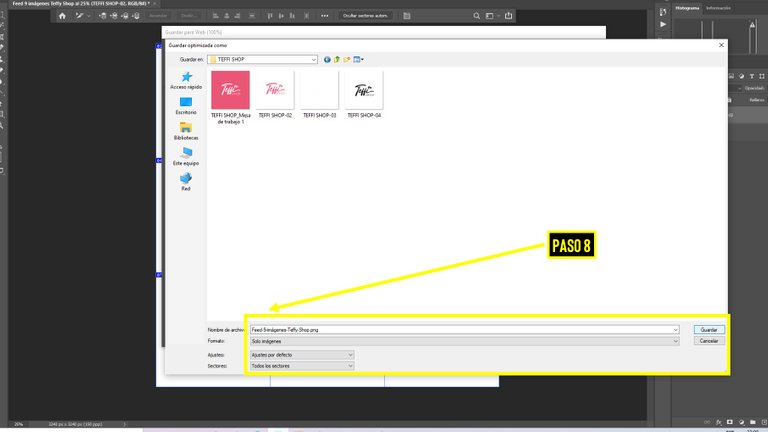
Paso 8, ya casi terminamos, sólo resta seleccionar nuestra carpeta destino. Verificamos el nombre del proyecto y esperar unos segundos.
Step 8, we are almost finished, we only need to select our destination folder. Verify the name of the project and wait a few seconds.

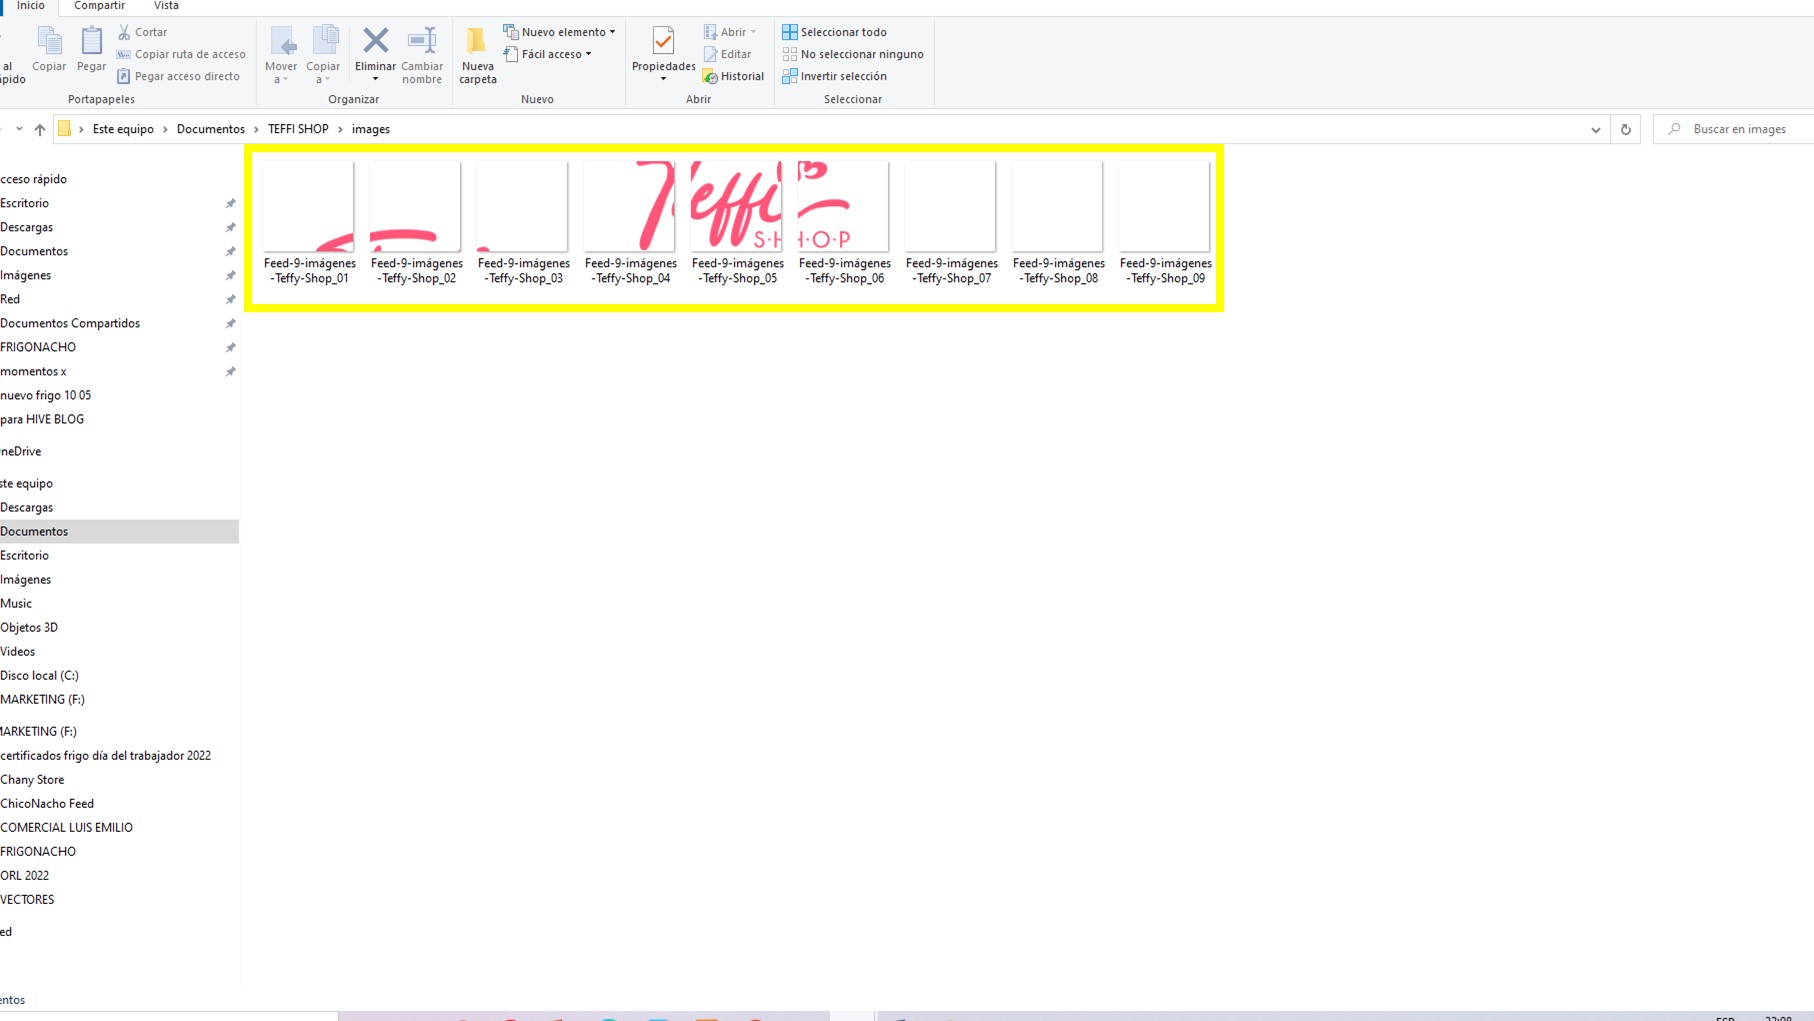
Ya una vez finalizado, verificamos en la carpeta que seleccionamos. Como ultima recomendación debemos ir subiendo las imágenes de forma regresiva, es decir, desde la 9 hasta la 1 en nuestro perfil, para que nos quede el resultado esperado en nuestro feed.
Once finished, we verify in the folder we selected. As a last recommendation we must upload the images in a regressive way, that is to say, from 9 to 1 in our profile, so that we get the expected result in our feed.
Me gusta compartir lo que he aprendido, y espero también te sirva, sobre todo si tienes un negocio, emprendimiento, o quieres darle mejor impresión a tu cuenta de instagra. Esto lo puedes emplear usando cuadrículas de 3, de 12, o la cantidad que desees, también sirve para elaborar carruseles. Pon a volar tu imaginación y crea arte.
I like to share what I've learned, and I hope it also helps you, especially if you have a business, entrepreneurship, or want to give a better impression to your instagram account. You can use this using grids of 3, 12, or the amount you want, it also serves to develop carousels. Let your imagination fly and create art.
Utilicé como traductor: https://www.deepl.com/translator
Para editar mis imágenes: Adobe PhotoShop y Microsoft Powerponit
I used as translator: https://www.deepl.com/translator
To edit my images: Adobe PhotoShop and Microsoft Powerponit

