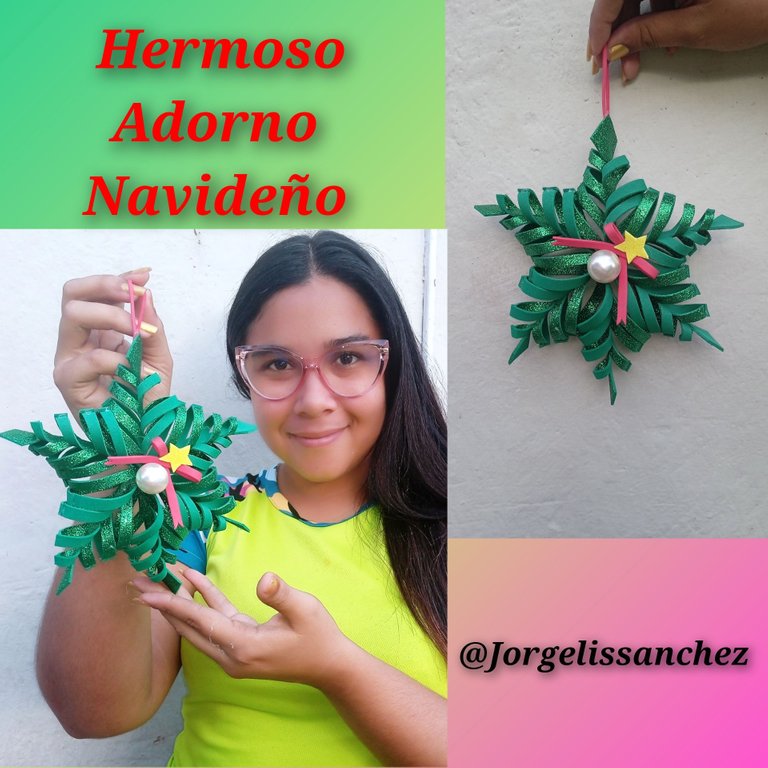
Hola mis queridos apreciados amigos de esta bellísima comunidad ,espero que se encuentren pasando un domingo agradable , este tutorial es inspirado en una de las épocas más hermosas de el año como lo es " La navidad" les quiero compartir una estrella que realice de foamis (goma Eva)para decorar el arbolito navideño, a continuación les mostraré cada paso que realice y material que utilice
Hello my dear friends of this beautiful community, I hope you are having a nice Sunday, this tutorial is inspired by one of the most beautiful times of the year as it is "Christmas" I want to share a star that I made of foamis (eva rubber) to decorate the Christmas tree, then I will show you each step I made and material used
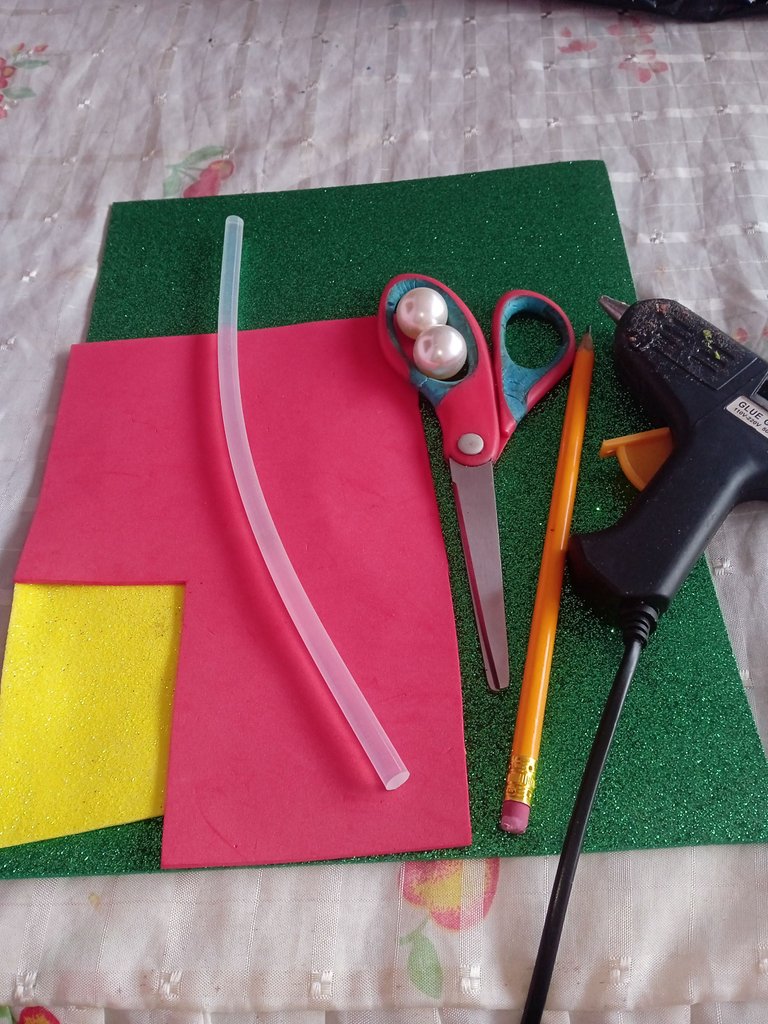
Materiales que utilice:
-Foamis (Verde,Amarillo y Rojo)
-Tijera
-Silicon
-Piedra plástica
-Lapiz
Materials used:
-Foamis (Green, Yellow and Red)
-Scissors
-Silicon
-Plastic stone
-Polish
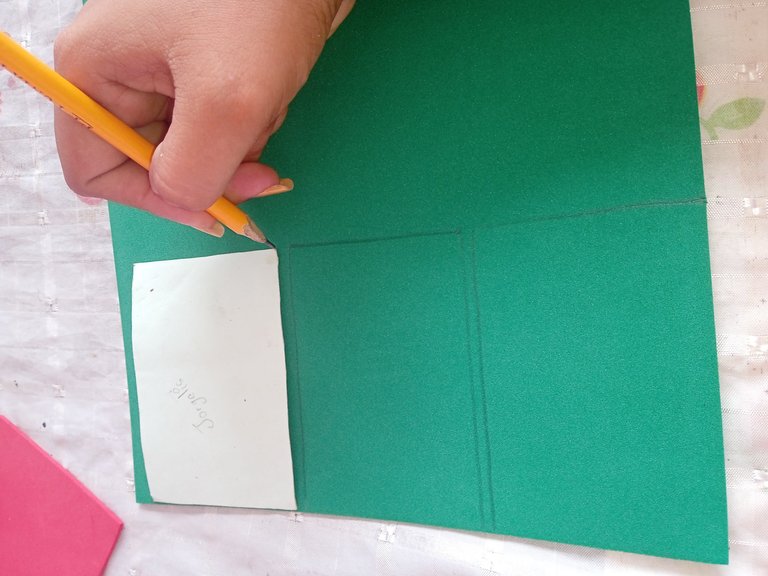
A continuación los pasos a seguir:
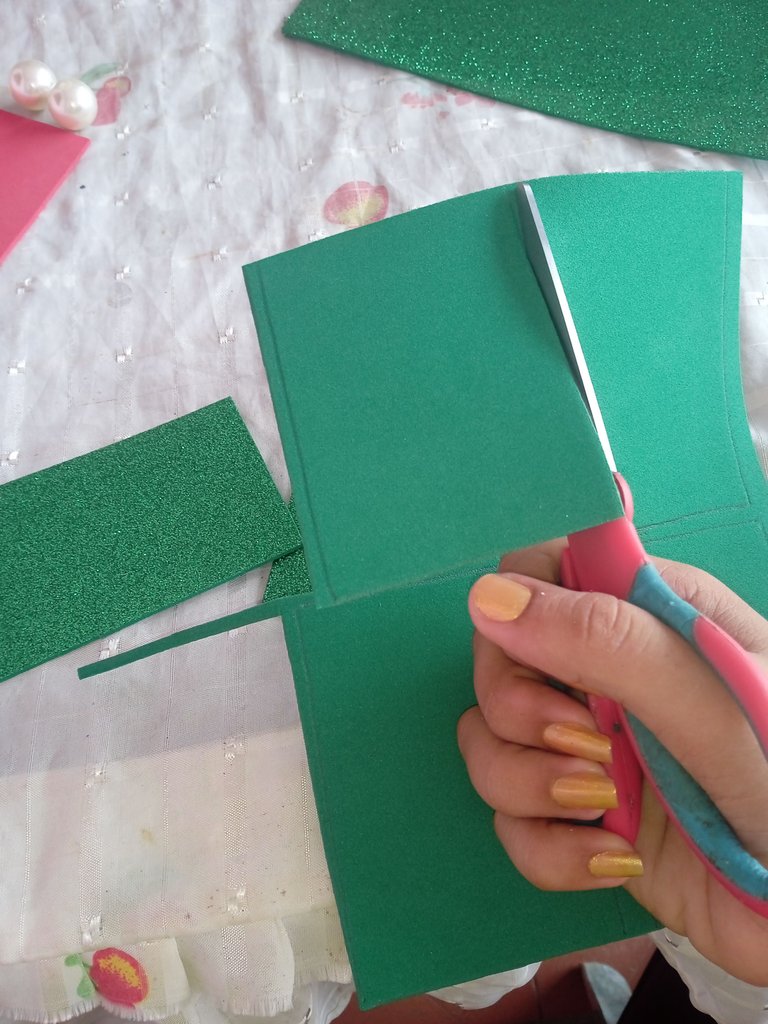
Iniciaremos dibujando unos pequeños cuadros en la parte de atrás de el foamis para no dañar la escarcha , podemos realizar los cuadros con la ayuda de una regla o objeto cuadrado , cada cuadro mide 8 cm de largo y 6 cm de altura , debemos realizar 6 cuadros exactos ,si desean que el adorno quede más grande realizamos los cuadros más grandes
Here are the steps to follow:
We will begin by drawing small squares on the back of the foamis to avoid damaging the frosting, we can make the squares with the help of a ruler or square object, each square is 8 cm long and 6 cm high, we must make 6 exact squares, if you want the ornament to be bigger we make the squares bigger.
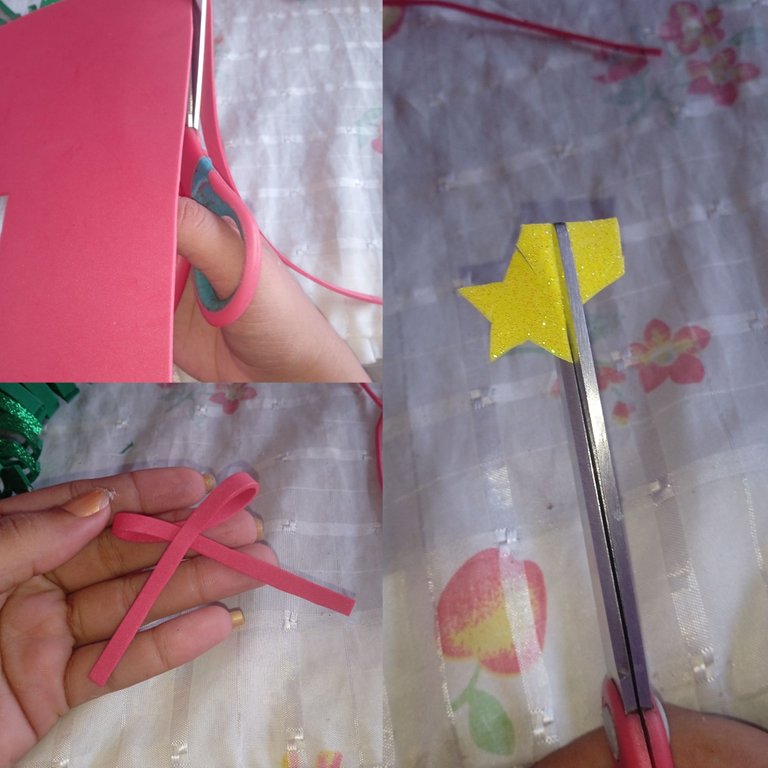
Luego continuaremos recortando cada cuadro que realice en el paso anterior con la ayuda de nuestra tijera
Then we will continue cutting out each frame we made in the previous step with the help of our scissors.
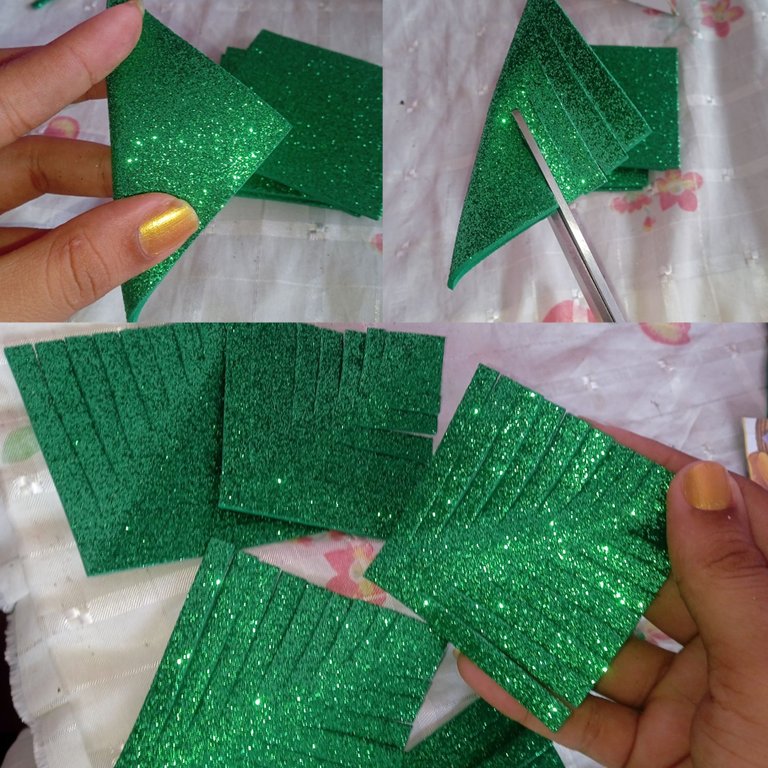
Luego continuaremos tomando cada cuadro que realizamos y lo vamos a doblar en forma de triángulo ,presionando fuertemente para que se marque una raya o un margen por todo el centro, luego continuaremos tomando la tijera y realizamos varios cortes en forma de tiras , iniciamos cortando desde arriba hasta llegar al final
Then we will continue taking each square that we made and we will fold it in the shape of a triangle, pressing hard to mark a line or a margin around the center, then we will continue taking the scissors and make several cuts in the form of strips, we start cutting from the top until we reach the end.
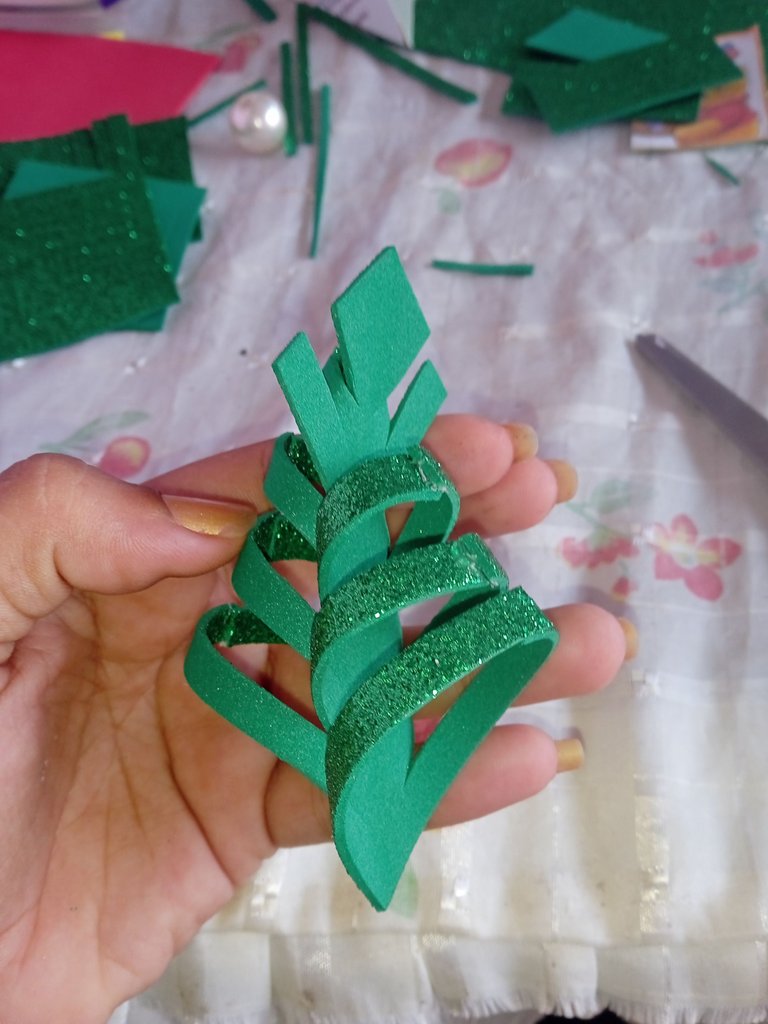
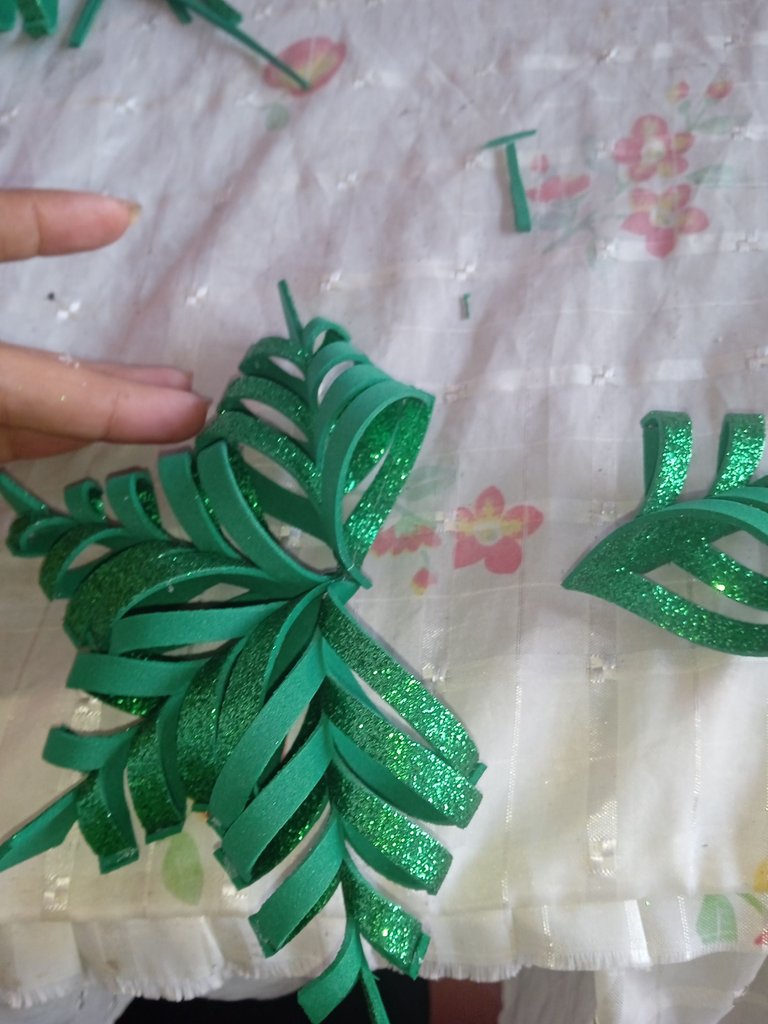
Una vez que tengamos listas todas las piezas a utilizar ,vamos a continuar pegando tira con tira ,iniciamos pegando las tiras punta con punta , luego dejamos una tira por el medio sin pegar para más adelante pegar al contrario
Once we have all the pieces ready to use, we will continue gluing strip by strip, we start by gluing the strips end to end, then we leave a strip in the middle without gluing to later glue the other way around.

Una vez que pegamos las primera tiras ,vamos a continuar pegando las de el lado contrario , para que se observe el lado escarchado de el foamis y este nos pueda dar el diseño deseado
Once we glued the first strips, we will continue gluing the strips on the opposite side, so that the frosted side of the foamis visible and this can give us the desired design.
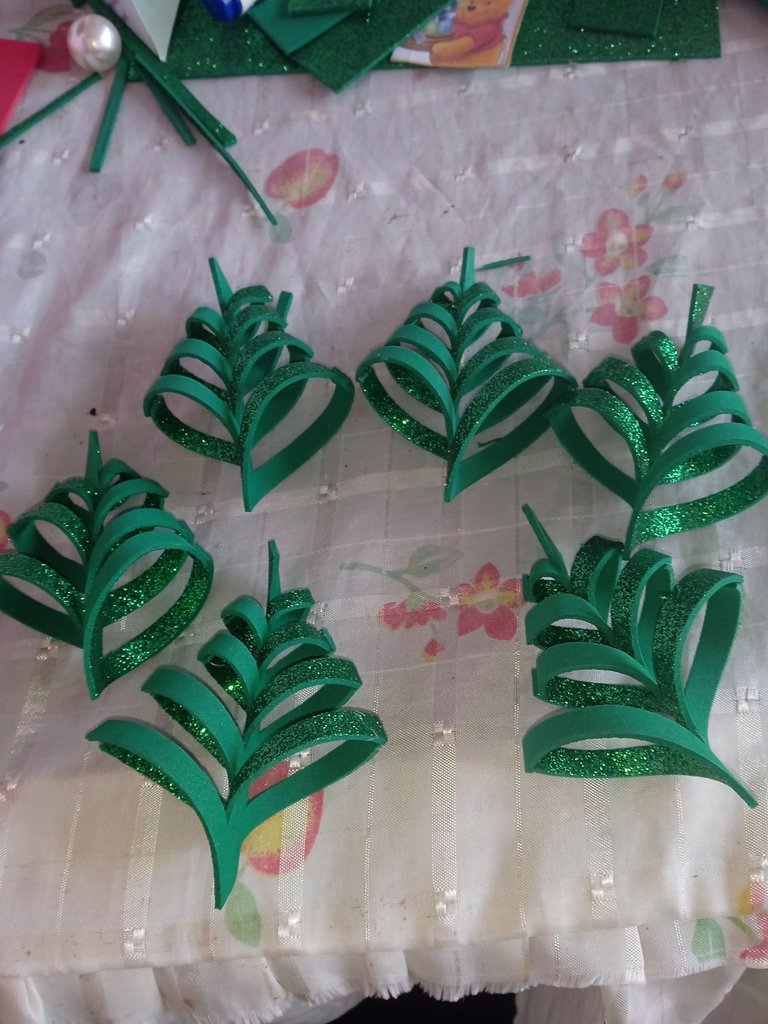
Luego continuaremos pegando cada pétalo que realizamos o pieza para formar nuestra estrella navideña ,añadimos silicón a la punta y pegamos
Then we will continue gluing each petal we made or piece to form our Christmas star, add silicone to the tip and glue.
Luego de este paso continuaremos con la decoración final de nuestra estrella , primero tomamos una tira de foamis rojo y realizamos con ella un pequeño lazo , por último con el foamis amarillo recortamos una pequeña estrella
After this step we will continue with the final decoration of our star, first we take a strip of red foamis and we make with it a small bow, finally with the yellow foamis we cut out a small star.
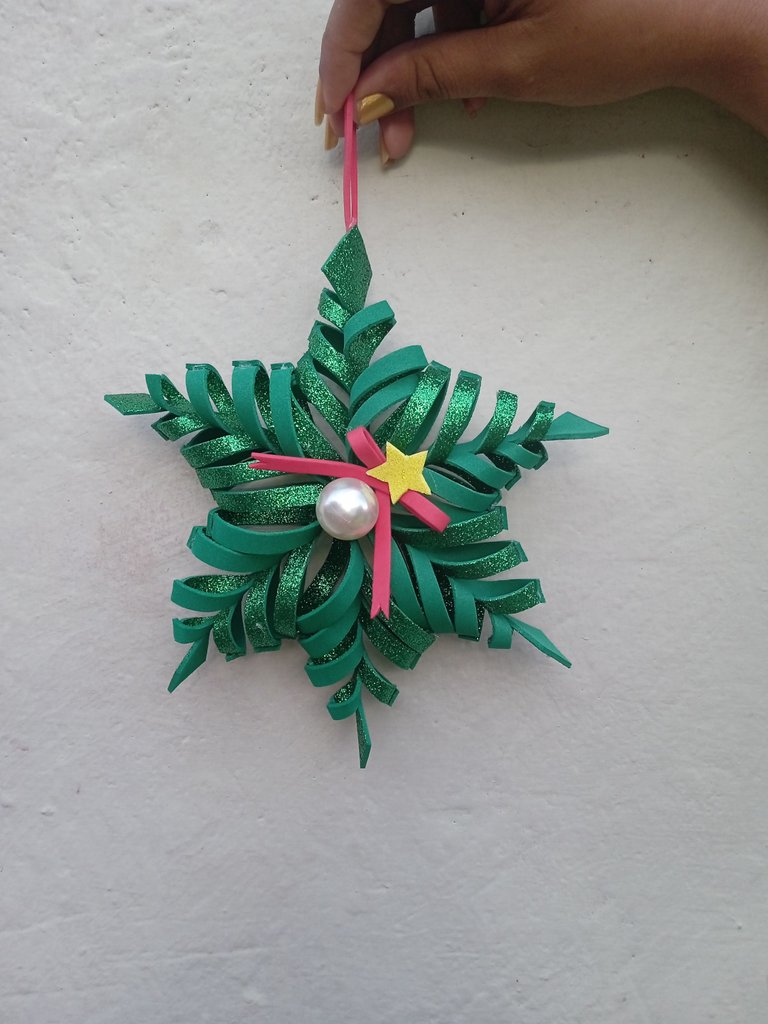
Luego continuaremos pegando en todo el centro de la estrella una piedra plástica torno perla , y seguido de este paso en un lado semi curvado pegue en lazo y en la parte de arriba pegue la estrella finalizando así mi decoración
Then we will continue gluing in the center of the star a plastic stone pearl lathe, and followed by this step in a semi-curved side glue in a loop and on top glue the star thus ending my decoration.
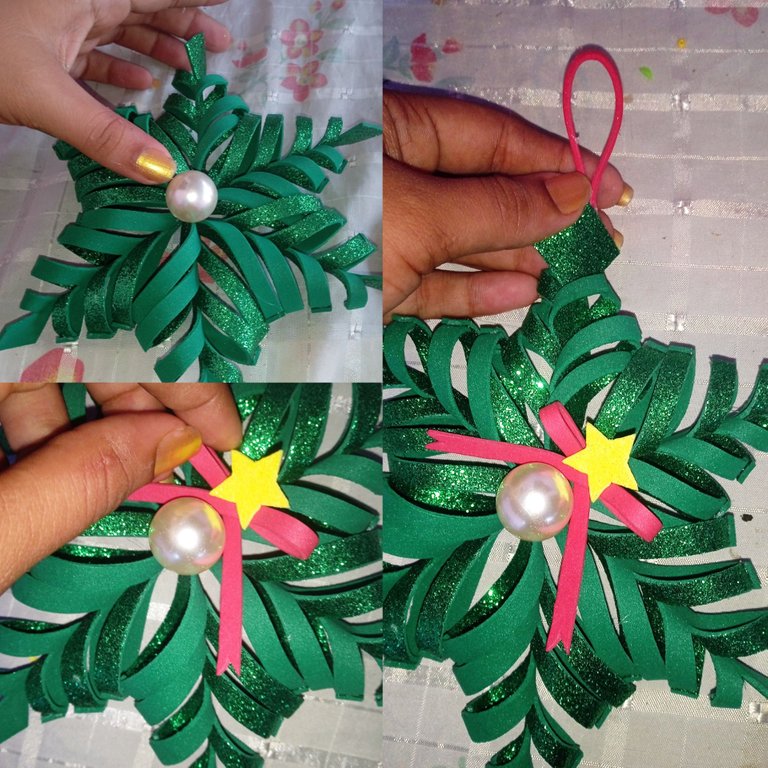
Este es el resultado final de mi estrella navideña ,ideal para la época de la navidad que está por llegar, les invito que puedan realizar lo desde sus hogares y redecorar sus árboles ,paredes o puertas , las fotos las tomé desde mi teléfono Redmi 9C y los textos los traduje con el traductor DeepL ,que pasen buenas tarde y muy buenas noches
This is the final result of my Christmas star, ideal for the Christmas season that is coming, I invite you to make it from your homes and redecorate your trees, walls or doors, the photos were taken from my Redmi 9C phone and the texts were translated with the translator DeepL, have a good afternoon and very good night