Hola buenas tardes amigos feliz fin de semana para todos , espero que se encuentren bien , hoy les quiero compartir un bolígrafo de rosa amarilla en honor al día de mañana , este presente lo realicé para obsequiar a una persona en especial, es mi primera vez que trabajo la rosa con cinta y amé el resultado me siento orgullosa
Hello good afternoon friends happy weekend to all, I hope you are well, today I want to share a yellow rose pen in honor of tomorrow, this present I made it to give to a special person, it is my first time I work the rose with ribbon and I love the result I am proud.
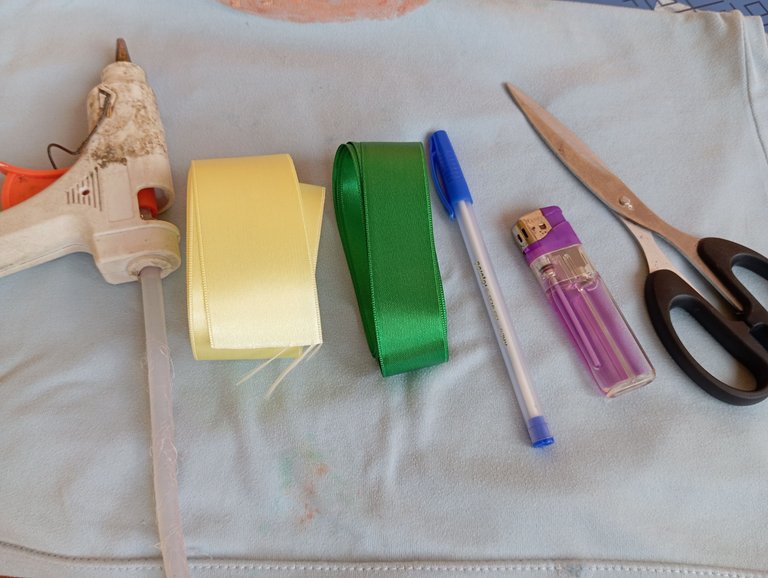
Materiales qué utilice para mí bolígrafo de rosa :
-Cinta gruesa amarilla metro y medio
-Cinta verde un metro
-Tijera
-Bolígrafo
-Silicon
-Encendedor
Materials that I used for my rose pen:
-Thick yellow ribbon one and a half meters
-Green ribbon one meter
-Scissors
-Pen
-Silicon
-Lighter
A continuación los pasos a seguir:
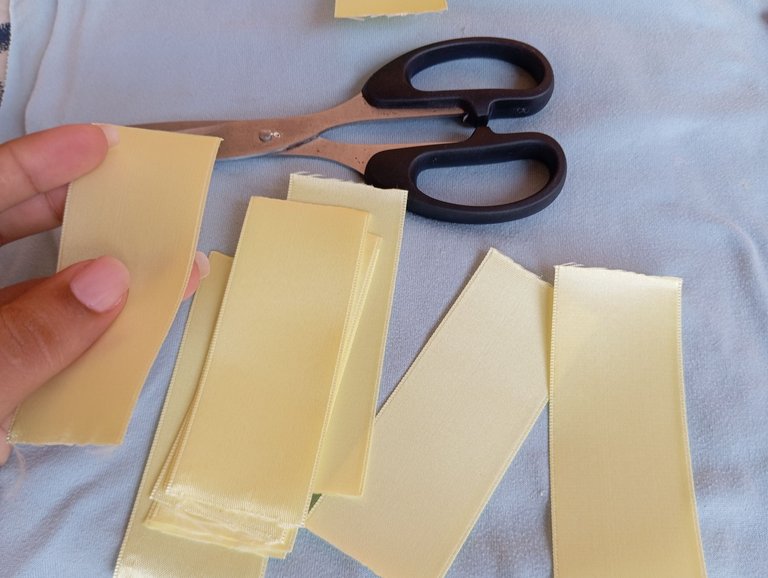
Iniciaremos tomando nuestra cinta amarilla y realizaremos varios dobles con la ayuda de una tarjeta o un objeto similar como lo pueden apreciar
Here are the steps to follow:
We will start by taking our yellow ribbon and we will make several doubles with the help of a card or a similar object as you can see.

Seguidamente vamos a continuar retirando la cinta con cuidado y al mismo tiempo recortando
Then we will continue removing the ribbon carefully and at the same time cutting it out.
A continuación vamos a formar nuestros pétalos, iniciamos tomando las puntas de arriba, agregamos silicón y llevamos a pegar hacia abajo , luego la punta que queda hacia los lados le agregamos silicón y llevamos a pegar hacia el centro como lo pueden aprender
Next we are going to form our petals, we start by taking the tips from the top, add silicone and glue them down, then the tip that is towards the sides we add silicone and glue it towards the center as you can see.
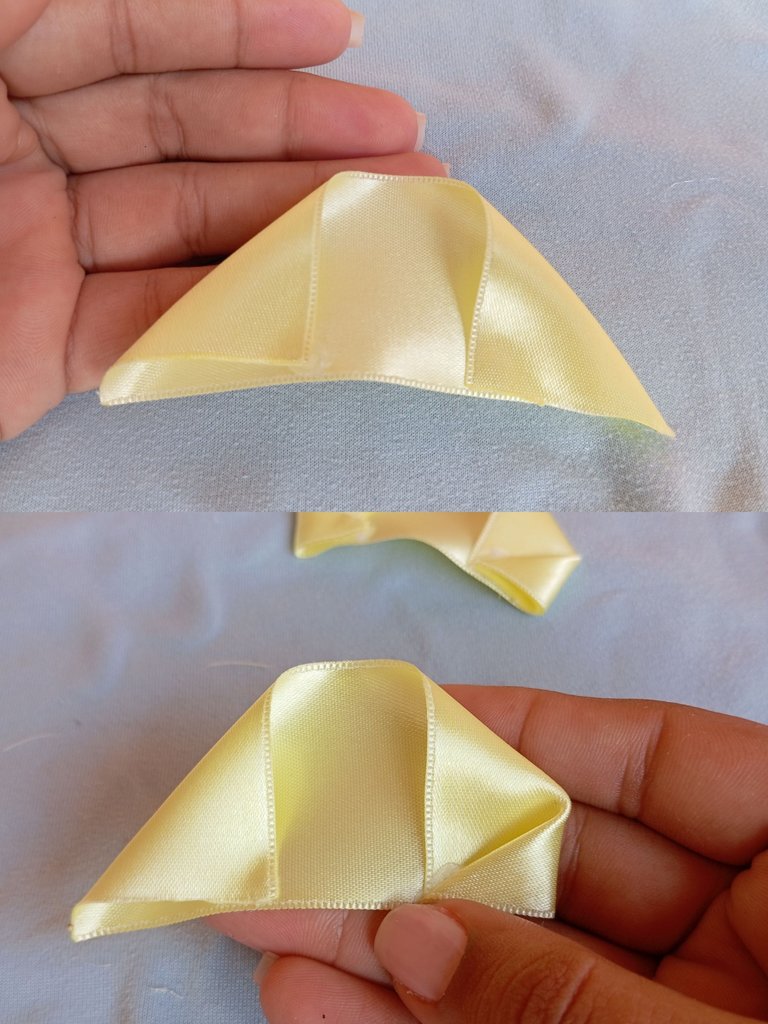
De esta manera deben quedar nuestros pétalos como pueden apreciar
In this way our petals should be as you can see
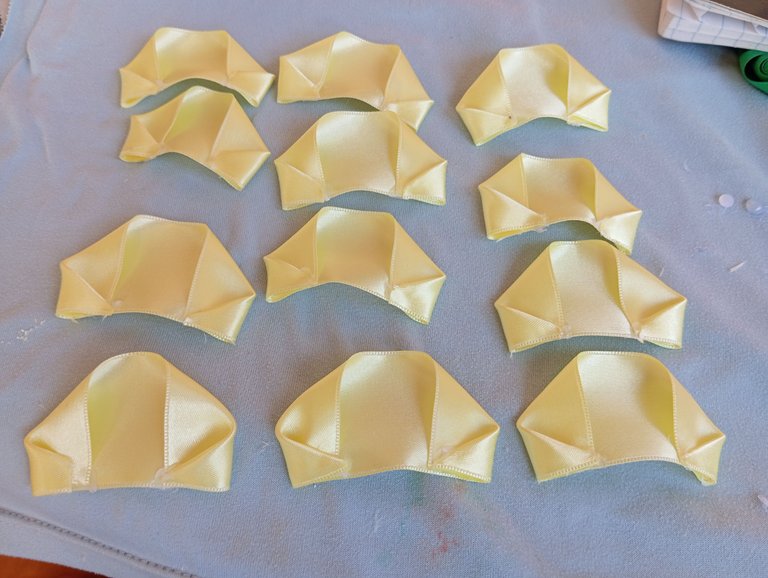
Seguidamente vamos a continuar tomando nuestros pétalos y agregamos silicón en una punta y comenzamos a pegar uno al lado del otro hasta formar una cadeneta de pétalos
Next we will continue to take our petals and add silicone to one end and start gluing one next to the other until we form a chain of petals.
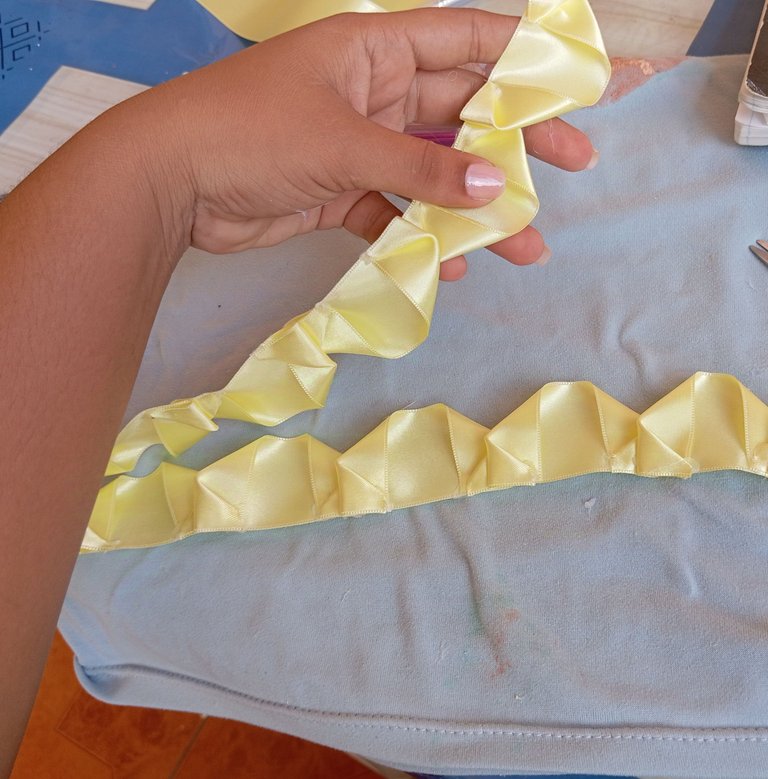
Luego procederemos a realizar nuestra rosa , tomamos la punta de un pétalo y comenzamos a enrollar y entre meter nuestros pétalos hasta formar nuestra bella rosa
Then we will proceed to make our rose, we take the tip of a petal and begin to roll and tuck in our petals until we form our beautiful rose.
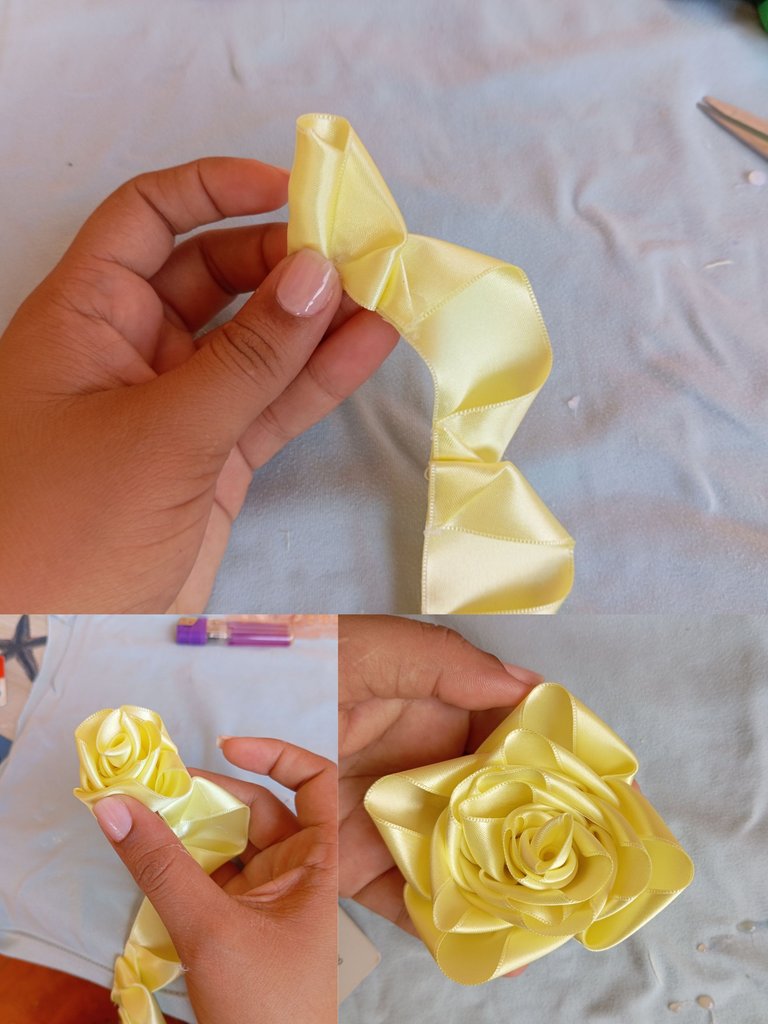
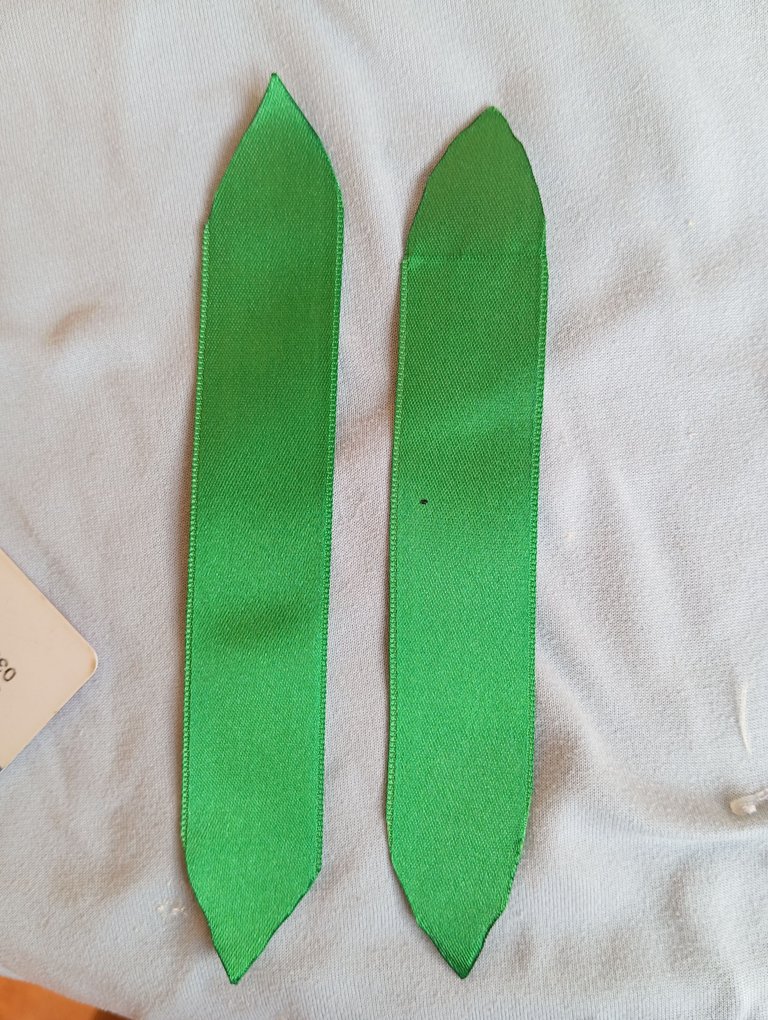
Una vez que tengamos lista la rosa vamos a proceder recortando para hacer unas hojas a nuestra rosa , recorté en tira y doble punta de hoja para que al pegar en la parte de abajo queden cuatro hojas
Once we have the rose ready we will proceed by cutting to make some leaves to our rose, I cut in strip and double leaf tip so that when gluing at the bottom there are four leaves
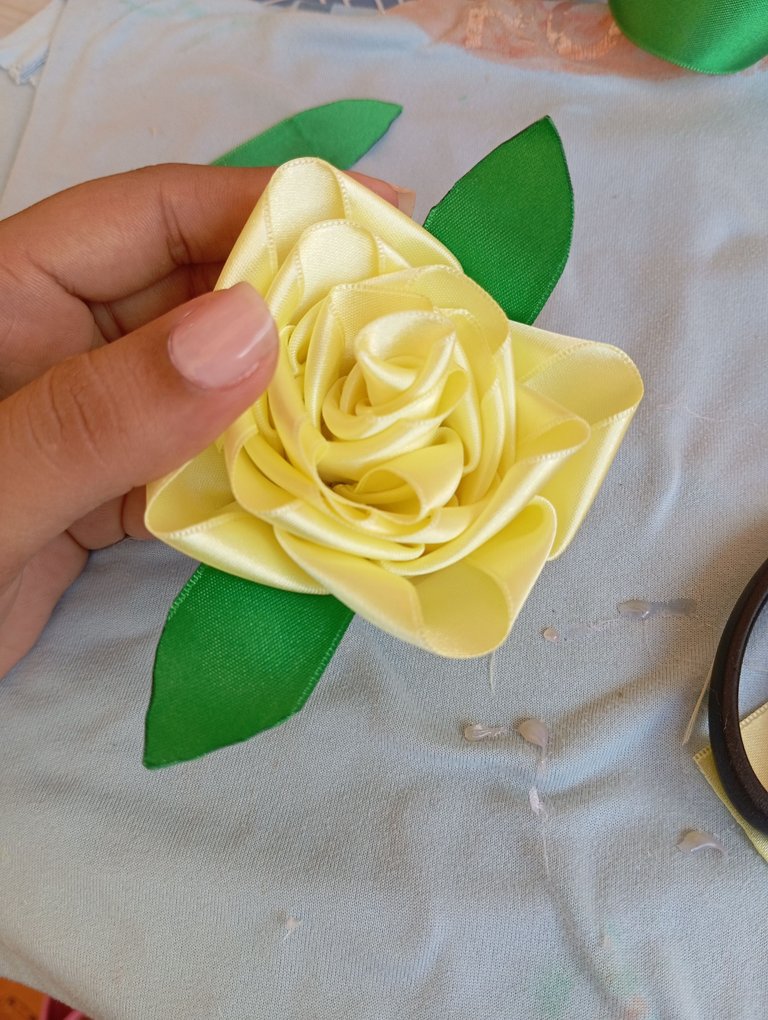
Seguidamente vamos a proceder pegando nuestras hojas a la rosa , la pegamos de abajo hacia arriba para que así quede la base verde que son las hojas que cubren a la rosa
Next we are going to proceed by gluing our leaves to the rose, we glue them from the bottom to the top so that the green base remains, which are the leaves that cover the rose
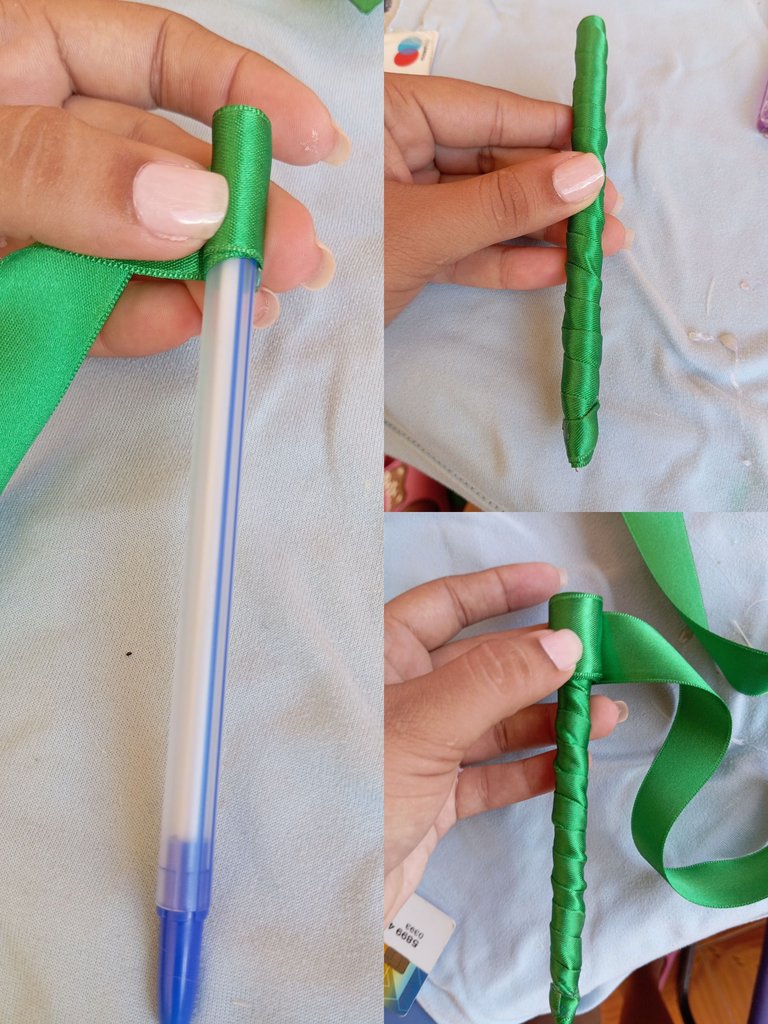
a continuación vamos a realizar el tallo de nuestra rosa , para esto utilizaremos el bolígrafo, iniciamos doblando nuestra cinta y comenzamos a enrollar de arriba hacia abajo hasta cubrirlo , por último en la parte de arriba vamos a enrollar nuestra cinta varias veces para que quede el tallo de la rosa gruesa
Next we are going to make the stem of our rose, for this we will use the pen, we start by folding our ribbon and begin to roll from top to bottom to cover it, finally at the top we will roll our ribbon several times so that the stem of the rose is thick.
Finalmente vamos a proceder pegando nuestra bella rosa al tallo , culminando nuestro hermoso diseño
Finally we will proceed by gluing our beautiful rose to the stem, culminating our beautiful design.

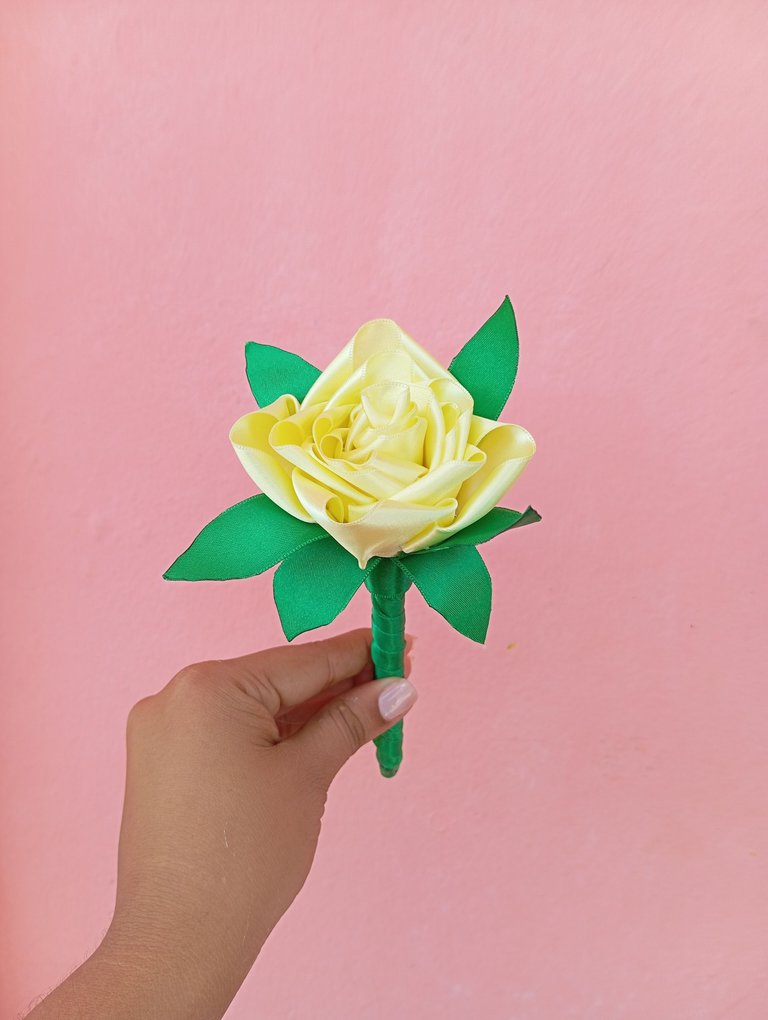
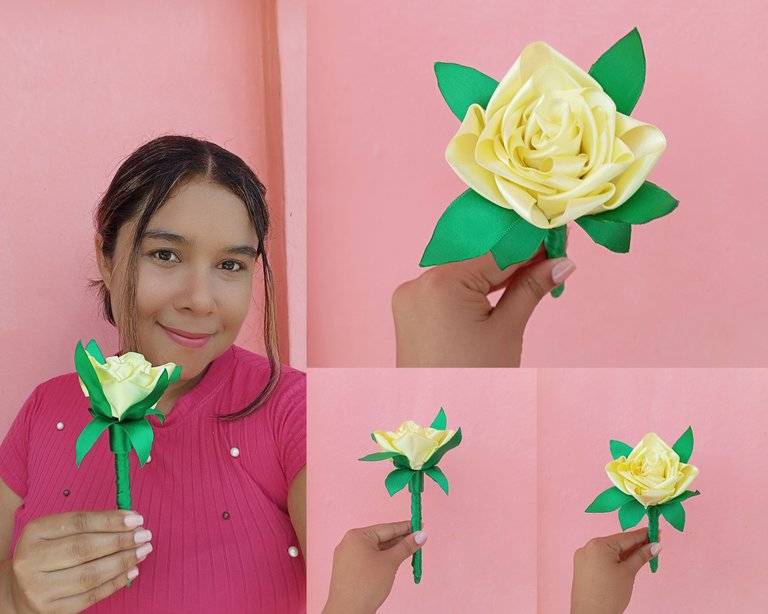
Este es el resultado final de mi hermoso bolígrafo de rosa amarilla ideal para obsequiar en su día y demostrar un gesto de amor , espero les sea de utilidad
Créditos: las fotos las tomé con mi redmi 12 y traduje los textos con el traductor deepl, feliz tarde
This is the final result of my beautiful yellow rose pen ideal to give as a gift on your day and show a gesture of love, I hope you find it useful.
Credits: the photos were taken with my redmi 12 and I translated the texts with the translator deepl, happy afternoon