Hola Amigos de Hive!
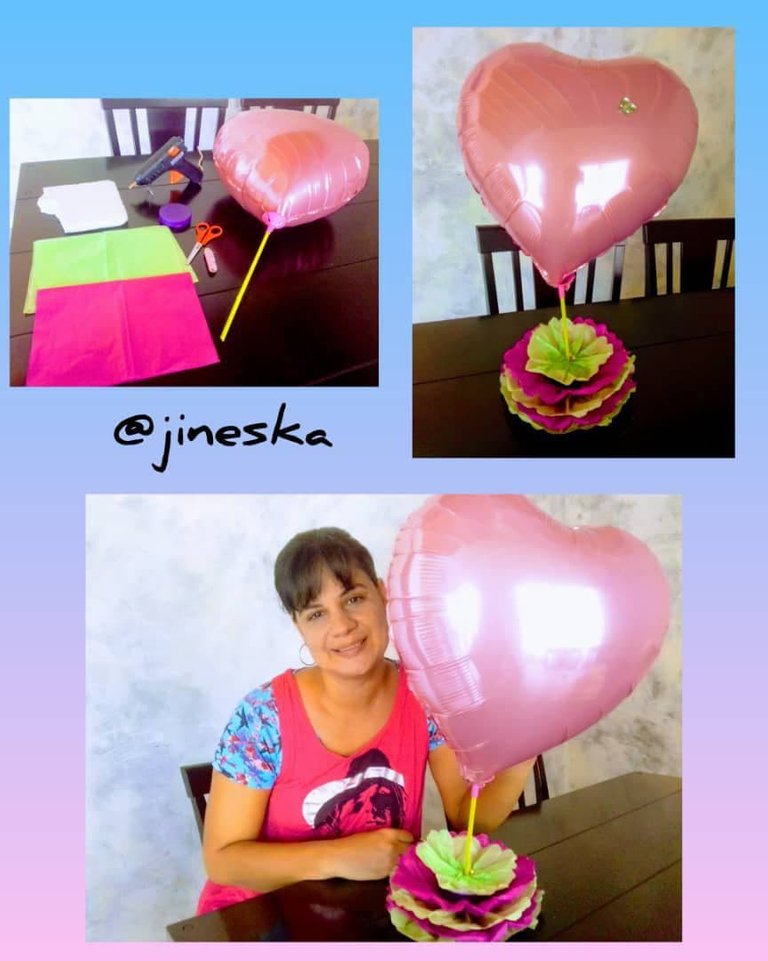
Por aquí estoy animada realizando este delicado centro de mesa, para mostrarle una sencilla idea de cómo decorar su centro de mesa en algún momento de celebración.
Es un adorno sencillo que se realiza en pocos pasos con un resultado muy bonito y maravilloso.
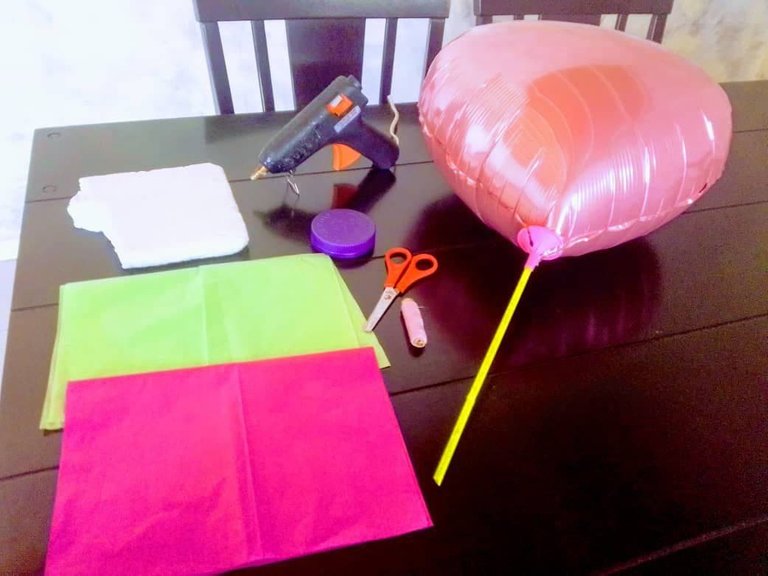
Espero les guste la idea y se animen a realizarlo cuando seles presente la ocasión. Los materiales que necesitamos serán los siguientes:
Over here I am animated making this delicate centerpiece, to show you a simple idea of how to decorate your centerpiece at some time of celebration.
It is a simple decoration that is done in a few steps with a very nice and wonderful result.
I hope you like the idea and are encouraged to make it when the occasion arises. The materials we need are the following:
- Silicón.
- 2 papel de seda colores favoritos.
- Hilo de coser.
- Globo decorativo.
- Anime.
- Tapa plástica reciclada de frascos.
- Silicone.
- 2 tissue paper favorite colors.
- Sewing thread.
- Decorative balloon.
- Anime.
- Recycled plastic jar lids.
Paso a Paso / Step by Step
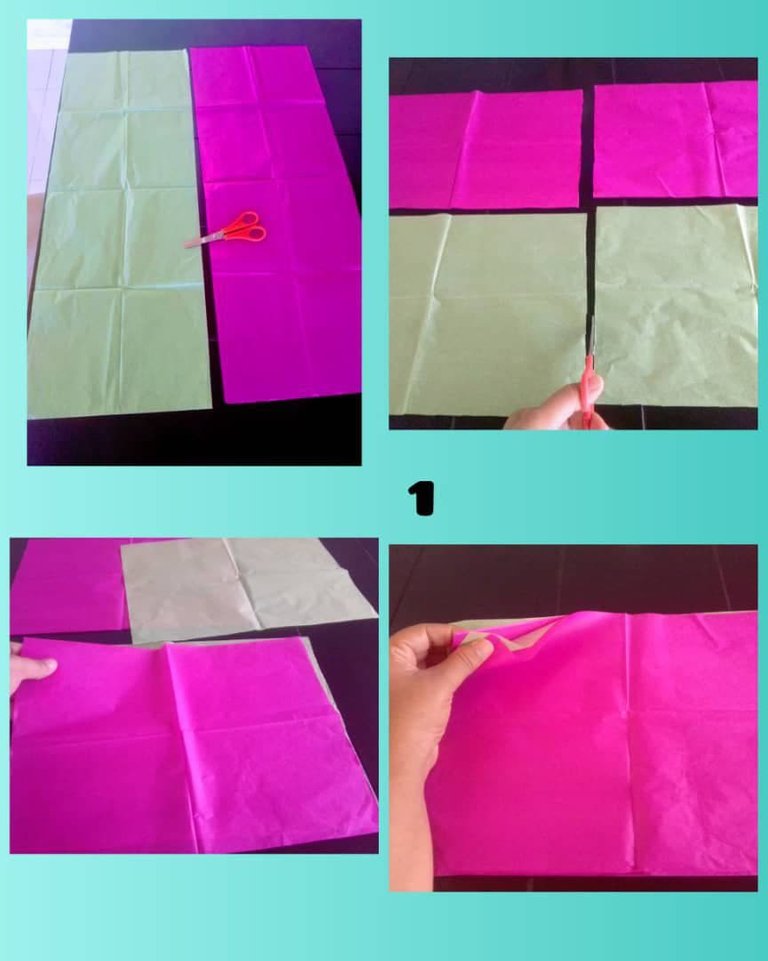
1.- En primer lugar debemos cortar el papel de seda en 4 partes de igual medidas. En mi caso 2 verdes y 2 fucsia. Luego los colocaremos de forma intercalada, es decir, uno verde y uno fucsia.
1.- First we must cut the tissue paper in 4 parts of equal measures. In my case 2 green and 2 fuchsia. Then we will place them in an intercalated way, that is to say, one green and one fuchsia.
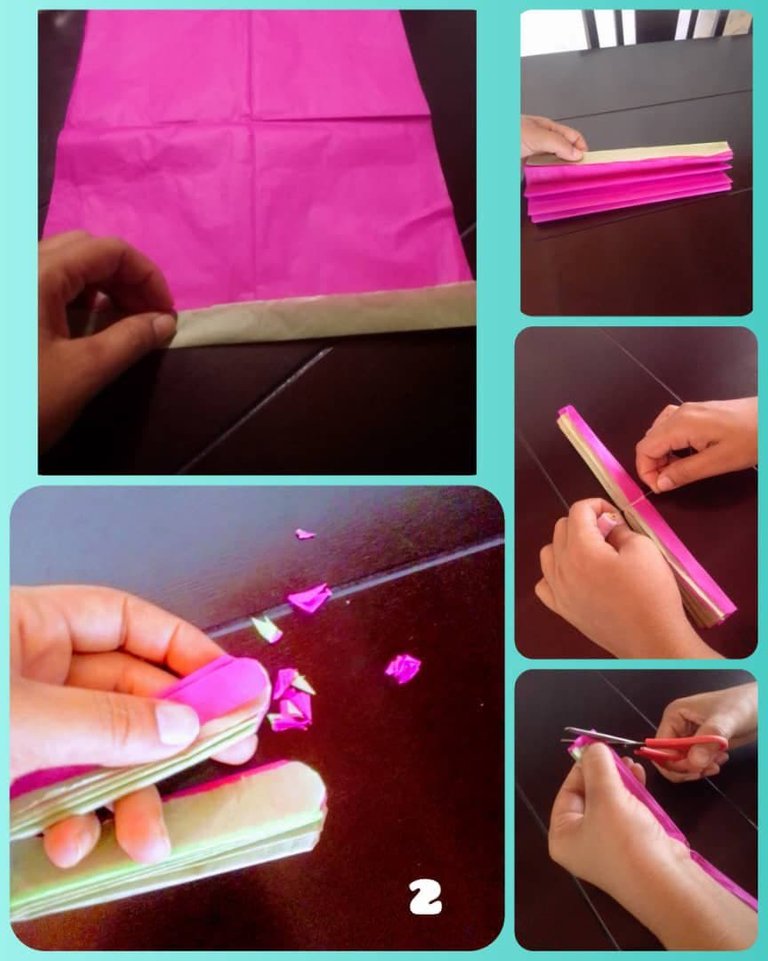
2.- Seguidamente doblaremos los papeles en forma de abanico, amarraremos con hilo en la parte del centro y cortaremos las puntas de forma circular para un mejor acabado.
2.- Then we will fold the papers in a fan shape, we will tie with thread in the center and we will cut the ends in a circular shape for a better finish.
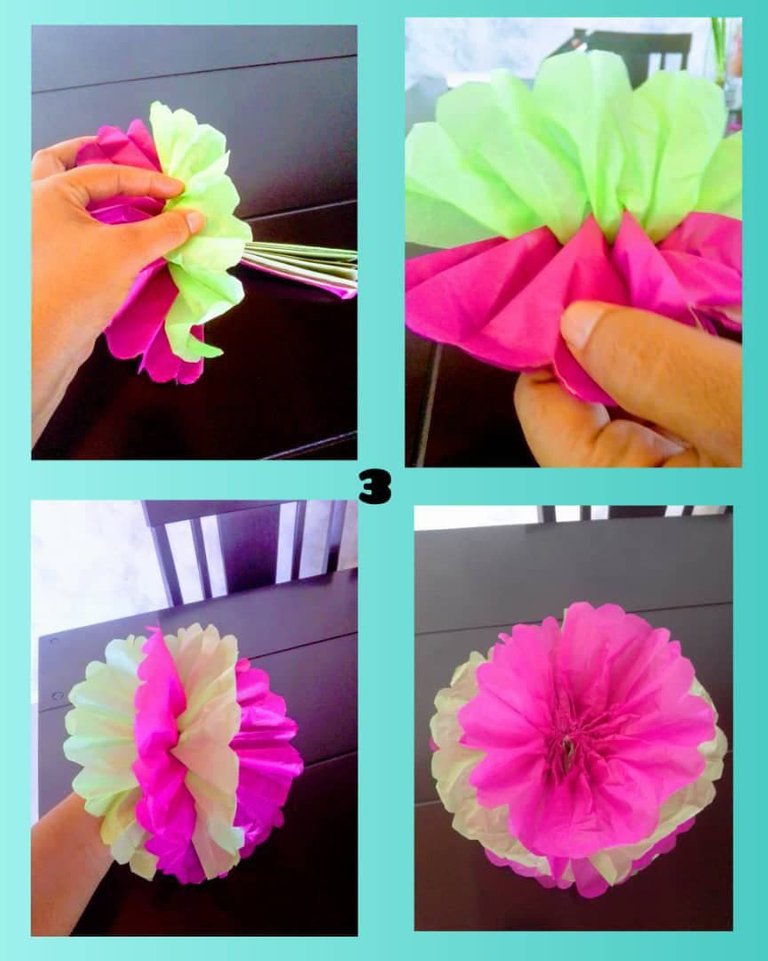
3.- Luego empezamos a abrir poco a poco cada pliego de papel, como se evidencia en las fotos. Repetimos este paso porcada lado hasta formar especie de una flor.
3.- Then we begin to open little by little each sheet of paper, as shown in the pictures. Repeat this step on each side to form a kind of flower.
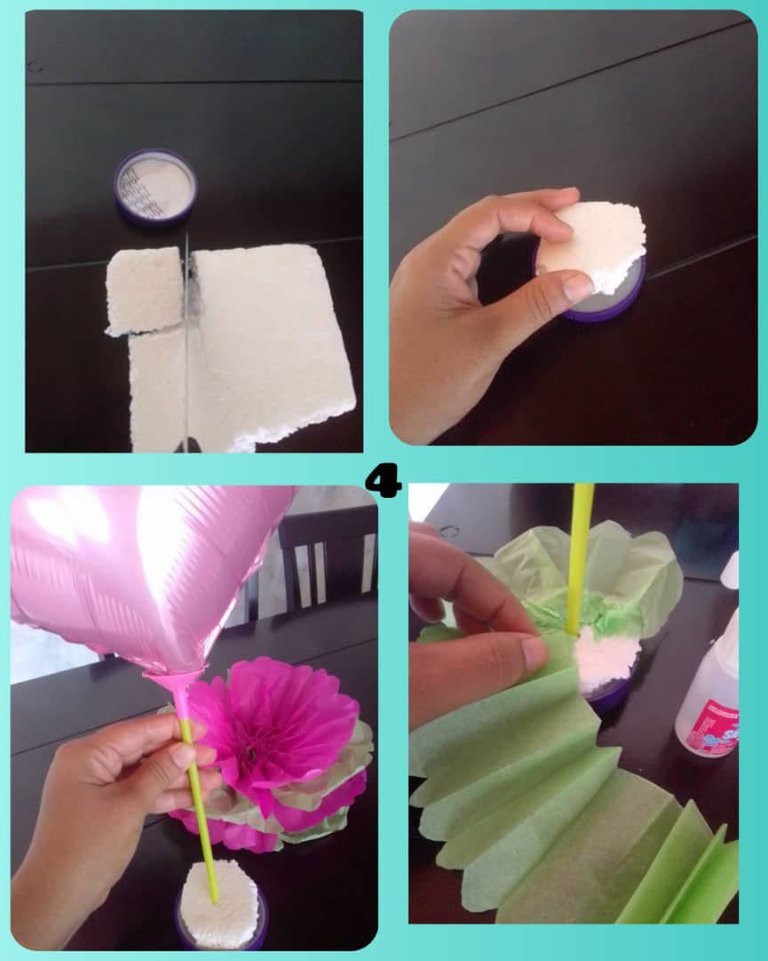
4.- Cortaremos el anime a medida de la tapa plástica y fijaremos con silicón. Introducimos el globo en el anime y decoramos con un retazo del papel de seda.
4.- Cut the anime to the size of the plastic cover and fix it with silicone. Insert the balloon into the anime and decorate it with a piece of tissue paper.
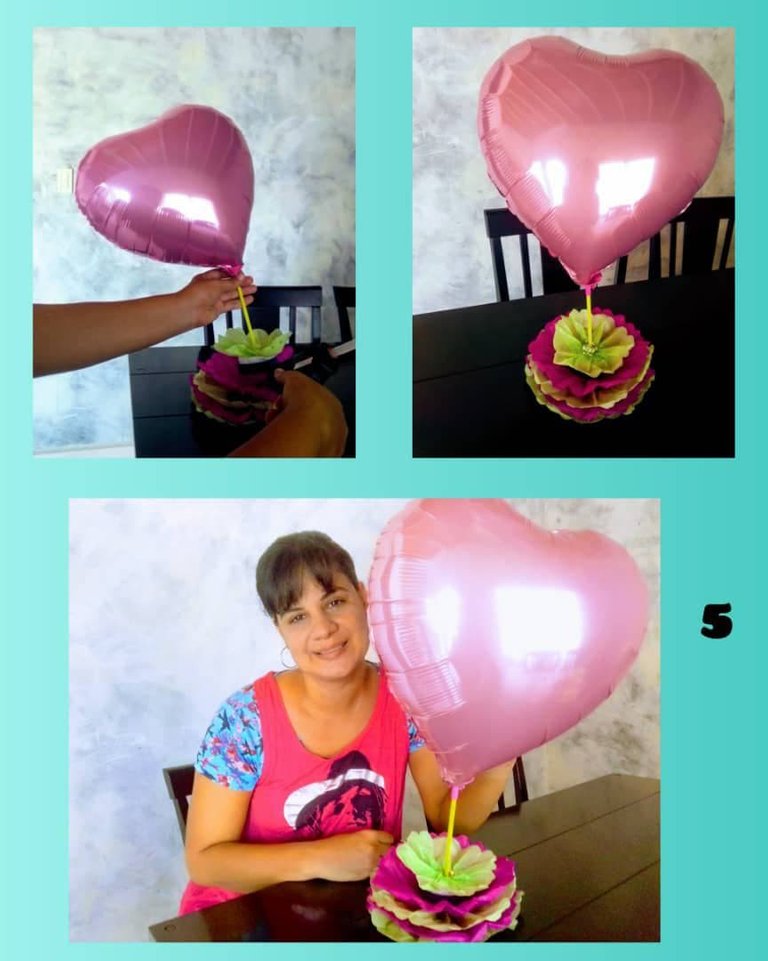
5.- Finalmente pegamos la tapa ya decorada, en la flor de papel elaborada.
Listo !!!Admiren lo hermosos y delicado que luce este adorno para sorprender a nuestros invitados en cualquier evento especial.
5.- Finally we glue the lid already decorated, on the elaborated paper flower.Admire how beautiful and delicate this ornament looks to surprise our guests in any special event.

¡Bendiciones infinitas!
Fotos de mi propiedad.
Tomadas con mi Celular BLU G5