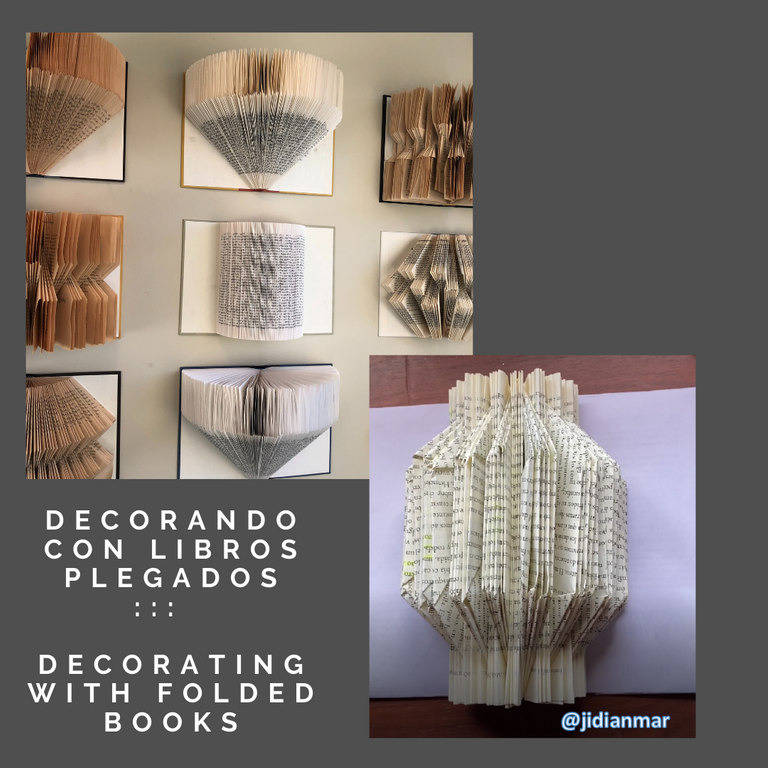


Hola amigos de esta creativa y hermosa comunidad #HIVEDIY!, espero que todos estén muy bien. Les doy la bienvenida a mi blog. El dia de hoy les voy a enseñar como decorar con libros viejos, que estén en mal estado y que por supuesto no vayamos a donar.!!
Les cuento que estando de visita en Rochester Minessota, entre a un salón de estudio y me quedé maravillada con lo lindo que estaba decorado el lugar y fue allí donde vi los libros plegados de diferentes formas colocados en la pared, se veían tan espectaculares, que me pregunte como se hacen?? y como soy demasiada curiosa comence a observarlos e indagando supe que son patrones repetitivos de plegados de hojas.
Con esta simple técnica, podemos lograr bellísimas e interesantes formas.
Para mí, lo importante de este proyecto es que estaremos reciclando, dandóle vida de nuevo a un objeto y que más novedoso que usarlos en la decoración.
Sin más preambulo les enseño en simples pasos como hacerlo.

Hello friends of this creative and beautiful community #HIVEDIY!, I hope everyone is doing well. I welcome you to my blog. Today I am going to teach you how to decorate with old books, that are in poor condition and of course we are not going to donate.!!
I tell you that while visiting Rochester, Minnesota, I entered a study room and I was amazed at how beautiful the place was decorated and it was there that I saw the books folded in different ways placed on the wall, they looked so spectacular, that I wonder how they are done? and since I am too curious, I began to observe them and investigating them, I learned that they are repetitive patterns of leaf folding.
With this simple technique, we can achieve beautiful and interesting shapes.
For me, the important thing about this project is that we will be recycling, giving life to an object again and what is more novel than using them in decoration.
Without further ado, I will show you how to do it in simple steps.

- Libro viejo preferiblemente con hojas amarillas
- Cartulina blanco.
- Tijeras.
- Lápiz y regla.
- Pegamento blanco para papel, pegamento de barrita o pegamento caliente de silicona, el que tengas disponible.

- Old book preferably with yellow pages
- White cardboard.
- Scissors.
- Pencil and ruler.
- White paper glue, glue stick, or silicone hot glue, whatever you have available.

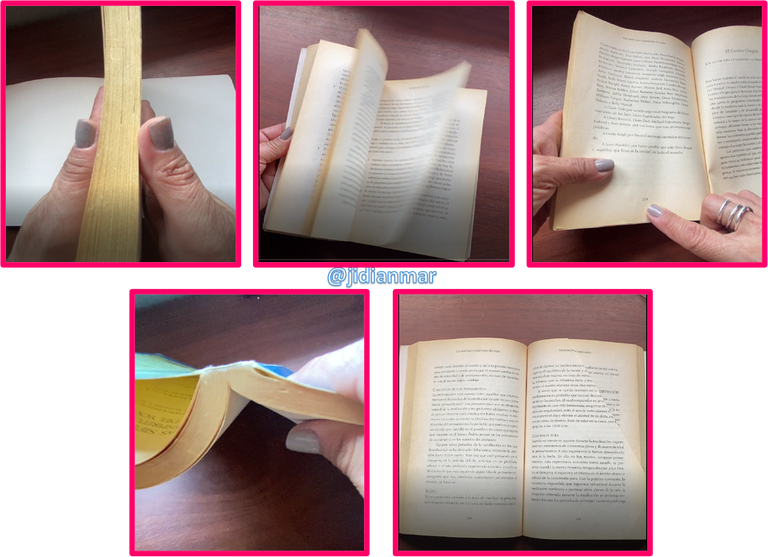
Para comenzar debemos saber cuantas hojas trae el libro, para esto iremos a la última página y la cantidad de páginas la dividimos entre 2 para saber con exactitud cual es la mitad del libro. Ya que desde la mitad del libro vamos a comenzar a plegar. cabe destacar quecomenzaremos desde la mitad hacia la contraportada y luego de la mitad hacia la portada del libro.
To begin we must know how many pages the book has, for this we will go to the last page and divide the number of pages by 2 to know exactly what half of the book is. Since from the middle of the book we are going to start folding. It should be noted that we will start from the middle towards the back cover and then from the middle towards the cover of the book.
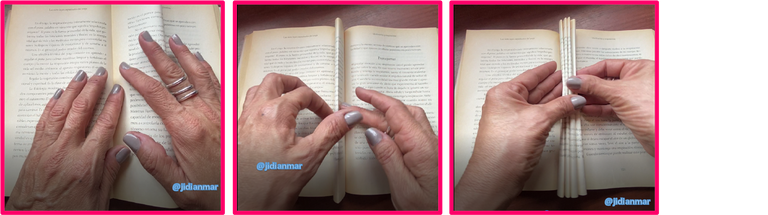
Primer plegado: repetir 5 veces
Una vez que sabemos cual es la mitad del libro, nos posicionamos alli y comenzaremos a doblar la hoja del libro a la mitad y luego volveremos a doblar por esa mitad como lo indica la figura. Esto se hace en grupos de 5 hojas.
First fold: repeat 5 times
Once we know which half of the book is, we position ourselves there and begin to fold the book sheet in half and then fold again in that half as indicated in the figure. This is done in groups of 5 sheets.
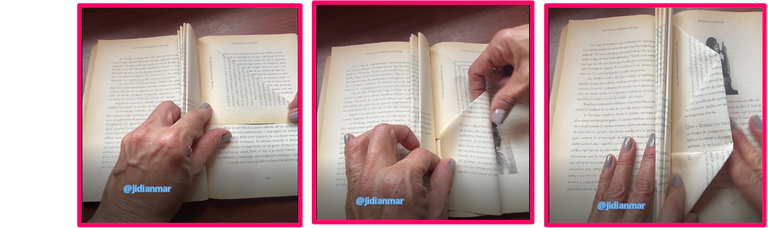
Segundo plegado: repetir 5 veces
Luego de haber plegado el primer grupo de hojas, procedemos a realizar el segundo plegado, el cual consiste en llevar la punta superior derecha hacia la mitad de la hoja, luego doblarlo a la mitad y como tercer doblez seria la punta inferior plegarla hacia arriba. Repetimos lo mismo en 5 hojas. posteriormente volvemos al primer plegado.
Seguimos la secuencia, plegado 1 y plegado 2 cada 5 hojas, hasta terminar de plegar todas las hojas del libro.
Second fold: repeat 5 times
After having folded the first group of sheets, we proceed to make the second fold, which consists of bringing the upper right tip to the middle of the sheet, then folding it in half and as a third fold, the lower tip would be folded upwards. We repeat the same on 5 sheets. later we return to the first fold.
We continue the sequence, folding 1 and folding 2 every 5 sheets, until we finish folding all the sheets of the book.

Una vez plegado el libro, procederemos a forrar la portada y la contra portada, para darle un mejor aspecto. esto lo hacemos con la cartulina blanca.
Once the book is folded, we will proceed to cover the front and back cover, to give it a better appearance. We do this with white cardboard.

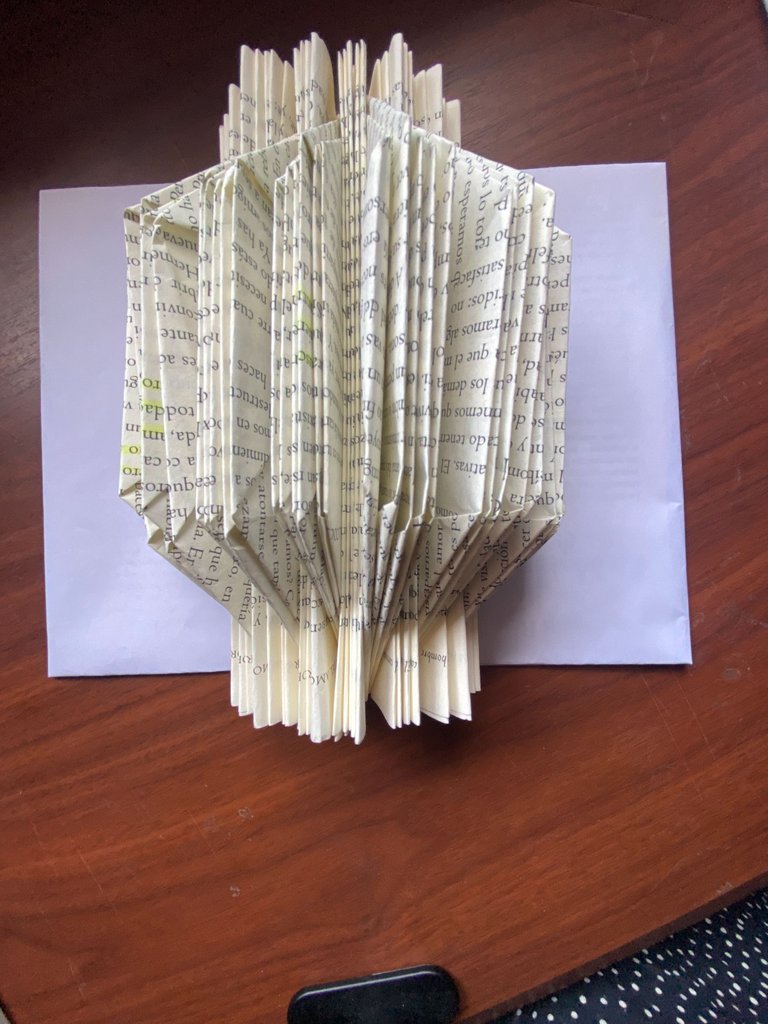
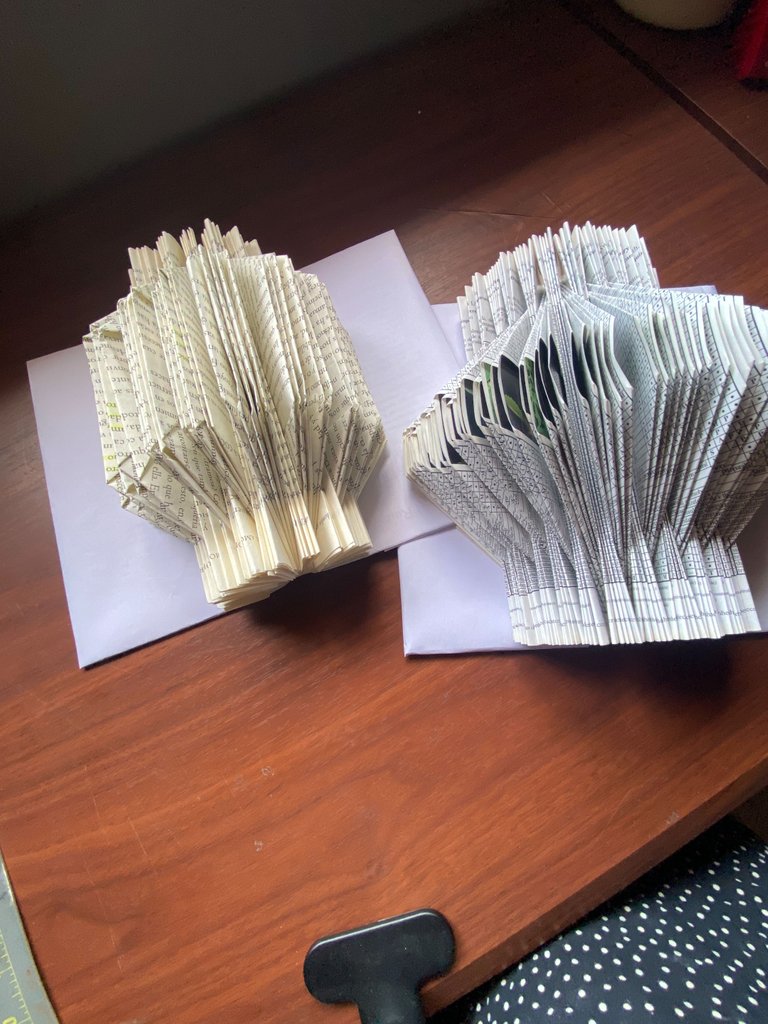

Y listo!!! ya tienes tu primer libro plegado perfecto para formar parte de tu decoración.
Queridos amigos, espero que les haya gustado este hermoso proyecto y que lo pongan en práctica.
Muchas gracias por visitar mi blog @jidianmar. Les envió muchas bendiciones, que tengan un excelente día, cuídense y pásenla bien.
And ready!!! you already have your first perfect folded book to be part of your decoration.
Dear friends, I hope you liked this beautiful project and that you put it into practice.
Thank you very much for visiting my blog @jidianmar. He sent you many blessings, have a great day, take care and have a good time.
Fotos editadas con Canva
Fotos de mi autoría Derechos de autor reservados
Fotos pared libros plegados, tomada por mi, en salón de estudios, Rochester, Minessota. Usa.
Cámara: Iphone11
Traducido con www.DeepL.com/Translator (versión gratuita)
Photos edited with Canva
Photos by me Author's rights reserved
Folded books wall photos, taken by me in study hall, Rochester, Minnesota. Usa.
Camera: Iphone11
Translated with www.DeepL.com/Translator (free version)