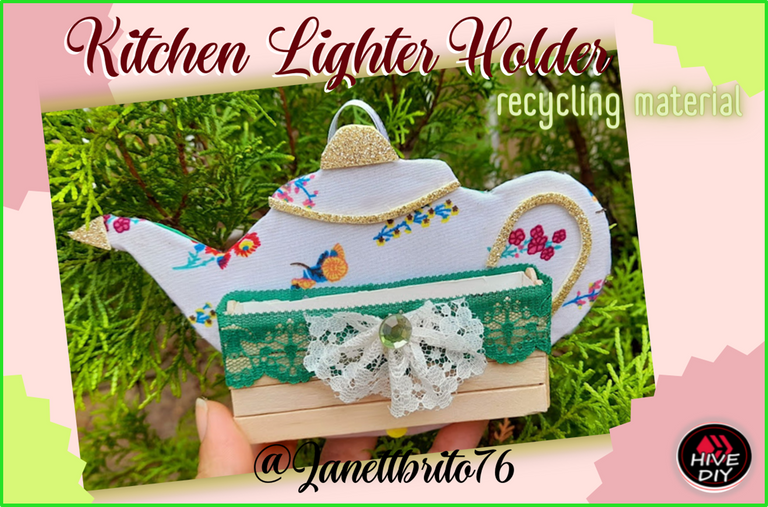

Have a happy and blessed start to the week everyone. I hope you had a great weekend in the company of your loved ones. I wish lots of good health to all of you.
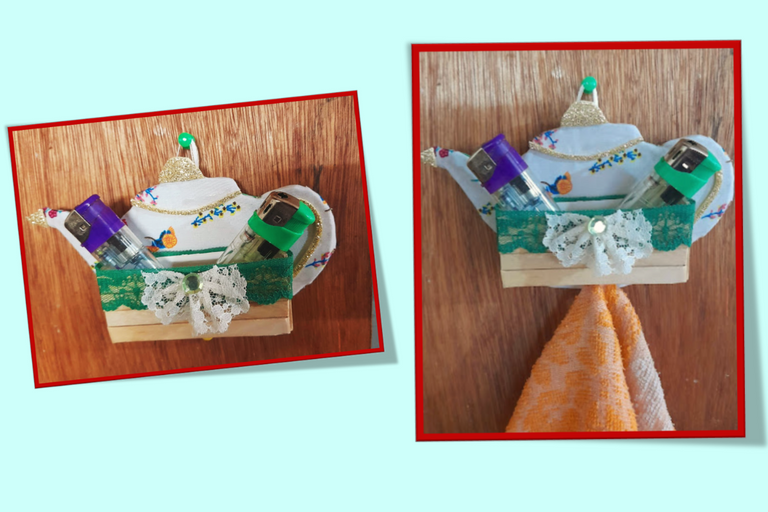
Welcome back to my blog, tonight I want to show you step by step how to make a beautiful lighter holder for the kitchen using recycled material. This cute and useful lighter holder is a simple, delicate and beautiful detail to make. It is an ideal craft to hang in the kitchen and also helps to decorate it a little. I tell you that this idea comes because in my home I always lose my lighter when it is time to use it... and I decided to make this beautiful lighter holder to have it always at sight. My friends the best of all is that this lighter holder is quite economical to make because you can make it with only recycled material and thus contribute to our planet by recycling and creating beautiful things, plus you can decorate it with the theme that you like and the colors that please you just have to let your imagination fly and you will get something super cute.
So my creative friends do not miss the step by step to make this useful lighter holder for the kitchen. Let's start!

Tengan todos feliz y bendecido comienzo de semana. Espero que hayan pasado un estupendo fin de semana en compañía de sus seres queridos. Les deseo mucha salud para todos ustedes.
Bienvenidos nuevamente a mi blog, en esta noche les quiero enseñar el paso a paso de como realizar un hermoso porta encendedor para la cocina utilizando material de reciclaje. Este lindo y útil porta encendedor es un detalle sencillo, delicado y bello de realizar. Es una manualidad ideal para colgar en la cocina ademas ayuda a decorarla un poco. Les cuento que esta idea viene porque en mi hogar siempre se me pierde el encendedor a la hora de usarlo... y decidí realizar este hermoso porta encendedor para tenerlo siempre a simple vista. Mis amigas lo mejor de todo es que este porta encendedor es bastante económico de realizarlo ya que lo puedes realizar con solo material de reciclaje y así contribuimos con nuestro planeta reciclando y creando cosas bellas, ademas puedes decorarlo con la temática que mas te guste y los colores que te agraden solo tienes que echar a volar tu imaginación y te quedara algo super lindo.
Entonces mis amigas creativas no se pierdan el paso a paso para realizar este Útil porta encendedor para la cocina ¡¡Comencemos!!


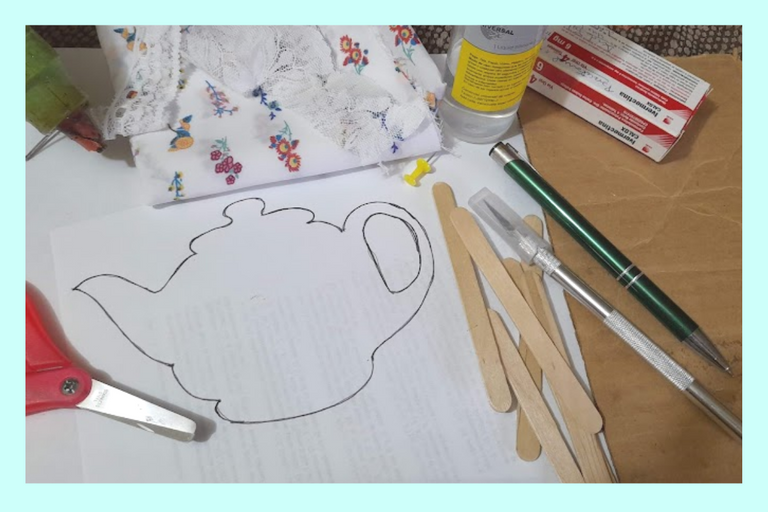
- Cardboard
- Wooden pallets
- Printed fabric
- Lace
- Green eva rubber
- Silicon and gold
- Scissors
- Box of pills
- Cutter
- Image teapot

- Cartón
- Paletas de madera
- Tela estampada
- Encaje
- Goma eva verde
- Silicon y dorado
- Tijera
- Caja de pastillas
- Cuter
- Imagen tetera


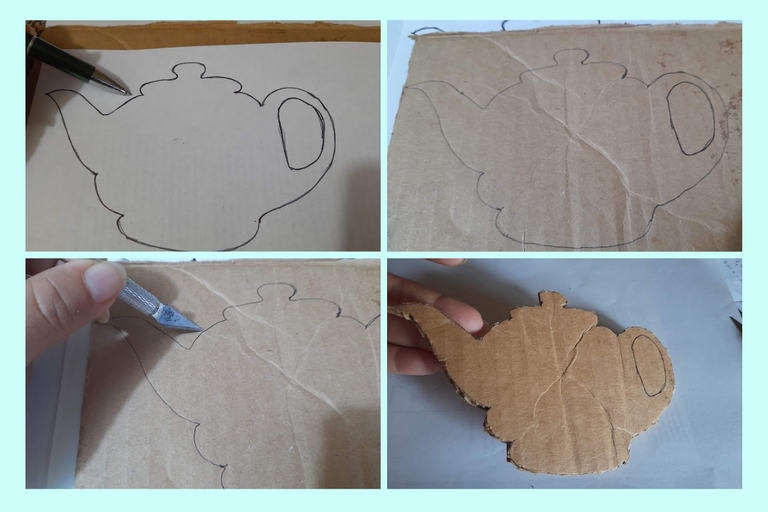
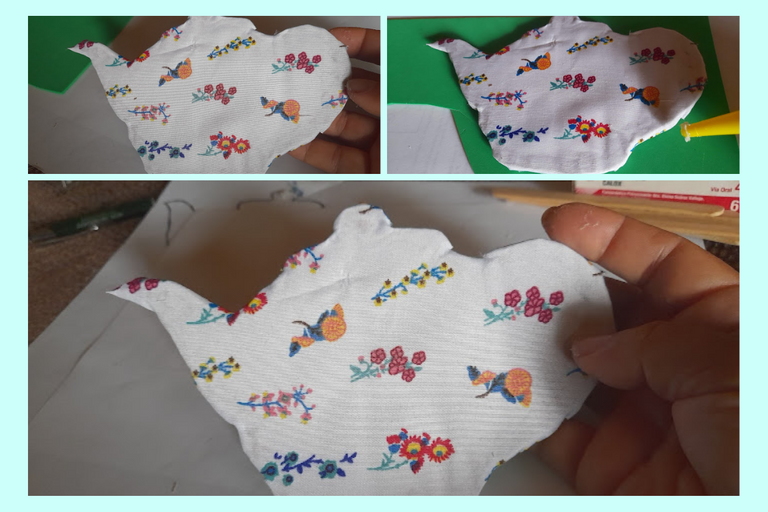
1: We start by marking the silhouette of the teapot on the cardboard, then with the help of the cutter we cut it out little by little, as you can see.

1: Iniciamos marcando la silueta de la tetera en el cartón, luego con la ayuda del cuter vamos recortando poco a poco, como pueden observar.


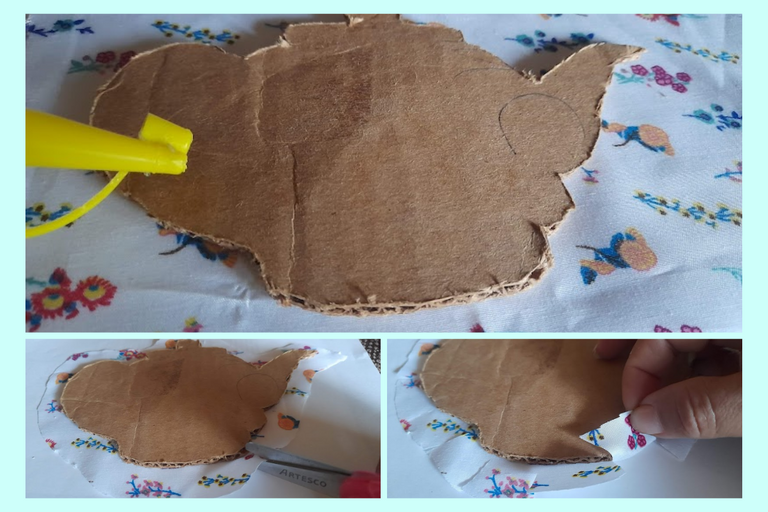
2: Now we proceed to line our cardboard base with the printed fabric, which we put glue on one side and on the other side we make several cuts to the fabric to give the shape to our teapot, then we glue it on the green eva rubber and cut it out.

2: Ahora procedemos a forrar nuestra base de cartón con la tela estampada, la cual le colocamos pega por un lado y por el otro lado le realizamos varios cortes a la tela para poder darle la forma a nuestra tetera, seguidamente la pegamos en la goma eva verde y recortamos.


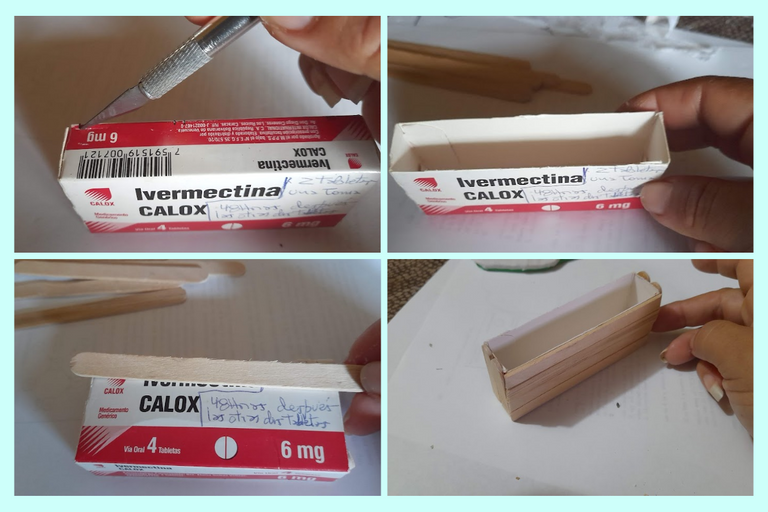
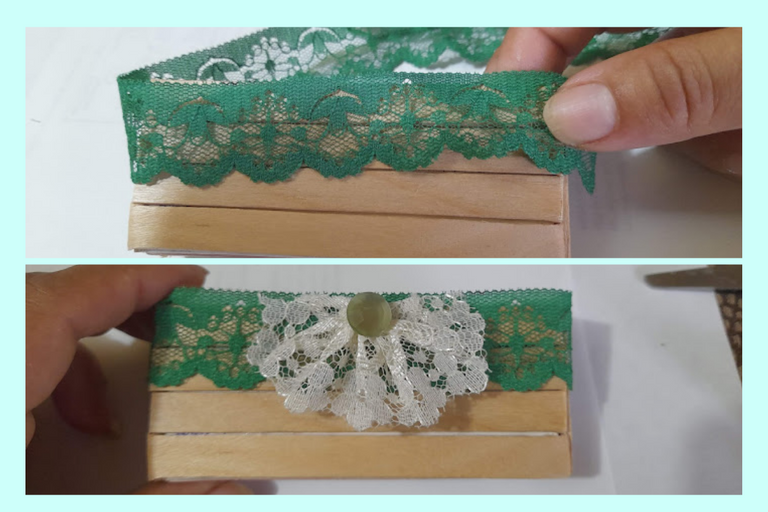
3: To make the deposit where we are going to place the lighter, we take the little box of pills and we cut the upper part, as you can see in the images, then to decorate it we glue the wooden pallets in front and on the sides, then we glue the lace on the edge of the top of the box and decorate it with a small detail with lace.

3: Para realizar el deposito donde vamos a colocar el encendedor, tomamos la cajita de pastillas y le recortamos la parte superior, como pueden observar en las imágenes, luego para decorarla le pegamos las paletas de madera por delante y por los lados, luego le pegamos el encaje por el borde de la parte superior de la cajita y decoramos con un detallito con encaje.


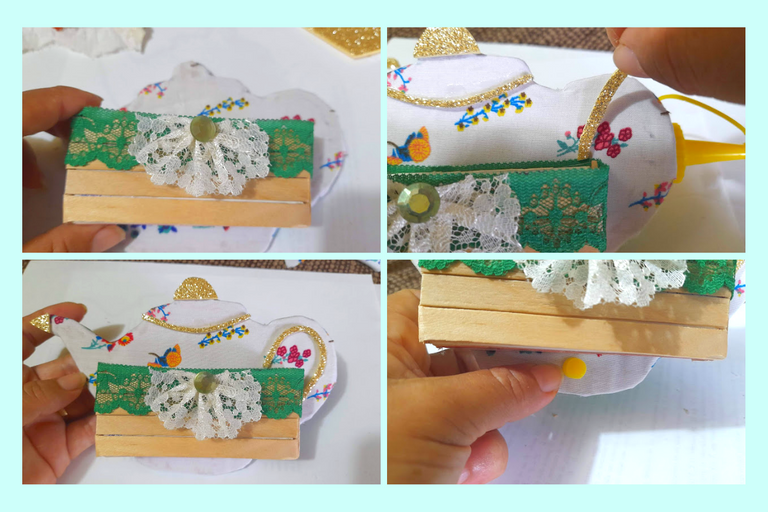
4: Once our deposit we proceed to glue it to our base, which we decorate with the golden eva rubber both the lid and the handle of our teapot then we place the pincushion under the deposit which will serve us to hang a kitchen towel.

4: Una vez realizado nuestro deposito procedemos a pegarla a nuestra base, la cual la decoramos con la goma eva dorado tanto la tapa como el asa de nuestra tetera luego le colocamos el alfiletero debajo del deposito el cual nos servirá para colgar una toallita de cocina.


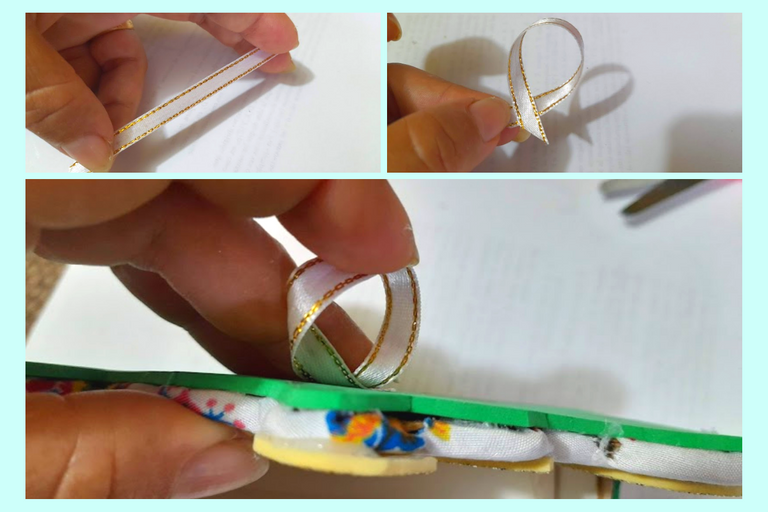
5: To finish my beautiful lighter holder, we cut 6 centimeters of ribbon, we intertwine it and then we glue it on the back of our teapot and that's it.

5: Para finalizar mi hermoso porta encendedor, cortamos 6 centímetros de cinta lo entrelazamos y luego lo pegamos por la parte de atrás de nuestra tetera y listo.
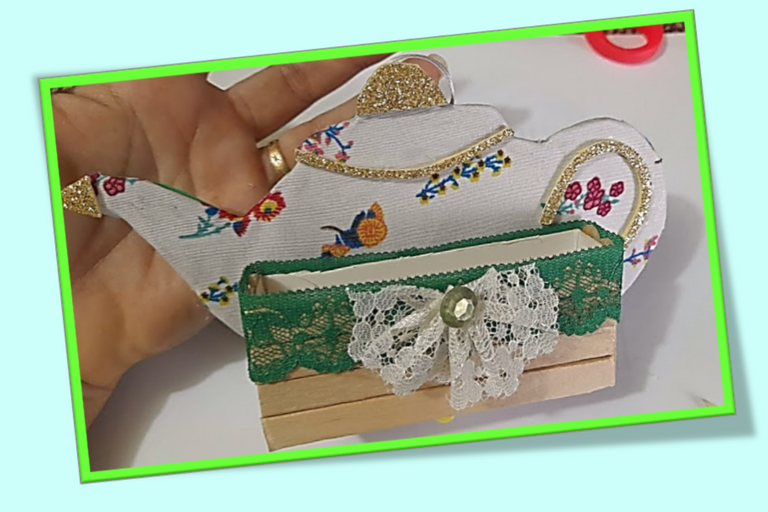


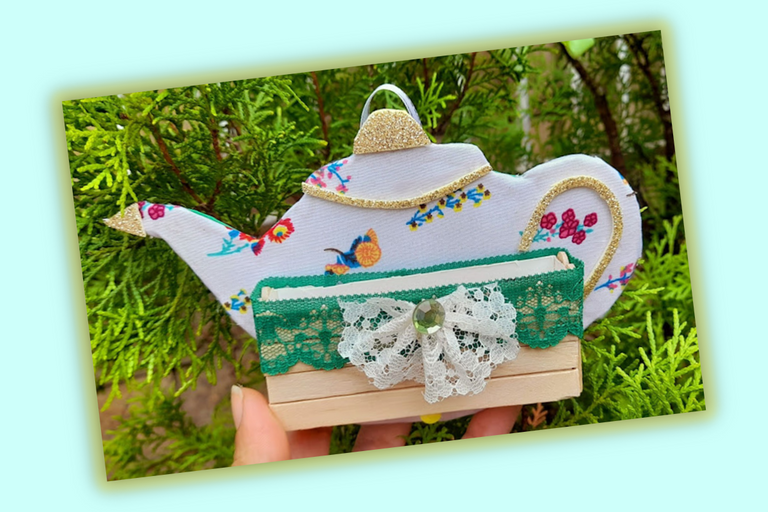
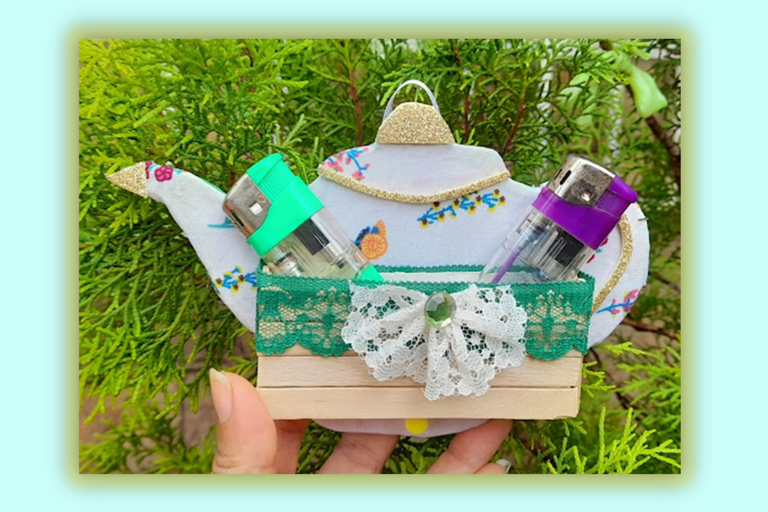
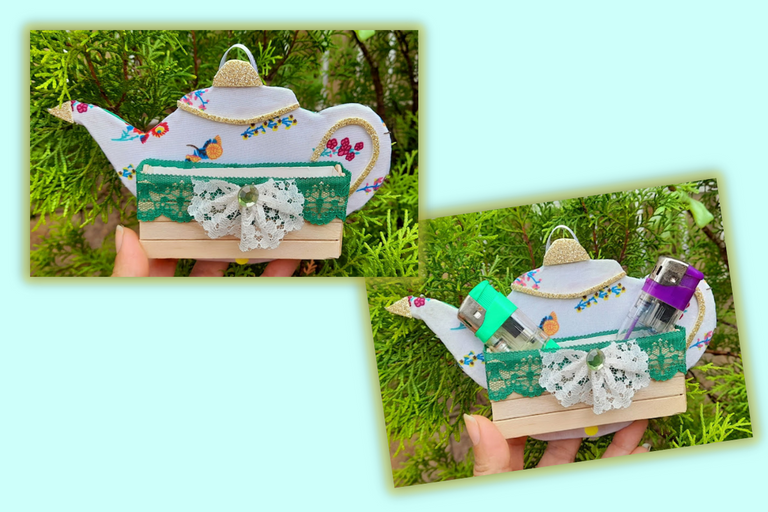
My dear crafters, this is the final result of my beautiful lighter holder for the kitchen made with recycled material, I hope you liked my project today and that you will be encouraged to make one like this one!
See you next time, my dear creative friends!

Mis queridos artesanos este es el resultado final de mi hermoso porta encendedor para la cocina elaborado con material de reciclaje. ¡Espero les haya gustado mi proyecto de hoy y se animen a realizar uno como este!
¡ Hasta una próxima publicación, mis queridas Amigas creativos!
Portada y plantillas elaboradas en canva
Separador
Imagen referencial


The pictures were taken with a Samsung A12 smartphone, the text was translated into English with the deepl translator link
The banner was designed on canvas link

Las fotografías fueron tomadas con un teléfono inteligente Samsung A12, el texto fue traducido al ingles con el traductor deepl link
El banner fue diseñado en canvas link


