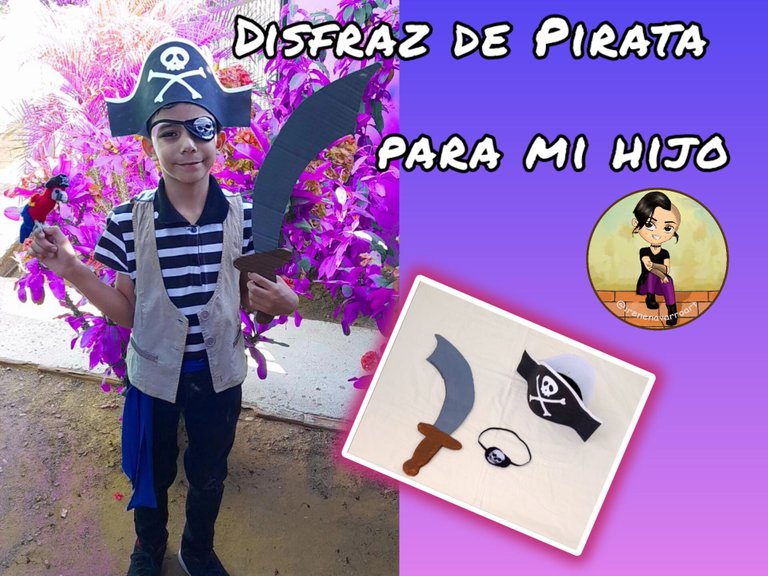
Saludos, es tiempo de Carnaval, una celebración donde tenemos la oportunidad de expresarnos a través de los disfraces, los niños son los que más disfrutan esta época del año y mi hijo Rafael no es la excepción, el sabe que siempre puede contar conmigo para hacer el disfraz que el quiera de alguna forma, siempre manteniendo la premisa de hacerlo nosotros mismos DIY, además de gastar el mínimo de materiales, aprovechando lo que tenemos en casa, él quería lucir como un pirata, por lo que busqué en mi ropa en primer lugar, es algo genial que mi hijo de apenas 7 años pueda usar mi ropa 😅 pues la camiseta a rayas, el chaleco y el pañuelo del cinturón son míos, por eso para hacer el disfraz de pirata faltaban los complementos, es decir, el sombrero, la espada y el parche del ojo, haciendo estos accesorios a mano, logramos que mi precioso hijo luciera como un pícaro pirata 🏴☠️🦜
Greetings, it's Carnival time, a celebration where we have the opportunity to express ourselves through costumes, children are the ones who enjoy this time of year the most and my son Rafael is no exception, he knows that he can always count on me to do the costume that he wants in some way, always maintaining the premise of doing it ourselves DIY, in addition to spending the minimum of materials, taking advantage of what we have at home, he wanted to look like a pirate, so I searched my clothes first place, it's something great that my son, barely 7 years old, can wear my clothes 😅 well, the striped shirt, the vest and the scarf on the belt are mine, that's why the accessories were missing to make the pirate costume, that is, the hat , the sword and the eyepatch, making these accessories by hand, we managed to make my precious son look like a rogue pirate 🏴☠️🦜

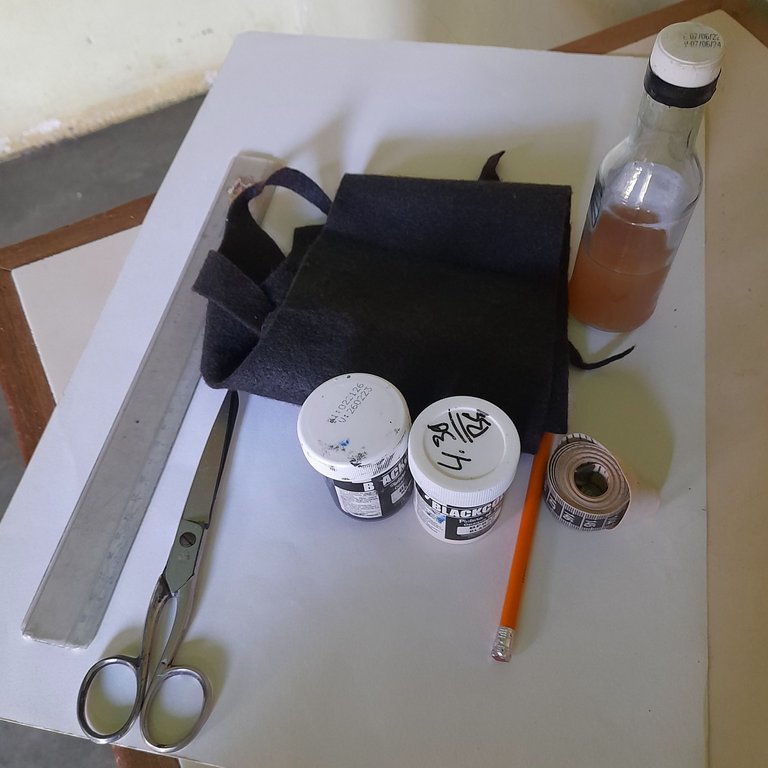
Materiales/ Materials
- ¼ pliego de cartulina
- Retazo de fieltro negro
- Pintura al frío negra, marrón y gris
- Regla y lápiz
- Hoja de papel
- Cinta métrica
- Tijera o cúter
- Pegamento
- Retazo de tela negra
- Elástico negro
- Aguja e hilo de coser
- Cartón de caja
- ¼ sheet of cardboard
- Piece of black felt
- Black, brown and gray cold paint
- ruler and pencil
- sheet of paper
- tape measure
- Scissors or cutter
- glue
- Scrap of black fabric
- black elastic
- Needle and sewing thread
- Cardboard box
Proceso / Process
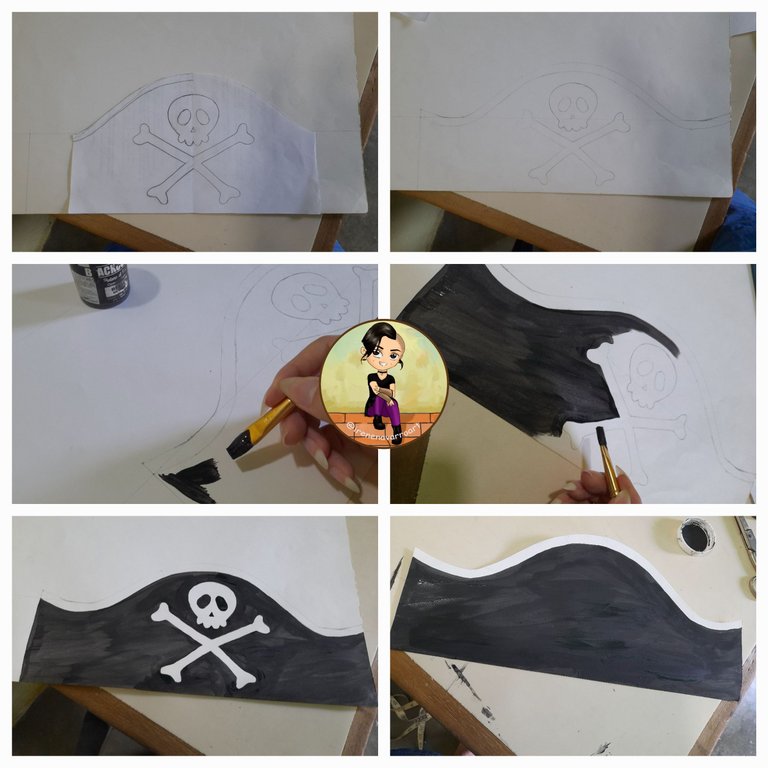
Para elaborar el sombrero lo primero que hice fue dibujar el patrón central en una hoja de papel, trazando una un rectángulo de 9 cm de alto y luego una línea de 16 cm de alto, esta será la altura de la curva central, que va descendiendo hasta lo 9 cm. En el centro dibujé una calavera.
Luego sobre la cartulina tracé un rectángulo de 48 × 9 cm, ubiqué el patrón de papel en el centro y tracé las líneas con un lápiz, luego en las esquinas subí 1 cm para prolongar un poco la curva hacia afuera. Hice dos lados iguales pero solo el frontal con el dibujo de la calavera. Pinté de negro dejando un borde 1 cm en blanco y dejando la calavera en blanco, luego corté la cartulina con una tijera para obtener los dos lados del sombrero.
To make the hat, the first thing I did was draw the central pattern on a sheet of paper, drawing a rectangle 9 cm high and then a line 16 cm high, this will be the height of the central curve, which is descending up to 9 cm. In the center I drew a skull.
Then on the cardboard I traced a 48 × 9 cm rectangle, I placed the paper pattern in the center and traced the lines with a pencil, then at the corners I went up 1 cm to extend the curve outwards a bit. I made two equal sides but only the front with the drawing of the skull. I painted black leaving a 1 cm white edge and leaving the skull white, then I cut the cardboard with scissors to obtain the two sides of the hat.
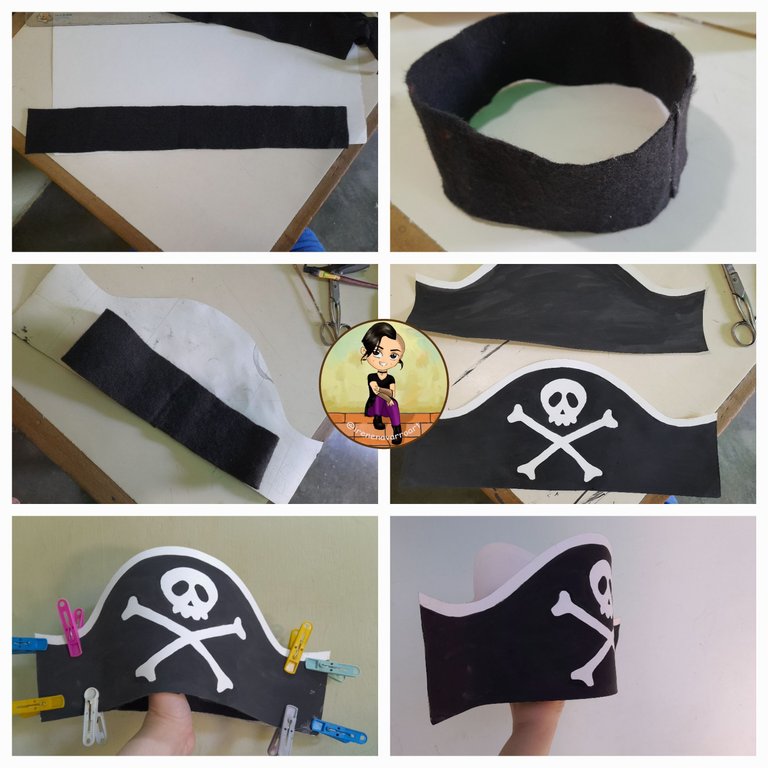
Con la cinta métrica medí la circunferencia de la cabeza de mi hijo, en este caso la medida es de 50 cm, recorté un rectángulo de fieltro de 51 cm de largo, pegué ambos borde para formar la circunferencia de 50 cm.
Luego pegué la cara frontal y posterior de la cartulina con el fieltro, pegando en solo 14 cm del centro de cada lado, mientras que los bordes de ambas cartulinas pegué 5 cm de cada lado. Obteniendo el sombrero con un interior suave para la cabeza.
With the tape measure I measured the circumference of my son's head, in this case the measurement is 50 cm, I cut out a 51 cm long felt rectangle, glued both edges to form the 50 cm circumference.
Then I glued the front and back of the card with the felt, gluing only 14 cm from the center of each side, while the edges of both cards I glued 5 cm from each side. Getting the hat with a soft interior for the head.
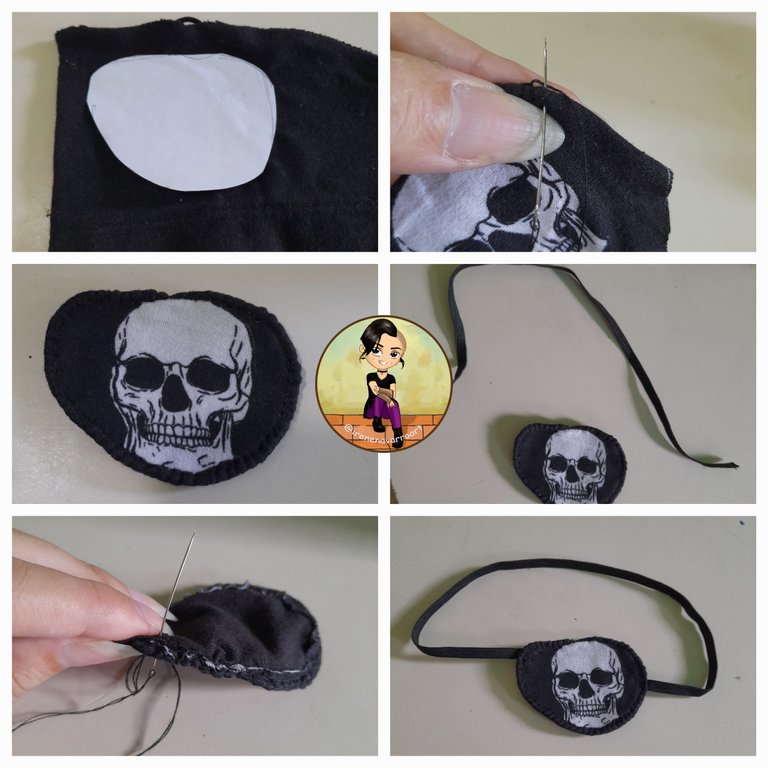
Para el parche del ojo, hice un pequeño óvalo de papel de 6 cm de alto, este lo puse sobre dos capas de tela y corté, luego corté una capa de tela adicional que tiene un estampado de calavera, esta la corté dejando un borde de costura, luego cosí las tres capaz de tela . Corté un elástico de 35cm y lo cosí al parche.
For the eye patch, I made a small oval of paper 6 cm high, I put this on two layers of fabric and cut, then I cut an additional layer of fabric that has a skull print, this I cut leaving a border of sewing, then I sewed the three layers of fabric. I cut a 35cm elastic and sewed it to the patch.
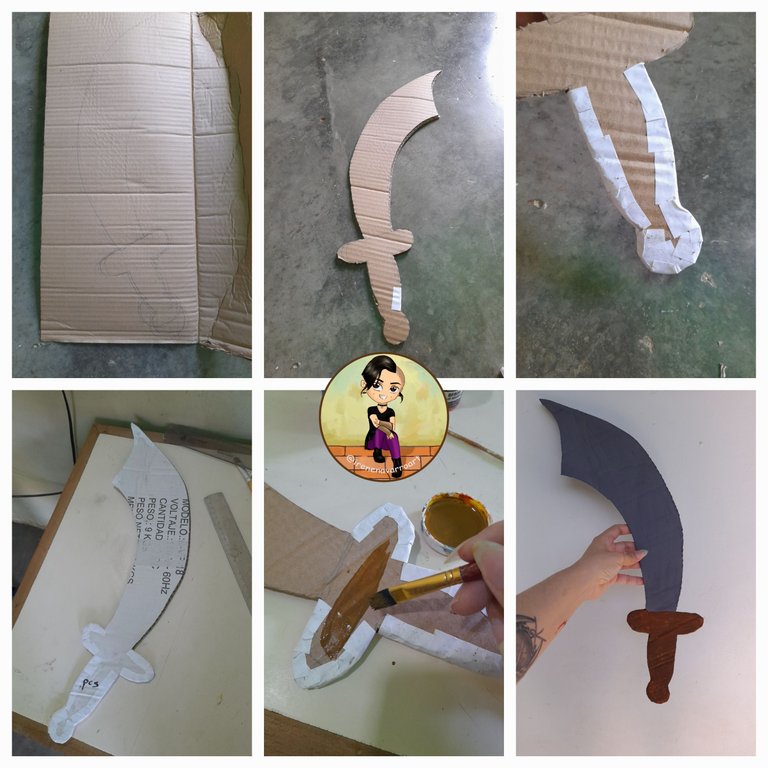
Para hacer más espada, dibujé la forma a mano alzada sobre el cartón de caja, esta mide aproximadamente 55 cm de largo, la hice con la forma de una espada de hoja curva, que es es uno de los atributos de las imágenes arquetípica de los piratas, corté la forma con un cúter, luego tome pequeños pedazos de papel y los pegué en los bordes del cartón con pega blanca, posteriormente cuando estaba seco el papel, pinté la empuñadura de color marrón y la hoja de color gris.
To make more sword, I drew the shape freehand on the box cardboard, this one is about 55 cm long, I made it in the shape of a curved bladed sword, which is one of the attributes of the archetypal images of the swords. pirates, I cut the shape with a cutter, then I took small pieces of paper and glued them to the edges of the cardboard with white glue, later when the paper was dry, I painted the handle brown and the blade grey.
Resultado / Result
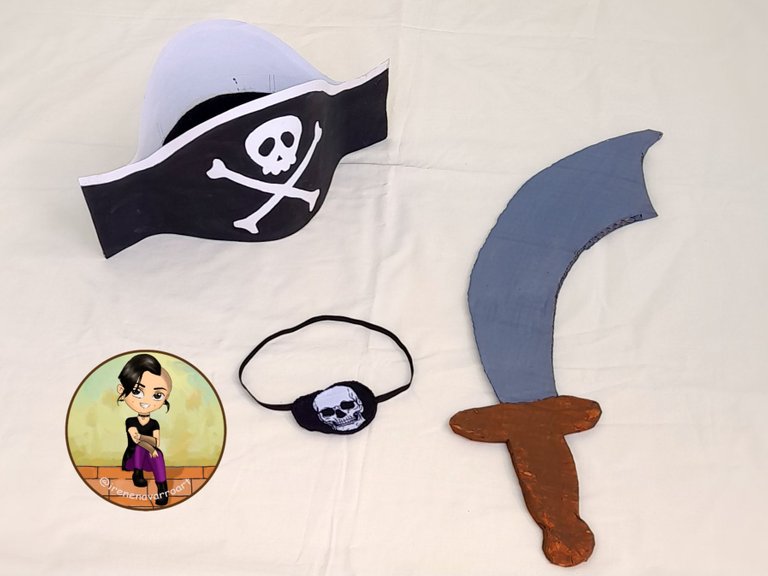
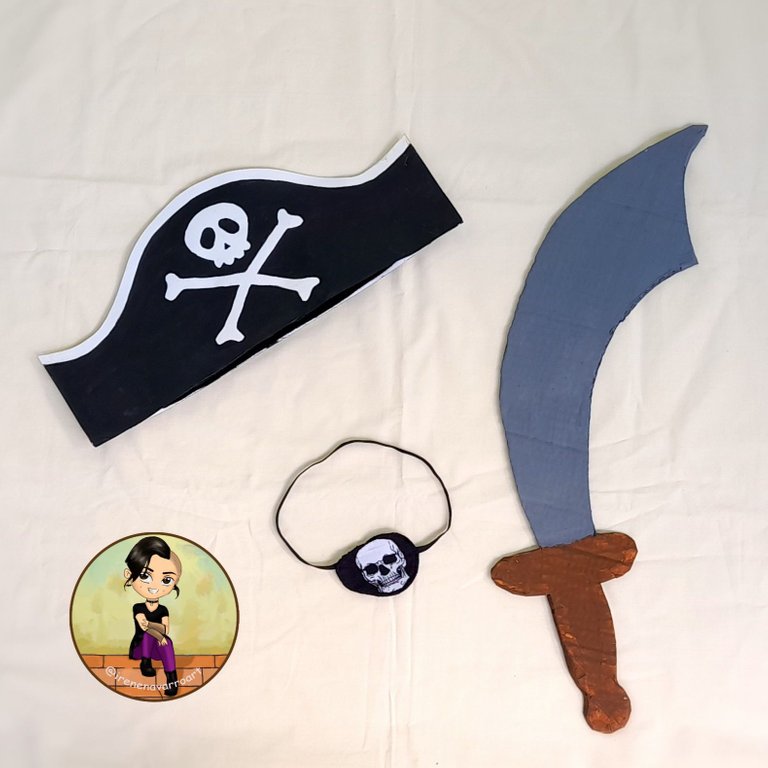
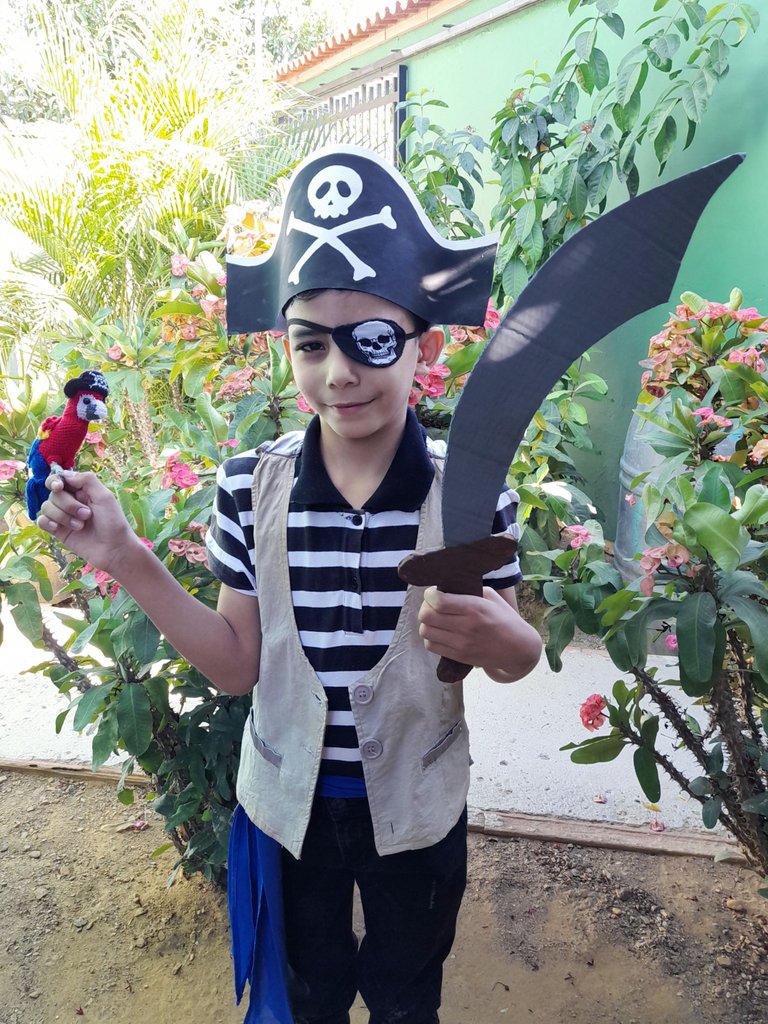
Una vez que la ropa y los complementos que hice estaban juntos la magia surgió, un disfraz de pirata estaba hecho, no hace falta gastar dinero si podemos usar la creatividad para hacer felices a los niños, mi hijo estaba tan emocionado que no podía dejar de hablar como pirata mientras me veía trabajar en esto. Espero a ustedes también les guste. (Por cierto la guacamayo pirata es un amigurumi que hice hace un tiempo 😁)
Once the clothes and accessories I made were together, magic happened, a pirate costume was made, no need to spend money if we can use creativity to make children happy, my son was so excited that he couldn't stop talk like a pirate while watching me work on this. I hope you like it too. (By the way, the pirate macaw is an amigurumi I made a while ago 😁)


Espero les haya gustado. Les invito a leer mis próximas publicaciones y siempre estaré dispuesta a responder sus preguntas y comentarios, también pueden seguirme y contactarme en cualquiera de mis redes sociales. ¡Muchas gracias!
I hope you liked it. I invite you to read my next publications and I will always be willing to answer your questions and comments, you can also follow me and contact me on any of my social networks. Thank you!