Recycling Tutorial // Tutorial de reciclaje
Making houses with empty boxes was one of my first hobbies as a child, I started using empty matchboxes that my grandmother kept in the kitchen, and from that moment on my creativity has never stopped regarding the recycling of cardboard boxes; since, every time I see or come across an empty box my creative mind starts working and I immediately find a new use for it, my grandmother was a seamstress and when I was a child that was great for me, because all my first boxes were lined with fabric!
Hacer casas con cajas vacías fué uno de mis primeros pasatiempos de niña, comencé utilizando cajitas de fósforos vacías que guardaba mi abuela en la cocina, y desde ese momento jamás mi creatividad ha parado con respecto al reciclaje de cajas de cartón; puesto que, cada vez que veo o me encuentro una caja vacía mi mente creativa comienza a trabajar y de inmediato le encuentro un nuevo uso , mi abuela era costurera y para cuando yo era niña eso era genial para mí, porque todas mis primeras cajas fueron forradas de tela!
Materials // Materiales
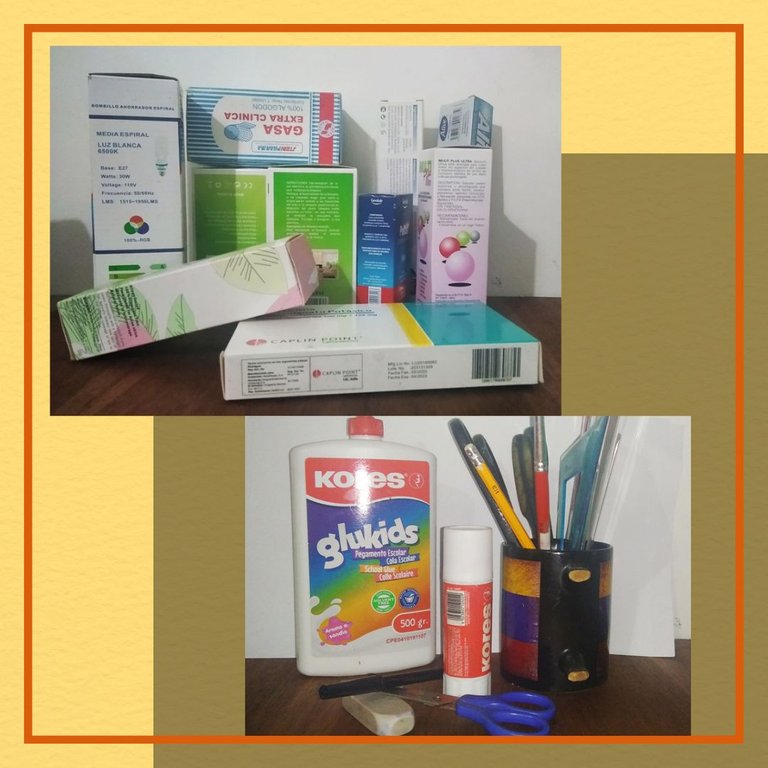
In this post we will see how to make some simple facades, and of course the bigger the box the bigger the building or house you want to make, the materials we need to make this project are:
*Empty cardboard boxes of different sizes.
*Glue
*Scissors, several types of scissors are needed because we will be cutting cardboard and paper of different thicknesses.
*Rulers
*Pencil and eraser
*Brush to help apply the liquid glue
*White sheets
*Pieces of paper of different colors, also useful are the small leftovers of colored cardboard to recycle, transparent and colored cellophane paper... in short, everything in stationery that you have left over from previous crafts!
En este post veremos cómo hacer unas fachadas sencillas, y por supuesto que mientras más grande sea la caja más grande será el edificio o casa que se desea hacer, los materiales que necesitamos para hacer este proyecto son:
*Cajas de cartón vacías de diferentes tamaños
*Pegamento
*Tijeras, se necesitan varios tipos de tijera porque cortaremos cartón y papel de diferentes grosor
*Reglas
*Lápiz y borrador
*Pincel para ayudar a colocar el pegamento líquido
*Hojas blancas
*Retazos de papeles de diferentes colores, también sirven las pequeñas sobras de cartulina de colores para reciclar, papel celofán transparente y de colores... en fin todo en papelería que te sobre de manualidades anteriores!
STEP 1 // PASO 1
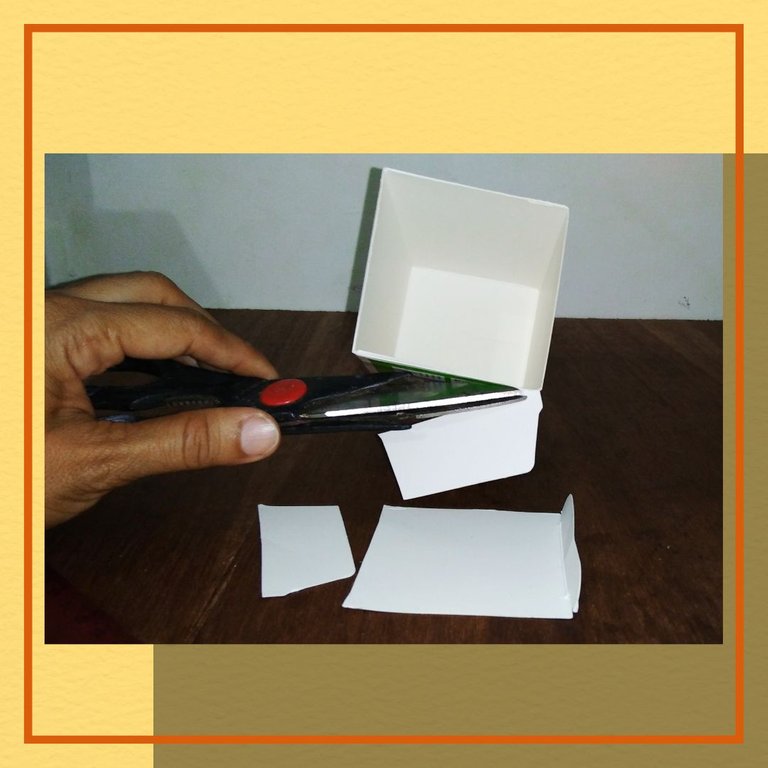
I will make a building and the first thing I do is to remove the lid of the box that would correspond to the base or floor of the building, its opposite side would be the roof, all these small leftovers we keep them in case we need them to make windows, doors or any other idea that comes to mind to beautify our project.
Haré un edificio y lo primero que hago es retirar la tapa de la caja que correspondería a la base o suelo del edificio, su lado contrario sería el techo, todos estos pequeños sobrantes los guardamos por si lo necesitamos para hacer ventanas, puertas o alguna otra idea que se nos ocurra para embellecer nuestro proyecto
STEP 2 // PASO 2
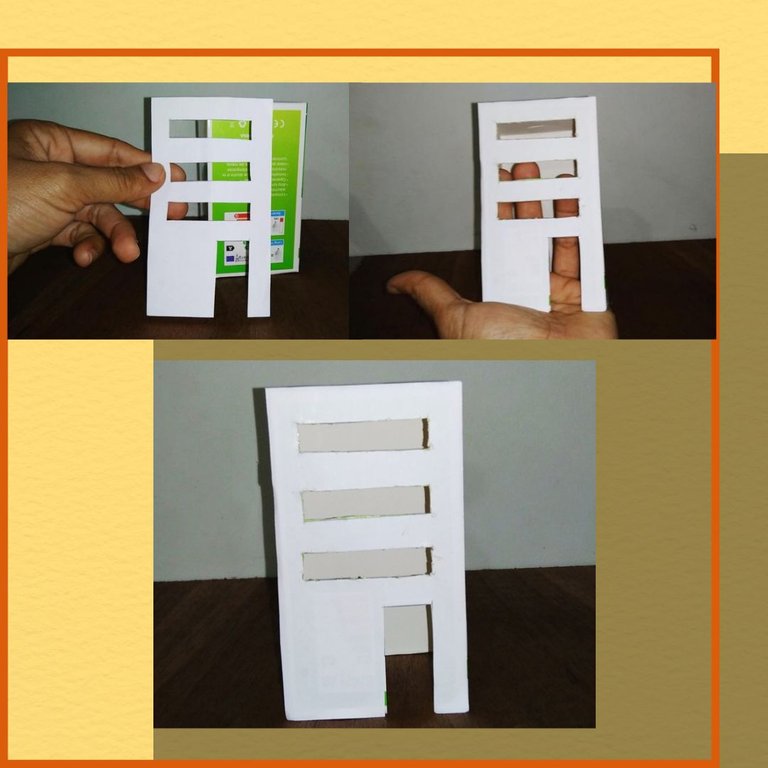
We make a design of the way we want the windows and doors, to this building I will make three long windows, then with great care and patience we must cut the box according to the design, to obtain windows and doors with good finish is advisable to use a small scissors, I always cover the walls with a layer of white paper, notice that the building is open below, this is the best option if you want to place lights inside and decorate the children's room.
Hacemos un diseño de la forma en que queramos las ventanas y puertas, a éste edificio le haré tres ventanas largas, luego con mucho cuidado y paciencia debemos recortar la caja según el diseño, para obtener unas ventanas y puertas con buen acabado es aconsejable utilizar una tijera pequeña, siempre cubro las paredes con una capa papel blanco, noten que el edificio queda abierto por debajo, esta es la mejor opción por si deseas colocar luces adentro y decorar la habitación de los niños
STEP 3 // PASO 3
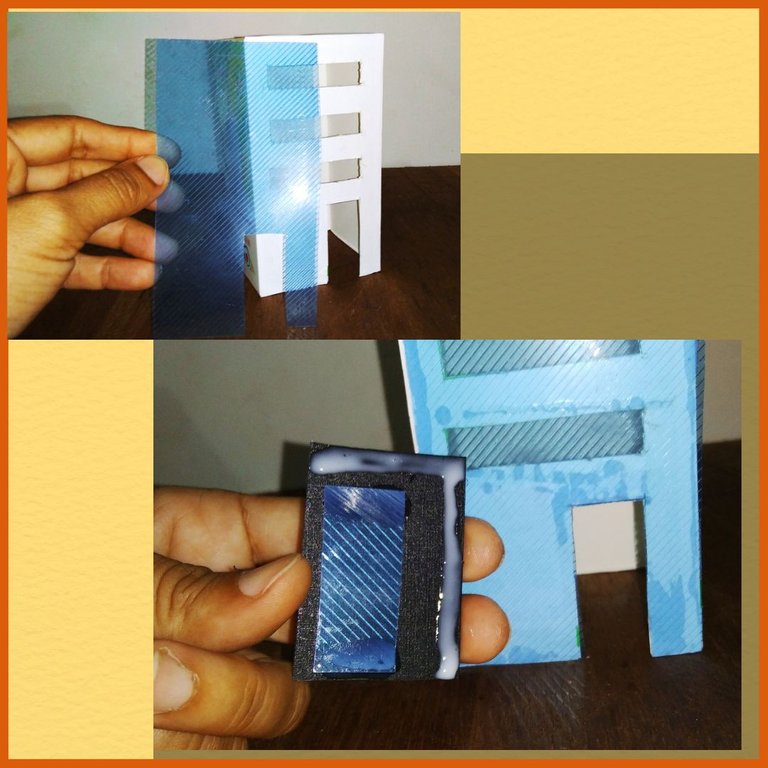
The color of this building will be blue, this is a plastic sheet that belonged to a school folder no longer in use, they are ideal for a business building facade, as they are bright, I also made a black door and I have pasted it inside the building.
El color de éste edificio será azul, ésta es una lámina de plástico que pertenecía a una carpeta escolar ya sin uso, son ideales para una fachada de edificio empresarial, pues son luminosas, también hice una puerta de color negro y la he pegado por dentro del edificio
STEP 4 // PASO 4
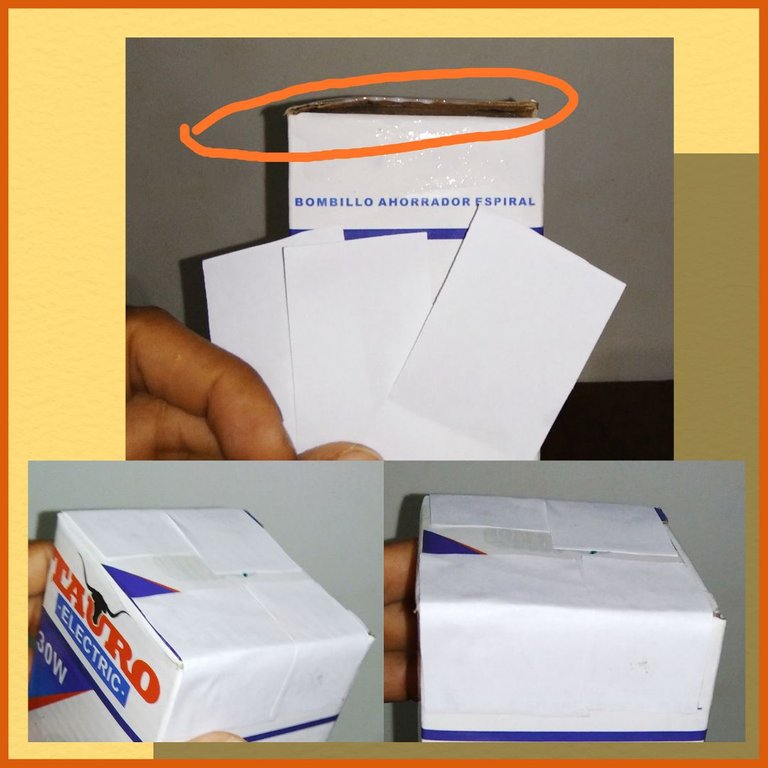
You can also make buildings and leave them white, I will make one so you can see how nice it looks, there is a detail that I want to tell you because it is very important, notice in the image that the box has a little imperfect detail, when closing the lid the box is with an unevenness and for this kind of details I prefer to cover everything in white correcting all the edges.
También puedes hacer edificios y dejarlos de color blanco, haré uno para que vean lo lindo que queda, hay un detalle que quiero decirles porque es muy importante, noten en la imagen que la caja tiene un detalle un poco imperfecto, al cerrar la tapa la caja queda con un desnivel y por éste tipo de detalles yo prefiero cubrir todo de blanco corrigiendo todos los bordes
STEP 5 // PASO 5
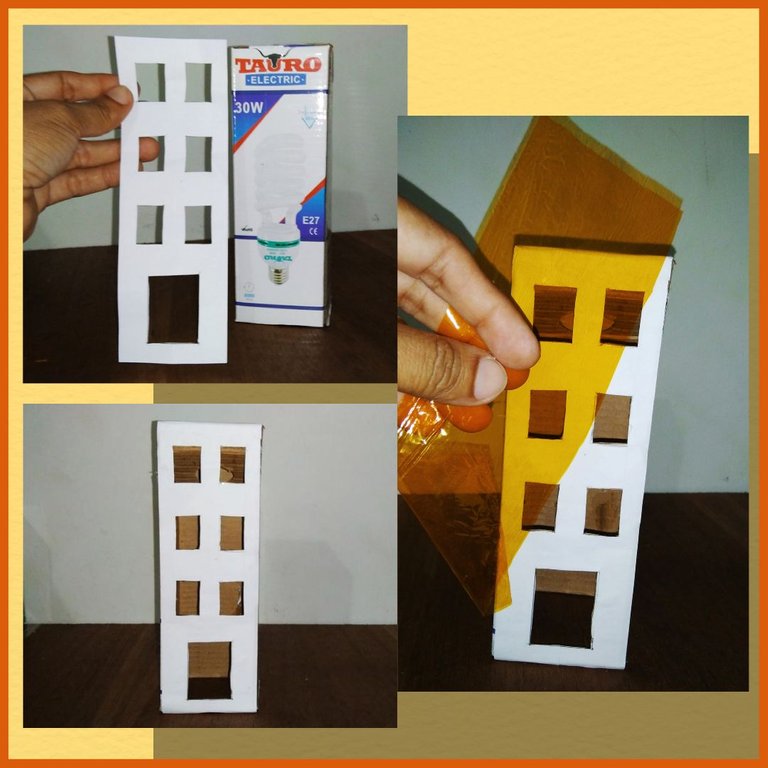
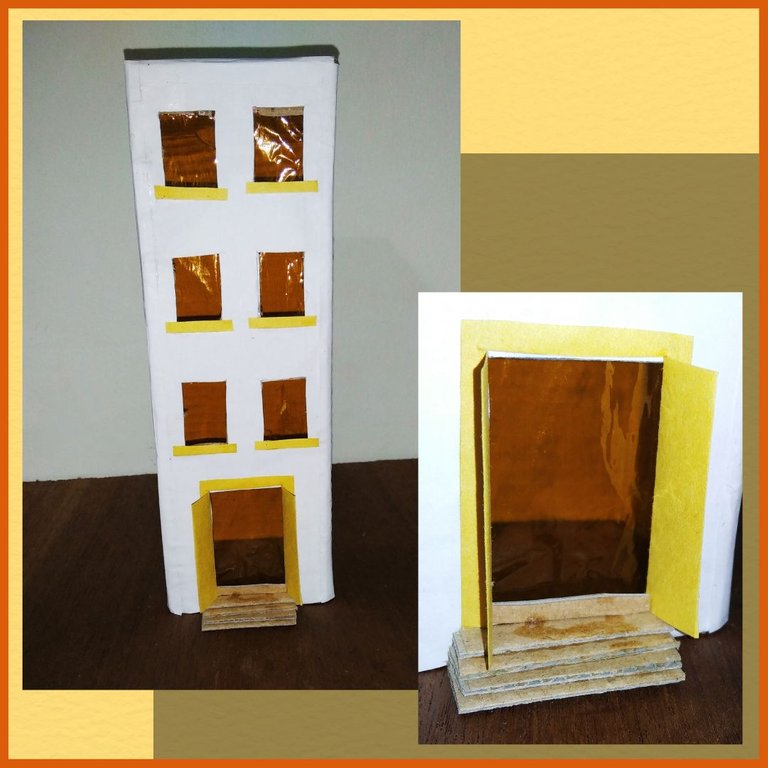
I use the same technique in each box, I cut a lid and remove it, then I make a design and cover everything with white paper, this building will have six small windows and what will simulate the glass of each window will be yellow cellophane paper, finally I made some mini stairs with the cardboard that I have left over from cutting the lid of the box, I put some details in each window with yellow paper and the door also in that color.
Utilizo la misma técnica en cada caja, corto una capa y la retiro, luego hago un diseño y cubro todo de papel blanco, este edificio tendrá seis ventanas pequeñas y lo que simulará el vidrio de cada ventana será papel celofán amarillo, por último hice unas minis escaleras con el cartón que me ha sobrado de cortar la tapa de la caja , le coloque unos detalles con papel amarillo y la puerta también de ese color
Use your creativity to decorate
// Utiliza tu creatividad para decorar
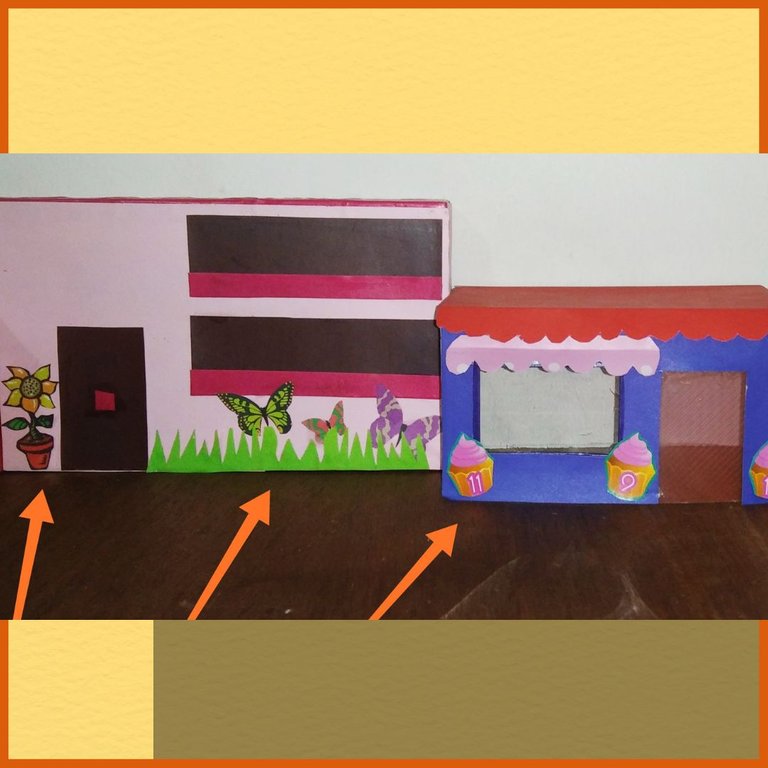
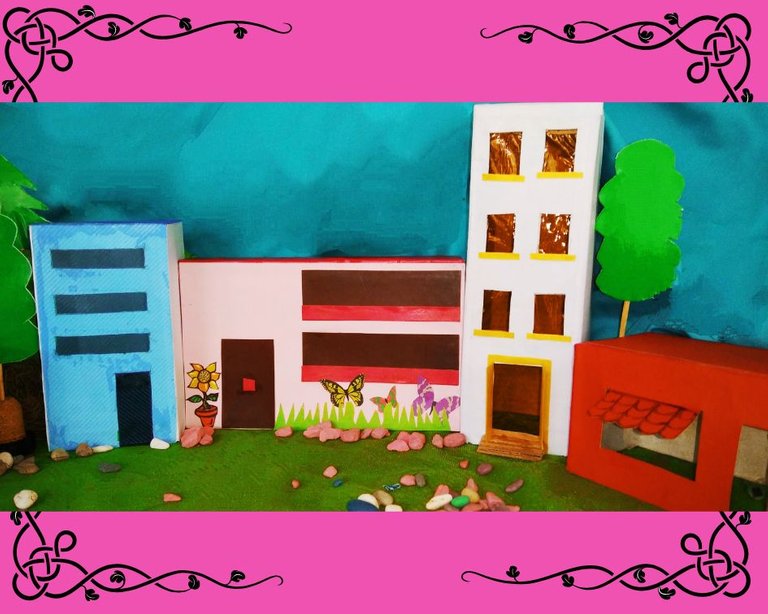
We can make facades with beautiful and creative details, for example, we can make a candy store and put cake cut-outs on it, or a nice house with a beautiful garden and put paper butterflies on it.
Podemos hacer fachadas con hermosos y creativos detalles, por ejemplo podemos hacer una tienda de dulces y le colocamos recortes de pasteles, o una linda casa con un hermoso jardín y le colocamos mariposas de papel
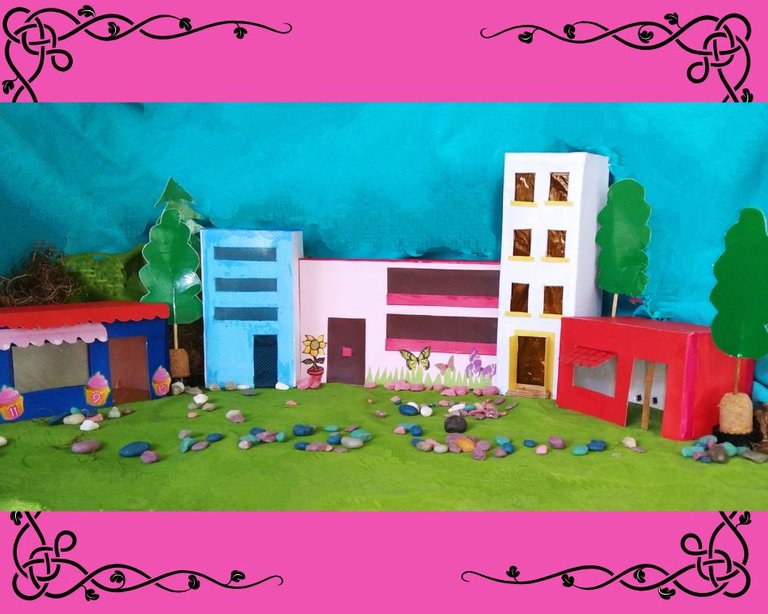
Beautiful scenery to play in
// Hermoso paisaje para jugar
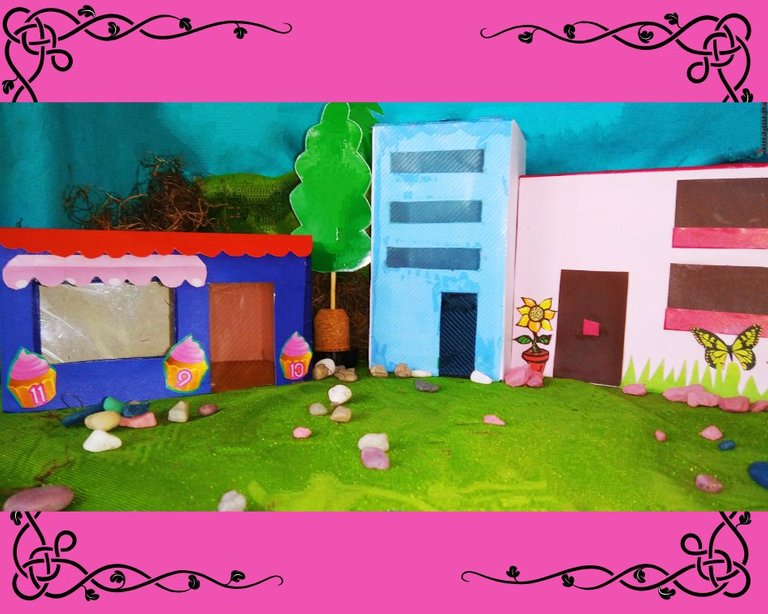
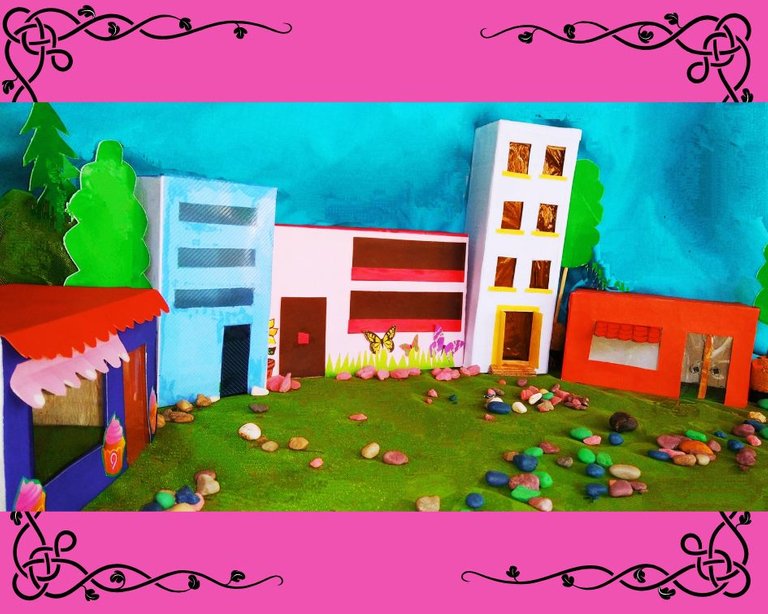
To create a pleasant environment to this beautiful city built of cardboard we added stones and trees, the best way for a child to enjoy completely is that he chooses the place he wants for each building.
Para crear un ambiente agradable a ésta hermosa ciudad construida de cartón le añadimos piedras y árboles, la mejor forma de que un niño disfrute por completo es que el mismo elija el lugar que desee para cada edificio
Thank you very much for coming here and reading my blog, it's good to know that you like crafts and support recycling, this is an ideal project for children with dual use because it serves to play and also to decorate.
Until a future post♻️
Muchas gracias por llegar hasta aquí y leer mi blog, es bueno saber que te gusten las manualidades y apoyes el reciclaje, éste es un proyecto ideal para niños con doble uso porque sirve para jugar y también para decorar
Hasta una próxima publicación♻️
The images were taken from my Redmi Xiaomi 8A phone and the edits were made in Canva // Las imágenes fueron tomadas desde mi teléfono Redmi Xiaomi 8A y las ediciones fueron hechas en Canva