.png)
English
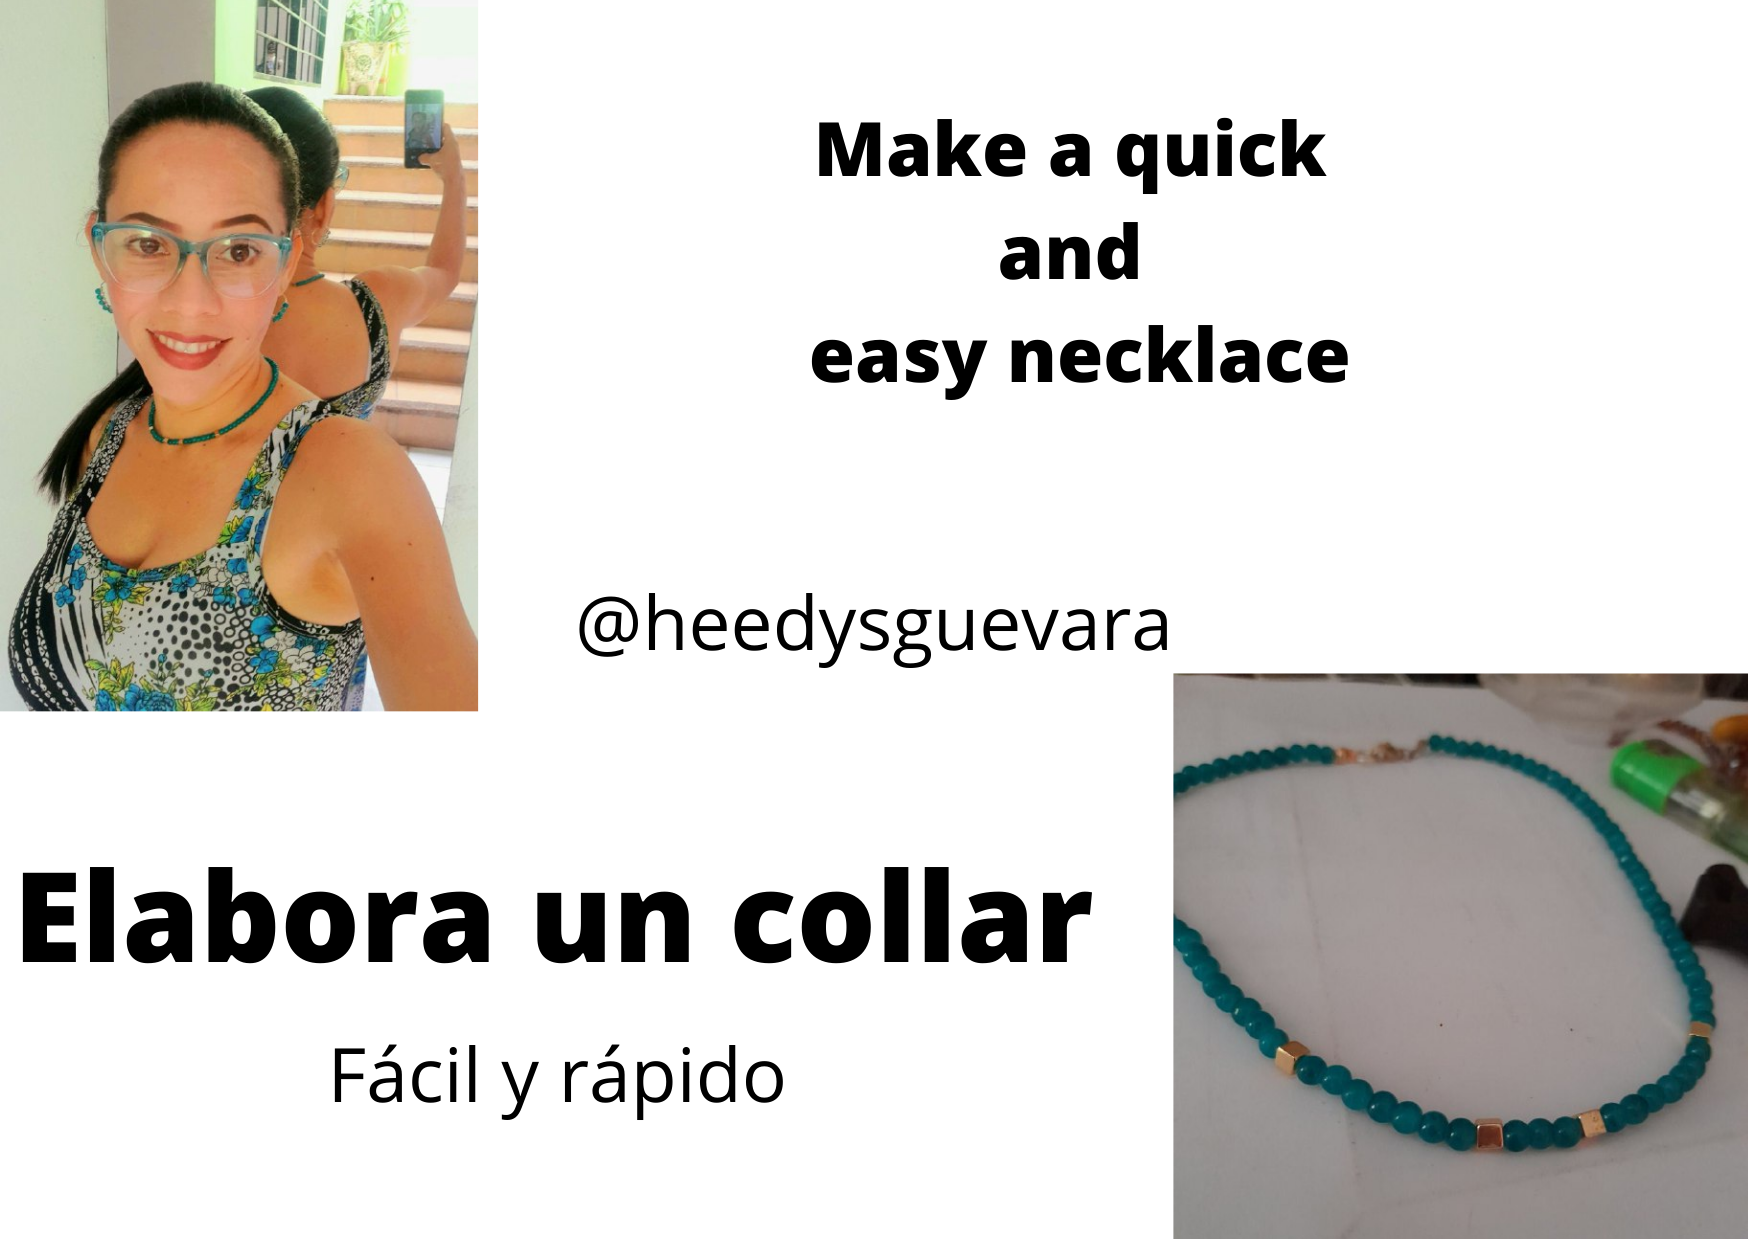
Hello artisans and creative friends!
I'm glad to be here once again, to share with you one of my favorite activities, because it's about jewelry, creating accessories is a work that I really like, so I took my stuff and I got down to work to make a new accessory. It is a basic that can be made by a beginner without any complications, you just need the right tools and some tips to make a great necklace.
Materials
- 1 strip of small spheres
- 4 small goldfield cubes
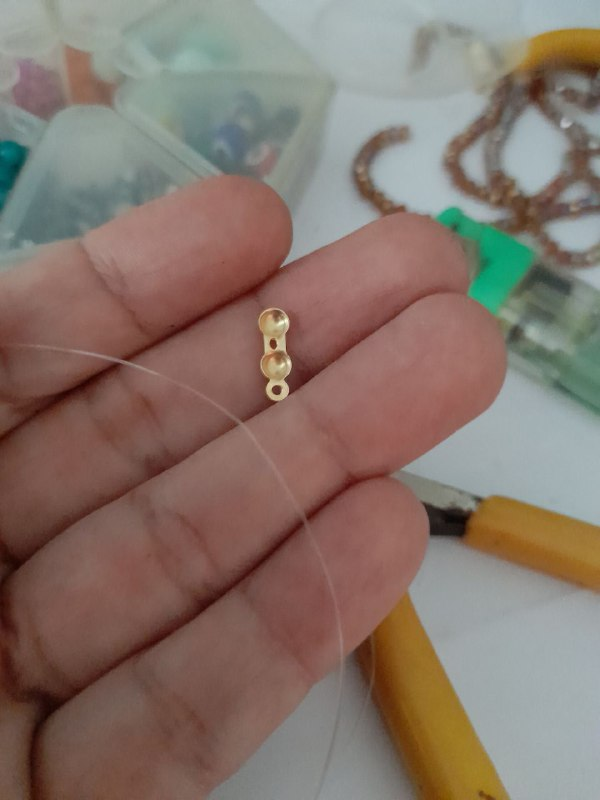
- 2 knot covers
- 40 cm of nylon
- 2 rings
- 1 locking ring
- Scissors
- Flat nose pliers
Procedure
Step 1
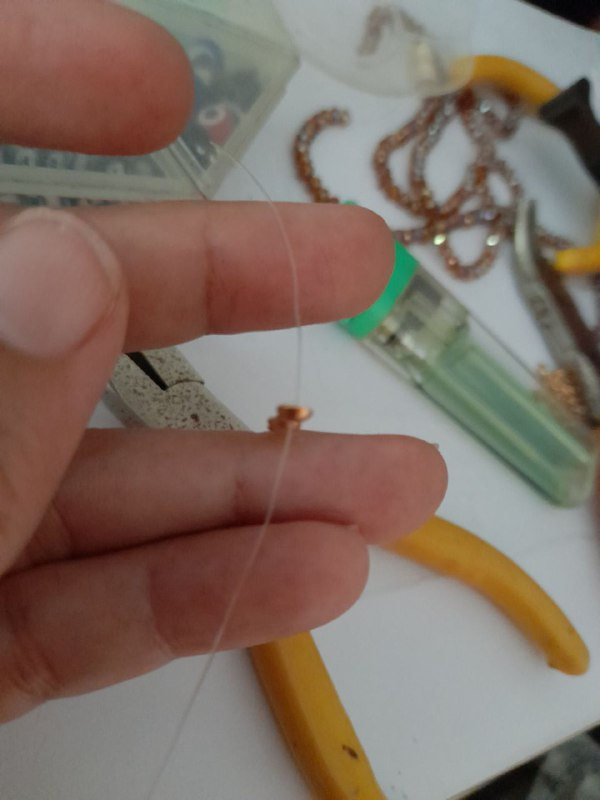
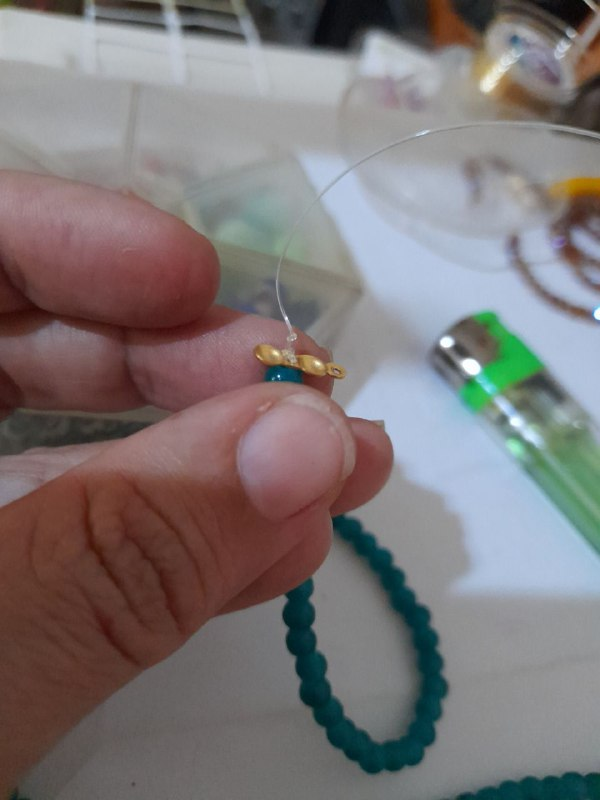
Take the knot cover and insert one end of the nylon thread into the hole in the center.
Step 2
When passing the nylon make several knots, this in order that it does not come out of the hole, it is like securing it.
Step 3
With the help of the flat nose pliers close the knot cover and cut the excess of the end, I also like to seal using a tinder and burn to avoid any discomfort with the end.
Step 4
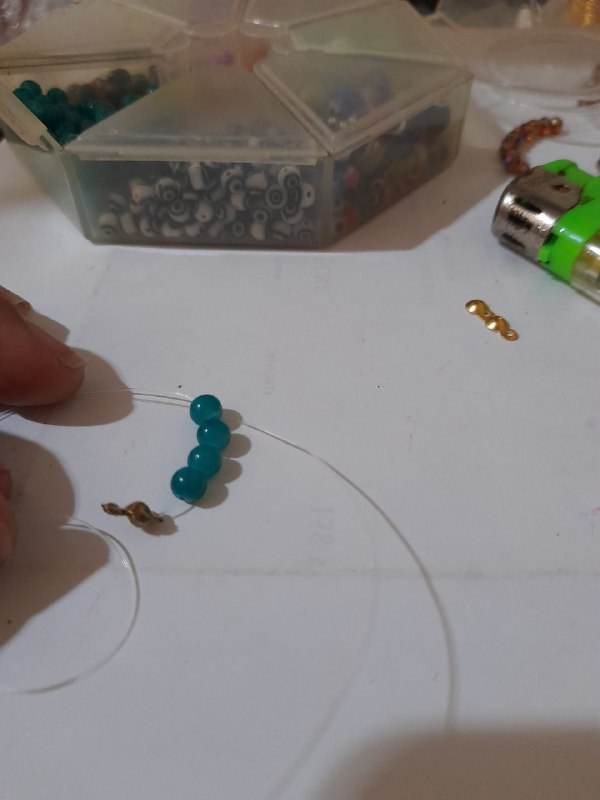
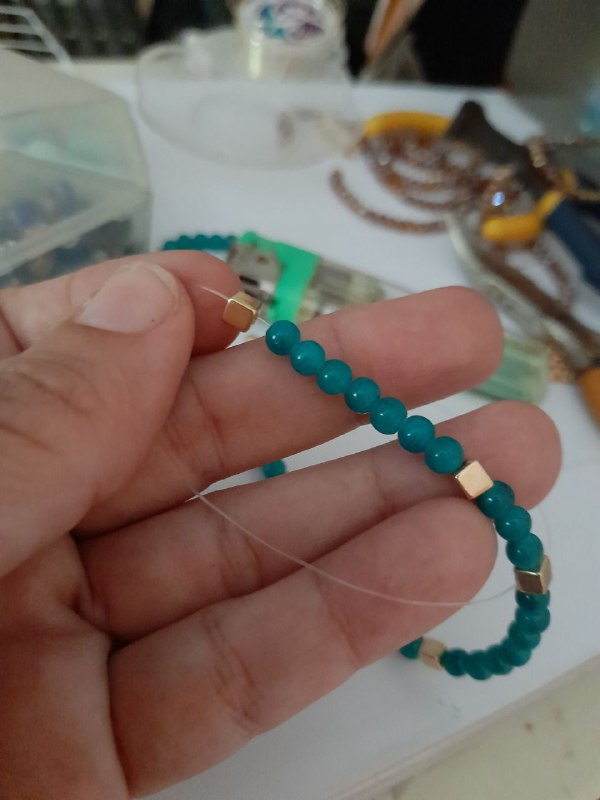
The next thing to do is to insert the spheres up to almost half of the thread, at that height place the goldfield cubes.
Step 5
Place more spheres and the next cube, at this point keep a sequence, to place the following cubes.
Step 6
After placing the cubes continue with more spheres until you reach the other end and proceed to place the other knot cover, tie several knots as in the initial step, close with the clamp and burn with the tinder.
Step 7
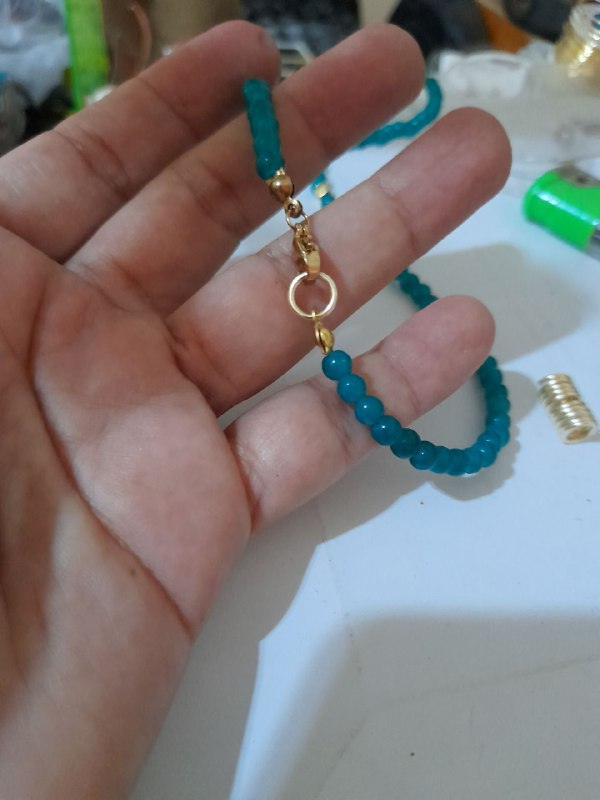
With the help of the pliers open a ring and place it in the ring of the knot cover, then place the locking ring, place the other side of another ring, to be the support of the locking ring.
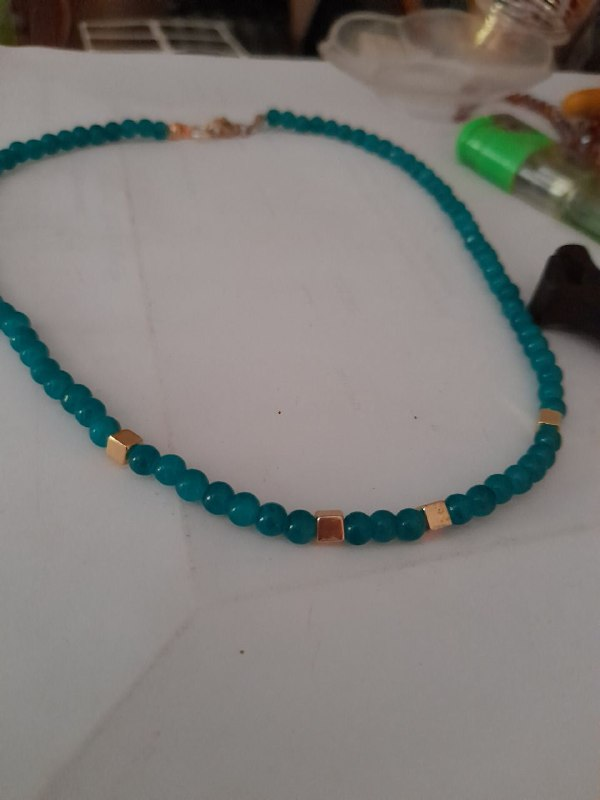
And this is how the necklace will look like, which I can combine with some nice earrings to match.

Thanks for reading.
Photos by @hetyg, taken with a Galaxy A21s.
Images edited in Canva.
Translated with www.DeepL.com/Translator.
Español
Hola amigos artesanos y creativos!
Encantada de estar por aquí una vez mas, para compartirles una de mis actividades favoritas, pues se trata de la bisutería, crear accesorios es una labor que me gusta mucho, en función de eso tome mis cosas y me puse manos a la obra para hacer un nuevo accesorio. Es un básico que puede hacer un principiante sin ninguna complicación, solo necesita las herramientas correctas y algunos tips para que el collar le quede estupendo.
Materiales
- 1 tira de esferas pequeñas
- 4 cubos pequeños de goldfield
- 2 tapa nudos
- 40 cm de nylon
- 2 argollas
- 1 trancadero
- Tijera
- Pinza de punta plano
Procedimiento
Paso 1
Tomar el tapa nudos e introducir en el agujero del centro un extremo del hilo nylon.
Paso 2
Al pasar el nylon hacer varios nudos, esto con el fin de que no se salga por el agujerito, es como asegurarlo.
Paso 3
Con ayuda de la pinza de punta plano cerrar el tapa nudos y cortar el excedente del extremo, también me gusta sellar empleando un yesquero y quemar para evitar alguna molestia con el extremo.
Paso 4
Lo siguiente es introducir las esferas hasta casi la mitad del hilo, en esa altura colocar los cubos de goldfield.
Paso 5
Colocar mas esferas y el siguiente cubo, en este punto mantener una secuencia, para colocar los siguientes cubos.
Paso 6
Después de colocar los cubos continua con mas esferas hasta llegar al otro extremo y procede a colocar el otro tapa nudos, realiza varios nudos como en el paso inicial, cierra con la pinza y quema con el yesquero.
Paso 7
Con ayuda de las pinzas abre un argolla y colócala en el arito del tapa nudos, para posteriormente colocar el trancadero, coloca del otro lado otra argolla, para ser el soporte del trancadero.
Y así es como quedara el collar, el cual puedo combinar con unos lindos aretes a juego.
Gracias por leerme.
Fotos de @hetyg, tomadas con un Galaxy A21s.
Imágenes editadas en Canva.
.png)